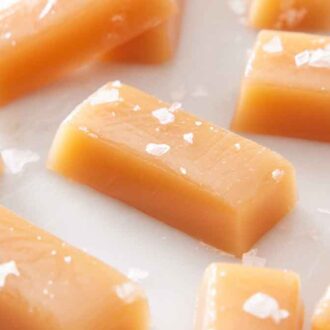
Caramels
Homemade caramels are easier to make than you think! They’re so soft, chewy, and buttery. This batch yields about 80 candies, perfect for sharing with friends and family!
Servings 80 pieces
Calories 83kcal
Equipment
- 9x13" baking pan
- Parchment paper
- Large pot or saucepan
- Candyor instant-read thermometer
Ingredients
- 2 cups granulated sugar (400g)
- 1 cup packed light brown sugar (220g)
- 1 cup light corn syrup (240ml)
- 1 cup unsalted butter cubed (226g)
- 1 teaspoon salt
- 2 cups heavy cream (480ml)
- 2 teaspoons vanilla extract
Instructions
- Lightly butter a 9x13-inch pan and line it with parchment paper, letting the excess come up the sides of the pan. Lightly butter the paper.
- In a large heavy-bottom saucepan (make sure it’s a 4 to 5-quart capacity), combine the sugars, corn syrup, butter, and salt. Place over medium heat and stir constantly until the butter and sugars have melted and the mixture starts to bubble, about 5 minutes. Slowly stir in the cream.
- Attach a candy thermometer and boil, stirring constantly until the mixture reaches 245°F to 248°F, 20 to 25 minutes. (You can also drop a small ball of the caramel into a glass of cold water. If it forms a firm ball but still moldable ball, it’s done.)
- Immediately remove from the heat and carefully stir in the vanilla. Pour into the prepared pan. Let the caramels to cool completely, about 4 hours. If desired, sprinkle flaked sea salt on top of the caramels after cooling for about 30 minutes. (To speed up the cooling, you can refrigerate the caramels until hardened. Just remove the slab about 30 minutes before slicing as the cold caramel can shatter or break when cut.)
- Remove the cooled slab from the pan and discard the parchment paper. Cut into squares and wrap in wax paper. Caramels will keep at room temperature for up to 1 week or refrigerated for several weeks. They should be enjoyed at room temperature.
Notes
- Use a heavy-bottomed saucepan. This will help ensure that the caramel doesn’t burn. Thin pans don’t insulate the food cooking very well and easily burn on the bottom of the pan.
- Prepare all your equipment and ingredients before you start. Things move along fairly quickly, and the caramel needs constant attention while it cooks. So prepare all your utensils, equipment, and ingredients before you start. You don’t want to be prepping the baking sheet when the caramel is done.
- Keep a pastry brush and a little water nearby. Sugar crystals may form as the caramel cooks, which can ruin its texture. Wet the pastry brush with water and brush the sides of the pan to dissolve the sugar crystals.
- Swap out the vanilla extract for the scraped seeds of one vanilla bean or vanilla bean paste.
- Make sure to separate the caramel squares when cutting. Cut a caramel and move it to another part of your cutting board, or recut them before trying to move them if they are touching. The edges will stick together and create a string if they are touching for too long.
- Make them first thing in the morning. Since these candies take several hours to cool, I like making a batch in the morning so they have plenty of time to cool at room temperature. Then in the late afternoon, I can cut and wrap.
- Chill the cooled caramel before slicing. Pop the caramel slab into the fridge for 15 minutes before slicing. They slice a little bit cleaner when the caramel is slightly cool and the knife is a little warm.
- To speed up the cooling process: You can refrigerate it until hardened or store the slab tightly wrapped in the fridge until you are ready to cut it. Just remove the slab about 30 minutes to 1 hour before slicing, as cold caramel can shatter or break when cut.
Nutrition
Calories: 83kcal | Carbohydrates: 11g | Protein: 0.2g | Fat: 4g | Saturated Fat: 3g | Polyunsaturated Fat: 0.2g | Monounsaturated Fat: 1g | Trans Fat: 0.1g | Cholesterol: 13mg | Sodium: 34mg | Potassium: 10mg | Sugar: 11g | Vitamin A: 158IU | Vitamin C: 0.04mg | Calcium: 8mg | Iron: 0.03mg