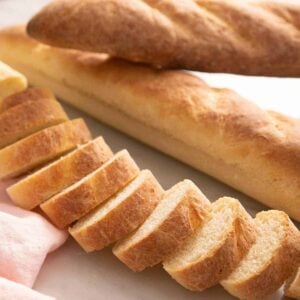
French Bread
Try my French bread if you’re looking for a recipe that is straightforward and yields a tender loaf of bread with a perfectly crisp crust.
Equipment
- Stand mixer
- mixing bowl
- Baking Sheet
Ingredients
- 2 cups warm water (about 110°F) (480ml)
- 2 tablespoons granulated sugar
- 1 tablespoon active dry yeast
- 5½ cups all-purpose flour or bread flour (660g)
- 1½ teaspoons sea salt
- 1 tablespoon olive oil
Instructions
- In the bowl of a stand mixer, stir together the warm water, sugar, and yeast, and set aside for about 5 minutes or until very foamy.
- Add 3 cups of flour to the mixture along with the oil and salt and stir together with a spatula, then begin mixing with the dough hook on medium-low speed. Add the remaining flour a half cup at a time. Increase the speed to medium and knead until the dough comes together in a ball, 2 to 3 minutes. The dough should pull away from the sides of the bowl, spring back when pressed, and not stick to your finger. Add additional flour a few tablespoons at a time if needed.
- Transfer to a lightly oiled large bowl, cover with plastic wrap, and place in a warm place to rise until doubled in size, about an hour.
- Turn the dough onto a lightly floured surface. Divide it in half and shape each half into roughly a 9x12-inch rectangle. Starting on one long side, roll the dough like a jelly roll into a cylinder. Line a baking sheet with parchment paper and place the loaves on the pan. Loosely cover and allow to rise once more until very visibly puffed, 30 to 40 minutes.
- After the loaves have risen for 20 minutes, preheat the oven to 375°F. (See Tips about how to bake loaves with a crisp crust.)
- Cut 3 to 4 diagonal slashes on top of each risen loaf using a bread lame or very sharp knife.
- Bake for 25 to 30 minutes or until golden brown and the loaves sound hollow when you tap on them.
Notes
- Add flour a little at a time to achieve the perfect soft dough. After adding the initial 3 cups of flour, add a little bit at a time as you knead (or while the dough hook works its magic) until you have a soft, springy dough that is not sticky. Depending on the brand of flour you use, how you measure your ingredients, and the humidity when making the bread, you may need more or less flour.
- Make sure your water is not too hot. The water should be warm (around 110°F), not hot, or it will kill the yeast, and your bread won’t rise.
- The dough rise time depends on your kitchen temperature. Don’t place the dough in direct sunlight or in an area that’s too hot, or it can over-proof. If your kitchen is warm (70-75°F), just leave it on the counter. If it’s cool, turn the oven light on and place it in the oven (make sure it’s off and cool). The light will add enough ambient warmth to create a suitable rising environment for the dough.
- Score the loaves before baking. Slashing the proofed dough diagonally 3 or 4 times will control how the bread expands and allow the loaves to keep their shape as they bake.
- For a nice crisp crust, you need to create some steam. Place a pan on the lower rack near the bottom of the oven before you turn it on to preheat. Then, after you add the bread to the oven, pour ¾ cup of hot water into the lower-rack pan. Do not open the oven door while the bread bakes until you think it's done. The bread will be delicious if you skip this, but it’s a bakery trick that I love to use for my loaves.
- For smaller loaves: Divide the dough into thirds or fourths before shaping, keeping in mind the rectangles will also be smaller for shaping, and the bake time will be 5 to 10 minutes less.
- For more perfectly cylindrical loaves, use a baguette pan! You can order them online or purchase them in specialty kitchen supply stores.
- For a faster rise time, use instant yeast. Rapid-rise yeast or instant yeast activates and rises faster than active dry yeast. It also doesn’t need to bloom in warm water. If you want to make the swap to one of these fast-acting varieties, simply skip step 1, whisk the yeast and sugar into the flour, add the water, oil, and salt, and continue as directed.
Nutrition
Calories: 1366kcal Carbohydrates: 275g Protein: 36g Fat: 11g Saturated Fat: 2g Polyunsaturated Fat: 2g Monounsaturated Fat: 5g Sodium: 1764mg Potassium: 388mg Fiber: 10g Sugar: 13g Vitamin C: 0.01mg Calcium: 61mg Iron: 16mg