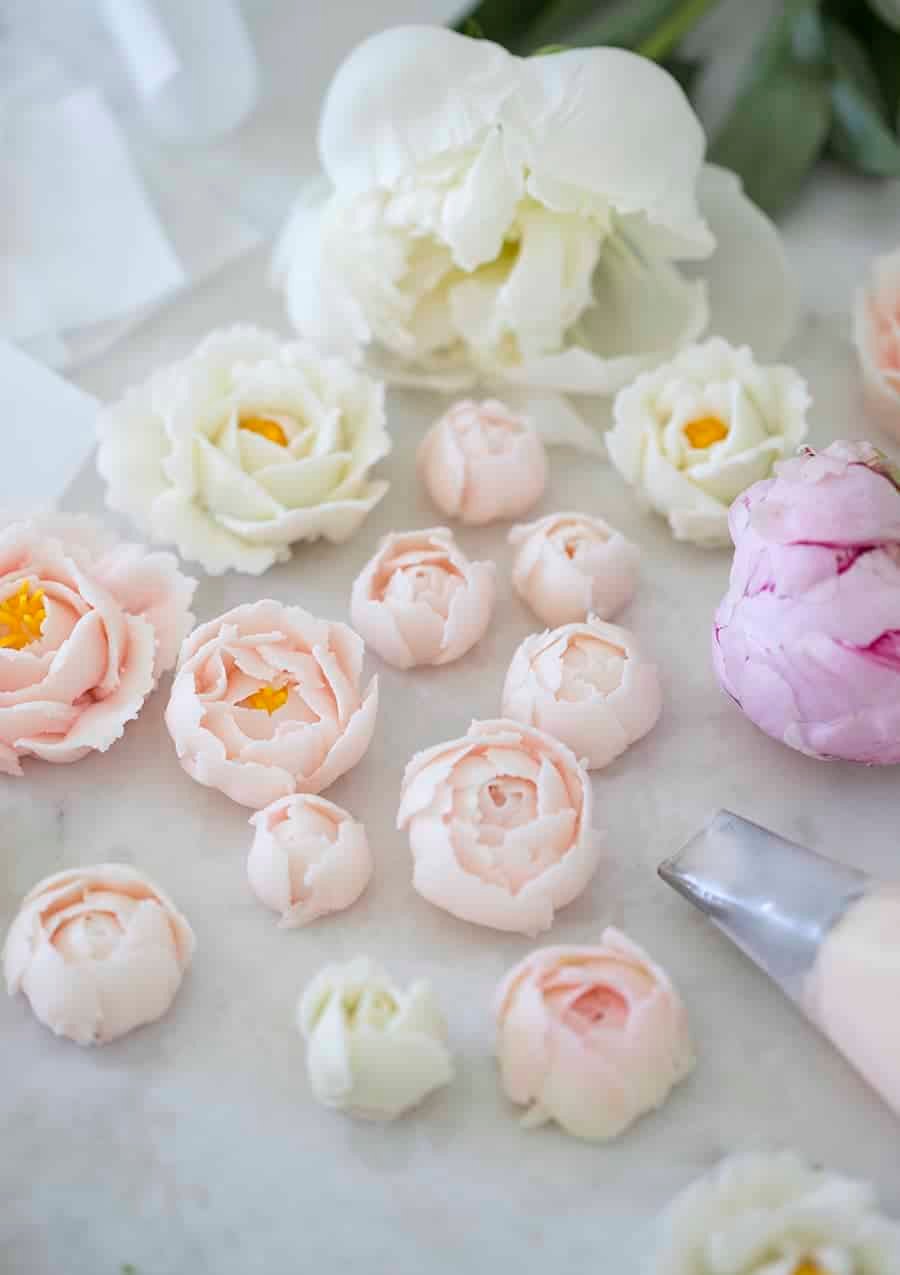
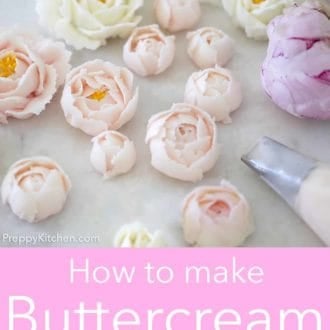
I’ve had SO many requests for a more detailed how to video on buttercream flowers! I’ve embedded a video in the recipe so scroll down for the full tutorial. Most of the problems I hear about relate to the consistency of the buttercream and the shape of the flower. It’s really important to create a cone-shaped base for the petals to sit on. This gives the flowers height and a more realistic appearance.
Pro Tips for Getting a Nice Buttercream Flower
- Make a small batch of extra thick buttercream to make a cone-shaped base for the flowers.
- ALWAYS sift your sugar. Any lumps will clog your tip.
- Storing your flowers in the fridge will make them easier to handle when it’s time to apply them to your cake/cupcake.
- Add food coloring a little at a time with a toothpick for maximum control.
Frequently Asked Questions
How do you make the base for the flower?
Reserve about 1/2 a cup of the buttercream and mix it with more confectioners sugar in a bowl until you get a thicker playdough-like consistency. For each flower you’ll form a cone with this thick buttercream to act as the base. If you don’t have this cone-shaped base your flower will look flat and unrealistic.
What’s the best buttercream to use for flowers?
Generally speaking American buttercream is the most forgiving to use for roses and peonies. You’ll need to reserve part of your buttercream batch for the bases and thicken it with more sugar. Orchids are easier to make with a meringue-based buttercream.
How do you store buttercream flowers?
If I’m making flowers in advance I store them in a sealable container in the refrigerator. If you’re staging the flowers and just need a place for them to hang out while you bake/build the cake then you can pop them into the freezer or let them set on the counter.
How do you transfer the flowers from the paper to a cake or cupcake?
It’s best to build your flowers on a square of parchment paper so you can transfer them to a surface that can be moved/chilled. To apply the roses I like to use a clean pair of scissors to cut the base off and move the flower onto the cake/cupcake/cookie. It’s best to apple some fresh buttercream onto the dessert to act as glue for the flower.
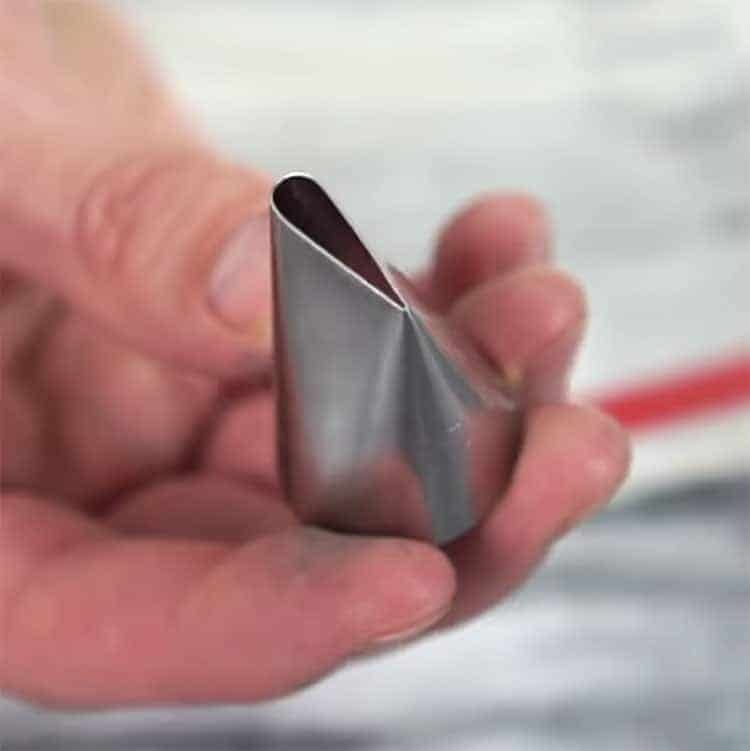
What piping tips will I need?
Get an assortment of petal tips. And a piping nail to work on. I Here are my favorite flower tips if you wanted to buy some individual ones online.
127, 122, 104, 120, 61, 143, 401, 349 (leaf)
How do you make a two-tone petal?
To make a two tone petal, which creates a beautiful often more realistic flower, you’ll need to mix up tow batcher of buttercream. I often make a soft pink and slightly more saturated pink. Fit the piping bag with the petal tip and spoon the more saturated frosting into the side with the pointy end of the piping tip. Fill the rest of the piping bag with the paler frosting and you’re ready to create!
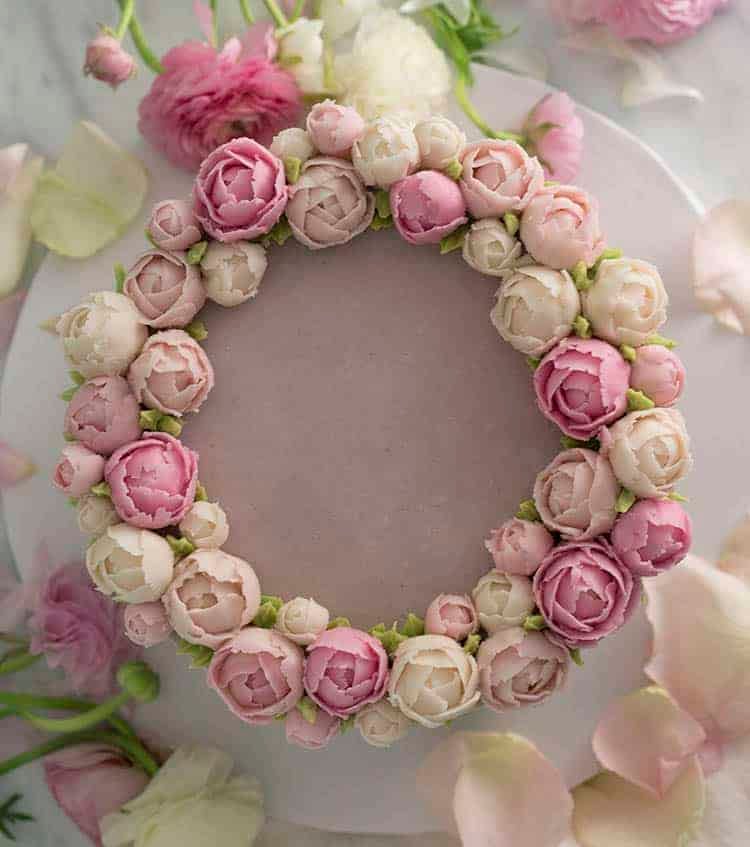
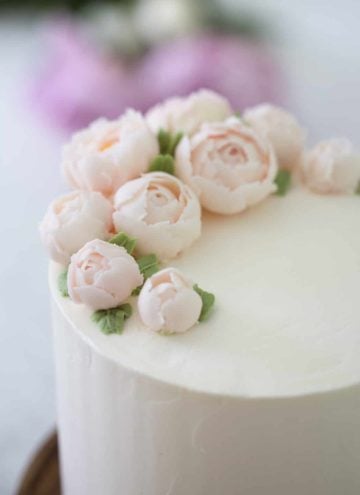
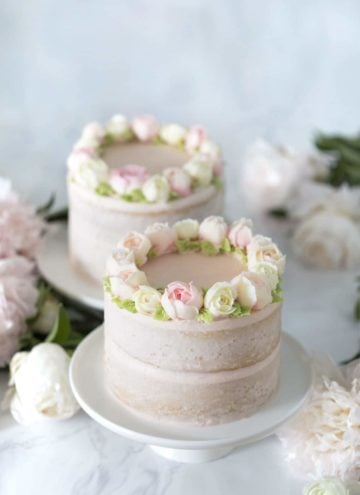
How to Make Buttercream Peonies
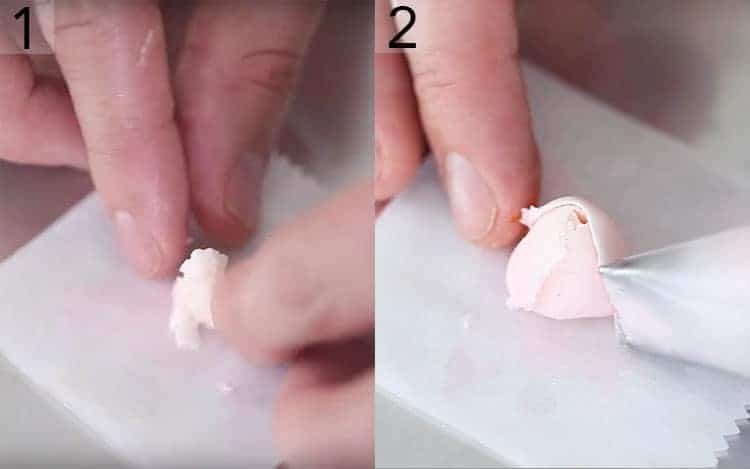
1. Add a small cone of thick buttercream onto a square of parchment paper.
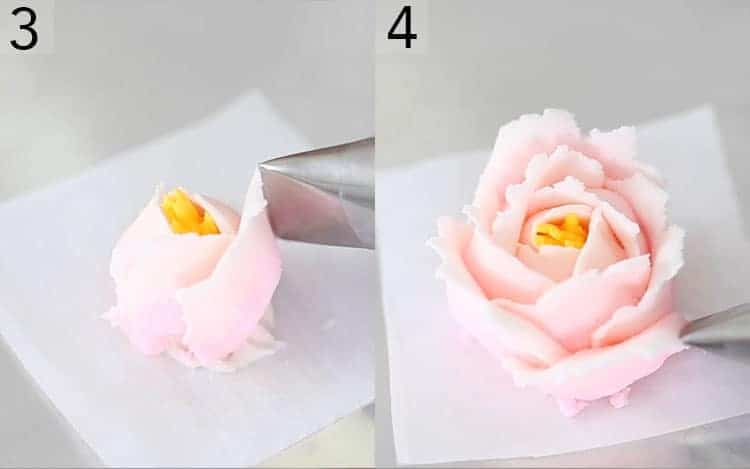
2. Use a curved petal tip like a 120, 121, 122 etc to create an overlapping group or petals that closely hug the cone. I often use my fingers to help press the edge of the petals onto the base.
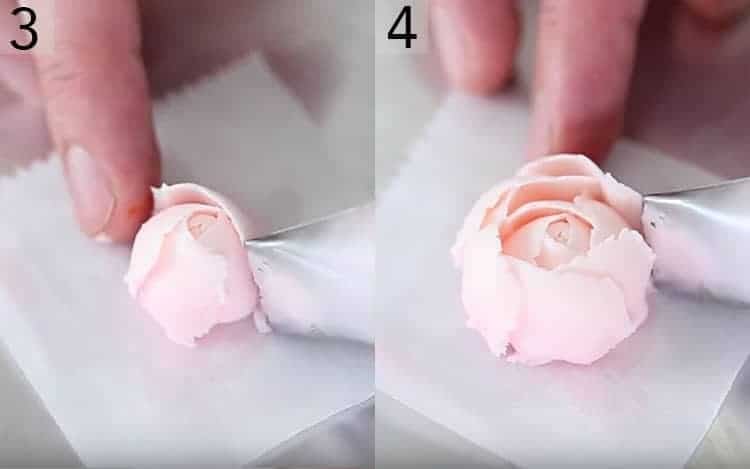
3. Continue building out the peony with more overlapping petals. These petals will not be arched so much as pipped directly across.
4. For a larger peony build another row or two of petals. These petals will not hug the center as closely so you can angle the tip out a bit more. Set the flowers aside until needed.
How to Make Buttercream Roses
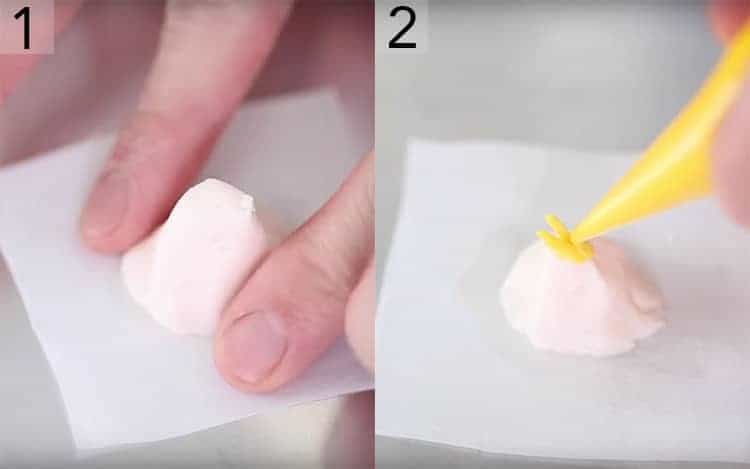
1. Add a medium to large cone of thick buttercream onto a square of parchment paper. The size of the base determines the size of your flower.
2. Pipe the stamens onto the tip of the cone using either a small round tip or a plain piping bag with the very tip snipped off. You might need to practice tis part but you’ll be starting with the piping bag touching the base, squeeze and lift the bag at the same time then continue lifting but stop squeezing to finish the stamen.
3. Use a regular petal tip (125, 126, 127, etc) to create tight arcs around the center.
4. Continue piping arcs that become larger as the rose increases in size. The petals should overlap a bit; feel free to use your clean finger or a small tool to press the edges of the petals down if there are any fly aways as this will make your flower look sloppy.
How to Make Buttercream Roses with a closed center
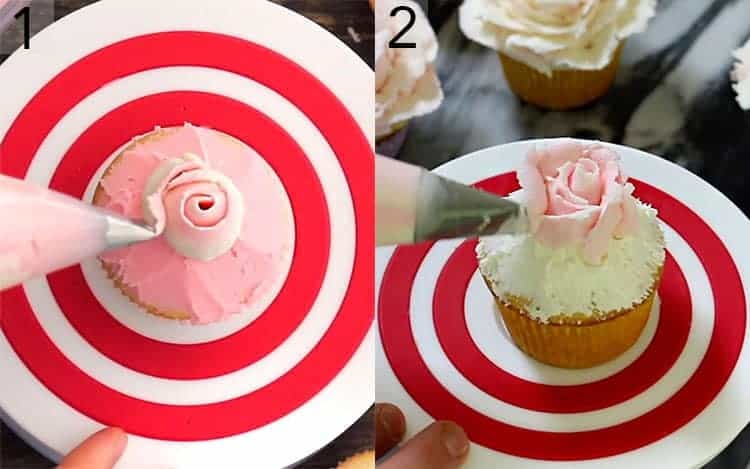
1. This flower is similar to the steps above. This time you’ll use the petal tip to pipe a spiral onto the base. In this photo you can see a rose being piped directly onto a cupcake. When you do this it’s important to create a cone-shaped base to work on.
2. After the center is piped you can begin adding the arc-shaped petals to create your rose. Follow the same steps from the instructions on making buttercream roses above.
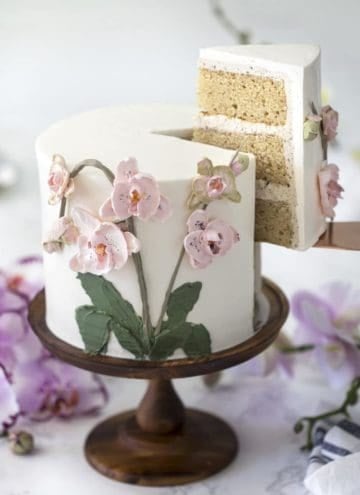
How to Make Buttercream Orchids
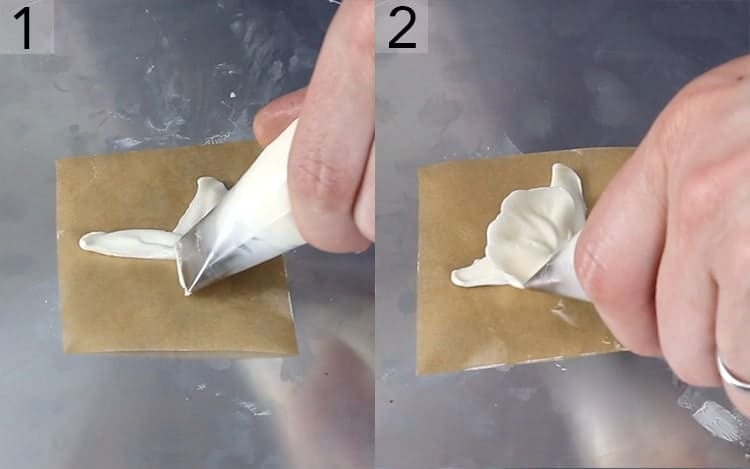
1. These flowers are VERY different. I like to use an Italian meringue buttercream for these flowers, which you can stiffen up by mixing with some American buttercream. The flowers will be soft so it’s best to store in the freezer then place on the cake, cupcakes, etc before serving. Use a straight petal tip like a 127 to create the three long petals. Start with the sharp end of the tip facing outwards, pull forward to start the petal then pull back towards the center and lift.
2. For the two larger petals you will use a curved petal tip. hole the sharp end outwards and pivot the tip so the blunt side moves just a little over teh center. Stop squeezing and release when the petal is a half circle.
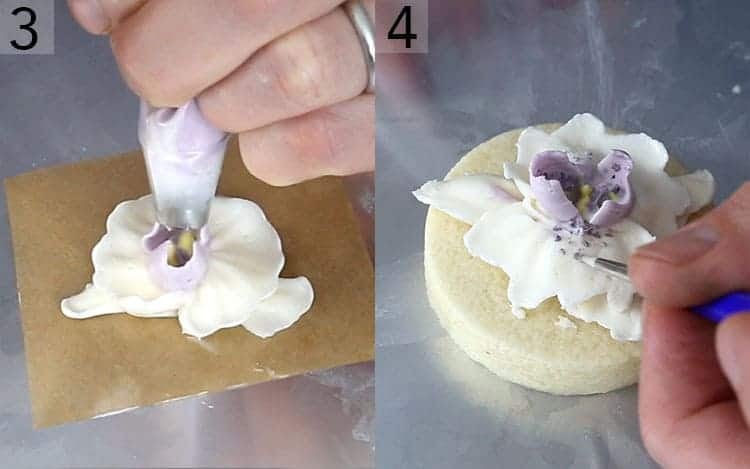
3. Use a 401 tip to create 2 hooded petals in the center. I like to add a few dabs of colored buttercream in the center first for added detail using either a small brush, toothpick or a piping bag with the tip snipped off. At this point I like to chill the flower so it holds it’s shape.
4. Use a small round brush to paint some extra details onto the chilled flower then carefully place it onto your dessert.
If you’ve tried this buttercream flowers tutorial then don’t forget to rate the recipe and let me know how you got on in the comments below, I love hearing from you!
How to Make Buttercream Flowers
Video
Ingredients
INGREDIENTS
For the American Buttercream:
- 1 cup butter 225g, unsalted, room temperature
- 1.5 lb confectioners sugar 460g, sifted
- 1 tsp rose water
- Soft pink, yellow and orange food coloring
- 1 tbsp matcha powder
Instructions
For the American Buttercream:
- In a stand mixer fitted with a paddle attachment, cream the room temperature butter until smooth.
- Sift in the confectioner’s sugar. You can add the sugar in two batches.
- Beat until you get to a thick consistency. Add a few drops of rose water.
- Save a small amount of buttercream in a bowl. Add more confectioners sugar and mix by hand until you get a play dough consistency. This will be used for the base of your flowers.
- Separate and dye a few batches yellow, blush and darker pink. Use some matcha powder to dye some buttercream a natural green for the leaves.
- Transfer the green to a bag fitted with a 68 tip.
For the Assembly:
- Cut 2.5- inch squares of parchment paper.
- Transfer the yellow buttercream to piping bag. Snip off the tip.
- Add the 127 tip to a piping bag. Transfer the blush and darker pink buttercreams to one bag. Work out the air bubbles and give it a test.
- Use a dash of buttercream to glue down the square of parchment paper to a piping nail or turntable.
- Mold a small cone of the thick base buttercream in the middle of the square.
- Add bits of yellow in the middle.
- Pipe a spiral, then add arcs to the spiral, curving up. Add more petals until you’ve reached a desired rose look.
- For a peony or closed rose, start off with a smaller base, pipe tight arcs and close off in a round shape.
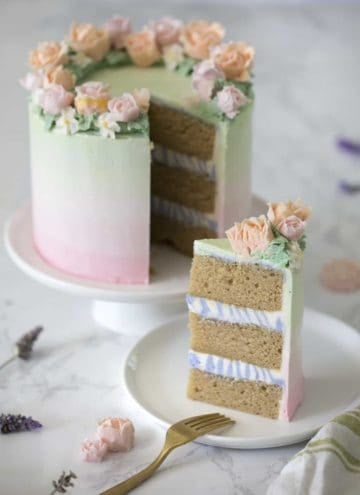
- When you’re ready to use the roses, cut the bottom with scissors and transfer to your cake, cupcake or cookie.
- Pipe leaves with the green buttercream to create some dimension.
Notes
- ALWAYS sift your sugar. Any lumps will clog your tip.
- Storing your flowers in the fridge will make them easier to handle when it's time to apply them to your cake/cupcake.
- Add food coloring a little at a time with a toothpick for maximum control.
Nutrition



Carla says
any substitution for the matcha powder??
Laura Banning says
Hi 😀 thank you so much for sharing this, it looks amazing. I have one question, I want to do this for a smash cake for my daughter, is there a “better” type of sugar that can be used [monk fruit, stevia]? Or can I modify the amount of sugar?
Ashley says
I have loved making buttercream flowers thanks to your tutorial! However, something is definitely not right in how I’m trying to replicate your recipe. My petals are thicker and seem almost melty. After a few minutes, they begin to lose much of their shape. Any thoughts on how to fix this?
Thanks!