
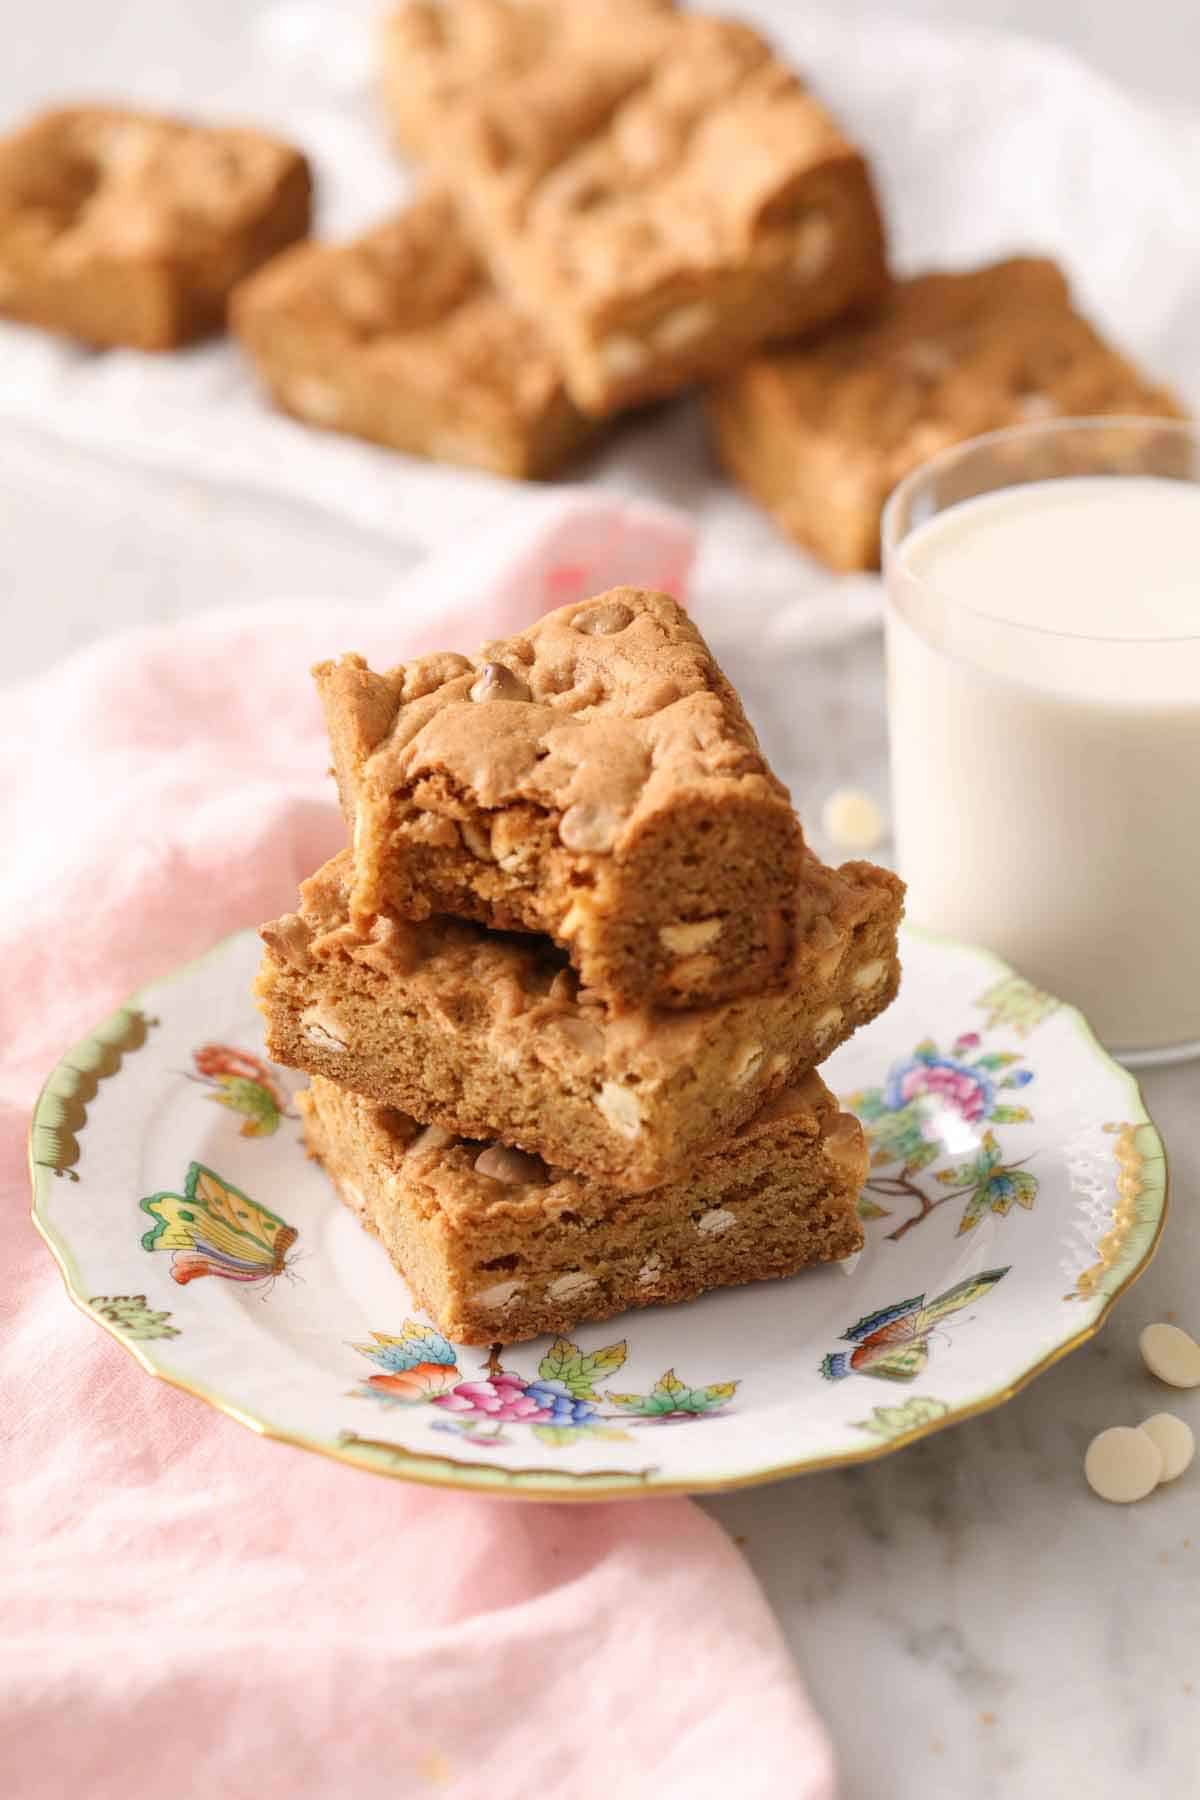
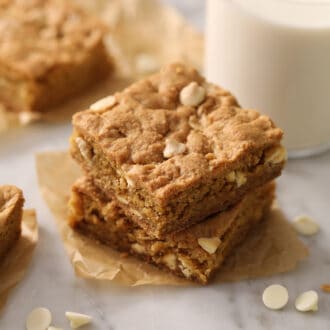
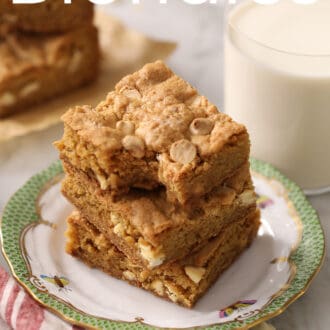
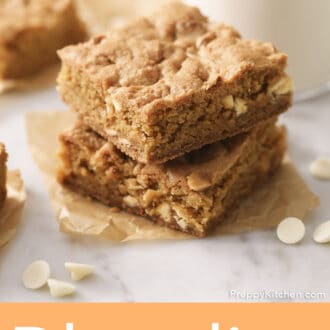
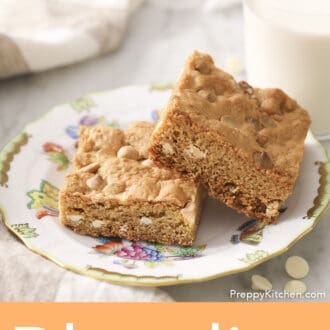
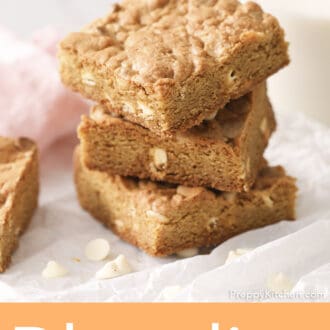
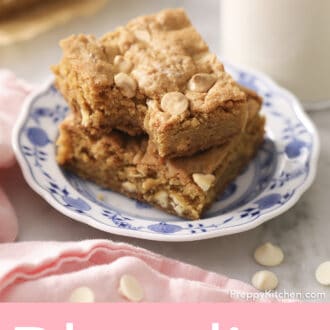
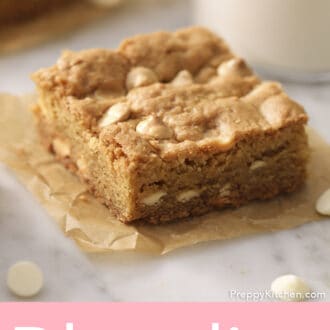
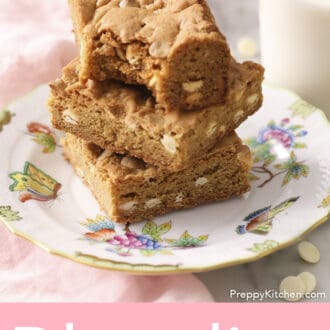
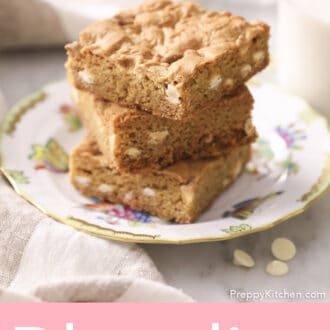
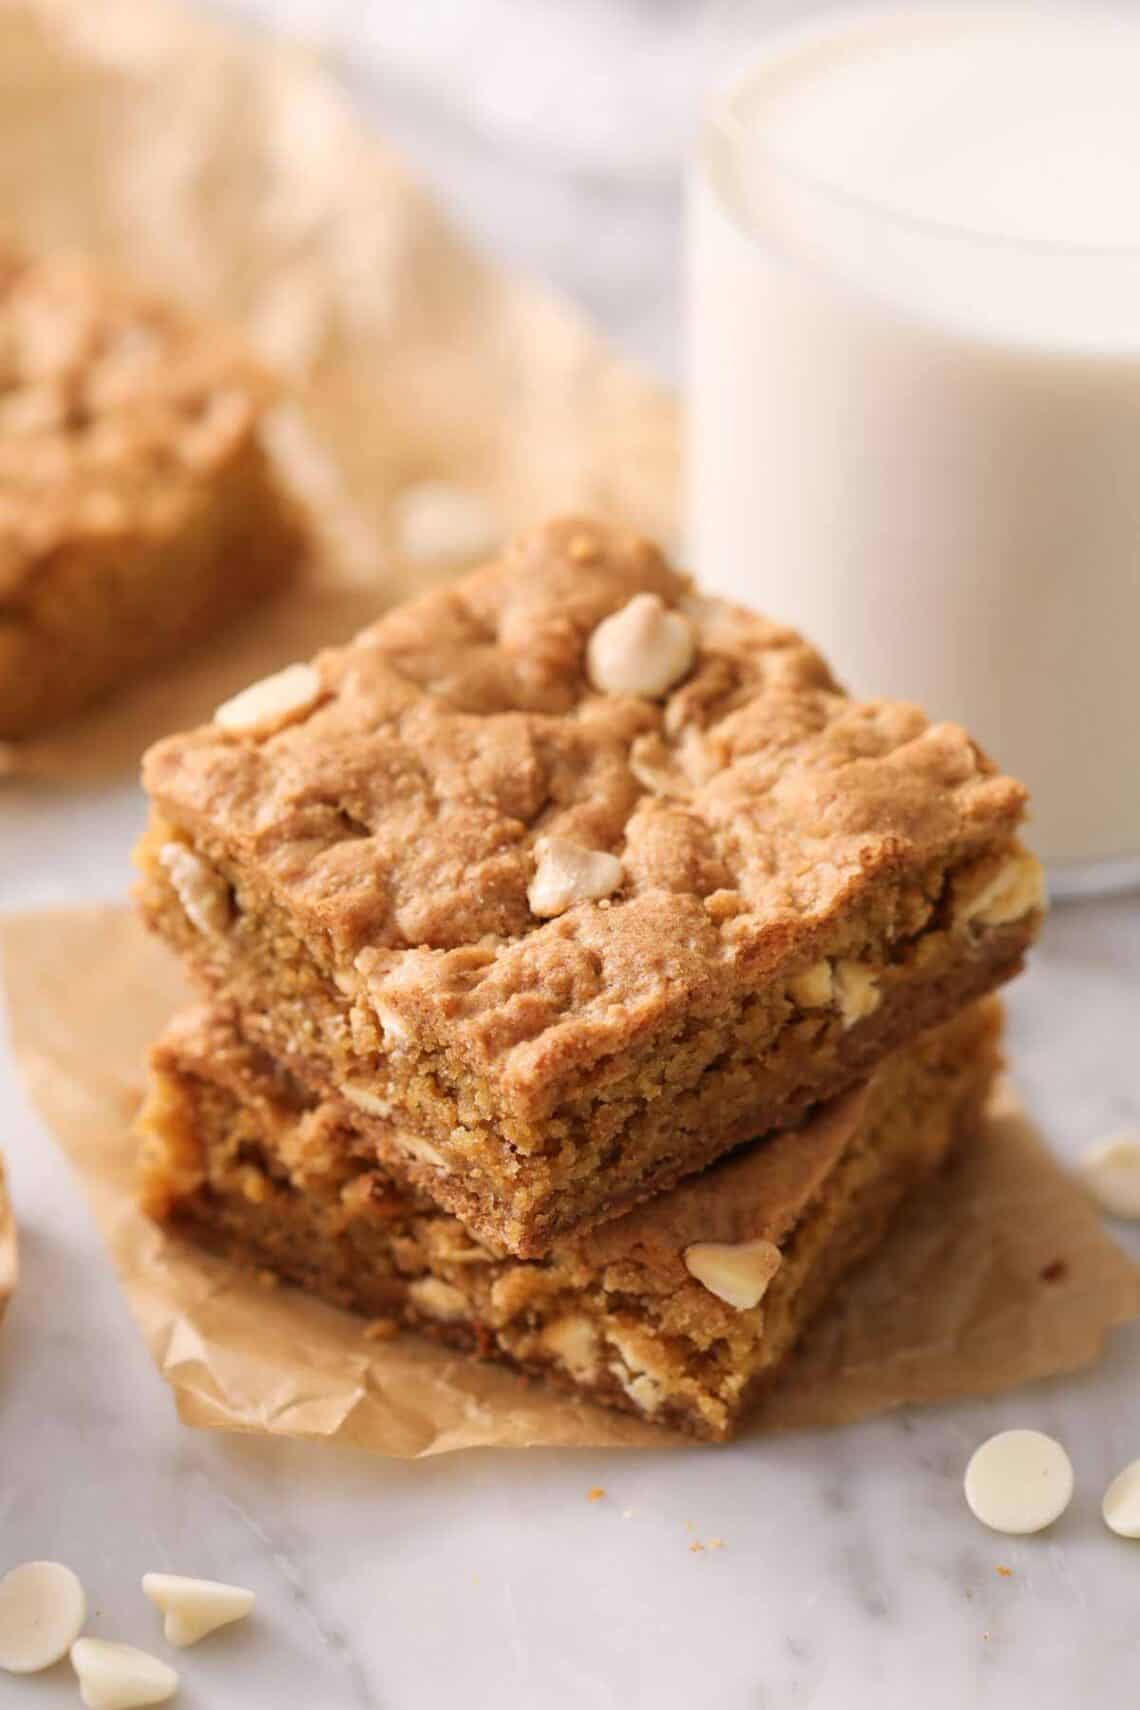
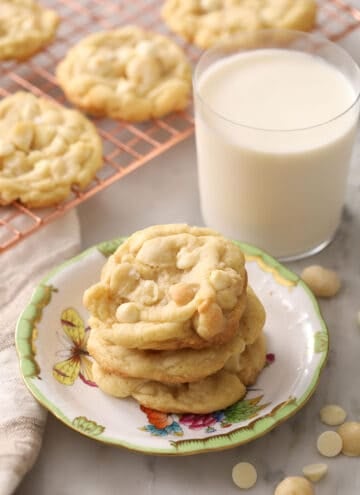
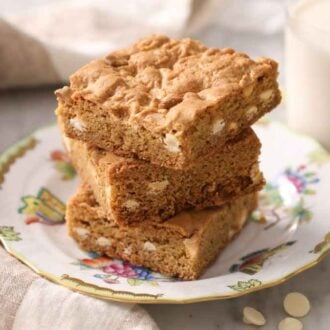
My classic blondie recipe yields blondies that are moist and tender with a chewy texture. They’re essentially a blonde brownie–the best parts of brownies and chocolate chip cookies combined! Ready in well under an hour, you don’t need a mixer or any special equipment for this easy blondie recipe: just some mixing bowls, utensils, and a baking pan!
One of my favorite things about this blondie recipe is how easy it is to customize based on what you like. You can add chocolate chips, chopped nuts, dried fruit, or omit the mix-ins completely. There is a perfect blondie out there for everyone! If you’re looking for more easy dessert bar recipes, try my extra fudgy brownie recipe, loaded s’mores bars, or easy chocolate chip cookie bars.
What’s The Difference Between Blondies And Brownies?
Often called “blonde brownies,” blondies are soft, gooey treats that are very similar to brownies. However, brownies are made with melted chocolate or cocoa powder in the batter, which is their most dominant flavor. Blondies, on the other hand, omit the chocolate and are made with brown sugar and a generous splash of vanilla, which gives them a butterscotch flavor.
Ingredients
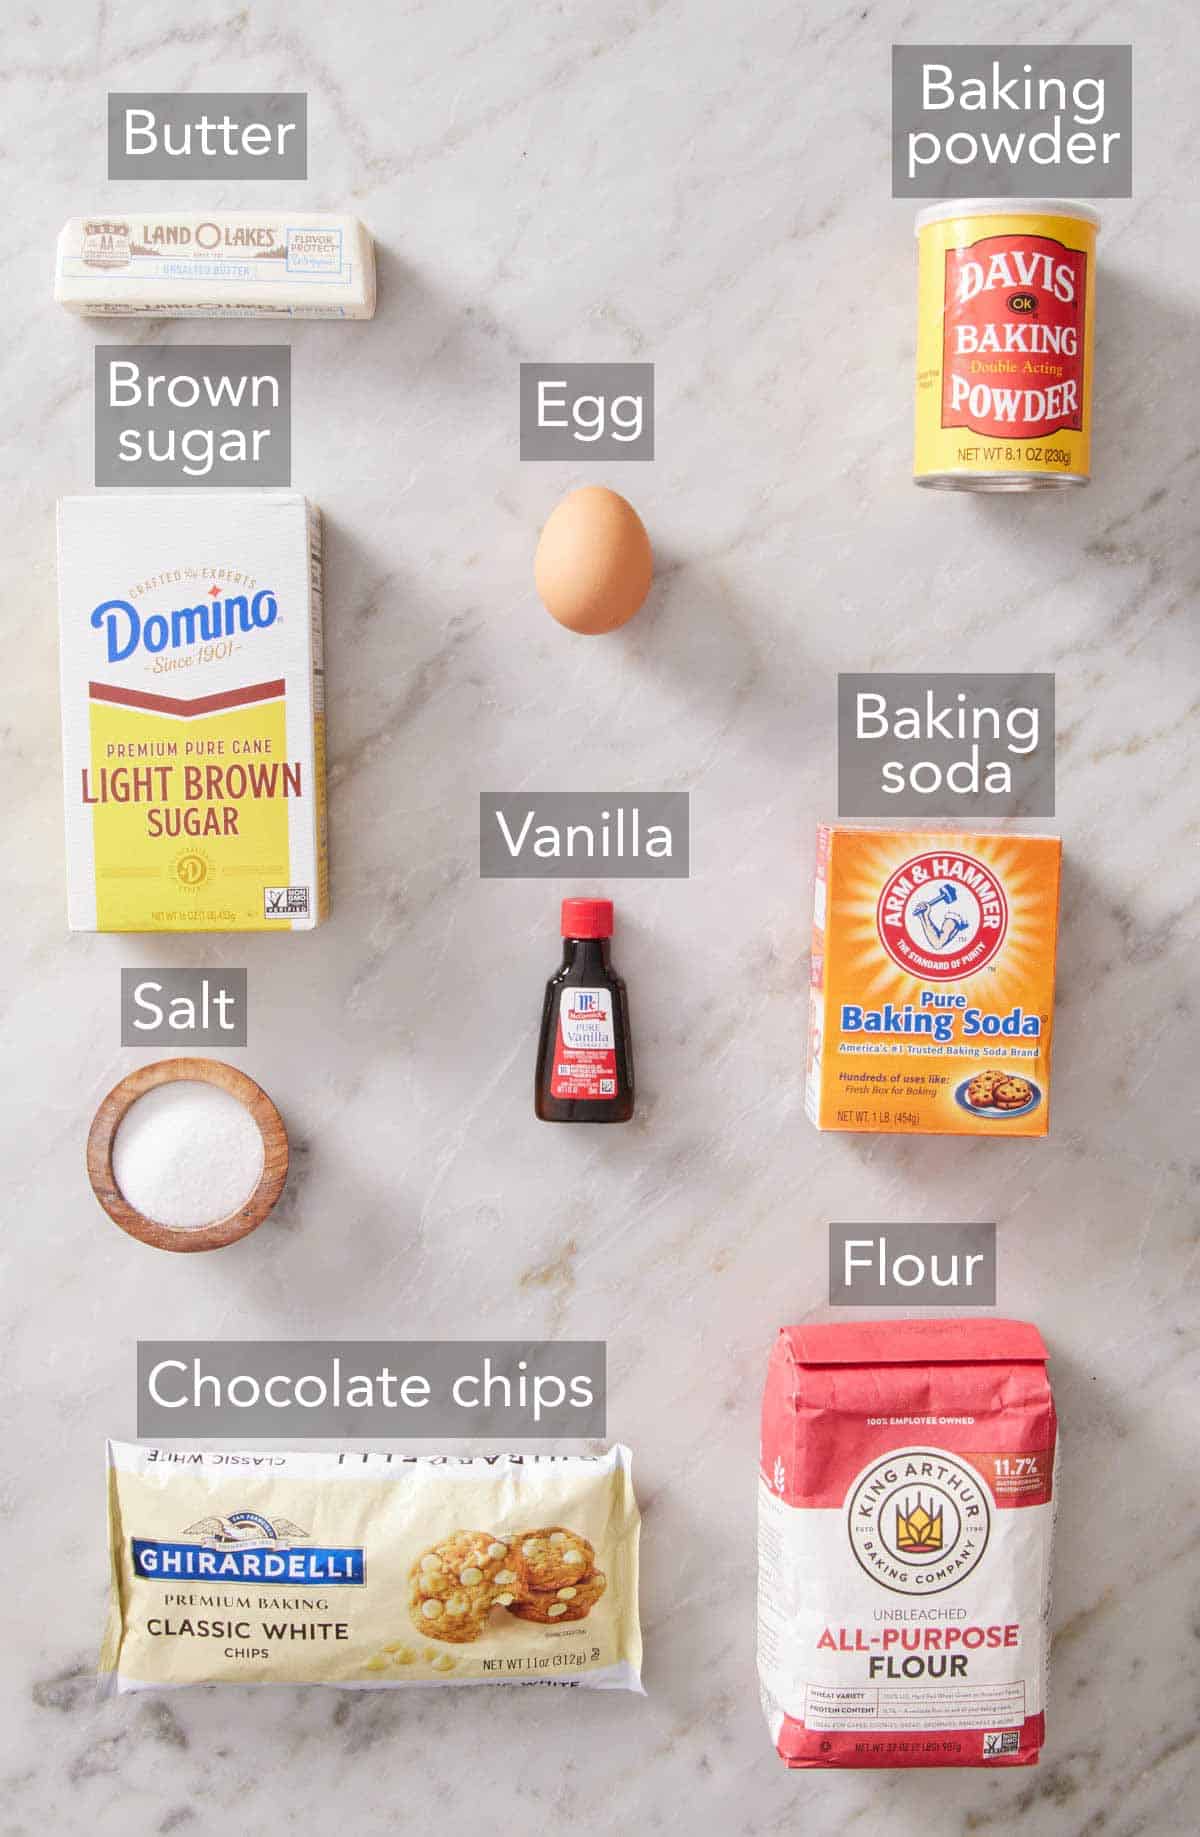
Flour — all-purpose flour is perfect for this chewy blondie recipe.
Leavening — baking powder and baking soda work together so the blondies achieve the perfect rise and texture.
Salt — salt balances the sweet flavors in these dessert bars.
Sugar — light brown sugar adds moisture, chewiness, and a nice butterscotch flavor.
Butter — unsalted butter is the best choice, so you can add salt separately to control the flavor of the blondies.
Egg — the large egg needs to be at room temperature when you start the batter so it incorporates easily with the other ingredients.
Vanilla — vanilla is an important part of a good blondie, so be sure to use high-quality vanilla extract, not vanilla flavoring (which is often artificial).
Mix-ins — you can choose to omit mix-ins, but I love adding a cup of white chocolate chips. I have lots of additional mix-in ideas in the Variations section!
How to Make a Blondie Recipe
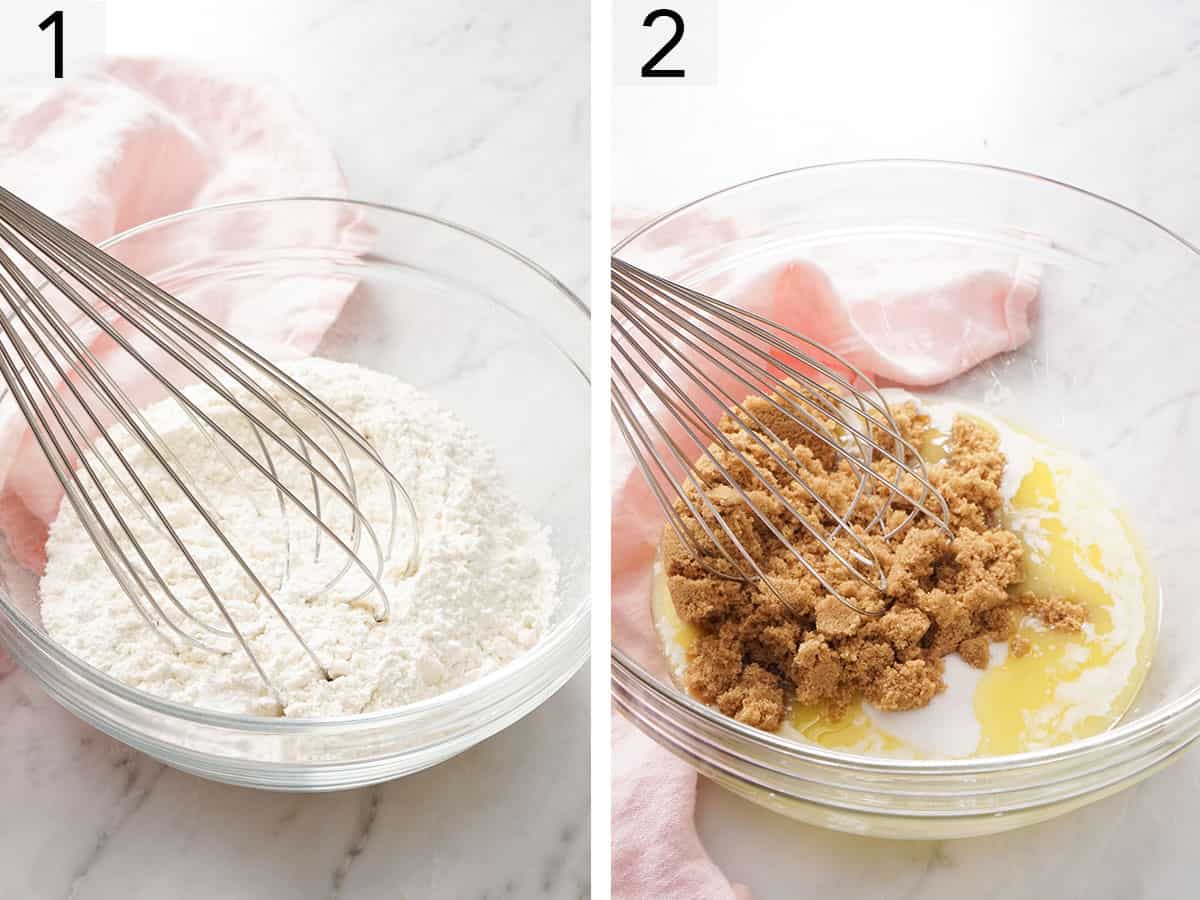
1. In a medium bowl, whisk together the flour, baking powder, baking soda, and salt.
2. To a large bowl, add the brown sugar and melted butter and whisk to combine.
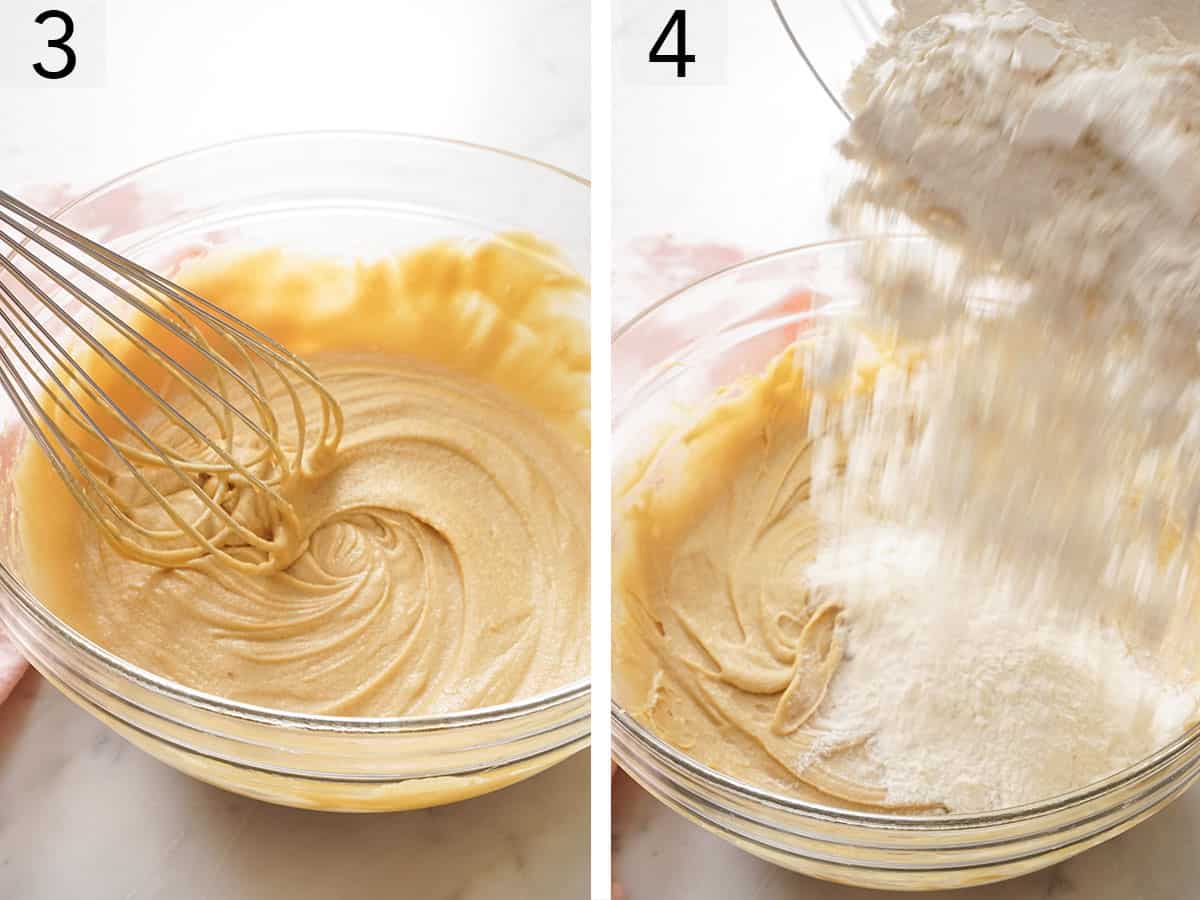
3. Add the egg and vanilla and vigorously whisk until you have a thick, well-incorporated mixture.
4. Add the dry ingredients mixture to the wet ingredients mixture and stir together with a rubber spatula until almost combined.
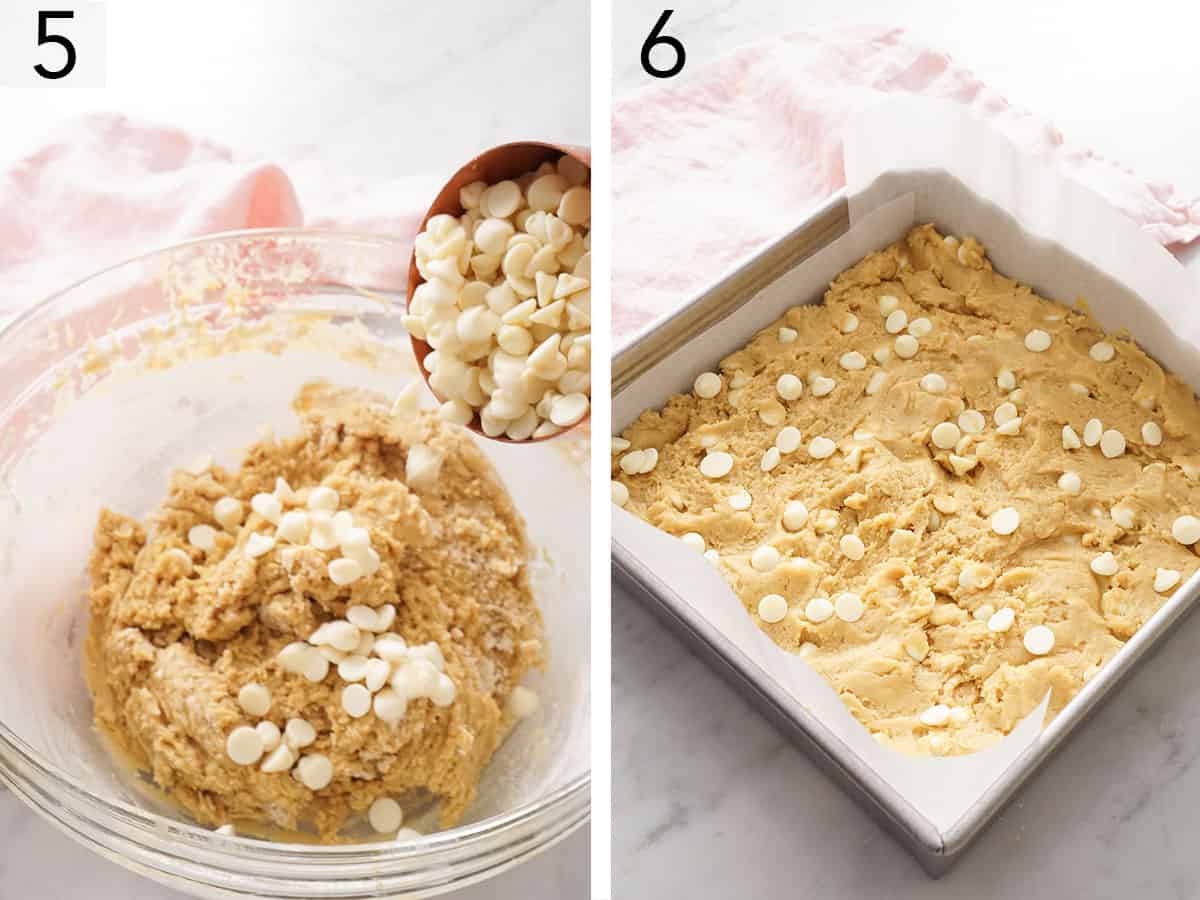
5. Add ¾ cup of your desired mix-ins (I used white chocolate chips) and stir until they are well distributed.
6. Transfer the blondie batter to an 8×8-inch baking pan lined with parchment paper or foil, with a 2-inch overhang on at least 2 of the sides. Spread into an even layer in the prepared pan. Press the remaining ¼ cup of mix-ins into the top. Bake at 350°F for 32 to 36 minutes or until the edges are set and golden brown and a toothpick inserted into the center comes out clean. Let the cookie bars cool completely in the pan before cutting them into neat slices.

Variations
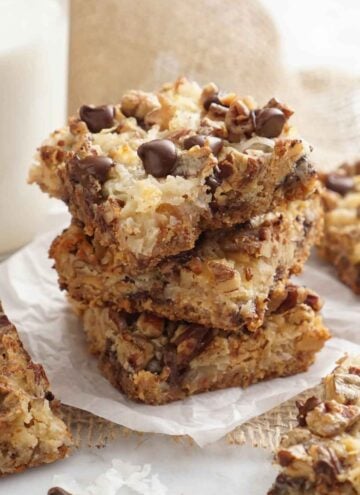
- Vary the mix-ins: Chopped candy bars, M&Ms, butterscotch chips, semisweet chocolate chips, milk chocolate chips, peanut butter chips, and dried fruit are all divine options! Chopped nuts such as toasted walnuts, pecans, or almonds add a nice crunch.
- Add cornstarch: Cornstarch might seem like an unusual choice, but it makes blondies so tender and is a game-changer if you are a fan of their chewy texture! Add up to 2 teaspoons of cornstarch along with the flour and other dry ingredients in Step 2.
- Use dark brown sugar: Swap the light brown sugar for dark brown sugar (or use a combination of the two) for a more intense molasses flavor.
- Use brown butter: Browned butter adds a nutty, caramel-like depth of flavor. Be sure to check out my post on making browned butter for the best way to substitute it.
Storing Homemade Blondies
The bars store very well (even though they don’t last very long in my house!). Be sure to let them completely cool before you transfer them to an airtight container. They will stay fresh at room temperature for up to 3 days or in the refrigerator for up to a week.
Pro Tips For The Best Blondies
- Measure the flour correctly. Using too much flour is a surefire way to end up with dry, crumbly blondies. The best way to measure flour is with a kitchen scale. If you don’t have one, fluff the flour in its bag or container and scoop it into your measuring cup. Level off the top with a knife.
- Melt the butter. Using melted butter is a vital part of this recipe as it adds a rich buttery flavor and yields chewy blondies. Plus, it means you can simply stir the batter together easily by hand!
- Don’t over-mix the batter. Mix just until the flour is incorporated. Over-mixing results in tough, dense blondies.
- Use a metal pan. Different materials heat up differently to metal, and you may end up with dry edges and an undercooked center if baking in a glass or ceramic pan. A metal pan will bake up a better blondie with crispy edges and a chewy center.
- Line the baking dish with parchment paper. This is essential so the blondies don’t stick to the pan. Leave an overhang on at least two opposing sides so you can easily lift them out of the pan.
- Use a bigger pan. This blondie recipe also works well in a 9×9-inch square baking pan but will yield slightly thinner blondies.
- Don’t over-bake them. It’s honestly better if blondies are ever so slightly underbaked. If you leave them in the oven for too long, they will turn out dry and hard instead of gooey, chewy, and soft.
- Finish the blondie recipe with flaky sea salt. Just after baking, add a sprinkle of flaked sea salt to play up the sweet-salty contrast.

Frequently Asked Questions
Yes. Spread the batter in the pan, cover, and chill for up to 24 hours before baking. Add a few minutes to the baking time to account for the cold batter.
Absolutely! I prefer to freeze individual slices of this blondie recipe so I can grab one or two as I need them instead of needing to thaw the entire batch. Once completely cooled and sliced, wrap each blondie in a layer of plastic wrap. You could add a layer of aluminum foil if you want for extra protection. Transfer them to a freezer bag or freezer-safe container and store them for up to 3 months. Defrost them on the counter for a few hours before enjoying.
Yes, you can double the recipe and bake the blondies in a 9×13-inch pan. Add 5 to 10 minutes to the baking time.
If you love this recipe try these out!


If you’ve tried this blondie recipe, then don’t forget to rate it and let me know how you got on in the comments below. I love hearing from you!
Blondies Recipe
Video
Equipment
- 8×8-inch square baking pan
- Parchment paper or foil
Ingredients
- 1¾ cups all-purpose flour (210g)
- 1 teaspoon baking powder
- ¼ teaspoon baking soda
- ¾ teaspoon salt
- 1 cup packed light brown sugar (220g)
- ½ cup unsalted butter melted (113g)
- 1 large egg room temperature
- 2 teaspoons vanilla extract
- 1 cup mix-in’s such as white, semi-sweet chocolate or butterscotch chips; chopped nuts such as walnuts, pecans, or almonds (180g)
Instructions
- Preheat the oven to 350°F. Line a 8×8-inch baking pan with parchment paper or foil, leaving a 2-inch overhang on at least 2 of the sides.
- In a medium bowl, whisk together the flour, baking powder, baking soda, and salt.
- In a large mixing bowl, whisk to combine the brown sugar and melted butter. Add the egg, and vanilla and whisk vigorously until the mixture is thick and well combined
- Add the dry mixture to the wet mixture and stir together with a spatula until almost combined. Add ¾ cup of mix-in’s and stir until they are well distributed.
- Transfer the dough to the prepared baking pan and spread into an even layer. Press the remaining ¼ cup of mix in’s into the top.
- Bake for 32 to 36 minutes or until the edges are set and golden brown and a toothpick inserted into the center comes out clean. Let the cookie bars cool completely in the pan before cutting.
Notes
- Measure the flour correctly. Using too much flour is a surefire way to end up with dry, crumbly blondies. The best way to measure flour is with a kitchen scale. If you don’t have one, fluff the flour in its bag or container and scoop it into your measuring cup. Level off the top with a knife.
- Melt the butter. Using melted butter is a vital part of this recipe as it adds a rich buttery flavor and yields chewy blondies. Plus, it means you can simply stir the batter together easily by hand!
- Don’t over-mix the batter. Mix just until the flour is incorporated. Over-mixing results in tough, dense blondies.
- Use a metal pan. Different materials heat up differently to metal, and you may end up with dry edges and an undercooked center if baking in a glass or ceramic pan. A metal pan will bake up a better blondie with crispy edges and a chewy center.
- Line the baking dish with parchment paper. This is essential so the blondies don’t stick to the pan. Leave an overhang on at least two opposing sides so you can easily lift them out of the pan.
- Use a bigger pan. This blondie recipe also works well in a 9×9-inch square baking pan but will yield slightly thinner blondies.
- Don’t over-bake them. It’s honestly better if blondies are ever so slightly underbaked. If you leave them in the oven for too long, they will turn out dry and hard instead of gooey, chewy, and soft.
- Finish the blondie recipe with flaky sea salt. Just after baking, add a sprinkle of flaked sea salt to play up the sweet-salty contrast.
Beth says
If you only have salted butter, how much would you reduce the salt the recipe calls for (3/4 tsp)? I made these this morning with the recommended salt and forgot my butter was salted. They turned out really tasty, just a little too salty.
Sarah Ward (Executive Editor, Preppy Kitchen) says
Hi Beth, generally you reduce the salt by 1/4 teaspoon per stick (1/2 cup). So for this recipe, if you use salted butter you would add 1/2 teaspoon of salt.
Jess says
Could I double and bake in a 9×13 pan?
Sarah Ward (Executive Editor, Preppy Kitchen) says
Definitely! Since the recipe is doubled, add about 5 to 10 minutes to the bake time to account for the larger amount and pan size.
Michelle Merritt says
Oh my gosh these are great! I did the browned butter option and for mixins I did toasted chopped pecans and mini semisweet chocolate chips. Flaky Maldon salt on top when done was the perfect touch. They were a hit with friends and I’ll make them again for sure.
yehudit says
good
Haneea says
I have tried this and lovelier it! John always has the best recipes. My go to guy for any recipe!
I wish you would make lotus biscoff cake and cheesecake soon😍
Angelo says
Amazing recipe! I made a huge batch and it was gone in a flash. Everybody freaking loved it and it was a lot of people’s first time here of even hearing about blondies. I may have converted a few to the vanilla side as well.
Quick question, are they still blondies if melted white chocolate gets incorporated in the batter? I just see so many contradicting stuff about mixing in melted white chocolate. Some folks say that it’s okay, others say it’s a completely different thing (white chocolate blondie), and even others say that it’s essential. It’s all so confusing. Thanks! 🙂
Eva Judin says
My white chocolate is browning on the top
John Kanell says
the heat caramelizes the white chocolate 🙂
Dan T. says
I Love this blondies recipe! The end result gives me a perfect blend of chewy and cakey. The Salt just gives it that needed oomph. I added around 250g of sugar total and it was great! Used vanilla flavored sugar instead of extract and it still worked well. Thanks for this wonderful recipe. I always appreciate that you use grams!