My chocolate bunny cookies are a really fun holiday treat and if nothing else I think you’ll love the no-spread sugar cookie recipe! You can totally make white or even pink bunnies with this recipe by substituting the chocolate for a white candy melt. Don’t try to use white chocolate, you’ll end up in tears. The fluffy tales are really fun to make; you’re just rolling a little ball of fondant and coating it in sanding sugar. I’ve attached a photo of the outline I drew for the two bunny silhouettes I piped at the bottom of this post. You’re welcome to download and print for use but most of you will enjoy sketching your own!
If you’d like to do this as a project with kids then here’s my advice: use candy melts so you don’t have to worry about the chocolate temperature and then depending on their age you can make the tails, mix and chill the dough ahead of time and even pre-bake cookies.
how to make bunny cookies
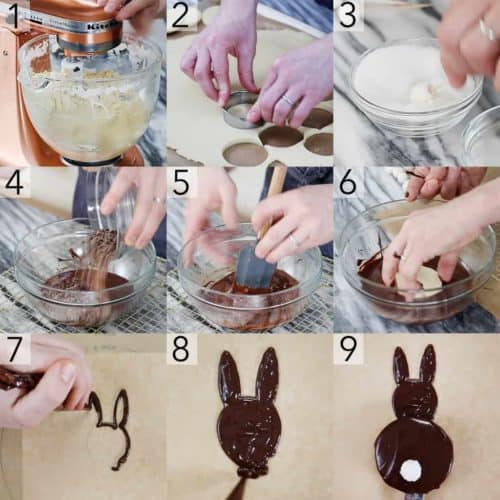
1. Cream butter and sugar. Mix in the eggs, flour, cornstarch, salt and vanilla. Chill for 1 hour.
2. Roll to ¼-inch thickness. Cut out circles.
3. Roll white balls of fondant. Dip in water, then roll in white sanding sugar and set aside
4. Melt chocolate to 114°F -118°F and add the chopped chocolate.
5. Mix and let it cool to 95°F-100°F
6. Dip cookies in chocolate.
7. Transfer chocolate to a piping bag. Pipe a bunny shape.
8. Pipe an extra bit at the base to help the cookie attach.
9. Attach cookies and allow chocolate to set.

Bunny Cookies:
Ingredients
INGREDIENTS
For the Cookies:
- 1 cup sugar 234g
- 2 sticks butter 227g
- 2 eggs
- 4 cups flour 501g
- ½ cup corn starch 60g
- 1 tsp vanilla
- ⅔ tsp salt
For the Chocolate:
- 280 g dark chocolate chopped
Instructions
INSTRUCTIONS
For the Cookies:
- Preheat to 375 F.
- In a stand mixer fitted with a paddle attachment, cream the butter and sugar.
- Add in the eggs.
- Sift in flour, cornstarch, salt.
- Add in vanilla.
- Separate dough into disks. Wrap in plastic.
- Chill for about 1 hour.
- Roll out between parchment.
- Roll to ¼-inch thickness.
- Cut out circles.
For the Chocolate:
- Draw or print a bunny shape for the stencil on white paper.
- Give chocolate a rough chop.
- Separate 80g of chocolate and set the bowl aside.
- In a double boiler, melt 200g of chocolate to 114°F -118°F.
- Take it off and let it cool to 95°F-100°F.
- Add the 80g of room temp chocolate. Mix together until melted.
- Bring back to a working temperature of 88°F - 90°F
- Dip each cookie in the chocolate. Transfer to parchment paper to cool.
- Transfer the rest of the tempered chocolate to a piping bag. Snip off the tip.
- Slip the stencil under a sheet of parchment paper. Pipe bunny shapes. Leave some extra chocolate at the base of the bunny.
- Place the chocolate covered cookies at the base of the bunnies.
- Let cool and harden.
For the Assembly:
- Roll small balls of white fondant.
- Dip in water, shake off excess, then roll in white sanding sugar.
- Attach to the base of the bunny.
Nutrition
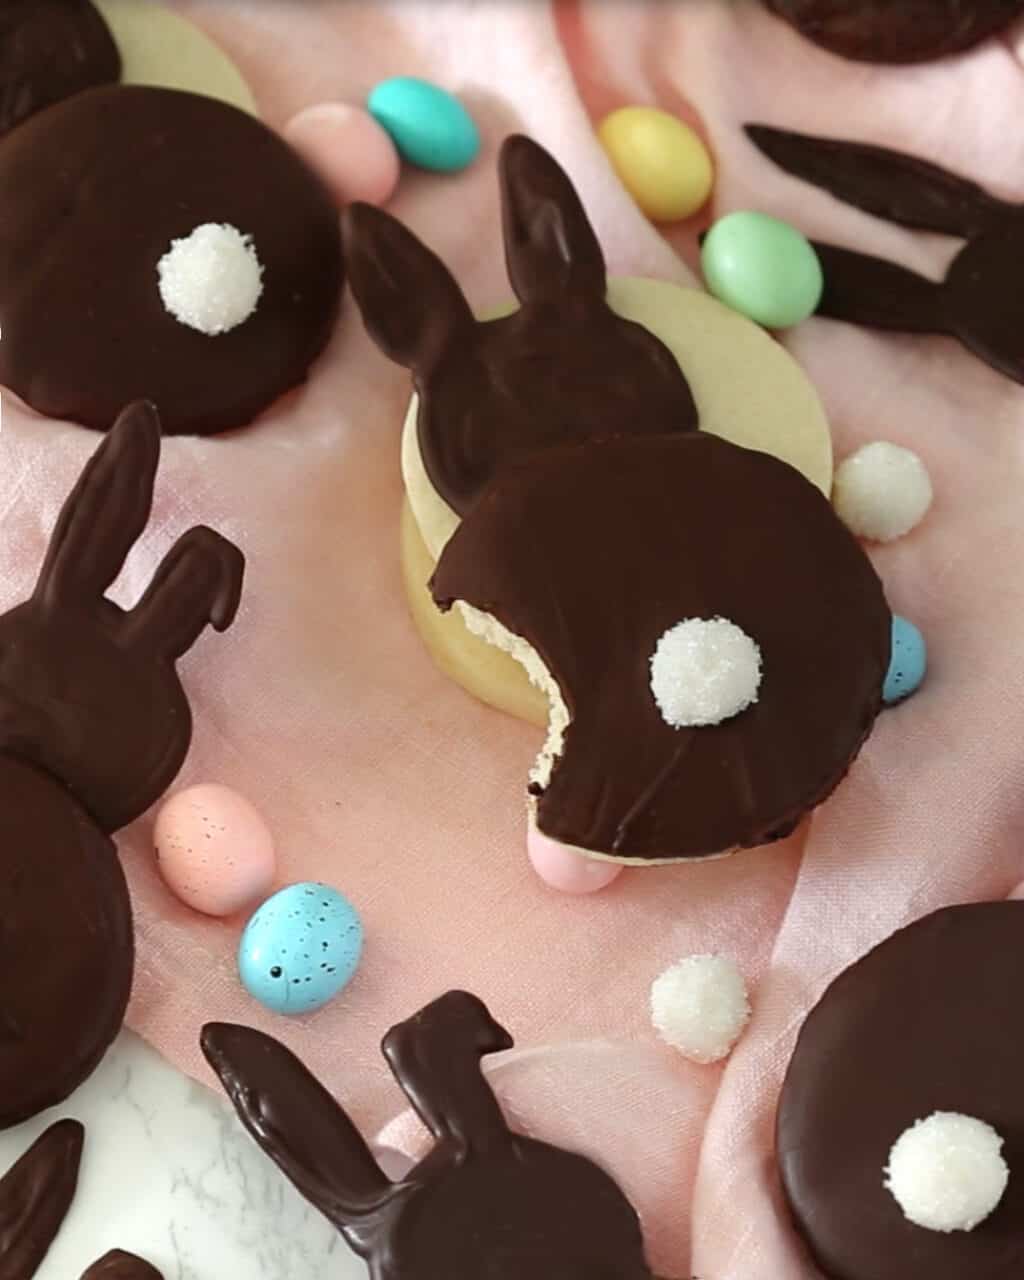
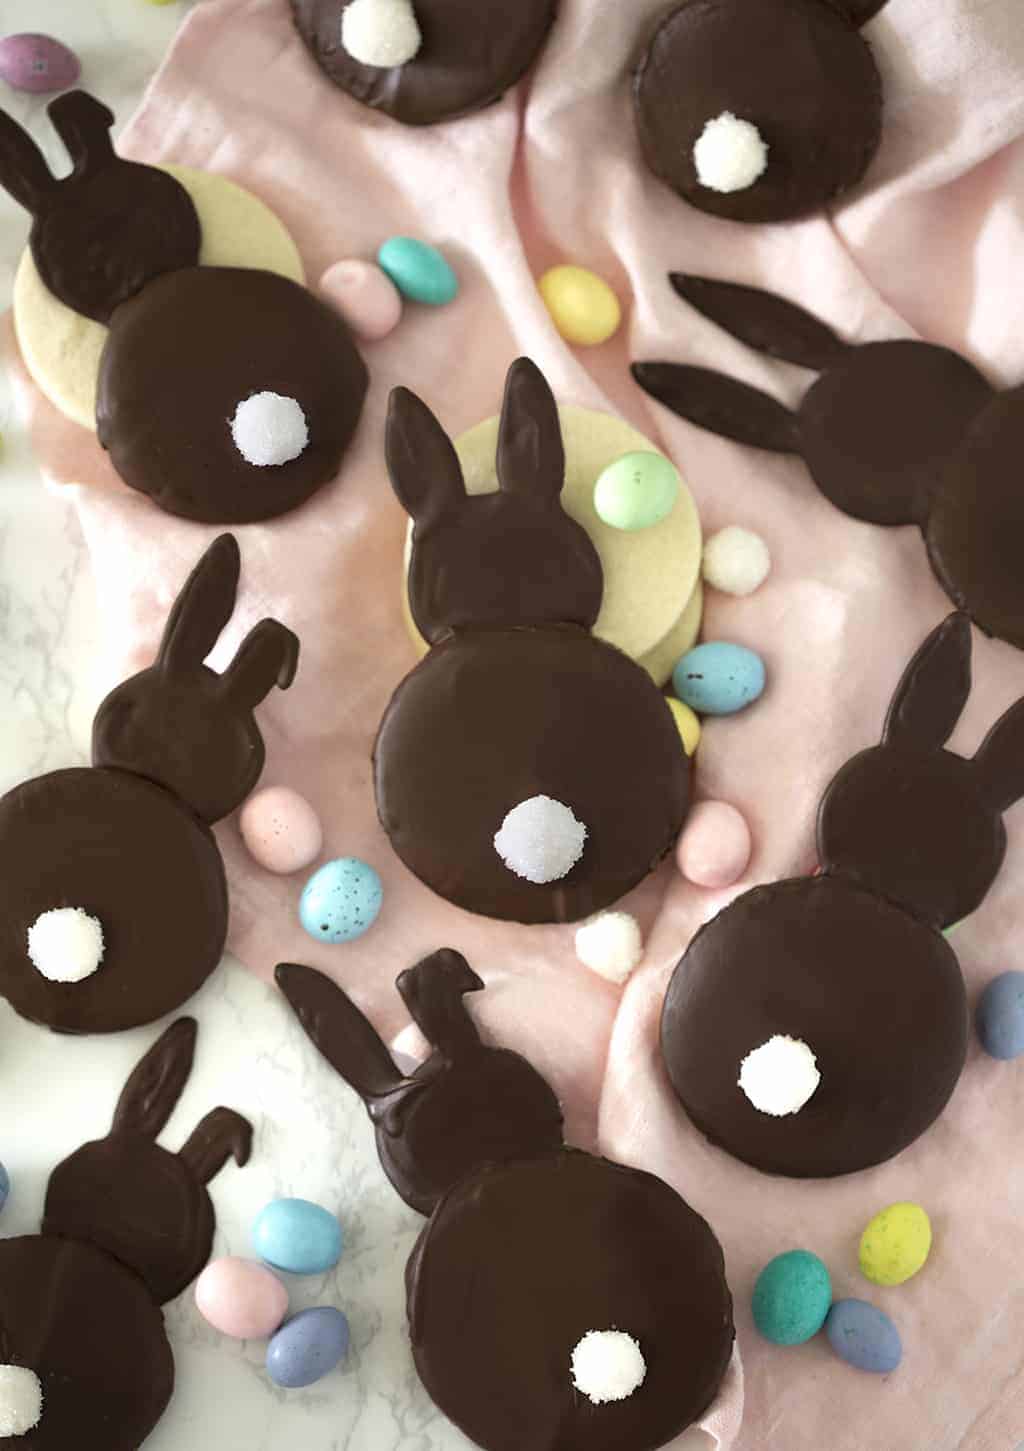
These cookies are a great addition to an easter basket and are pretty tasty! Use a chocolate you like or go ahead and use candy melts to save the time it takes to temper the chocolate. Candy melts are a chocolate-like substance you can easily melt in the microwave and use for dipping and piping, they won’t seize and you can dye them.
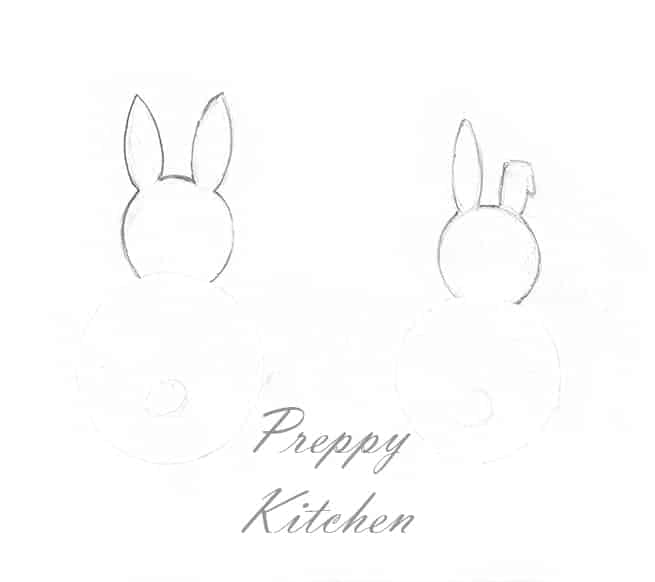
Here’s the sketch I made to guide my piping. Just place it under a sheet of parchment or wax paper and pipe your chocolate or candy melt bunny heads then assemble immediately. Feel free to print out and use.



Katherine says
These are adorable! I can’t wait to make them for a spring baby shower I’m going to!! Well done!!