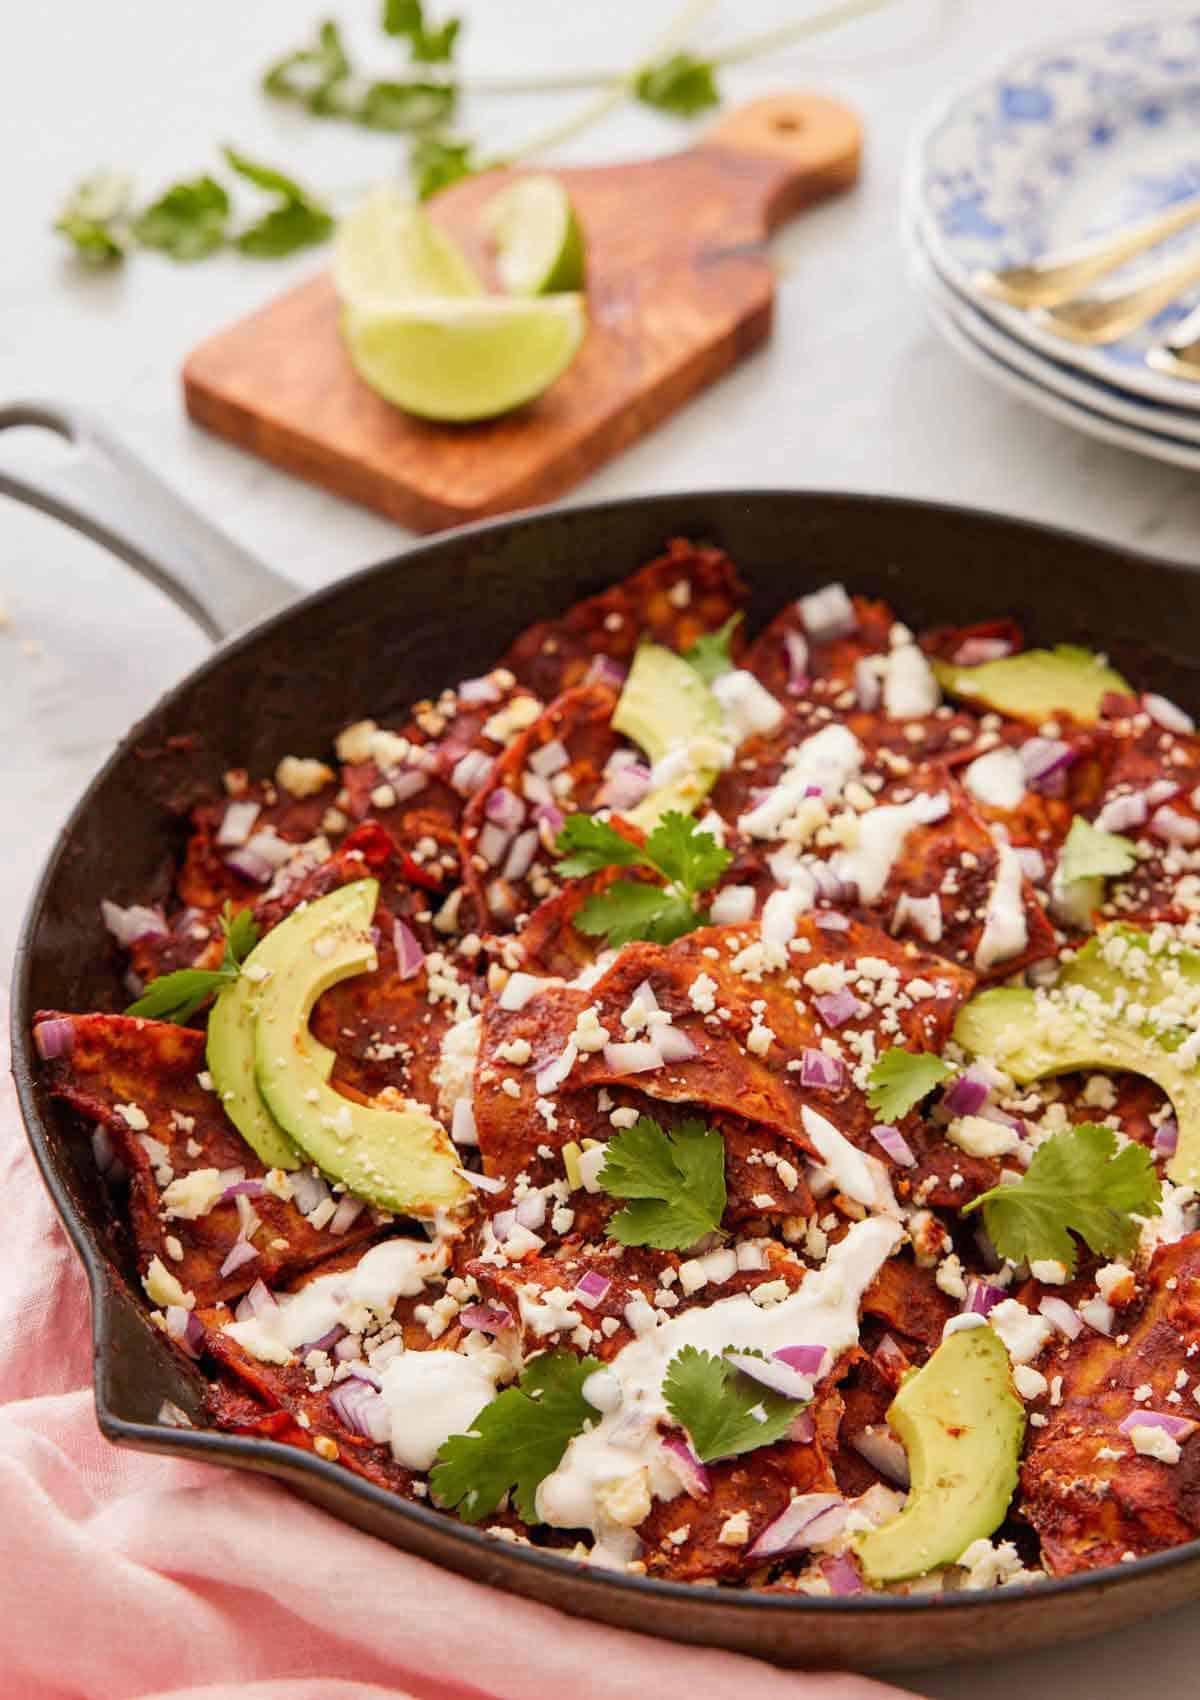
If you’ve never had chilaquiles (pronounced “chee-lah-kee-lays”), it is a classic comforting dish that is also a traditional Mexican breakfast recipe. It is composed of fried pieces of corn tortillas tossed in a delicious sauce and topped with various toppings and garnishes.
You can cook the tortillas in a green sauce (chilaquiles verdes) or red sauce (chilaquiles rojos), as chilaquiles are super versatile and you can easily customize the dish based on what you have in the fridge. While it’s great for breakfast, don’t let that stop you from serving it for brunch, lunch, or dinner. You won’t believe how easy it is to make everything from the chips to the red sauce from scratch. Want another delicious Mexican recipe to try? Make my capirotada recipe, empanadas recipe, or Mexican hot chocolate recipe next!
What You Need to Make This Recipe
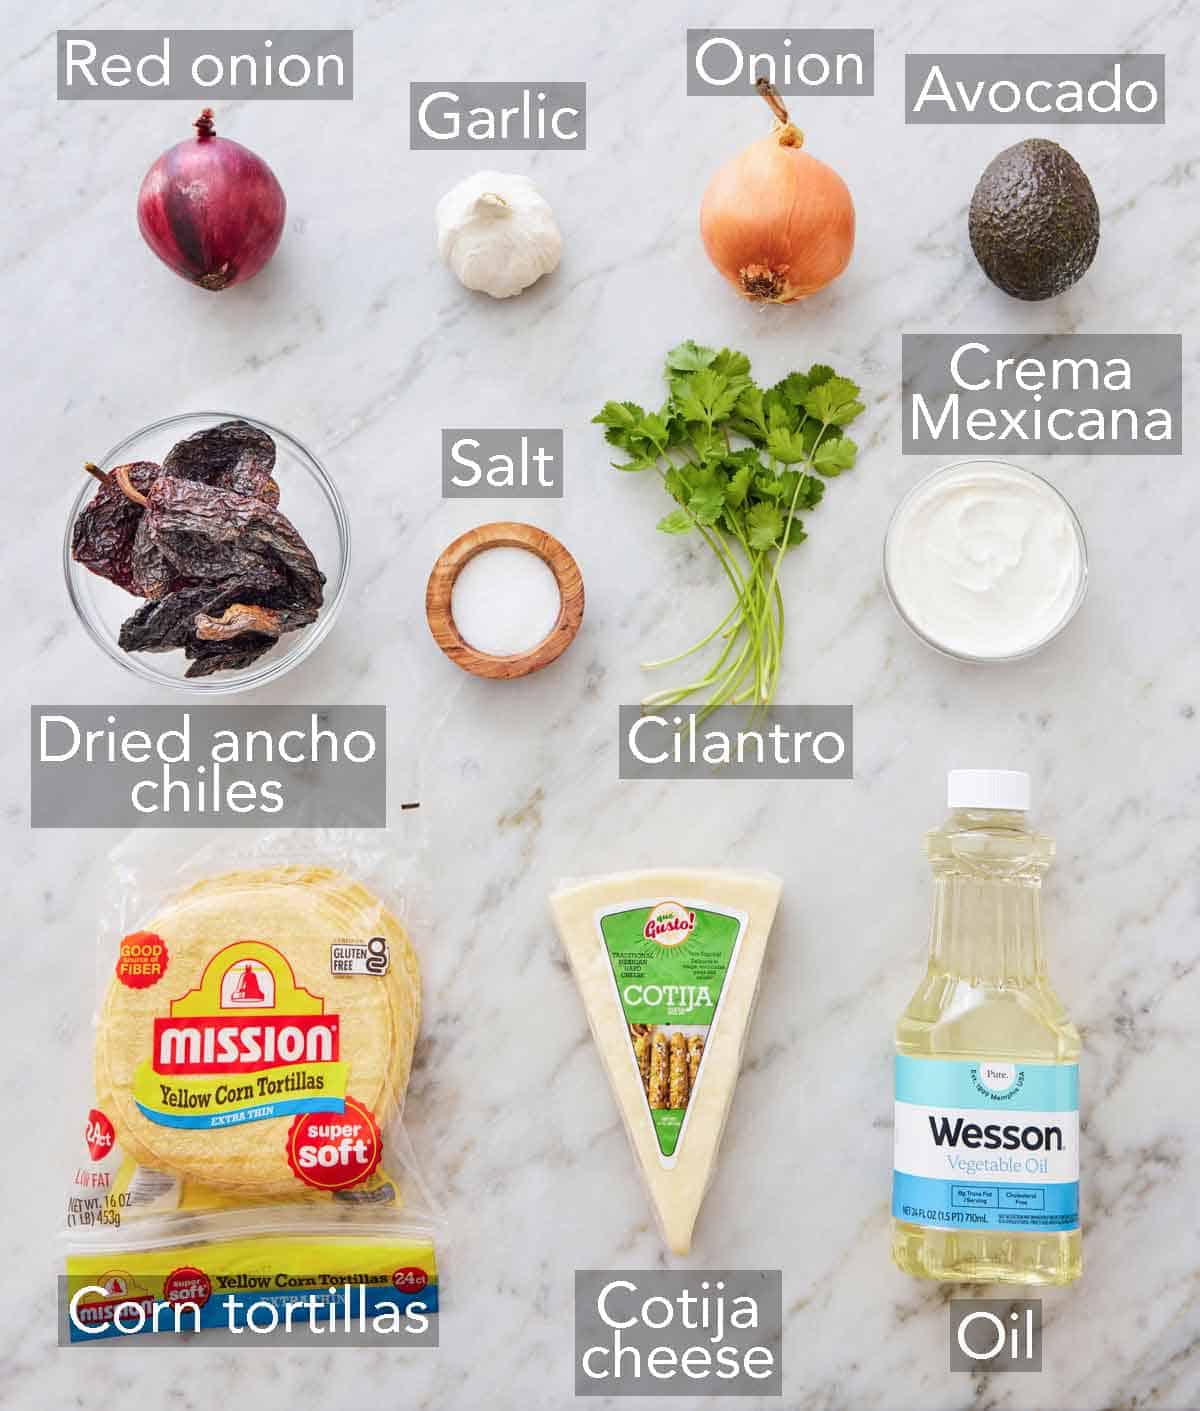
Dried chiles — you can use dried ancho chiles or guajillo chiles for the red sauce. Make sure you remove the seeds and stems beforehand. Dried ancho chiles are more mild than guajillo chiles if you prefer the red sauce to be less spicy.
Oil — make sure you use an oil with a high smoke point, such as vegetable oil. Using a low smoke point oil will impart a bitter, unpleasant flavor to the tortilla chips.
Corn tortillas — standard 5- to 6-inch corn tortillas work well for chilaquiles. Do not use flour tortillas, or they will become soggy. Corn tortillas hold up much better. Even better, stale corn tortillas make for the best chips! So, if you have some hanging around the kitchen, this is the perfect recipe to use them up.
Toppings — feel free to use whatever toppings you love for your chilaquiles! I use queso fresco, Mexican Crema, red onion, cilantro, and avocado slices. I also love a fried egg on top.
How to Make Chilaquiles
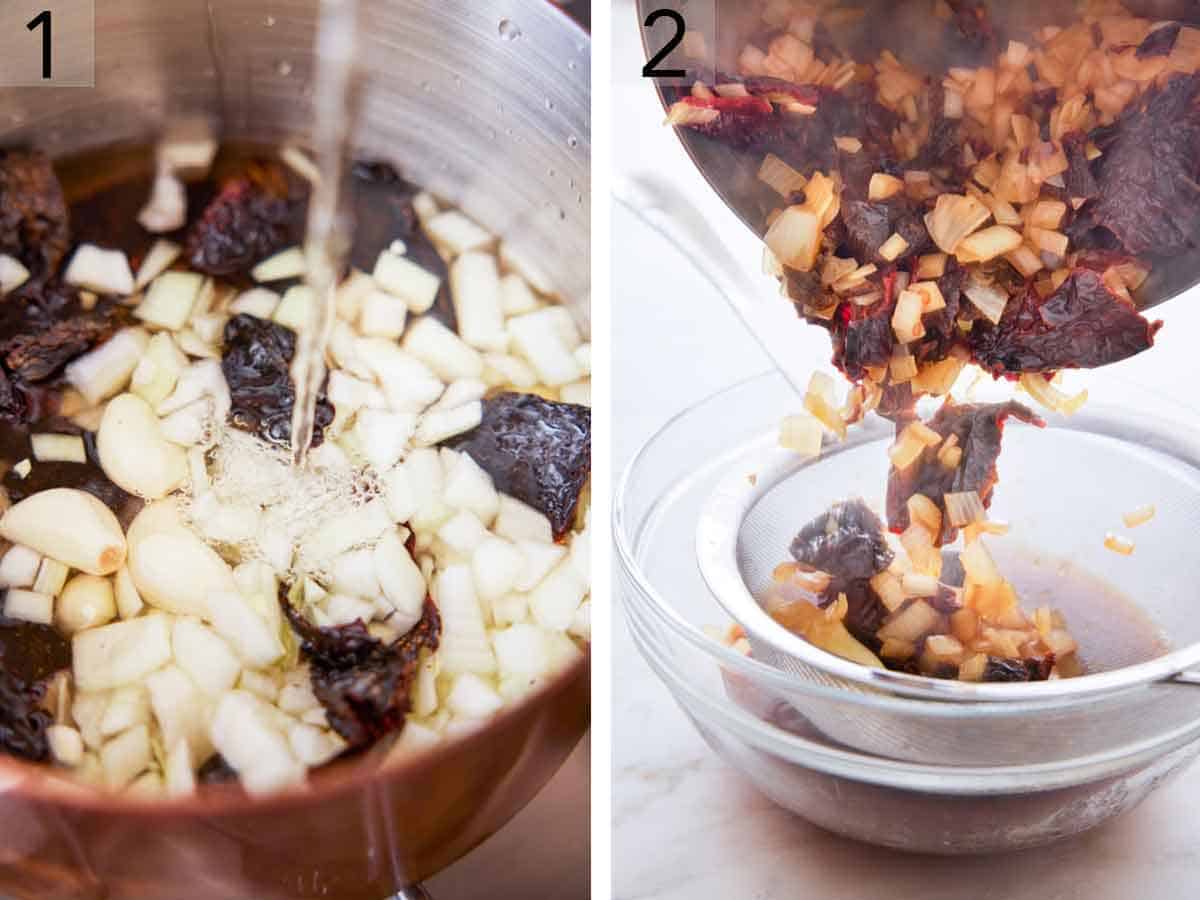
1. In a medium saucepan, combine the chiles, onion, and garlic. Add enough water to cover the ingredients by about 1 inch. Bring to a boil over high heat.
2. Boil until the vegetables are very tender and the cooking liquid is a brownish-red color, about 10 to 15 minutes. Strain the mixture over a heat-safe bowl and reserve ½ cup of the cooking liquid.
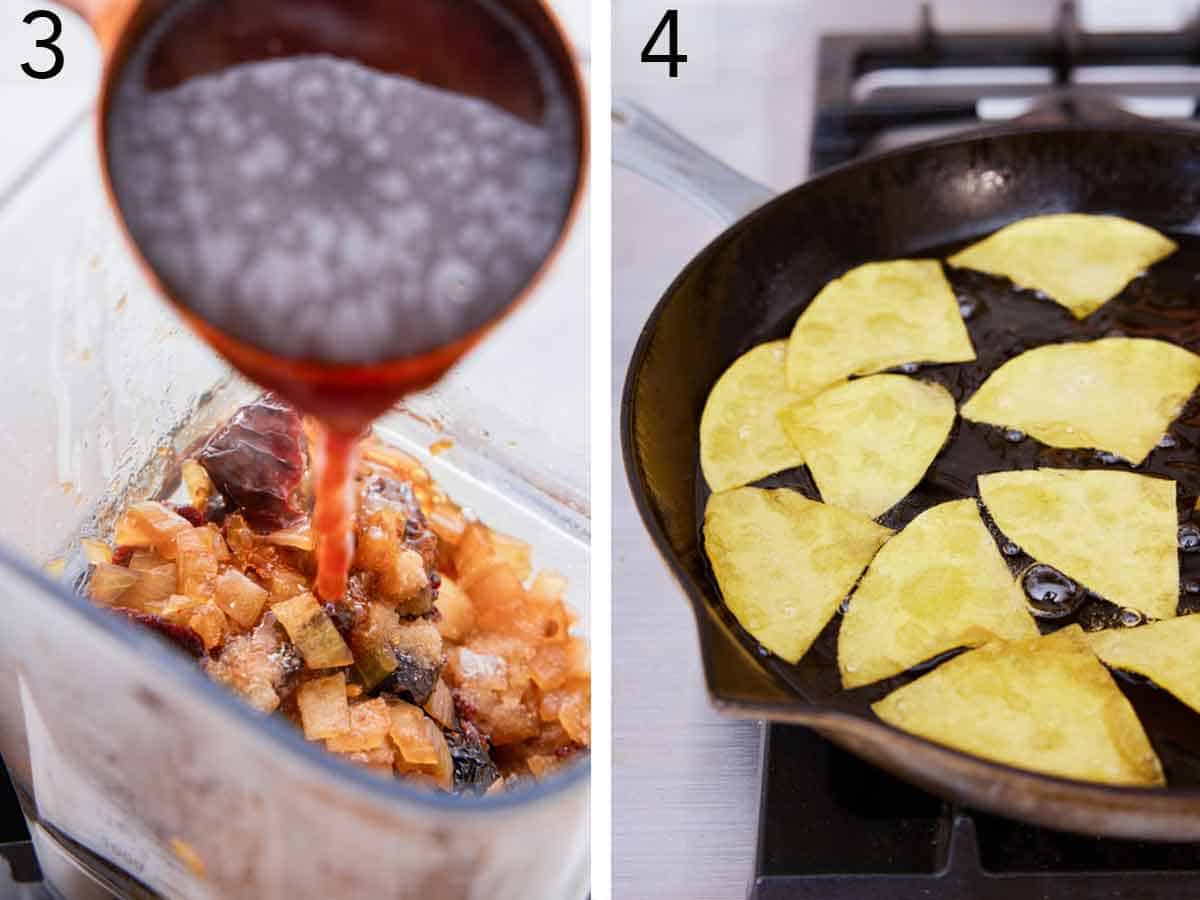
3. Add the cooked chiles and vegetables, the ½ cup reserved cooking liquid, and salt to a blender container. Blend until very smooth.
4. Fill a large skillet with oil to cover the bottom by ½-inch and heat the oil over medium heat until it reaches 350°F. Working in batches, add enough cut tortillas to the oil to fry in a single layer. Fry the corn tortilla wedges until lightly golden brown, flipping and frying for about 30 seconds on each side.
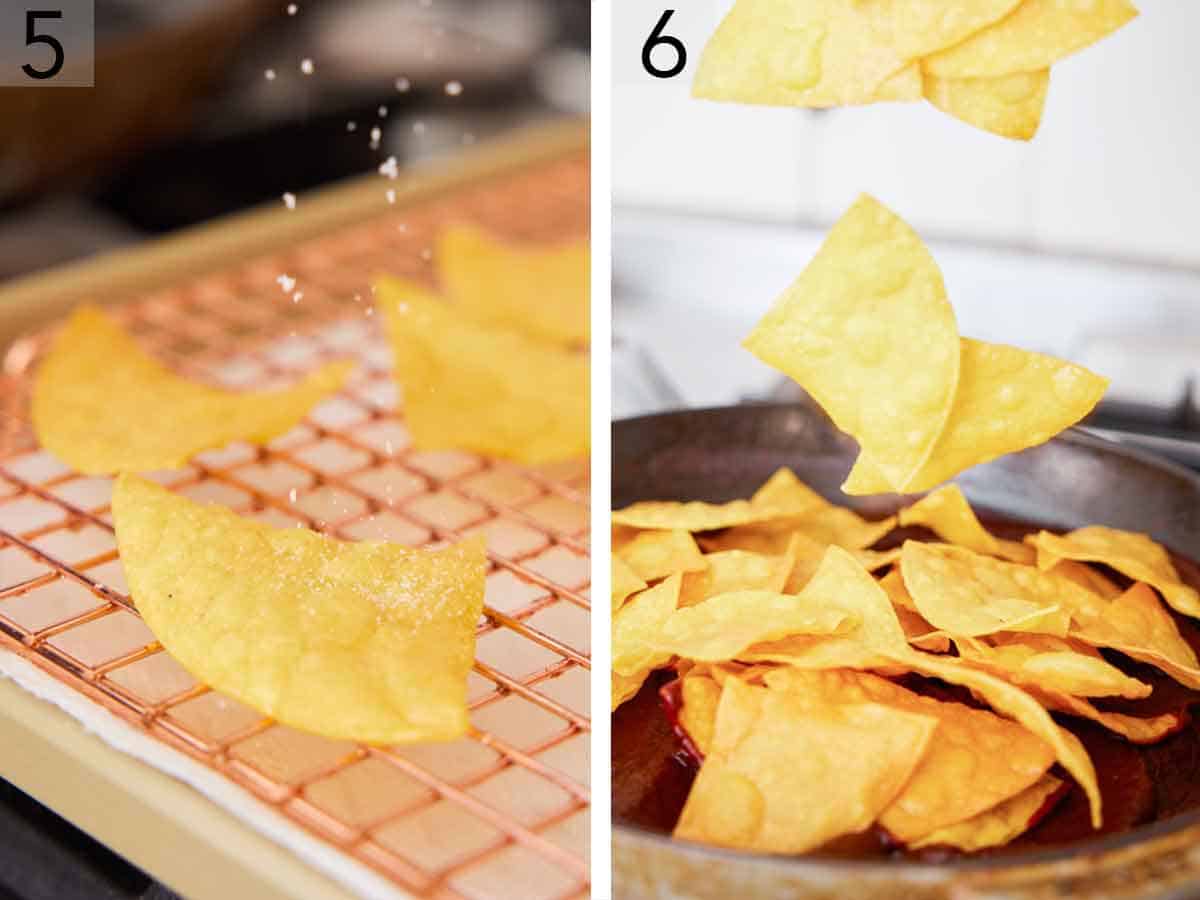
5. Transfer the chips with a slotted spoon to the rack over a baking sheet lined with paper towels to drain. Immediately sprinkle the chips lightly with salt. Repeat with the rest of the cut tortillas.
6. Empty and clean the skillet before returning it to medium heat. Add the red sauce and stir occasionally until warm and just starting to steam. Add the fried tortilla chips.
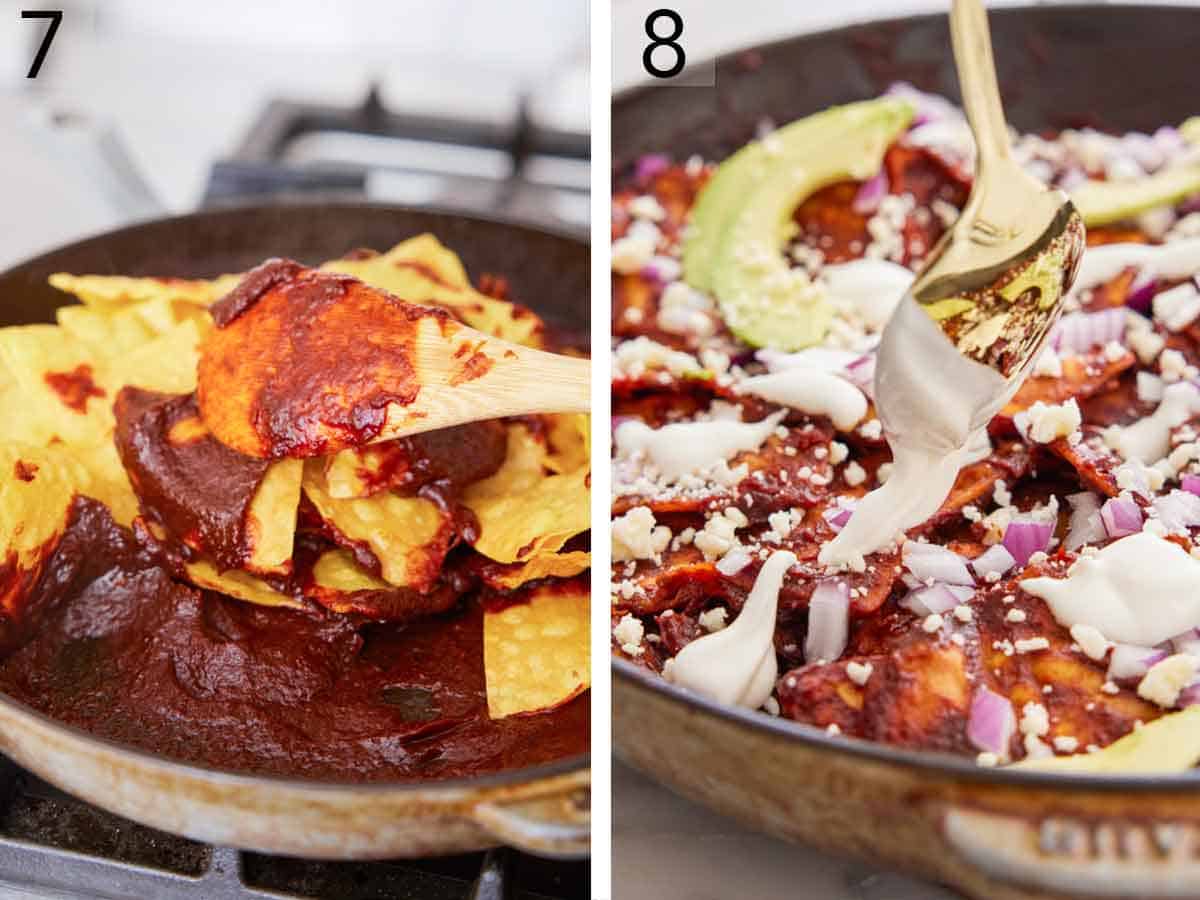
7. Gently toss to coat in the red sauce. Remove from the heat.
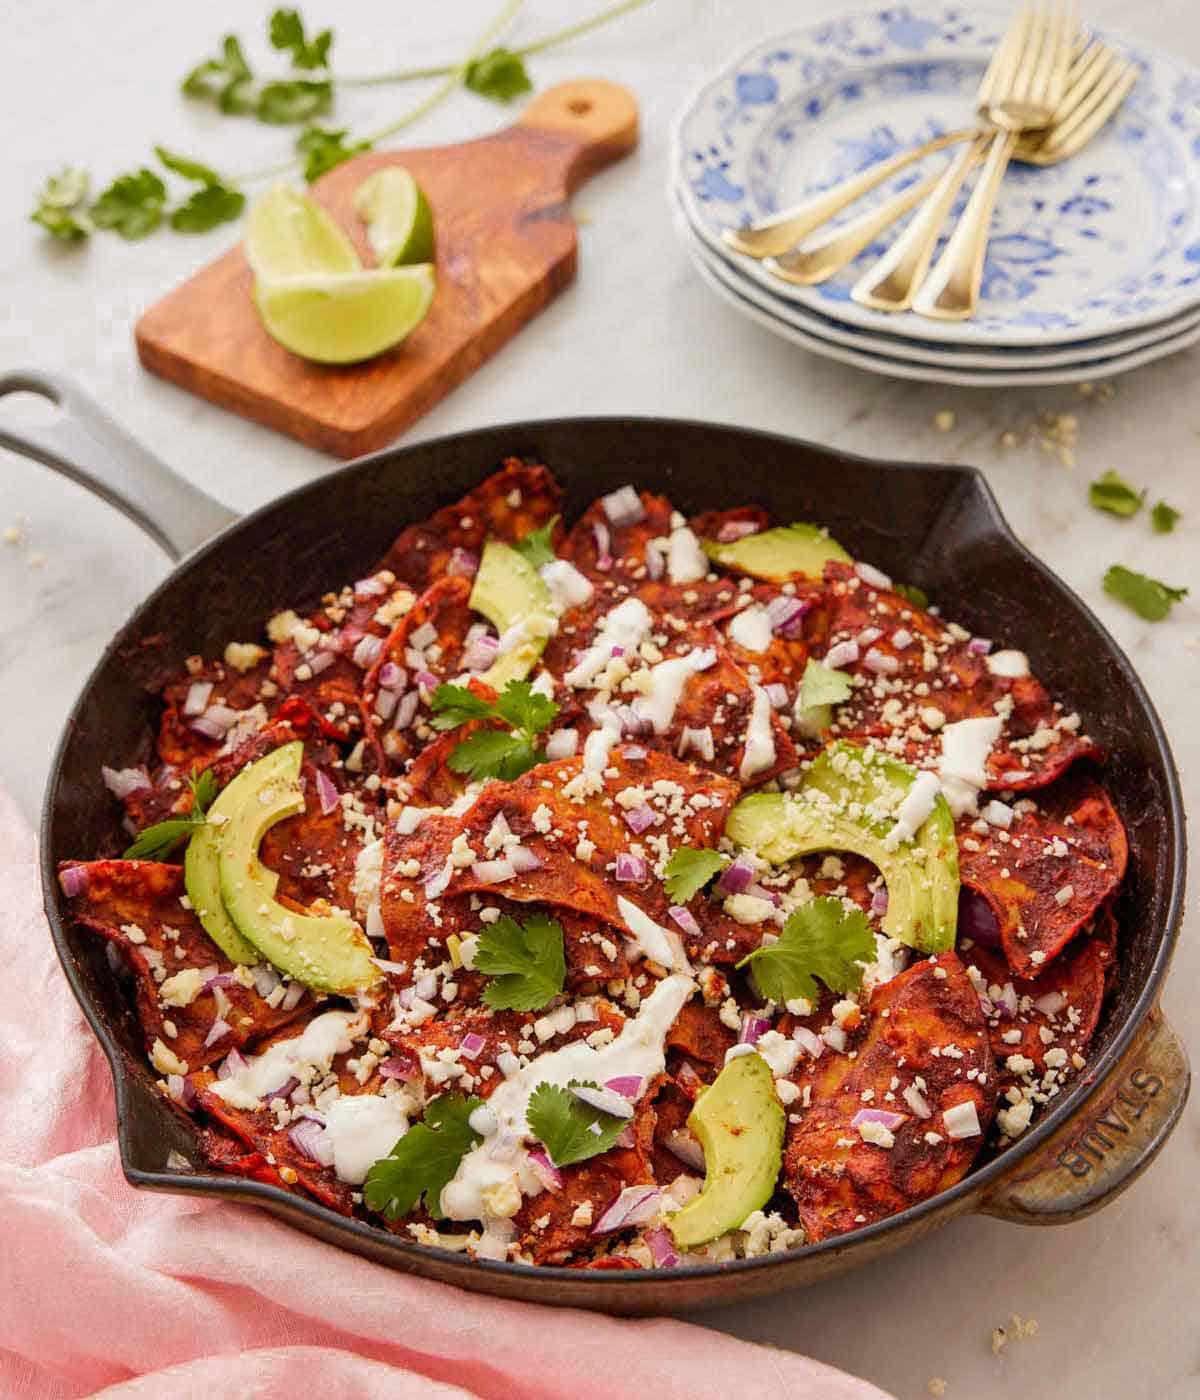
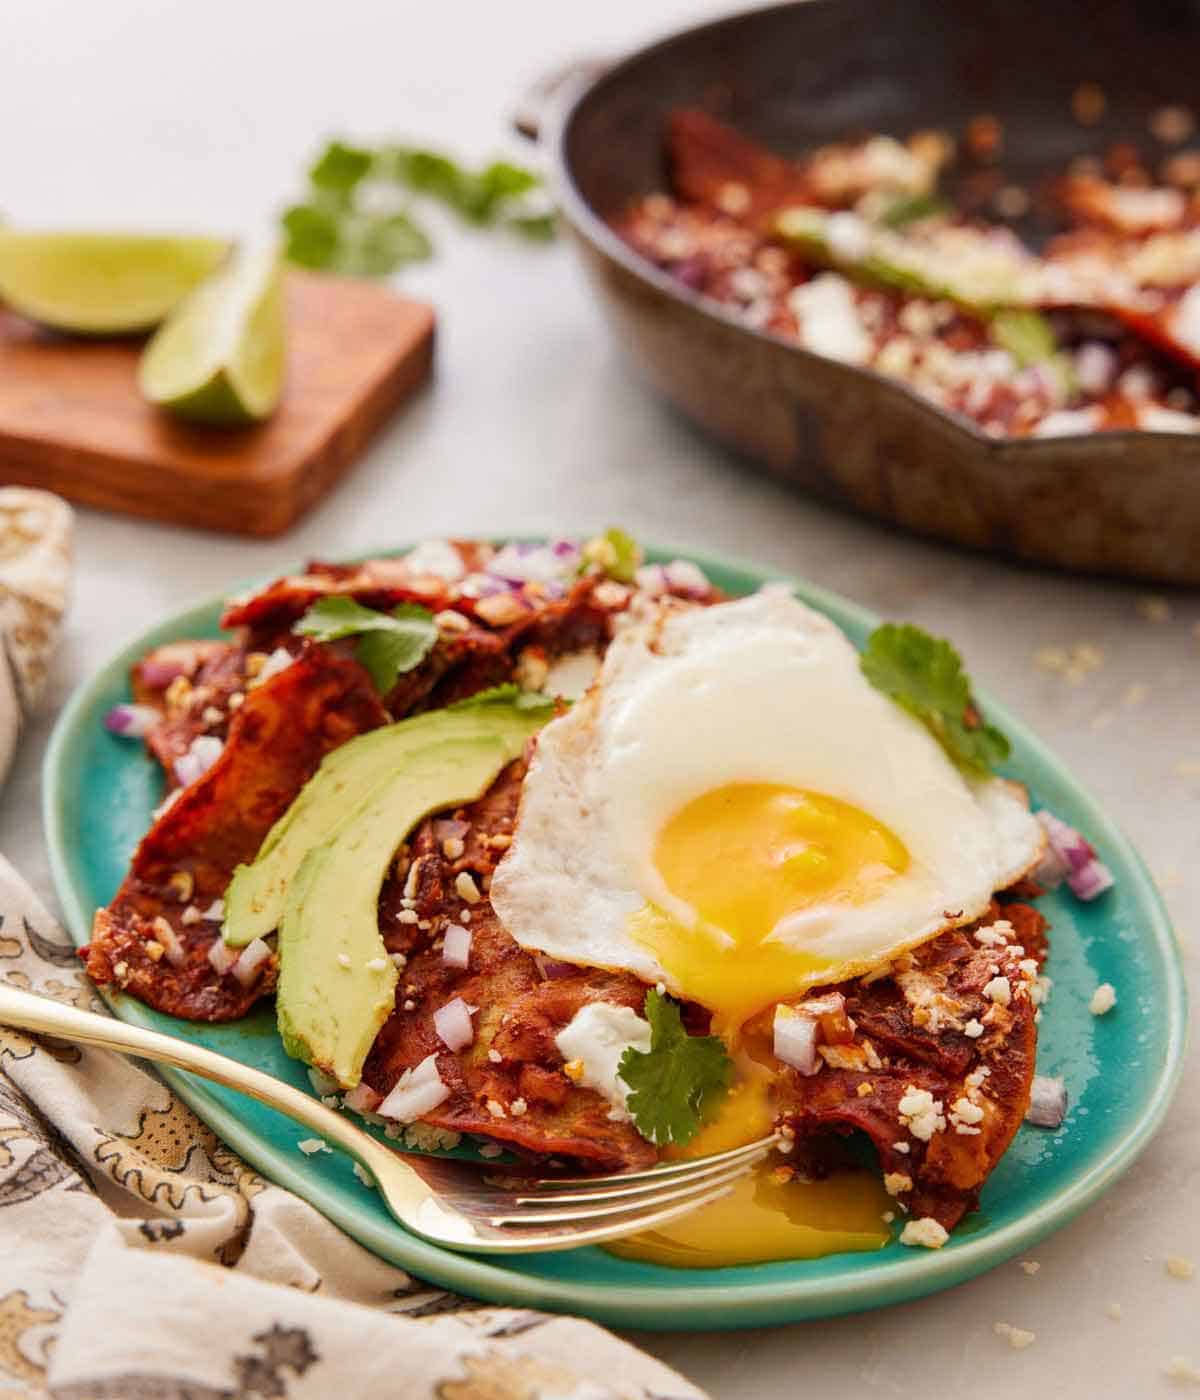
8. Top with queso fresco, Mexican Crema, red onion, cilantro, and avocado slices, and serve the chilaquiles immediately from the skillet. If desired, fry an egg to top each serving.
Pro Tips for Making This Recipe
- I highly recommend making your own fried tortilla chips instead of store-bought chips, as the texture and flavor are much better.
- Do not rush cooking the dried chiles. You want them thoroughly softened so they’ll blend up easily.
- If you want your chips to be more crisp, you can remove the skillet from the heat before you gently toss to coat the chips in the red sauce.
- Serve the chilaquiles immediately after you make them, as they will become soggy over time. I suggest getting your garnishes and toppings ready, so you can add them immediately to avoid giving the chips too much time to sit.
Frequently Asked Questions
No! While they both consist of corn tortilla chips and similar toppings, they are not the same dish. Nachos are meant to be shared, eaten with your hands, and much more melty cheese is on top. With chilaquiles, on the other hand, you cook the tortilla chips in a sauce, so they absorb the flavor and change the texture of the fried tortilla. It’s almost like a casserole and is meant to be eaten with a fork.
While the ingredients may seem the same, the two dishes are different. In Huevos Rancheros, the fried eggs, salsa, and toppings are served over the chips, whereas the chips in chilaquiles are combined with the sauce while warm.
While the ingredients are very close, migas uses fried tortilla “crumbs,” and you add the eggs to the tortilla and scramble them together.
You can prepare the red sauce ahead of time. After blending, store the sauce in an airtight container in the fridge for a couple of days before using it. You can also freeze the sauce for 3 months. It’s best to enjoy chilaquiles right after you make them, so I don’t suggest making the entire dish ahead of time or making too much extra for leftovers.
If you have leftovers in the fridge, feel free to add them to your chilaquiles! Shredded chicken, pulled pork, beef, beans, jalapenos, refried beans, guacamole, radishes, pickled onions, tomatoes, salsa, and any sliced veggies make for great additions to your dish.
The texture of your dish should not be super soft as the fried tortilla chips should retain their crunch, but they will be on the softer side (but not soggy) as you quickly cook them in the red sauce.
Yes! If you prefer to bake the tortilla instead of frying them, you can do so by drizzling the cut tortillas with olive oil before placing them in a single layer on a sheet pan and baking them for 10 to 15 minutes or until crispy at 425F.
If you’ve tried this Chilaquiles recipe, then don’t forget to rate the recipe and let me know how you got on in the comments below, I love hearing from you!
Chilaquiles
Video
Equipment
- Saucepan
- Blender
- Strainer
- Heat-proof bowl
- Large baking sheet
- Wire rack
- Paper towels
- Large skillet
Ingredients
For the Red Sauce:
- 6 dried ancho or guajillo chiles stems and seeds removed
- 1 medium yellow onion chopped
- 4 garlic cloves peeled
- 1½ teaspoons kosher salt
For the Chilaquiles:
- 15 corn tortillas
- 1 quart vegetable oil for frying (960ml)
- salt
- ½ cup cotija cheese or queso fresco (40g)
- ¼ cup crema Mexicana (60g)
- ¼ cup diced red onion
- ⅓ cup chopped cilantro
- 1 medium avocado sliced
Instructions
For the Red Sauce:
- In a medium saucepan, combine the chiles, onion, and garlic. Add enough water to cover the ingredients by about 1 inch. Bring to a boil over high heat.
- Boil until the vegetables are very tender and the cooking liquid is a brownish-red color, about 10 to 15 minutes. Strain the mixture over a heat-safe bowl and reserve ½ cup of the cooking liquid.
- Add the cooked chiles and vegetables, the ½ cup reserved cooking liquid, and salt to a blender container. Blend until very smooth.
For the Chilaquiles:
- Line a rimmed baking sheet with paper towels and place a wire rack on top.
- Cut the tortillas into quarters.
- Fill a large skillet with oil to cover the bottom by ½-inch. Heat the oil over medium heat until it reaches 350°F.
- Working in batches, add enough wedges to the oil to fry in a single layer (about 8 pieces). Fry the corn tortilla wedges until lightly golden brown, flipping and frying for about 30 seconds on each side. Transfer the chips with a slotted spoon to the prepared rack to drain. Immediately sprinkle the chips lightly with salt. Add more oil to the skillet during frying if needed.
- When all of the tortilla wedges are fried, remove the skillet from the heat. Carefully empty the skillet of any remaining oil and wipe out the skillet to remove any cooked bits of tortilla.
- Return the skillet to medium heat. Add the red sauce and stir occasionally until warm and just starting to steam. Add the fried tortilla chips and gently toss to coat in the red sauce. Remove from the heat.
- Top with queso fresco, Mexican Crema, red onion, cilantro, and avocado slices, and serve immediately from the skillet. If desired, fry an egg to top each serving.
Notes
- I highly recommend making your own fried tortilla chips instead of store-bought chips, as the texture and flavor are much better.
- Do not rush cooking the dried chiles. You want them thoroughly softened so they’ll blend up easily.
- If you want your chips to be more crisp, you can remove the skillet from the heat before you gently toss to coat the chips in the red sauce.
- Serve the chilaquiles immediately after you make them, as they will become soggy over time. I suggest getting your garnishes and toppings ready, so you can add them immediately to avoid giving the chips too much time to sit.








Leave a Reply