
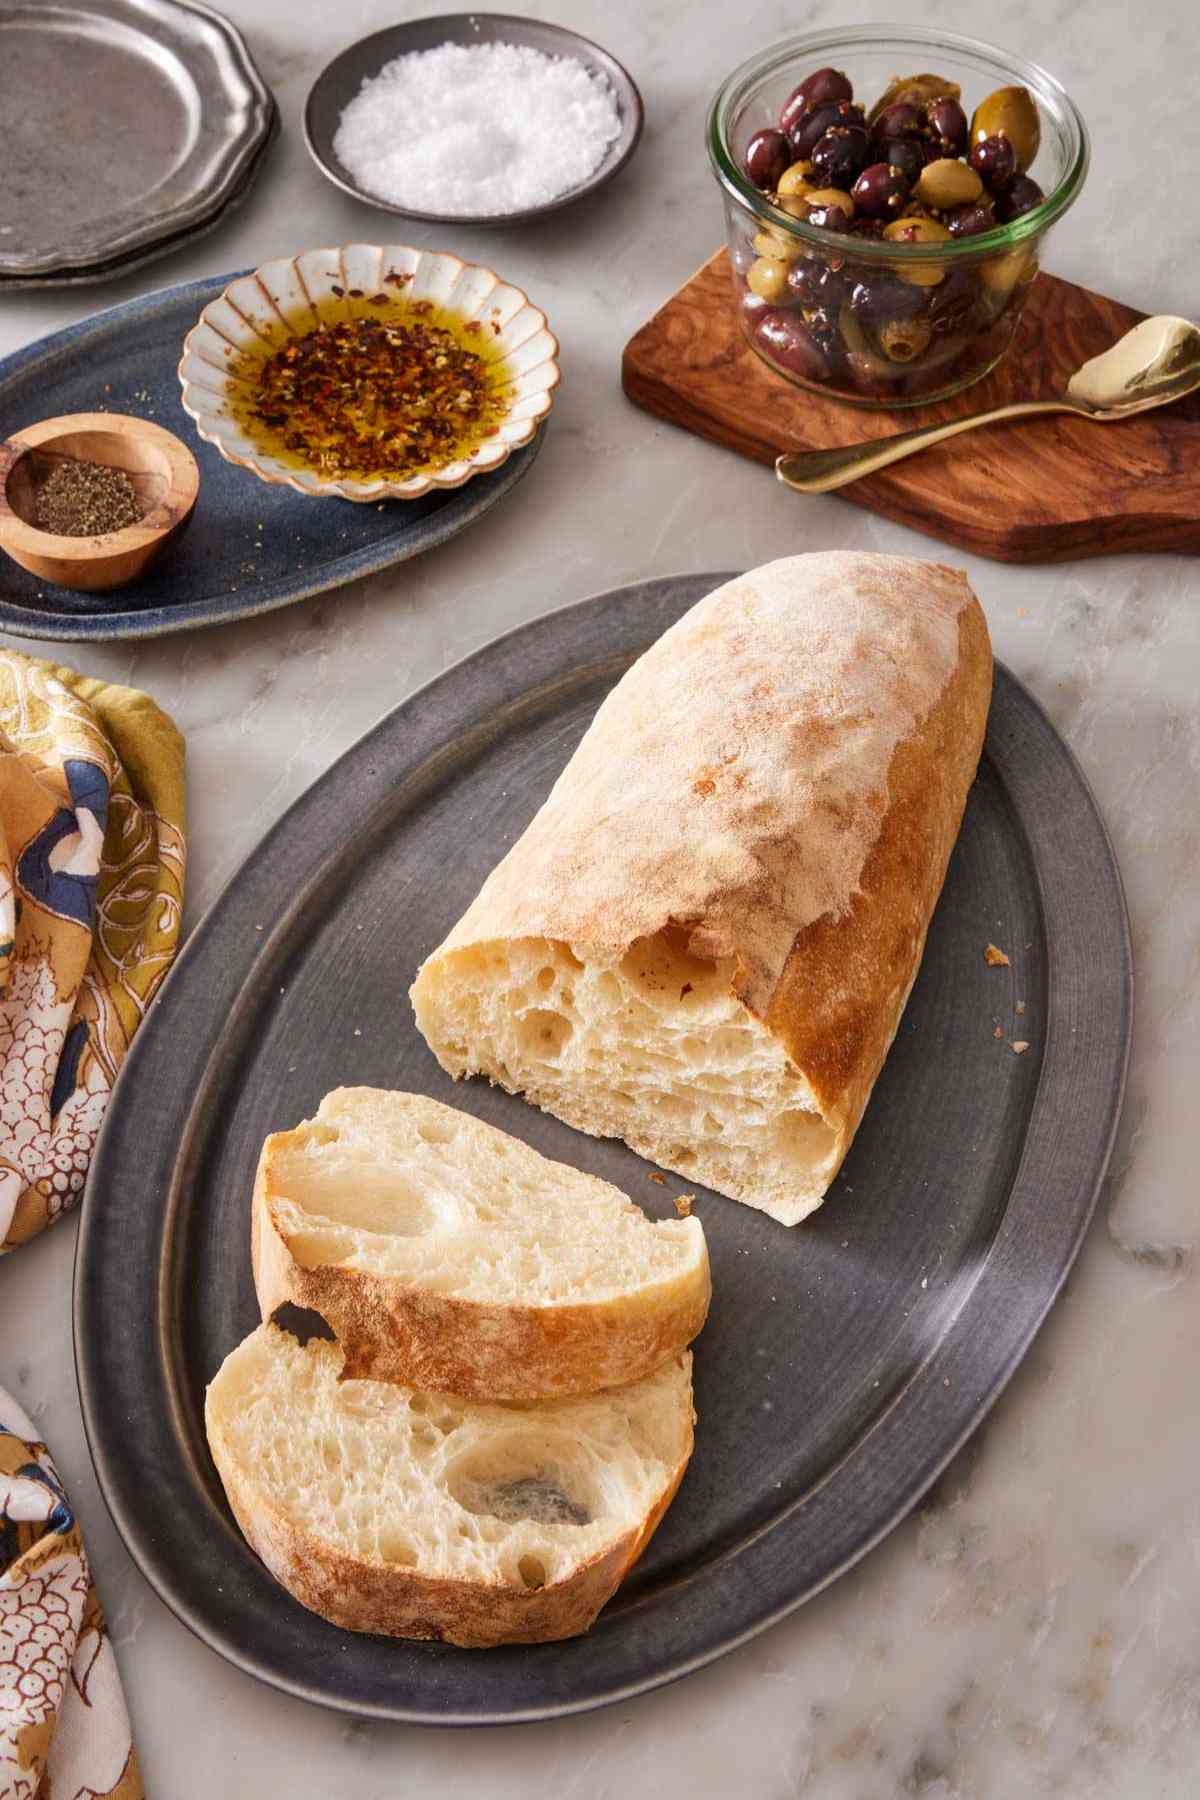


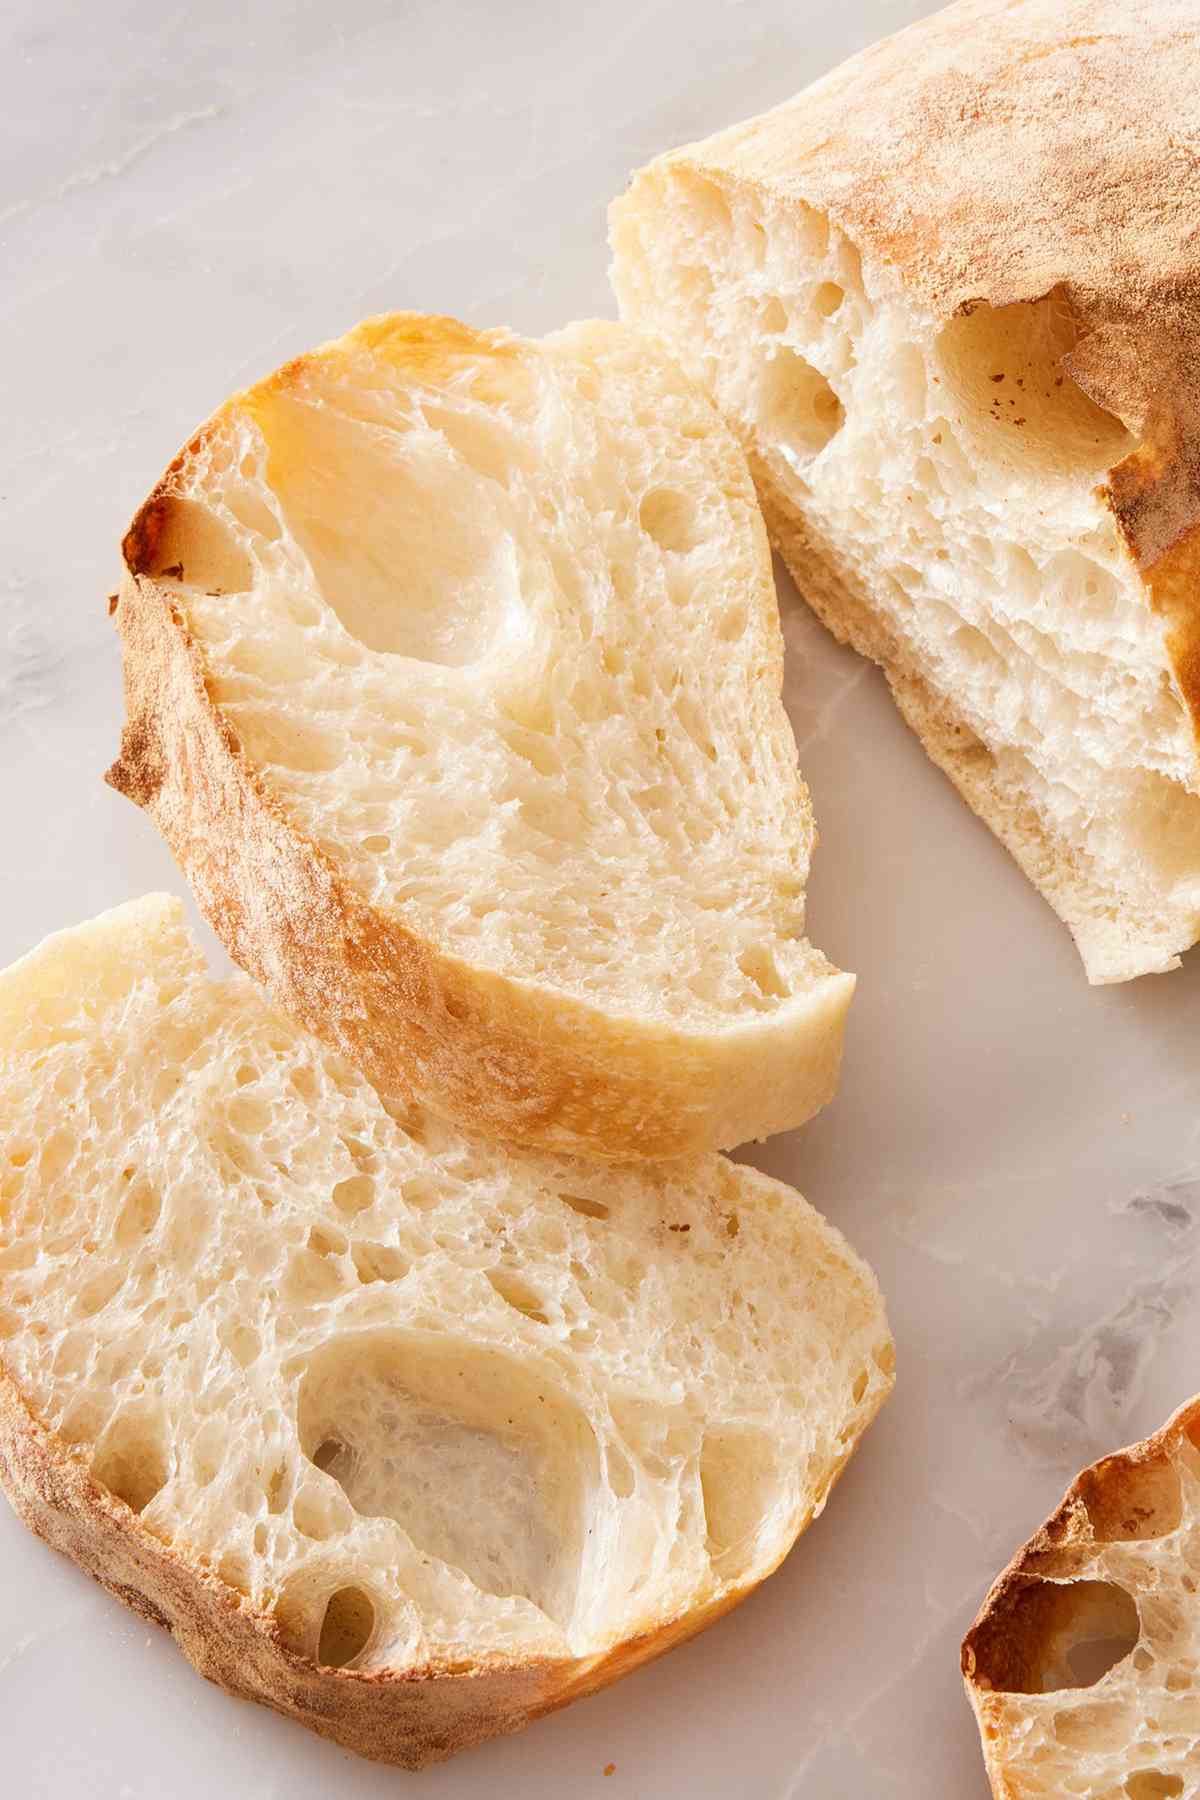
Few things are better than homemade bread, and this no-knead ciabatta bread recipe is no exception. Hailing from northern Italy, this rustic, chewy, airy bread with a crisp, golden brown crust requires no special skills or tools to make. You just need the secret ingredient: Time. Allowing the dough plenty of time to rise will pay off with loaves or rolls that have the perfect texture and flavor. If you’ve made my sourdough bread, you know that patience is key!
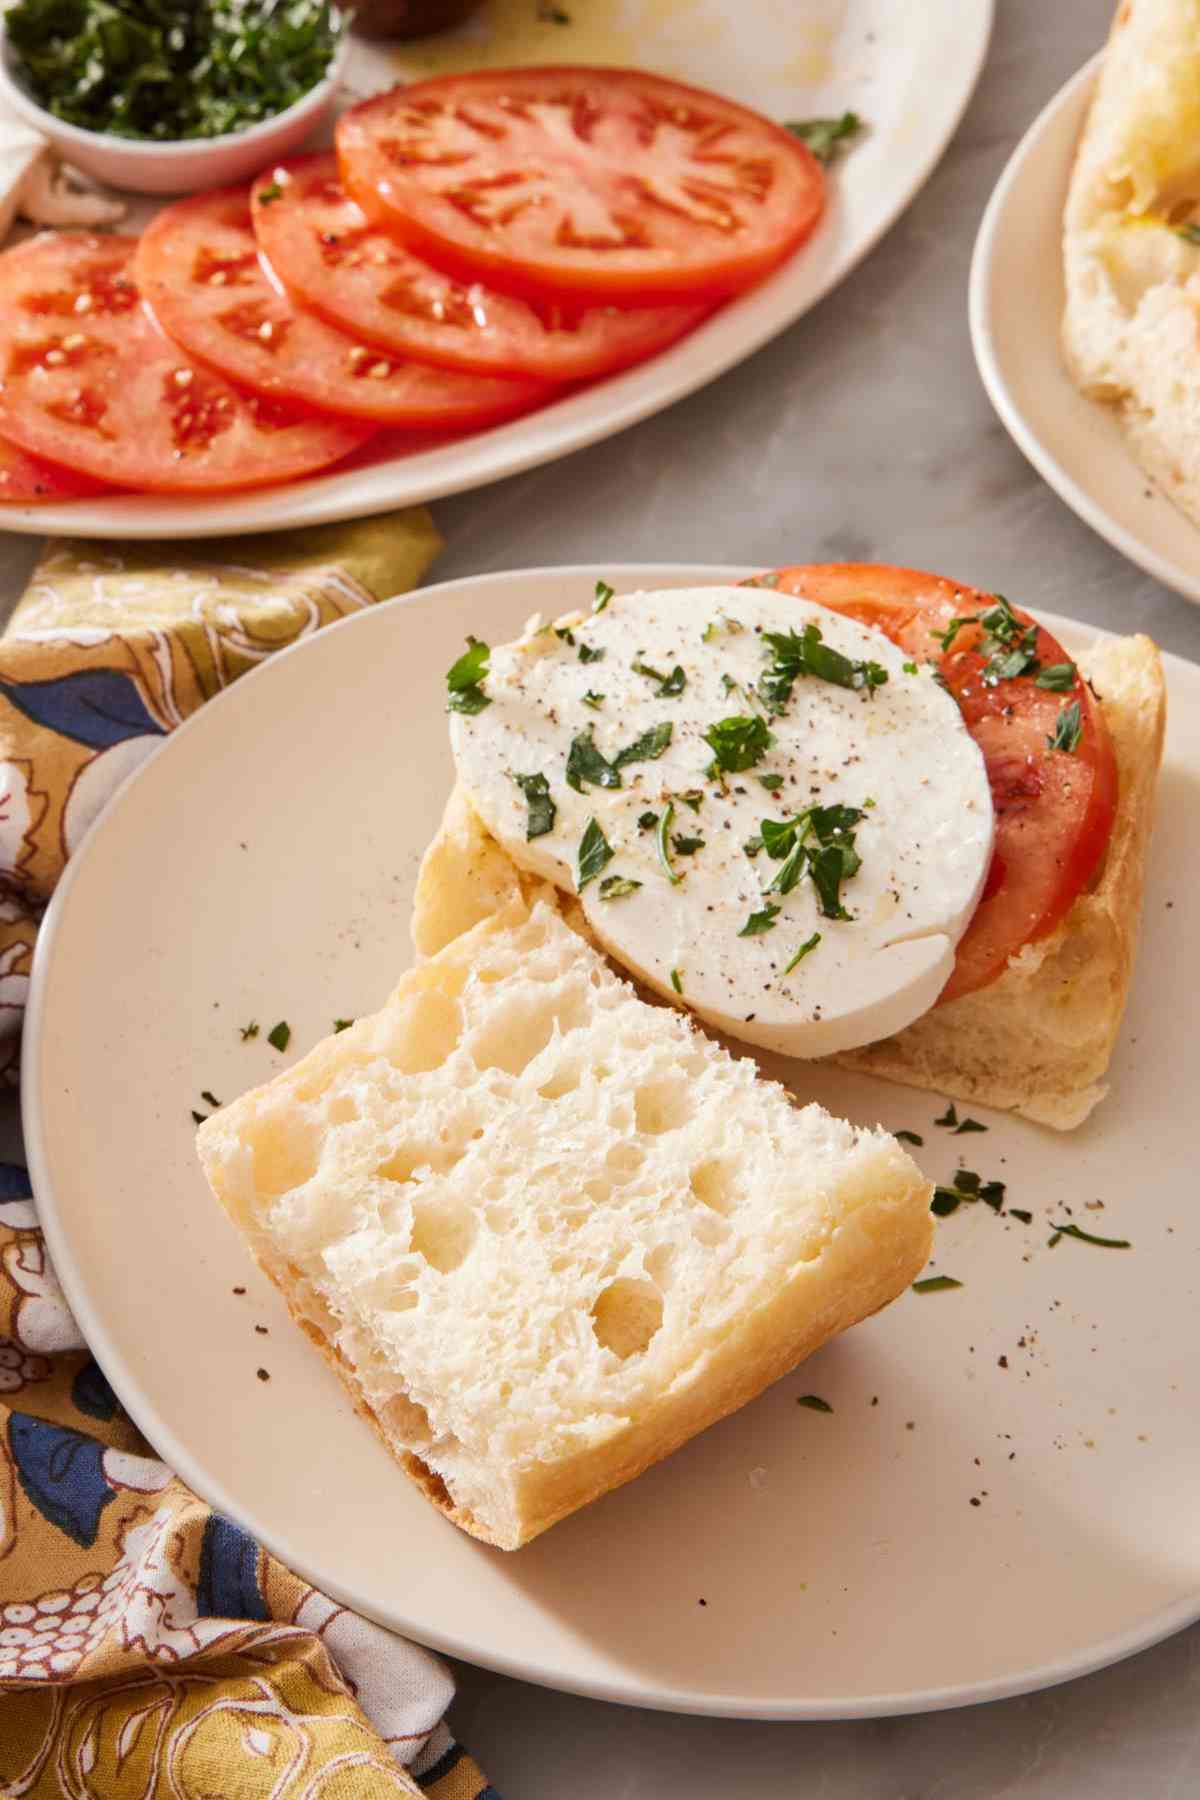
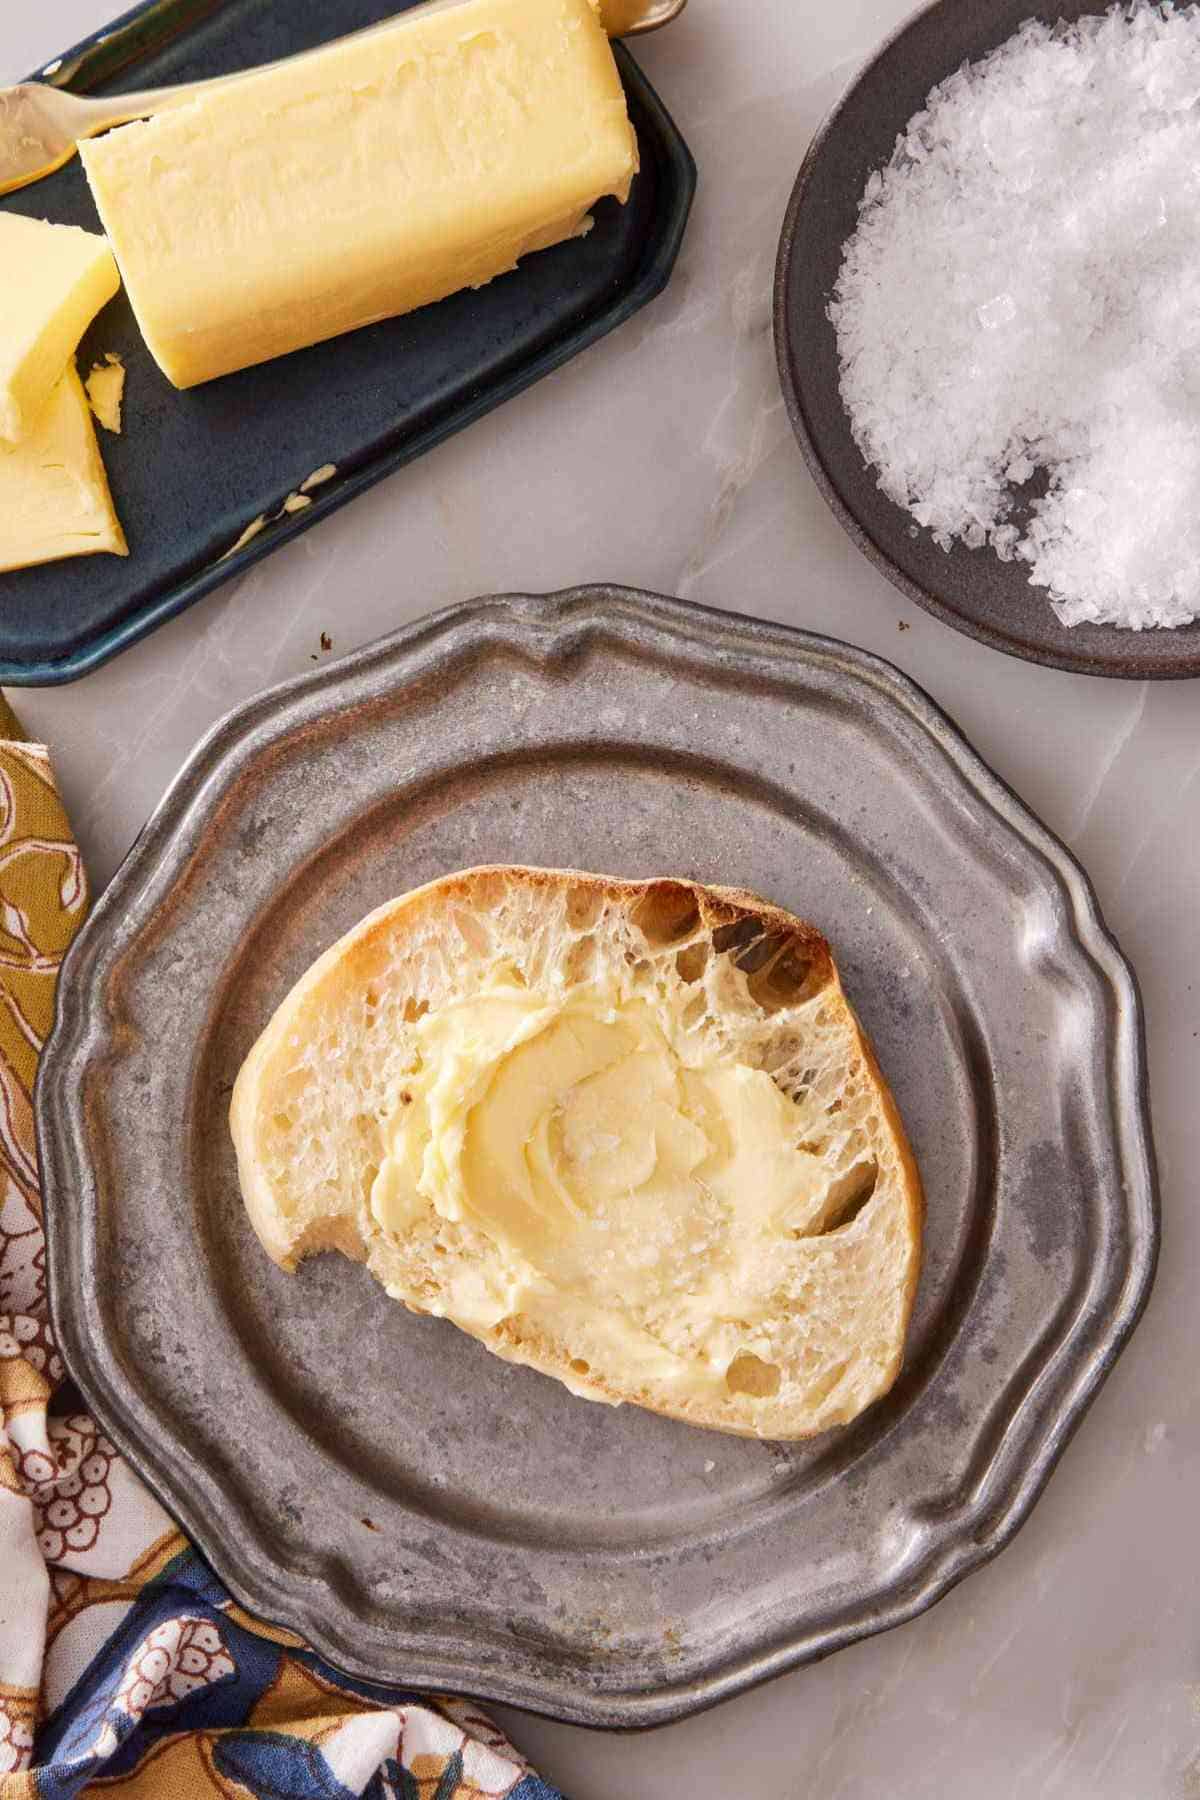
Like my no-knead artisan bread, sliced ciabatta bread is wonderful dipped in soups or olive oil mixed with fresh herbs, or you can turn the dough into rolls to use for chicken sandwiches or garlic bread! I share all the tips and tricks for timing your bread-making, getting a gorgeous crisp crust, and adding other flavors to the bread.
Table of Contents
- The Only 5 Ingredients You Need
- Helpful Tools To Use
- What Is A Biga And Do I Have To Use It?
- Why Does The Dough Rise In The Fridge For So Long?
- How Do I Get A Dark Brown Crusty Exterior?
- An Easy Schedule For Making Ciabatta Bread
- Pro Tips For Making This Recipe
- How To Make Ciabatta Bread
- How To Store
- Can I Make Ciabatta Rolls?
- Frequently Asked Questions
The Only 5 Ingredients You Need
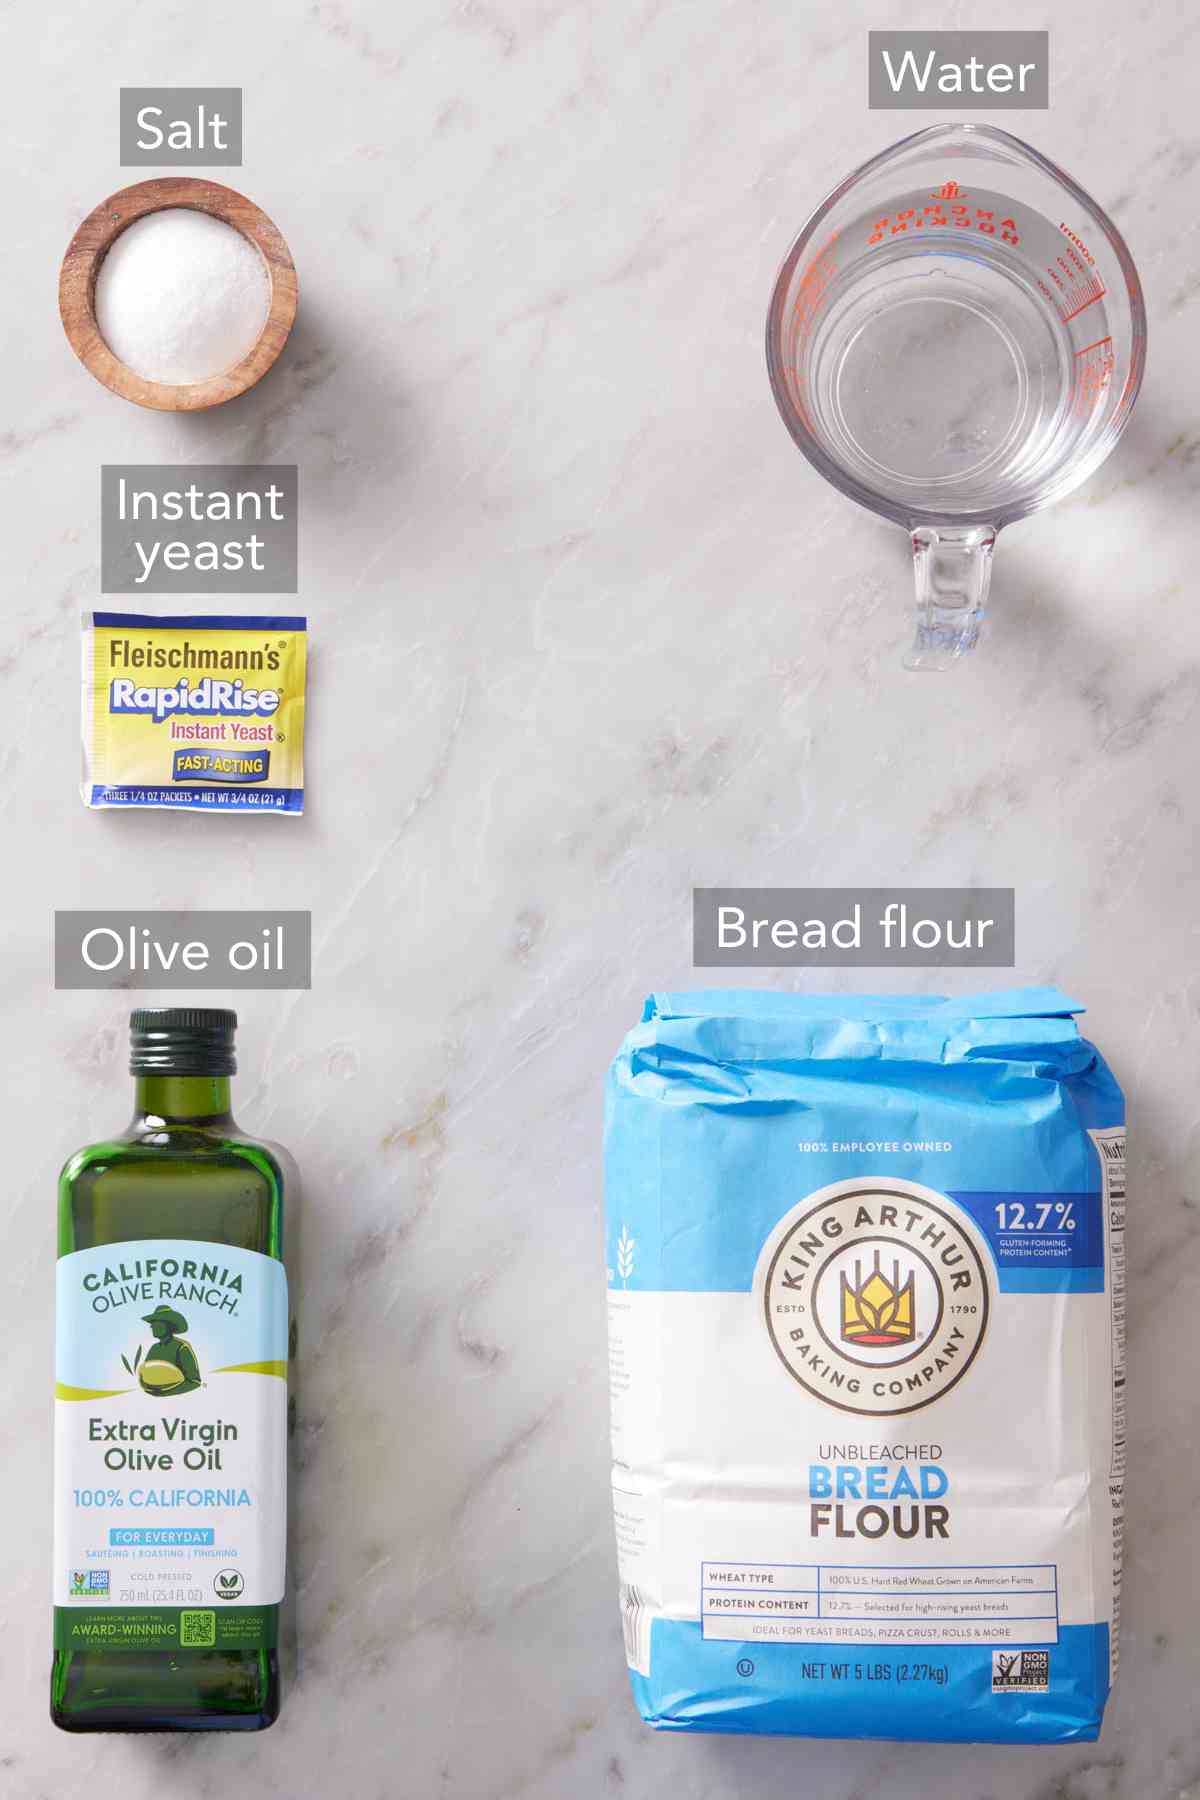
The best ciabatta is made with just 5 simple ingredients! You can find the measurements and full instructions in the recipe card below.
Instant yeast — you will use this fast-acting yeast to create the fermentation (rise) in the dough. Make sure your packet or jar is labeled as “instant” or “rapid rise,” not “active dry yeast.” Active dry yeast has to be bloomed before using it. I streamlined the recipe a bit for easier dough mixing and chose instant yeast that can be directly mixed into the dough without blooming it first.
Water — water is a vital ingredient for moisture in this high-hydration dough. You’ll need it at a specific temperature to activate the yeast, so keep a thermometer handy.
Oil — olive oil adds a little richness and flavor, and the small amount of fat makes the sticky dough a bit easier to handle.
Bread flour — a must for this ciabatta recipe. Bread flour has a high gluten content, yielding a chewier bread than you could get from standard all-purpose flour.
Salt — salt not only adds flavor, but it also strengthens the dough so it can hold onto all of those airy bubbles produced by the yeast.
Helpful Tools To Use
These are some basic kitchen tools that help when making ciabatta. The best part is, you don’t need a stand mixer! You can mix this dough right in a mixing bowl by hand with a wooden spoon or spatula.
Kitchen scale — important for weighing ingredients, especially flour, so you don’t accidentally use too much and end up with a dry ciabatta dough. It’s also very useful for dividing the dough into equal loaves or rolls so each piece of dough has the same weight.
Bench or dough scraper — very helpful for manipulating a wet dough like this one. A bench scraper can be used in this recipe to shape the dough, cut it into pieces, and transfer the loaves to parchment paper. A flexible dough or bowl scraper is also helpful for scraping the dough out of the mixing bowl, but you can also use a spatula or your bench scraper.
Instant read thermometer — I can’t imagine baking bread without a thermometer! In this recipe, I use it to check the temperature of the water (which needs to be 85°F to 90°F) and to check the baked bread for doneness. When the ciabatta bread is thoroughly baked, its center should be between 195°F and 205°F.
Baking stone — I love using a baking stone (or pizza stone) to get a fast oven rise and crispy bottom on my ciabatta loaves. But if you don’t have one, don’t worry! Just use a rimmed sheet pan turned upside down (I’ll explain more in the recipe below!).
What Is A Biga And Do I Have To Use It?
Biga is a preferment or starter sponge made by mixing together yeast, flour, and water, and set aside to ferment before the main batch of dough is made. This is a common technique used in bread baking, especially for breads that are soft or very airy, like ciabatta! The biga is essential to producing the signature airy texture of ciabatta because it enhances the bread’s gluten structure, which allows it to hold onto the big bubbles produced by the yeast when the dough is rising.
I tested this recipe without the preferment, but the ciabatta bread lacked flavor, and the crumb texture was dense. I discovered you really don’t want to skip this step! It only takes a minute to mix up, and then you leave it alone to rise, so it’s quite easy, and the end results are worth it.
Why Does The Dough Rise In The Fridge For So Long?
You’ll probably see this a few times in this post, but time is truly the secret ingredient to perfect ciabatta. If you’ve ever made my focaccia recipe, you know that a longer fermentation time in a cold environment (8 to 24 hours) produces a very deeply flavored bread. It also creates a more stable gluten structure with bigger bubbles, leading to a perfectly soft and airy ciabatta bread inside.
While the rise time is totally hands-off, you do need to factor it in so the loaves or rolls are ready to bake when you need them. But I’ve got you covered there, too. Just keep reading for an easy schedule for baking ciabatta to serve at lunch or dinner time!
How Do I Get A Dark Brown Crusty Exterior?
With steam! Adding ice cubes to the oven at the beginning of baking will create a humid environment for the bread to bake. It’s a professional bread-baking trick that yields a deliciously crisp outer crust. It also creates a thin crust, which will remain crisp longer than a thick crust, as steam is easily able to escape the more porous exterior after baking.
The steam also slows down the cooking process of the dough’s surface by restricting surface moisture loss, which lets the dough rise more. Slowing down the cooking process also helps control the color, so the bread doesn’t become too dark while the inside is still not cooked through.
But be careful not to underbake the bread, either. While you do not want a burned crust, you do want it darker for ultimate crispness and flavor.
An Easy Schedule For Making Ciabatta Bread
Ciabatta bread is very easy to make, but to achieve the signature airy texture, the dough needs time (I told you I would mention it often!). The actual hands-on time for this recipe is short, but you’ll want to plan ahead to allow time for chilling and rising. Here’s an easy schedule to follow to bake fresh ciabatta in time for lunch or dinner:
Day 1:
- 9:30 am or 3 pm: Mix the biga in the morning or afternoon so it can sit for 3½ hours.
- 1 pm or 6:30 pm: You’ll need a total of 2 hours for the folding and resting stage (though it’s only about 5 minutes of hands-on time in total!).
- 3 pm or 8:30 pm: Allow 8 to 24 hours to refrigerate the dough until the next day.
Day 2:
- 8 am or 3 pm: You need 1 hour to bring the dough back to room temperature, then shape your loaves.
- 9 am or 4 pm: The loaves will rise for about 2 hours before they are ready to bake.
- 11 am or 6 pm: Bake the loaves!
Pro Tips For Making This Recipe
Keep in mind that this is an easy recipe, but it takes a bit of time. Slow and steady is the name of the game when baking ciabatta bread. The dough is basically foolproof, and you don’t need any special skills to make it. But it needs time, so don’t rush it. Luckily, the chill time and rising time are hands-off and don’t require any additional effort on your part! To ensure your bread is ready when you need it, see my simple schedule above.
The dough will be very sticky. This is a high hydration dough, meaning it is very moist, which, in turn, means it is very sticky. So instead of kneading, you’ll stretch and fold the dough to develop the gluten, similar to what you’d do when baking focaccia or sourdough bread. You should dampen or flour your hands and bench scraper as appropriate when working with the dough to prevent sticking. I share exactly how to prevent sticking at different stages of the recipe.
How To Make Ciabatta Bread
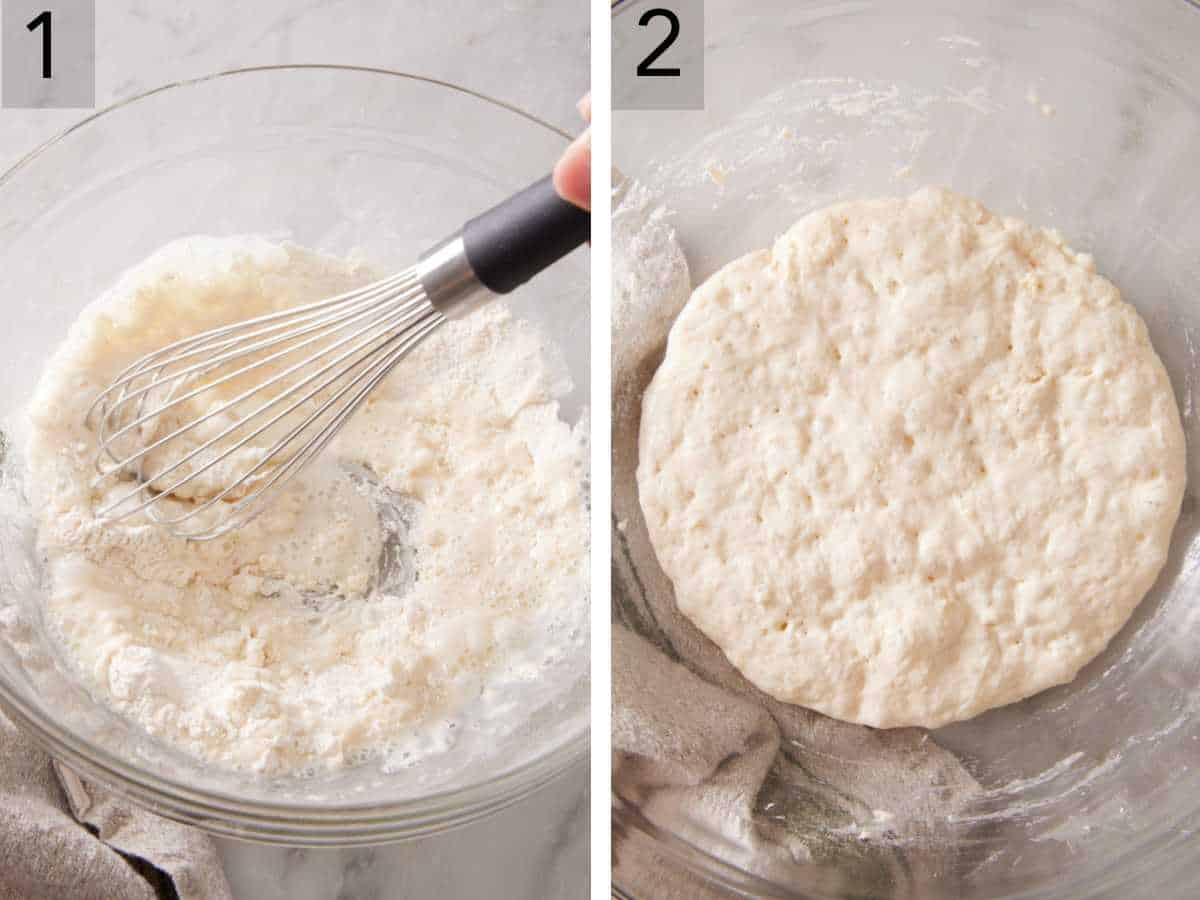
1. Prepare the sponge or biga by mixing together the flour, water, and yeast.
2. Cover and let rest until it’s bubbly all over, which will take a few hours.
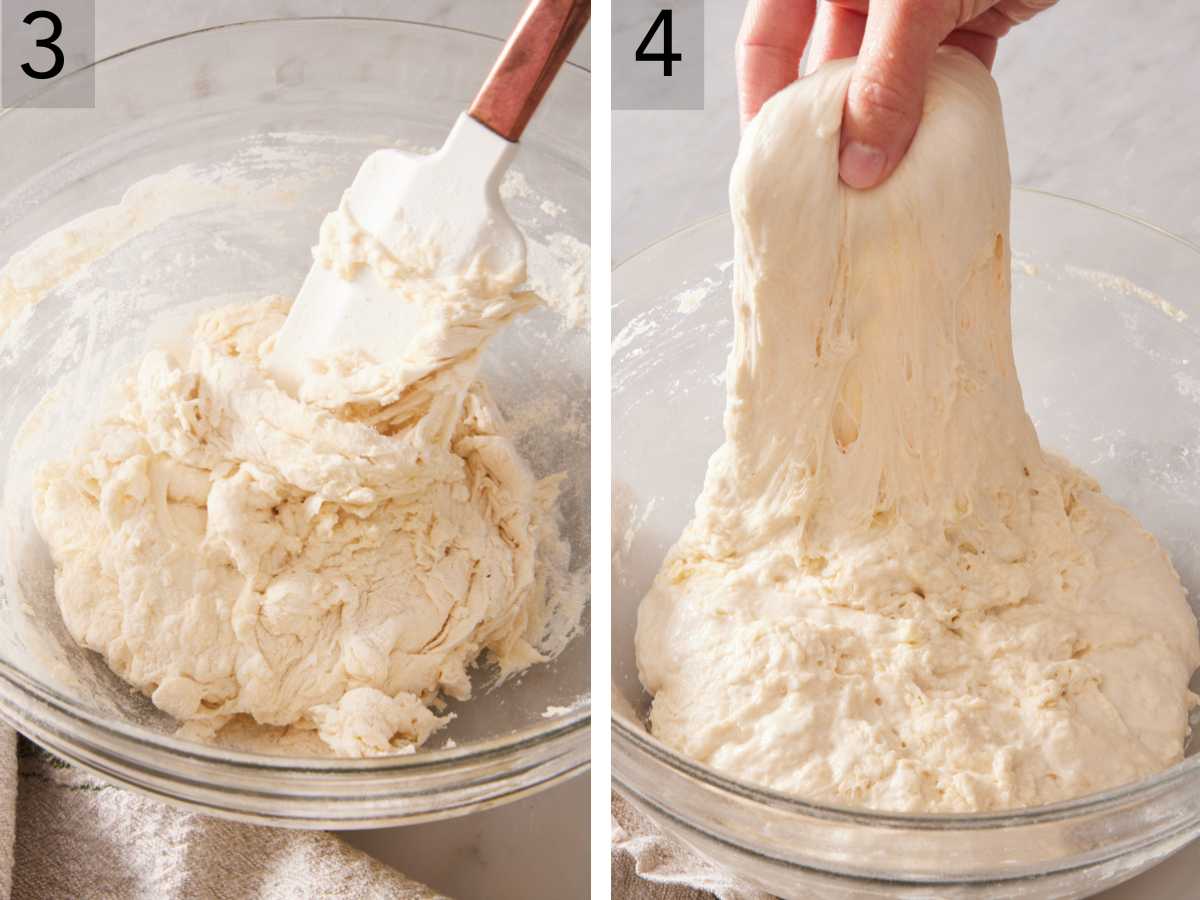
3. Once the preferment is ready, combine it along with more warm water, olive oil, flour, instant yeast, and salt in a large bowl. Mix until a shaggy dough forms, then cover with a kitchen towel and let rest for 30 minutes.
4. Wet hands with warm water to help prevent sticking and perform a series of stretches and folds on the dough to develop the gluten and create an elastic dough. Cover and set aside for 30 minutes. Repeat the process of 8 folds and turns twice more, letting the dough rest for 30 minutes between each. Then, transfer the dough to a lightly oiled bowl, cover, and refrigerate for 8 to 24 hours.
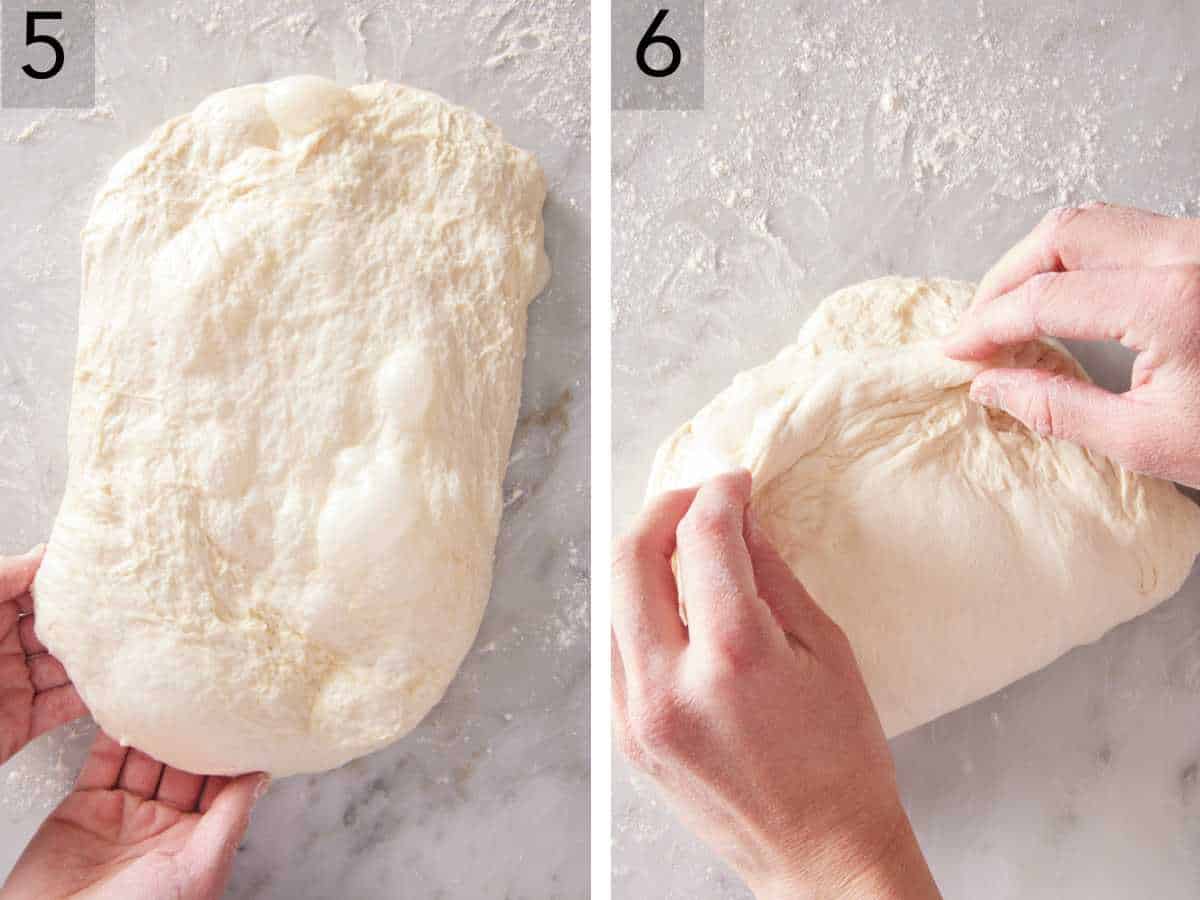
5. Let the ciabatta dough sit at room temperature for 1 hour to warm up before continuing. Onto a well-floured work surface, scrape the dough with a floured bench scraper. Gently stretch it into a rectangle measuring about 6 inches wide by 12 inches long.
6. Take hold of one short side of the dough and fold it over, sort of like you’re closing a book, and pinch gently to seal the seams.
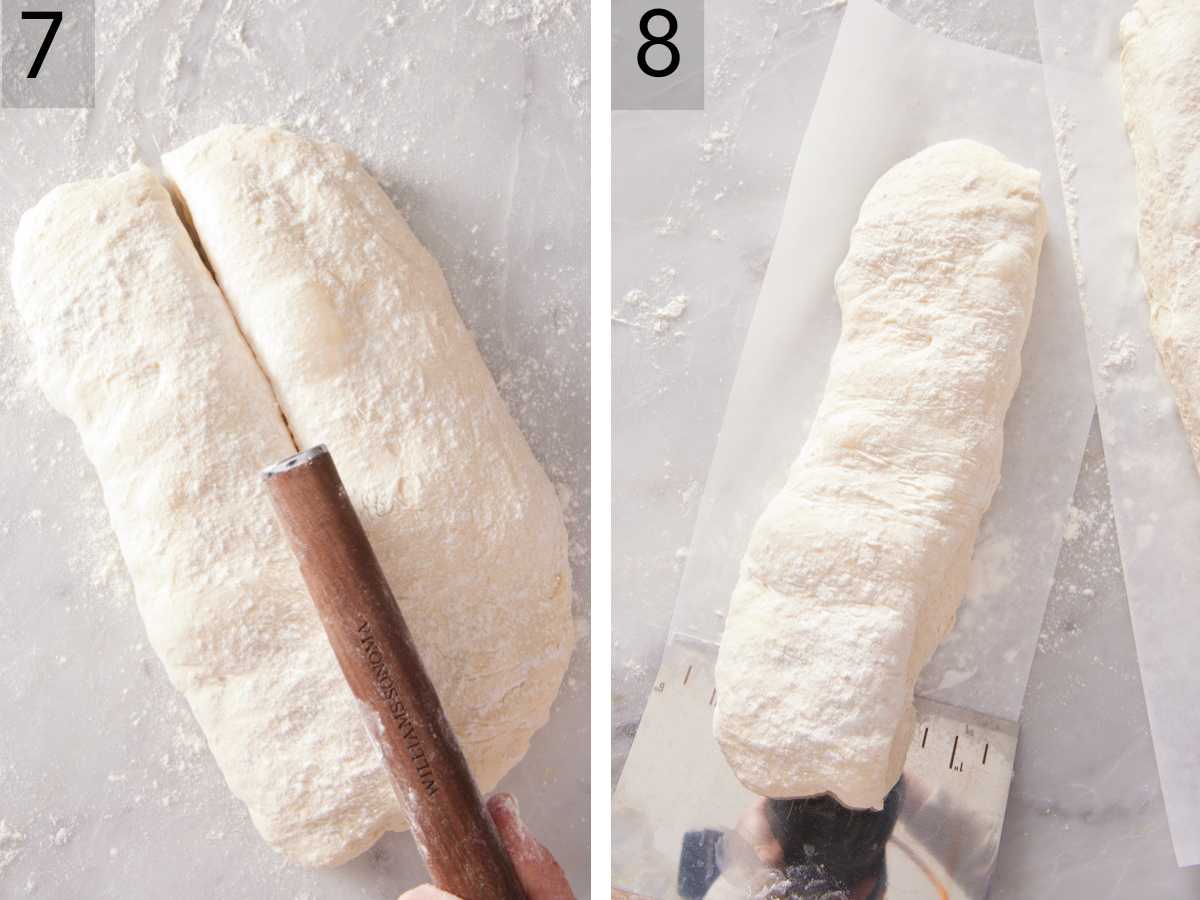
7. Stretch and press the dough once again into a 6-inch wide by 10-inch long rectangle. Sprinkle the top of the dough generously with flour. Cut the dough in half lengthwise to create 2 long loaves.
8. Place each loaf onto a rectangular piece of parchment paper, cover with a kitchen towel, and let rise for about 2 hours or so, until the loaves are puffed and bubbles appear all over the surface. Be sure to preheat the oven to 475°F with the baking stone or pan and skillet in it for at least 30 minutes before baking. Once the last rise is complete, transfer the loaves (with the parchment paper) to the hot baking surface. Add about 1 cup of ice cubes to the skillet on the lowest rack and quickly close the oven door. Bake for 13 to 15 minutes, or until the internal temperature reaches about 200°F. Transfer to a cooling rack and let the ciabatta bread cool until warm before slicing with a serrated knife.
Ciabatta Bread Recipe
Video
Equipment
- Baking stone or steel
- Large sheet tray
- Parchment paper
Ingredients
For the Sponge or Biga:
- 1 cup bread flour (120g)
- ½ teaspoon instant yeast
- ½ cup warm water (85 to 90°F) (120mL)
For the Ciabatta:
- 1 cup warm water (85 to 90°F) (240mL)
- ½ teaspoon instant yeast
- 1 tablespoon olive oil
- 2⅔ cups bread flour (320g)
- 2 teaspoons salt
Instructions
For the Sponge or Preferment:
- In a medium bowl, whisk together the flour, water, and yeast. Cover it with a towel and let rest until it’s bubbly all over, 3 to 3½ hours.
Make the Ciabatta Dough:
- In the large bowl, combine the warm water, all of the sponge (from step 1), olive oil, flour, instant yeast, and salt. Mix vigorously with a silicone spatula until a shaggy dough forms and all the flour is absorbed. Cover and let rest for 30 minutes.
- Wet your hands with warm water. With the dough bowl directly in front of you, slide your fingers or a wet bench scraper under one edge of the dough down to the bottom of the bowl. Pull that section of dough up, stretch it over to the opposite side of the bowl. Turn the bowl a quarter turn, and repeat 7 more times until you’ve made 8 folds and turns. (Continue to moisten your hands or the bench scraper so that the dough doesn’t stick.) Cover and set aside for 30 minutes.
- Complete two more sets of 8 folds and turns (for a total of 3 times), resting for 30 minutes between each. After the last set, transfer the dough to a lightly oiled bowl. Cover and refrigerate the dough for 8 to 24 hours.
Shape the Loaves:
- Remove the dough from the refrigerator and let sit at room temperature for 1 hour to warm up.
- Sprinkle a work surface generously with flour. With a floured bench scraper, gently scrape the dough from the bowl onto the flour, being careful not to disturb any of the bubbles. Gently stretch it into a rectangle about 6 inches wide by 12 inches long. Starting at one of the short sides, fold one half of the dough over top of the other half, like you are closing a book. Pinch gently to seal the seams.
- Stretch and press the dough into a 6 inch wide, by 10 inch long rectangle. Sprinkle the top generously with flour.
- Using a bench scraper or very sharp knife, cut the dough in half lengthwise, pushing the two pieces away from each other as you cut, to create two long loaves.
- Cut a large sheet of parchment paper in half lengthwise (to have 2 rectangles, about 6 inches by 16 inches each.) Carefully transfer the loaves to each sheet of parchment paper. Ensure the loaves are generously floured on top, then cover with a lint-free kitchen towel. Let rise for about 2 to 2½ hours, until the loaves are puffed and bubbles appear all over the surface.
- After 1 hour and 30 minutes of rising, place one oven rack in the center of the oven and another oven rack in the lowest part of the oven. Place an overturned baking sheet or a baking stone or steel on the middle rack. Place a 10-inch oven-proof, heavy-bottomed skillet on the lowest rack. Preheat the oven to 475°F for at least 30 minutes before baking.
- Once the loaves have finished rising, transfer the parchment paper with the loaves on it to the preheating baking sheet, stone, or steel in the oven. (A pizza peel or cookie sheet without a rim can help to transfer it easily.) Pull out the rack with the skillet and fill it with about 1 cup of ice cubes. Quickly push the oven rack in, then close the door. (This step is optional, but will help to create steam in the oven and make a crusty exterior).
- Bake for 13 to 15 minutes, or until the ciabatta is deep brown and the internal temperature reaches 200°F. Transfer to a cooling rack to cool until warm. Slice with a serrated knife to cut through the crust.
Notes
- Cool the bread before slicing it. Let the ciabatta cool for 30 to 45 minutes until it’s warm to give the bread a chance to set and for steam to escape properly. Slicing it too soon will cause the bread to turn out gummy instead of light and chewy.
Nutrition
How To Store
Storing: Cover the ciabatta bread loosely and store in an airtight container at room temperature for 2 days.
Freezing: For longer storage, freeze the bread. Once completely cool, wrap the loaf tightly in plastic wrap and aluminum foil and place it in a freezer bag. It will freeze well for up to 3 months. Thaw it out on the counter for a few hours and warm it in the oven for that just-baked smell.
Can I Make Ciabatta Rolls?
Absolutely! You can make 8 rolls with this recipe. After dividing the dough into 2 long pieces in Step 8, cut each half into 4 pieces horizontally to create 8 dough squares. Place them 2 inches apart on a parchment-lined baking sheet and let them rise as written in the recipe. Then, bake as directed.
Frequently Asked Questions
Yes! Add 1–2 tablespoons of minced fresh or 1–2 teaspoons dried herbs into the main dough when you add the flour and remaining ingredients in Step 2. Rosemary, chives, and thyme are some favorites to add for a mouthwatering aroma and flavor. If you’re a garlic lover, add 1 or 2 minced fresh garlic cloves. Or add air fryer roasted garlic for a milder, nuttier flavor.
Yes, with some tweaks. You will need to remove some flour and water as well, not just the yeast. To swap the instant yeast for 100% hydration sourdough starter in the biga, replace 12 grams each of water and flour with a total of 24 grams of starter. For the main dough, replace 32 grams each of water and flour with a total of 64 grams of starter. You will therefore need 88 grams of sourdough starter.
Keep in mind that the rise times may be different since you are using a natural leavener, which can vary greatly between individual sourdough starters.
If you’ve tried this homemade ciabatta bread recipe, then don’t forget to rate it and let me know how you got on in the comments below. I love hearing from you!
Laraine says
First time I tried ciabatta bread. Turned out really good. I tried adding Asiago cheese but I guess I didn’t add enough. Next time I will put in more
Mahnaz says
I really like the preppy kitchen website and have make various things using it. I also watch its videos on YouTube.