
This post may contain affiliate links. Please read our disclosure policy.
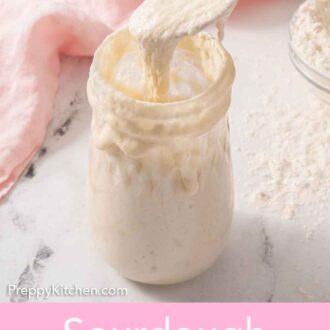

Make your own Sourdough Starter with just flour, water, and time! My daily step-by-step guide has all the info for what to do every step of the way for a starter. It’s as simple as stirring together flour and water, and giving it a bit of time to grow. Use your bubbly, thriving starter to make sourdough bread, pizza crusts, waffles, and more.
I like to think of making your very own sourdough starter like a science project, which, as a former science teacher, I absolutely love! It takes some time, but it is so easy— simply stir water and flour together, then wait, and repeat. I’ve been baking with sourdough starter for years, and I’ve learned many helpful dos and don’ts along the way.
I developed my recipe to be your handbook for beginning the starter, how to feed it, and how to tell when it is ready for use. You’ll also find answers to common questions, like what exactly discard is, how to tell when your starter is hungry, how to maintain a healthy starter for years to come, and much more.
“Worked the first time!!! I’ve tried several different sourdough starter methods, but this is the only one that has worked out for me! So excited to get to start my sourdough journey!”
Nikki
A Few Things To Know Before You Start
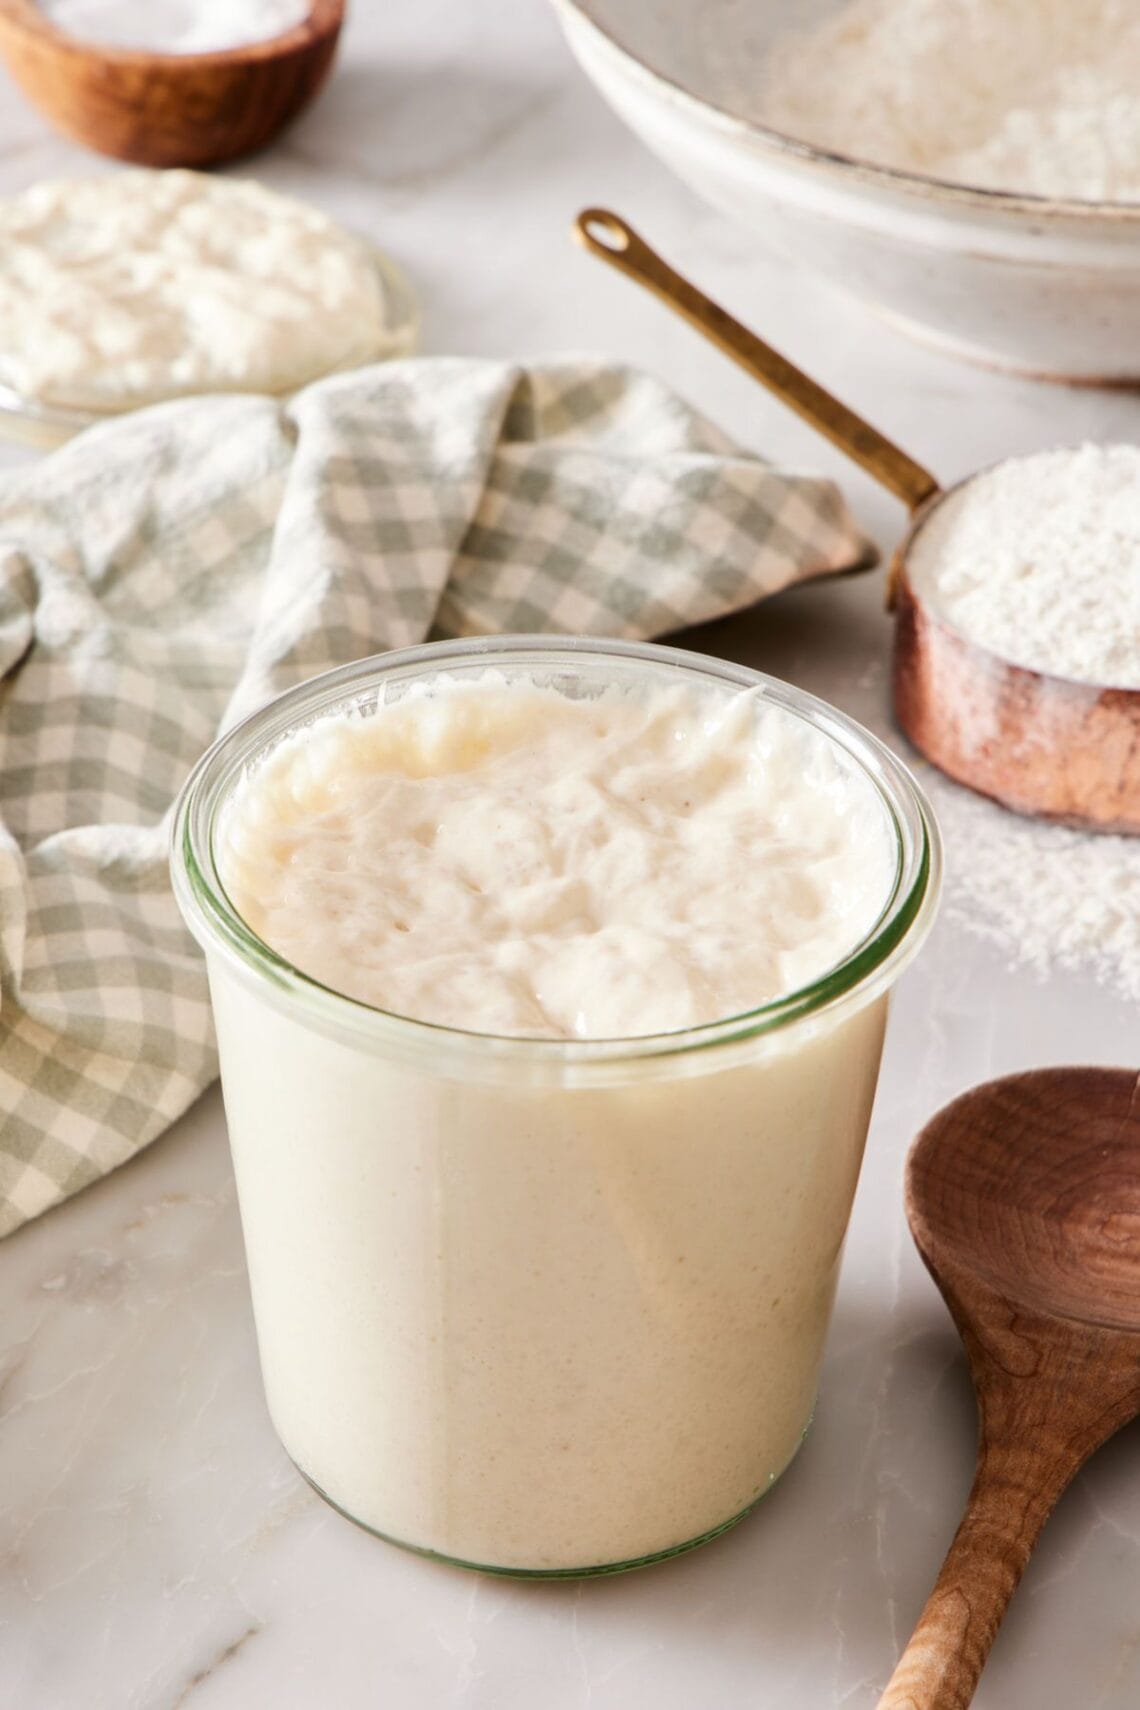
What is sourdough starter? It’s a fermented yeast made with a simple combination of flour and water. Sourdough starter captures wild yeast that naturally exists in the flour and air. During the fermentation process, the natural yeast feeds on the sugars in the flour and turns it into lactic acid bacteria, which then makes carbon dioxide (forms bubbles and makes doughs puff up). It is essentially a fresh, wild version of store-bought dry packets of commercial yeast! It is used to make dough rise and lends a delicious, complex flavor to all kinds of yeasted doughs like sourdough bread and other naturally leavened baked goods.
Is sourdough discard different from sourdough starter? They are the same thing! The term “discard” comes from the process of feeding the starter. To activate the starter before using it in a recipe, you remove (discard) some of it in order to add fresh flour and water. Now, you can simply throw out the sourdough discard. Or, you can place it in a clean glass jar and add flour and water to it, and you have another jar of active starter. So feel free to keep it or share it with a friend! You can also use the discard to make other recipes (more on that later in this post).
How long does it take to make sourdough starter? Generally, it takes about a week to make an active, healthy sourdough starter. However, this will be dependent on your environment (i.e., the ambient temperature in your kitchen). It can take up to 2 weeks in a cooler kitchen or as little as 5 days in a warmer one. I walk you through each step so you know exactly what to look for to tell whether your starter is ready.
You Only Need 3 Ingredients
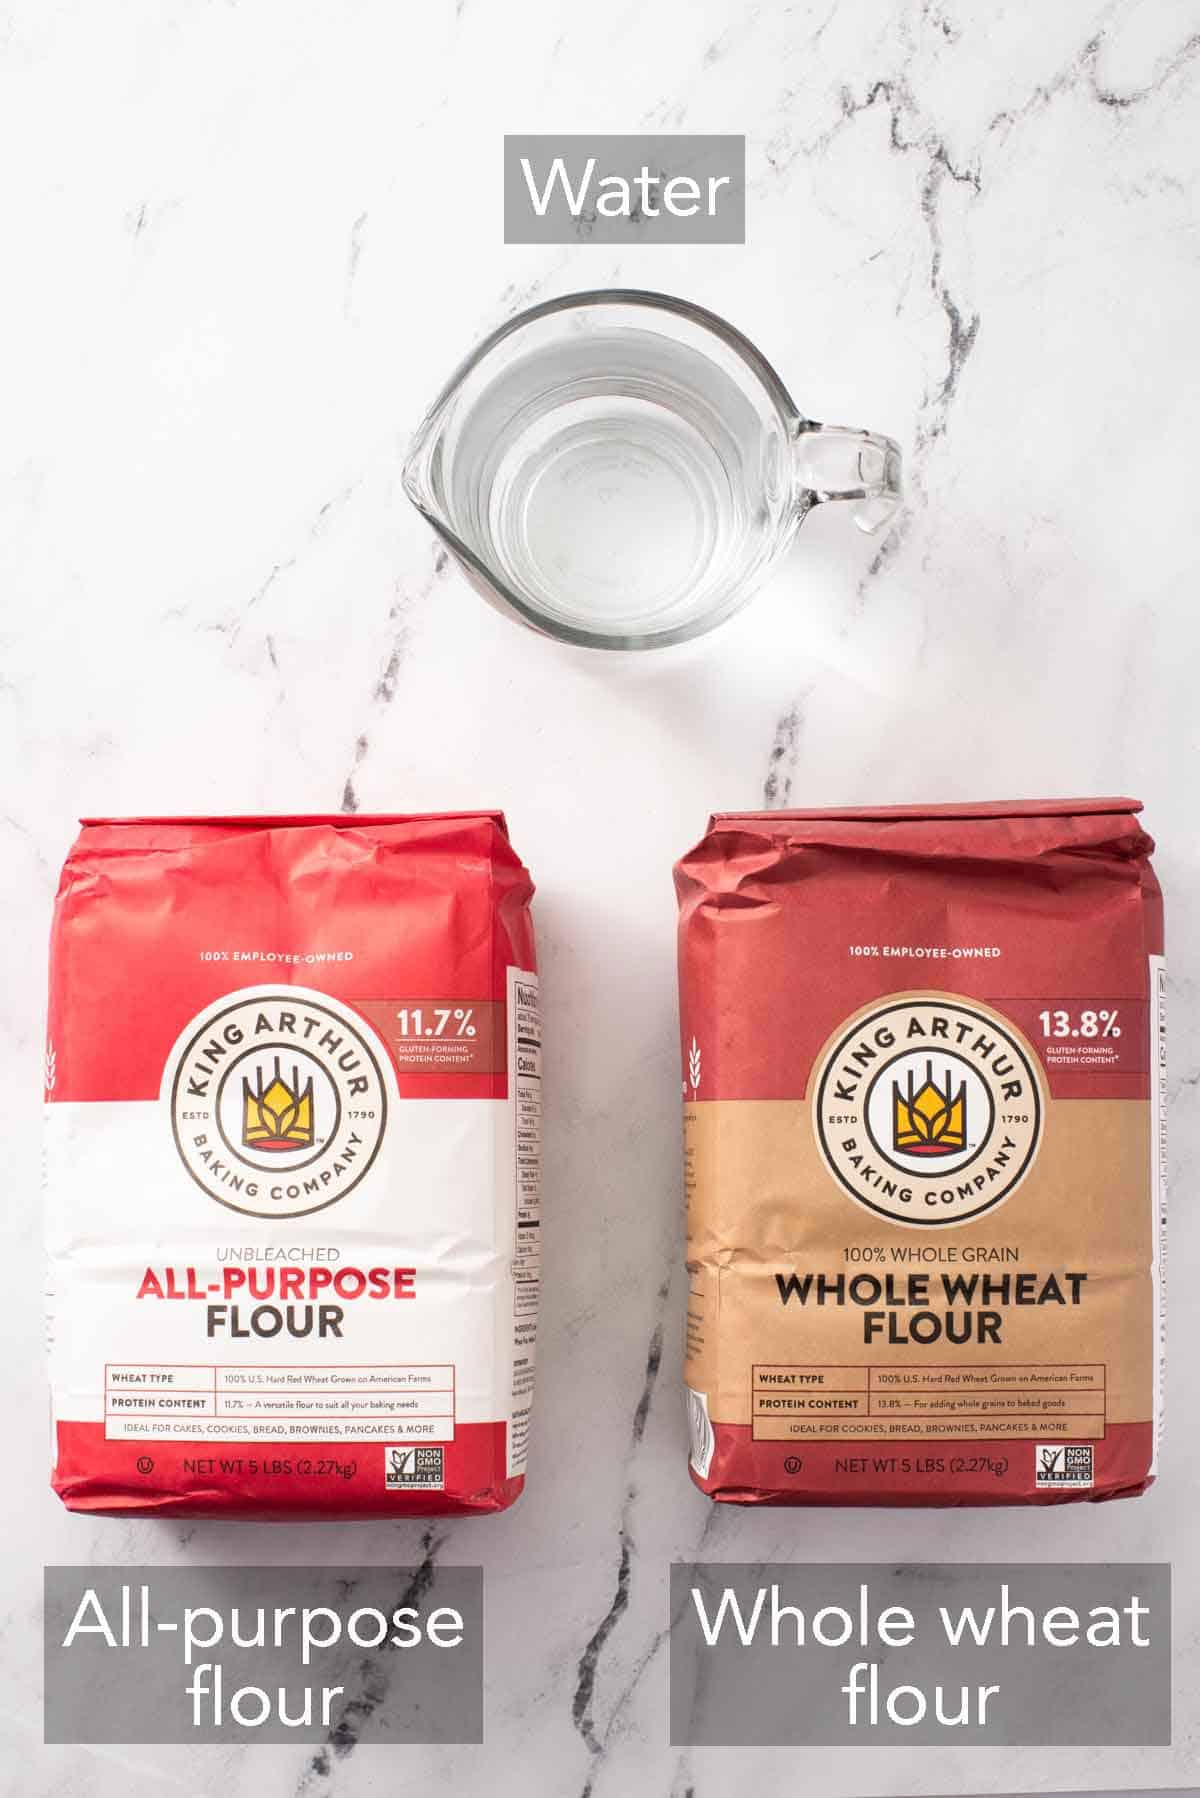
Sourdough starter only needs three ingredients and some time to transform into a wild yeast leavener. You can find the measurements with full instructions in the recipe card below.
Whole wheat flour — whole wheat flour is used to start off the process because the bran on the wheat is a rich food source for the wild yeast and kickstarts the growth of the starter. If you like, you can use whole grain rye flour instead, since it is also excellent for feeding a starter. Once the sourdough starter is active, you can continue feeding and maintaining your starter with all-purpose flour only.
Filtered water — it is super important to only use filtered water to make your sourdough starter. Tap water contains chlorine, which can prevent your starter from growing. It can also slowly kill the yeast of a healthy starter over time. If you have a drinking water filter at home, that works fine! If not, buy bottled water for your starter. You will need a total of 1¼ cups (300g/300ml) for making the starter.
Unbleached all-purpose flour — unbleached is best for this recipe. The bleaching process reduces the microbes in flour, which can slow down the development of a sourdough starter. AP flour eventually becomes the base of the starter, and is what you’ll use to feed and maintain it. The bag of flour will say “bleached” or “unbleached” on it somewhere, so look for that indicator when purchasing your flour. I use the King Arthur brand for my sourdough baking with excellent results. You could also use bread flour to feed the starter, if you want, but I stick with AP flour since I always have it on hand.
Equipment Needed
Clean glass jar — a clean jar is essential, so you don’t inadvertently introduce bad bacteria to the starter, which can cause it to go bad. A pint-size jar (16 ounces) will work great. A wide-mouth jar with straight sides is ideal for easier mixing. I recommend weighing the jar without the lid and making a note of it. This way, when you start discarding the starter, you can weigh the whole thing, subtract the jar weight, and know how much starter is in your jar.
Rubberband — a rubber band around the jar is a great way to keep track of the starter’s growth, as you can simply roll it up and down the jar anytime you feed your starter. You can also use a marker or tape to indicate the starting point. Marking the height of your starter is very helpful, so you can easily see how much the starter has grown and know it has doubled in size.
Spatula or spoon — you need one of these to mix together the flour and water at the very beginning, and to combine everything at every feeding. I recommend silicone or metal. Wood can hold onto bacteria and odors that can affect your starter.
How To Make Sourdough Starter
Making your own sourdough starter is very easy, but it takes several days to grow the wild yeast. Below, I’ve highlighted portions of the recipe in day-by-day process images along with instructions for making sourdough starter from scratch. You can find the full set of instructions in the recipe card below.
Day 1: Mix The Starter
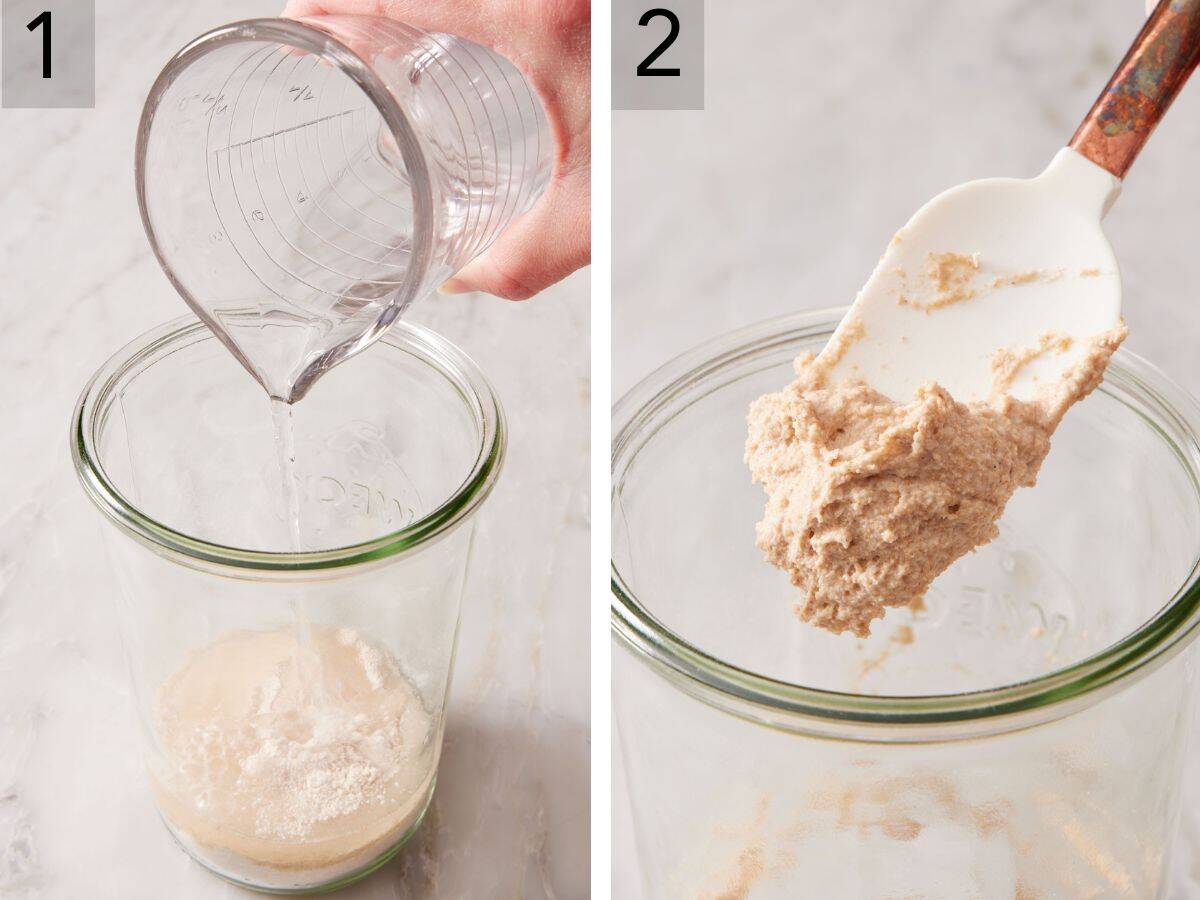
1. To a clean glass jar, add whole wheat flour. Then pour in the filtered water.
2. Use a spoon or spatula to stir the mixture of flour and water together until all of the flour is hydrated. It should resemble a paste or thick batter in its consistency. Loosely cover the jar with its lid and let it sit in a warm spot (75-80°F) for 24 hours.
Day 2: Look for Bubbles & The First Feeding
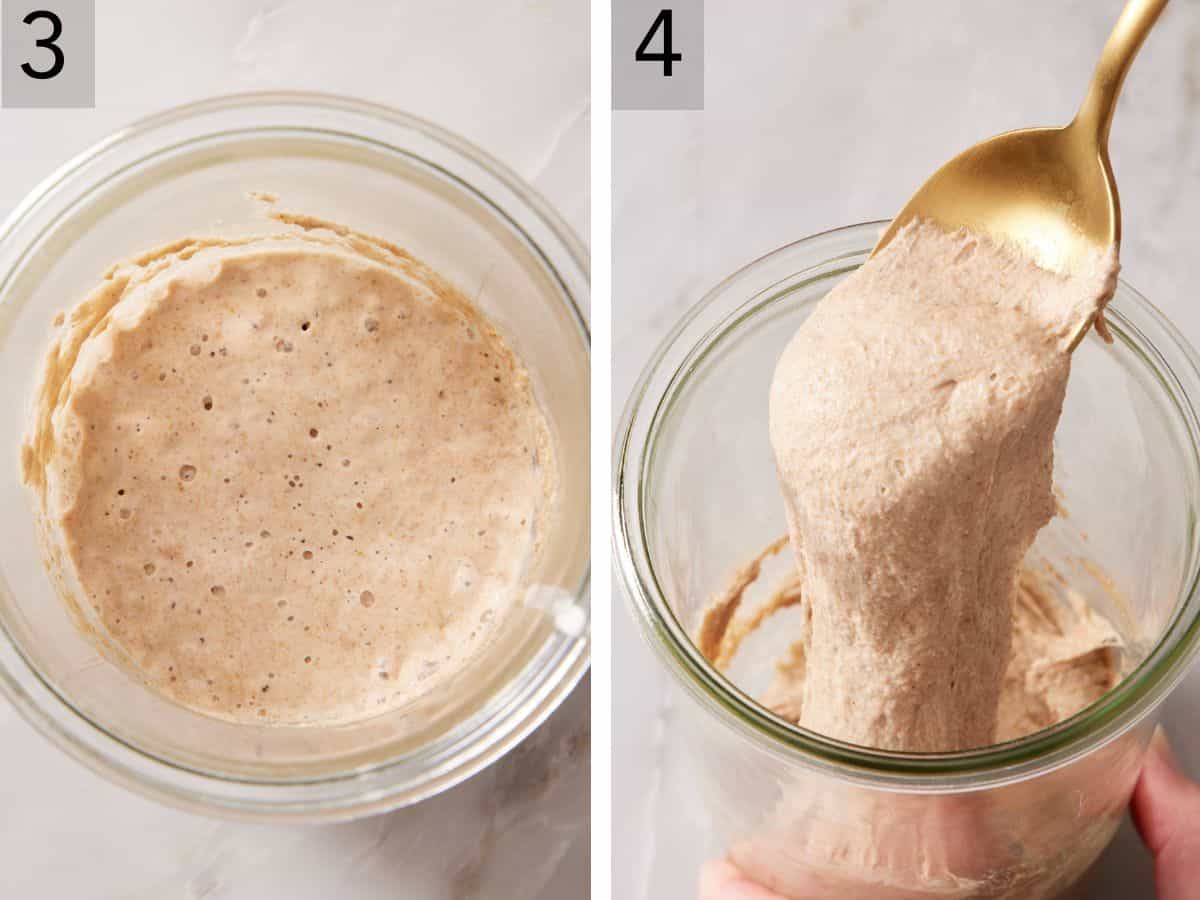
3. After the first 24 hours, look for any bubbles that have formed on top of the flour mixture. If you don’t see any, let the jar sit for another 12 to 24 hours. The starter can take longer to get going in cooler temperatures, so if you live in a cool climate or it is winter, you may need the additional 12 to 24 hours.
4. Once you see bubbles, it’s feeding time! Discard half of the starter, keeping about 60g in the jar. At this stage, the starter will still be thick but will be spoonable and somewhat stretchy. Add ½ cup (60g) of all-purpose flour and ¼ cup (60g) of water to the starter left in the container.
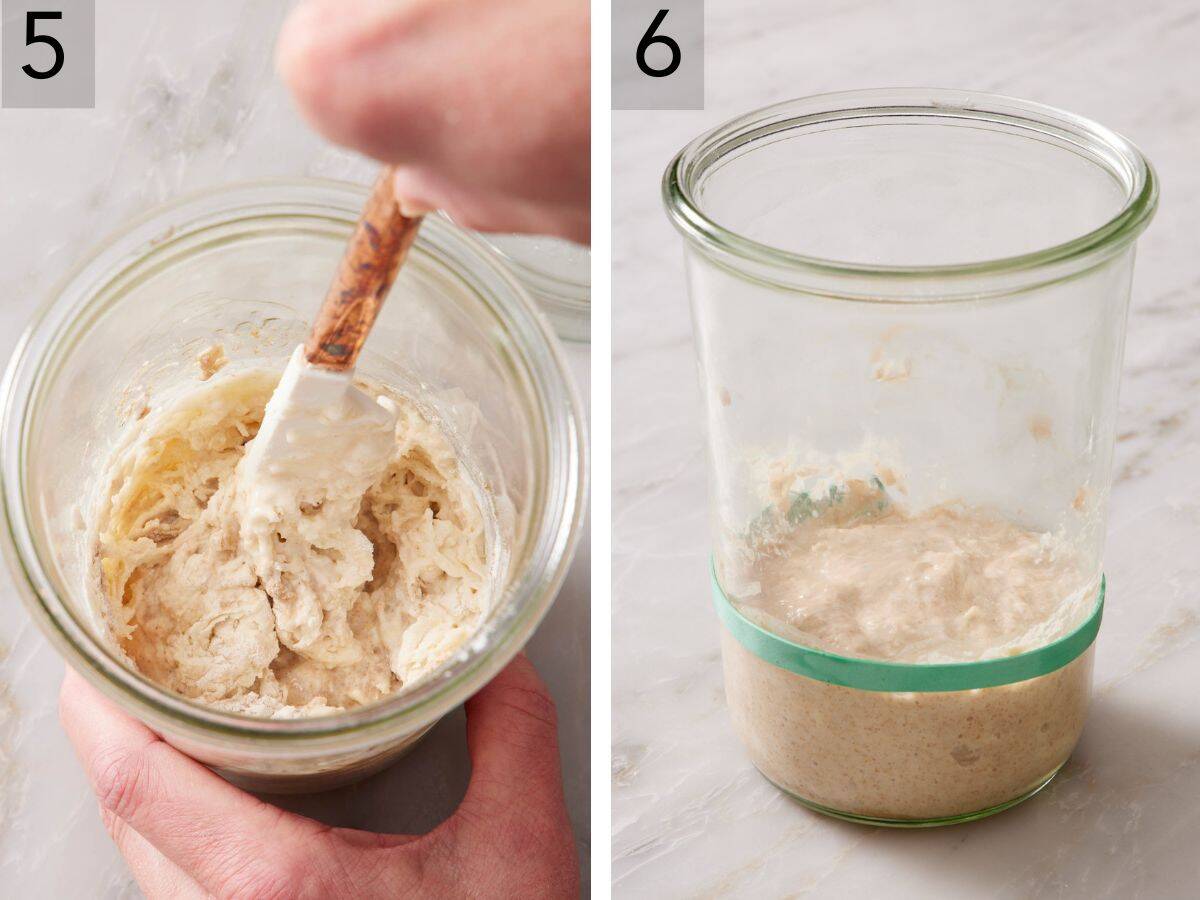
5. Stir until well combined. Once mixed, the starter will be quite thick and still look somewhat brown from the whole wheat flour. (It will lighten in color as you continue feeding it with all-purpose flour.)
6. Use a rubber band, marker, or piece of tape to mark the level of the mixture on the side of the jar. Loosely cover once again and let it rest in a warm spot for another 24 hours.
Day 3: Feed The Starter
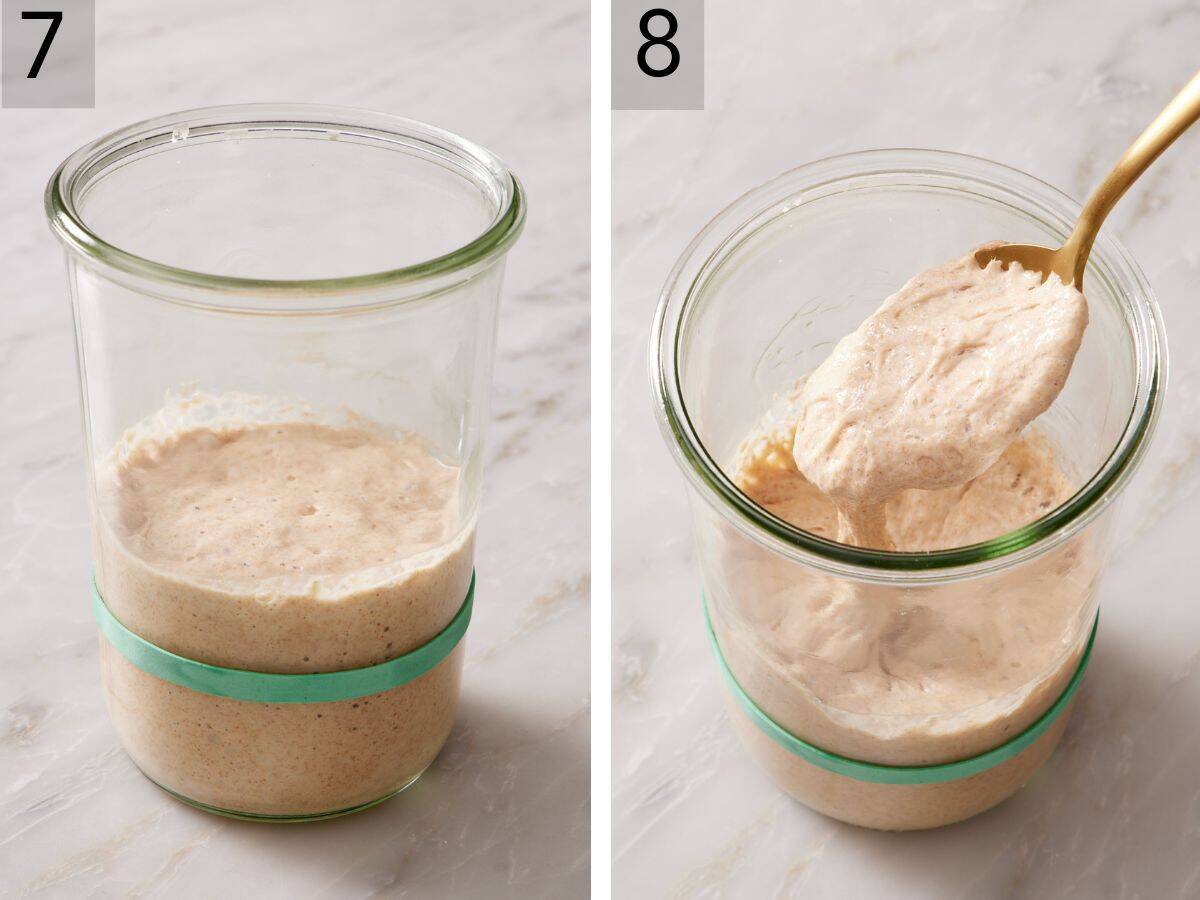
7. The start should now be very bubbly and have risen in the jar, almost doubling in volume. This will be easy to see because you marked the starting volume in the step above! If the volume has not changed much, leave the mixture to sit for longer until it does. (This may take several to 24 hours more, depending on how cool your kitchen is.)
8. Once it rises, discard half the sourdough starter and feed it again with the same amounts of all-purpose flour and water. Cover loosely with the lid and let sit until doubled in size once more, which could take anywhere from 6 to 24 hours. At this stage, it should start to smell somewhat sour, but it may be faint.
Day 4 & 5: Building A Healthy Starter
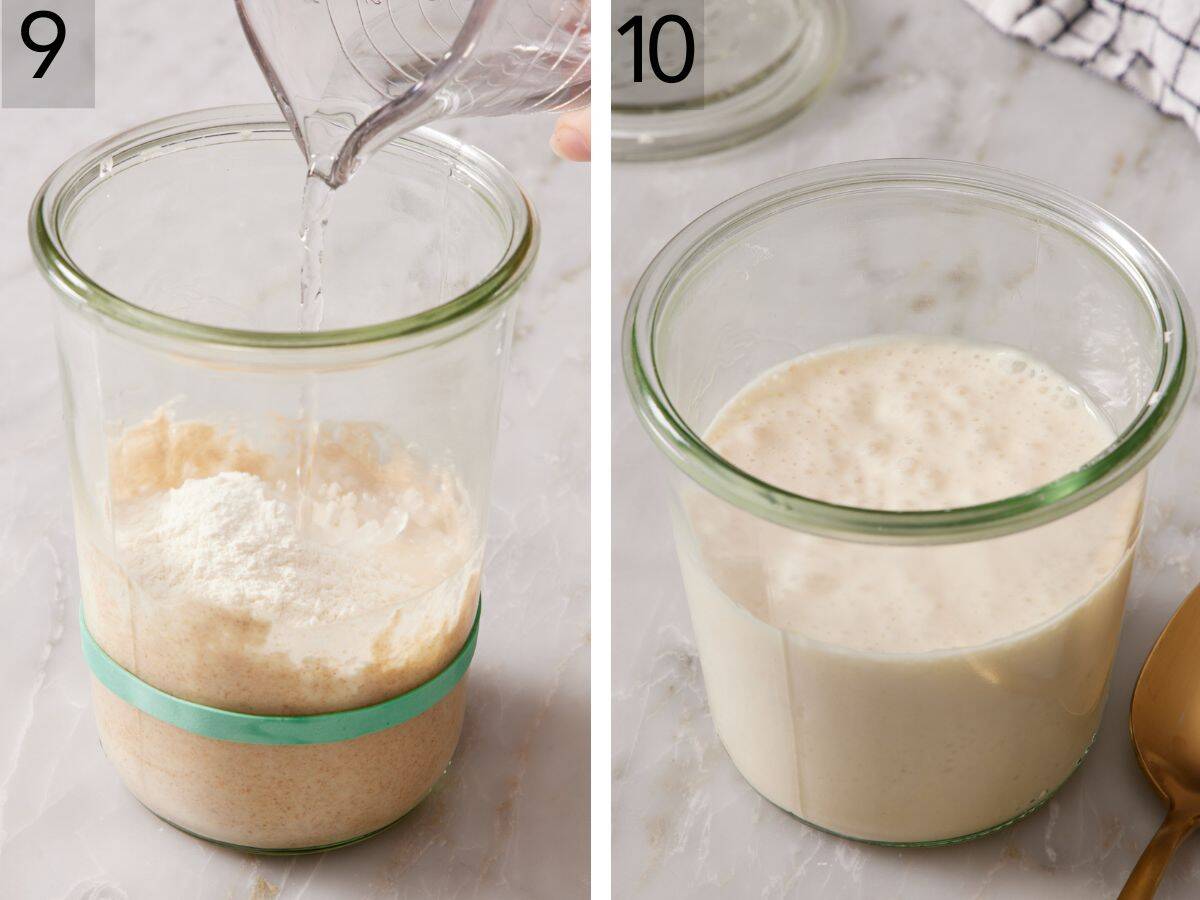
9. Repeat the discarding and feeding process twice more after the starter doubles in volume each time. Each time you feed it, leave 60g of starter in the jar and add another 60g each of water and AP flour. It should also have developed a noticeable but pleasant sour smell by day 4.
10. After the final feeding and rise time, your sourdough starter is ready to use! You can follow my sourdough recipes, like homemade sourdough pizza crust, to put it to use. From now on, since you have built a healthy, robust starter, you can also use the sourdough discard in other recipes instead of throwing it out.
How To Feed Sourdough Starter
Once you have built your healthy starter, you will need to continue feeding it to keep it alive and healthy. Here’s a simple how-to for feeding your sourdough starter:
- Discard some of the starter. You can throw this out or use it to make delicious sourdough discard recipes— keep reading for ideas!
- Then add equal parts all-purpose flour and water to the starter in the jar. At this point, you don’t need to worry too much about how much starter you have to begin with: Even if you only have 10g of sourdough starter and add 100g each of AP flour and filtered water, it will still eventually activate. It will just take longer to grow in volume if you start off with less starter.
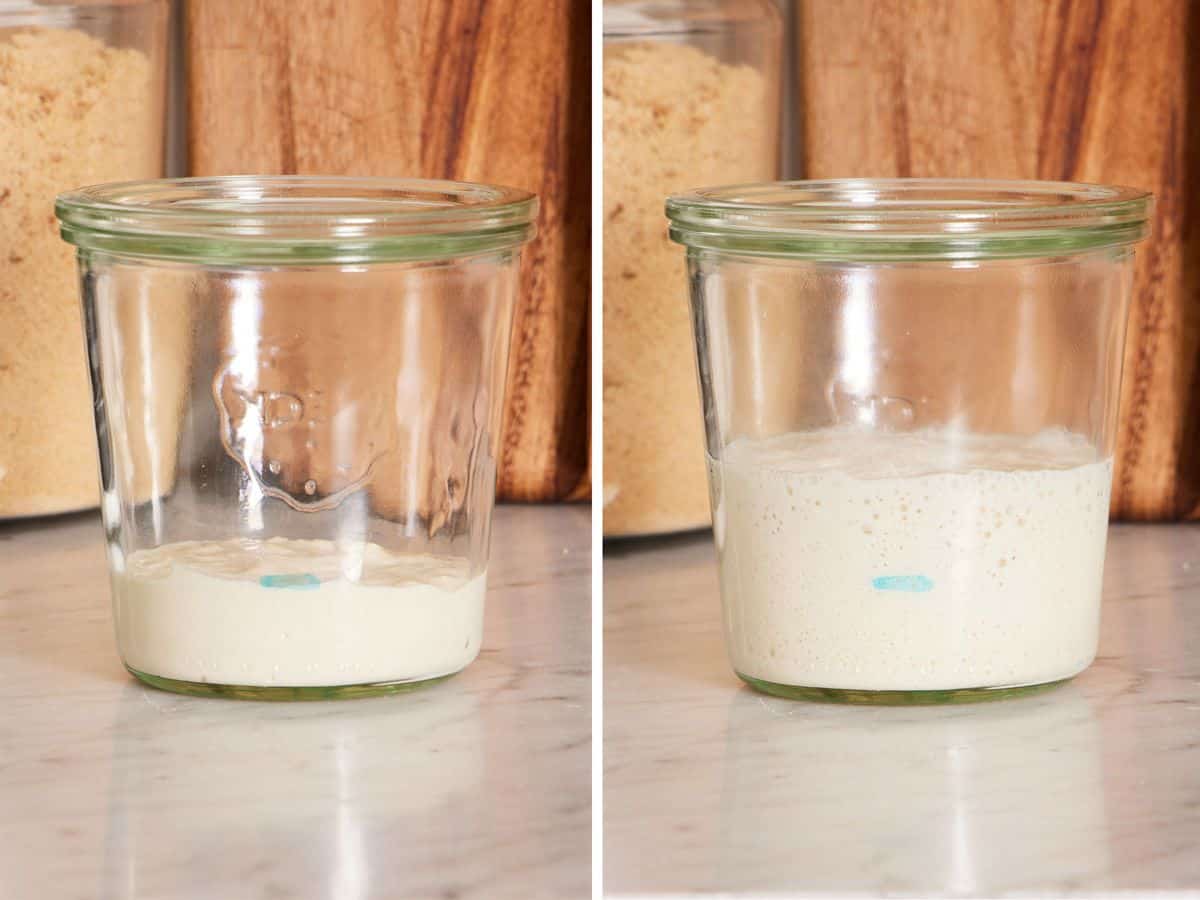
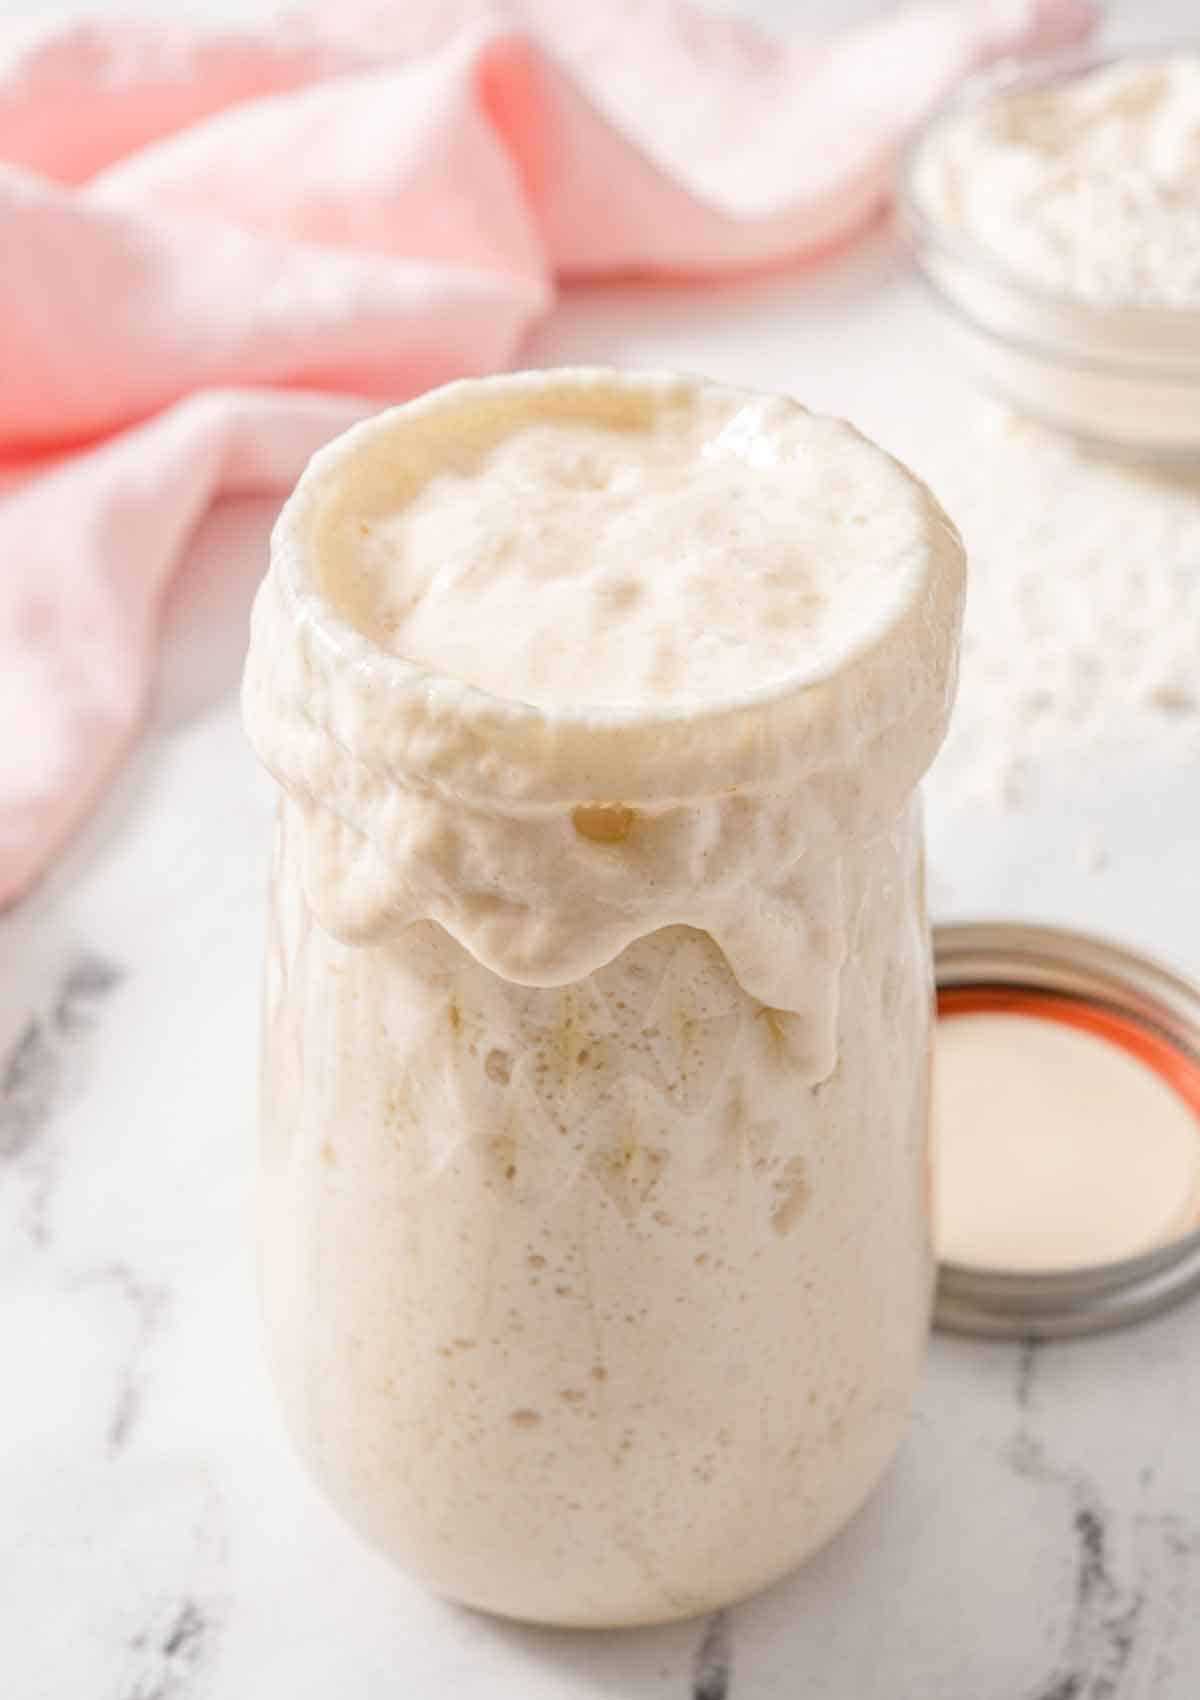
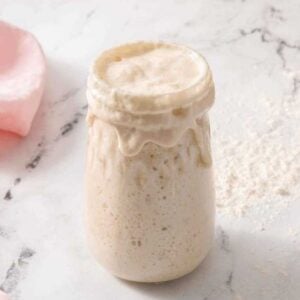
- Your sourdough starter will grow in volume after it is fed, becoming “active” or ready for use in a recipe. Generally, you want the volume to double before you use it. For an active starter, this typically takes 4 to 8 hours. You can see in the image below.
- Feed it again after you have poured off some starter to use in your recipe or when it looks hungry. Also, try not to overfeed your starter, which happens when you don’t allow enough time between feedings for the yeast to grow. Make sure it increases in volume before you use it and feed it again.
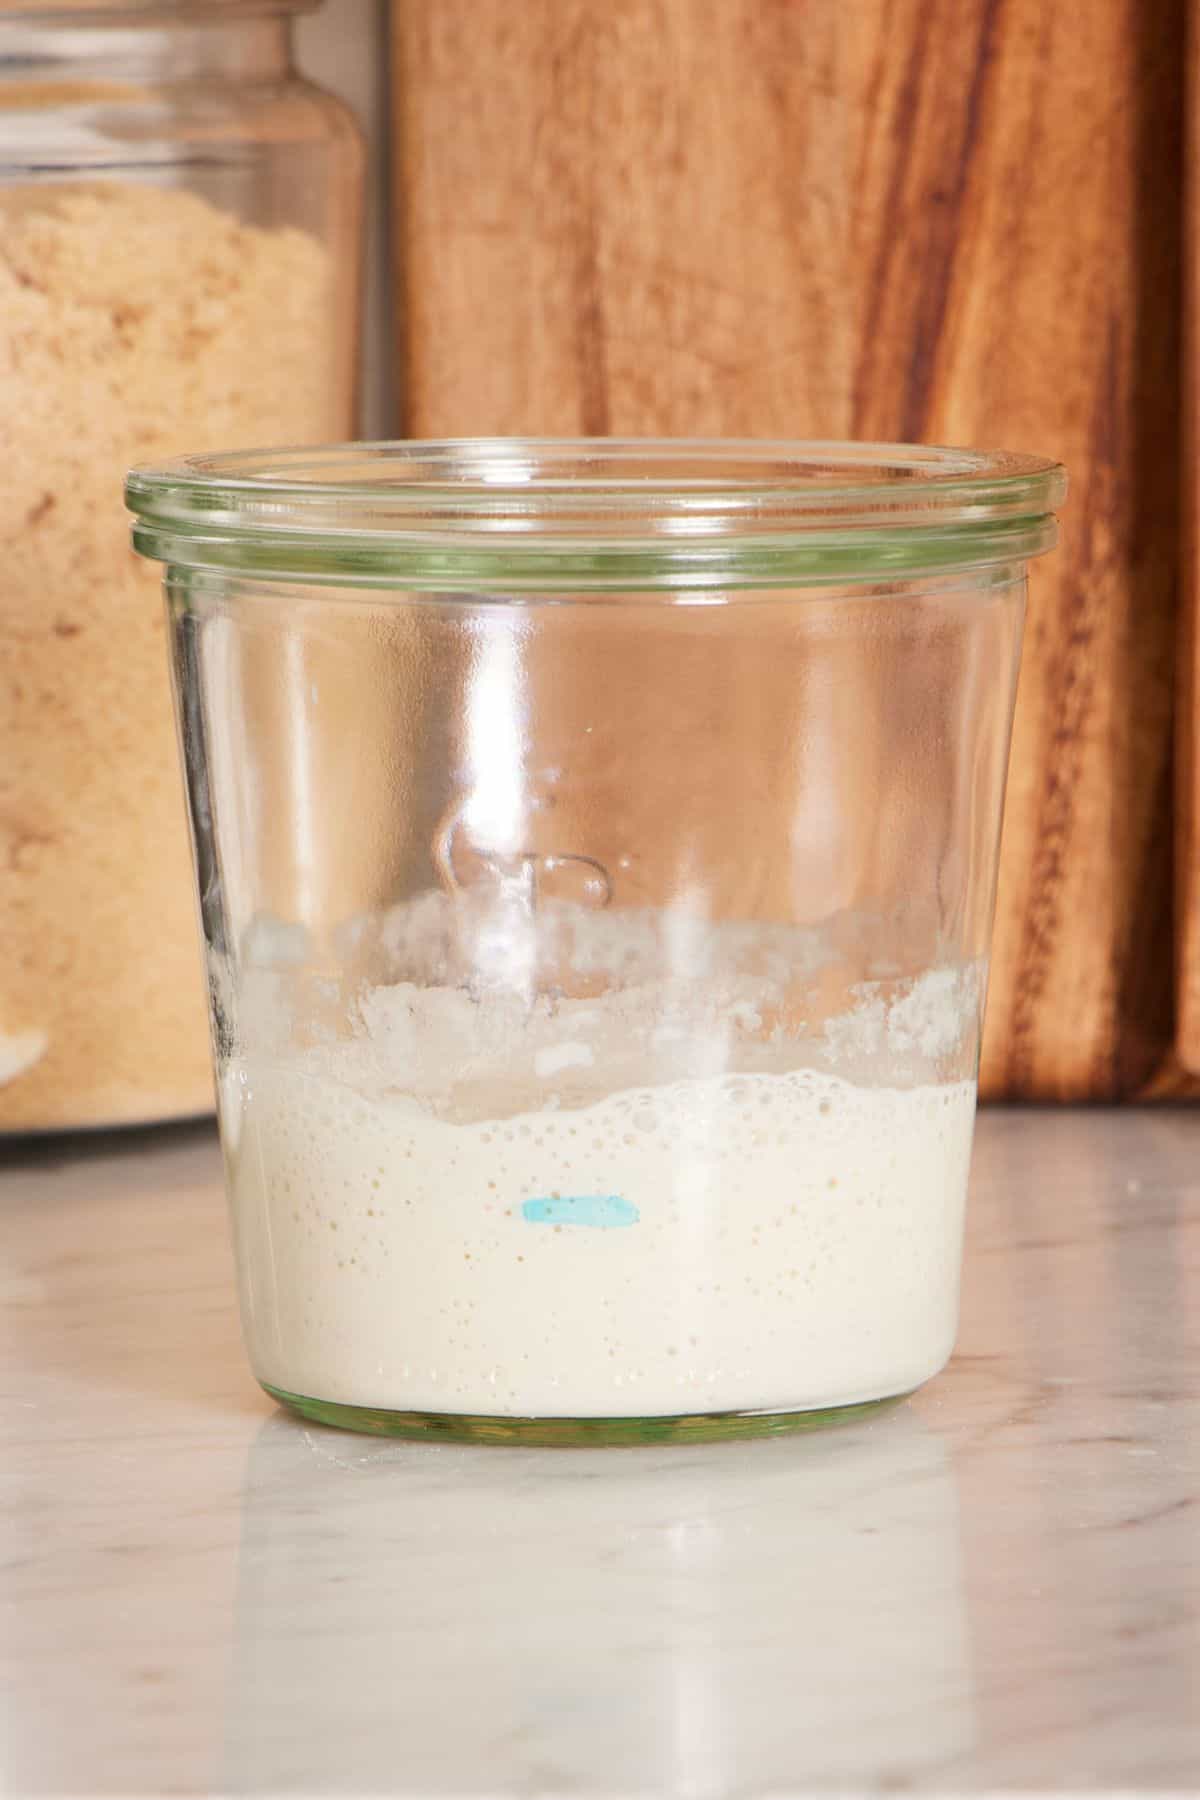
How Can I Tell My Starter Is Hungry?
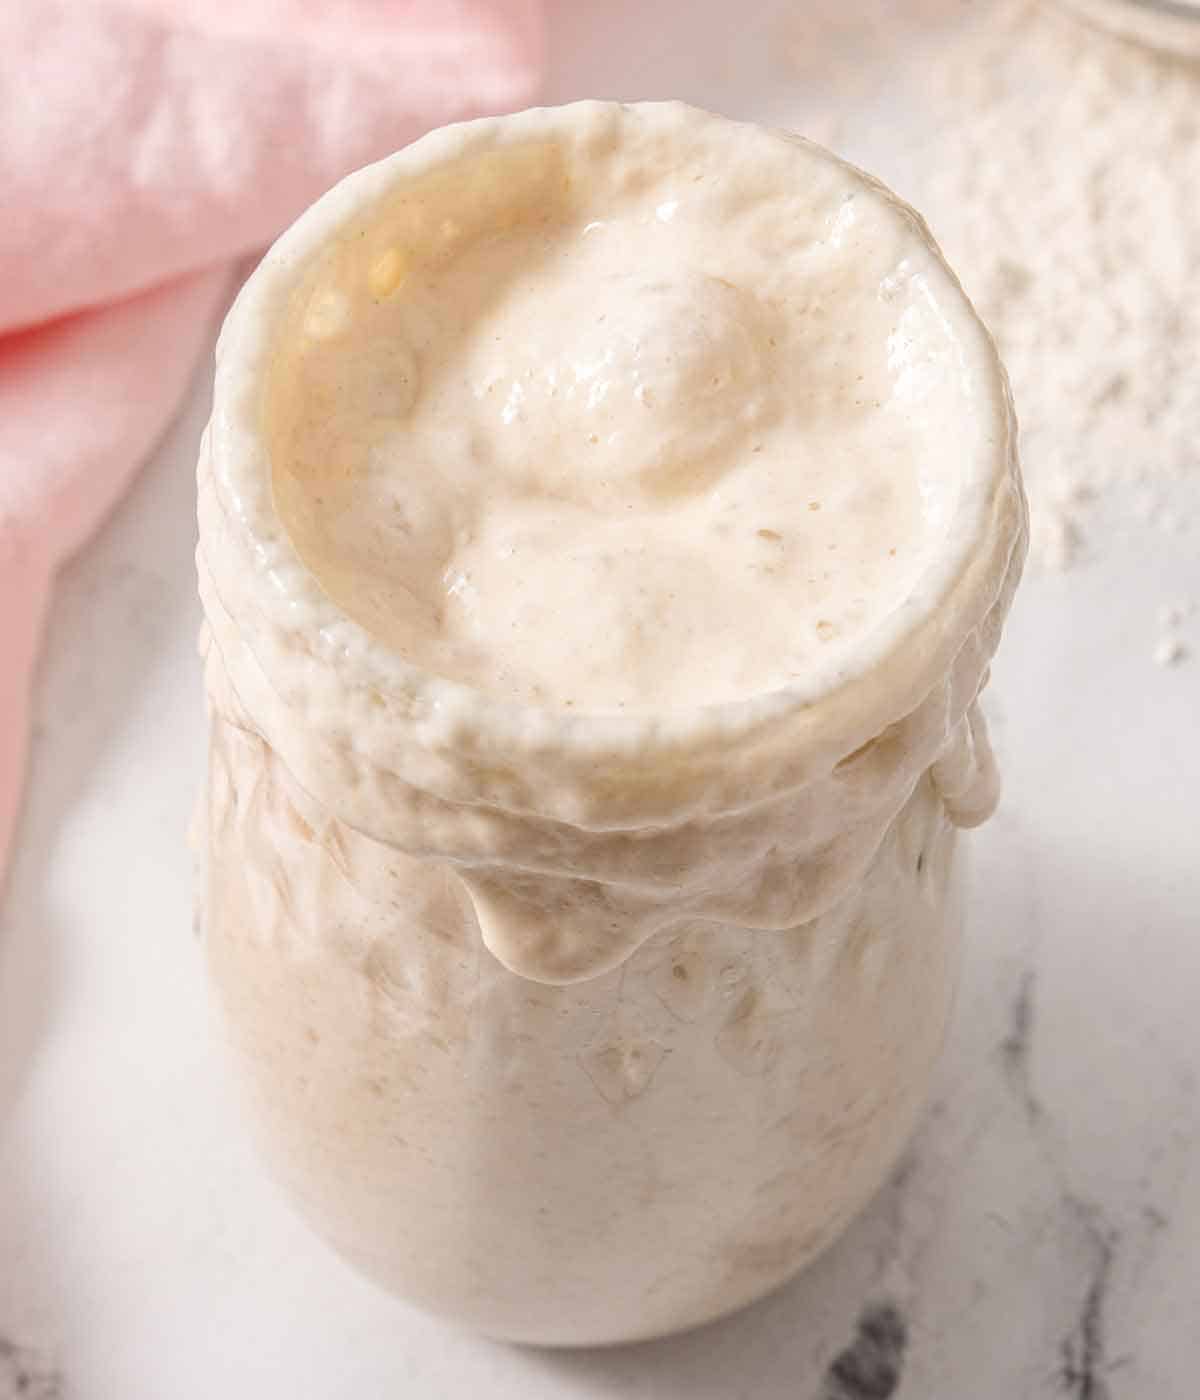
Typically, once a starter doubles in volume, it means the yeast is almost running out of food (fresh flour). When the doubled starter starts to shrink back down, this indicates it’s “hungry,” which is an excellent time to feed it! You will see some residue on the sides of the jar above the top of the starter, indicating it has started to collapse and is shrinking in volume. Make sure you don’t wait for more than a few hours at this point, or the yeast will start dying, making your starter less robust.
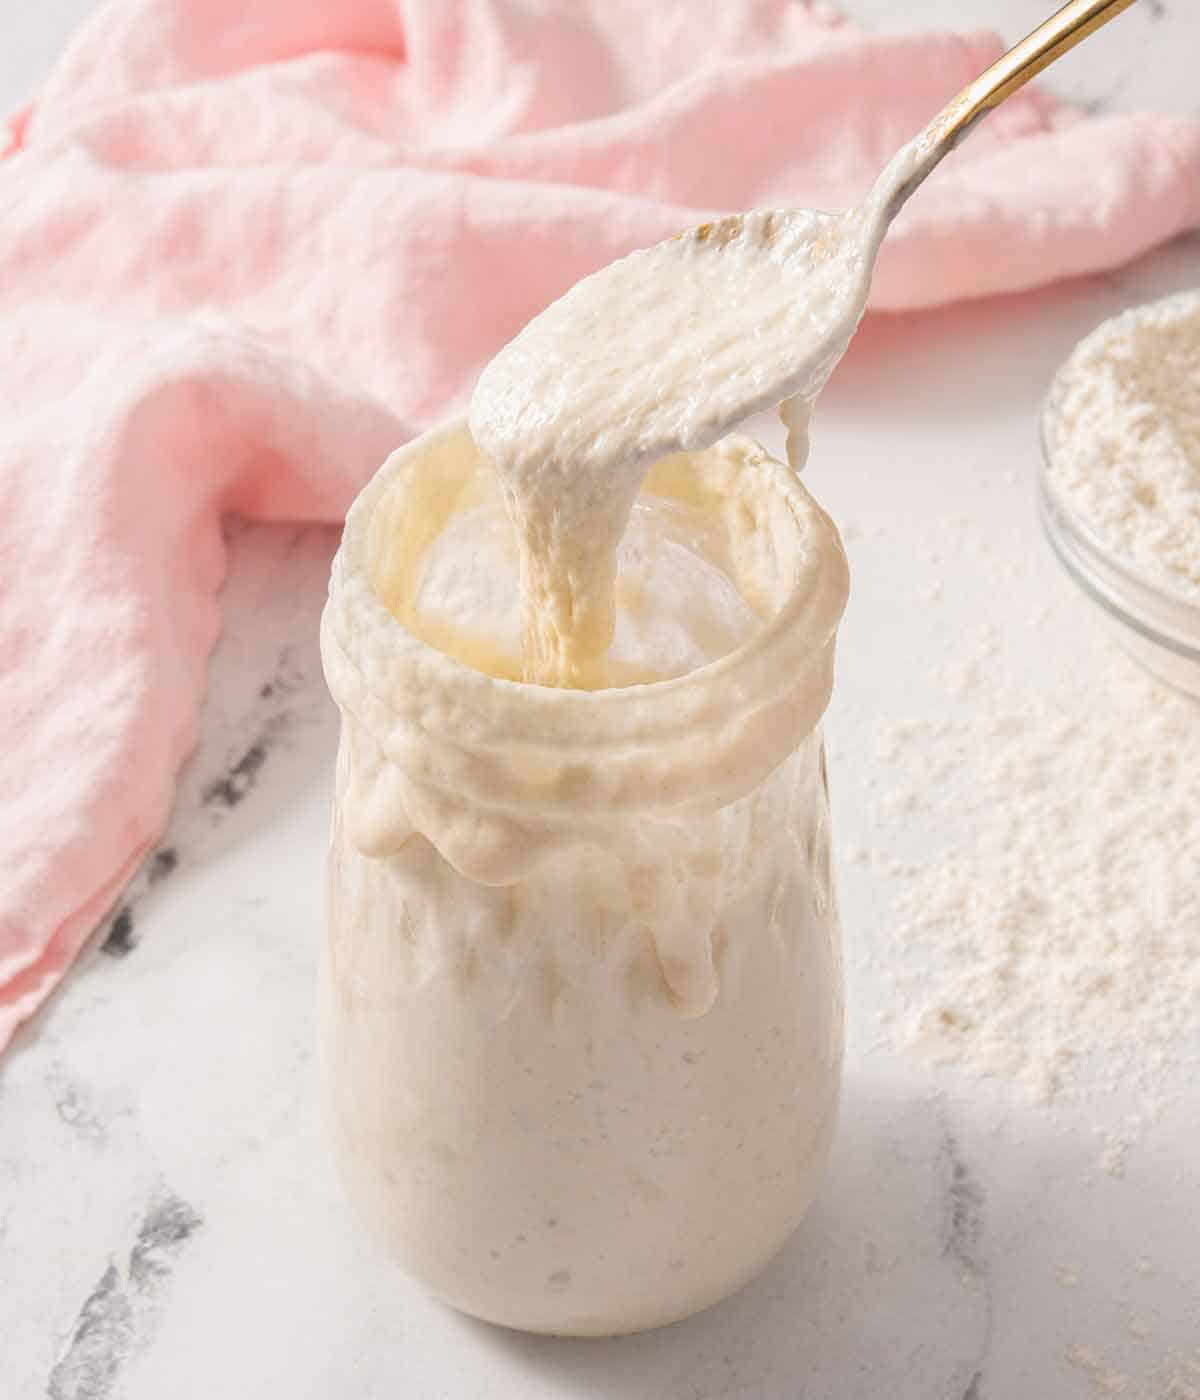
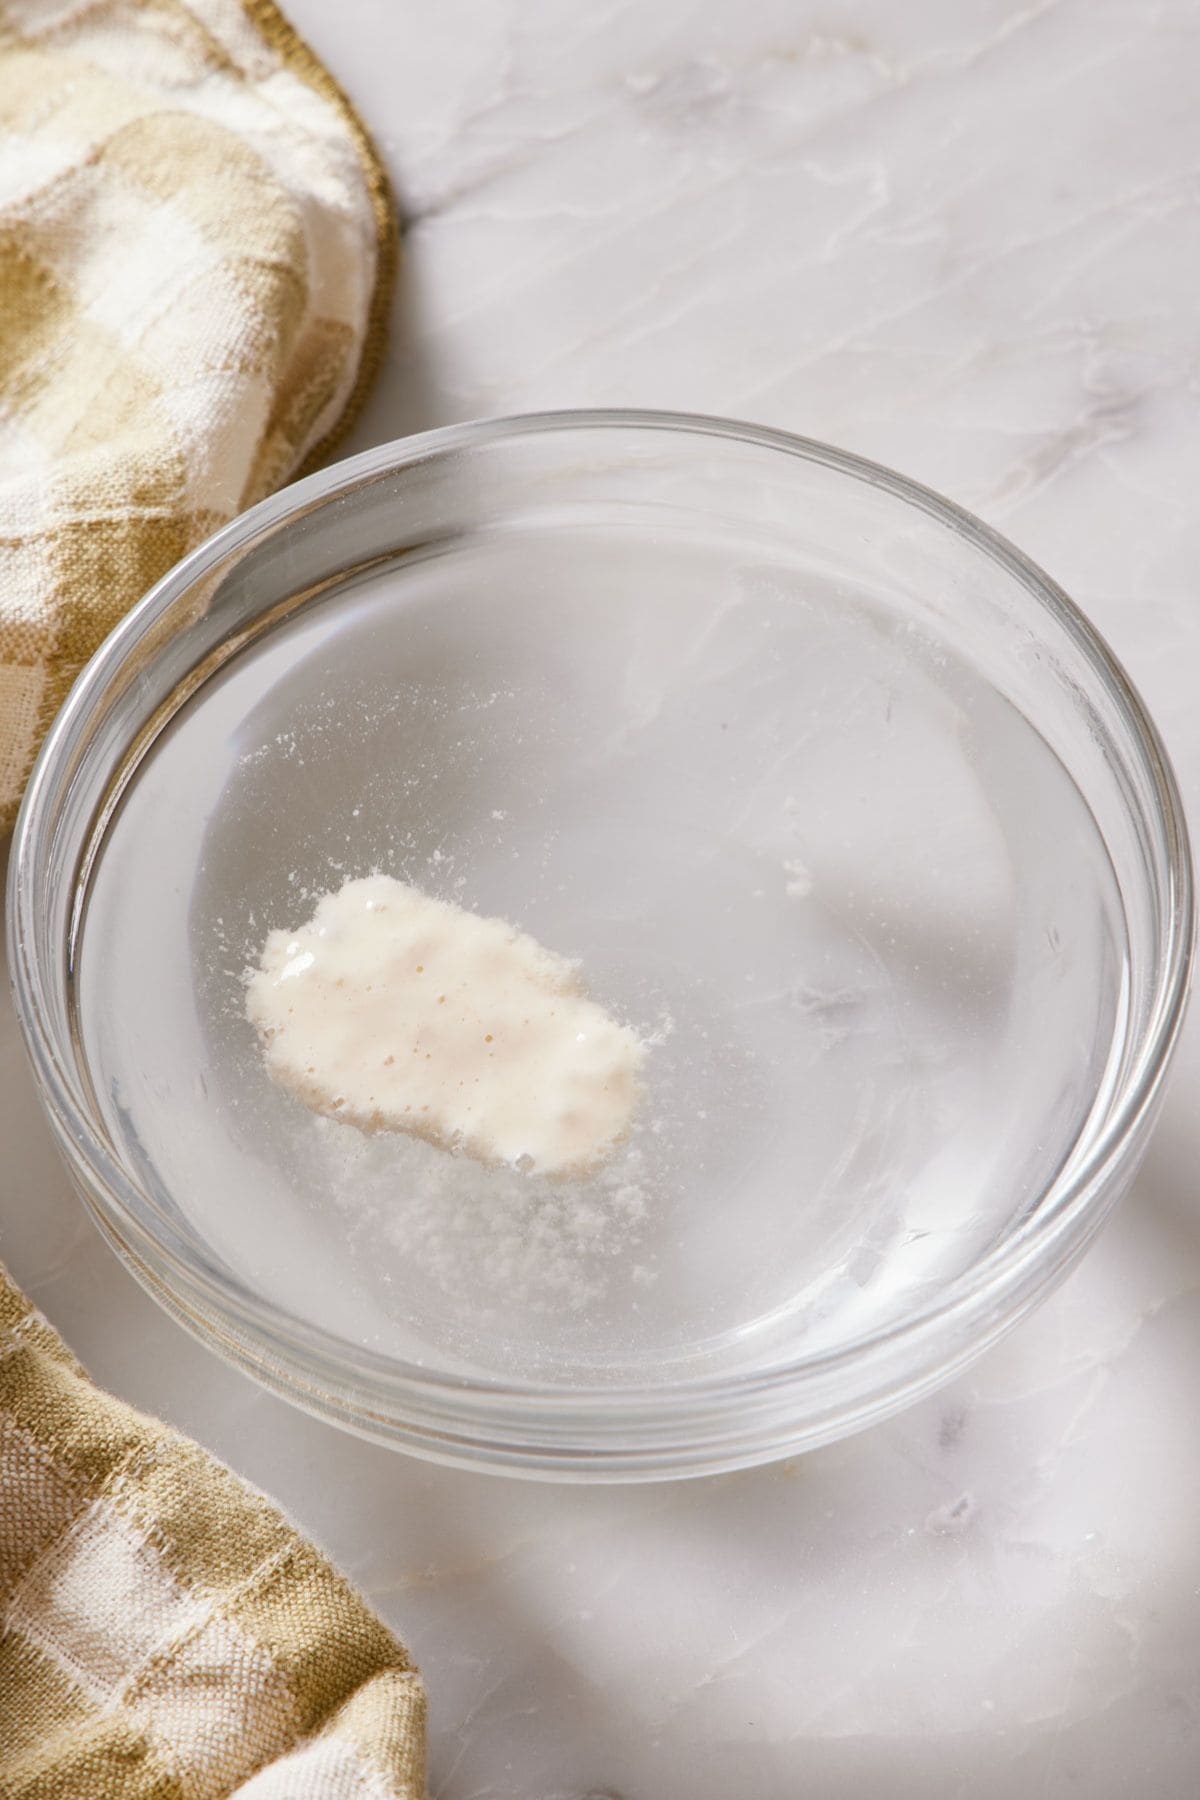
How To Tell When Starter Is Active: The Float Test
If you aren’t sure your starter has doubled in volume or risen long enough, you can do a float test.
How to do the float test: Scoop a small teaspoon of the starter into some cold water. If it floats, the sourdough starter is ready to use! The starter floating indicates that enough of the yeast has grown and activated to produce carbon dioxide (the bubbles you see in the starter), which makes the starter float.
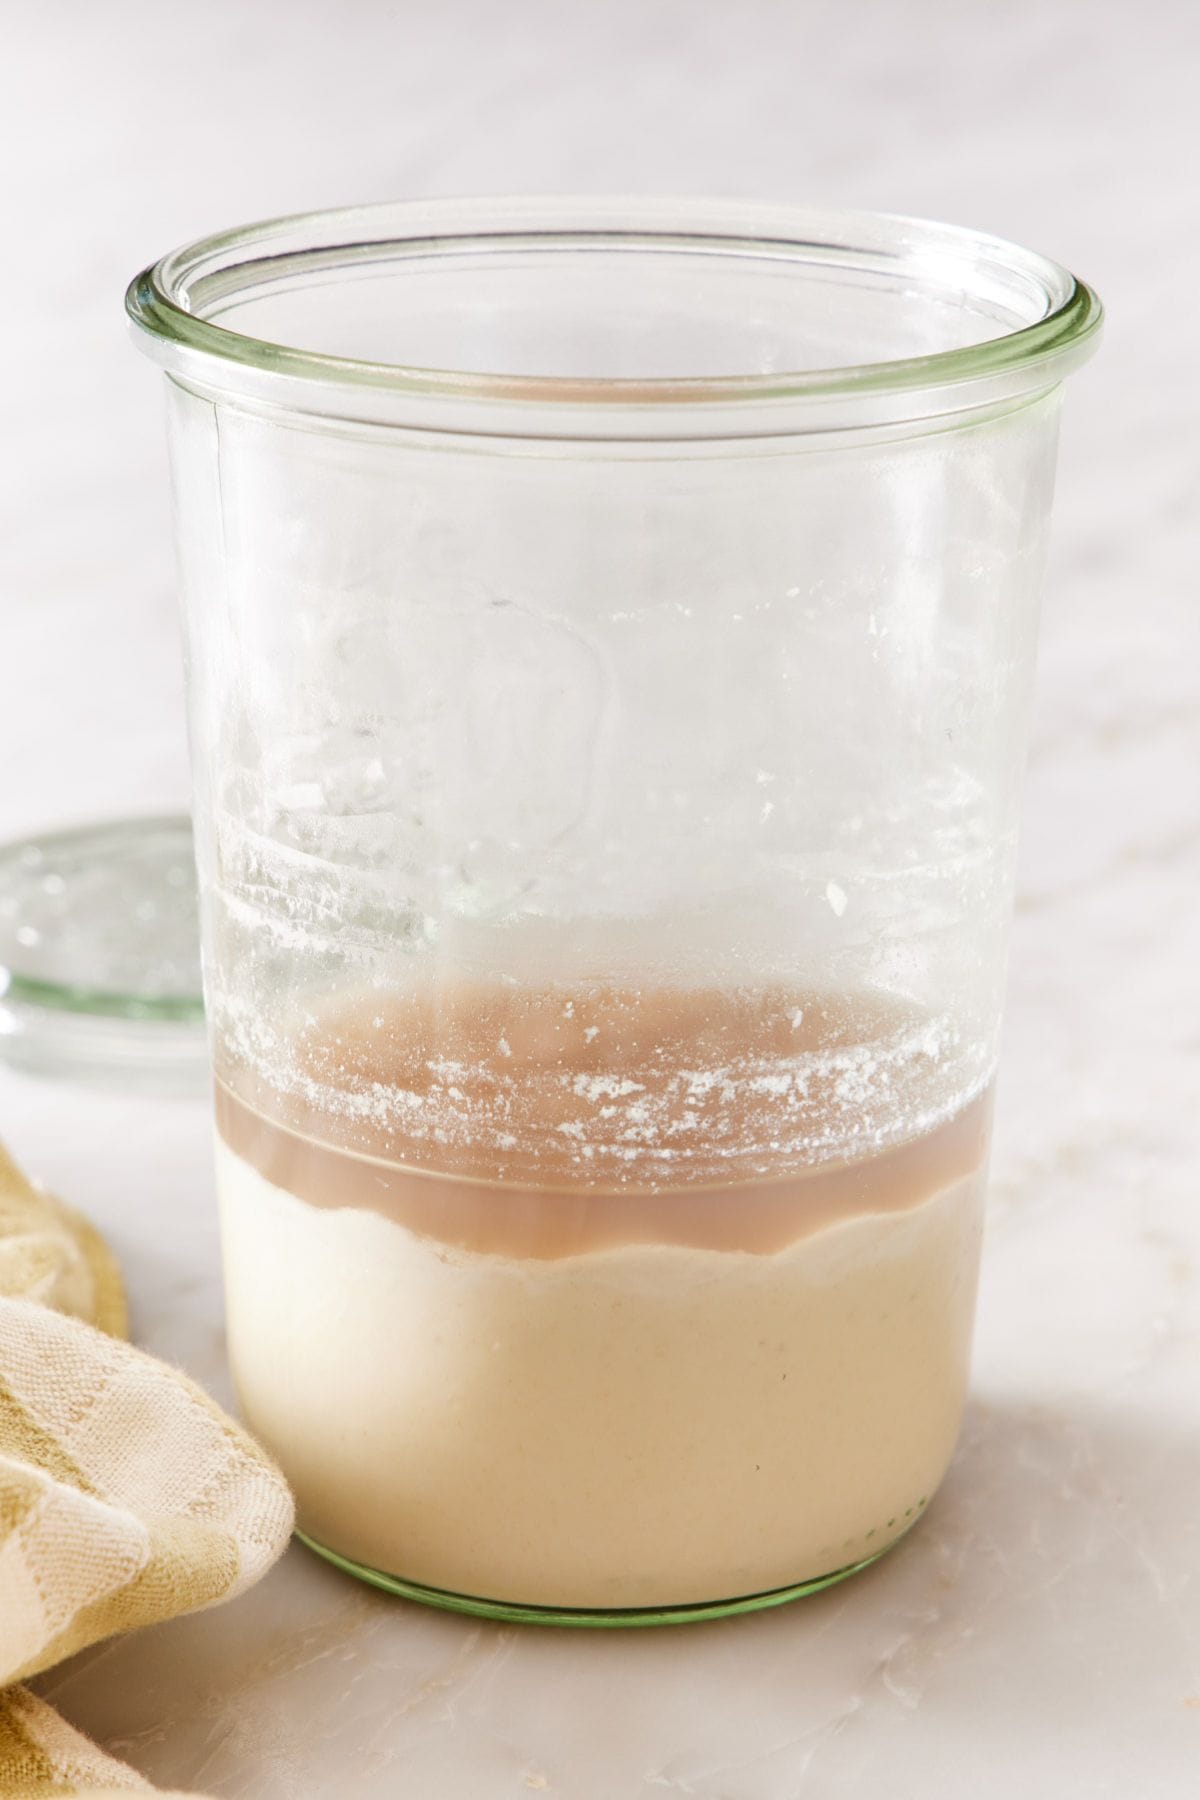
Why Is There Liquid On Top Of My Starter?
While it can look concerning, this substance is called “hooch,” and it is very normal. Hooch develops when the yeast has started consuming most of the food in the flour and has started converting the sugars and starches in the starter into ethanol (alcohol), forming a liquid on top. If the liquid is brown, like in the image below, just stir it into the starter before discarding and feeding it. If it is grey or blackish in color, pour it off before discarding and feeding your starter.
Don’t worry, your starter isn’t going to make your bread alcoholic! I discard a greyish hooch because it becomes very sour in flavor and has a pungent sour smell at that stage. I find the bread tastes better if I just pour it off.
Can I Use Sourdough Starter In Place Of Commercial Yeast?
Generally speaking, yes! You can replace active dry yeast with sourdough starter in almost any recipe, as long as you know a few things before you swap. You will need 20% starter to replace 1 (.25-ounce/7g) packet of dry yeast. To calculate this, find the total weight of flour and multiply it by 0.2. This will give you the weight of active starter you need for the recipe. For example, 3 cups (120g) of all-purpose flour will require 72g of active starter.
The starter should be active, so you don’t need to bloom it. Mix it with the liquid in the recipe, but don’t wait for it to get foamy; just continue on as directed. The rise times will likely be longer since the sourdough yeast grows more slowly than commercial yeast. Look for the visual indicators in the recipe to know when the dough is ready (i.e., double in size).
Pro Tips and Troubleshooting Sourdough Starter
Temperature matters for how fast the starter grows. Sourdough starter likes a warm and cozy environment to grow (about 75°F to 80°F is ideal). If your room is cold, place the jar in the oven with the light on or on the bread proof setting, or leave it somewhere warmer in your house. A starter can still grow when it is colder than its ideal temperature, but it will take longer. So if you do have a kitchen with a cooler ambient temperature and your starter isn’t bubbling after 24 hours, don’t be alarmed.
Smell your starter to help you know when it’s ready to use. A healthy, active starter will smell sour and slightly sweet or nutty. This is typical and ideal— the smell comes from the wild yeast and lactic acid bacteria fermenting in your starter. If the starter has no smell, it probably needs more time to grow and activate. The sour flavor will also develop with time as your starter ages and becomes more robust.
There is mold on my starter—what do I do? Unfortunately, you need to get rid of your starter and begin again. Sourdough starter does contain bacteria, but a good kind! Signs of fuzzy mold, slimy orange mold, or black spots in your starter mean it has grown bad bacteria or fungus and is not safe to use.
To help prevent this, set yourself up for success by using a clean glass jar. Always use a clean utensil when stirring your starter, and store the starter properly to prevent the development of bad bacteria. See my Storing and Maintaining Sourdough Starter Long-Term section just below the recipe card for more information.
Sourdough Starter Recipe
Equipment
- Scale (optional)
- Pint- or quart-sized glass container
Ingredients
For the Starter:
- ½ cup whole wheat flour (60g)
- ¼ cup filtered water (60g)
For Each Feeding:
- ½ cup unbleached all-purpose flour (60g)
- ¼ cup filtered water (60g)
Instructions
For the Starter:
- Day 1: In a clean glass jar (at least a pint or larger in size), combine the whole wheat flour and water. Stir together until the flour is fully combined. It should be the consistency of a paste or thick batter. If it’s dough-like, thin with a bit more water.
- Cover the container loosely with the lid and let the jar sit in a warm spot (75-80°F) for 24 hours.
- Day 2: It’s time to check the starter and feed it! Look for any bubbles that have formed on top. If it doesn’t appear bubbly, let the starter sit for another 12 to 24 hours or until you see signs of bubbles. When you do see bubbles or if a greyish liquid has formed on top, continue on with feeding. (This timing will depend on the ambient temperature where the starter is sitting. You may not see any activity within the first 24 hours if it’s cool.)
For Each Feeding:
- Once you see bubbles (this could be on day 2 or after another 24 hours), discard half of the starter, keeping about 60g in the container. Add ½ cup (60g) of all-purpose flour and about ¼ cup (60g) of water to the container, and stir until well combined. Mark the level of the mixture on the side of the container with a rubber band, marker, or piece of tape. Loosely cover and let it rest in a warm spot for another 24 hours.
- Day 3: Check the starter. It should be very bubbly and risen, almost doubling in volume. If you do not see much activity or the starter hasn’t increased in volume at all, continue to let the mixture sit until it does. (This could take another 24 hours.) The starter should start to take on a faint sour smell at this stage as well!
- Once risen, discard half of the starter and feed again with the same amounts of flour and water. Loosely cover and let the starter sit until it has doubled in size. This could be anywhere from 6 to 24 hours.
- Day 4 & 5: Continue discarding and feeding the starter 2 more times after it doubles in volume each time. (You will be creating a bit of discard or waste in this initial phase, but it’s worth it! Once your starter is healthy and active, you can use the discard in other recipes.)
- After the final feeding and rise, your starter is ready to use! It should have developed a pleasantly sour aroma that is easily noticeable when it is fed and active. You can follow my homemade Sourdough Bread recipe to put it to use.
Maintaining the Starter:
- To store your starter long-term, keep it refrigerated so it stays healthy. Before storing, discard and feed one more time. Let the starter sit in a warm spot just until it starts to rise (about 2 hours), then cover tightly and refrigerate. Feed it by repeating the same process of discarding and adding flour and water once every week to keep the starter healthy. The cold will slow the yeast down so that they feed on the flour more slowly. When ready to bake again, discard and feed as normal. Let the starter sit in a warm place until doubled in size. Use as directed in the recipe.
Notes
- Whole-grain rye flour can be used in place of whole wheat flour for the development of a starter. Like whole wheat flour, rye flour is full of micronutrients that help feed the good bacteria and yeast in a sourdough starter, fostering healthy and fast fermentation.
- Be sure to always use filtered water. Tap water or water containing chlorine can kill the good bacteria in your starter, either killing a healthy starter or keeping one from forming to begin with.
- A starter that has been stored in the fridge or left on the counter for too long can form a brown or greyish liquid on top. This is called “hooch” and is actually alcohol that forms when the yeast finishes feeding on the fresh flour. As long as there is no mold present on the surface, you can pour this off or just stir it back into the starter before feeding it.
Have you tried this recipe? Tag me today!
Mention @preppykitchen and tag #preppykitchen!
Storing and Maintaining Sourdough Starter Long-Term
Countertop or room temperature: This will require you to give your sourdough starter a lot more attention. You must feed it daily to keep it healthy and active, since the warm room temperature will allow the yeast to develop quickly. This is a good storage option for the baker who will be using their starter every day.
Refrigerator: This is how I store my sourdough starter, and I think it’s the best way to store a healthy starter long-term if, like me, you don’t use it every day but use it at least once a month! Before storing, discard and feed your starter one more time. Then, let it sit in a warm spot just until it starts to rise (about 2 hours), cover tightly, and refrigerate.
Ideally, discard and feed it once a week (though I have been known to forget about it for a month, and it is totally fine!). The cold will slow the yeast down so that they feed on the flour more slowly. I like to let it sit at room temperature for an hour before feeding it, so the starter is less thick and incorporates better with the fresh flour and water. Let the starter sit at room temperature for 2 hours or so again after feeding it to let the yeast start feeding on the fresh flour, then refrigerate it.
When ready to bake again, discard and feed as normal, letting the starter sit in a warm place until doubled in size. Use as directed in the recipe.
Why Isn’t My Starter Rising After Feeding It?
If you have neglected your starter for a while, it may need a jumpstart. Replace half of the all-purpose flour in the feeding with whole wheat flour. Just like with building the starter, the wheat bran in the whole wheat flour will provide a rich source of food for the yeast in the starter and help wake it back up. You may need to feed it a couple of times before using it again.
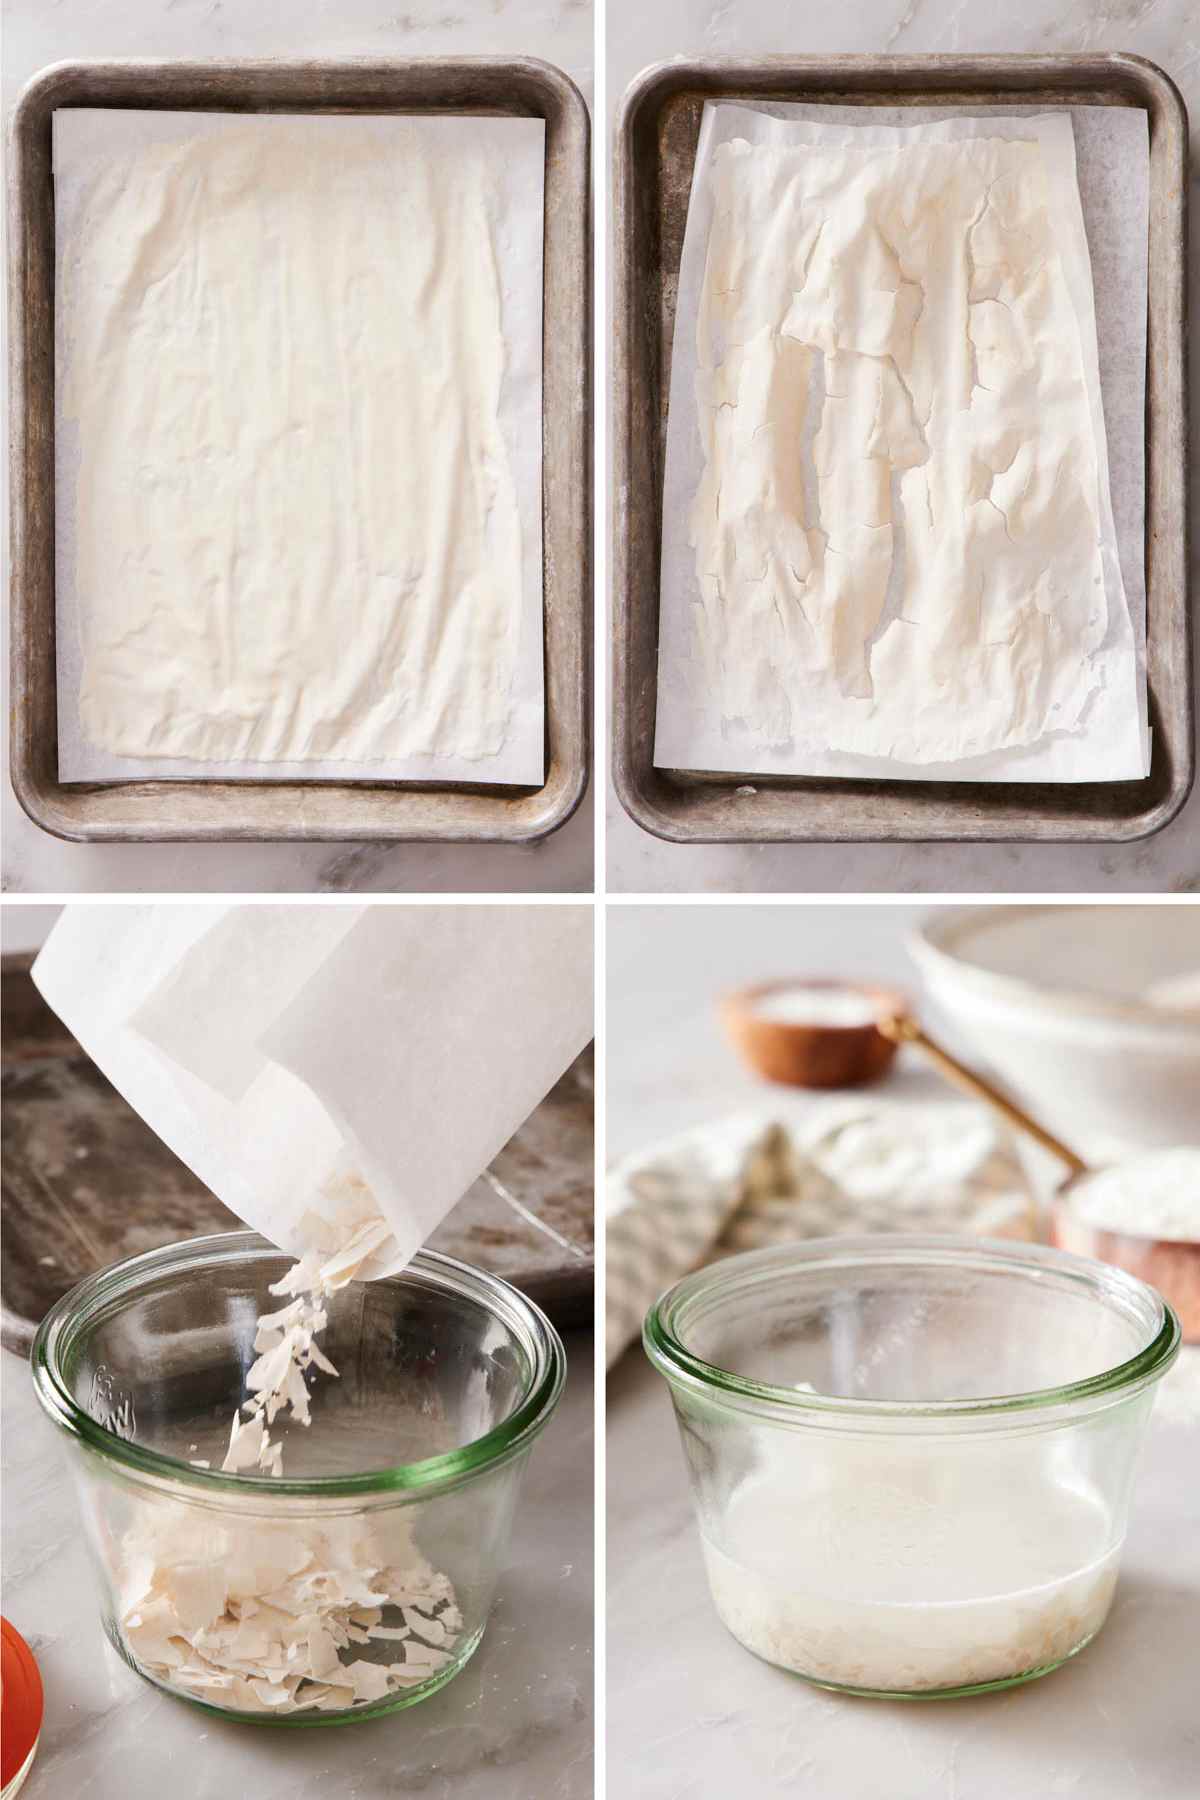
Pantry Stable Starter: Dehydrate It
Pantry-stable sourdough starter is an excellent option to preserve your starter if it needs to go a long time without being fed (for example, if you don’t plan on baking with your starter for several months).
Spread the sourdough starter into a very thin layer on parchment paper, and leave it out to dry (about 24 hours). Then crush it into flakes and store it in an airtight container in the pantry. To rehydrate it, weigh the starter flakes and add a 2:1 ratio of warm water (90°F-100°F) to the starter flakes.
So, if you have 30g of dehydrated starter, add 60g of water. Let them sit, mashing the mixture occasionally, until it is pasty and the starter has fully dissolved. This may take 1 to 3 hours, depending on how much starter you are rehydrating. At this point, feed it like you normally would, by adding equal amounts of flour and water!
Can I Use The Sourdough Discard?
Yes, but only once your starter is mature and active. After the final feeding (around Day 5 of the process), you will have a healthy, robust sourdough starter. At this point, you can use the discard in recipes such as sourdough waffles, sourdough pancakes, or sourdough biscuits. Before that, while you’re still nurturing the starter, you will need to throw out the discard when feeding the starter.
More Bread Recipes To Try
If making sourdough bread with homemade starter has you hooked on bread-making, try one of these bread recipes next!
With its thick, crispy crust and chewy crumb, my artisan bread recipe is a hit every time! It’s very forgiving, making it ideal for the beginner bread maker.
Soft, buttery, unbelievably fluffy brioche bread is wonderful when served with butter and jam, and is also one of my favorite breads to make French toast!
Irish soda bread is a no-knead, yeast-free bread made with pantry staples. You can also add flavor and texture by adding currants or raisins, fresh herbs, chopped nuts, and more!
Homemade focaccia is so simple to adapt to your menu. While it is perfect with a sprinkle of flaky sea salt and fresh herbs, you can flavor it any way you like.
Try my pillowy dinner rolls to add a special touch to any meal. You can also freeze them before baking, so you can prep a batch ahead of time!
If you’ve tried this sourdough starter recipe, then don’t forget to rate it and let me know how you got on in the comments below. I love hearing from you!


