As delicious as it is cheerful, this pineapple upside down cake recipe is full of tropical flavor from sliced pineapple and plenty of sweetness from maraschino cherries. When baked at the bottom of the cake pan in a butter and brown sugar mixture, the fruit becomes addictively caramelized and glossy. Once flipped, it makes the most beautiful cake topping!
Many easy pineapple upside down cake recipes call for yellow cake mix. I find the flavor of a homemade cake is far superior, and it’s also easy to mix up! The cake itself is fluffy but more dense than the average vanilla cake. It has a bit more structure to withstand the weight of the fruit topping while still being incredibly moist, tender, and never soggy. For more pineapple dessert recipes, try my hummingbird cake, millionaire pie, and dump cake.
Ingredients

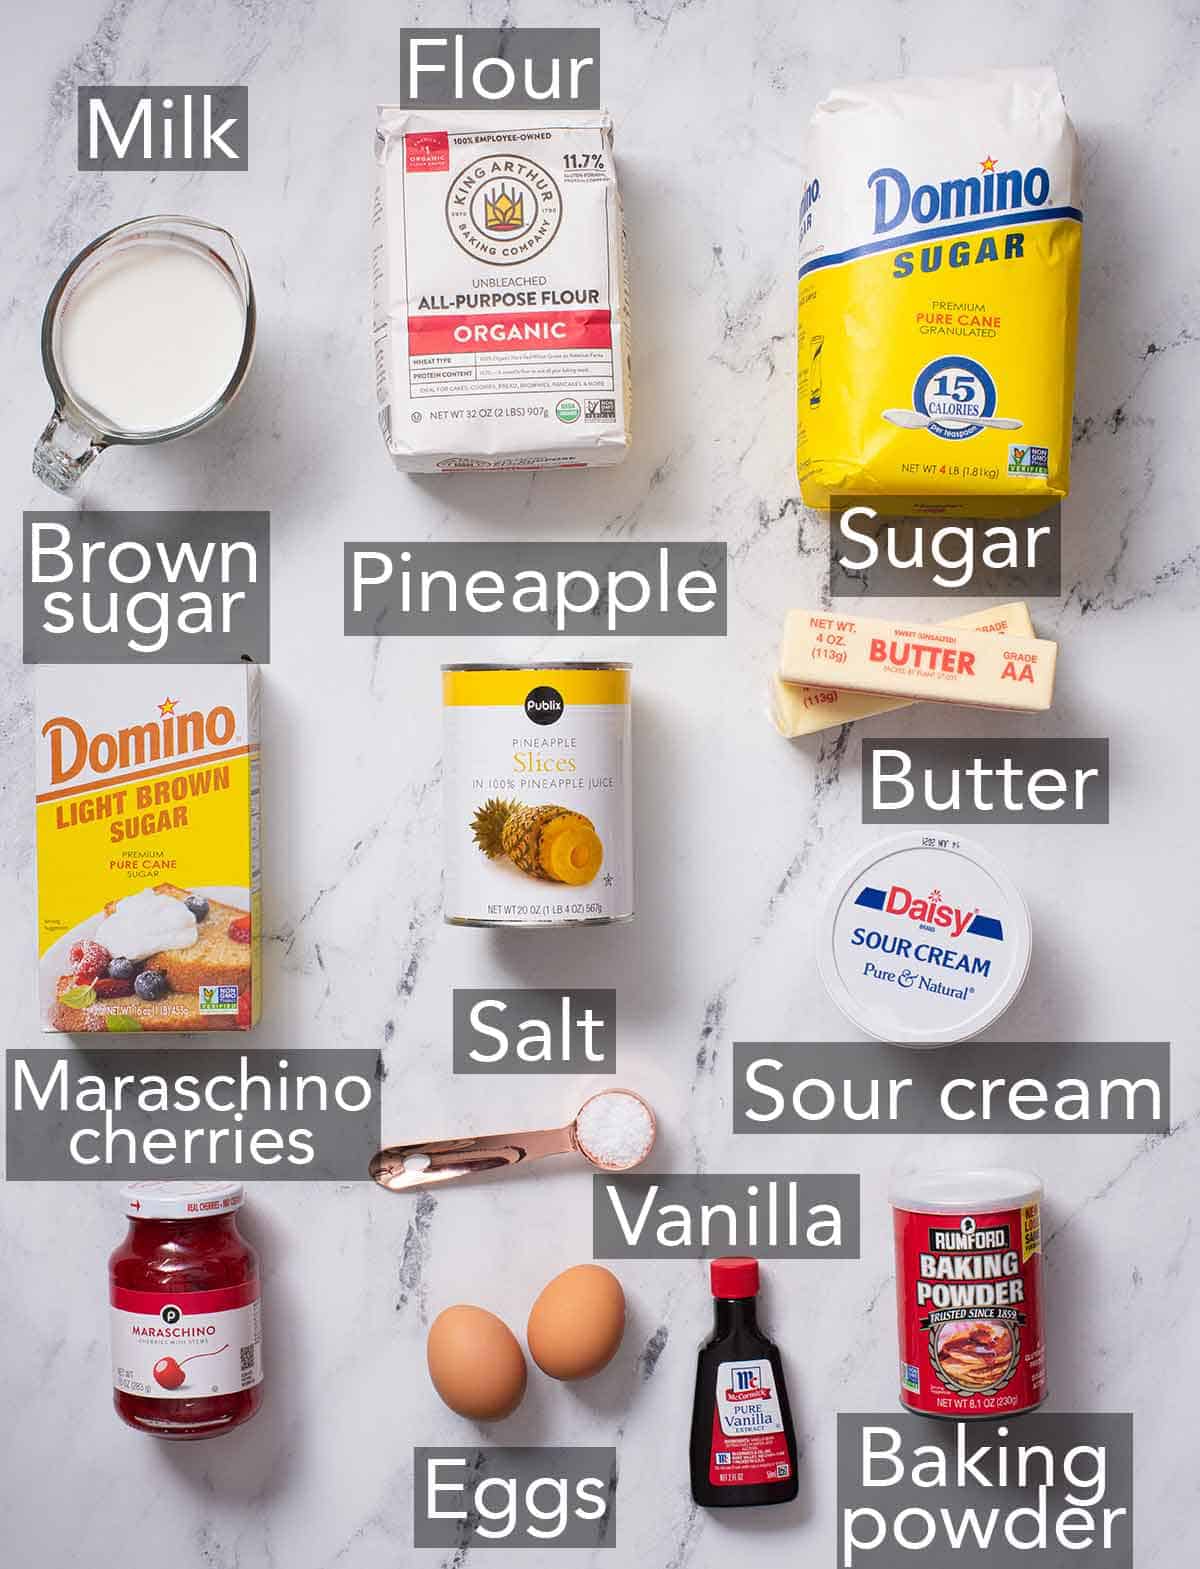
You only need a handful of basic ingredients and pantry staples to get started! You can find the full list of ingredients in the pineapple upside-down cake recipe.
Melted butter and brown sugar — melted unsalted butter and light brown sugar create the foundation of the cake assembly but turn into a shiny caramel coating on top of the cake once it’s baked and flipped upside down. This mixture also helps keep the cake from sticking to the pan. You can use dark brown sugar if desired.
Pineapple — canned pineapple slices in juice are the best option here. Avoid using pineapple canned in syrup as it will make the cake way too sweet.
Cherries — for the most classic look, use red maraschino cherries with the stems removed. But you can use any variety of canned or jarred cherries that you like. Avoid ones packed in thick syrup, though.
Butter and sugar — beating together softened unsalted butter and granulated sugar produces a light and fluffy mixture, incorporating air into the batter. This helps the cake rise and have the perfect texture.
Eggs — large eggs bind the ingredients in the batter and provide structure.
Sour cream — sour cream adds a hint of flavor and also tenderizes the cake. Plus, it keeps the cake moist for several days!

Pineapple Upside Down Cake Recipe
Video
Equipment
- 9-inch pie pan
- Mixer
Ingredients
For the Topping:
- ¼ cup unsalted butter melted (56g)
- ½ cup light brown sugar (110g)
- 1 (20-ounce, 567g) can pineapple slices in juice drained
- 20 maraschino cherries stems removed
For the Cake:
- 1½ cups all-purpose flour (180g)
- 1½ teaspoons baking powder
- ½ teaspoon kosher salt
- ½ cup (1 stick) unsalted butter room temperature (113g)
- ¾ cup granulated sugar (150g)
- 2 large eggs room temperature
- 2 teaspoons vanilla extract
- ⅓ cup sour cream room temperature (75g)
- ⅓ cup whole milk room temperature (80mL)
Instructions
- Preheat the oven to 350F.
For the Topping:
- Pour melted butter into a 9-inch round cake pan or pie dish. Swirl to coat the bottom and up the sides of the dish. Sprinkle brown sugar evenly over the bottom of the dish.
- Pat pineapple slices with a towel to remove excess liquid. Place one slice in the center of the pan. Arrange 6 more around it. If you’d like, cut 3 more slices in half and arrange standing up around the sides of the pan. Place a cherry in the center of each slice and to fill in any other gaps between slices.
For the Cake:
- In a medium bowl, whisk together flour, baking powder, and salt.
- In a large liquid measuring cup, whisk together sour cream and milk.
- In a large mixing bowl or the bowl of a stand mixer with the paddle attachment, beat butter until creamy. Add the sugar and beat on medium speed until light and fluffy, about 3 minutes.
- Add the eggs one at a time, beating until well combined before adding the next. Beat in the vanilla.
- Beating on low speed, add a third of the flour, mixing just until combined. Add half of the sour cream mixture, beating just until combined. Continue alternating with the remaining flour and sour cream mixture. Stop occasionally to scrape down the bowl.
- Pour the batter into the cake pan and carefully spread to the edges of the pan.
- Place the cake pan on a large baking sheet and bake for 40 to 45 minutes, or until a toothpick inserted into the center comes out with a few moist crumbs. You may want to cover with foil after 30 minutes if the cake is already golden brown.
- Cool the cake on a wire rack for 15 minutes. Place a cake plate or stand over the top of the cake and carefully invert. Cool for another 20 minutes or completely before serving.
Notes
- Blot the pineapple and cherries. Excess liquid can lead to a soggy cake.
- Weigh the flour. Using a kitchen scale is the most accurate way to measure flour. If you don’t have one, make sure to fluff the flour first and then spoon it into your measuring cup. Then, level it off with the back of a knife to ensure you don’t overpack the flour.
- Use room temperature ingredients. For the cake batter, the eggs, butter, milk, and sour cream should be at room temperature to ensure they incorporate into the batter evenly. If you’ve forgotten about the eggs, you can quickly bring them to room temperature by placing them in a large bowl and covering them with warm tap water for 5 minutes. See my post for how to soften butter if you need a quick option for butter!
- To boost the pineapple flavor, use the pineapple juice left from the can of slices in place of the milk. Be sure that the pineapple slices you use are packed in juice, not syrup.
Nutrition
How To Make Pineapple Upside Down Cake

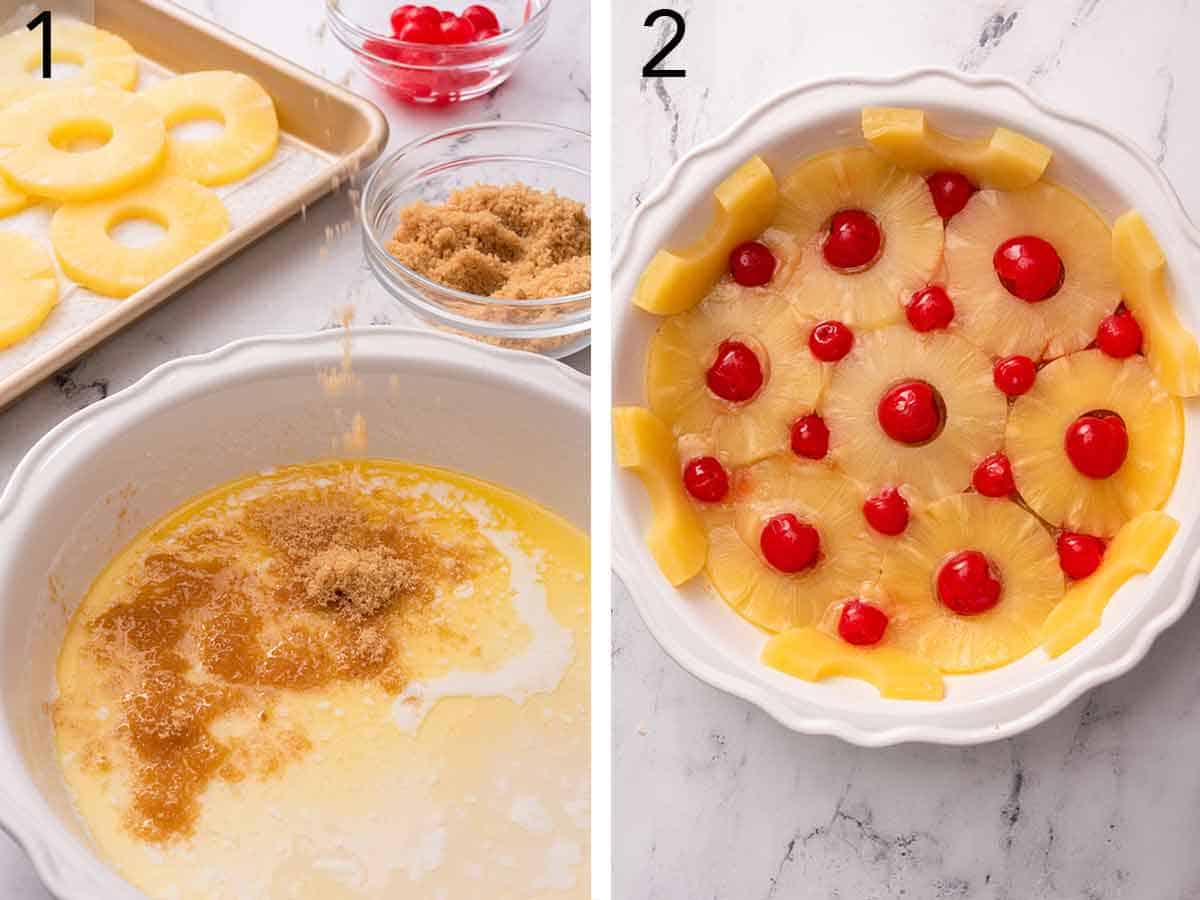
1. Swirl the butter in a 9-inch round cake pan or pie dish so the bottom, as well as the sides of the pan, are coated. Sprinkle the bottom of the pan evenly with brown sugar.
2. Pat the pineapple slices with a paper towel to remove any excess liquid. Making a single layer, place one slice in the center of the pan and arrange 6 more around it. You can also cut 3 more slices in half and stand them up around the sides of the pan. Place a maraschino cherry in the center of each slice. Use more cherries to fill in any gaps between slices. Set aside for the moment.

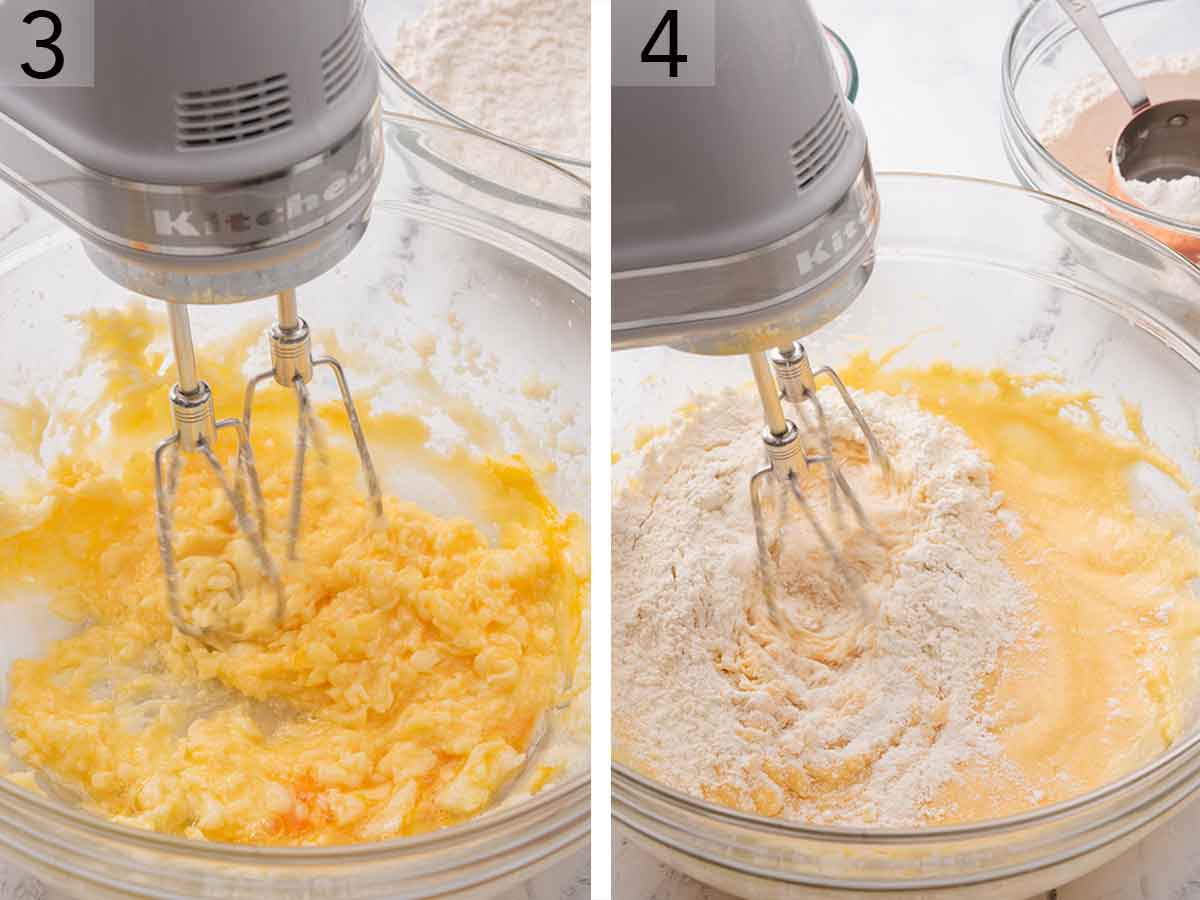
3. In a medium bowl, whisk together the dry ingredients– flour, baking powder, and salt and set aside. Whisk together the wet ingredients in a large liquid measuring cup– sour cream and whole milk and set aside. In the large mixing bowl of a stand mixer fitted with the paddle attachment, beat the softened butter until creamy. Add the sugar and beat for about 3 minutes on medium speed until fluffy. Then, add the eggs one at a time, beating each one until they are well combined. Beat in the vanilla extract.
4. With the beater on low speed, add a third of the dry ingredients to the mixing bowl, mixing just until combined.

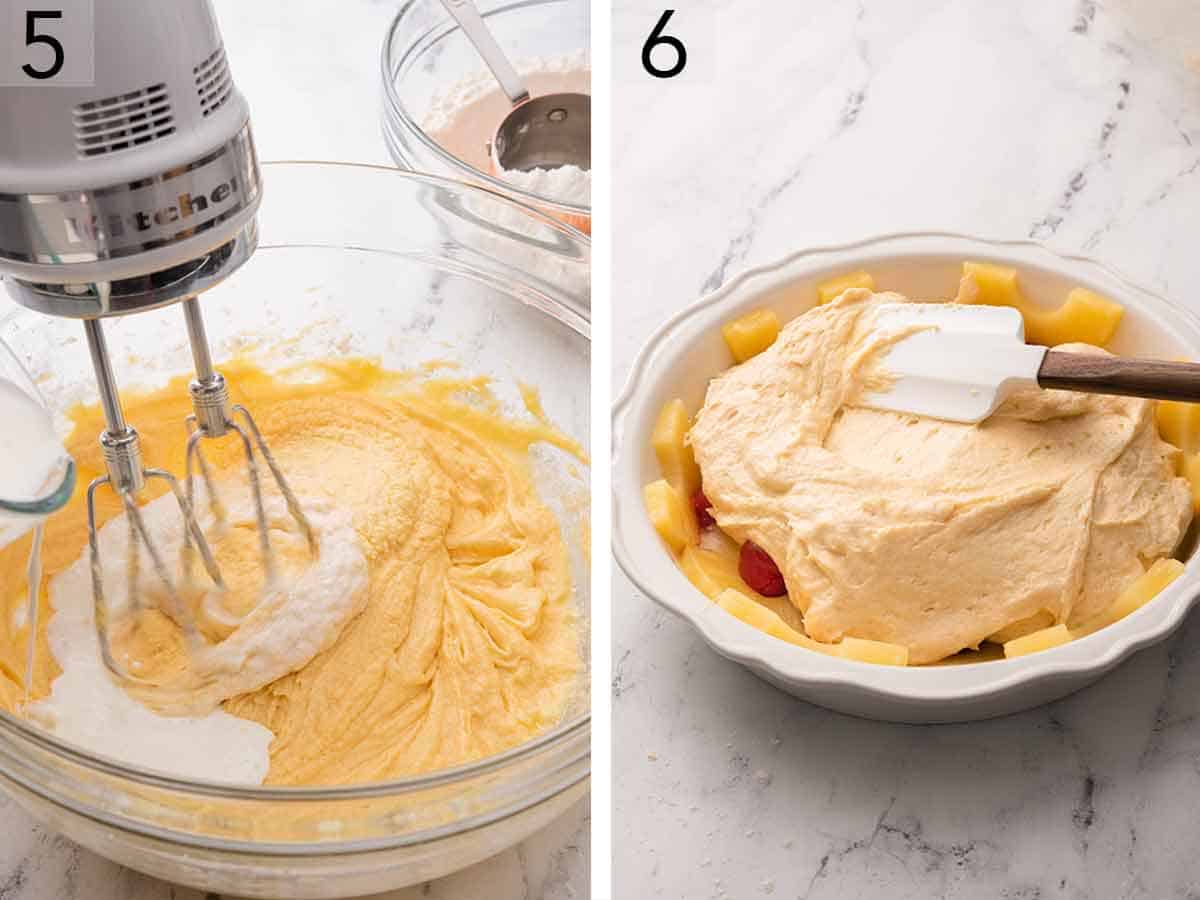
5. Add half of the sour cream mixture and beat until just combined. Continue alternating between the two until the batter is combined.
6. Pour batter and spread it into an even layer in the cake pan containing the pineapple and cherries. Place the pan on a rimmed baking sheet and bake at 350°F for 40 to 45 minutes, or until a toothpick inserted into the center comes out with a few moist crumbs but no raw batter. Cool the cake in the pan on a wire rack for 15 minutes. Then, place a cake serving plate or stand over the top of the cake and quickly but carefully invert it. Carefully remove the pan, and cool for at least 20 minutes before slicing and serving.
Tips For Flipping The Cake
- Let it cool slightly (but not too long!). Letting the pineapple upside down cake cool for 20 minutes allows time for the topping to set just enough to still release from the pan but not fall apart. If it cools for too long, the topping will likely stick to the pan.
- Loosen the edges if needed. If there are any spots where the cake edge touches the pan after baking, gently loosen them so they don’t stick and tear when you invert the pan.
- Place a plate on top first. Use a plate or cake stand that’s larger than the pan.
- Flip quickly! The quicker you invert the cake, the less chance there is of any mistakes. It’s all about confidence– be careful but don’t hesitate!
- Slowly remove the cake pan after flipping it. Doing this slowly is helpful in case there is any sticking. Gently tap or shake the pan if needed. All the butter you added at the very beginning tends to make the cake pan removal super easy.
- Use oven mitts. The pineapple upside down cake will still be hot even after the 20-minute cooling time, so protect your hands!
Can I Use Different Fruit For The Topping?
Yes! You can swap the pineapple for fresh blueberries or halved strawberries, sliced fresh or canned peaches. You can also skip the pineapple entirely and use only cherries (canned or fresh), or try my orange upside down cake for something a little different.

How To Serve and Store
This cake doesn’t require any decorating! However, you can add a dollop of whipped cream or vanilla ice cream to each slice when serving. Once flipped, you can serve the cake warm or at room temperature. I prefer it warm, so I’ve included instructions on how to warm up leftover cake!
Storing Leftovers: Place leftover pineapple upside down cake in an airtight container and refrigerate for up to 5 days. Let it come to room temperature, or heat it gently in the oven (covered with aluminum foil) before serving.
Freezing Leftovers: To freeze, let the cake cool to room temperature first. Then, wrap individual slices or the entire cake in plastic wrap and a layer of aluminum foil before freezing for up to three months. When ready to eat, thaw overnight in the fridge and then bring to room temperature before enjoying.
Reheating: You can reheat leftovers by covering the cake with some foil and placing it in a 350°F oven until the cake has warmed through, about 10 minutes. If you’re only reheating a single slice, feel free to use the microwave or air fryer.
Pro Tips For Making This Recipe
- Blot the pineapple and cherries. Excess liquid can lead to a soggy cake.
- Weigh the flour. Using a kitchen scale is the most accurate way to measure flour. If you don’t have one, make sure to fluff the flour first and then spoon it into your measuring cup. Then, level it off with the back of a knife to ensure you don’t overpack the flour.
- Use room temperature ingredients. For the cake batter, the eggs, butter, milk, and sour cream should be at room temperature to ensure they incorporate into the batter evenly. If you’ve forgotten about the eggs, you can quickly bring them to room temperature by placing them in a large bowl and covering them with warm tap water for 5 minutes. See my post for how to soften butter if you need a quick option for butter!
- To boost the pineapple flavor, use the pineapple juice left from the can of slices in place of the milk. Be sure that the pineapple slices you use are packed in juice, not syrup.

Frequently Asked Questions
Yes! Peel, core, and slice the fresh pineapple. Be sure to blot them as well. I recommend baking for an extra 3 to 5 minutes to ensure the slices soften and both the pineapple and cake cook through.
Make sure to coat the pan well with the melted butter first. This not only forms a caramelized layer on the fruit but also acts as a way to grease the pan. Using a non-stick pan also adds an extra layer of insurance!
There’s a fine line between moist cake and soggy cake. To prevent the pineapple upside down cake from getting soggy, don’t skip blotting the pineapple slices and maraschino cherries. And be sure to bake until only a few crumbs come out on a toothpick inserted into the cake. You should not have any raw batter on the toothpick.
If you’ve tried this pineapple upside-down cake recipe, then don’t forget to rate it and let me know how you got on in the comments below. I love hearing from you!


Sherry says
Came out Sooper
Thx john☺️❤️
Victoria Davis says
Made this cake yesterday for our family, everyone LOVED it! Not too sweet which I love and very light and fluffy.
Margaret says
I made this tonight and it followed the instructions exactly. Mine turned out perfect. My husband said he had never had one this good before. Rich and buttery but fresh tasting from the fruit. He says better than his mother’s. Thanks John. You never disappoint.
Mary says
Older Comments prompt needs repair. Won’t work on ANY of your recipes. Always helpful to read Comments.
Dana says
So I’ve never really been a fan of pineapple upside down cake..until now. My husband requested this cake, and for such a simple cake, it packs a punch of flavor. I will be making this again and again. It baked so beautifully and came out so clean. I wish there was a way to share our photos here, but you’ll have to just take my word for it. Amazing!!
Patricia Gibson says
The batter was not thick. More on the runny side. Instead of 2 tablespoons of rum I substitute for vanilla extract. I used a 9 inch Springform pan. Went to bake it and noticed that the batter was leaking out from the bottom sides . I purchased my pan from NordicWare. Help John K.
Ronak Mehta says
The cake looks perfect and fabulous to bake for a special day. Yes, its definitely the best pineapple Cake. Lovely!!
karen S says
is it possible to add less sugar?