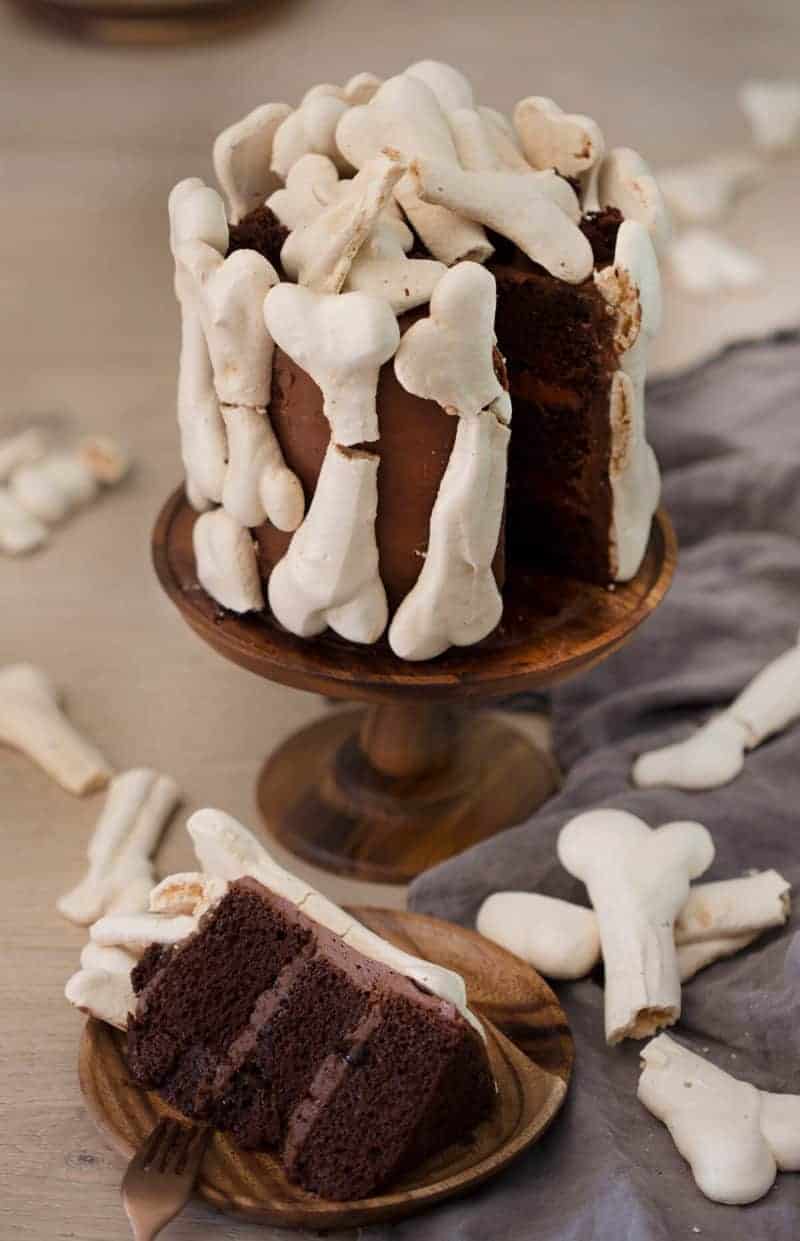
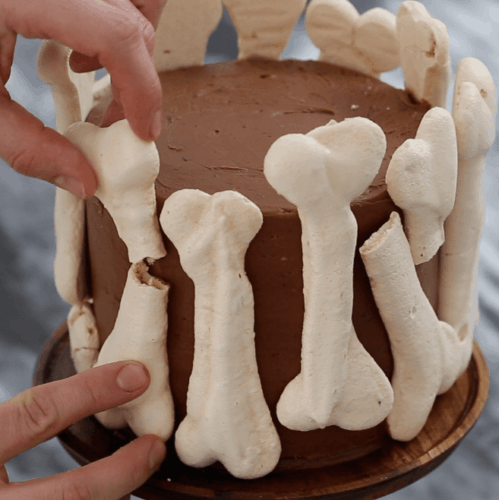
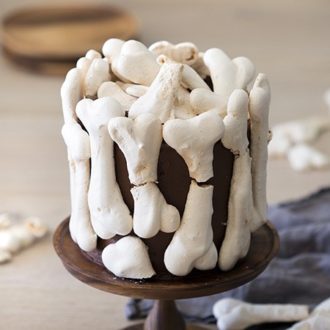
Rich chocolate cake layers paired with a chocolate buttercream, chocolate ganache all covered in meringue bones. The effect is striking and perfect for Halloween but the execution is so easy! I’ve actually seen a bunch of meringue bone cakes online and just finally got around to trying my hand at one. If you’re in the mood to try another meringue recipe then don’t forget to check out my meringue cookie!
Pro Tips for the Best Bone Cake
- Measure your flour correctly! Adding too much flour to the recipe is the most common mistake. The best, and easiest way to measure flour is by using a scale. If you don’t have one then fluff your flour with a spoon, sprinkle it into your measuring cup, and use a knife to level it off.
- Broken bones are no problem so don’t worry if they crack! I think they make the cake look all the more menacing. If you really want to up the gore factor you can add some raspberry reduction for blood and drizzle that all over. I opted to skip that as my husband is a bit squeamish…
- To get FLAT layers that are moist inside and out try using cake strips! You can buy a set on the shop page or make your own from foil and paper towels at home. I made a whole blog post on it so check it out if you’re interested!
- Don’t take the “bones” out of the oven too soon! They need to dry out while the oven is off.
- If you find cake decorating to be a bit intimidating then check out my How to Decorate a Cake post, it has lots of helpful tips and a full how to video.
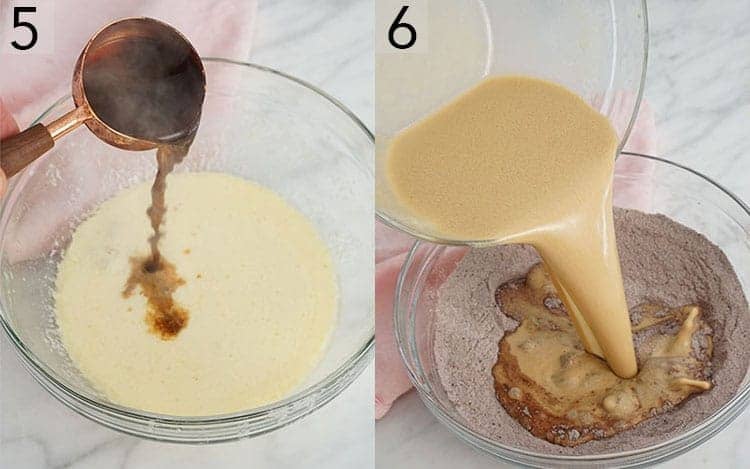
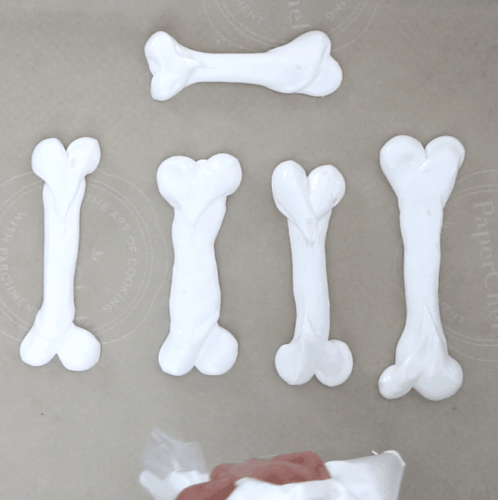
- Piping the bones is really easy. Just whip up a batch of french meringue, transfer to a piping bag and snip the tip off. Then pipe the bone shaped onto a baking sheet lined with parchment paper. The hardest part is waiting for them to dry out in the oven. It takes forever and is so tempting to take them out early.
Frequently Asked Questions
What Kind of Cocoa Powder Should You Use?
I love using a high-quality Dutch processed cocoa powder. Dutch processed cocoa powder is darker, less acidic and fudgier in baked goods. You’ll usually get less rise out of it though. My go to company is Valrhona but there are lots of great brands out there, including Callebaut, Ghirardelli and lots of organic and fair trade options too!
How do I know when the cake is done?
A cake layer is done when the center springs back after being lightly pressed and the edge pulls away from the pan. A skewer will come out clean when inserted in the center.
What’s the best way to prep the pan?
I wipe my pans down with butter then flour them. If you have bad luck with cakes breaking when removed from the pans you can use a circle of parchment paper on the bottom for an easy release.
How to Make a Meringue Bone Cake

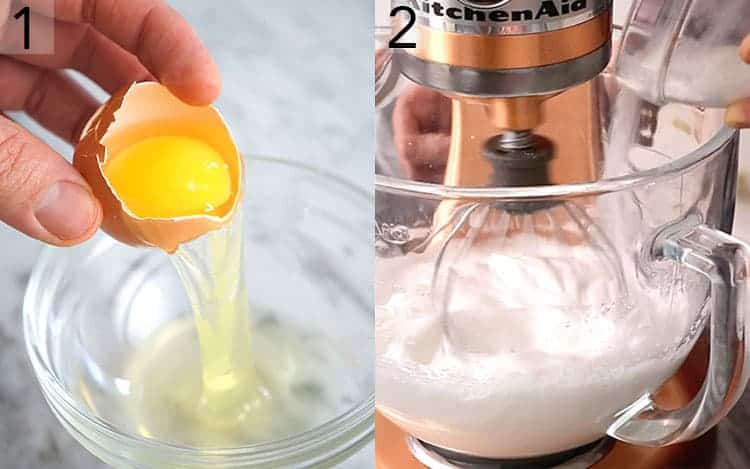
1. For the meringue; You’ll want to line a baking sheet with parchment paper. clean your mixing bowl to make sure it’s completely free of residual fats. I like to wipe mine down with vinegar. Separate the whites one at a time into a small bowl transferring a white into the mixing bowl after each egg has been separated.
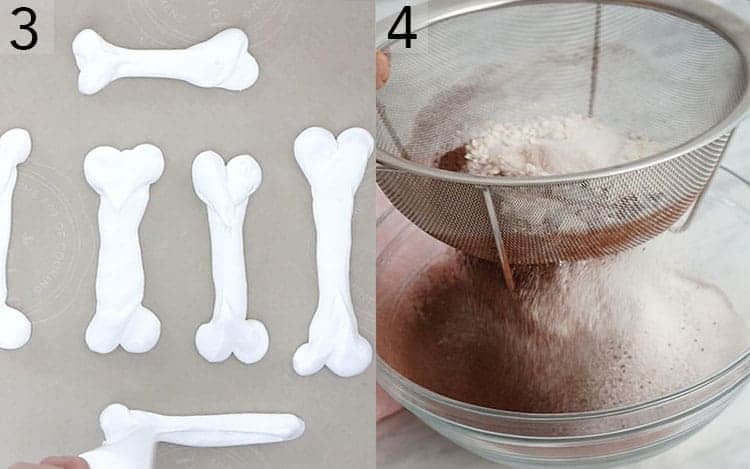
2. Whisk the egg whites, salt and cream of tartar with a wire whisk on low working your way up to high. Once the eggs froth up SLOWLY sprinkle the sugar in. Mix on high until stiff marshmallowy peaks form.
3. Cut off the edge of a piping bag and fill it with the meringue. Pipe the bone shapes onto the parchment paper (I made about 14 bones). Bake them for about 60 minutes at 215 degrees then use a wooden spoon to crack the oven open and allow them to cool in the over for another hour.
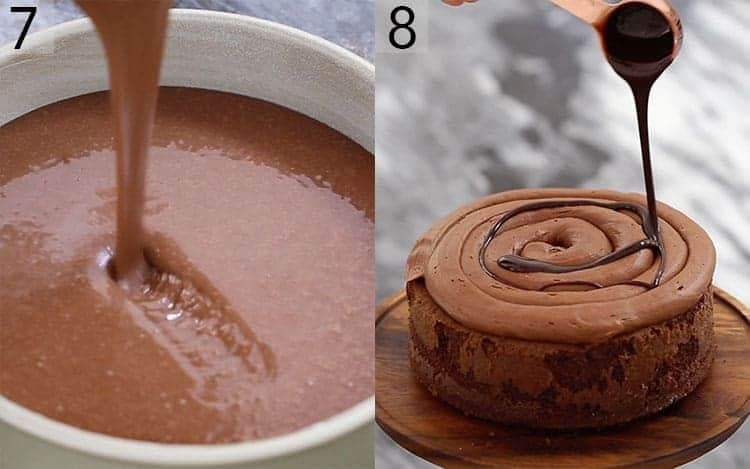
4. To make the cake; butter and flour three 9-inch cake pans. I highly recommend using cake strips for a more even bake! Sift together the dry ingredients (including the sugar) into a large bowl and whisk to combine.
5. Now time for your wet ingredients! Mix all the wet ingredients into a large bowl and whisk together making sure everything is well incorporated.
6. Go ahead and add your wet ingredients to the dry ingredients. Whisk them together to combine and if you’re working with a stand mixer, attach the bowl to it then mix on level 2 for two minutes.
7. Distribute the batter evenly to the three pans and bake for about 35-40 minutes at 350 degrees F or until a toothpick inserted in the center comes out clean. I also recommend rotating the pans halfway through the bake. Allow time to cool for 10 minutes then invert onto wire racks to cool fully. While the cake is in the oven it’s time to make the buttercream. Sift your confectioners sugar and set it aside. In a small bowl combine the semi sweet chocolate with 3 tablespoons of cream Microwave for 40 seconds on 50% power. Stir to combine then set aside. Whip the butter, salt, and cocoa powder for a few minutes using a paddle attachment. Scrape the bowl down then beat in the sifted confectioners sugar and add the cream. Beat in the melted and cooled chocolate ganache. You may add the optional vanilla and espresso at this step.
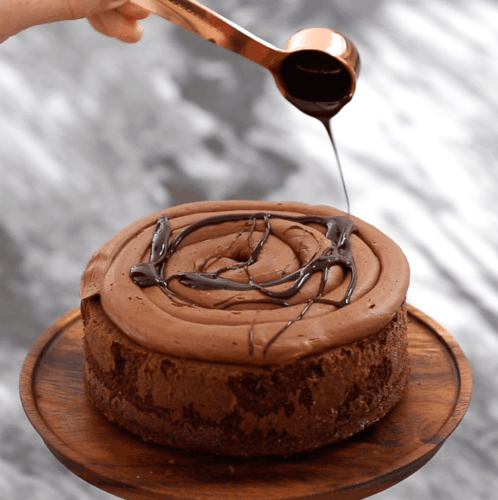
8. Build the cake by piping buttercream onto the first layer then drizzling with ganache. Repeat until the cake is complete then cover in a layer of buttercream.
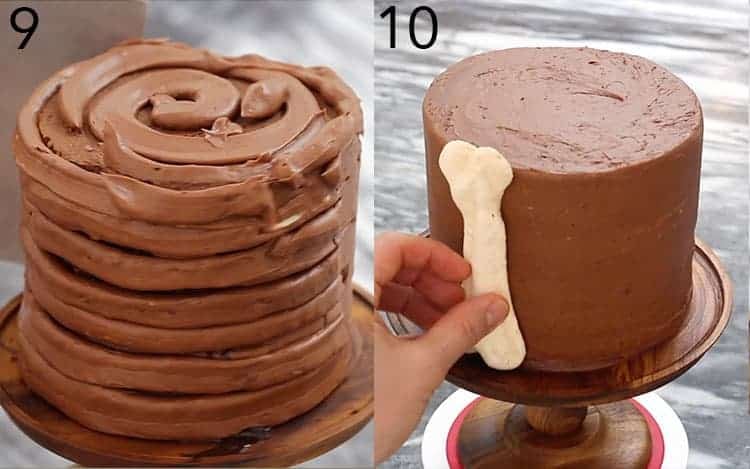
9.Smooth the buttercream using a bench scraper and offset spatula if you have them. A rough smooth is fine though since you’ll be covering the cake with meringue bones!
10. Finally you can decorate your cake with the bones! Place the meringue bones on the outside layer of the cake and create a little pile of bones for the top. I broke some of mine in half to make the cake look more menacing. If you REALLY want a gore factor, you can add some raspberry reduction for blood and drizzle that all over! Have fun!
If you’ve tried this cake then don’t forget to rate the recipe and let me know how you got on in the comments below, I love hearing from you!
Meringue Bone Cake
Video
Ingredients
For the Cake:
- 1/2 cup sour cream 120mL
- 1 cup buttermilk 240mL
- 3 large eggs room temp
- 1 1/2 cup strong hot coffee 360mL I use a Moka pot so it's basically espresso
- 3/4 cup vegetable oil 180mL
- 1 tbsp vanilla extract 15mL
- 3 cup all-purpose flour 360g
- 2 2/3 cup granulated sugar 535g
- 1/2 cup cocoa powder 65g
- 1 1/2 tsp baking powder 6g
- 1 tbsp baking soda 18g
- 1 tsp kosher salt 5g
For the Chocolate Buttercream:
- 1 1/2 lb confectioner's sugar 450g
- 1 1/2 cup unsalted butter 375g room temperature
- 1/4 cup heavy whipping cream 60mL
- 1/4 cup Cocoa powder 30g
- 1 tsp vanilla 5mL optional
- 1 tsp espresso 5mL optional
- 1/4 tsp salt 1g
- 1/4 cup semi-sweet chocolate 45g
For the Ganache:
- 3/4 cup chocolate 135g semi-sweet
- 1/3 cup heavy whipping cream 80g
For the Meringue:
- 3 egg whites large
- 3/4 cup granulated sugar 150g
- 1/4 tsp cream of tartar 4g
- 1/2 tsp vanilla extract 3mL
- 1 pinch kosher salt
Instructions
For the Meringue:
- Preheat oven to 215 degrees. Line a baking sheet with parchment paper.
- In a very clean bowl, whisk egg whites with a wire whisk on medium low. (I wiped the inside of my bowl with a lemon.) Add cream of tartar, vanilla and salt
- When your egg whites are foamy, begin to beat on medium, then gradually add sugar. Add remaining sugar when whites reach a "soft-peak" stage. Increase speed to medium-high, until "firm-peaks" appear.
- Cut off the edge of a piping bag, fill with meringue. On the parchment, piping bone-like shapes. Bake for about 60 minutes. Use a wooden spoon to crack the oven open open and allow to cool in the oven for another hour.
For the Cake:
- Butter and flour three 8-inch cake pans. I highly recommend using cake strips for a more even bake.
- Sift together the dry ingredients (including the sugar) into the bowl of a stand mixer and whisk to combine.
- Add the wet ingredients into a large bowl and whisk together.
- Add the wet ingredients the dry ingredients.
- Whisk to combine then mix on level 2 for two minutes.
- Distribute batter evenly to the three pans and bake for about 35-40 minutes at 350F or until a toothpick inserted in the center comes out clean. I recommend rotating the pans halfway through the bake.
- Allow time to cool for 10 minutes then invert onto wire racks to cool fully.
For the Chocolate Buttercream:
- In a small bowl combine the semi-sweet chocolate with 2 tbs of cream then microwave for 40 secs on half power. Stir to combine then set aside.
- Whip the butter, salt, and cocoa powder for about 5 minutes using a paddle attachment.
- Scrape the bowl down and beat in the confectioner’s sugar slowly.
- Add the cream.
- You may add the optional vanilla and espresso at this step.
- Mix until you have a fluffy, even consistency.
- Beat in the melted and cooled chocolate ganache.
For the Ganache:
- Melt the chocolate and cream in a microwave for a few 30 second bursts at 50% power.
- Transfer to a piping bag with and cut the tip off.
For the Assembly:
- Spread chocolate buttercream and chocolate ganache between each layer.
- Spread the buttercream on the outside of the cake. Smooth it.
- Add a smooth coat of chocolate buttercream to the surface of the cake.
- Use meringue bones to decorate outside layer.
Notes
- Broken bones are no problem so don't worry if they crack! I think they make the cake look all the more menacing. If you really want to up the gore factor you can add some raspberry reduction for blood and drizzle that all over. I opted to skip that as my husband is a bit squeamish...
- If you’re not using 6-inch pans, double the recipe for 8-inch pans or triple the recipe for 9-inch pans.
- To get FLAT layers that are moist inside and out try using cake strips! You can buy a set online or make your own from foil and paper towels at home. I made a whole blog post on it so check it out if you’re interested!
- Don't take the "bones" out of the oven too soon! They need to dry out while the oven is off.
Nutrition


