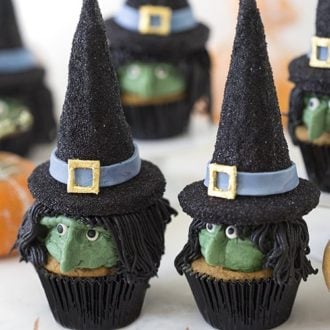
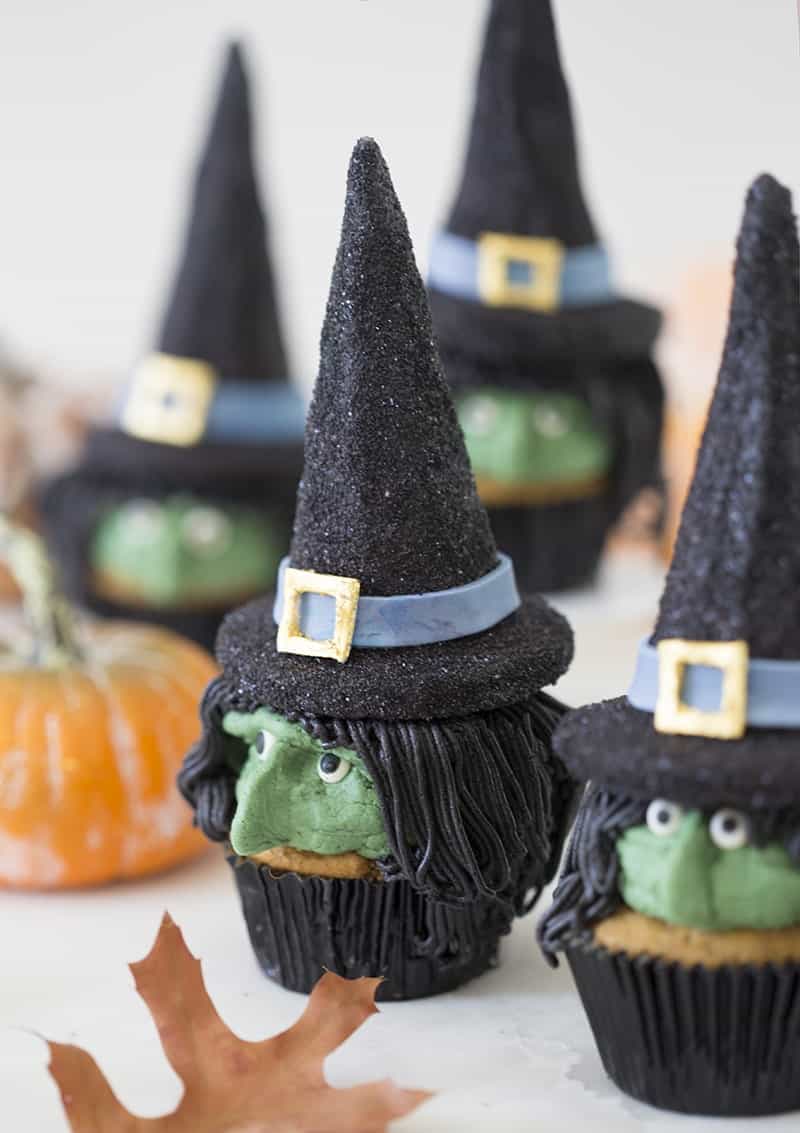
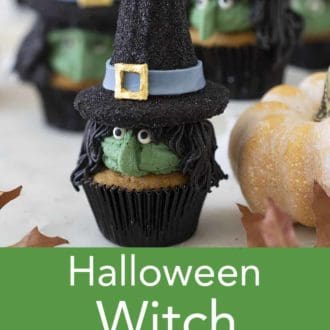
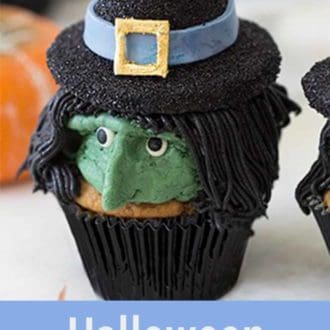
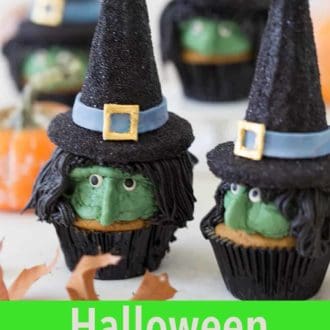
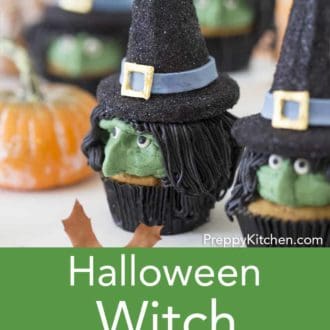
My witch cupcakes are made with buttercream faces and hair topped with a hat that might just look familiar to you if you’re a regular visitor to this blog. Last year I made witch hat cookies for halloween, which I LOVED! This year I wanted to use the same idea but take it further. I’m not going to lie, these little treats take a bit of time to make but I think it’s totally worth is and the whole project was pretty fun!
Pro Tips and Tricks for the best Witch Cupcakes
- If you’re short on time then skip the hats. The witch’s faces are pretty quick and easy to pipe.
- I used an 808 or large round tip for the head and a 125 or petal tip for the nose. Hair was piped with a large grass tip.
- When you’re adding food coloring to the buttercream remember that it darkens after it sits out for a but so don’t panic if the color isn’t super-saturated right away.
- Black sanding sugar is MESSY! So best to work over a baking pan and contain the chaos!
- When working on the cookies pop them into the freezer to set quickly
- You will be microwaving your chocolate from time to time as it cools while you’re doing the various steps. Black Candy Melt can be substituted for chocolate. It’s easer to melt and you don’t need to worry about it seizing.
- I used gold leaf for the buckles but they could also be made from yellow fondant.
Tools you’ll need to make these cupcakes
Large round tip for to pipe the head
My favorite set of round cookie cutters for the brim
How to make Witch hats for the cupcakes
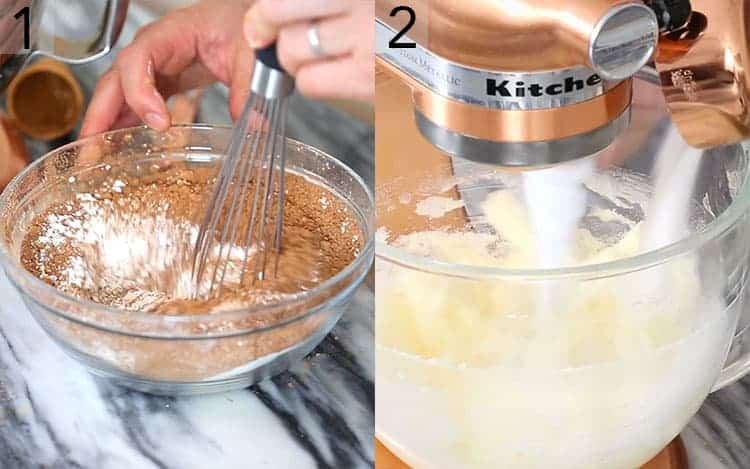
1. Preheat oven to 350 degrees. Sift together flour, cocoa and salt. Whisk to combine.
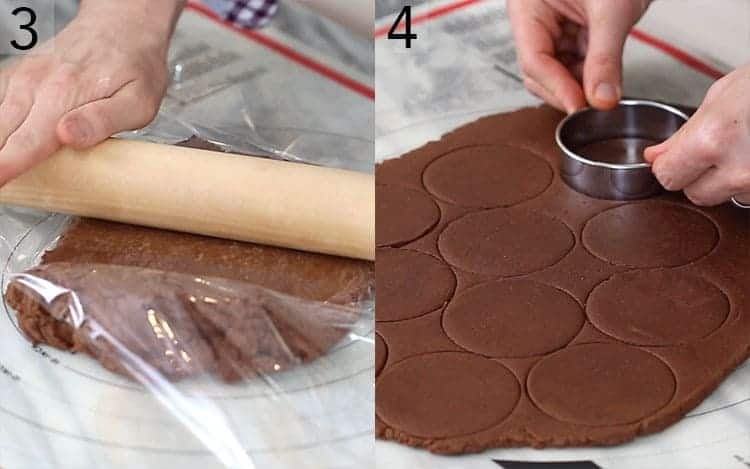
2. Combine butter and sugar in a bowl. Mix on medium-low speed with a paddle attachment. Mix until incorporated. Add eggs one at a time mixing until incorporated before adding the next. Don’t forget to scrape the bottom and side of the bowl. Mix in vanilla then add in flour mixture to the bowl. Mix at low speed for 30 seconds. The dough is ready when it sticks to the paddle mixture
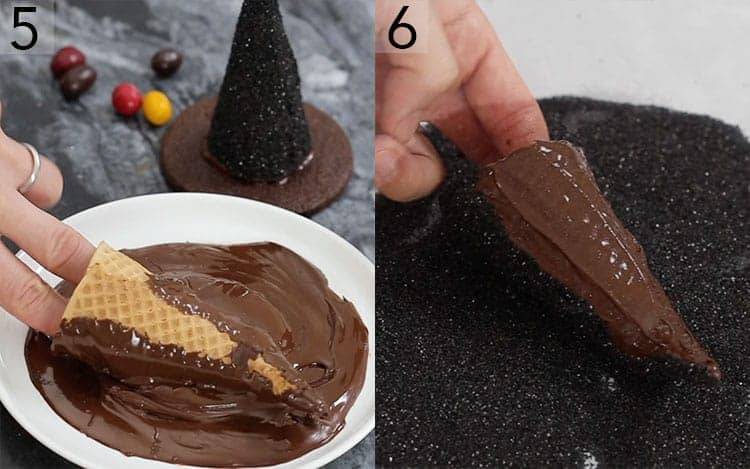
3. Roll out the dough between 2 pieces of parchment paper or plastic wrap. Refrigerate for about an hour.
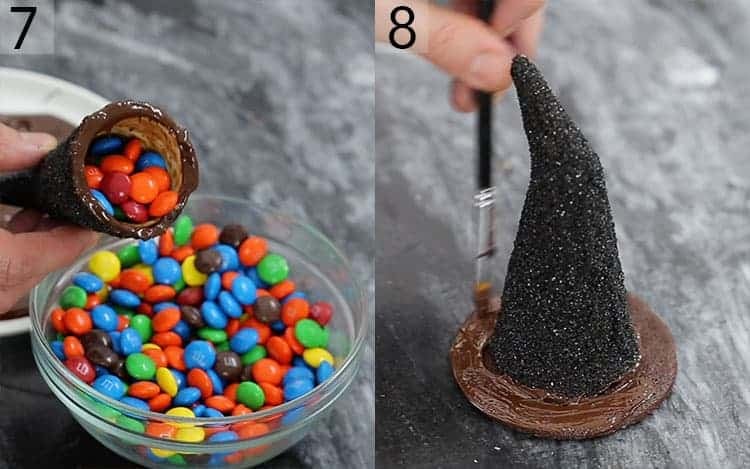
4. Use a cookie cutter to cut out shapes. If you want super sharp edges then refrigerate pieces again for about 20 minutes but this is totally optional. Bake on parchment or silpat lined baking sheet for 8-12 minutes or until centers are set. Let cookies cool on baking sheet for about 10 minutes then transfer to wire rack to cool completely.
5. Roll ice cream cone in either melted chocolate or black candy melt. Use a knife or small spatula to wipe off the excess and cover any stray areas.
6. Immediately roll in black sanding sugar. Best to pop into freezer for a couple minutes to set before moving on.
7. Dip the base of the cone in melted chocolate or candy melt then fill cone with candy. You could also pipe or wipe melted chocolate onto the cone instead of dipping it.
8. Attach cookie to cone then brush melted chocolate or candy melt onto the brim.
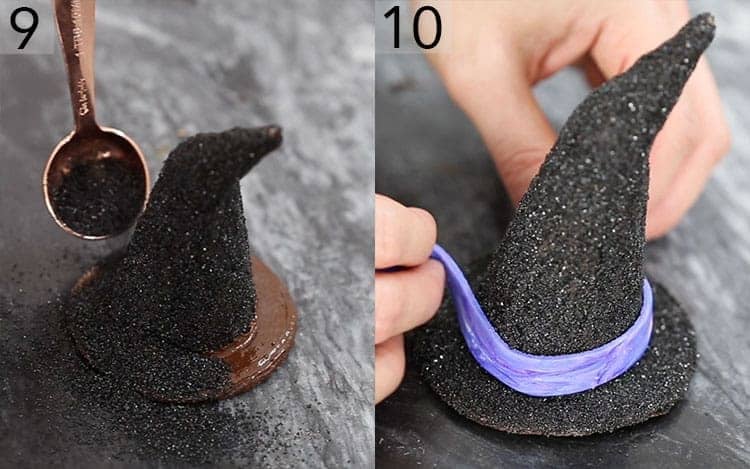
9. Sprinkle sanding sugar onto the brim.
10. Add red and blue food coloring to fondant (mixing more will give an even color. Mixing less will give a tie dye look) Roll out and cut bands for the hat. Cut out a buckle shape. You can either color the fondant yellow before rolling or you can use gold leaf or gold luster powder to enhance the buckle. Attach bands to hat then add buckle. You can wipe the back of the buckle with a damp paper towel to help fasten it.
How to make witch cupcakes
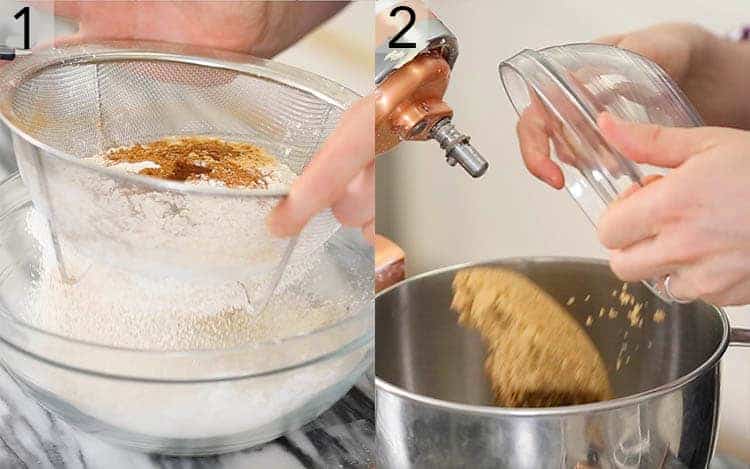
1. For the cupcakes; preheat the oven to 350F and add the cupcake papers to a cupcake pan. Mix the buttermilk, vanilla, orange blossom and sour cream in a glass and set it aside. Now sift the dry ingredients (except the sugar) together and give them a good whisk.
2. Cream the butter and sugar together in a stand mixer with a paddle attachment for approximately 4 minutes on medium. Add the eggs one at a time to make sure each one is incorporated well before adding the next. Add the flour mixture in three batches alternating with the milk mixture. Make sure you start and end with the flour mixture. Be careful not to over mix, just beat until combined.
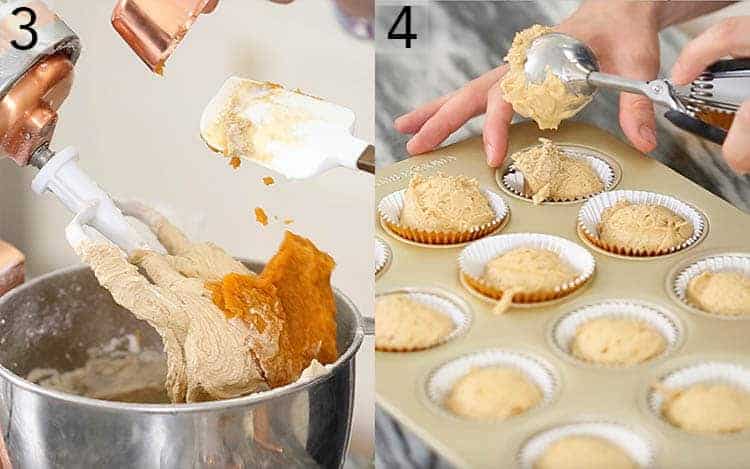
3. Mix in the pumpkin puree and scrape down the sides of the bowl to make sure the pumpkin is well incorporated.
4. Transfer the batter into the cupcake papers. I use an ice cream scoop for uniform amounts and neatness but you can also spoon the batter in.Bake at 350 degrees for about 18-20 minutes or until the center is set and let cool.
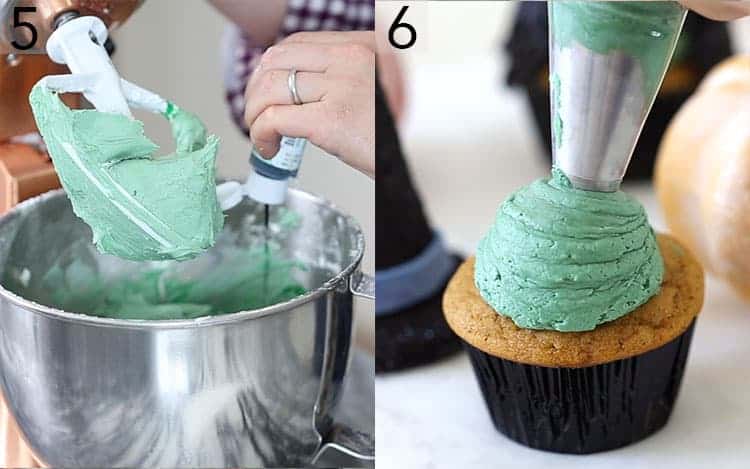
5. To make your buttercream, put the butter in the standing mixer with a paddle attachment and give it a little mix. Sift in your confectioners sugar in several batches, mix on low then add your vanilla. Reserve half of the buttercream to make one batch green and the other black.
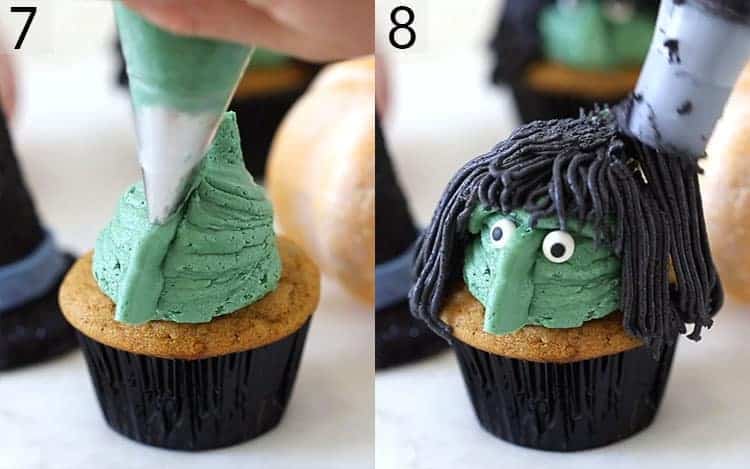
6. Add some of the green buttercream into a piping bag fitted with an 808, or large round tip to pipe the face. A big crinkly mound will do just fine, witches don’t have smooth perfect faces!
7. Use a large petal (125) tip turned around so the wide end faces outward to pipe the nose. Now pipe the brow and pop the candy eyes on. You can use mini chocolate chips with the flat side facing outward if you don’t have candy eyes.
8. Use a large grass tip to pipe the hair. Carefully place the hat on top, and you’re done!
If you’ve tried these witchy cupcakes then don’t forget to rate the recipe and let me know how you got on in the comments below, I love hearing from you!
Witch Hat Halloween Cupcakes
Video
Ingredients
Ingredients
For the Cupcakes:
- 2 cups all purpose flour 250g
- 1/2 tsp baking soda 3g
- 2 tsp baking powder 8g
- 1 1/2 tsp cinnamon 4g
- 1 tsp ginger 2g
- 1/4 tsp nutmeg .25g
- 1/4 tsp cloves .25g
- 1/4 tsp allspice .25g
- 1/4 tsp kosher salt 1g
- 2 large eggs
- 3/4 cup pumpkin puree 170g
- 1 1/3 cups brown sugar 180g
- 1/2 cup buttermilk 120ml
- 1/2 cup butter 113g, unsalted, room temperature
- 1/4 cup sour cream 60g
- 1 teaspoon orange blossom water 5mL
- 1 teaspoon vanilla 5mL
For the Cookies:
- 2 cups all-purpose flour 250g
- 1 cup granulated sugar 228g
- 1 cups butter 226g, unsalted, room temperature
- 1 large egg
- 3/4 cups cocoa powder 75g
- 1/2 tsp kosher salt 2.5g
- 1 tsp vanilla extract 5mL
For the Buttercream:
- 1 lb confectioners sugar 500g
- 1 cup butter 226g, unsalted, room temperature
- 3 tsp vanilla extract 15mL
- Black and green food coloring
For the Assembly:
- 1 cup black candy melts 175g
- 2.5 cups black sanding sugar 500g
- 1 small waffle ice cream cones
- Fondant
- Candy eyes
- Purple food coloring
- Black food coloring
- Gold leaf
Instructions
Instructions
For the Cupcakes:
- Preheat oven to 350 degrees. Add cupcake papers to a cupcake tin.
- Sift the dry ingredients (except the brown sugar) together in a large bowl. Give a good whisk.
- Mix the wet ingredients together in a separate bowl.
- In a stand mixer fitted with a paddle attachment, cream the butter and sugar for a few minutes on medium until creamy and combined.
- Add the eggs into the stand mixer one at a time making sure each incorporated before adding the next.
- Alternate adding the dry and wet mixtures to the mixer. Scrape down the bowl and beat until combined.
- Scrape down the sides of the bowl and make sure the pumpkin is well incorporated.
- Pour the batter into cupcakes papers.
- Bake at 350 degrees F for about 20 minutes, or until the centers are set.
- Let them cool to room temperature.
For the Cookies:
- Preheat oven to 350 degrees.
- In a stand mixer fitted with a paddle attachment, add butter and sugar. Mix on medium-low speed until incorporated.
- Add eggs, mix and scrape the sides of the bowl.
- Add vanilla.
- In a large bowl, sift flour, cocoa and salt.
- Add the flour mixture to the mixer. Mix at low speed until the dough is combined.
- It’s ready when it sticks to the paddle attachment.
- Roll out the dough between 2 pieces of parchment paper.
- Put on a baking sheet and refrigerate for 1 hour.
- Use a cookie cutter to cut out medium circles.
- Bake for 8-12 minutes or until centers are set.
- Let cool.
For the Buttercream:
- In a stand mixer fitted with a paddle attachment, cream the room temperature butter for about 5 minutes.
- Beat in the sifted confectioners sugar.
- Add the vanilla. Beat until you have an even, fluffy consistency.
- Divide the buttercream.
- Dye one black and the other green.
- Transfer the black to a piping bag fitted with a grass tip.
- Transfer some of the green to bags fitted with a 125 tip and a large round tip.
For the Assembly:
- The assembly can be messy! Keep a pair of thin gloves nearby.
- Melt the candy melts in a bowl.
- Cover each ice cream cone in black candy melt.
- Over a large bowl, cover the cone in black sanding sugar and pat down. The candy melts dry quickly so work fast!
- Paint some candy melt on the rim of the ice cream cone. Attach it to a cookie.
- Paint candy melt onto the exposed part of the cookie. Add black sanding sugar and brush off any excess.
- Dye some fondant blue. Roll out and cut .5 inch strips for the band around the hat.
- Roll out some plain white fondant. Cut squares for the buckles.
- Paint some water onto the squares. Add gold leaf sheets and pat down to dry.
- Attach the band the the bottom of the cone. Add the buckle to the middle.
- Pipe a large dollop of green buttercream for witch head. With a 125 tip, pipe a long witch nose. Add candy eyes.
- Add bangs and hair to the witch head. Attach the hats.
Notes
- If you're short on time then skip the hats. The witch's faces are pretty quick and easy to pipe.
- I used an 808 or large round tip for the head and a 125 or petal tip for the nose. Hair was piped with a large grass tip.
- When you're adding food coloring to the buttercream remember that it darkens after it sits out for a but so don't panic if the color isn't super-saturated right away.
- Black sanding sugar is MESSY! So best to work over a baking pan and contain the chaos!
- When working on the cookies pop them into the freezer to set quickly
- If you can't find candy melt use chocolate! Just be careful not to burn it and remember that it takes longer to set.
- I used gold leaf for the buckles but they could also be made from yellow fondant.



Hunter says
hey John what time would they be done my mom wants to know.
jkanell says
Like how long do they take to make? The faces are Very quick. The hats have some chill time so they take about 20 minutes to make a batch of them.
Hunter says
HEY JHON THANK YOU FOR ANSWERING ME> I ALSO HAVE A NOTHER QUESTION…..
HOW LONG HAVE YOU BEEN STOCKING ME.
JK:)))))))))))))))))))))))))))000
Elyse says
So fun to make and delicious! Thanks!
Carla says
These are great. Thanks for sharing!
John K. says
Hey Carla,
Thanks!! I’m happy you like them! Let me know how they turn out!
Best,
John
Anne says
Thank you for sharing recipes John, is Dark cocoa or just unsweetened cocoa?
jkanell says
unsweetened
Hunter says
i’m going to try to make them thank you.