By employing mini muffin tins, we can easily shrink a full-size quiche down into bite-sized morsels wrapped in flaky pie crusts. These tasty little quiche cups are the ideal make-ahead snack. I like to whip up a batch and feast on them throughout the week, or freeze them for later. Frozen mini quiche are quick to heat up, making them ideal for drop-in guests or late-night study sessions. Better yet, since each batch yields a whopping 48 muffin tin quiches, you can experiment with multiple flavors at the same time.
From breakfast & brunch to cocktail hour, this delectable mini quiches recipe is sure to hit the spot. If you love eggs as much as I do, then heck out one of my other breakfast recipes for shakshuka, frittata, and breakfast casserole next!
What You Need To Make This Recipe
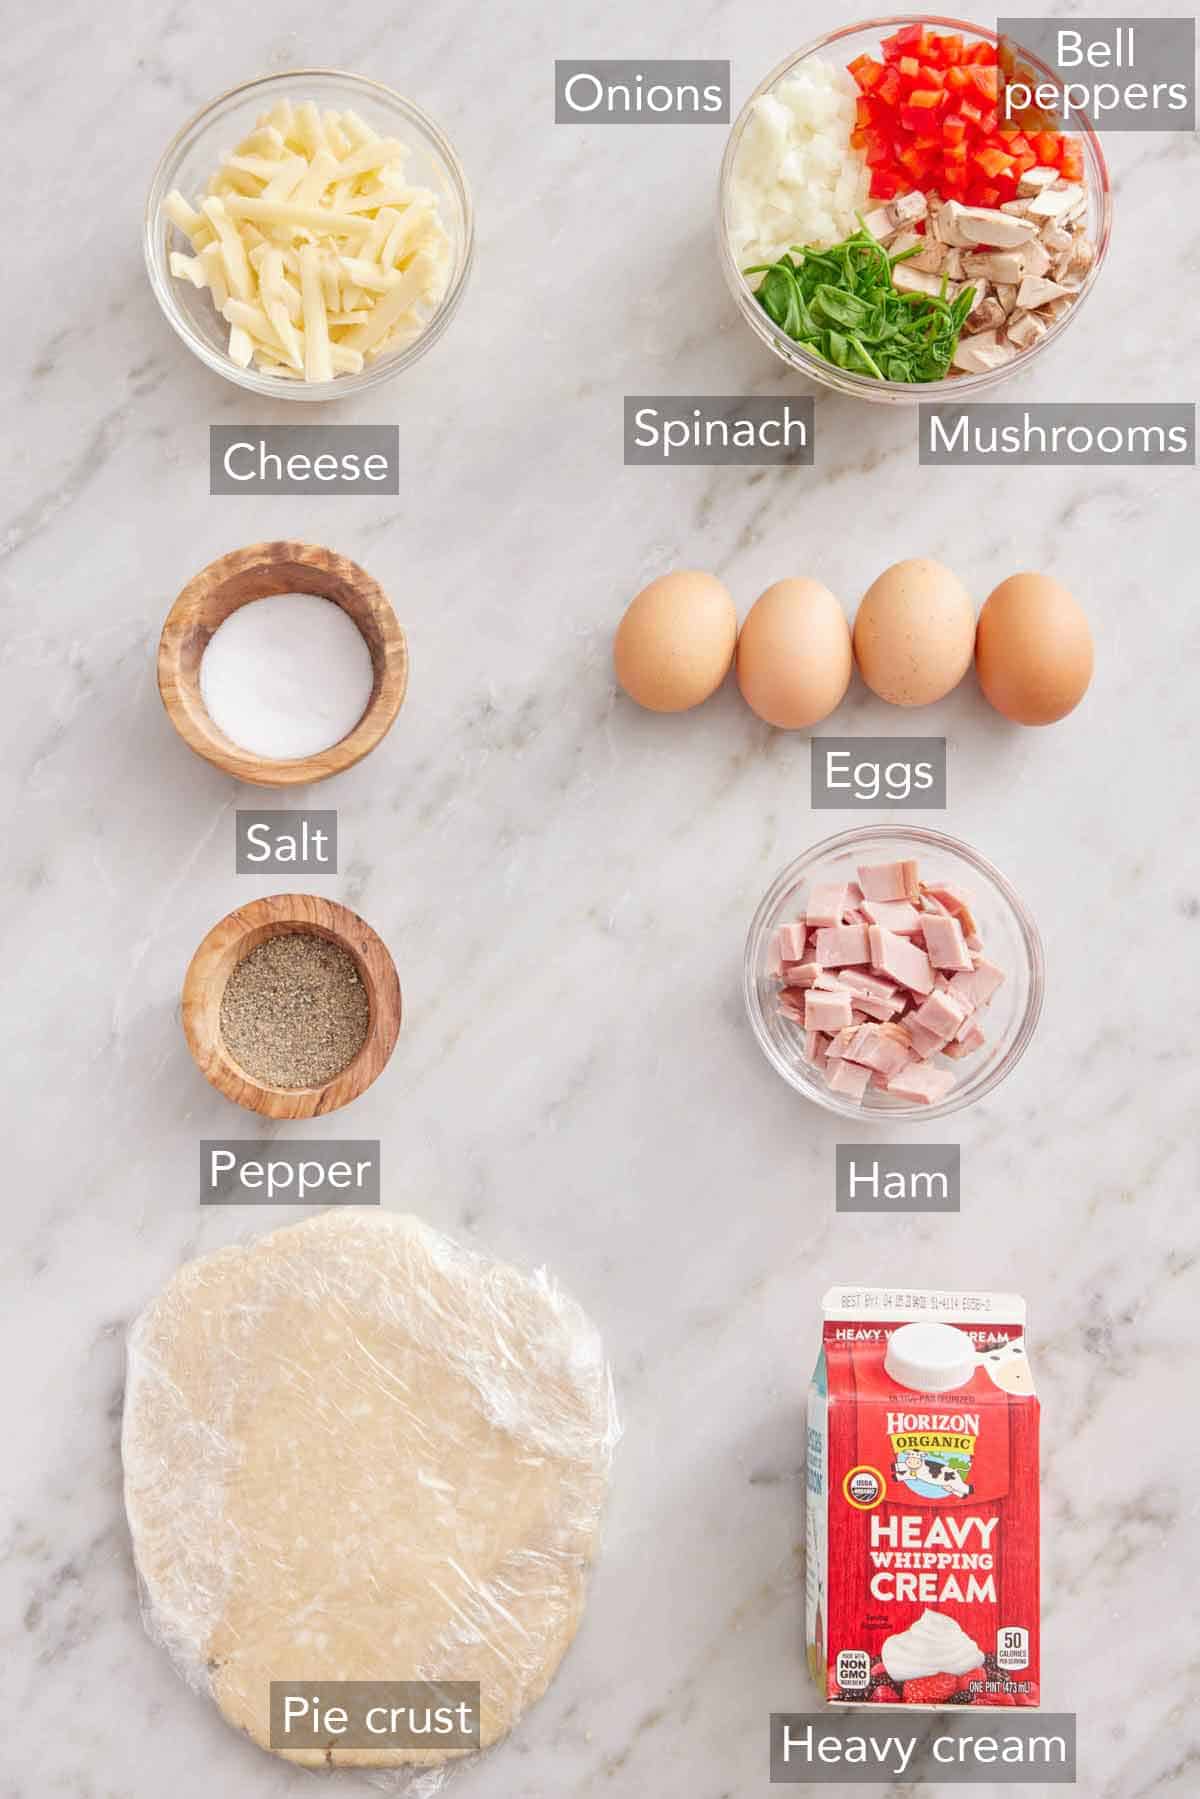
Pie Crust — my super flaky homemade pie crust yields the perfect amount of dough to make 48 mini breakfast quiche. Of course, you’re welcome to swap in store-bought pie crust if you want to save a bit of time.
Eggs — you’ll need 8 whole eggs to make a full recipe, so make sure you’re stocked up! Because eggs are the main star in this recipe, I like to use high-quality eggs, like pasture-raised ones.
Heavy Cream — the best mini quiche recipe calls for plenty of cream to make the egg filling perfectly custardy and delicious, so I certainly don’t skimp on it.
Cheese of Choice — I tend to prefer melty cheeses with rich flavor like sharp cheddar, nutty gruyere, or fiery pepper jack. If you’re a fan of Mediterranean flavors, feta and goat cheese are also great choices.
Fillings of Choice — Consider this recipe for breakfast mini quiches the culinary equivalent of a choose-your-own-adventure story. Mix and match all your favorites, and feel free to make more than one flavor per batch! Here are some of my favorites to choose from:
- Cooked spinach
- Diced roasted red bell peppers
- Diced ham
- Chopped roasted mushrooms
- Finely chopped caramelized onion
- Cooked and crumbled bacon
- Cooked and crumbled sausage
How To Make Mini Quiche
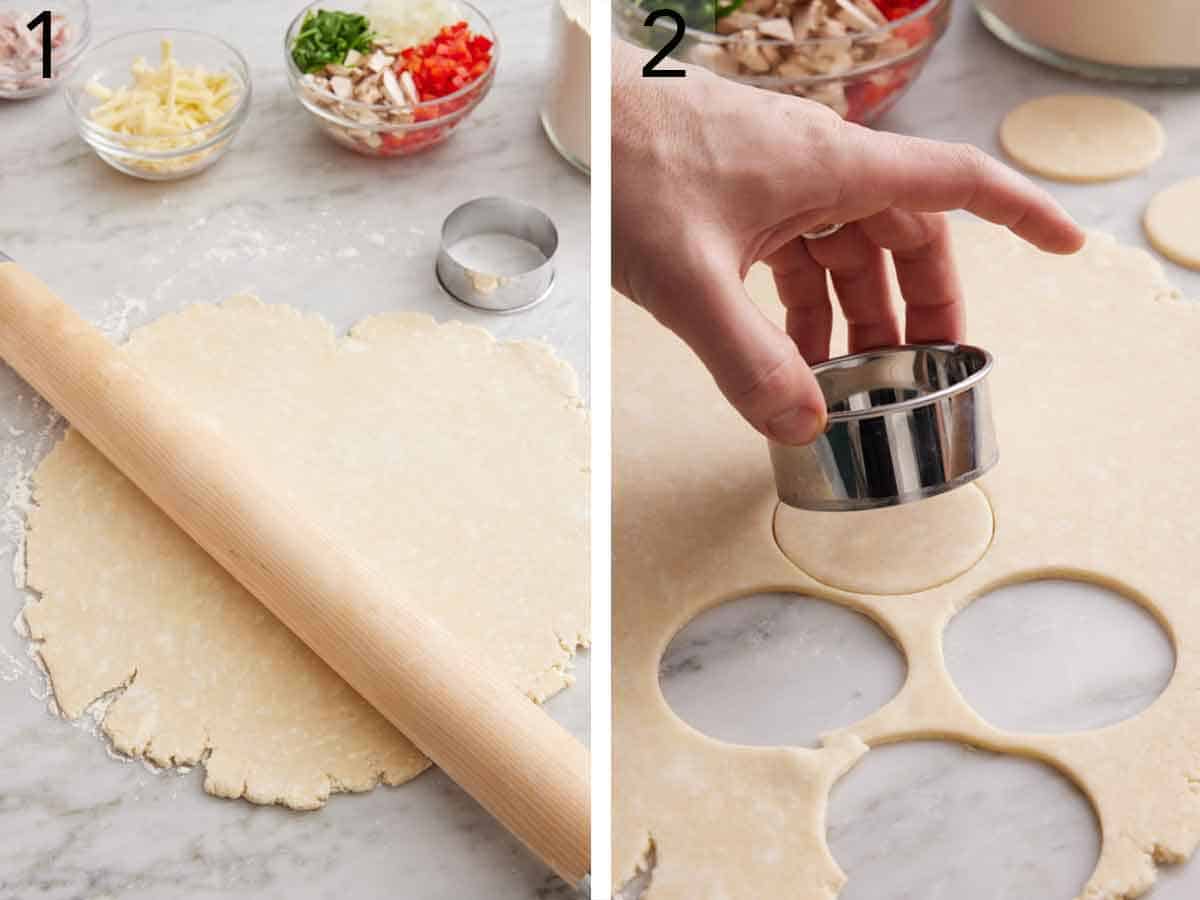
1. On a lightly floured work surface, roll out each pie crust disk to about 1/8-inch thickness.
2. Using a 2 1/2-inch round cookie cutter, cut 48 circles, rerolling scraps as needed.
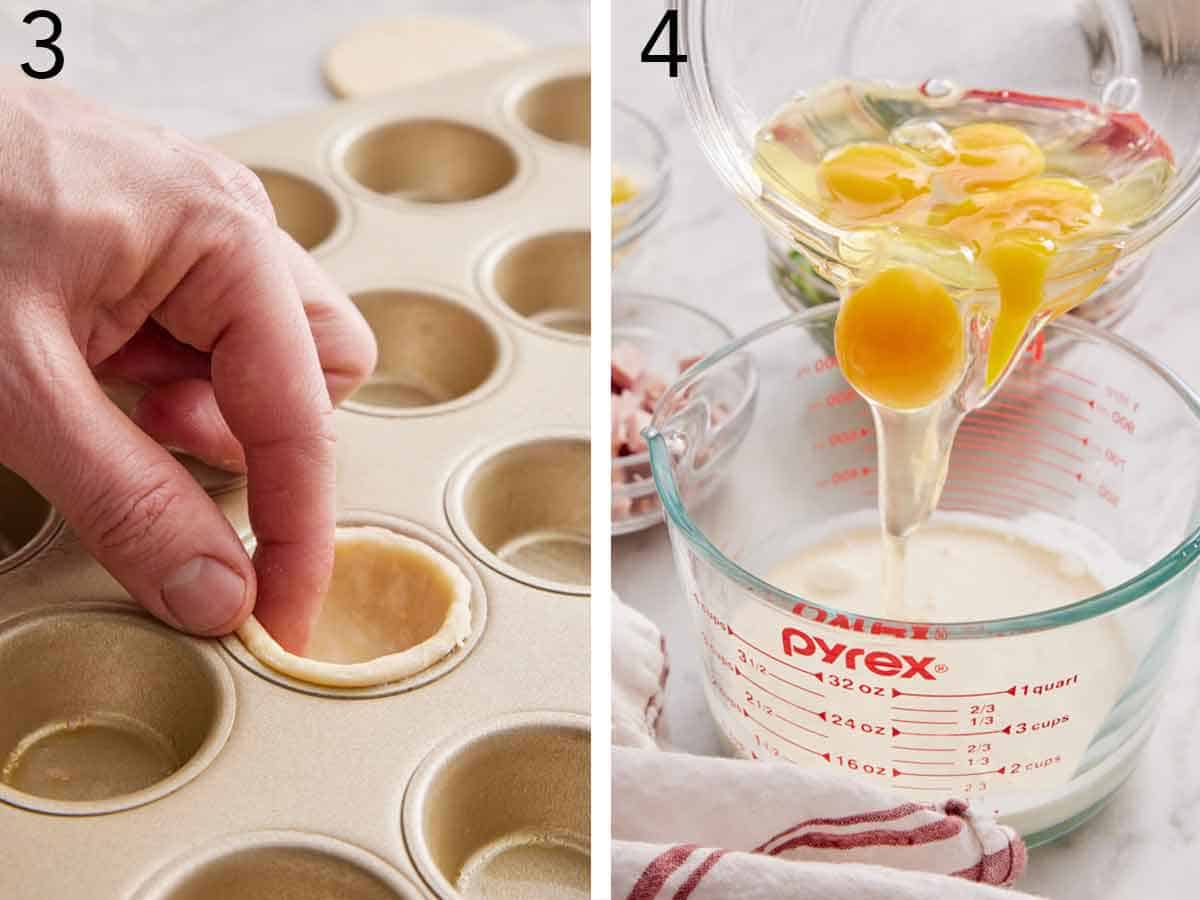
3. Place the pastry circles in each well of the prepared mini muffin pan pressing into the bottom and up the sides of the muffin cups. Chill, uncovered, until firm, about 15 minutes.
4. In a large measuring cup or medium bowl, combine the eggs, cream, salt, and pepper.
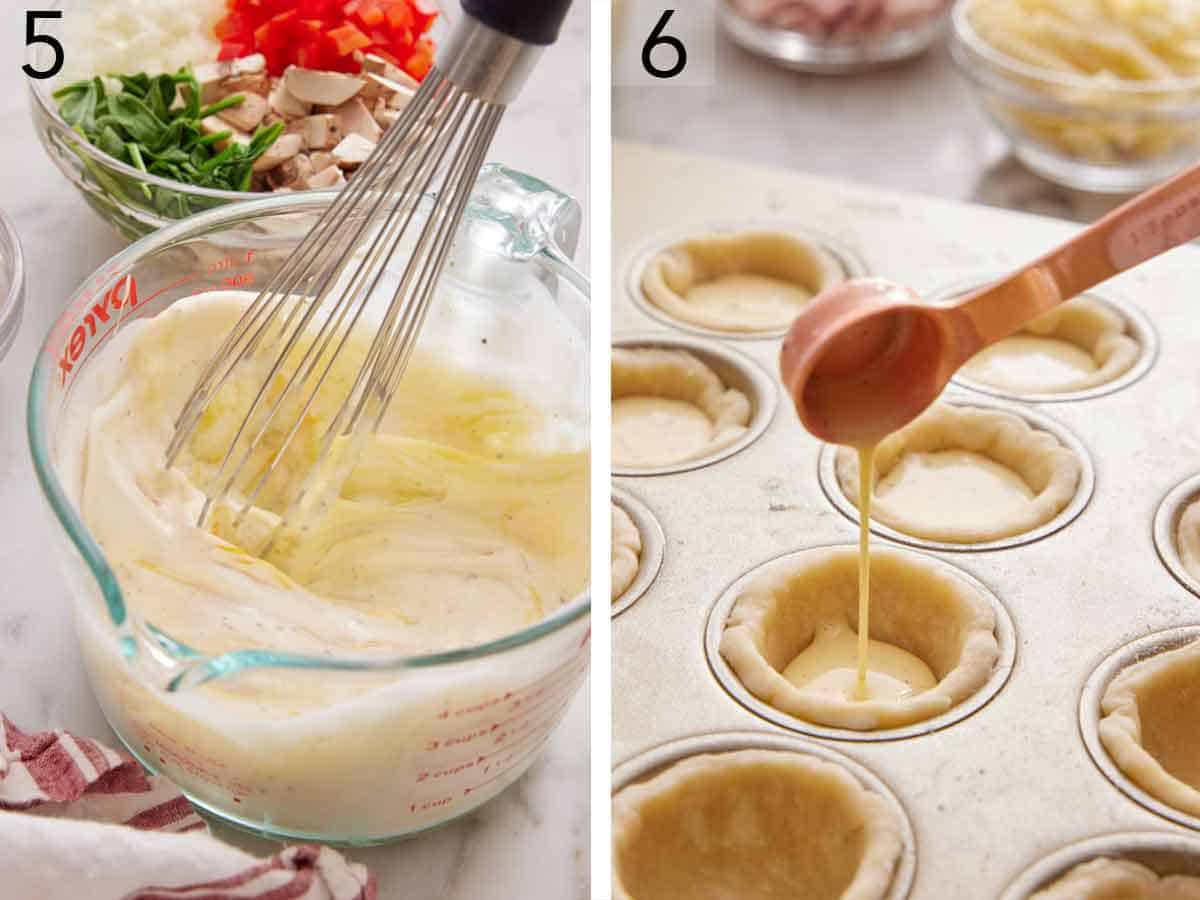
5. Whisk until fully combined.
6. Divide the egg mixture evenly among the chilled pie crusts, filling about two-thirds of the way full (roughly 1½ teaspoons per crust).
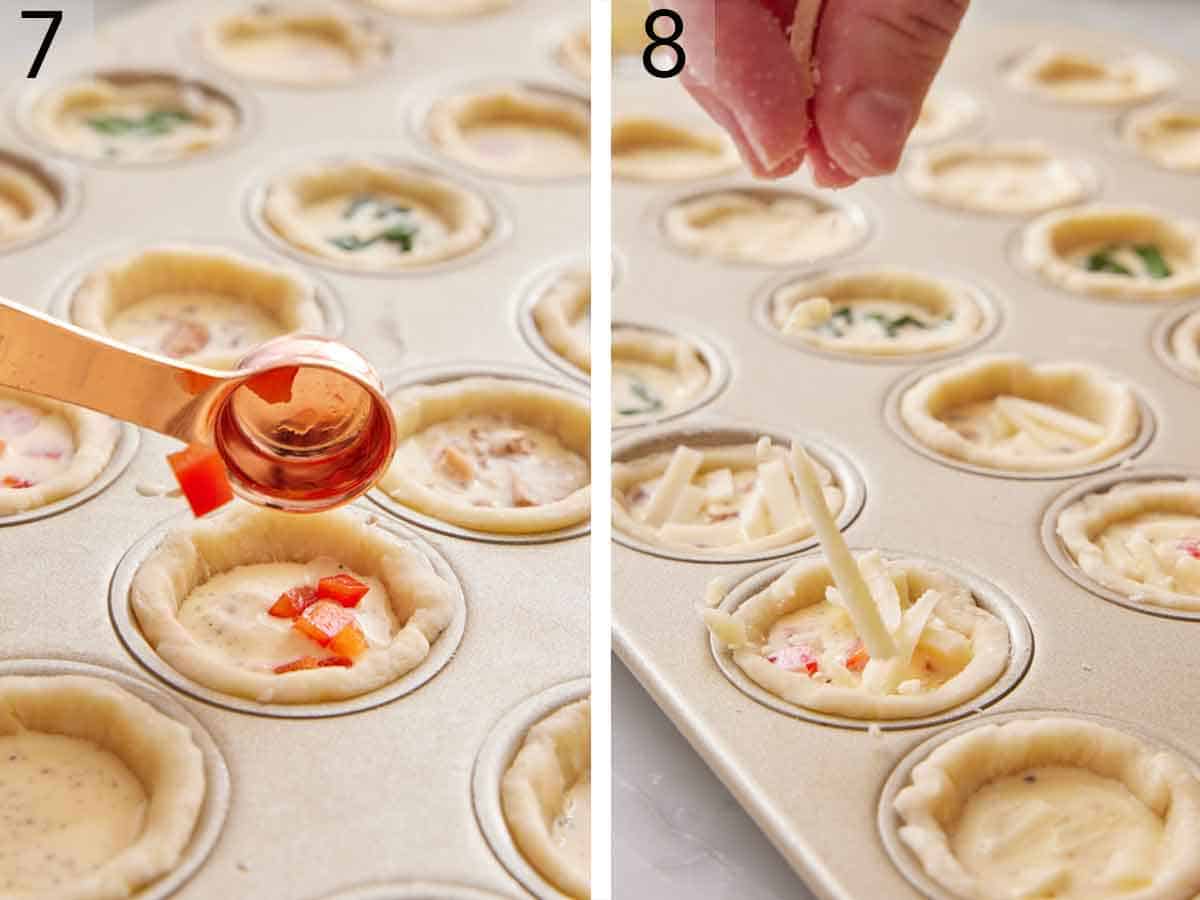
7. Divide the desired fillings among the crusts.
8. Sprinkle with cheese, then bake with one of the muffin pans on each oven rack for 25 to 30 minutes, swapping the pans on each rack top to bottom halfway through or until the filling is set and the crust is golden brown. Place on wire racks and let cool in the pans for 5 minutes. Remove the mini quiche from the pans. Serve warm or at room temperature. The baked quiche can be refrigerated in an airtight container for up to 5 days or frozen for up to 3 months.

Pro Tips For Making This Recipe
- A surprising tool to shape the crust! Use a clean wine cork to press the pie dough into the mini muffin tin cups. It’s the perfect size for getting into the corners!
- Egg temperature matters. Make sure your eggs are at room temperature so they bake evenly. If you forgot to take them out of the fridge ahead of time, you can warm them up by placing them in a bowl of warm water for about 5-10 minutes.
- For the easiest pouring: whisk your egg mixture in a liquid measuring cup! This makes it easy to pour the egg mixture into the dough without any mess. If you don’t have a large one, make the filling in a mixing bowl and pour it into a measuring cup.
- Don’t skip the chilling step! This will help prevent your pie crusts from shrinking during baking.
- Avoid over-mixing the eggs. You want the filling to come out custardy, so you don’t want to introduce too much air. The more air you whip into the eggs the more bubbles and pockets the quiche fillings will have.
- Prefer crustless mini quiches? Just spray non-stick muffin pans with cooking spray and fill the cups with the eggs and mix-ins of your choice. The bake time might be 5 to 10 minutes shorter, so start checking them early.

My Favorite Mini Quiche Flavor Combos
While there are hundreds of delicious iterations of these mini breakfast quiches, these are my all-time favorites:
- Greek: cooked spinach, diced bell pepper, diced onion, and crumbled feta.
- Bacon: crumbled cooked bacon, diced onion, and shredded swiss or cheddar cheese.
- Mushroom: diced mushrooms, diced onion, diced bell pepper, and shredded swiss cheese.
- Ham and Cheese: diced ham, diced onion, and shredded swiss cheese.
What are your favorite quiche add-ins? Let me know in the comments below, or tag me in your social posts (@preppykitchen) so I can cheer you on!
Frequently Asked Questions
Mini quiches will generally last for about 4 to 5 days in the refrigerator if stored in a clean, airtight container. That said, if you notice any signs of spoilage (e.g. an “off” smell, strange texture, or mold growth), it’s better to play it safe and not consume them.
Freezing your mini quiche appetizers is a great way to extend their shelf-life. To freeze them, cool to room temperature, then place them in an airtight container or wrap the whole pan tightly in plastic wrap and freeze for up to 2 months. Be sure to label them with the date so you can keep track of how long they’ve been frozen. I like to keep a roll of masking tape and a Sharpie in the kitchen for just this reason.
Preheat your oven or toaster oven to 350°F (175°C). Place the miniature quiches on a rimmed baking sheet or in an oven-safe dish and cover them loosely with aluminum foil to prevent excessive browning. Heat them for about 10 to 15 minutes or until they are heated through the center.
If you’re short on time, the microwave is a great option, but note that the crust won’t be quite as flaky if you use this method. Arrange the mini quiches on a microwave-safe plate, and cover them with a microwave-safe lid or microwave-safe wrap. Heat them on medium power for about 30 seconds to 1 minute per quiche, or until they are heated throughout. Depending on how many you’re making, you may need to heat them in batches to ensure even heating.
Remember to check the internal temperature of the quiches to ensure they are piping hot before serving. If you have a food thermometer, the temperature should reach at least 165°F (74°C) to ensure food safety. After reheating, let them cool for a moment, then dig in. Enjoy your warm, tasty mini egg quiches!
If you’ve tried this Mini Quiche recipe, then don’t forget to rate the recipe and let me know how you got on in the comments below, I love hearing from you!

Mini Quiche Recipe
Equipment
- 2 mini muffin pans
- Round cookie cutter
- Rolling Pin
- Mixing bowl or large liquid measuring cup
- Wire cooling rack
Ingredients
- 1 Pie Crust Recipe
- 4 large eggs
- ¾ cup heavy cream (180mL)
- ¾ teaspoon salt
- ¼ teaspoon ground black pepper
- ¾ cup desired fillings
- ¼ cup desired cheese
Fillings and Cheese:
- Cooked spinach
- Diced red bell peppers
- Diced ham
- Diced mushrooms
- Finely chopped onion
- Cooked and crumbled bacon
- Shredded swiss cheese
- Crumbled feta cheese
Instructions
- Position oven racks in the upper and lower thirds of the oven. Preheat the oven to 375°F. Lightly grease 2 (24-cup) mini muffin pans.
- On a lightly floured work surface, roll out each pie crust disk to about 1/8-inch thickness. Using a 2 1/2-inch round cookie cutter, cut 48 circles, rerolling scraps as needed. Place a dough circle in each well of the prepared pans pressing into the bottom and up the sides to line the well.
- Chill, uncovered, until firm, about 15 minutes.
- In a large measuring cup, whisk together the eggs, cream, salt, and pepper until fully combined. Divide the egg mixture evenly among the chilled pie crusts, filling about two-thirds of the way full (roughly 1 1/2 teaspoons per crust). Divide the desired fillings among the crusts and sprinkle with cheese.
- Bake with one pan on each oven rack for 25 to 30 minutes, swapping the pans on each rack top to bottom halfway through, or until the filling is set and the crust is golden brown. Place on wire racks and let cool in the pans for 5 minutes. Remove the mini quiche from the pans. Serve warm or at room temperature. The baked quiche can be refrigerated in an airtight container for up to 5 days or frozen for up to 3 months.
Notes
- A surprising tool to shape the crust! Use a clean wine cork to press the pie dough into the mini muffin tin cups. It’s the perfect size for getting into the corners!
- Egg temperature matters. Make sure your eggs are at room temperature so they bake evenly. If you forgot to take them out of the fridge ahead of time, you can warm them up by placing them in a bowl of warm water for about 5-10 minutes.
- For the easiest pouring: whisk your egg mixture in a liquid measuring cup! This makes it easy to pour the egg mixture into the dough without any mess. If you don’t have a large one, make the filling in a mixing bowl and pour it into a measuring cup.
- Don’t skip the chilling step! This will help prevent your pie crusts from shrinking during baking.
- Avoid over-mixing the eggs. You want the filling to come out custardy, so you don’t want to introduce too much air. The more air you whip into the eggs the more bubbles and pockets the quiche fillings will have.
- Prefer crustless mini quiches? Just spray non-stick muffin pans with cooking spray and fill the cups with the eggs and mix-ins of your choice. The bake time might be 5 to 10 minutes shorter, so start checking them early.





Leave a Reply