
This post may contain affiliate links. Please read our disclosure policy.

This strawberry lemon cake is super moist, flavorful and easy to make, well the batter and buttercreams are easy at least. The decoration scheme is not crazy but maybe a bit above beginner level. I’ve taken to using strained strawberry jams to flavor cakes lately and have loved the results. I used to make fresh reductions for these cakes but the results are so similar and yet much faster when using jam; time-savers will always win when flavor isn’t compromised! Adding lemon zest to the batter makes a huge difference bringing in a lot of zing and brightness to help the strawberry flavor shine. This batter would be great for a pink lemonade cake BTW.
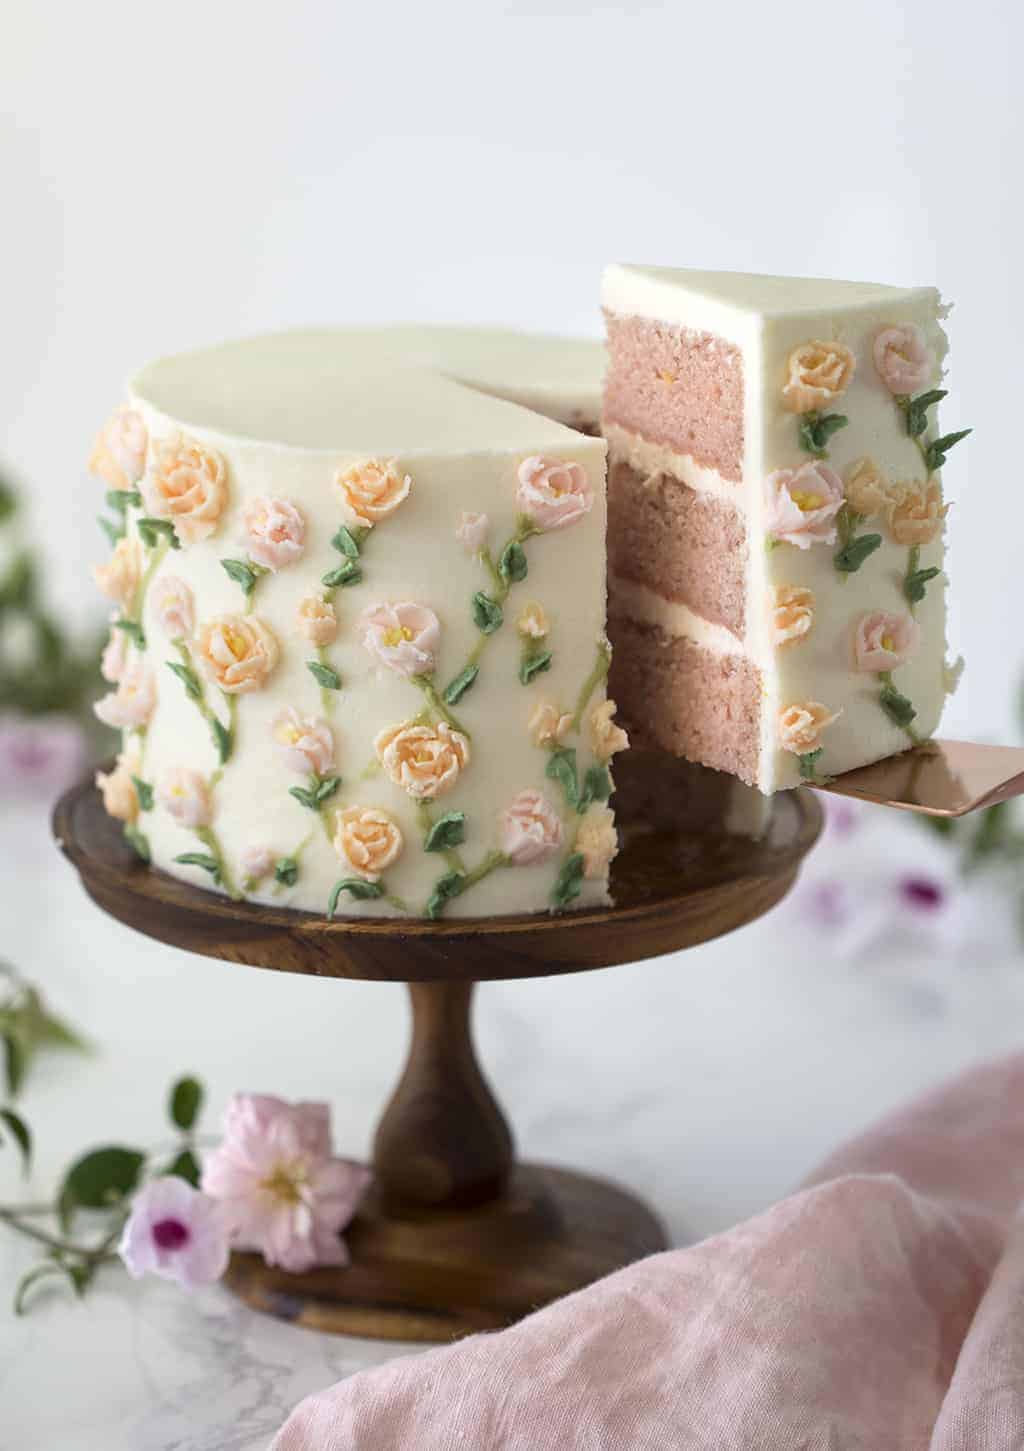
So first off I love the overall effect of this cake. To my eye it looks like a piece of delicate porcelain, which I’m all about! I’ve wanted to make a painted cake for the longest time but for some reason I found it intimidating. I finally decided to practice on a plate and that really took all my worries away as there was not ruined cake in the picture!
Many, many, many years ago I was an art major at UCLA and after graduating painted for a good number of years; selling a few works here and there. Anyhow, this should be just my type of cake but it was a bit intimidating since I had high expectations of myself and no direct experience in the medium of buttercream!
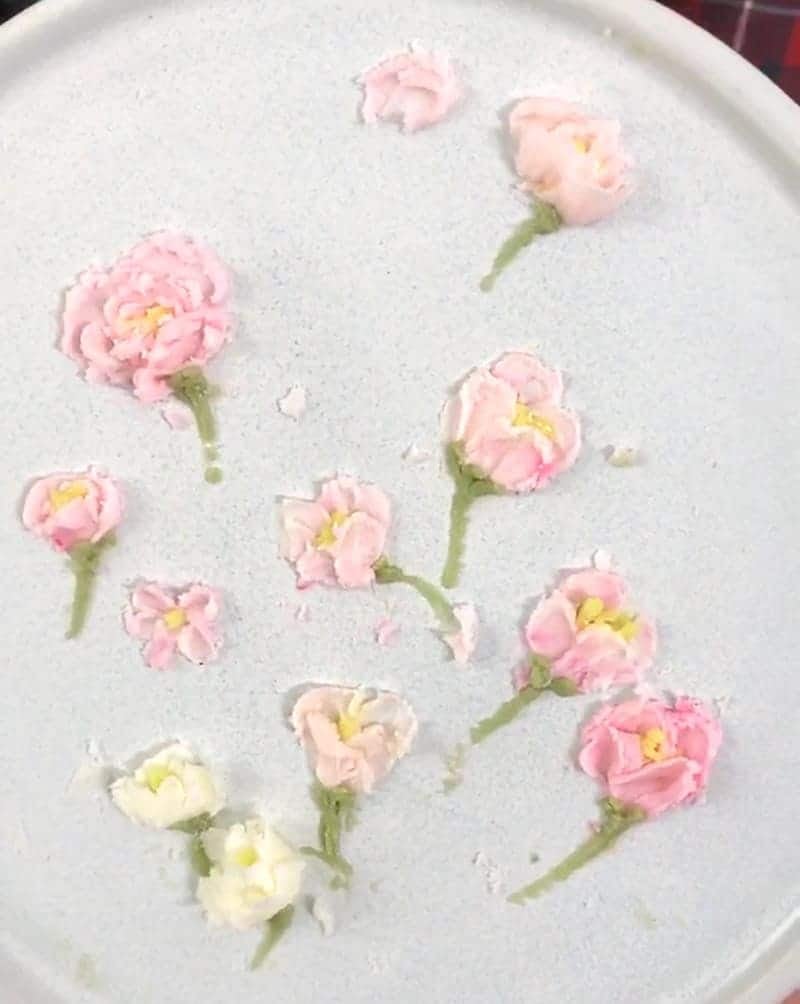
- I practiced a bit on a plate to get the feel for applying the petals with a palette knife, piping the stamens and leaves etc. After you get the hang of it the process is really not difficult.
- I ended up using a small petal tip (61) for the last few petals in the foreground of each flower. It was much easier than applying with only a palette knife although that is totally doable. Almost all of the flowers on the plate were done with a palette knife for all of the petals.
- The leaves were piped on with a 349 tip.
How to Make a Painted Cake

1. Preheat oven to 340F. Butter and flour three 6-inch cake pans. Soak baking strips in water. Strain the strawberry preserves. Sift dry ingredients (including sugar). Whisk to combine.
2. In another bowl, whisk together wet ingredients.
3. Combine wet and dry mixtures. Whisk until combined. Add a few drops of pink food coloring until a desired consistency is reached. If the batter is lumpy, it’s okay! Add damp baking strips to the cake pans. Evenly distribute batter into pans. I like to use a kitchen scale for precision. Bake for about 30- 35 minutes or until the centers are set and springy to the touch.
4. In a stand mixer, cream the butter until fluffy. Sift in half of the confectioners sugar. Mix, then add the rest. Squeeze lemon juice and combine. Reserve ¼ cup of the white buttercream to dye green for the stems and leaves. Transfer ½ the plain white buttercream from the standing mixer to a piping bag. Snip off the tip. Add in 1 tbsp of strained strawberry preserves to the remaining buttercream. Mix until combined. Save about 1-2 cups for the flowers in a separate bowl. Transfer the strawberry buttercream to a piping bag and snip off the tip. Use food coloring to dye the buttercream different shades of pink to orange for the flowers.
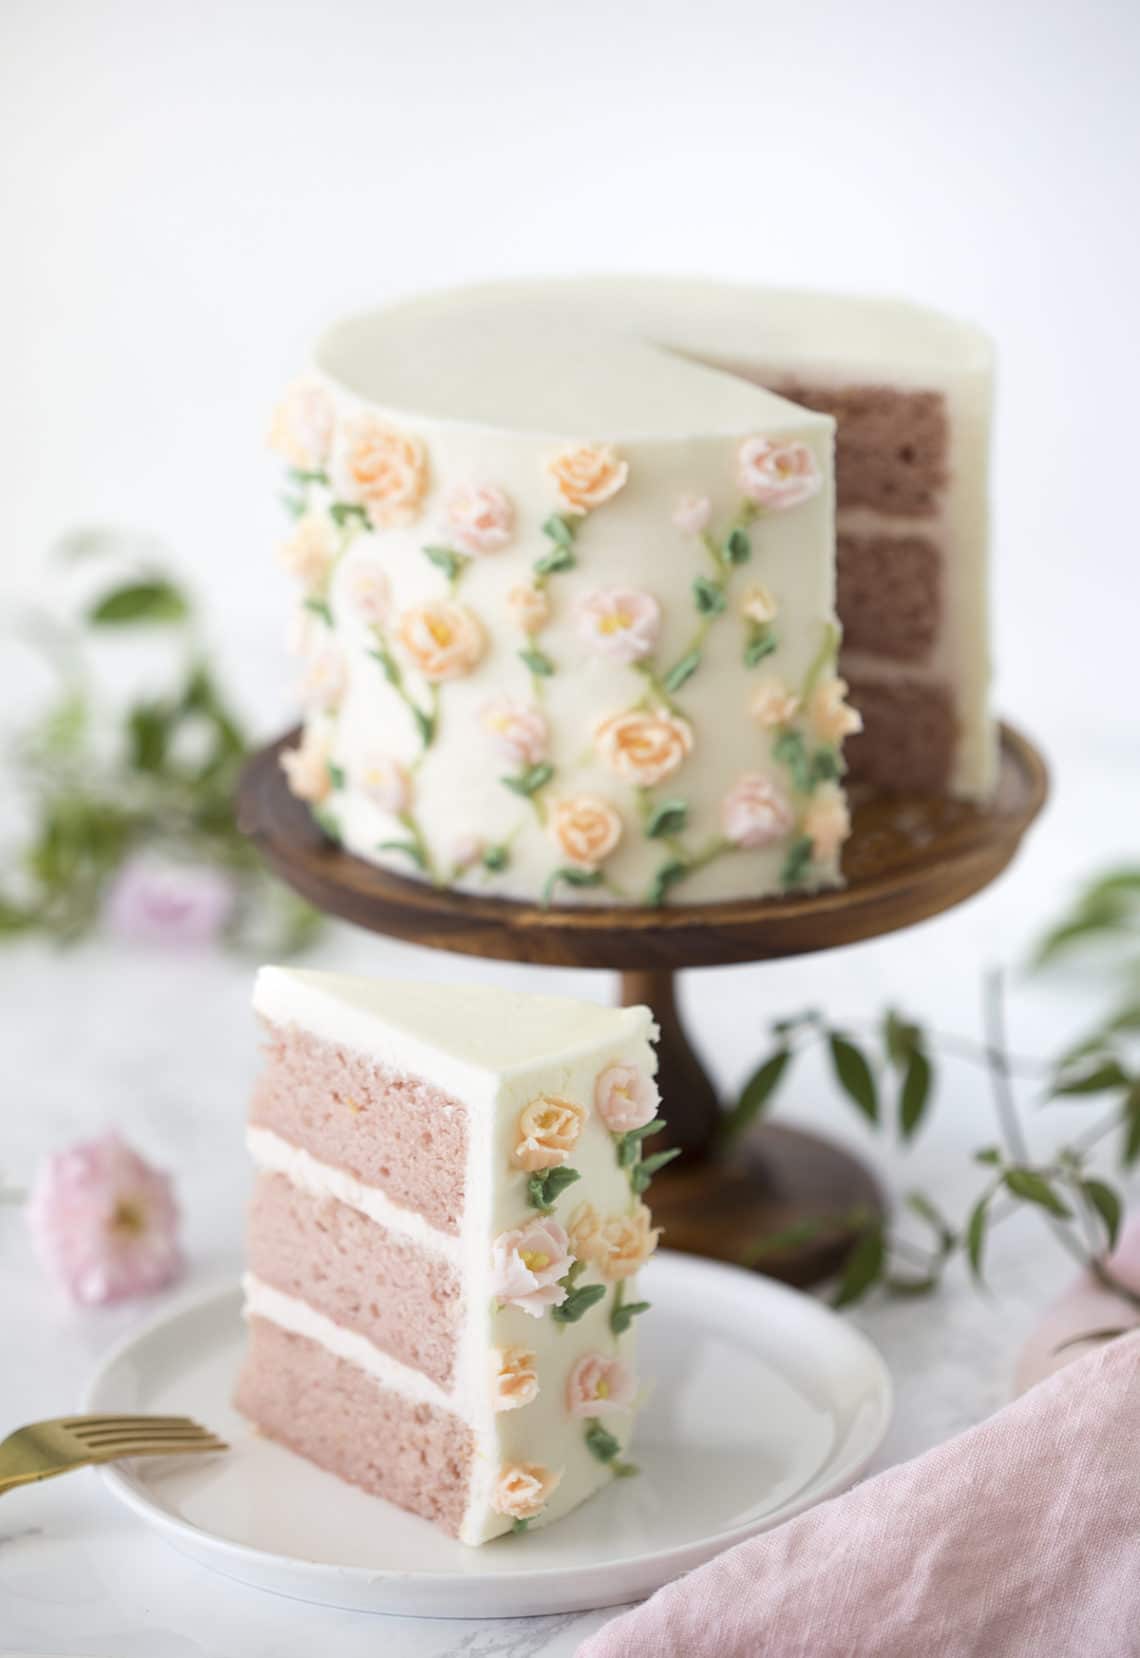
5. Pipe the strawberry buttercream between each layer.
6. Crumb coat the cake.
7. smooth with a scraper.
8. Pipe a thin layer of plain white buttercream on the outside of the cake. Even out with a hot scraper and offset spatula. Chill for about 30 minutes.
9. Using a palette knife, sculpt flowers from the pink and orange buttercream.
10. Add details.
11. Pipe on stems
12. Pipe on leaves.
If you’ve tried this painted cake then don’t forget to rate the recipe and let me know how you got on in the comments below, I love hearing from you!
Painted Cake
Ingredients
INGREDIENTS
For the Cake:
- 1 ⅔ cup all-purpose flour 213g
- 1 cup granulated sugar 228g
- 1 tsp baking powder 3g
- ¼ tsp baking soda 1g
- ¾ cup butter 176g, room temperature or melted
- ¼ cup whole milk 60ml, warm
- ¼ cup strawberry preserves 46g, strained, warm
- ½ cup sour cream 120ml
- 3 tsp vanilla extract 10g
- 3 egg whites large
- Pink food coloring
For the American Buttercream:
- 1 lb confectioners sugar 462g
- 2 sticks unsalted butter 228g, room temperature
- 1 tbsp strawberry preserve strained
- 2 tbsp lemon juice strained
- Pink, orange and green food coloring
Instructions
INSTRUCTIONS:
For the Cake:
- Preheat oven to 340F. Butter and flour three 6-inch cake pans. Soak baking strips in water. Strain the strawberry preserves.
- Sift dry ingredients (including sugar). Whisk to combine.
- In another bowl, whisk together wet ingredients.
- Combine wet and dry mixtures. Whisk until combined. Add a few drops of pink food coloring until a desired consistency is reached. If the batter is lumpy, it’s okay!
- Add damp baking strips to the cake pans.
- Evenly distribute batter into pans. I like to use a kitchen scale for precision.
- Bake for about 30- 35 minutes or until the centers are set and springy to the touch.
For the American Buttercream:
- In a stand mixer, cream the butter until fluffy.
- Sift in half of the confectioners sugar. Mix, then add the rest.
- Squeeze lemon juice and combine.
- Reserve ¼ cup of the white buttercream to dye green for the stems and leaves.
- Transfer ½ the plain white buttercream from the standing mixer to a piping bag. Snip off the tip.
- Add in 1 tbsp of strained strawberry preserves to the remaining buttercream. Mix until combined.
- Save about 1-2 cups for the flowers in a separate bowl. Transfer the strawberry buttercream to a piping bag and snip off the tip.
- Use food coloring to dye the buttercream different shades of pink to orange for the flowers.
For the Assembly:
- Pipe the strawberry buttercream between each layer.
- Crumb coat the cake and smooth with a scraper.
- Pipe a thin layer of plain white buttercream on the outside of the cake. Even out with a hot scraper and offset spatula. Chill for about 30 minutes.
- Using a palette knife, sculpt flowers from the pink and orange buttercream. Add details, stems and leaves.
Notes
Nutrition
Have you tried this recipe? Tag me today!
Mention @preppykitchen and tag #preppykitchen!
Recipe Notes
- I used an American buttercream for this cake but if you like things on the less sweet side then I would substitute an Italian meringue buttercream in, much less sweet but so creamy and silky. It really lets the cake shine through. I stuck with a traditional American buttercream because it’s more stable in warmer temperatures and thicker in consistency making it more forgiving to paint with.
- To achieve some extra depth you can mix up some batches or buttercream with more coloring, then use that for different parts of the flower. I often do this when piping roses and it really helps.
- I know this cake is decorated to heck and back, which isn’t always a feasible thing to do. Feel free to make this as a naked cake or to employ any decoration scheme you’d like!
IF YOU ENJOYED THIS RECIPE THEN TRY SOME OF THESE OUT


