
This post may contain affiliate links. Please read our disclosure policy.
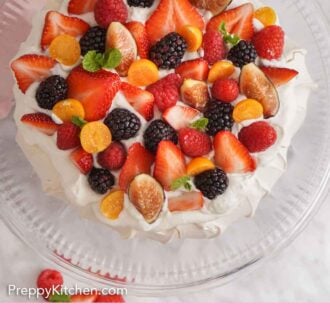
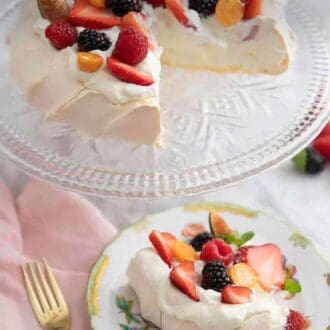
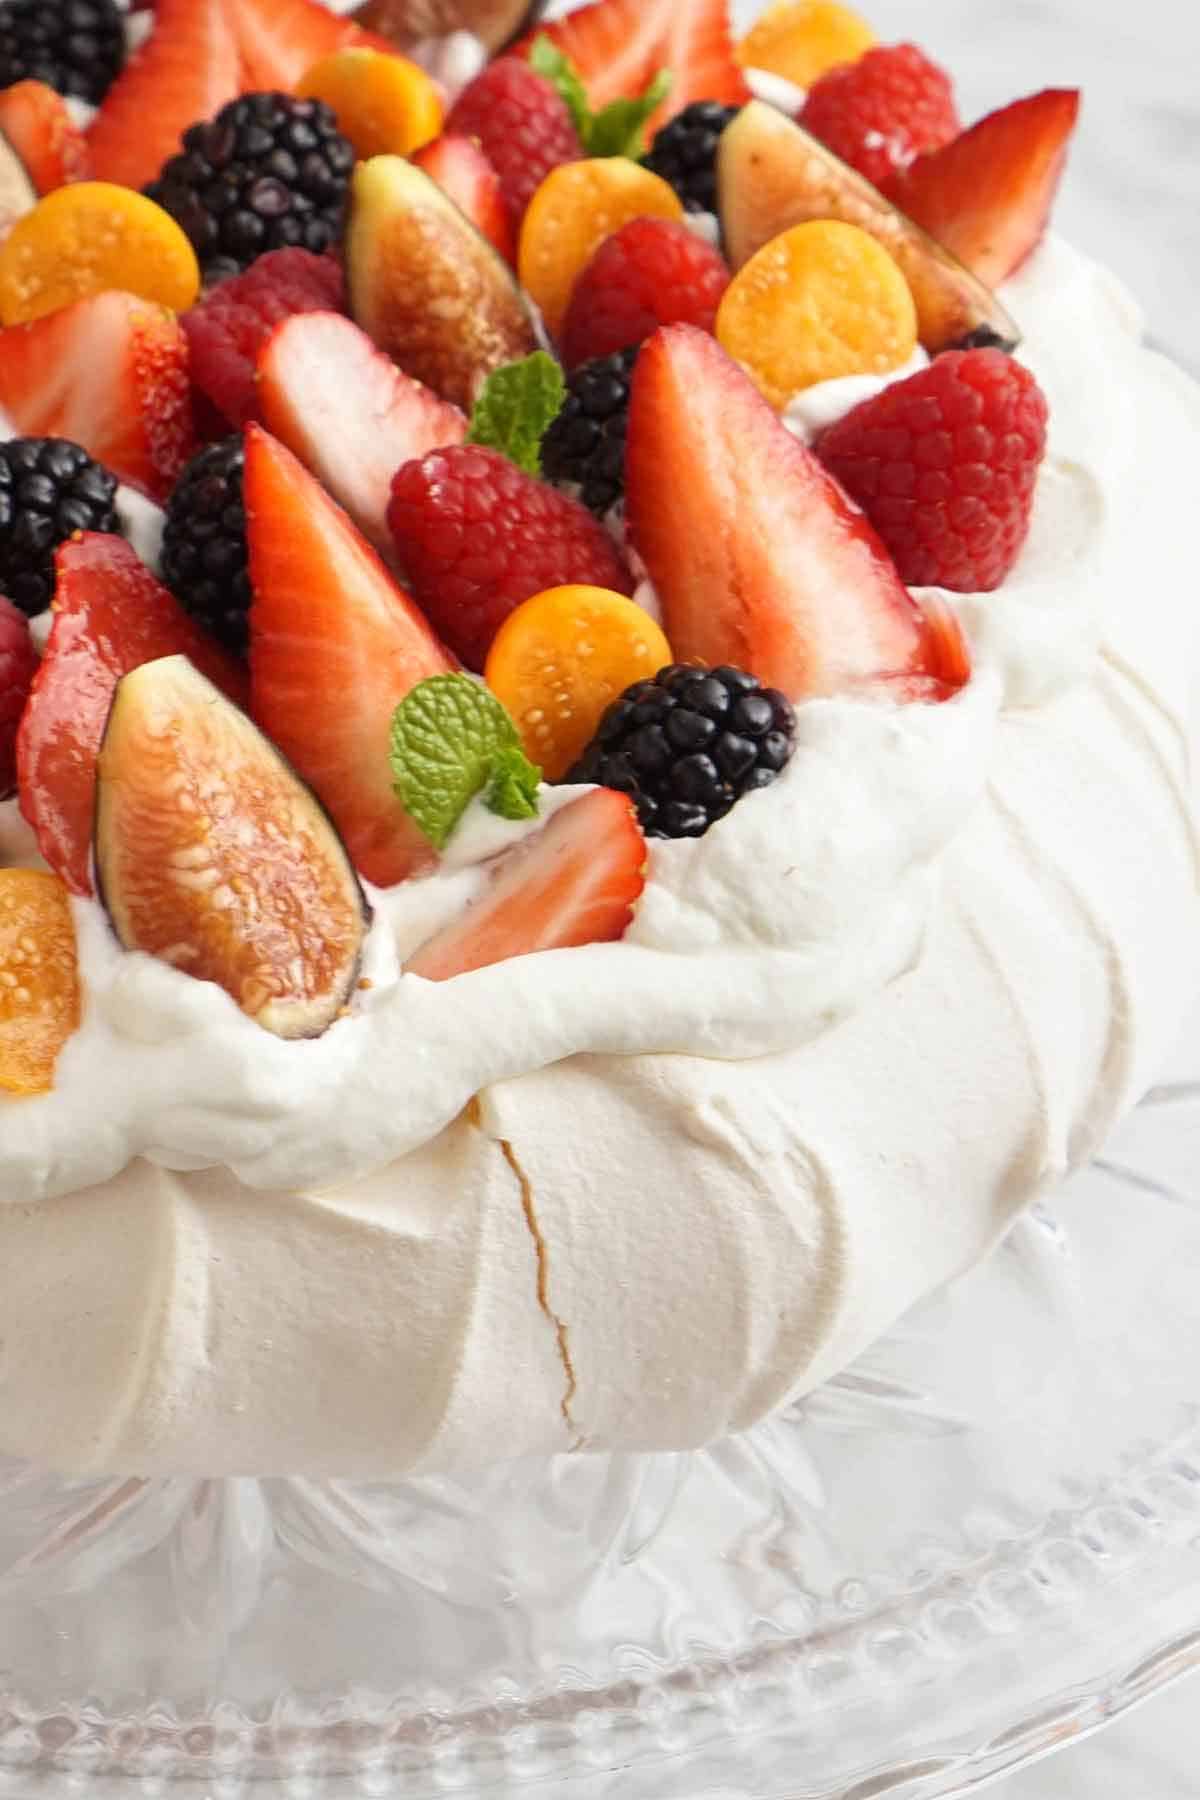
Today, I’m sharing with you a recipe that is delicate, beautiful, and so tasty– the timeless Pavlova. Imagine a meringue base that’s crisp on the outside, marshmallowy soft inside, crowned with a fresh burst of whipped cream and a colorful cascade of fruits. It’s simply delicious!
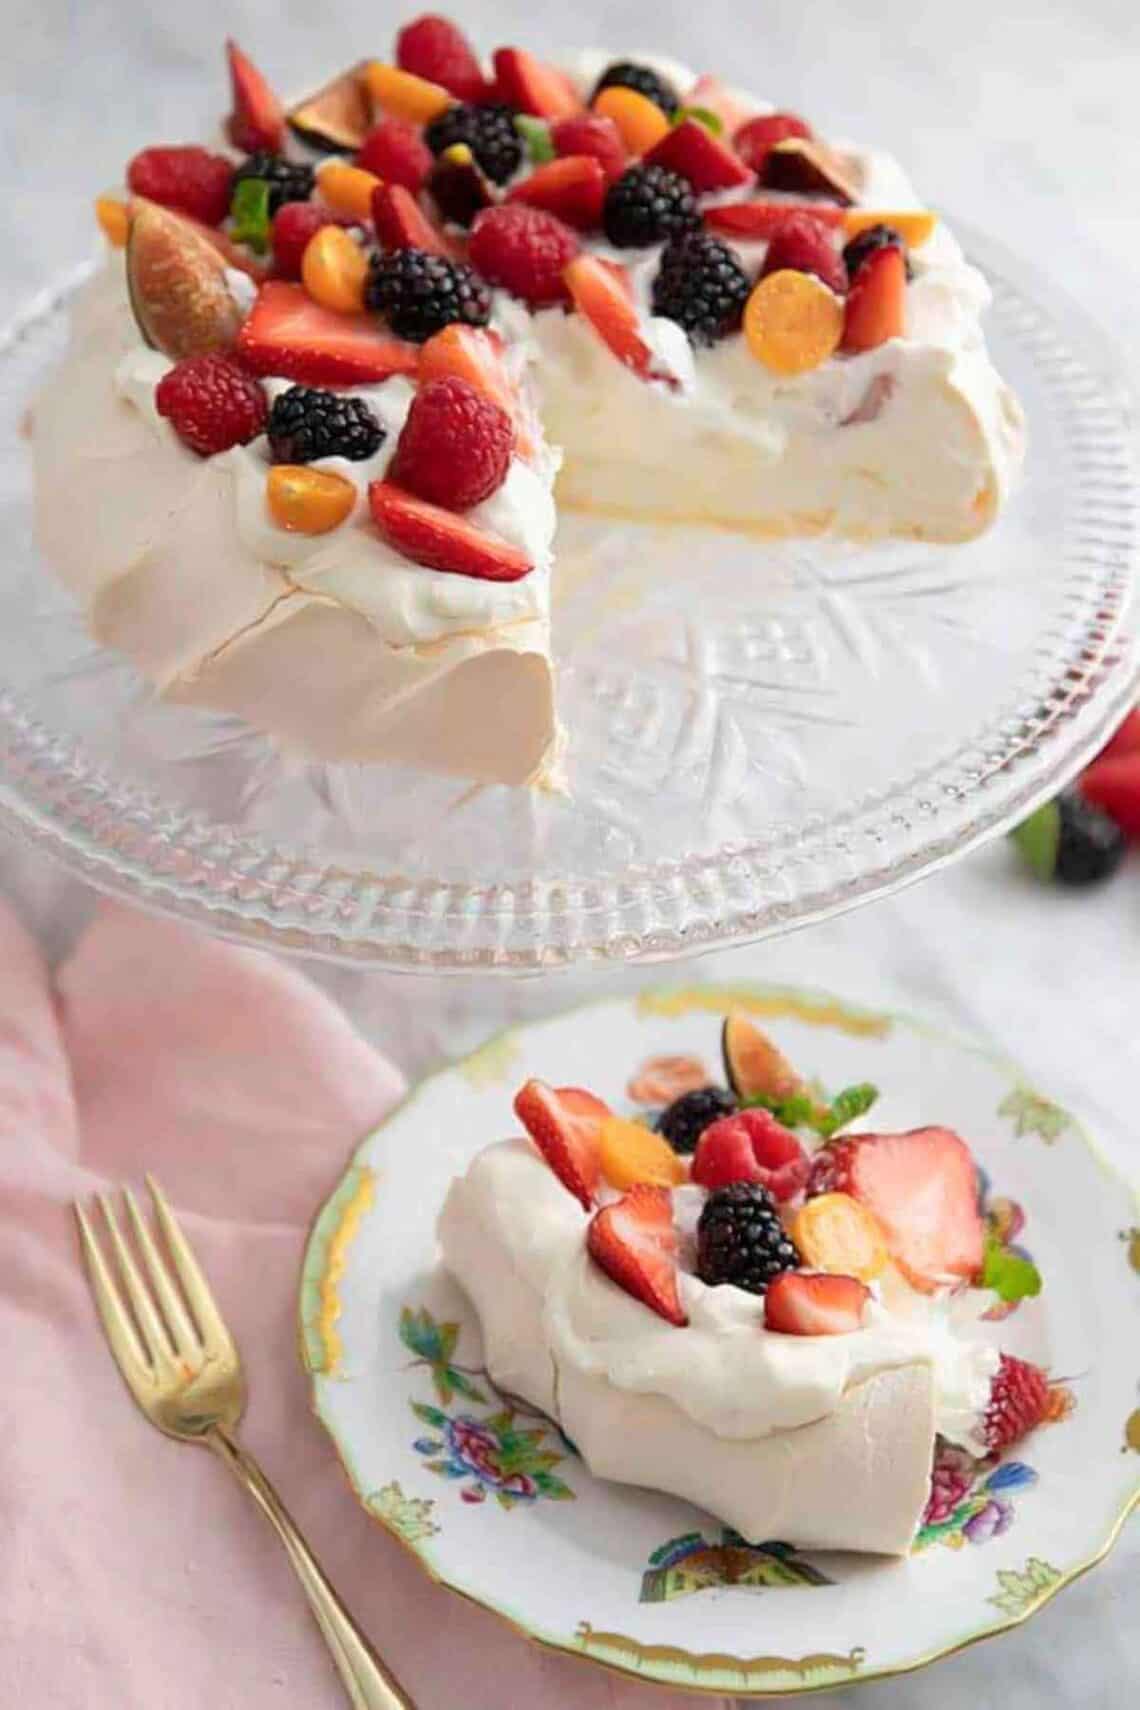
Named after the iconic Russian ballerina Anna Pavlova, this light-as-air meringue dessert is a gorgeous centerpiece for any dinner party. It’s equally at home on an al fresco table in the middle of summer as it is after a hearty, comfort food meal in winter.
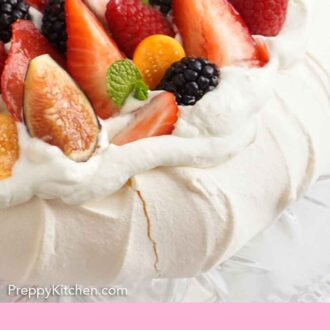
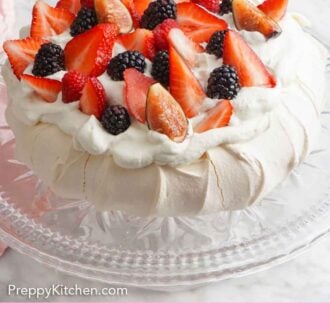
But, what makes a Pavlova? The secret is the contrast. A classic pavlova is a baked meringue with a crisp, crackly outer shell housing the softest, melt-in-your-mouth center. Top that with a mountain of luscious whipped cream and a vibrant array of fresh fruits, and you’ve got yourself not just a dessert, but a full sensory experience! And it only takes a few common ingredients and a quick whip with an electric mixer to make the magic happen. For more showstopping fruit desserts, check out my recipes for Lemon Meringue Pie, fresh Strawberry Tart, and a 3-layer Key Lime Cake next!
What You Need To Make This Recipe
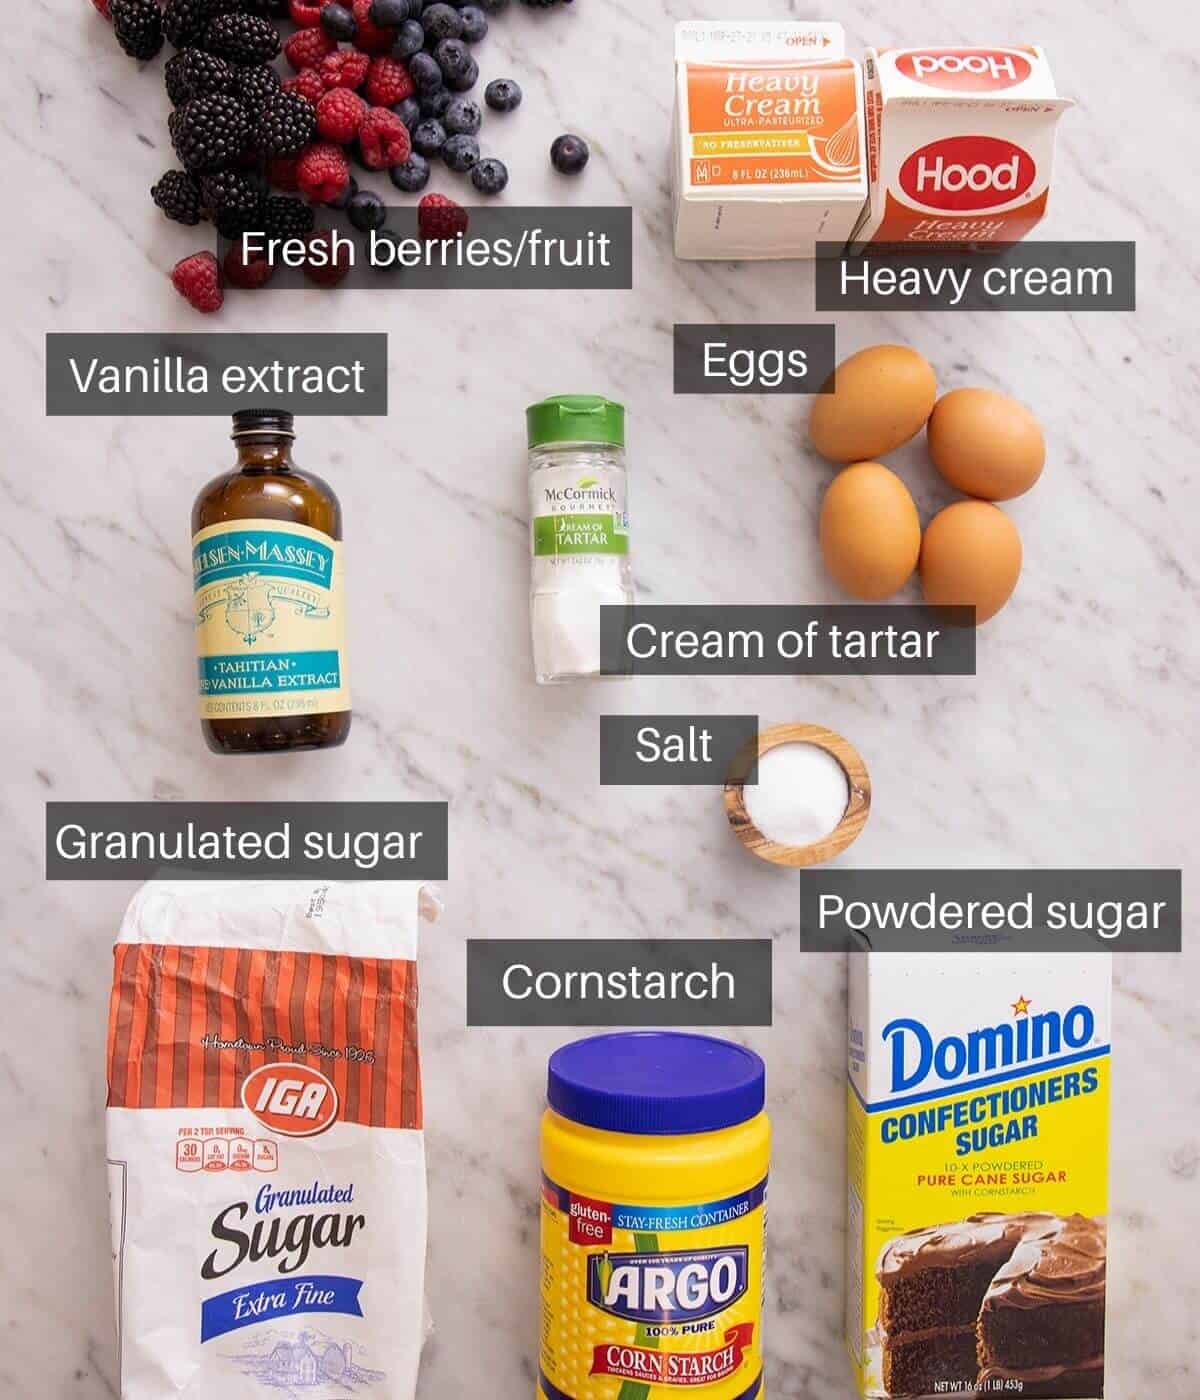
Egg whites — note that you’ll need egg whites from whole fresh eggs, not the kind that come in a carton. Bringing them to room temperature will help them whip up faster and with better structure.
Cream of tartar — this ingredient is traditional for pavlova recipes, but it’s only one type of acid that you can add. Feel free to swap in 2 teaspoons of fresh lemon juice or white wine vinegar in its place.
Vanilla — for aromatic warmth. You can also use an equal amount of vanilla paste if you like the appearance of vanilla bean flecks.
Superfine sugar — look for sugar labeled as superfine sugar or caster sugar for the best results. Regular granulated sugar granules are larger and may not fully dissolve which can cause the meringue to weep during baking and not be crisp. Be careful with tricky labeling on packages though! Some regular granulated sugar is labeled as “extra fine” — this is not the same as “superfine.”
Cornstarch — sift it first so it mixes in more easily.
Whipped cream — a billowy cloud of whipped cream does a magnificent job of introducing some lusciousness while keeping the whole dish ethereally light.
Fresh fruit — berries, kiwi, mango, pomegranate… let your imagination run wild. If you like eating a particular fruit with whipped cream, chances are you’re also going to like it when meringue is introduced to the equation.
How To Make Pavlova
1. Preheat the oven to 300°F. Use a plate, bowl, or cake pan to draw a circle between 8 and 9 inches on a sheet of parchment paper. Place the paper, drawn side down, on a baking sheet and set aside.
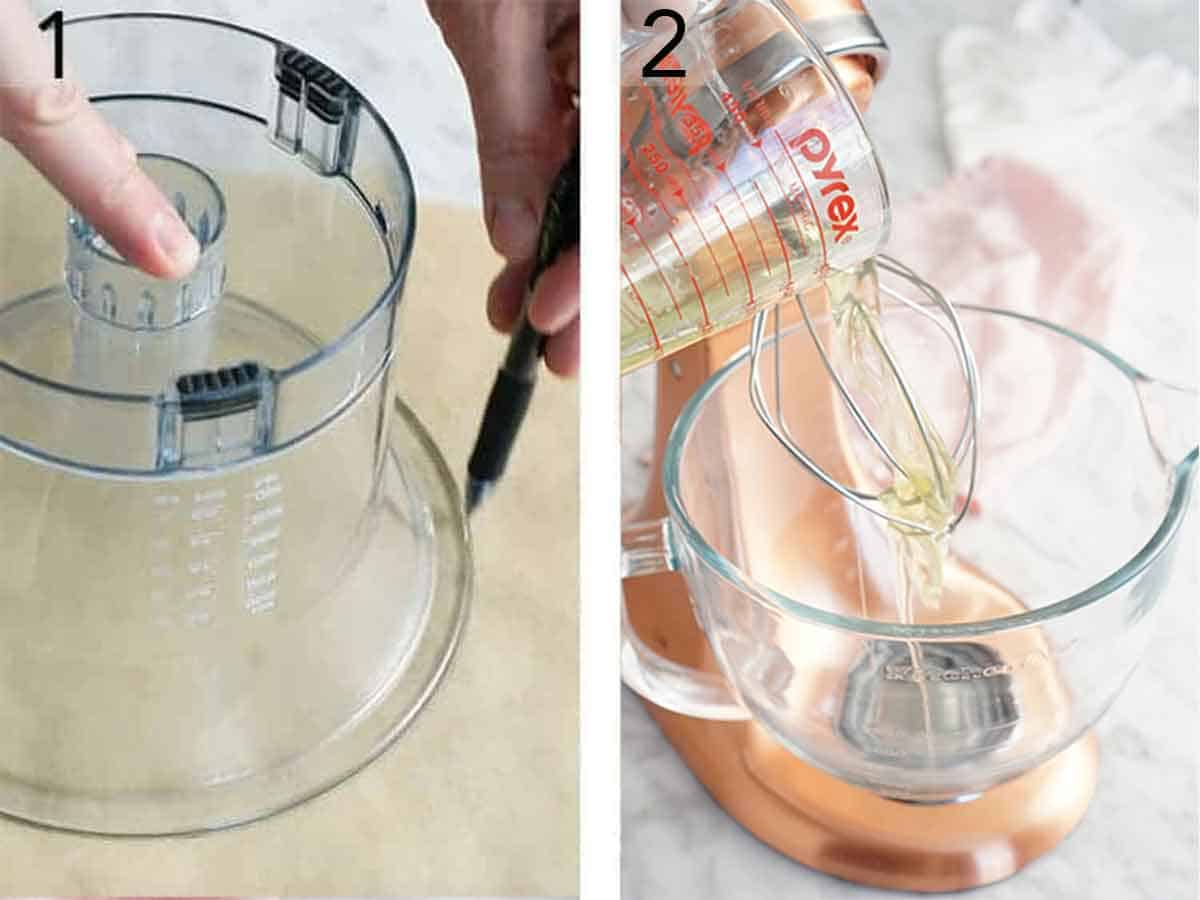
2. Combine the egg whites, cream of tartar, and salt in the mixing bowl of a stand mixer fitted with a whisk attachment. Beat on low-medium speed until frothy, about 1 minute. (You can also use an electric hand mixer but it will require some patience.)
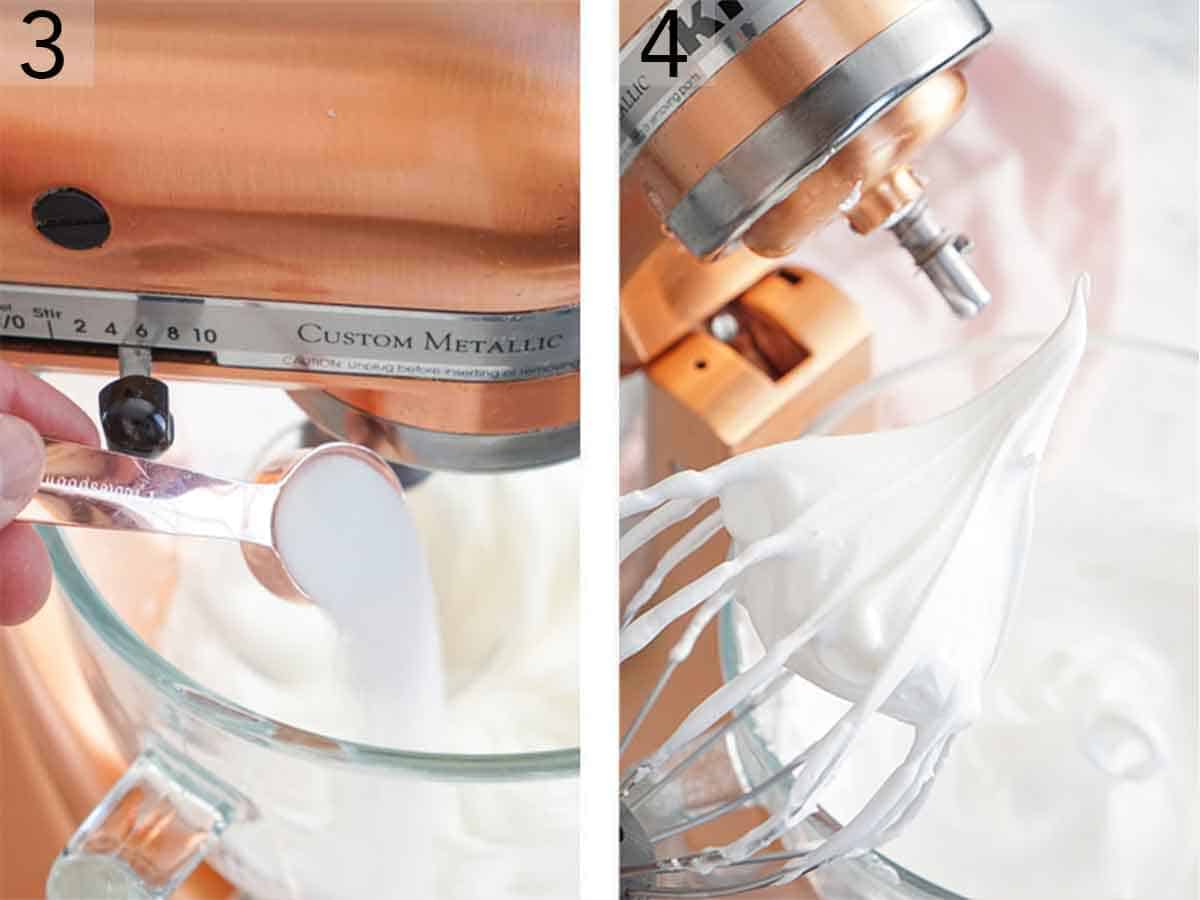
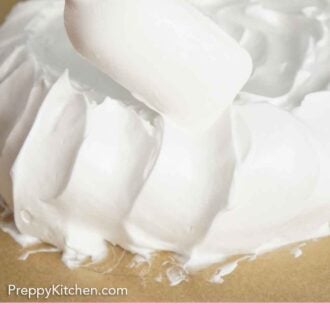
3. Once the egg whites are frothy, begin sprinkling in the sugar a spoonful at a time. (The key is not to dump the sugar in but to add it very slowly so it has time to dissolve.) Once the sugar is added, scrape down the bowl and add the vanilla extract, then beat to soft peaks.
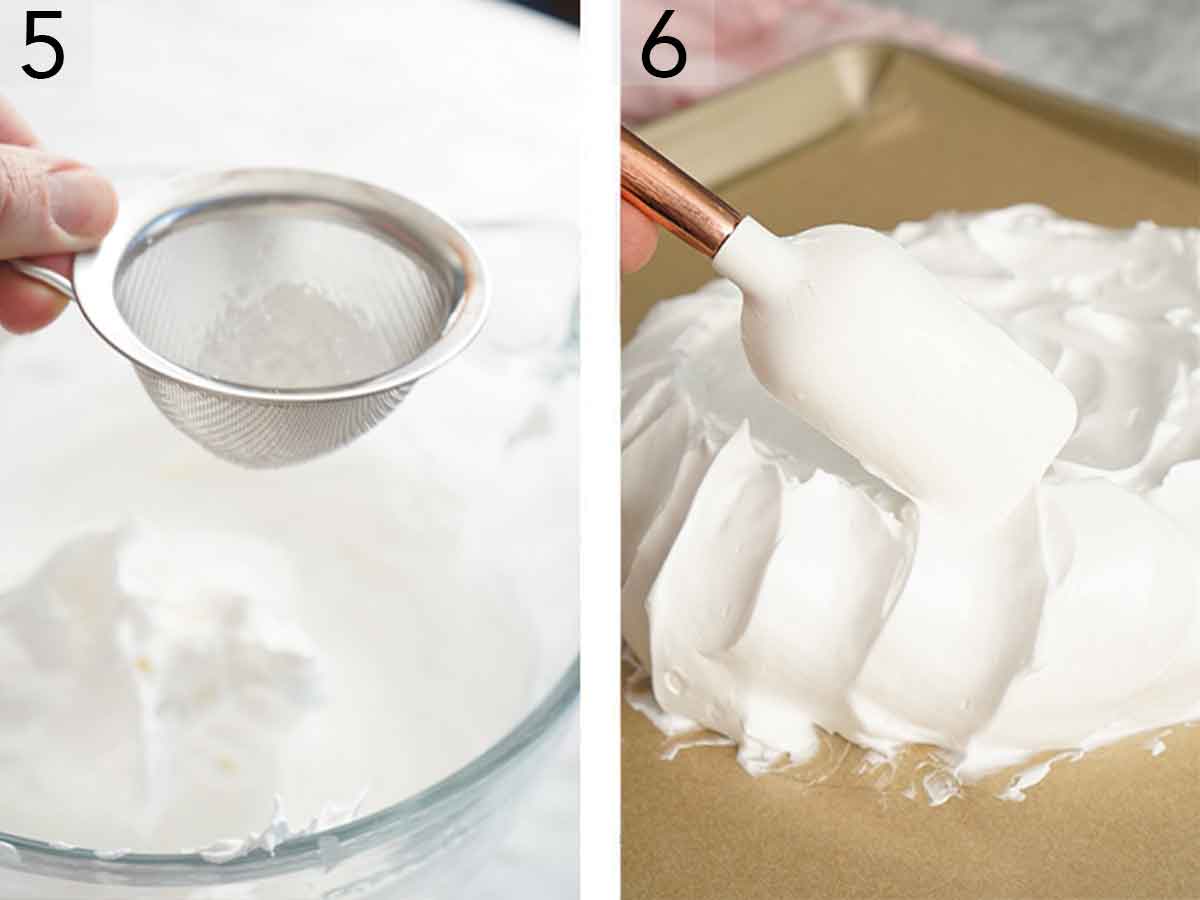
4. Continue to beat on medium-high speed until glossy, stiff peaks form, about 5 to 8 minutes. Test it by stopping the mixer, removing the attachment, and dipping it into the meringue. Remove it and hold it upright. If the peak droops when you move it, keep beating. If it holds its shape, you’re good to go on to the next step.
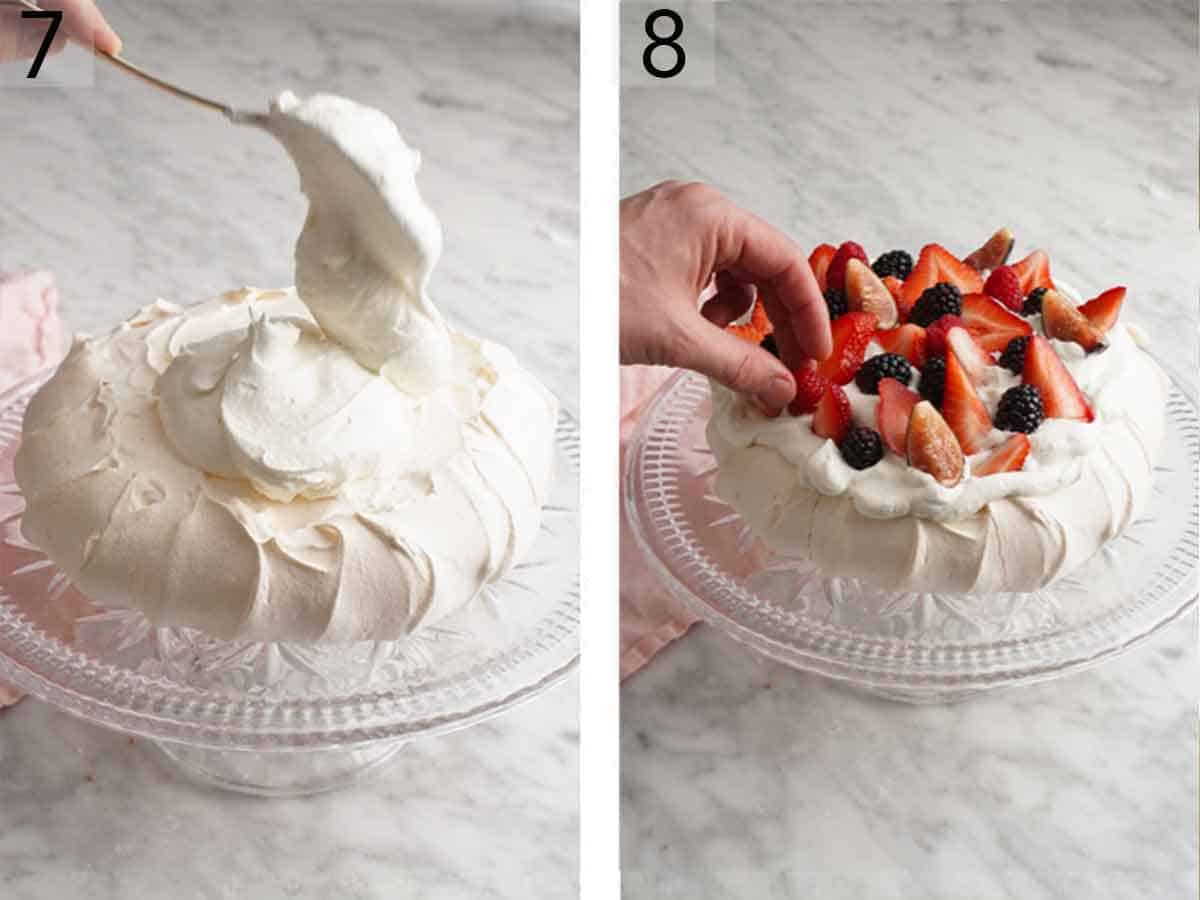
5. Sift the corn starch onto the meringue and fold in using a spatula. Spoon the meringue mixture into the center of the drawn circle.
6. Spread the meringue using an offset spatula into a disk, using the circle as a guide. Make a slight depression on top a few inches wide in the center. You can use the spatula to create vertical swoops on the side or leave things nice and rustic. Place your meringue into the preheated oven, then immediately reduce the temperature to 250°F. Bake for about for 1 hour to 1 hour and 15 minutes or until the meringue is slightly cream in color and feels dry and hard on the outside. Turn the oven off and allow the pavlova to cool completely in the oven, about 3 hours.
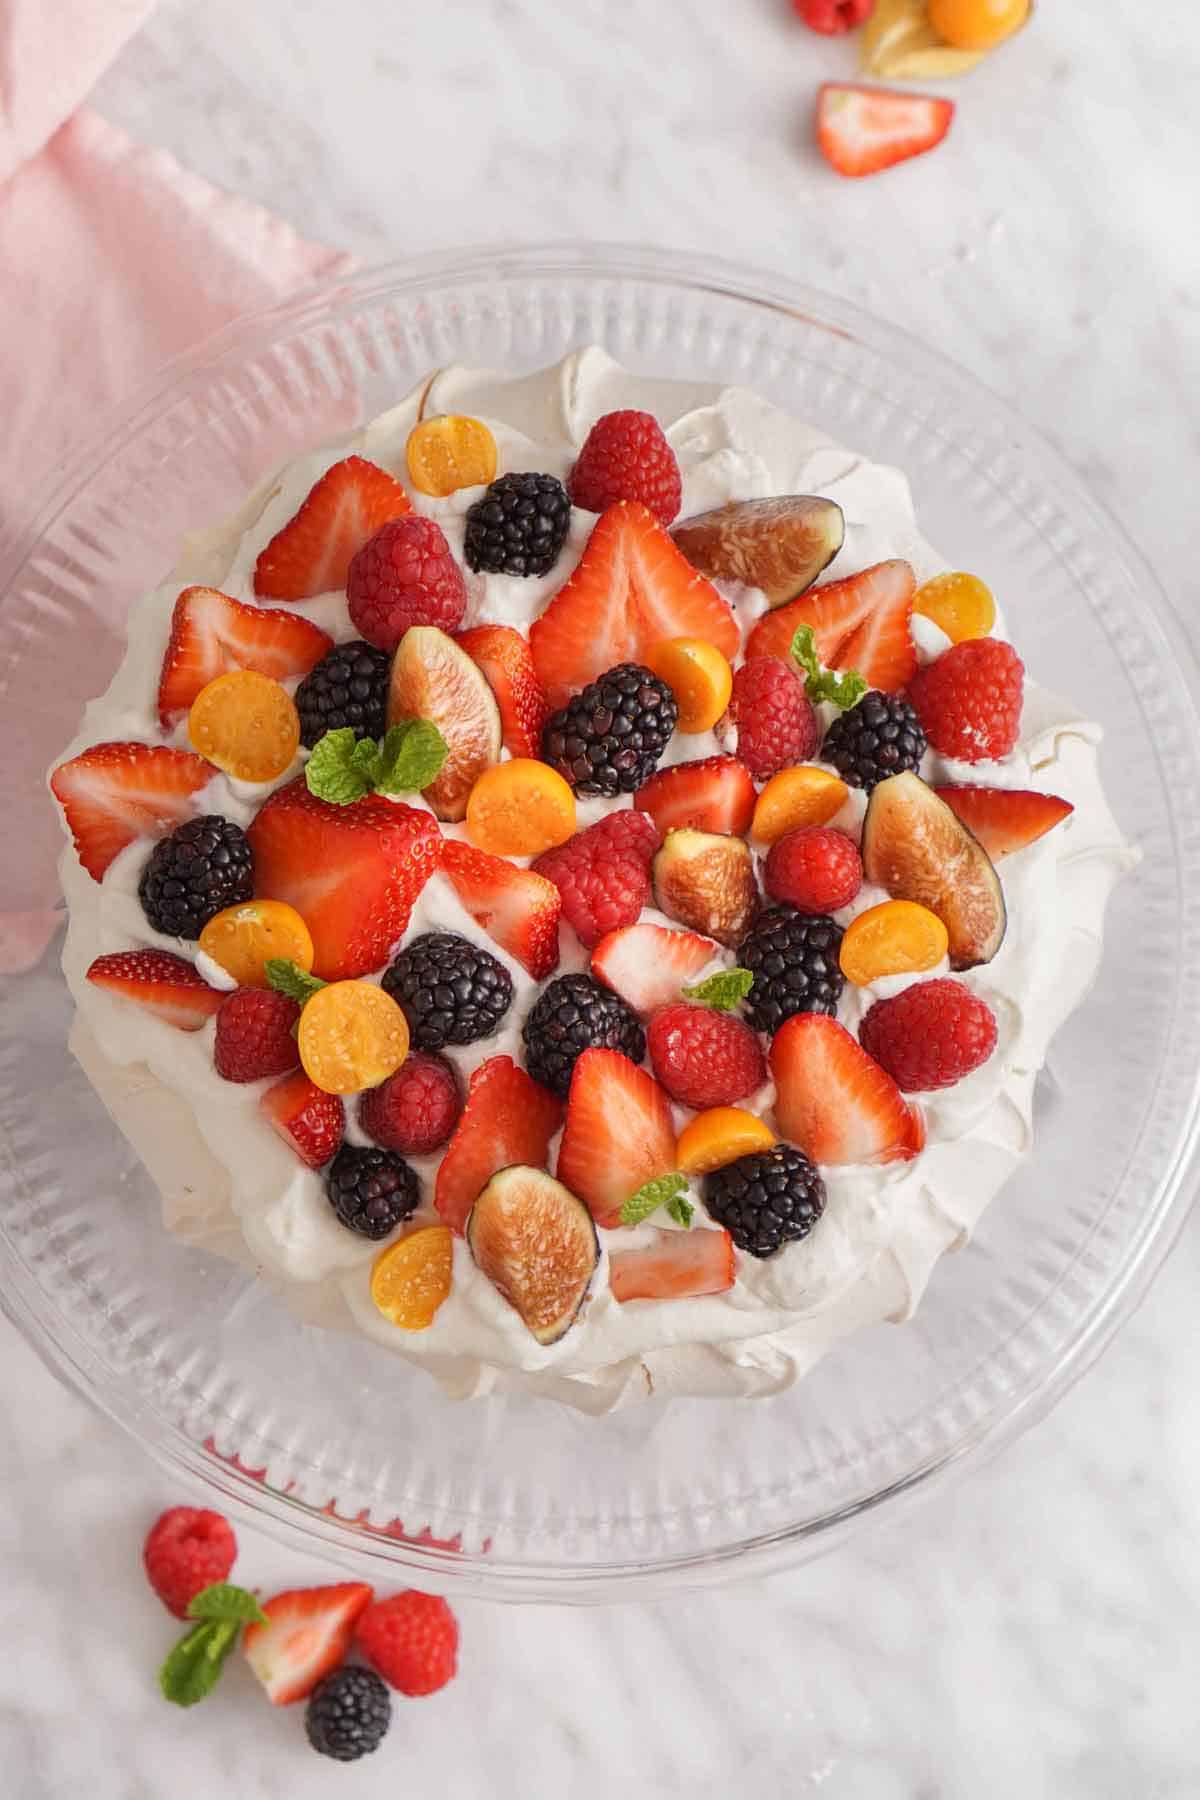
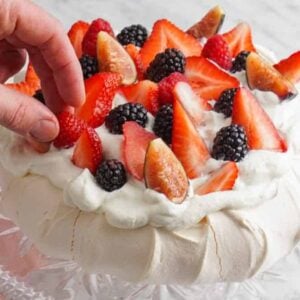
7. In a large mixing bowl, combine the cream, powdered sugar, and vanilla. Beat on high speed until soft peaks form, 3 to 5 minutes. When ready to serve, carefully peel the cooled meringue off the parchment paper and place it on a serving plate. Spoon the whipped cream on top of the meringue.
8. Top with and desired fruit like kiwi, strawberries, blackberries, raspberries, or figs. Serve immediately.
Pro Tips For Making This Recipe
- Make sure your egg whites are room temperature. It’s best to separate the eggs while they’re cold from the fridge (which makes the yolk less likely to break), then let the whites age on the counter as they come to room temperature. They will beat up faster and hold air better when they aren’t cold.
- Can’t find superfine or caster sugar at the store? Blitz your regular granulated sugar in a food processor for 1-2 minutes, then sift it to remove any large granules that might remain.
- To cool your meringue faster without cracking, after 1 hour of cooling with the oven door closed, crack the door open with a wooden spoon and continue cooling for another hour.
- Get creative with your toppings. Sometimes I like to add a layer of lemon curd (or fold it into my whipped cream) for an extra pop of flavor. I also love to use fruit that’s in season, but if you can’t get fresh berries you’re welcome to macerate some frozen ones. You can even make a Christmas pavlova with whipped cream, dark chocolate shavings, and fresh pomegranate arils.
- Want to make it easier to serve at a potluck or other larger gathering? Make individually sized mini pavlovas, then serve the whipped cream and fruit on the side for guests to help themselves.
Frequently Asked Questions
Try making homemade lemon curd, ice cream, or chocolate pudding. Yum!
While I don’t recommend storing leftover assembled pavlova, you can definitely make the meringue ahead of time. You can leave it in the oven for several hours or overnight if you’re concerned about humidity or are making it in advance. Alternatively, place it in a zip-top bag or airtight container with a packet of silica and keep at room temperature for up to 24 hours.
If you do have leftovers of the assembled dessert, just note that the meringue will lose its crispness, the fruit will weep a bit, and the whipped cream will deflate, but it’ll still taste very good.
Absolutely! Just make sure there is no cross-contamination if you are serving people with celiac.
If you’ve tried this Pavlova recipe, then don’t forget to rate the recipe and let me know how you got on in the comments below, I love hearing from you!
Pavlova
Ingredients
For the Meringue:
- 4 large egg whites room temperature
- ½ teaspoon cream of tartar*
- 1 pinch salt
- 1 teaspoon vanilla
- 1 cup superfine sugar (225g)
- 1½ teaspoon cornstarch
For the Topping:
- 1½ cups heavy whipping cream (360ml)
- ¼ cup powdered sugar (30g)
- 1 tablespoon vanilla extract
- 3 cups fresh fruit (blueberries, raspberries, kiwi, sliced strawberries, etc.)
- Fresh mint leaves (optional)
Instructions
For the Meringue:
- Preheat the oven to 300°F. Use a plate, bowl, or cake pan to draw a circle between 8 and 9 inches on a sheet of parchment paper. Place the paper, drawn side down, on a baking sheet and set aside.
- Combine the egg whites, cream of tartar, and salt in the mixing bowl of a stand mixer fitted with a whisk attachment. Beat on medium-low speed until frothy, about 1 minute. (You can also use an electric hand mixer but it will require some patience.)
- Once the egg whites are frothy, begin sprinkling in the sugar a spoonful at a time. (The key is not to dump the sugar in but to add it very slowly so it has time to dissolve.) Once the sugar is added, scrape down the bowl and add the vanilla.
- Beat on medium-high speed until stiff, glossy peaks form, about 5 to 8 minutes. Sprinkle the cornstarch onto the meringue and fold in using a spatula.
- Spoon the meringue into the center of the drawn circle. Spread the meringue using an offset spatula into a disk, using the circle as a guide. Make a slight depression on top a few inches wide in the center. You can use the spatula to create vertical swoops on the side or leave things nice and rustic.
- Place your meringue into the preheated oven, then immediately reduce the temperature to 250°F. Bake for about for 1 hour to 1 hour and 15 minutes or until the meringue is slightly cream in color and feels dry and hard on the outside.
- Turn the oven off and allow the pavlova to cool completely in the oven, about 3 hours. (To cool faster, after 1 hour of cooling with the oven door close, crack the door open with a wooden spoon and continue cooling for another hour.) You can leave it in the oven for several hours or overnight if you’re concerned about humidity or are making it in advance.
For the Topping:
- In a large mixing bowl, combine the cream, powdered sugar, and vanilla. Beat on high until soft peaks form, 3 to 5 minutes.
- When ready to serve, carefully peel the cooled meringue off the parchment paper and place it on a serving plate. Spoon the whipped cream on top of the meringue and top with fruit and mint. Serve immediately.
Notes
- Make sure your egg whites are room temperature. It’s best to separate the eggs while they’re cold from the fridge (which makes the yolk less likely to break), then let the whites age on the counter as they come to room temperature. They will beat up faster and hold air better when they aren’t cold.
- Can’t find superfine or caster sugar at the store? Blitz your regular granulated sugar in a food processor for 1-2 minutes, then sift it to remove any large granules that might remain.
- To cool your meringue faster without cracking, after 1 hour of cooling with the oven door closed, crack the door open with a wooden spoon and continue cooling for another hour.
- Get creative with your toppings. Sometimes I like to add a layer of lemon curd (or fold it into my whipped cream) for an extra pop of flavor. I also love to use fruit that’s in season, but if you can’t get fresh berries you’re welcome to macerate some frozen ones. You can even make a Christmas pavlova with whipped cream, dark chocolate shavings, and fresh pomegranate arils.
- Want to make it easier to serve at a potluck or other larger gathering? Make individually sized mini pavlovas, then serve the whipped cream and fruit on the side for guests to help themselves.
Nutrition
Have you tried this recipe? Tag me today!
Mention @preppykitchen and tag #preppykitchen!


