
This post may contain affiliate links. Please read our disclosure policy.

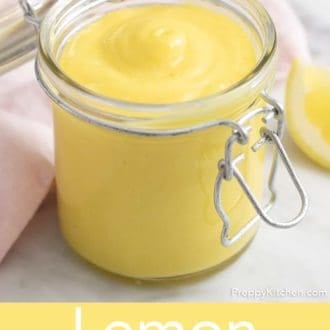

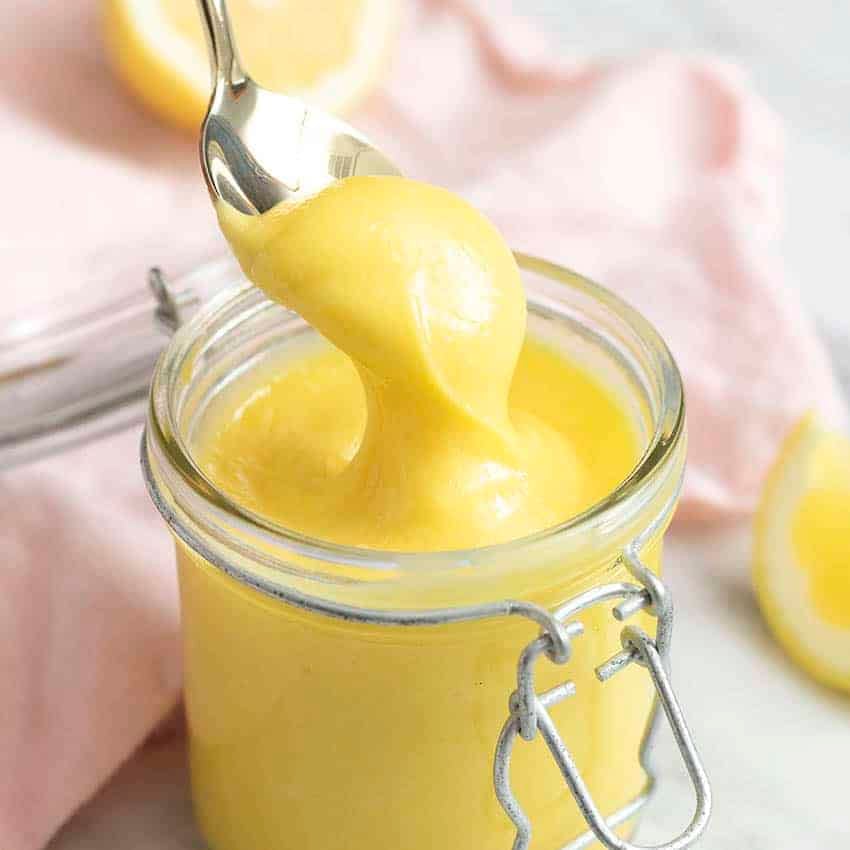
How to make the easiest homemade Lemon Curd with just four simple ingredients. It’s sweet, tart, smooth and creamy, and can be used in so many ways from filling cakes, tarts, scones and so much more!

Lemon curd is one of the easiest things to make; it’s a thick spread made from fresh lemons, sugar, eggs, and butter. It’s smooth and creamy in texture with a bright, sweet, and zingy flavor, which is perfect for use in desserts or simply spreading on toast for breakfast.
Once you make this easy homemade version, I guarantee you’ll never be tempted to pick up a jar at the store again because it doesn’t taste nearly as delicious! The secret to making the best lemon curd? Adding in cold butter at the end. It gives the curd the most delicious, silky soft texture and thickens it beautifully.
Use it to flavor buttercream, to top or fill cakes or cupcakes, or to serve over meringues. See my full recipe tutorial below that shows you all the ingredients you need, including some important notes on substitutions, step-by-step photos and video, and all the tips you need to make the very best homemade lemon curd from scratch!
“My go-to curd recipe!! No matter the citrus, this recipe is amazing. I’ve done lemon, lime, key lime, and orange, and all are divine. Great in my macarons and cakes!”
Julie
Key Ingredients
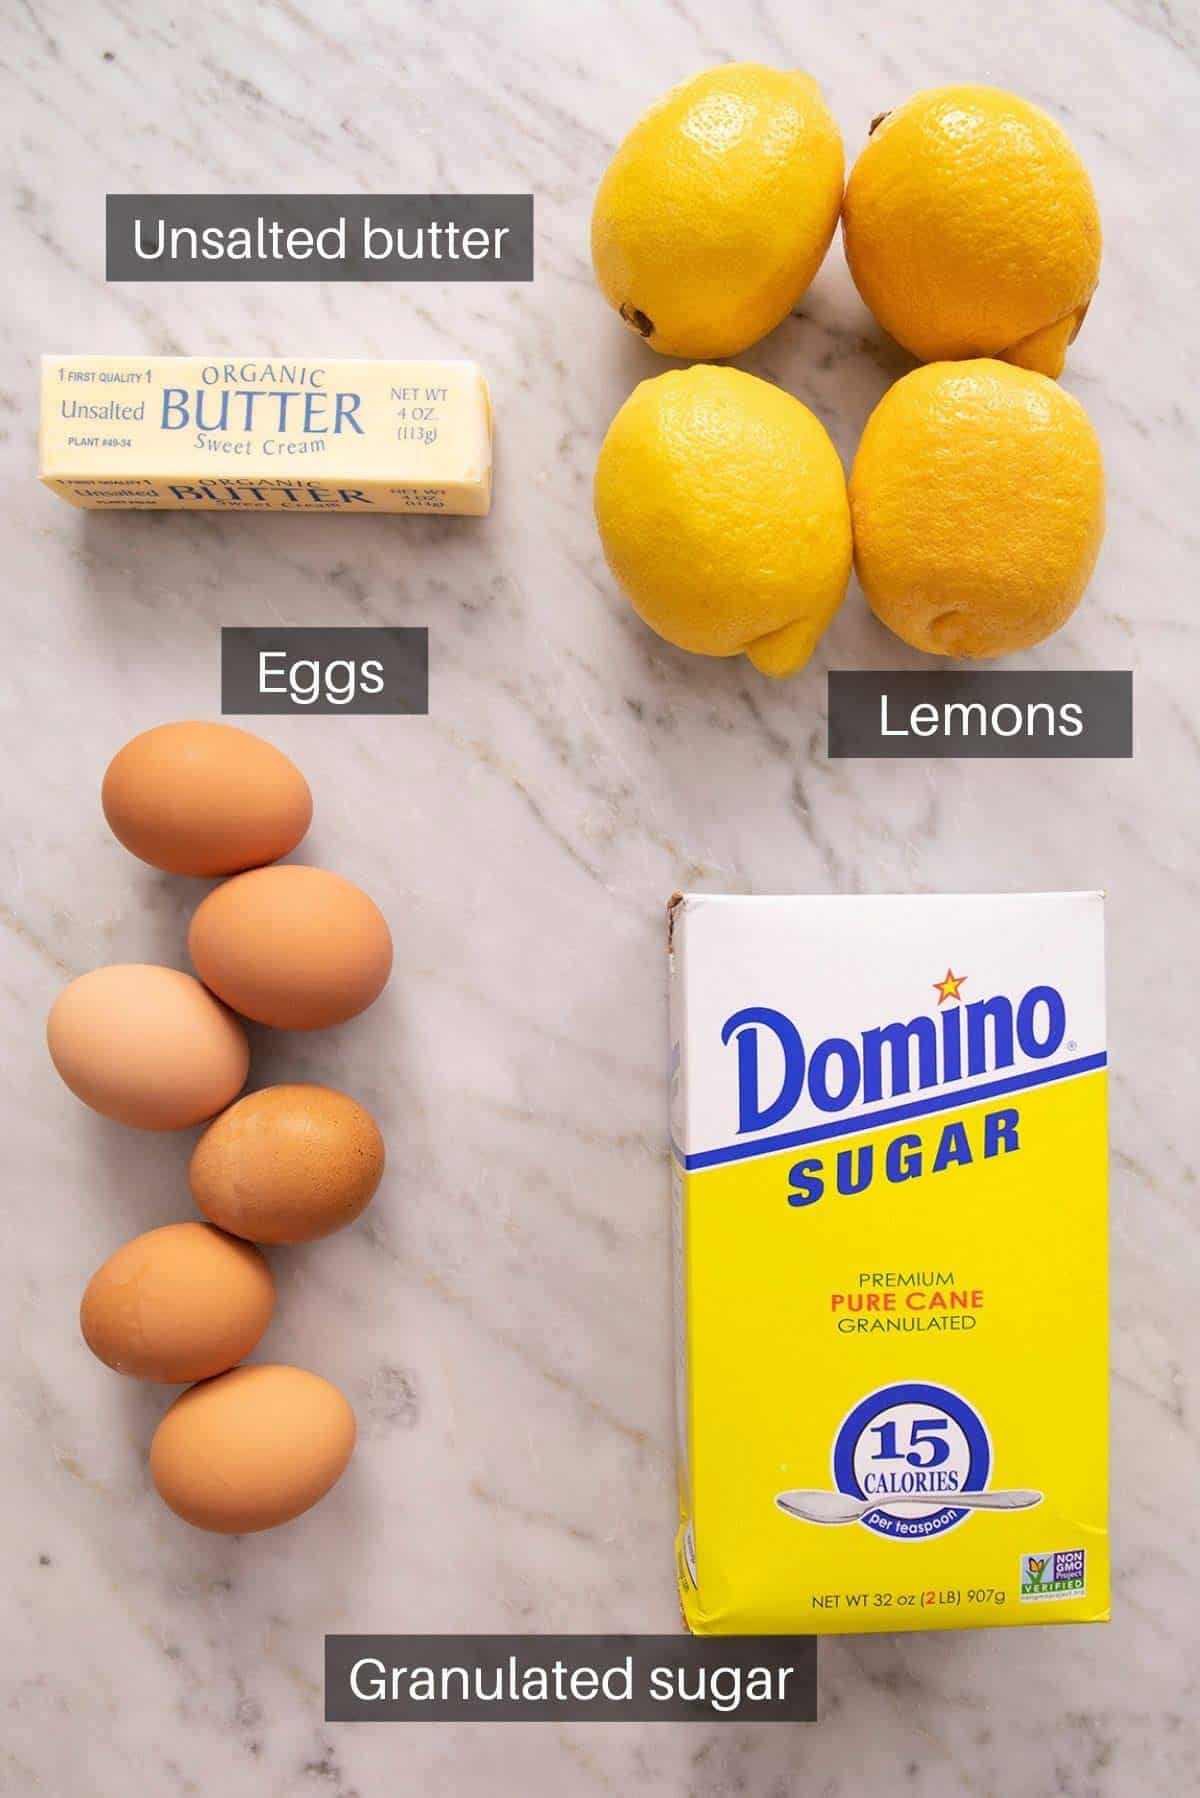
These are the main ingredients you need to make the best lemon curd. You can find the full list of ingredients and measurements in the recipe card below.
Lemons – use good quality fresh lemon for best results, you’ll need to use the zest and juice for that extra zingy and citrusy flavor.
Egg yolks – you only need the egg yolks which is used to thicken the curd. Separate the whites and freeze them for a later use like making Swiss Meringue Buttercream or an Angel Food Cake.
Butter – butter also helps thicken the curd and gives it a delicious creamy and decadent flavor. Make sure to use unsalted butter and I like to keep it cold before adding so it thickens the curd quickly.
Sugar – use white granulated sugar, don’t use brown sugar or it’ll change both the flavor and color of the curd.
Can I Use Other Citrus?
Absolutely! I have tested this recipe with a variety of citrus fruits, and it works great with oranges, Meyer lemons, regular or key limes, and grapefruit. For a sweeter citrus like oranges, I suggest keeping 2 tablespoons of lemon juice in the overall juice amount so the curd still has a bit of tartness. But that’s up to your personal preference!
Pro Tips For Making The Best Lemon Curd
The most important tip for flavor is to use fresh lemon juice that’s been freshly squeezed. Don’t be tempted to use bottled lemon juice of any kind, as it’ll be far too acidic and will ruin the flavor.
If you don’t feel like pulling out your food processor or don’t have one, you can also massage the lemon zest into the sugar with your fingertips until the sugar is all moistened and aromatic.
Keep the heat low, don’t turn it up to speed up the process. Cooking with too high heat will overcook the eggs and cause them to curdle or scramble.
Don’t stop whisking the curd until it’s off the heat. For the same reasons and using lower heat, if you let the curd cook undisturbed, the bottom will overheat and the eggs will scramble and turn lumpy. If you don’t have a very low setting on your stove, it’s best to use a double boiler so you don’t overcook the eggs. It will take a few extra minutes to thicken the curd with this method, but it’s worth it for a smooth lemon curd!
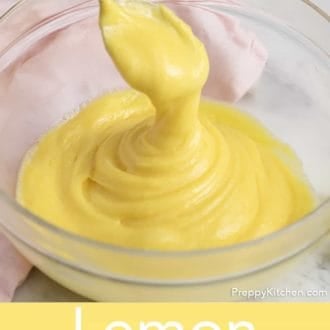
You’ll know the curd is ready when it noticeably thickens in consistency and coats the back of a wooden spoon. If you want the curd even thicker, you can continue cooking it until it holds the trace of the whisk when pulled through the curd.
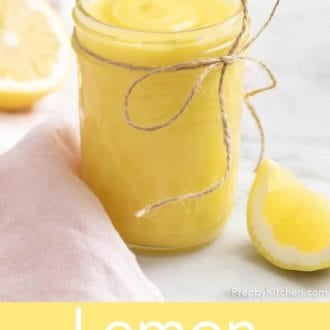
Prevent a skin from forming with this trick. Once transferred to a bowl or jar, place a piece of plastic wrap directly on top of the curd, and press it to the surface. This eliminates any contact with air as it cools, preventing a skin, or rubbery layer from forming.
Cold butter will help cool the curd and set it more quickly. I like to cube my butter before I start, then put it back in the fridge and pull it out after I pull the pot off the heat.
How To Make Lemon Curd
Below, I’ve highlighted portions of the recipe in step-by-step process images along with instructions for making homemade lemon curd. You can find the full set of instructions in the recipe card below.
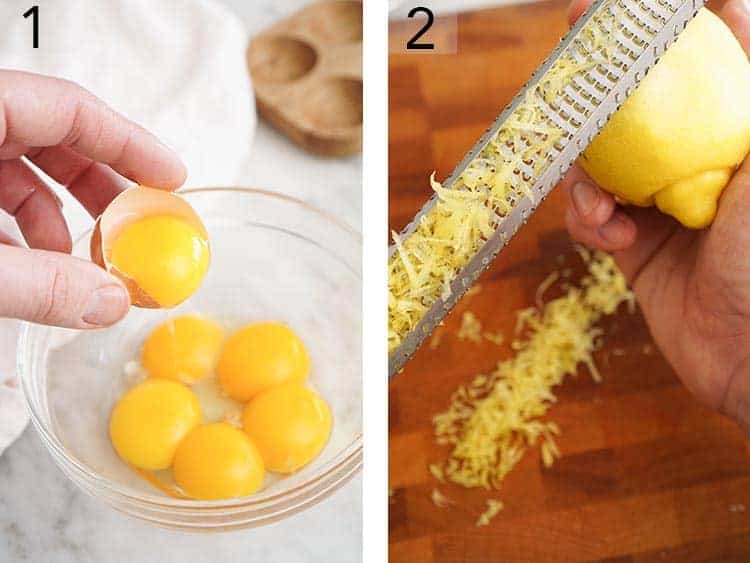
1. Add the egg yolks to a bowl (freeze the whites for another use).
2. Zest two lemons which will yield about two tablespoons.
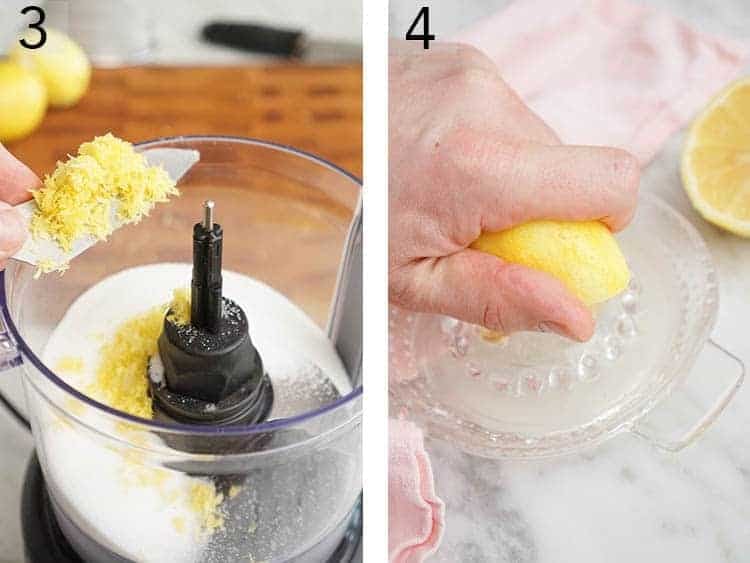
3. Add the sugar and zest to a food processor and pulse until the zest is totally incorporated and your sugar is fragrant and light yellow in color. This step is optional but it really takes that lemon flavor up a notch.
4. Juice your lemons until you have about 1/2 a cup, strain to remove any pips and pulp.
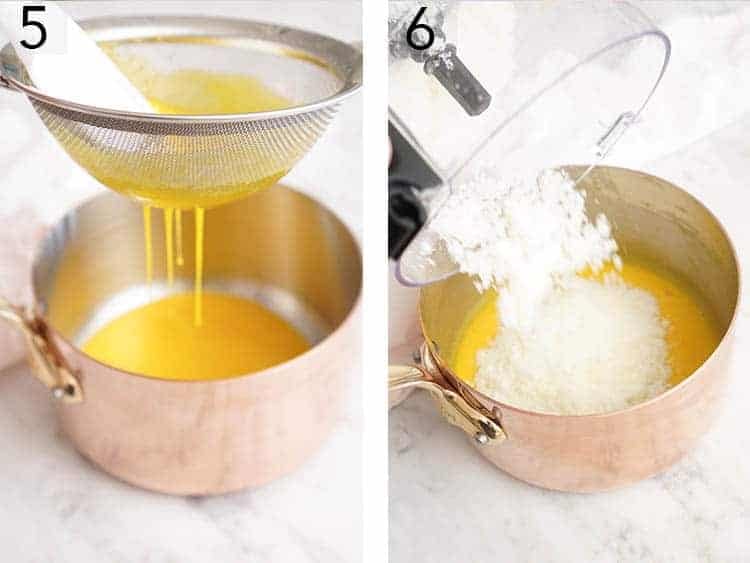
5. Strain the yolks into the pot to remove any non yolk parts of the egg (optional but recommended).
6. Add the sugar to the eggs.
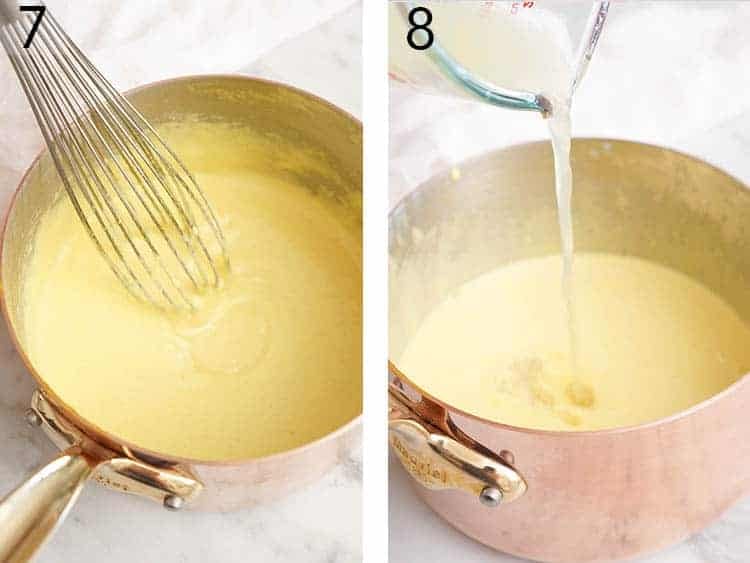
7. Whisk the sugar and yolks until you have a nice light color, this helps dissolve the sugar.
8. Slowly whisk in the lemon juice and mix until incorporated.
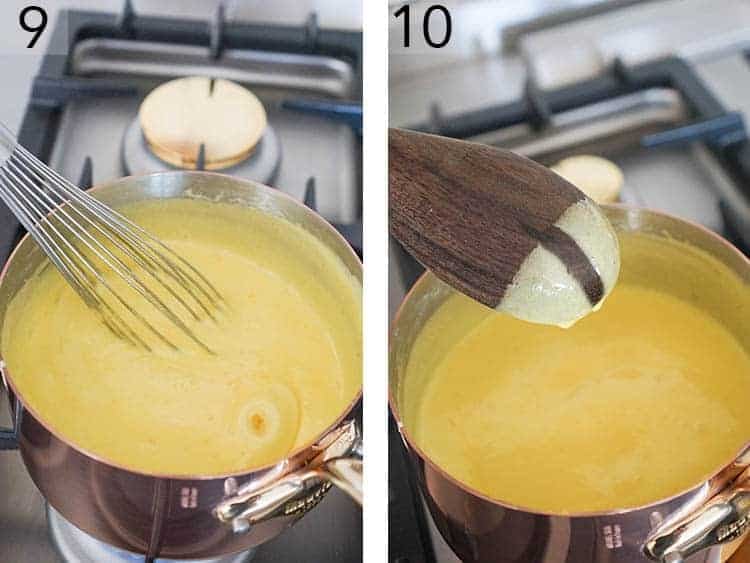
9. Place on a low heat and whisk until you see the curd noticeably thicken and just start to bubble.
10. When the curd is thick enough you should be able to draw a line on the back of a wooden spoon with your finger and it holds.
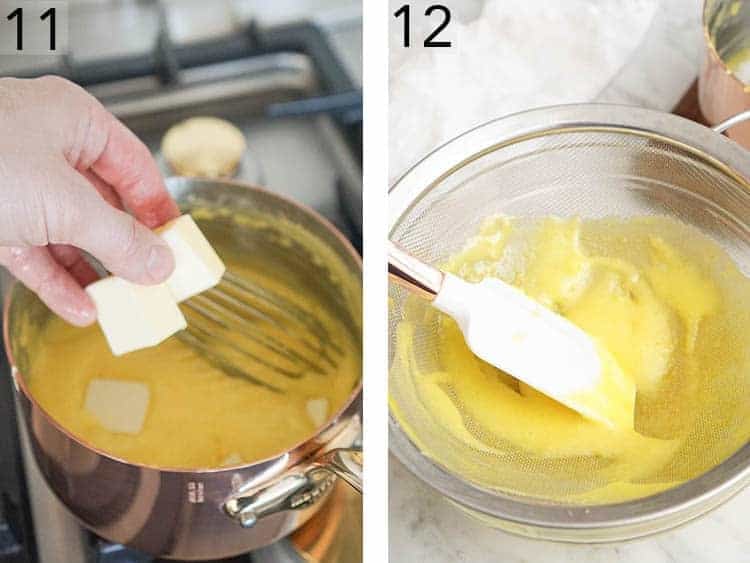
11. Remove the Pot from heat, add the cold butter and stir in until melted and incorporated.
12. Strain the curd straight into a bowl or jar and place a sheet of plastic wrap directly on top of the curd to prevent a skin from forming as it cools. Chill until ready to use.
Lemon Curd Recipe

Equipment
- Medium pot
Ingredients
- 1 cup granulated sugar (200g)
- 2 tablespoons lemon zest (from 2 lemons)
- 6 large egg yolks
- 7 tablespoons lemon juice (100mL)
- ½ cup butter unsalted cold (113g)
Instructions
- Zest the lemons. If you have a food processor handy I like to pulse the lemon zest and sugar together to really extract all the oils from them but this step is not a must.
- Juice the lemons until you have about half a cup of lemon juice. Don’t forget to strain out the seeds.
- Strain egg yolks into a pot and beat lightly with a wire whisk. Whisk in the sugar and give it a good mix until lighter in color. Stir in lemon juice gradually.
- Heat on low, while stirring constantly with a wire whisk until mixture thickens, just starts to bubble and coats the back of wooden spoon.
- Remove pot from heat, then add the cold, cubed butter and mix until melted.
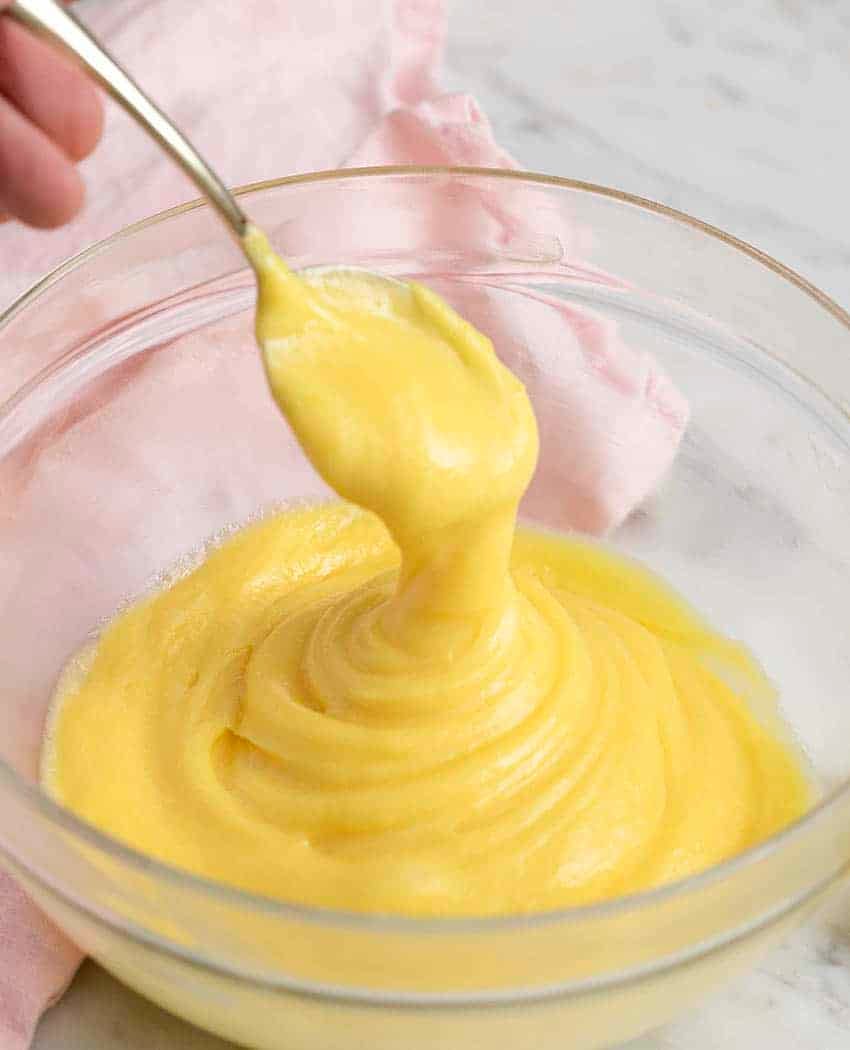
- This is optional but I like to strain the final mixture to remove any bits of zest, etc. The final curd will be SILKY SMOOTH and amazing.
- Transfer the curd to a sealable container or bowl. If storing in a bowl make sure to cover the surface with plastic wrap to prevent a skin from forming.
Notes
- The curd will set completely in the fridge. The lemon curd will thicken as it cools, so it’s really important to cool it completely before using it to fill cakes, or it won’t be the right consistency. I prefer making my lemon curd at least a day or two before I plan to use it. This way, I’m not rushed or waiting for it to cool.
- How To Store Lemon Curd: Keep the lemon curd refrigerated in an airtight container for up to 1 week. Once it has fully cooled, you do not need to keep plastic wrap pressed to the surface, as long as it has an airtight lid.
Nutrition
Have you tried this recipe? Tag me today!
Mention @preppykitchen and tag #preppykitchen!
Ways To Use
Lemon curd is so versatile! You can simply spoon it on split scones, over a slice of angel food cake or pound cake, or use it as a filling for Linzer cookies. A few spoonfuls can flavor the most incredible frosting by beating it into vanilla buttercream. You can use it to fill between layers of lemon cake or top lemon cupcakes.
It’s also an excellent decoration and finishing touch spread on top of lemon cheesecake. Add a citrusy zing to pavlova by spreading lemon curd on the baked meringue before topping with whipped cream and fruit.
Frequently Asked Questions
No, you don’t have to but I highly recommend it because the zest contains the natural oils from the lemon so adds a ton of extra flavor.
If your curd seems too thin after cooling (pourable like a sauce) then you can thicken it by adding in a cornstarch slurry (1 tbsp of cornstarch mixed with 3 tbsp water). Mix it in and heat the curd, stirring until it thickens. Remember that the curd will thicken more once cooled.
If you have lumps in your lemon curd it’s most likely pieces of overcooked egg. Pass the curd through a sieve to remove the zest and lumps but if it’s still lumpy give it a quick blend with a regular blender or immersion (handheld) blender until smooth.
Straining the lemon curd is an optional step but it’s one that I recommend because it removes the lemon zest and any extra egg pieces making the curd extra silky smooth and delicious. To strain the curd, press it gently through a sieve into a bowl, this will leave the zest and any lumps behind giving you an extra smooth curd to enjoy.
Lemon curd will keep in the refrigerator for up to a week or in the freezer for up to three months. After freezing, thaw it in the fridge overnight before using.
More Lemon Recipes To Try
These desserts are packed with punchy, fresh lemon flavor!
A flaky crust is filled with a lemon curd and topped with a cloud of whipped meringue to make this classic, lemon meringue pie.
My lemon bars have loads of flavor from fresh lemon juice as well as lots of lemon zest! The shortbread base is crisp and buttery to balance out the soft, tart lemon topping.
The lemon curd filling in my lemon tart sets up perfectly for a gorgeous, clean slice. Top it with whipped cream and fresh berries for a delightful dessert.
Topped with a sweet lemon glaze, my lemon Bundt cake is bursting with lemon flavor! The addition of sour cream to the cake batter means the cake stays tender and super moist for a few days.
Whip up a batch of these lemon crinkle cookies without a mixer! The dough balls get rolled in powdered sugar before baking for a sweet, crackly crust all over the cookies.
If you’ve tried this lemon curd recipe, then don’t forget to leave a rating and let me know how you got on in the comments below. I love hearing from you!


