
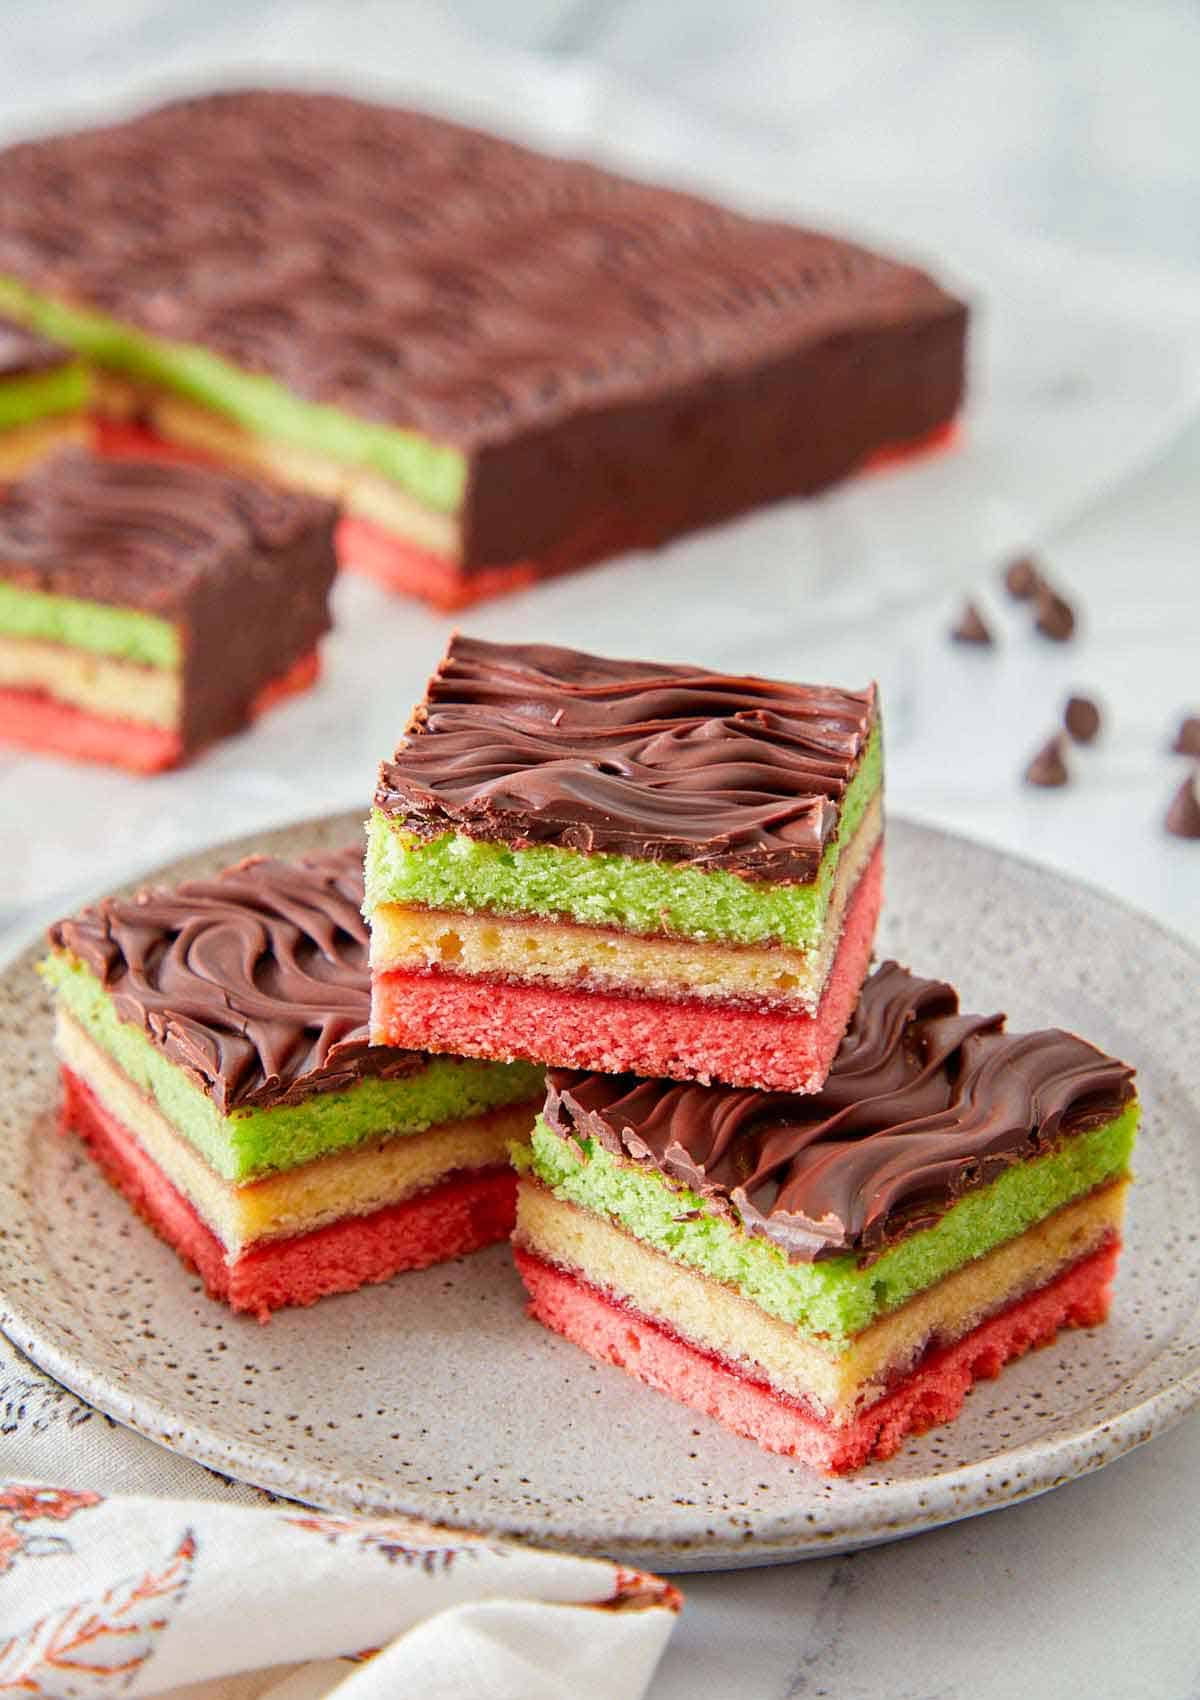
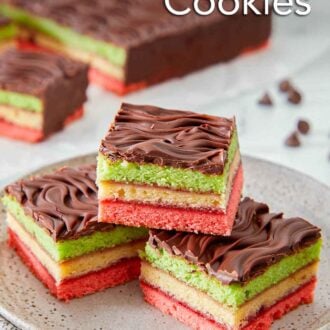
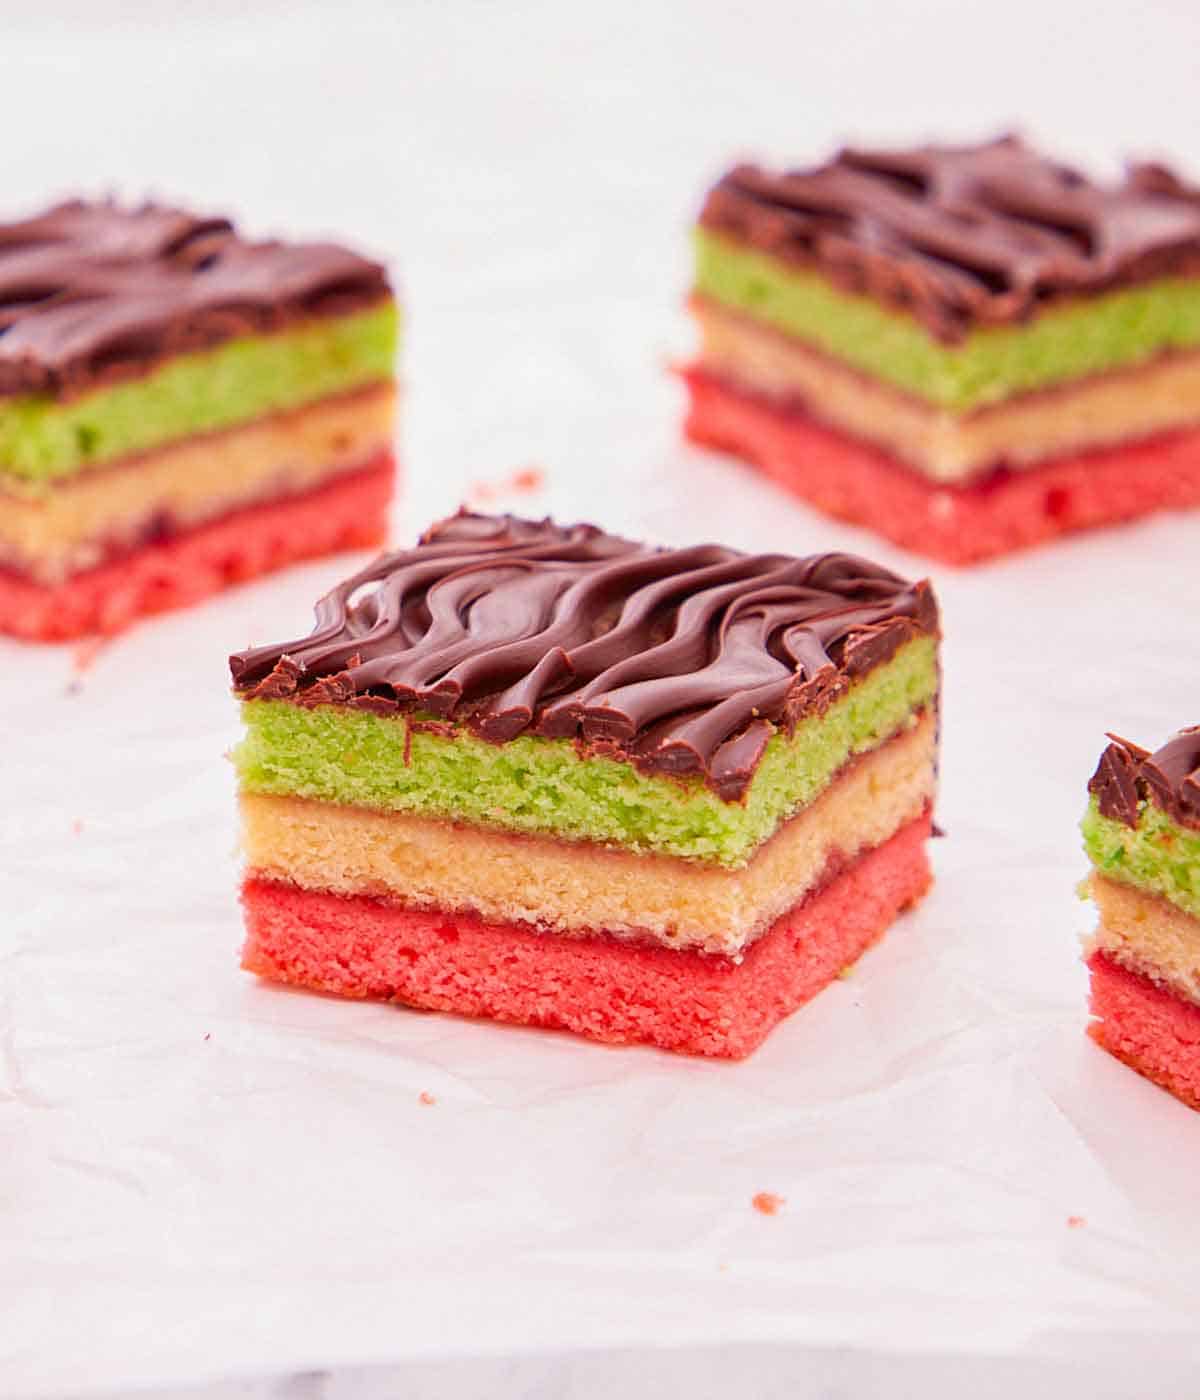
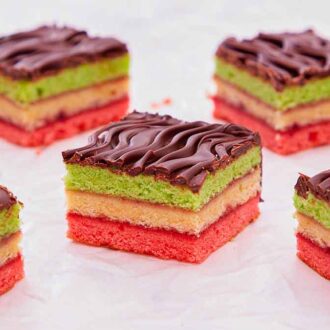
You may know these rainbow cookies as rainbow cake, tri-color cookies, Neopolitan cookies, or Italian rainbow cookies. They are a bright and eye-catching dessert made with a sponge cake base. Flavored with almond paste and almond extract, the cookies have a delicious rich almond flavor that pairs wonderfully with the raspberry jam between the cake layers and the chocolate coating. They are as delicious as they are pretty!
While all the layers and colors may make you think the rainbow cookies are difficult to make, the recipe itself is relatively straightforward and easy to make! The most difficult part is flipping the cake layers on top of each other. Want another Italian dessert for the holidays? Try my anise cookies recipe, panettone recipe, and cannoli recipe.
What You Need to Make This Recipe
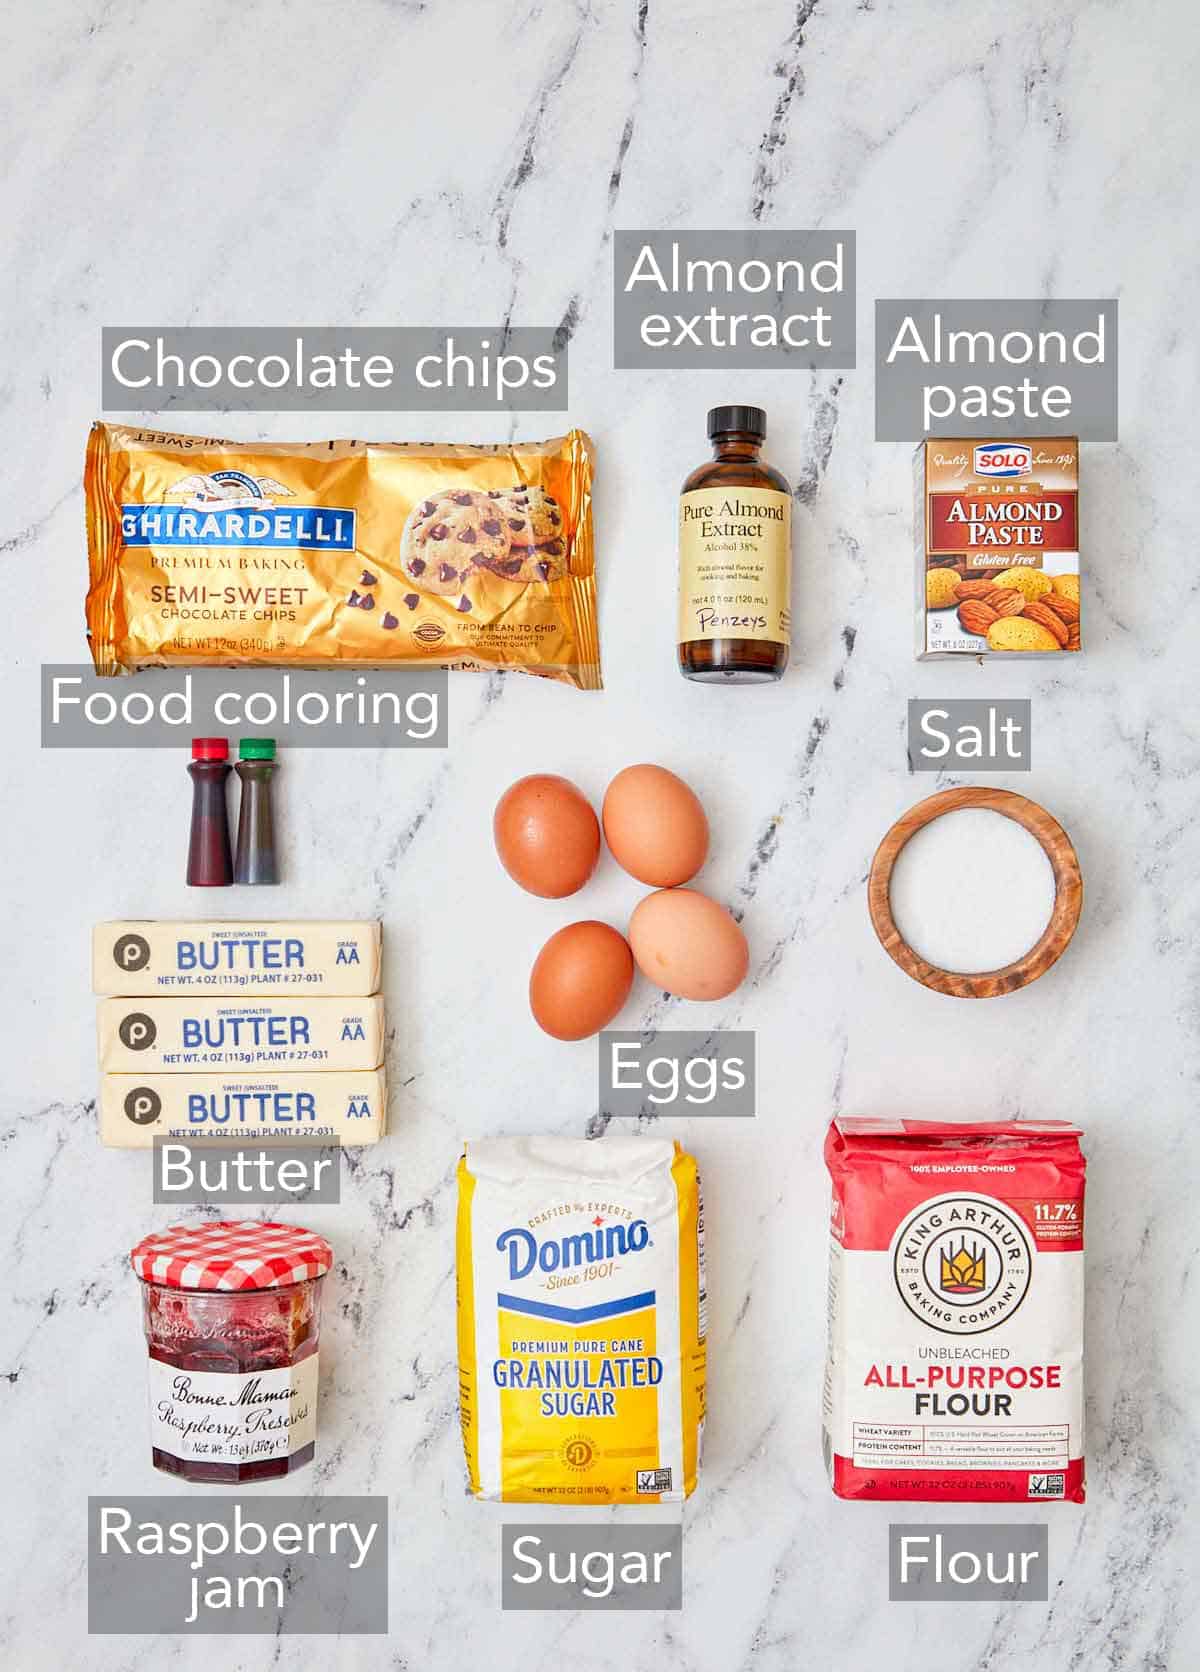
Butter — make sure you buy unsalted butter. The butter also needs to be at room temperature to cream smoothly.
Almond paste — almond paste consists of ground almonds or almond meal and sugar and gives the cookies the texture they’re known for. Do not confuse this for marzipan, as it’ll change the texture and flavor of the batter.
Eggs — four eggs may seem like a lot, but it helps gives the layers their spongey texture. Make sure to separate the eggs, as beating the egg whites lightens and tenderizes the cookie layers.
Almond extract — using almond extract adds a rich, slightly fruity flavor to the cookies.
Food coloring — gel food coloring is ideal as you can use less to get the desired color.
Jam — I use raspberry jam to hold the cookie layers together, but you can also use apricot jam or another jam of your choice.
Chocolate chips — use good-quality chocolate chips such as Ghirardelli chocolate chips, as they melt down easily and have a super creamy texture.
How to Make Rainbow Cookies
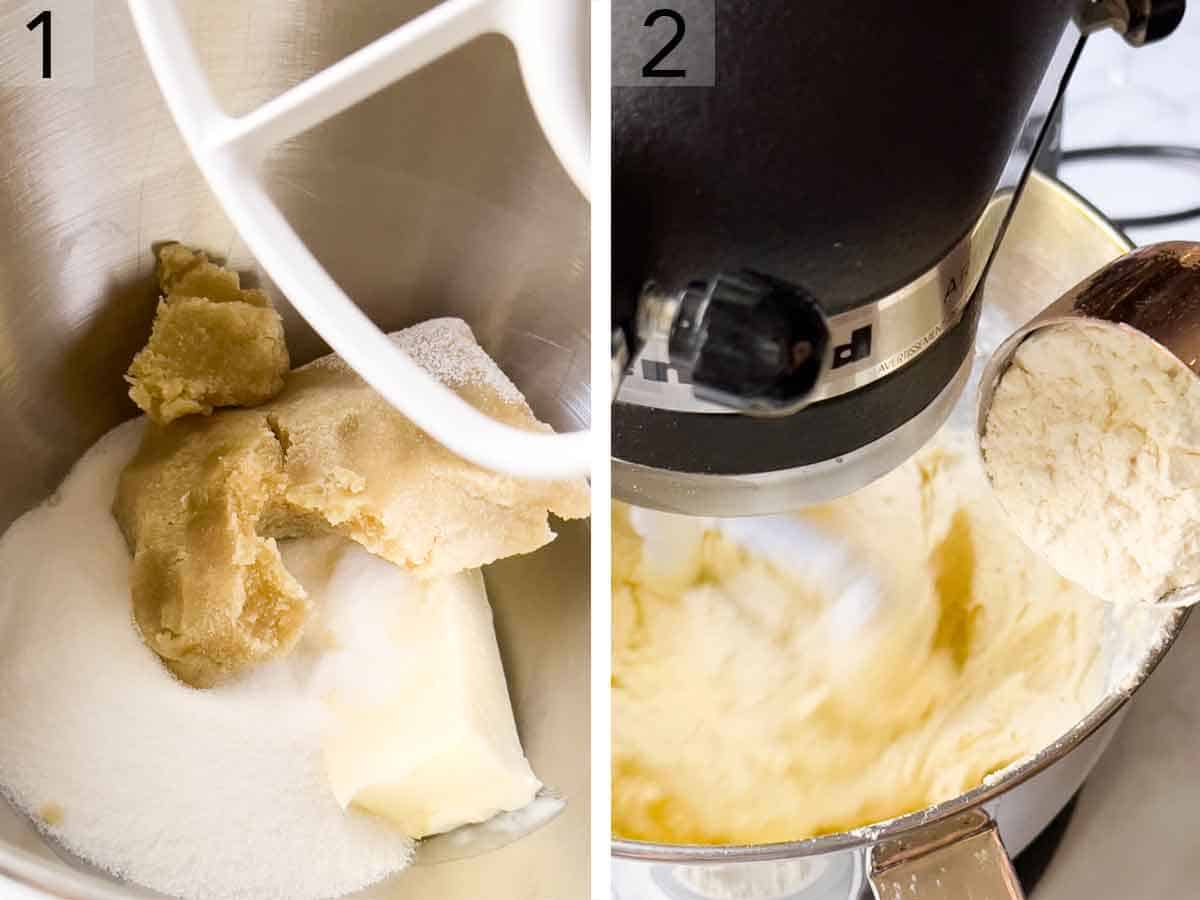
1. In the bowl of a stand mixer fitted with the paddle attachment, beat together ½ cup of butter, the sugar, and almond paste on medium speed until smooth. Add the remaining 1 cup of butter. Beat on medium until light and fluffy. With the mixer on low, add the egg yolks and almond extract, beating until just combined.
2. Gradually add flour and salt, beating until just combined. Stop occasionally and scrape down the bowl during mixing.
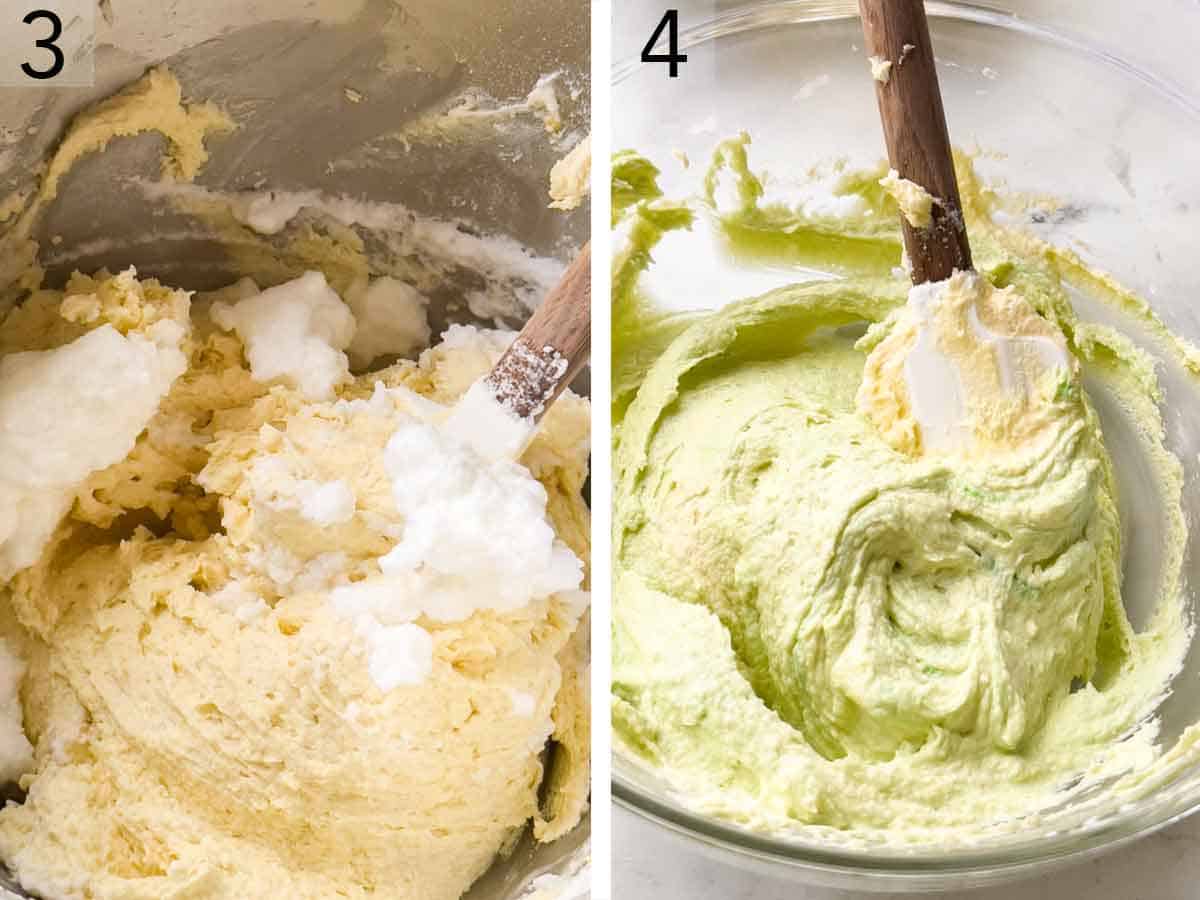
3. In a large mixing bowl, beat the egg whites with an electric mixer with clean beaters or the whisk attachment on high speed until stiff peaks form. Working in batches, gently fold the egg whites into the cookie batter until combined and no streaks of egg white remain.
4. Divide the batter evenly among 3 bowls. Stir the red food coloring into one of the bowls of batter until fully combined. Stir the green food coloring in the other bowl of batter until fully combined. Leave the final bowl uncolored.

5. Spread each batch of batter into 3 different lined 9×13-inch baking pans. Bake for 15 minutes, then rotate the baking pans in the oven before baking for another 12 minutes. Let the cookies cool completely in the pans on wire racks.
6. With the cooled green layer still in the pan, spread ¼ cup of the jam in an even thin layer over the top.
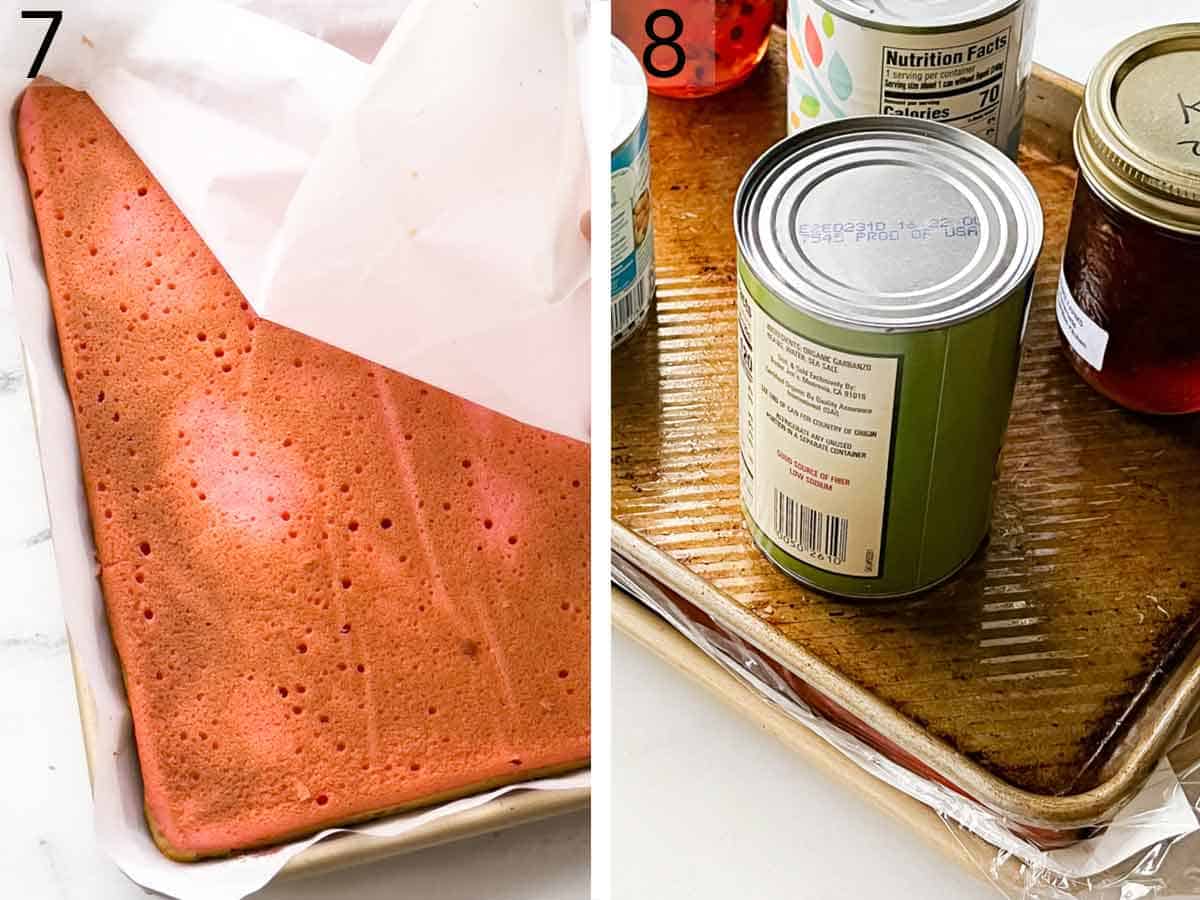
7. Flip the plain (un-dyed) layer on top of the jammy green layer. Spread the remaining ¼ cup jam in an even, thin layer over the plain layer, then place the red layer on top of the jammy plain layer. Cover with a sheet of plastic wrap.
8. Place one of the baking pans on top of the stacked layers. Evenly place weights (such as plates or canned vegetables) on top of the pan. Refrigerate for at least 4 hours or up to 12 hours.

9. Once chilled, remove the weights and plastic wrap. Invert onto a cutting board and trim the edges to straighten it. In a microwave-safe bowl, heat the chocolate chips in 30-second intervals stirring between each, until the chocolate is melted. Spread the melted chocolate over the top and sides of the stack. Let cool slightly, about 5 minutes.
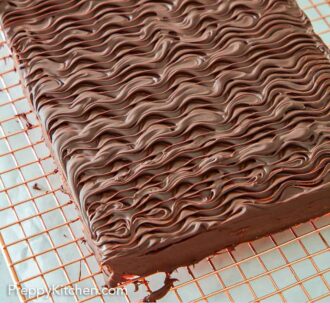
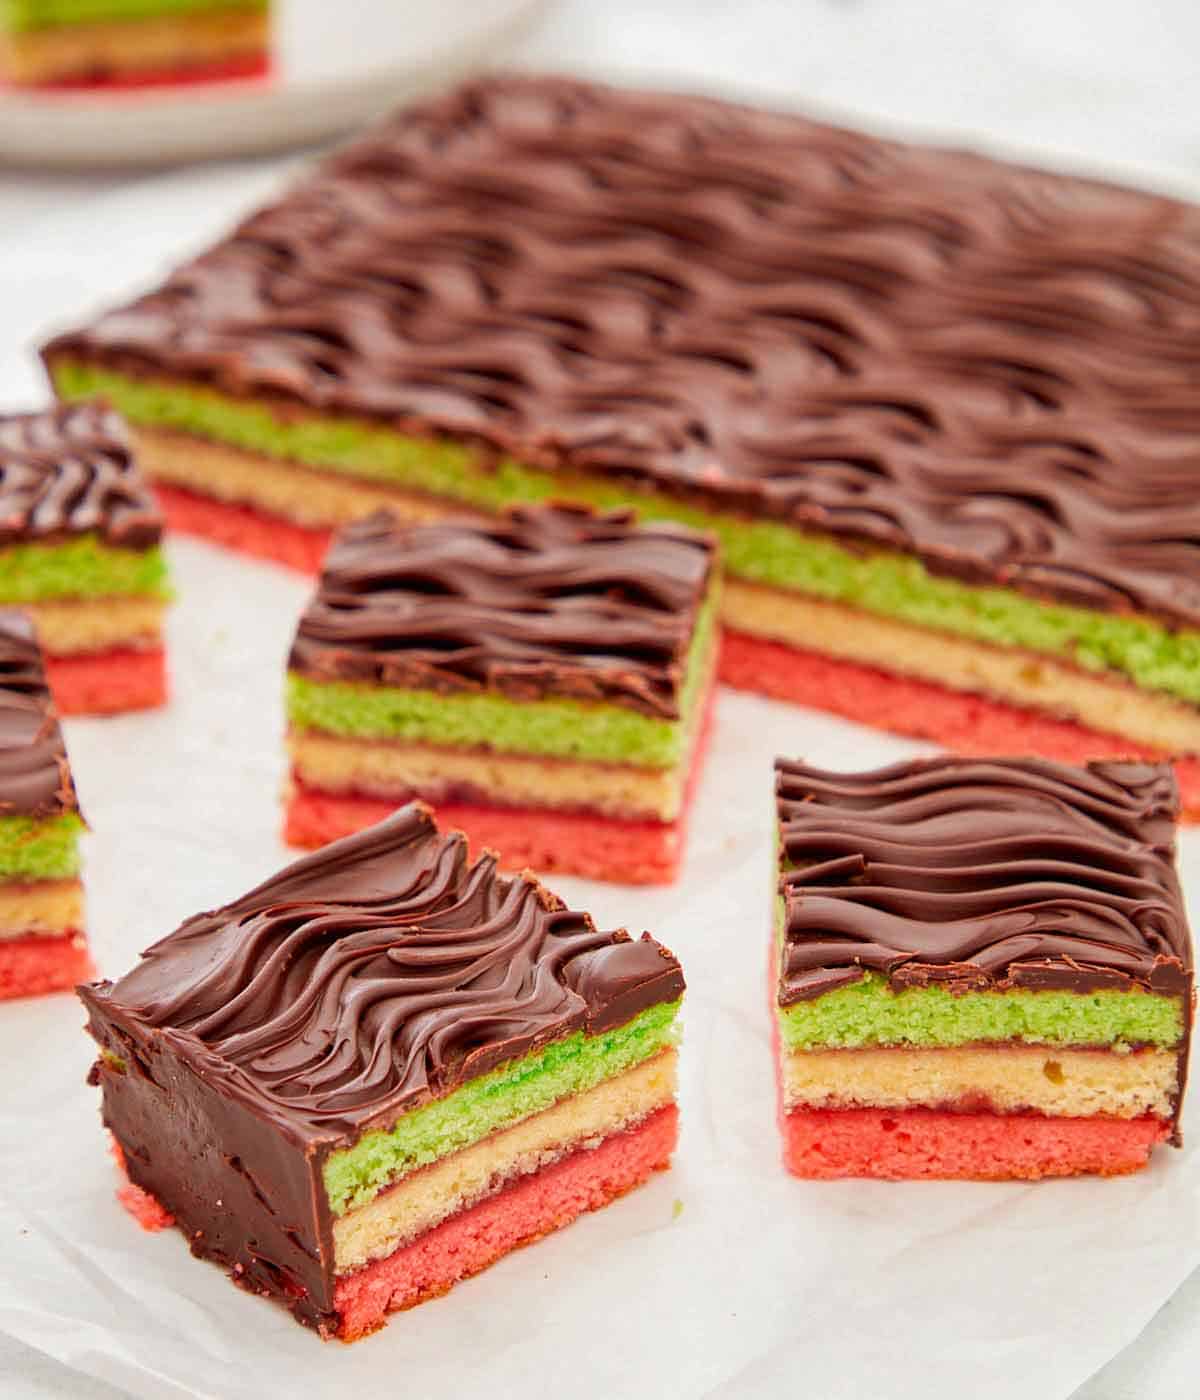
10. Using fork tines, scrape wavy lines into the chocolate. Refrigerate, uncovered, until the chocolate is set, about 30 minutes. Using a serrated knife, slice the slab of rainbow cookies into 2-inch squares.
Pro Tips for Making This Recipe
- Using seedless raspberry jam is preferred. You can also press raspberry jam through a fine mesh sieve to remove seeds.
- Instead of microwaving the chocolate, you can place chocolate chips in a small heatproof bowl set over a small saucepan of 1-inch simmering water; constantly stir until the chocolate fully melts, about 5 minutes.
- It is essential to have a clean and dry bowl for whipping the egg whites. The egg whites also cannot contain any egg yolk. You will have difficulty whipping up the whites if the bowl is not completely clean or yolk-free.
- Eggs are easier to separate when cold, but egg whites whip up easier when closer to room temperature. I recommend separating them in advance.
- Measure your flour correctly! Adding too much flour to the recipe is the most common mistake. The best and easiest way to measure flour is by using a scale. If you don’t have one, fluff your flour with a spoon, sprinkle it into your measuring cup, and use a knife to level it off.
- Use a serrated knife to cut the rainbow cookies for the best-looking results. Serrated knives will cut smoothly through things with a hard exterior and softer interior. Run the knife under hot water before slicing, and clean the knife between each slice for a clean presentation of the layers.
- Do not skip weighing down the layers. Doing so will let the jam absorb into the layers and help them stick together. Weighing the layers down also ensures that the cookies won’t fall apart when sliced.
- This melted chocolate sets up much better if the rainbow cookie layers aren’t warm. The chocolate will melt off if you do not give enough time for the layers to chill.
Frequently Asked Questions
Store the rainbow cookies in an airtight container at room temperature for up to 1 week or refrigerated for up to 2 weeks.
You can definitely freeze these cookies. Place the cookies in an airtight container with sheets of parchment or wax paper in between to keep them from sticking. Allow the rainbow cookies to thaw at room temperature for 10 to 15 minutes before serving.
You could say these rainbow cookies are a cake disguised as a cookie! The cookies consist of three layers of sponge cake but are commonly called a cookie.
No. Do not swap almond filling for almond paste, as you cannot use them interchangeably in a recipe. Almond paste is firm, whereas almond filling has a jam-like consistency.
These rainbow cookies originated in Italian immigrant communities of the United States during the 1900s and are a popular treat in New York bakeries. The green, red, and white layers resemble the Italian flag, but the festive colors make them a massive hit during Christmas!
If you love this recipe try these out!


If you’ve tried this Rainbow Cookies recipe, then don’t forget to rate the recipe and let me know how you got on in the comments below, I love hearing from you!
Rainbow Cookies
Video
Equipment
- 3 (9×13″) baking sheets
- Large mixing bowls
- Electric hand or stand mixer
- Parchment paper
- Plastic wrap
- Various weights (canned food works!)
Ingredients
- 1½ cups unsalted butter softened divided (340g)
- 1 cup granulated sugar (200g)
- 1 (8-ounce/227g) package almond paste
- 4 large eggs separated
- 1½ teaspoons almond extract
- 2 cups all-purpose flour (240g)
- ¼ teaspoon salt
- red food coloring
- green food coloring
- ½ cup raspberry jam (160g)
- 1½ cups semi-sweet chocolate chips (312g)
Instructions
- Position oven racks in the upper third and lower third of the oven. Preheat the oven to 325°F. Lightly grease 3 (9×13-inch) baking pans or quarter sheet pans and line with parchment paper.
- In a large mixing bowl or the bowl of a stand mixer fitted with the paddle attachment, beat together ½ cup of butter, the sugar, and almond paste on medium speed until smooth, about 1 minute. Add the remaining 1 cup of butter. Beat on medium until light and fluffy, about 2 to 3 minutes.
- With the mixer on low, add the egg yolks and almond extract, beating until just combined. Gradually add flour and salt, beating until just combined. Stop occasionally and scrape down the bowl during mixing.
- In a large mixing bowl, beat the egg whites with an electric mixer with clean beaters or the whisk attachment on high speed until stiff peaks form, about 5 minutes. Working in batches, gently fold the egg whites into the cookie batter until combined and no streaks of egg white remain. Divide the batter evenly among 3 bowls.
- Stir about 8 drops of red food coloring into one of the bowls of batter until fully combined. Spread into an even layer in 1 prepared pan. To another batter bowl, stir in about 8 drops of green food coloring and spread into another prepared pan. Spread the remaining plain batter into the remaining prepared pan.
- Place 2 pans on the upper third rack, ensuring the pans are not touching, and 1 pan on the lower third oven rack.
- Bake for 15 minutes, then rotate the pans on the top rack to the bottom rack and vice versa. Continue baking until a wooden pick inserted in the centers of each cookie pan comes out clean, about 12 minutes more. Let the cookies cool completely in the pans on wire racks.
- With the cooled green layer still in the pan, spread ¼ cup of the jam in an even thin layer over the top. Flip the plain (un-dyed) layer on top of the jammy green layer and carefully remove and discard the parchment from the plain layer. Spread the remaining ¼ cup jam in an even thin layer over the plain layer. Place the red layer on top of the jammy plain layer and remove and discard the parchment. Cover with a sheet of plastic wrap.
- Place one of the baking pans on top of the stacked layers. Evenly place weights (such as plates or canned vegetables) on top of the pan. Refrigerate for at least 4 hours or up to 12 hours.
- Once chilled, remove the weights and plastic wrap. Place a large cutting board on top of the stack and invert. Carefully remove and discard the parchment paper from the green layer.. Using a serrated knife, trim the edges to straighten. Place the stack, green layer up, on a wire rack set inside a large, rimmed baking sheet.
- In a medium, microwave-safe bowl, heat the chocolate chips in 30-second intervals stirring between each, until the chocolate is melted.. Spread the melted chocolate over the top and sides of the stack. Let cool slightly, about 5 minutes.
- Using fork tines, scrape wavy lines into the chocolate. Refrigerate, uncovered, until the chocolate is set, about 30 minutes.
- Using a serrated knife, slice the slab into 2-inch squares. Store the cookies in an airtight container at room temperature for up to 1 week or refrigerated for up to 2 weeks.
Notes
- Using seedless raspberry jam is preferred. You can also press raspberry jam through a fine mesh sieve to remove seeds.
- Instead of microwaving the chocolate, you can place chocolate chips in a small heatproof bowl set over a small saucepan of 1-inch simmering water; constantly stir until the chocolate fully melts, about 5 minutes.
- It is essential to have a clean and dry bowl for whipping the egg whites. The egg whites also cannot contain any egg yolk. You will have difficulty whipping up the whites if the bowl is not completely clean or yolk-free.
- Eggs are easier to separate when cold, but egg whites whip up easier when closer to room temperature. I recommend separating them in advance.
- Measure your flour correctly! Adding too much flour to the recipe is the most common mistake. The best and easiest way to measure flour is by using a scale. If you don’t have one, fluff your flour with a spoon, sprinkle it into your measuring cup, and use a knife to level it off.
- Use a serrated knife to cut the rainbow cookies for the best-looking results. Serrated knives will cut smoothly through things with a hard exterior and softer interior. Run the knife under hot water before slicing, and clean the knife between each slice for a clean presentation of the layers.
- Do not skip weighing down the layers. Doing so will let the jam absorb into the layers and help them stick together. Weighing the layers down also ensures that the cookies won’t fall apart when sliced.
- This melted chocolate sets up much better if the rainbow cookie layers aren’t warm. The chocolate will melt off if you do not give enough time for the layers to chill.
Pamela says
I made these for a surprise party for a friend who’s family was from Italy and they were a hit. I was not sure if the taste of the almond paste was a little stale tasting, but next time I make these, I’ll look for a better brand.
Your video and recipe was easy to follow.
Ally says
You are AMAZING- love all of your recipes and videos! You make baking easy and fun, so glad I came across your page…..I can’t find packaged almond paste anywhere and do not like to order food from Amazon – where do you purchase your almond paste from?
Thank you!
Loretta says
These cookies were absolutely delicious and I literally couldn’t stop eating them. I make them everytime we are having company so there is someone to help me eat them and I don’t eat the entire batch by myself😃
Lou says
Love your recipes John but this one was disappointing. Followed the recipe exactly, turned out dry and crumbly. The recipe I have used for years uses 7 eggs, confectioner’s sugar and only 1 1/2 cups flour and turns out just like they do in the Bronx bakeries. I still love your videos 🙂
Tom says
One of the better detail video’s out there that cover a lot of great points? Always enjoy your video’s John very entertaining and wonderful saves many from making dumb mistakes that can cost time, money and frustration which I appreciate. You cover a lot of great details that prevents mistakes which is something few do and explains issues? Keep them coming. Also, always something interesting and entertaining in them like when something happens unexpectedly like when the fork landed in the chocolate after layering it so nicely. That reminded me of stuff that happens to me thanks for the laugh.
Katia says
Made this recipe 4 times over last few months. Cooked are delicious, everyone loved them.
Adriana says
I have been searching for a Rainbow cookie recipe for so long and couldn’t seem to find any good ones. This recipe is THE BEST! I love these cookies and will definitely make them again. They’re definitely worth the time and effort.
Renee L. Buonaguro says
Thank you for this recipe! This was such a hit with my family and they are tough critics! I have tried many rainbow cookie recipes and this one is the best! Thank you for continuing to teaching me how to bake!
Merry Christmas and Happy Healthy New Year!
Lee Ann says
I made these cookies for the first time! They definitely are a labor of love and very much worth it! These are so delicious. It’s not hard to follow the directions and easy to make. I made them a day ahead of time before I gave them away for gifts! Thank you John!
Loretta Place says
I watched John make these on you tube and though they would be perfect to give to my neighbors for christmas. I made them yesterday and we tasted them of course and tasted them again and now it’s the next day and there aren’t any left to give to the neighbors and I will have to make another batch. These things are so incredibly delicious and I am sure anyone I give these to will love them as much as we did. Another winning recipe from John
Claudia Martín del campo says
You are the best !!
I have made a lot off your recipes and they come out
Perfect and delicious….