
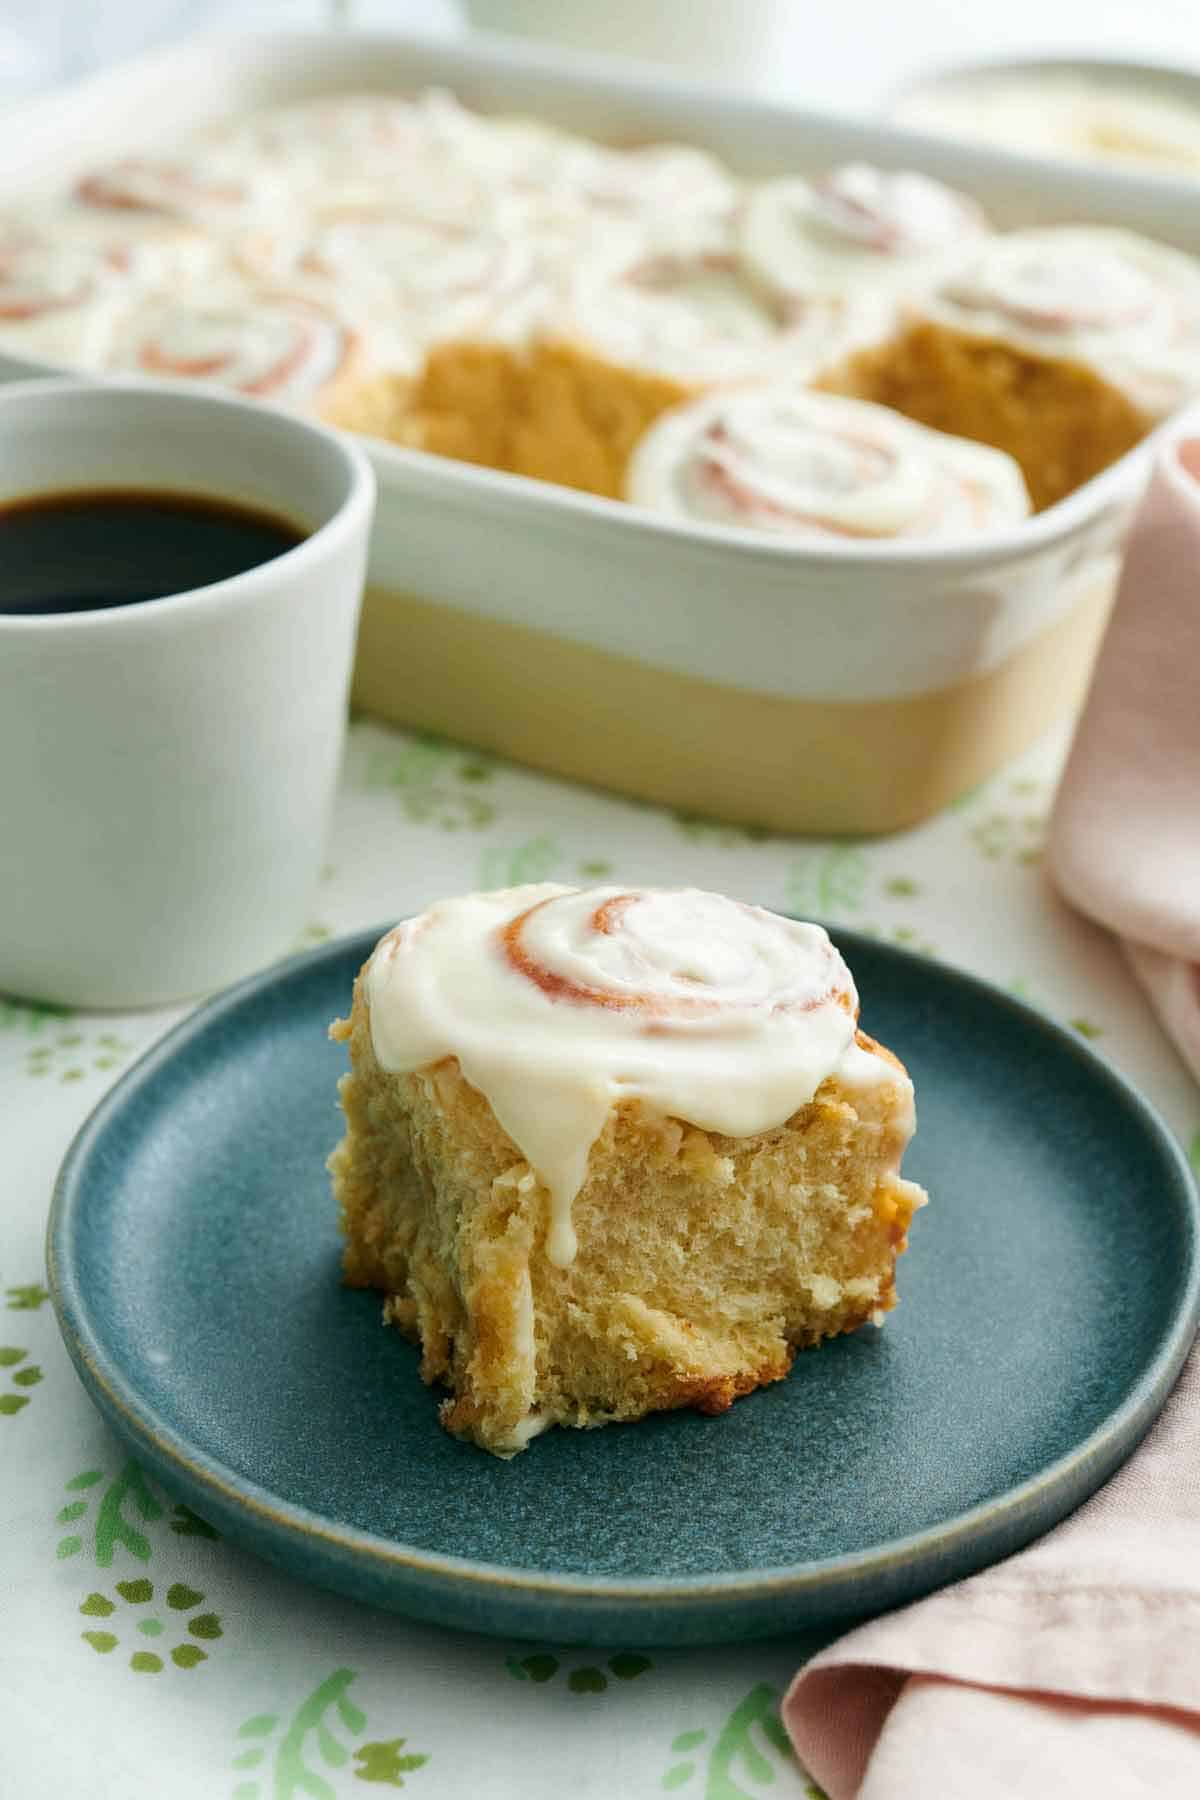

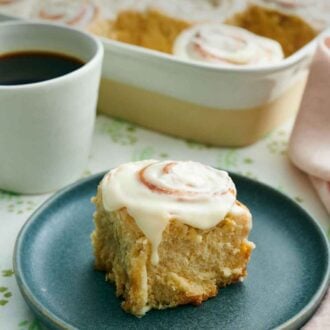
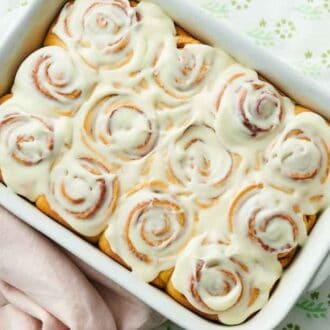
This honestly is the best cinnamon roll recipe (and Brian, who is a self-proclaimed but very experienced cinnamon roll expert, would agree!). I spent months testing this recipe to find the perfect balance of fluffy cinnamon rolls that were also super gooey in the center. Brian loves the centers, and I wanted the pan to be virtually all centers—pillowy soft and gooey with no hard edges. The tricks I discovered? The right balance of milk and butter in the dough and baking the cinnamon rolls in the correct type of pan!
A reader, V, says: “This may be the best thing I have ever tasted in my entire life…They are as soft as pillows. Melt in your mouth delicious. Gooey, tender, and absolutely wonderful!” ★★★★★
Table of Contents
Key Ingredients for Cinnamon Rolls
These are the main ingredients you need to make homemade cinnamon rolls. You can find the full list of ingredients and measurements in the recipe card below.

Milk – whole milk will provide the best flavored and textured cinnamon buns as the extra fat tenderizes the dough. Warm the milk to 110-120°F, or until the milk is just warm to the touch.
Active Dry Yeast – be sure to check the expiration date and that it isn’t labeled as rapid-rise or instant yeast. Expired yeast may not rise properly, and rapid-rise yeast shouldn’t bloom in hot liquid. Both of these can cause the rolls will turn out flat and dense. To keep yeast fresh the longest, store it in the refrigerator or freezer.
All-Purpose Flour – for light and fluffy cinnamon rolls, measure the flour by weighing it. If you do not have a food scale, scoop the flour into the measuring cup and level off the top for an accurate measurement.
Egg – one large egg brought to room temperature is all you need. Don’t use a cold egg, as the cold temperature can throw off the yeast’s rising process. To quickly bring an egg to room temperature, place it in a bowl of warm water for 5 minutes.
Unsalted Butter – both room temperature and melted butter are used in this recipe. Room temperature is used in the brown sugar filling, and melted butter makes the rough dough tender and rich. Always use unsalted butter, unless salted is all you have. If so, reduce the salt in the dough to a generous ¾ teaspoon if opting for salted butter.
Baking With Yeast For Beginners
There are two common types of dry yeast– active dry and instant yeast (also called rapid-rise yeast).
- Active dry yeast must be activated by dissolving it in warm water first and allowing it to bloom, or sit until foamy, before adding it to dry ingredients. It also grows more slowly, so the rise times are longer and can be drawn out even more when placed in a cold environment like the refrigerator. This yeast is ideal for making overnight cinnamon rolls and produces baked goods with a deeper flavor.
- Instant yeast can be added to a recipe without being activated first and should not be bloomed like active dry yeast. However, it’s not the ideal choice if you want to hold dough in the fridge for several hours. It is intended to speed up the rising time for yeasted doughs to bake sooner, typically cutting rise times by half. Doughs made with instant yeast can overproof much more easily so keep an eye on them!
For this recipe, I prefer active dry yeast because I often assemble the rolls and hold them in the refrigerator overnight to bake off fresh in the morning. If you would like to make these rolls more quickly, use instant yeast instead and stir it together with the milk and sugar. Skip the 5-minute activation time and immediately move to Step 2. The rise times will be much faster, so check them after 30 minutes for each rise.
The Best Way To Cut Cinnamon Rolls
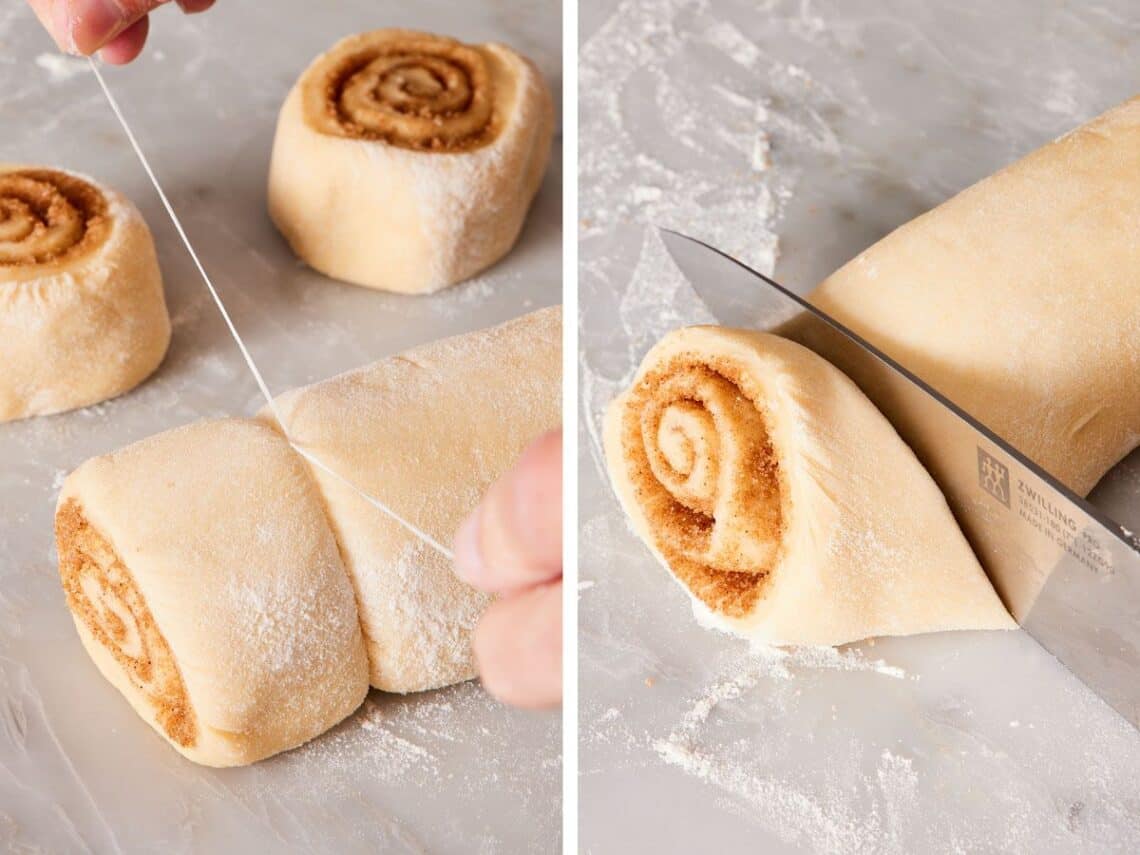
Dental floss is not the most common kitchen tool, but it is the ideal item for cutting perfect cinnamon rolls! Choose unflavored dental floss so your rolls don’t have a minty taste.
To cut the rolls, mark out each one with the blade of the knife down the dough log so you end up with even slices. Slip the dental floss under the dough log at a mark, pull the ends up, and cross them over the dough, then pull firmly and quickly in opposite directions until the floss has cut all the way through the dough. You should have a clean cut and a round slice!
If you don’t have dental floss, use a large, sharp serrated knife (like a bread knife) to cut each slice. Use long cutting strokes to reduce smashing the layer. You can see in the image below that if you use a sharp knife and simply press straight down to cut them, you will smash the dough and lose your defined layers and round shape.
How To Make Overnight Cinnamon Rolls
This is the perfect recipe to assemble at night and bake the next morning. To make overnight cinnamon rolls, shape the rolls, cut them, and place them in the prepared baking pan before covering them with plastic wrap and refrigerating for up to 18 hours. Making them ahead like this allows you to skip the second rise, as they will rise in the fridge. When ready to bake the buns, remove the pan from the fridge and let them come to room temperature for an hour. Once at room temperature, uncover the rolls and bake as directed.
Pro Tips For Making The Best Cinnamon Rolls
Proof the dough in a warm but not hot place. The ideal proofing temperature is around 75°. I often proof the rolls in the oven with the heat off but the oven light on. Other great places are on a sunny counter, on top of the refrigerator, or in any other warm place in your house or kitchen.
Spread the rolled dough with very soft, room-temperature butter. If it is still firm, microwave it in 5-second intervals until it is easily spreadable.
Use a ceramic or glass baking pan. Using ceramic or glass creates the softest rolls. Metal conducts heat better and can dry out the rolls on the edges and corners of the pan. They will still bake up fine in metal, but they won’t all be as soft, and the outer rolls will have more of a crust.
How To Make Cinnamon Rolls
Below, I’ve highlighted portions of the recipe in step-by-step process images along with instructions for making cinnamon rolls from scratch. You can find the full set of instructions in the recipe card below.
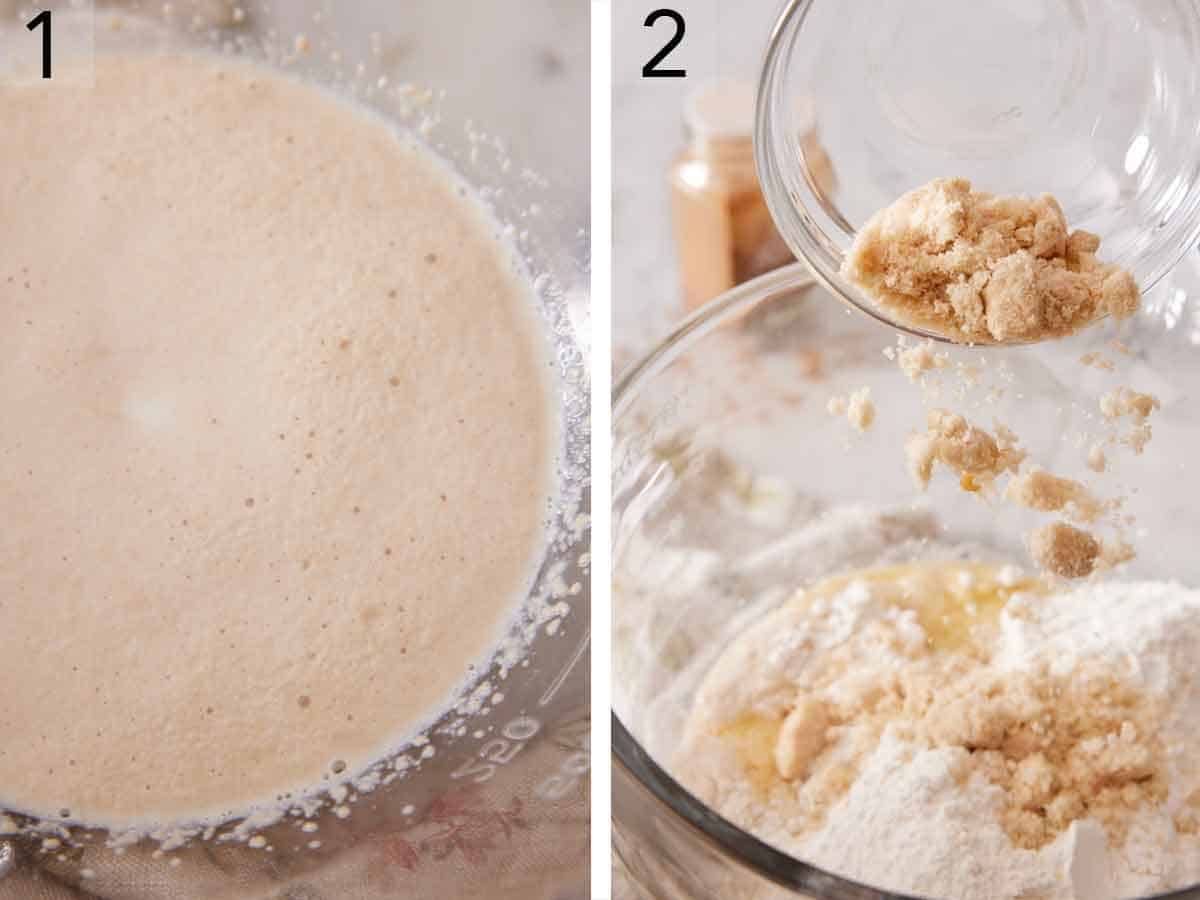
1. In the bowl of a stand mixer, stir together the warm milk, granulated sugar, and yeast, and set it aside until the top is very foamy, about 5 minutes.
2. Once foamy, add the all-purpose flour, brown sugar, melted butter, egg, vanilla extract, salt, and cinnamon. Attach the dough hook and mix everything together on low speed until the dough starts to form. Then, increase the speed slightly to medium-low and continue kneading the dough. It is done once it feels springy and a bit tacky when tapped, but doesn’t stick to your finger. This will take about 8 to 10 minutes.
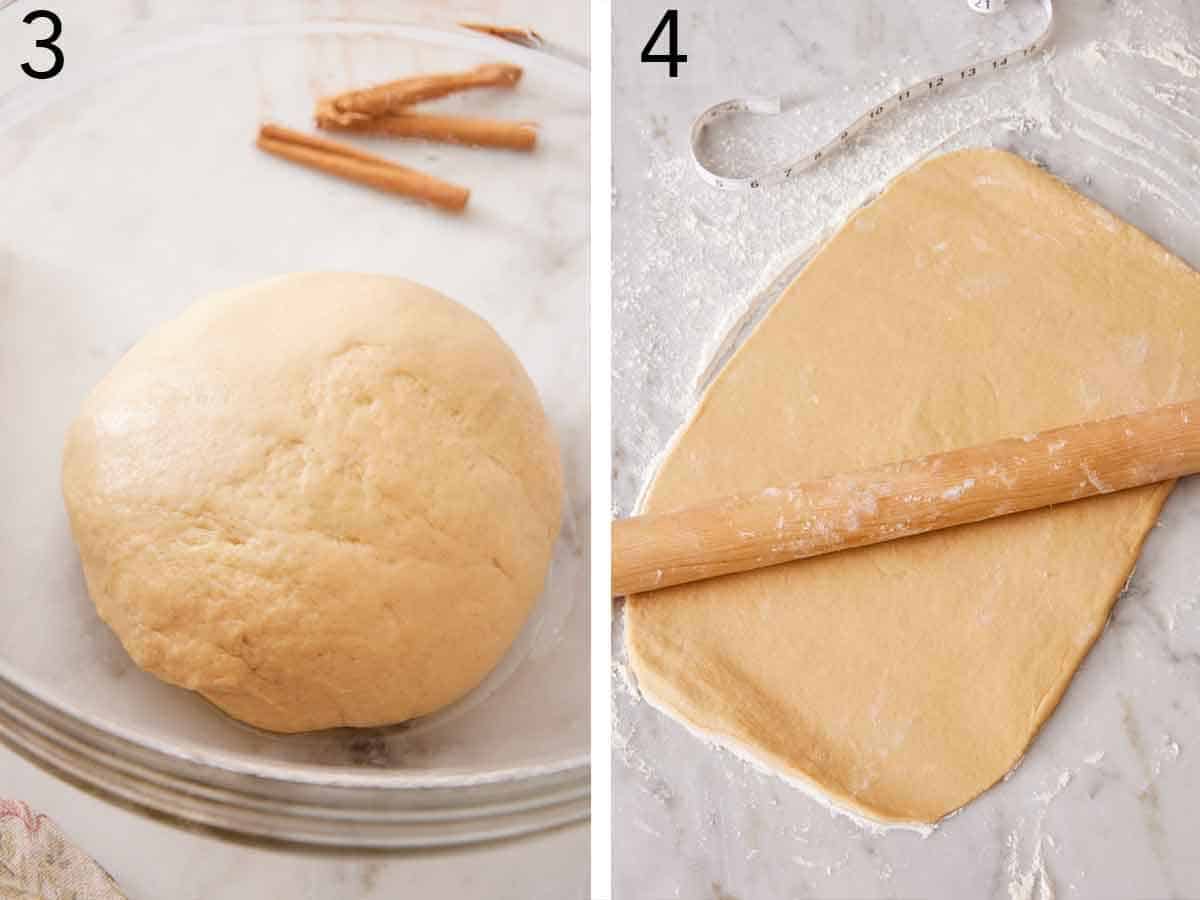
3. Place the dough in a lightly oiled bowl, cover, and leave it in a warm place to rise until doubled in size (1½ to 2 hours). This is the first rise.
4. After the dough has risen, lightly grease a 9×13-inch baking dish. Dust a clean surface well with flour and turn the dough onto it. Then roll and stretch the dough to form a rough 12×24-inch rectangle.
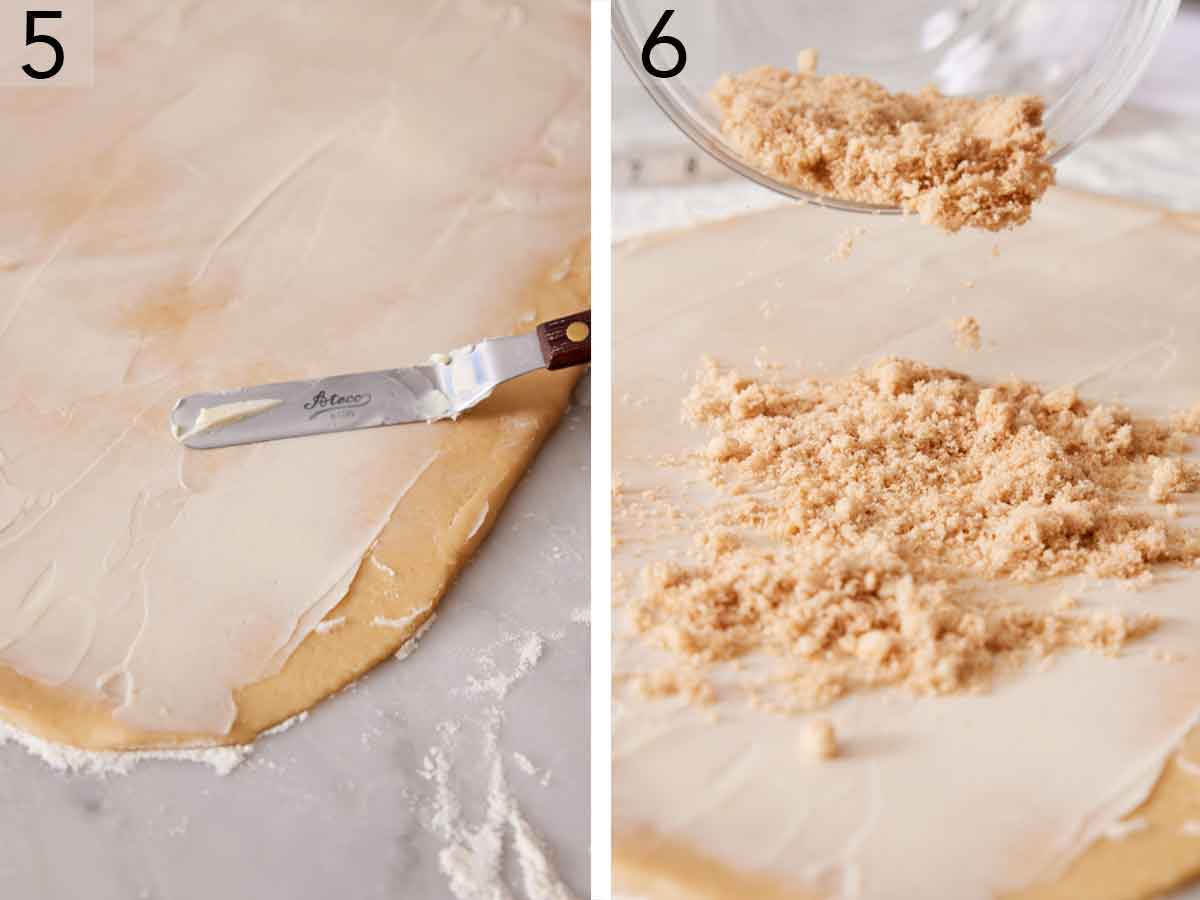
5. To fill the rolls, spread the very soft butter onto the cinnamon roll dough in a thin layer. Leave a ½-inch strip along one long side of the dough free of butter so you can seal the dough once rolled up.
6. Stir together the brown sugar and cinnamon in a small bowl, and sprinkle it evenly over the butter.
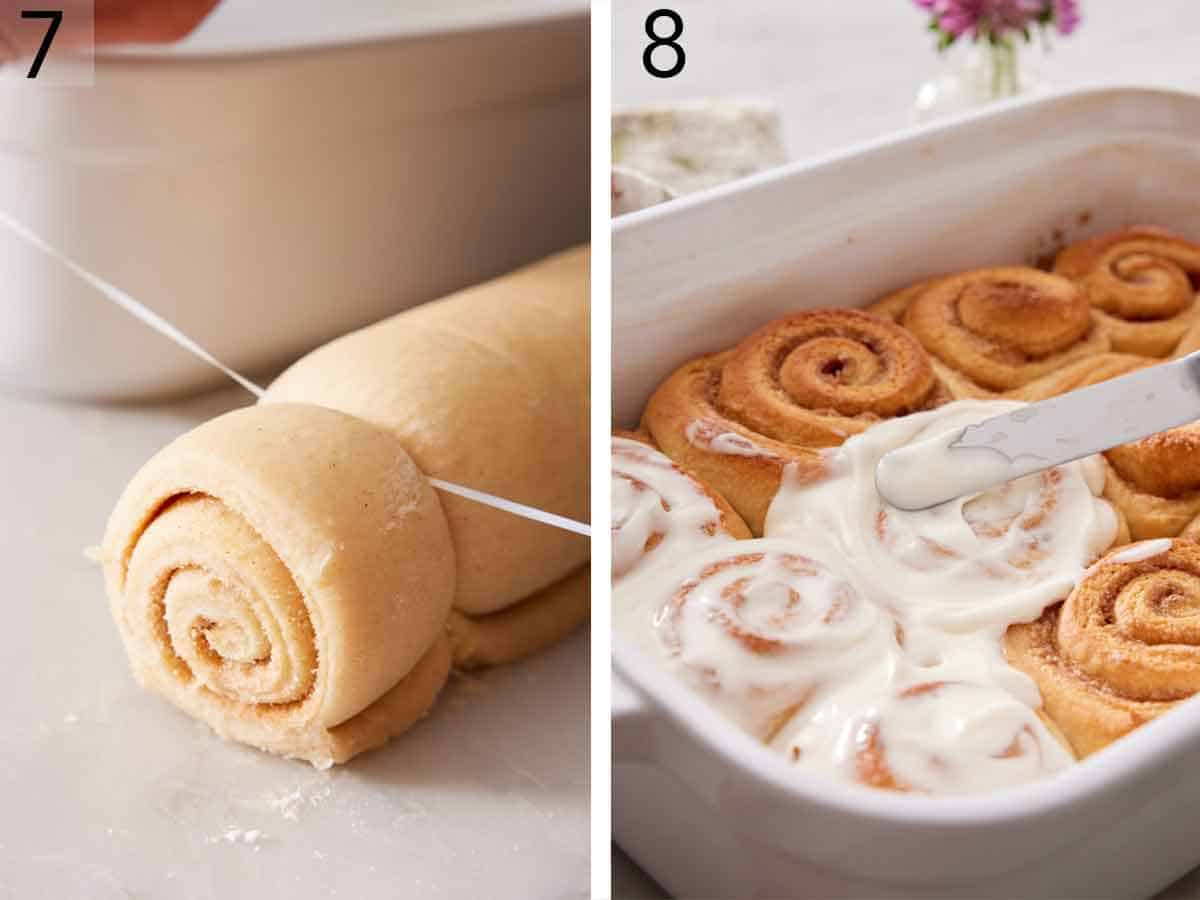
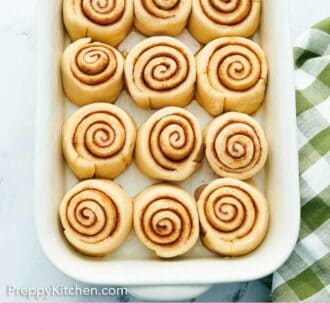
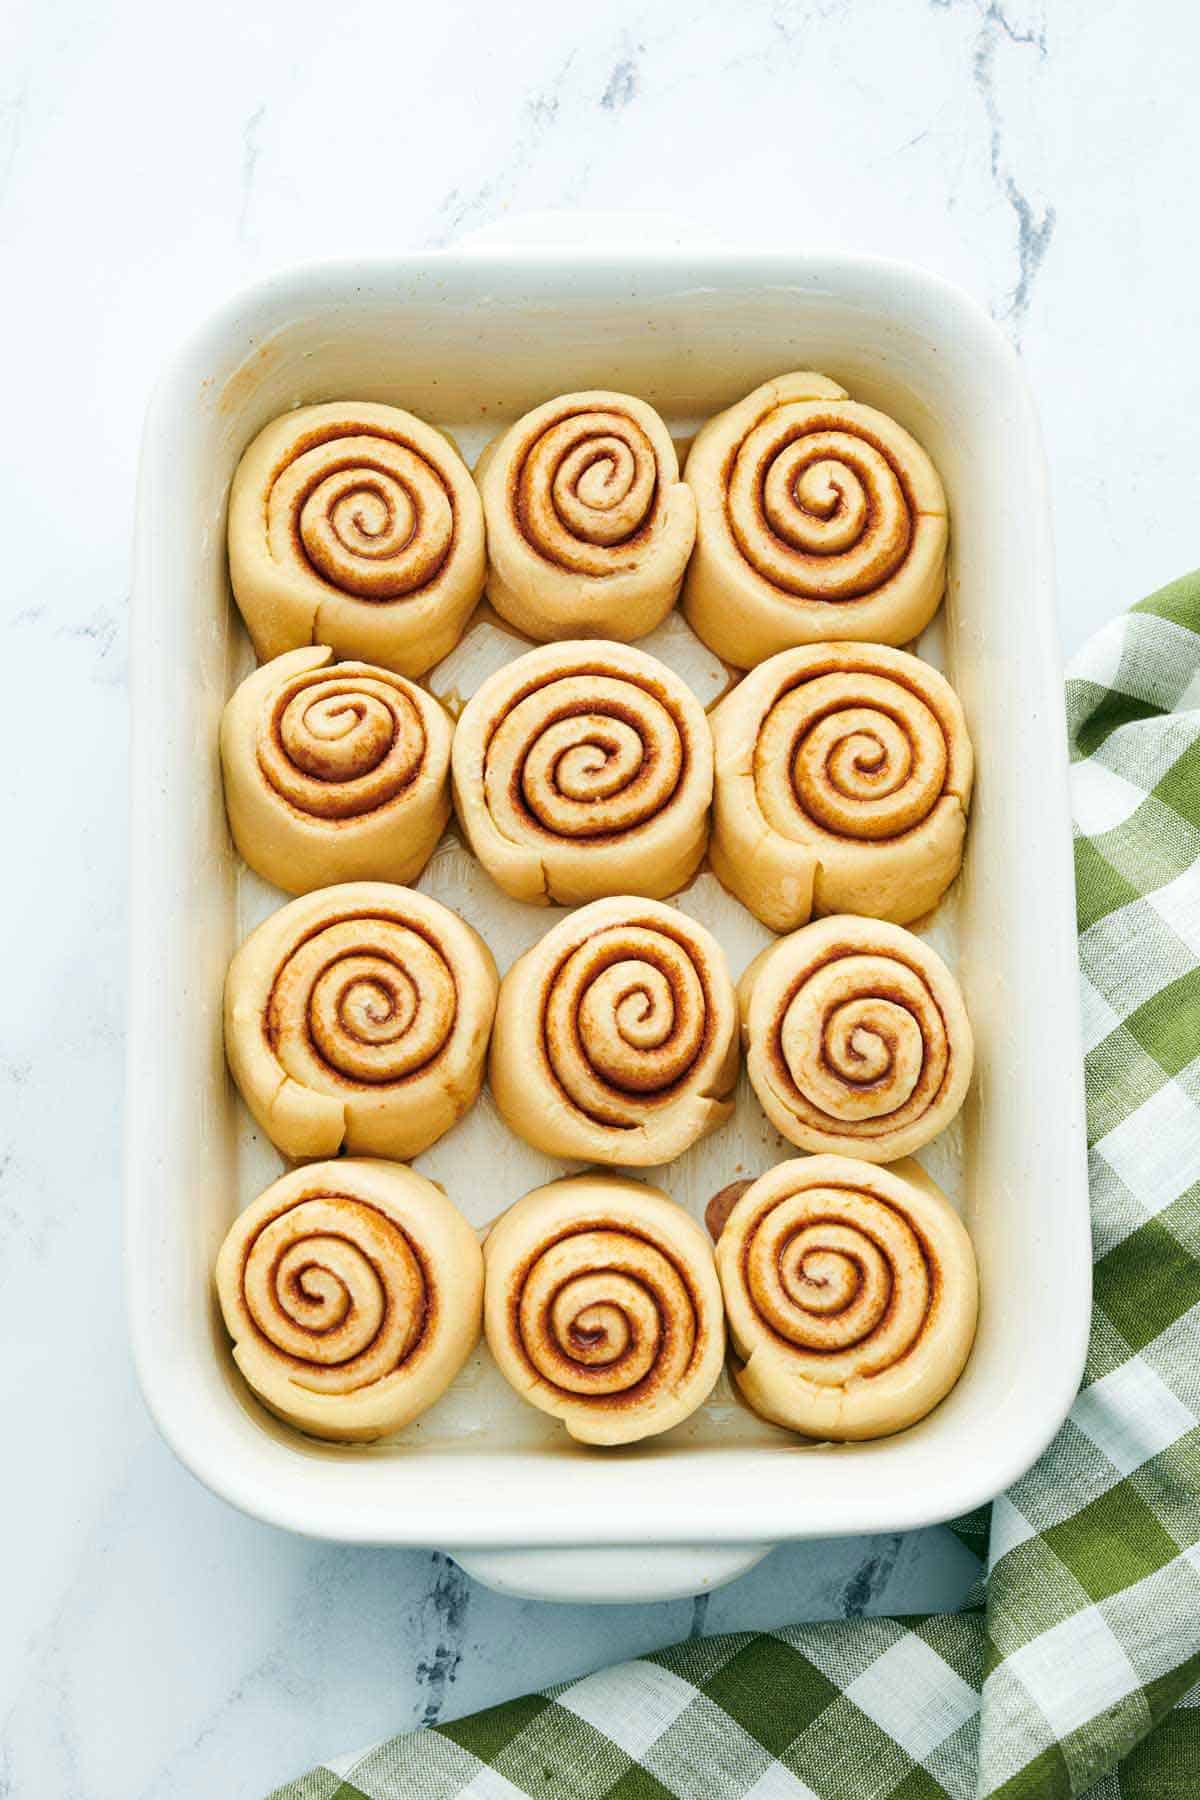
7. To roll the dough, start at the long side across from the unbuttered strip. Roll up the dough into a tight log like a jelly roll. Mark 12 even rolls on the log (about 1½ inches wide), and cut the rolls. Place each roll evenly spaced apart in the greased baking dish. Loosely cover the dish and let the rolls rise for the second time in a warm place until doubled in size (about 1 hour).
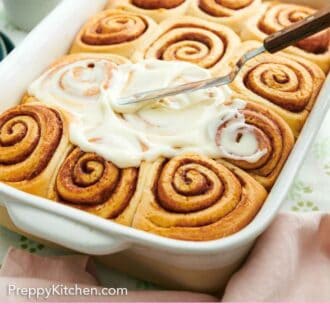
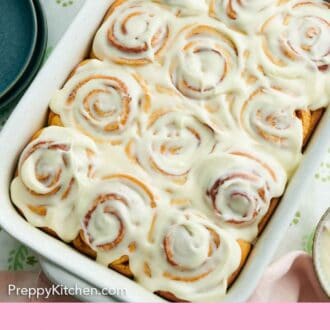
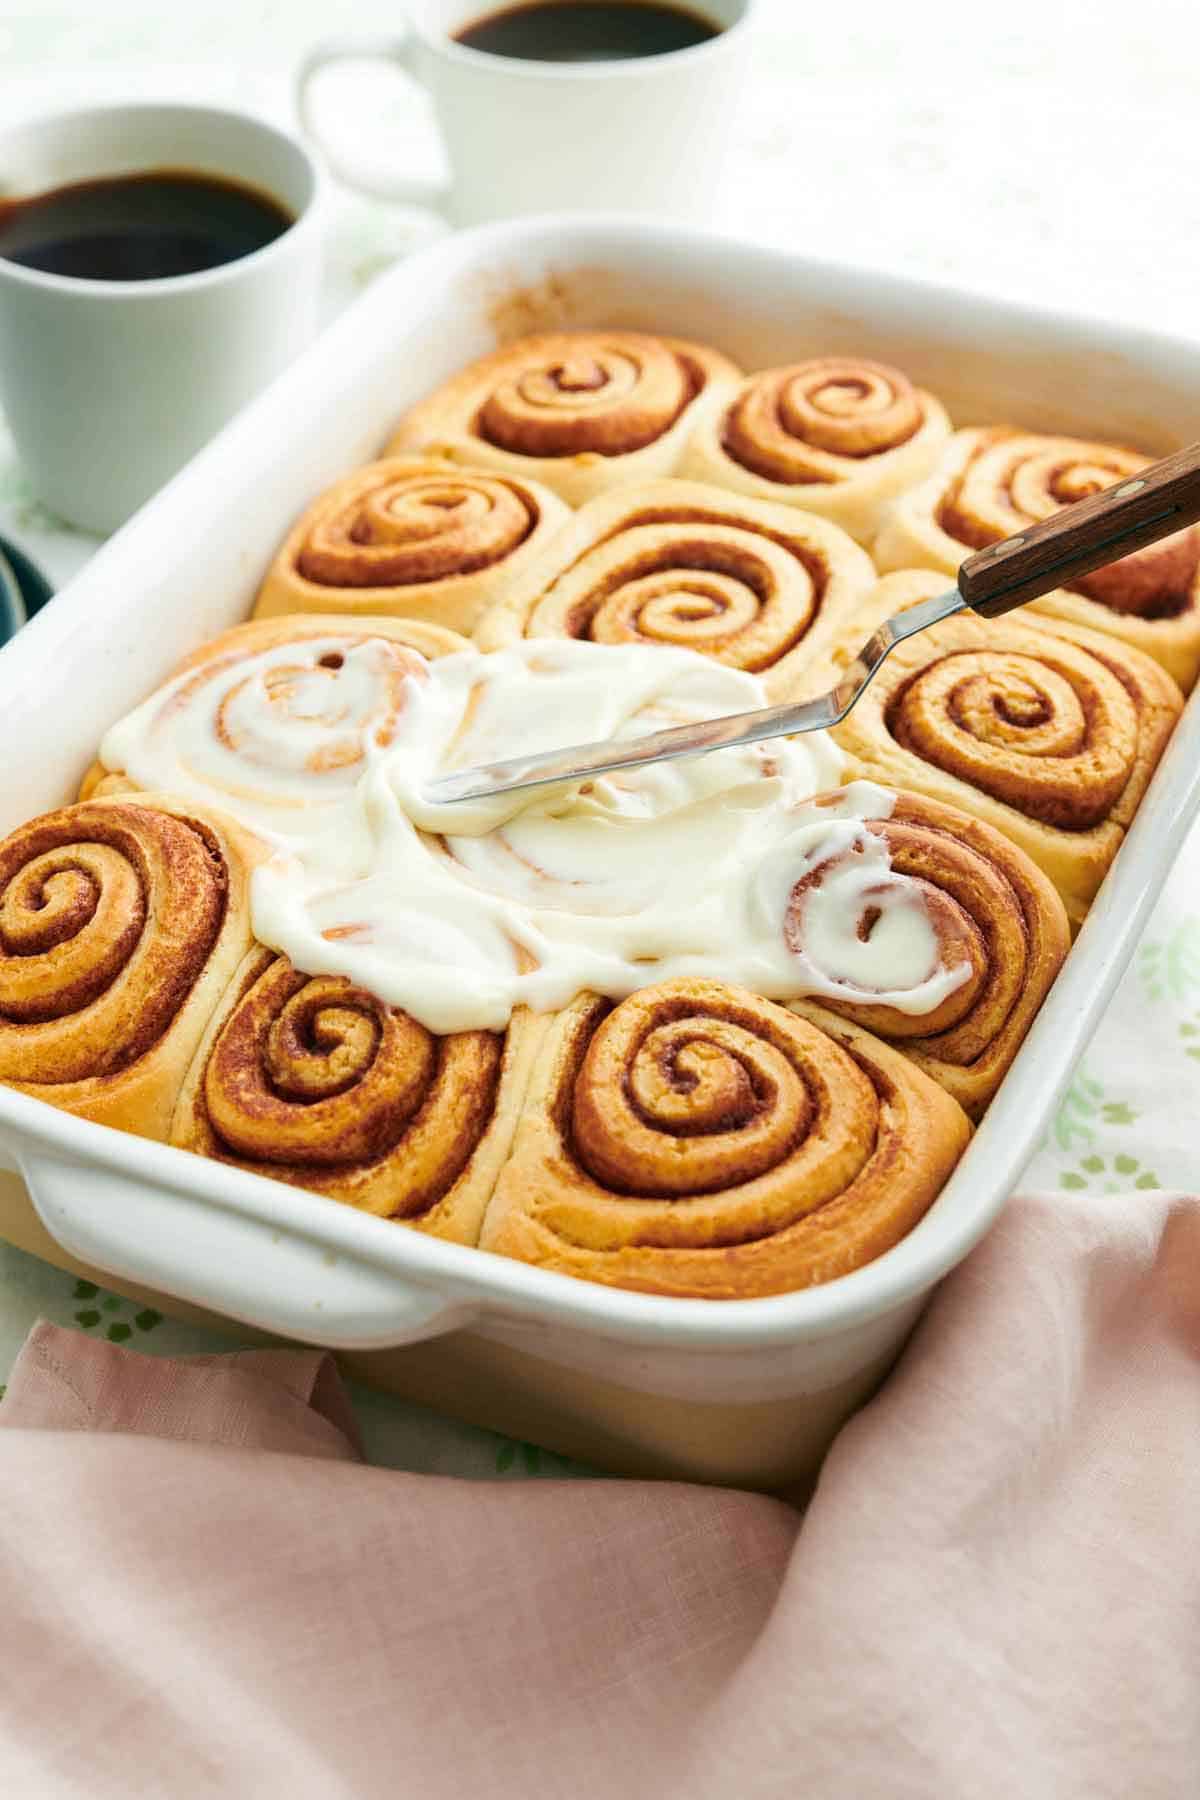
8. When the rolls are close to risen (after about 45 minutes), preheat the oven to 350°F. Uncover and bake the rolls until they are golden brown on top, 20 to 25 minutes. Meanwhile, make the frosting by beating the cream cheese, butter, vanilla, and salt together until smooth. Add the powdered sugar and beat on low speed until well combined. (Thin the frosting with 1 to 2 tablespoons of milk if desired.) Spread one-third of the frosting on the warm rolls as soon as they come out of the oven. Let them cool for a few more minutes, and then spread the rest of the frosting on top. Enjoy the warm cinnamon rolls!
Cinnamon Rolls
Video
Equipment
- Mixing Bowls
- Stand mixer
- 9×13-inch baking pan
- Rolling Pin
Ingredients
For the Dough:
- 1 cup warm milk (110-120F) (240mL)
- 5 tablespoons granulated sugar (63g)
- 2¼ teaspoons active dry yeast (.25oz/7g packet)
- 4⅔ cups all-purpose flour plus more for dusting (560g)
- ⅓ cup packed light brown sugar (73g)
- ½ cup unsalted butter melted (113g)
- 1 large egg room temperature
- 1 tablespoon vanilla extract
- 1½ teaspoon salt
- ½ teaspoon cinnamon
For the Filling:
- 6 tablespoons unsalted butter room temperature (85g)
- ½ cup light brown sugar (110g)
- 1½ tablespoons cinnamon
For the Glaze:
- 4 ounces cream cheese room temperature (113g)
- 2 tablespoons butter room temperature
- 1 teaspoon vanilla extract
- Pinch of salt
- 2 cups powdered sugar (240g)
- 1 to 2 tablespoons milk
Instructions
For the Dough:
- In a large mixing bowl or the bowl of a stand mixer fitted with the dough hook attachment, stir together the warm milk, granulated sugar, and yeast. Let stand until foamy, about 5 minutes.
- Add the remaining ingredients. Begin mixing on low speed until the mixture starts to come together. Increase the speed to medium-low and continue kneading until the dough is springy and tacky to the touch but doesn’t stick to your fingers, 8 to 10 minutes.
- Transfer the dough to a lightly oiled large bowl. Cover and let rise in a warm place (about 75F) until doubled in size, about 1½ to 2 hours.
- Lightly grease a 9×13-inch baking pan with butter or baking spray
- Turn out the dough onto a well-floured surface. Roll the dough into roughly a 12×24-inch rectangle.
For the Filling:
- Spread the butter onto the dough in a thin and even layer, leaving a ½-inch border down one long side of the dough. (make sure your butter is very soft! If it’s still firm, microwave it in 5-second increments until easily spreadable.)
- In a small bowl, stir together the sugar and cinnamon. Sprinkle the cinnamon sugar all over the butter.
- Starting at one long end opposite the unbuttered border, roll up the dough into a tight log. Cut the log into 12 equal pieces (about 2 inches wide) using a sharp serrated knife or unflavored dental floss.
- Place the rolls cut side down evenly spaced in the prepared baking dish. Loosely cover and let rise in a warm place until almost doubled in size, about 1 hour.
- Preheat the oven to 350F while rising.
- Uncover and bake for 20 to 25 minutes or until lightly browned on top. Place on a wire rack to cool.
For the Glaze:
- While the rolls are baking, combine the cream cheese, butter, vanilla and salt in a medium mixing bowl. Beat together on medium speed until smooth. Sift in the powdered sugar and beat on low speed until well combined. For a thinner consistency, beat in 1 to 2 tablespoons of milk.
- When the rolls are right out of the oven, spread a third of the glaze over the hot rolls. Let cool for 5 minutes, then spread the remaining glaze on top. The rolls are best enjoyed warm but can be covered and stored at room temperature for 2 days.
Notes
- Kneading options. If you have a stand mixer, knead the dough with the dough hook attachment. Otherwise, you can knead the dough on a lightly floured surface or counter. Give the dough a good long kneading – at least 8 to 10 minutes – or until it stretches evenly and doesn’t stick to your hands or the counter.
- Frost the rolls in two steps. This will allow the frosting to melt into the layers of the swirl while also accumulating on top. Swipe ⅓ of the cream cheese frosting over the hot buns immediately after they come out of the oven; spread on the rest of the frosting 5 minutes later, after the buns have cooled slightly.
Nutrition
Storing and Reheating Leftovers
Store leftover iced cinnamon rolls in an airtight container at room temperature for 2-3 days or in the refrigerator for up to 1 week. The rolls can also be frozen in a freezer-safe container for up to 3 months. Defrost the rolls at room temperature for 2-3 hours, or until thawed.
Reheating: You can warm a cinnamon roll in the microwave for 10-15 seconds, or place it on a piece of foil and reheat it in the air fryer at 325°F for 3-5 minutes. To reheat the whole pan, loosely cover it with foil and warm in the oven at 350°F until heated through, about 20 minutes. The icing will likely melt when reheating, but that will just make the cinnamon rolls even gooier!
FAQs and Troubleshooting
Yes! Shape and cut the rolls, placing them in a prepared baking dish that is also freezer-safe. Loosely cover, and let the rolls rise until almost doubled in size, about 1 hour. Tightly wrap the dish in plastic wrap, then a layer of foil, and freeze for up to 3 months.
When you are ready to thaw, put the pan in the fridge overnight or for at least 12 hours and up to 24 hours. When you are ready to bake, place the pan at room temperature or in a warm spot for 1-2 hours (making sure they aren’t cold to the touch anymore), remove the wrapping, and bake as directed.
Though there are a handful of potential reasons why the rolls are not fluffy, the most common are that too much flour was added to the dough or not enough time was given to let the dough rise properly. The bread will become dense, heavy, and dry if too much flour is added to the dough while kneading. To prevent this, add the flour to the kneading surface in small amounts, allowing the flour to be worked in before determining if you need more flour.
Secondly, if the dough doesn’t rise enough, the dough will be dense instead of light and fluffy. Allow the buns to double in size before placing them in the oven. A trick to know that they have risen sufficiently is to take a before photo, to which you can compare the risen buns.
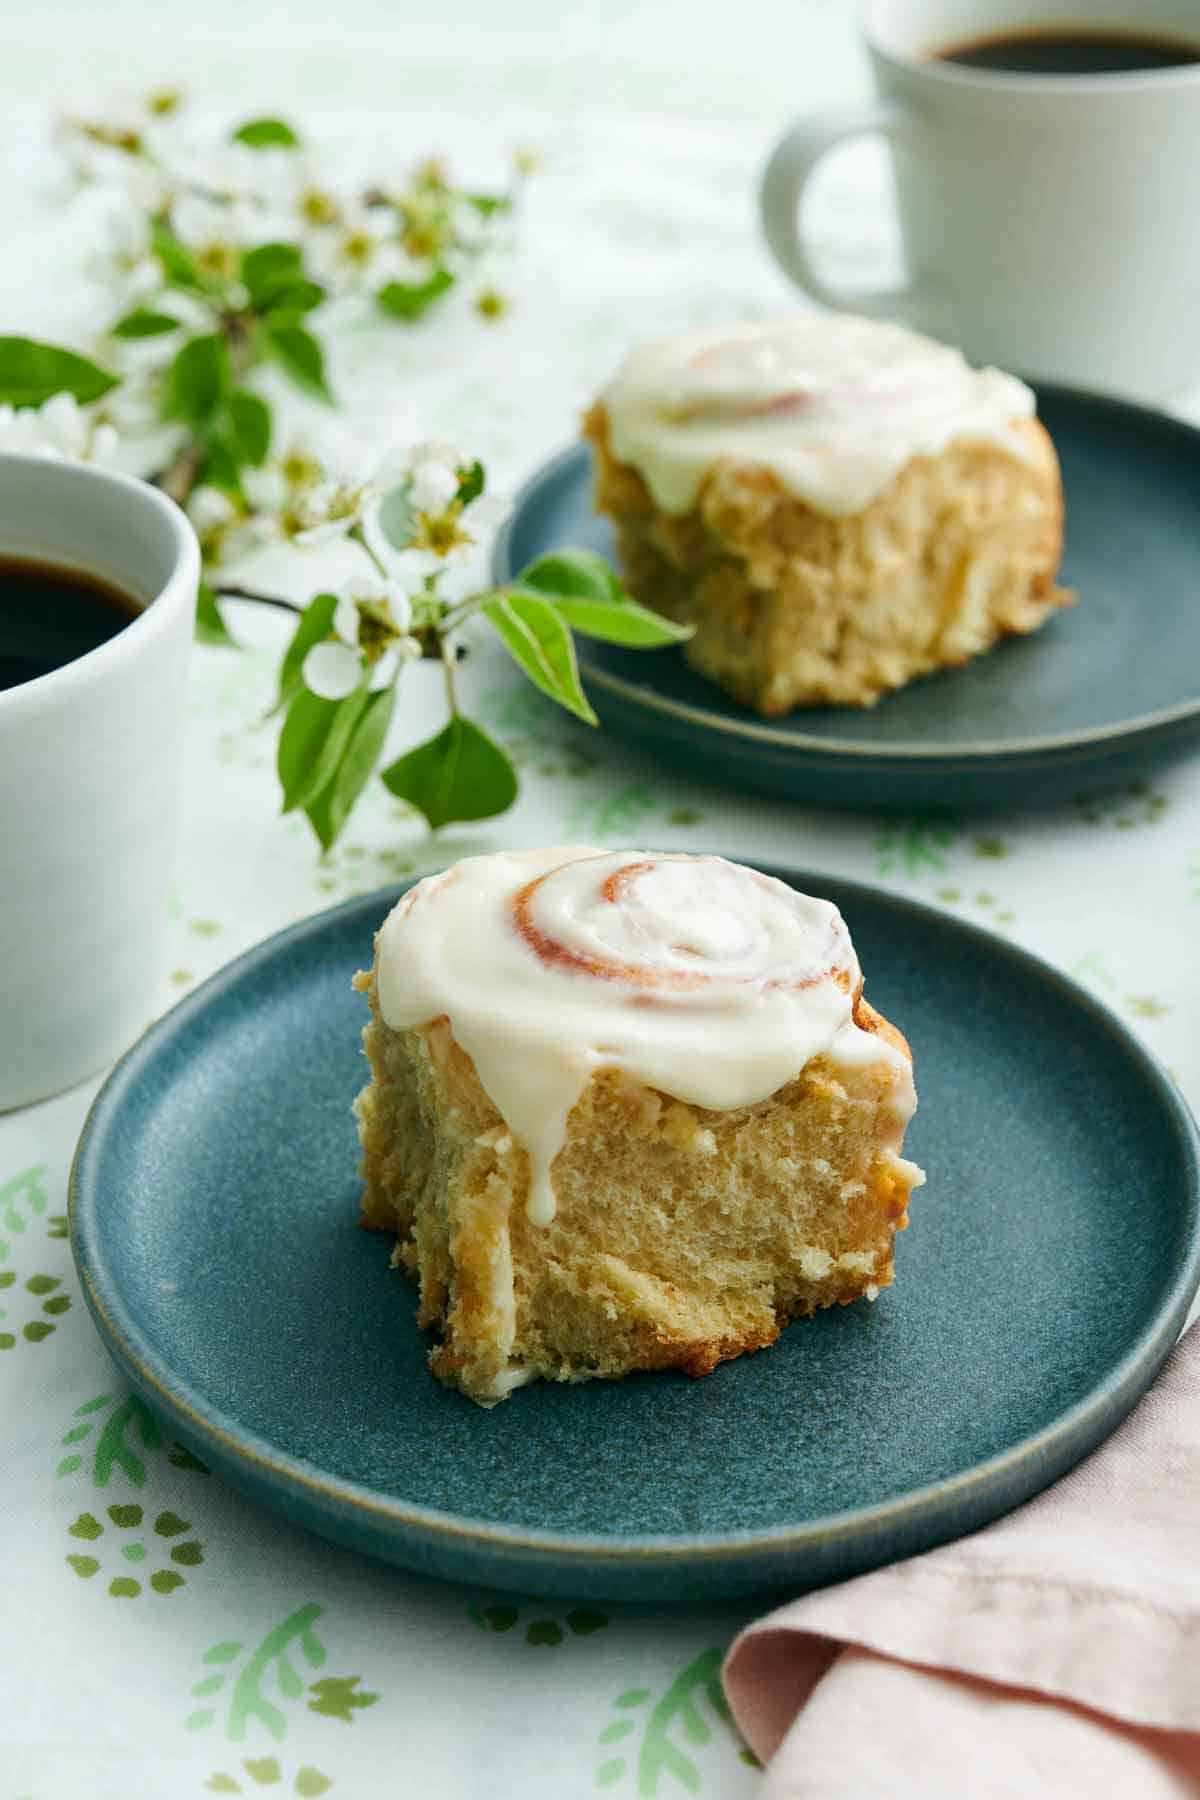
Serve cinnamon rolls warm with hot tea, freshly brewed coffee, orange juice, or hot chocolate. On hungry mornings, plate the cinnamon rolls with sliced fruit, yogurt, and even scrambled eggs for a complete breakfast.
You can try it, but I have not tested it! For store-bought cup-for-cup gluten-free baking flours, you can substitute the weight of the gluten-free flour 1:1 for the weight of all-purpose flour. You will, however, need to adjust the amount of liquid. Typically, gluten-free flour needs an additional 2-3 tablespoons of liquid per cup than all-purpose wheat flour.
This is where I caution the swap in the recipe. If you want to try it, increase the milk by ⅔ cup (160ml), adding an additional tablespoon at a time as needed when mixing the dough.
More Breakfast Recipes To Try
Add one of these delicious breakfast treats to your must-try list!
My old-fashioned sticky buns recipe is an excellent weekend breakfast recipe! The rolls are fluffy and baked with a gooey brown-sugar topping.
The ultimate breakfast pastry has to be a flaky, buttery croissant! With my recipe and step-by-step guide, you can make homemade croissants with the best flavor and texture to really impress your guests (or yourself!).
These strawberry rolls are filled with both strawberry jam and chopped fresh strawberries for a fruit-packed treat. Top it with an easy glaze for the best brunch recipe alongside fruit, eggs, and coffee.
A slice of classic coffee cake is perfect paired with a cup of hot coffee. The cake is super moist thanks to the addition of sour cream, and has a ribbon of cinnamon sugar running through the middle, along with a crunchy streusel topping.
Pumpkin puree turns regular cinnamon rolls into fluffy, moist pumpkin cinnamon rolls! Topped with a maple cream cheese glaze, they are an excellent treat for cold fall and winter mornings.
If you’ve tried this cinnamon roll recipe, then don’t forget to rate it and let me know how you got on in the comments below. I love hearing from you!
Siria says
I tried these today and they are perfect! Gooey and soft, the filling just melts in your mouth. My family personally does not like the frosting so I don’t make it but they are perfect even without it. For the first time i didn’t get a sticky dough! I think this will become my standard cinnamon roll recipe.
Ms Ifrahim says
Noice.Recommended.
Samantha says
I made them for my family and they absolutely loved them we went with a different icing that didn’t have cream cheese but the cinnamon rolls were nice and fluffy they tasted amazing and had a bunch of flavor
L Jackson says
I have made other cinnamon rolls before and they were okay but knowing how much I love all of John’s recipes I thought I’d give these a try. They were delicious! The best homemade cinnamon rolls I’ve had. The dough was soft and pillowy and baked up to be so tender. The flavor was on point. I’ve made this recipe three times and they’ve all turned out perfectly.
Today, my daughter suggested a savory roll so I used John’s recipe, just leaving out the brown sugar in the dough and replacing the cinnamon with onion powder & garlic powder. For the filling I used the same amount of butter and again replaced the cinnamon with onion powder & garlic powder. I added a couple tablespoons of flour to the butter to help bind it. Once I spread that out over the rolled up dough, I put two cups of freshly shredded mozzarella, mini pepperonis, and Italian seasoning on top. I rolled them up and cut them before putting them into a baking dish. After the second rise I topped with more cheese and baked. Served these warm with marinara and they were a hit!
Jaime says
These are the best cinnamon rolls I have ever made! They are easy to make and stay soft and moist.
Jennifer says
Amazing! I live in a high altitude (7200’) area. I did need to add a little extra flour. Other than that these cinnamon rolls are so easy to make and did I say, AMAZING! Thank you for the recipe.
Lara says
Made these yesterday and they turned out great! Super easy and so delicious! This recipe will be bookmarked as a fave, thank you!
Desiree H. says
These were wonderful! I made these for Christmas breakfast and we LOVED them!
Joye says
I normally make a different cinnamon bun recipe every Christmas morning but decided to try these this year. They were by far the best I’ve ever made. I did sprinkle nutmeg over them to add to the spices. These will be my new go to buns.
Beatriz . says
Very good recipe, easy to follow and delicious, everyone at the Christmas Eve dinner loved it!