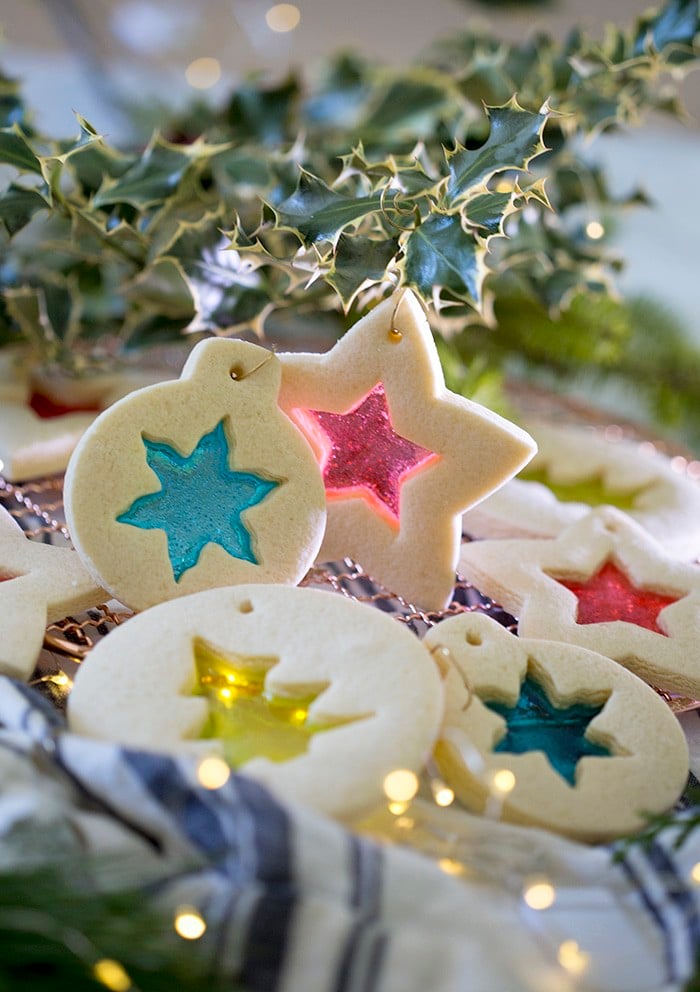
These stained glass cookies come together in a flash and bring ALL the holiday cheer! You can use any combination of cookie cutters to make them. Just be try not to make the edge too thin as they will become brittle.
Use a skewer to poke a hole where you’d like to hang the cookie from and voila, your cookies are now beautiful Christmas ornaments you can hang on the tree. If you make them on Christmas eve you’ll have a wonderful treat for the morning to help tide you over during present opening!
How to make Stained Glass Cookies
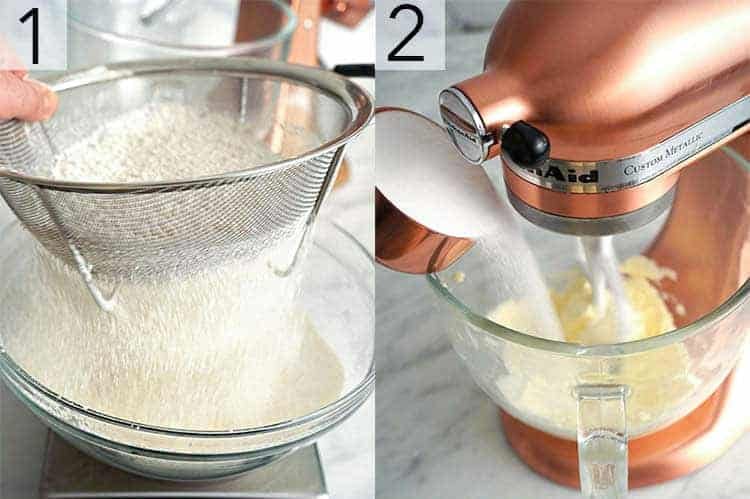
1. Sift the flour, cornstarch and salt into a large bowl, whisk together and set aside.
2. In a stand mixer fitted with a paddle attachment, cream the butter and sugar together.
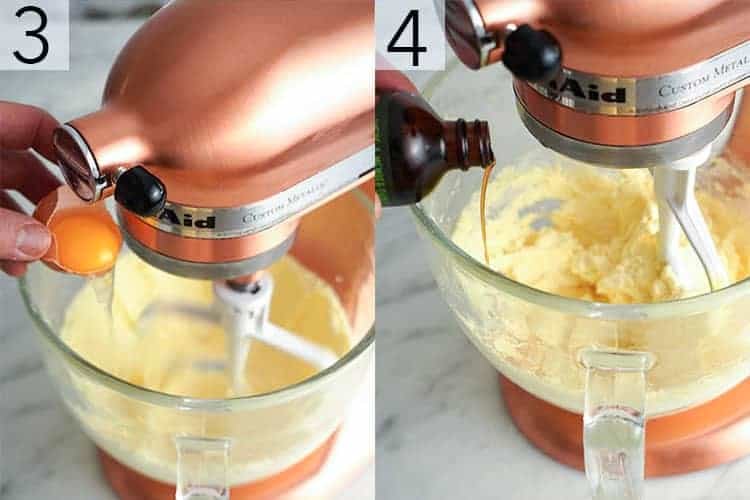
3. Add the eggs one at a time while mixing on medium speed.
4. Pour in the vanilla and mix to combine.
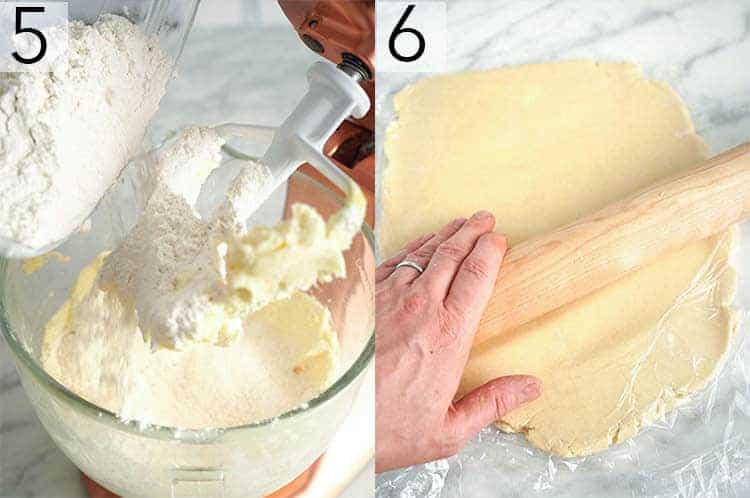
5. Add the flour and mix on low for a few seconds then scrape the bowl down and continue mixing until just combined.
6. Roll the dough out to about an inch thickness between two sheets. Chill for at least 20 minutes to allow the dough to firm up.
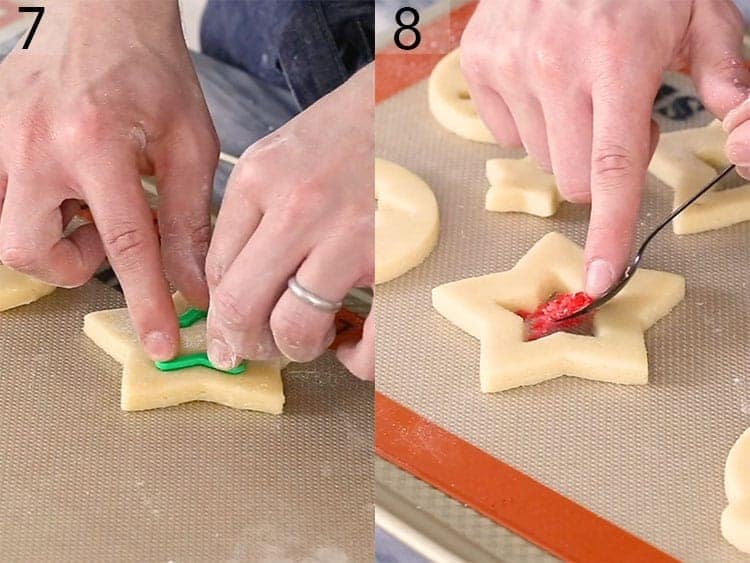
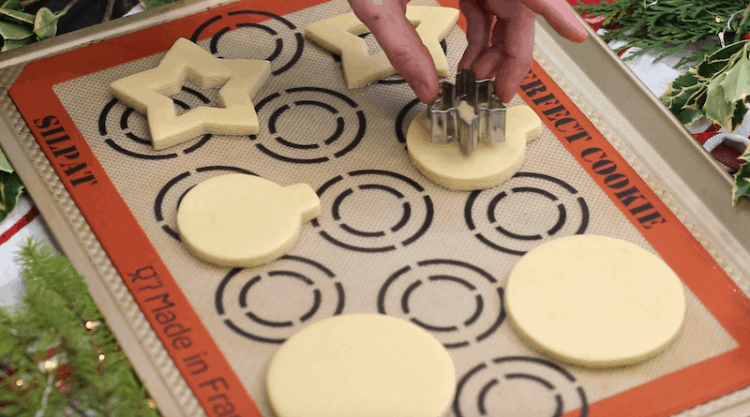
7. Once the dough is chilled, roll it out to a 1/4 inch thickness. Cut out a shape using a medium to large cookie cutter. Poke a small hole at the top of the cookie if you want to use them as ornaments.
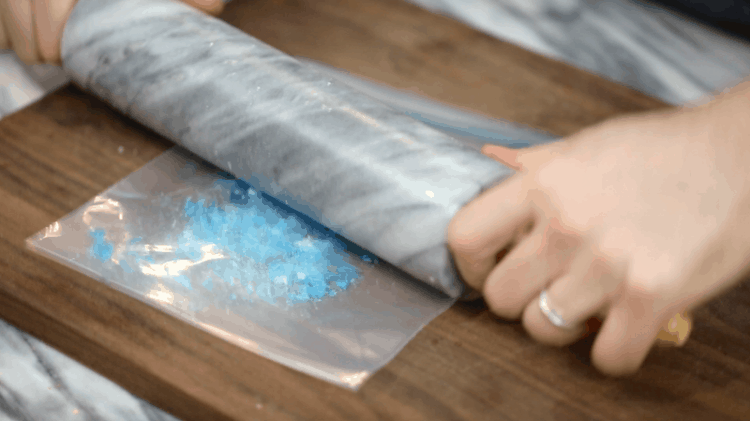
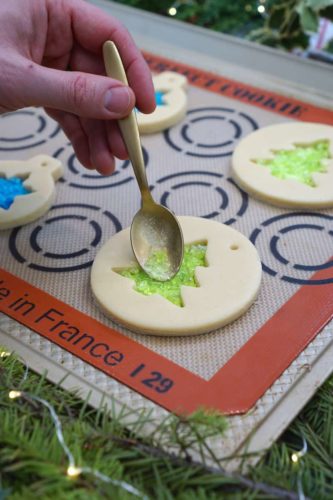
8. Choose a brand and flavor of hard candies that you enjoy, add them to a ziplock bag and crush them up. Add the crushed up bits of the candy to the inside of the cookies. Make sure to distribute evenly. Bake the cookies for 12 minutes then let them cool to allow the candy to harden back up.
Pro Tips For this recipe
- Measure your flour correctly! Adding too much flour to the recipe is the most common mistake. The best, and easiest way to measure flour is by using a scale. If you don’t have one then fluff your flour with a spoon, sprinkle it into your measuring cup, and use a knife to level it off.
- Try not to get any hard candy on the sugar cookie as it will look messy.
- I used a pin to pop any air bubbles when the cookies were RIGHT out of the oven; this gave the cookies a wonderful unblemished look.
- You really need a silicone baking mat for this. Baking paper MIGHT work in a pinch though.
- Make sure you wait for the cookies to cool before lifting them off the baking sheet, they need to set and firm up.
- Humidity will make the candy centers of these cookies sticky so watch out!
Frequently Asked Questions
Which candies can I use for the stained glass?
Any hard candy will work. I used Jolly Ranchers for the video but you can choose one that you enjoy!
How long will these cookies keep for?
In a sealed DRY environment these cookies will keep for up to a week. Humidity is the enemy of these cookies as it makes the “glass” sticky.
HOW DO YOU KEEP COOKIES FROM STICKING?
Using corn starch helps but the best way to prevent cookie dough from is sticking is to roll out the dough between two layers of plastic wrap. This way there’s no fuss and ZERO chance of sticking. It’s always a good idea to flour your work surface well and move the dough often. I like to work on a pastry mat which can be lifted up and even transferred into the refrigerator. Baking these cookies on a silicone baking sheet is the BEST way to ensure they don’t stick.
WHY DO RECIPES ASK FOR UNSALTED BUTTER?
Various brands of butter add different amounts of salt to their product. Using unsalted butter helps to control the amount of salt in a recipe and give people a uniform result no matter where they live. This is also why you’ll see recipes call for kosher salt. Different types of salt have smaller and larger grains; the smaller the grain, the more salt each teaspoon will hold. Specifying kosher salt just calls for a standard grain size. All this being said you can usually use salted butter and just reduce or eliminate the added salt in a recipe.
If you’ve tried these stained glass window cookies then don’t forget to rate the recipe and let me know how you got on in the comments below, I love hearing from you!

Stained Glass Cookies
Video
Ingredients
INGREDIENTS:
For the Cookies:
- 1 cup unsalted butter 226g, room temp
- 1 cup granulated sugar 200g
- 2 eggs
- 4 cups all-purpose flour 480g, sifted
- 1/2 cup cornstarch 65g, sifted
- 3/4 teaspoon kosher salt 3g
- 1 teaspoon vanilla extract 5mL
For the Window Pane:
- 1/3 cup Hard candies You can use any one you'd like.
Instructions
- Preheat to 375 degrees F.
- Sift the flour, cornstarch and salt into a large bowl and whisk together.
- In a standing mixer fitted with a paddle attachment, cream butter and sugar together.
- Add eggs one at a time then the vanilla while mixing on low.
- Scrape the bowl down and mix in the dry mixture.
- Separate dough into two disks. Wrap in plastic and chill for about an hour. I like to roll my dough out a bit between two sheets of plastic wrap at this point so there's less rolling later on.
- Roll chilled dough to a 1/4 inch thickness.
- Cut out a shape using a medium to large cookie cutter. Cut out the window shape on the inside using a smaller shape.

- Poke a small hole at the top of the cookie. This is for the ornament hook.
- Place cookies on a silpat lined baking sheet.
- Add hard candies to a ziplock bag. Choose a brand and flavor of hard candies that you enjoy.

- Crush up, then add to the inside of the cookies. Distribute evenly.

- Bake for 12 minutes at 375F then allow to cool on baking sheet.
- Add ornament hook if hanging.
Notes
- Measure your flour correctly! Adding too much flour to the recipe is the most common mistake. The best, and easiest way to measure flour is by using a scale. If you don't have one then fluff your flour with a spoon, sprinkle it into your measuring cup, and use a knife to level it off.
- Try not to get any hard candy on the sugar cookie as it will look messy.
- I used a pin to pop any air bubbles when the cookies were RIGHT out of the oven; this gave the cookies a wonderful unblemished look.
- You really need a silicone baking mat for this. Baking paper MIGHT work in a pinch though.
- Make sure you wait for the cookies to cool before lifting them off the baking sheet, they need to set and firm up.
- Humidity will make the candy centers of these cookies sticky so watch out!
Nutrition






Glynis Lailann says
Thank You, Thank You. True as you stated, the cookies kept their shape. I did add a just over a teaspoon of baking powder and a pinch of baking soda to the recipe though as I live at the coast at sea level (Cape Town, South Africa). I will definitely make these again. I cant wait to try out your recipe for shortbread. Happy Holidays and Thank you once again.
Michelle says
Thanks for the good information. Tried them & they came out AWWSOME! Used parchment paper & it worked GREAT!
John K. says
Hi Michelle,
I’m so glad to hear that! I love these cookies. 🙂
Best,
John
Susannah Strong says
These cookies look gorgeous! I might have to try stained-glass cookies next Christmas! I enjoy your blog and have referenced it for buttercream frosting inspiration, especially. Back in Oct. I made your mini pumpkin cakes (here’s a link to my blog post where I also reference you: https://homeandhearth.blog/2018/11/05/mini-pumpkin-cakes-by-preppy-kitchen/ ) and fell in love with how awesome your buttercream recipe was. Thanks for wonderful inspiration and content.
jkanell says
So happy you enjoyed!
Erin Jane says
I loved this idea, thank you! I tried out the stained glass effect using parchment paper (because I don’t have a silpat on me at the moment) and it worked like a charm! So festive and fun ?
jkanell says
Yay!
Richard says
John: love your new mixer. Do you like the glass bowl better than the steel bowl? Is the glass bowl machine washable? Do you like the tilt head better than the locked head on the mixer? I am planning a new Kitchen Aid so would value your assessment. Thanks.
jkanell says
I actually like the metal bowl better because it’s easier to attach and remove
Chris says
So cute and the cookies too!
Haley says
For some reason, these remind me of my childhood. I need to make them with my little sister.
Katherine says
Fun to bake with kids!
Ava says
This idea is very cute!