
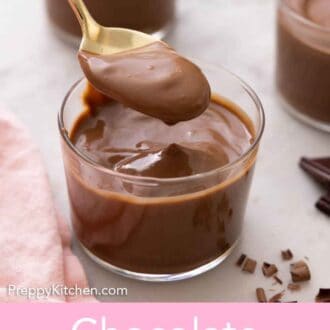
You will ditch the box mix forever once you give my homemade chocolate pudding recipe a try! I tested this recipe to be fast and simple. You’ll be making silky, glossy chocolate pudding from scratch with only a handful of ingredients in minutes! And if you take note of my tips, you’ll know just how to avoid potential issues like a runny or grainy pudding. It also lasts a few days in the fridge, so you can make it in advance and let it chill in the fridge until you’re ready to serve.
A reader, Pauline, says: “I wanted something smooth, creamy, and silky, and this is the recipe if that is exactly what you’re looking for. I will not go to any recipes for chocolate pudding anymore.” ★★★★★
Table of Contents
- Key Ingredients & Substitutions
- Can I Make Chocolate Pudding Dairy-Free?
- How Can I Make It Without Eggs?
- Use This Pudding As A Pie Filling
- Pro Tips For Homemade Chocolate Pudding
- How To Make Chocolate Pudding
- Serving Suggestions
- Storage & Make-Ahead
- Frequently Asked Questions
- More Chocolate Dessert Recipes To Try
Key Ingredients & Substitutions
These are the main ingredients you need to make this easy chocolate pudding from scratch. You can find the full list of ingredients and measurements in the recipe card below.
Milk — I typically use whole milk when I make chocolate pudding. It produces a rich pudding with that classic texture and flavor we love from childhood. If you want it a bit more decadent, you can replace half of the milk with half and half or heavy cream for added richness.
Cocoa powder — I use regular unsweetened cocoa powder, but you can use Dutch-processed cocoa powder for a dark chocolate flavor. Do not use sweetened cocoa powder. That will add more sugar to the pudding, making it much too sweet.
Egg yolks — egg yolks add richness and act as a thickening agent. Pudding is a custard (cooked milk and eggs), and the eggs give the pudding its signature thick yet velvety consistency. You will only need to use yolks for the pudding, as egg whites contain a lot more protein and would make the pudding very dense and stiff. Don’t throw out your egg whites, though! Save them to make my angel food cupcakes.
Cornstarch — corn starch acts as an additional thickener for the chocolate pudding. It also helps protect the eggs from heat. The starch raises the temperature at which egg proteins coagulate, helping prevent the yolks from forming curdles and turning the pudding lumpy. You can swap it for arrowroot powder or potato starch, both of which serve the same functions as cornstarch.
Butter — butter adds rich flavor and decadence, as well as giving the pudding a glossy finish. You will cube it and add it cold to the hot pudding. This helps it slowly melt in and prevents the pudding from getting a greasy coating.
Vanilla — vanilla is an important flavor component in this recipe, as it amplifies chocolate flavor, so be sure to use a high-quality kind. Or you can make your own fragrant vanilla using my vanilla extract recipe!
Can I Make Chocolate Pudding Dairy-Free?
For a dairy-free or lactose-free version of this easy recipe, use oatmilk, almond milk, or low-fat coconut milk in place of regular whole milk. Make sure any version of plant milk you use has fat in it for the thicker consistency and richness. You can swap the butter for a stick-style nondairy butter of your choice.
How Can I Make It Without Eggs?
The best chocolate pudding is a custard (which is egg-based), so you will lose some richness in flavor and texture without the eggs. But if you don’t want to use the egg yolks, use an extra tablespoon of cornstarch to get as close as possible to the proper consistency. The chilled and set pudding will be firmer and a bit stickier than velvety.
Use This Pudding As A Pie Filling
Homemade chocolate pudding makes a delicious no-bake pie filling on its own or combined with whipped cream or other fillings and toppings. It’s what I fill my chocolate pie with! To make this chocolate pudding for a pie filling, increase the cornstarch to ¼ cup (32g) and the butter to ¼ cup (56g) to get a firmer set.
Pro Tips For Homemade Chocolate Pudding
Temper the eggs correctly. Properly tempering eggs means you slowly add the hot liquid into the eggs to gradually bring them up to temperature. If you do the opposite, little bits of egg will hit the hot milk and immediately cook and solidify, turning your pudding lumpy.
Whisk constantly while cooking. You do not want the chocolate to stick to the pan. If that happens, lumps will form in your pudding, affecting the silky mouthfeel. Don’t be vigorous with your whisking, though. You don’t want to whip it—just stir with the whisk and make sure you get the corners of the pan too.
Can I fix a lumpy pudding? If you just have small lumps, I suggest pressing the pudding through a fine mesh sieve before cooling it. This may not fully fix the texture, but it will remove any large, chewy clumps, greatly improving it.
How To Make Chocolate Pudding
Below, I’ve highlighted portions of the recipe in step-by-step process images along with instructions for making this 10-minute chocolate pudding. You can find the full set of instructions in the recipe card below.
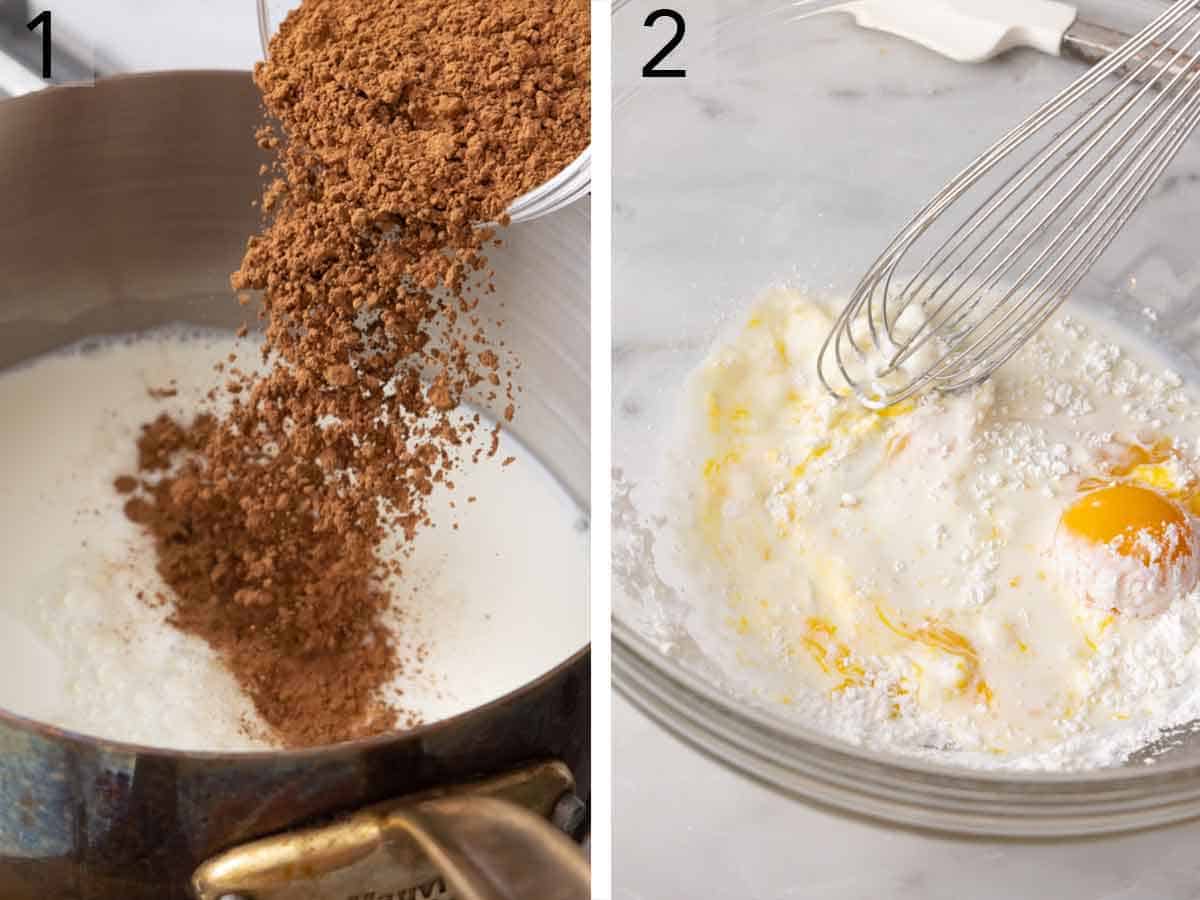
1. Add 2 cups of whole milk plus the sugar, cocoa powder, and salt to a small saucepan. Whisk to combine, then place over medium heat until the mixture is very steamy and just starts to simmer. Stir frequently to prevent the chocolate from scorching and sticking to the bottom of the pot.
2. Meanwhile, whisk together the egg yolks, cornstarch, and ¼ cup of milk in a large bowl for tempering.
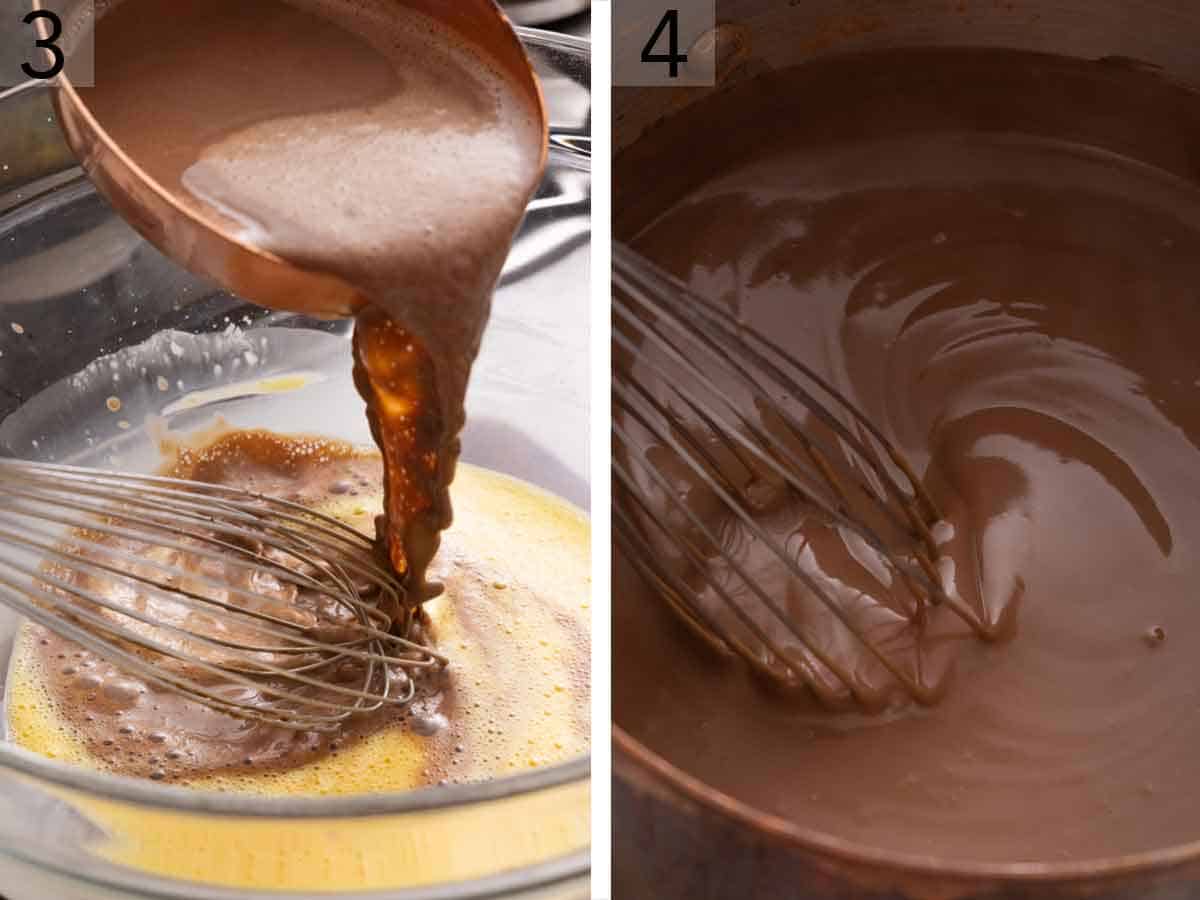
3. Once the milk mixture on the stove is hot, slowly whisk about a cup of it into the egg mixture. This tempers the egg yolks, gently increasing their temperature and cooking them without them scrambling. Then whisk in the rest of the hot chocolate milk mixture, and pour it all back into the saucepan.
4. Place over medium heat once again and cook until the pudding mixture bubbles. Stir constantly during this time. You will need about 3 minutes to cook it until it is thick enough, but you can also use an instant-read thermometer to remove any guesswork. It should read around 170°F (but not higher than 180°F — see the Notes section for details).
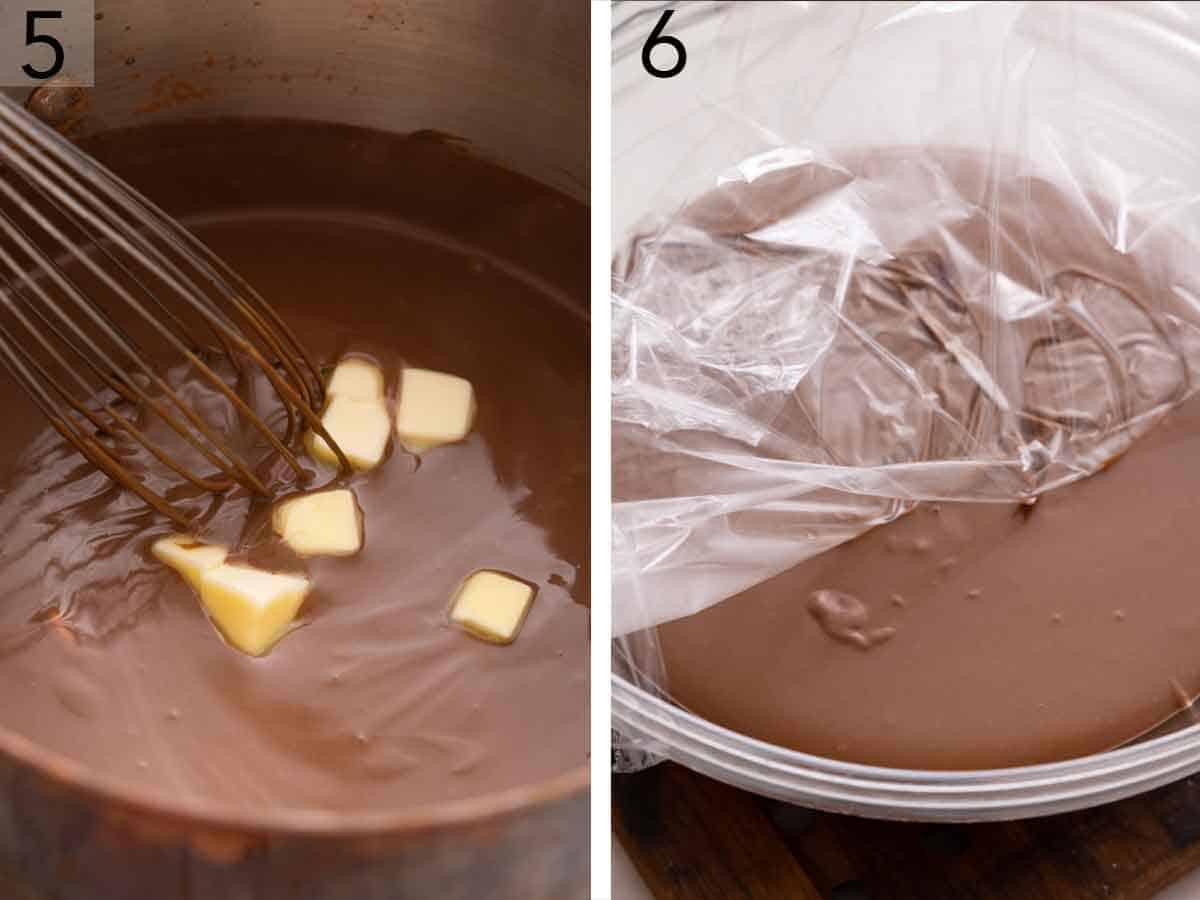
5. Remove from the heat and add the cubed butter and vanilla extract. Whisk until the butter melts, and everything is nicely combined. The mixture will be nice and glossy.
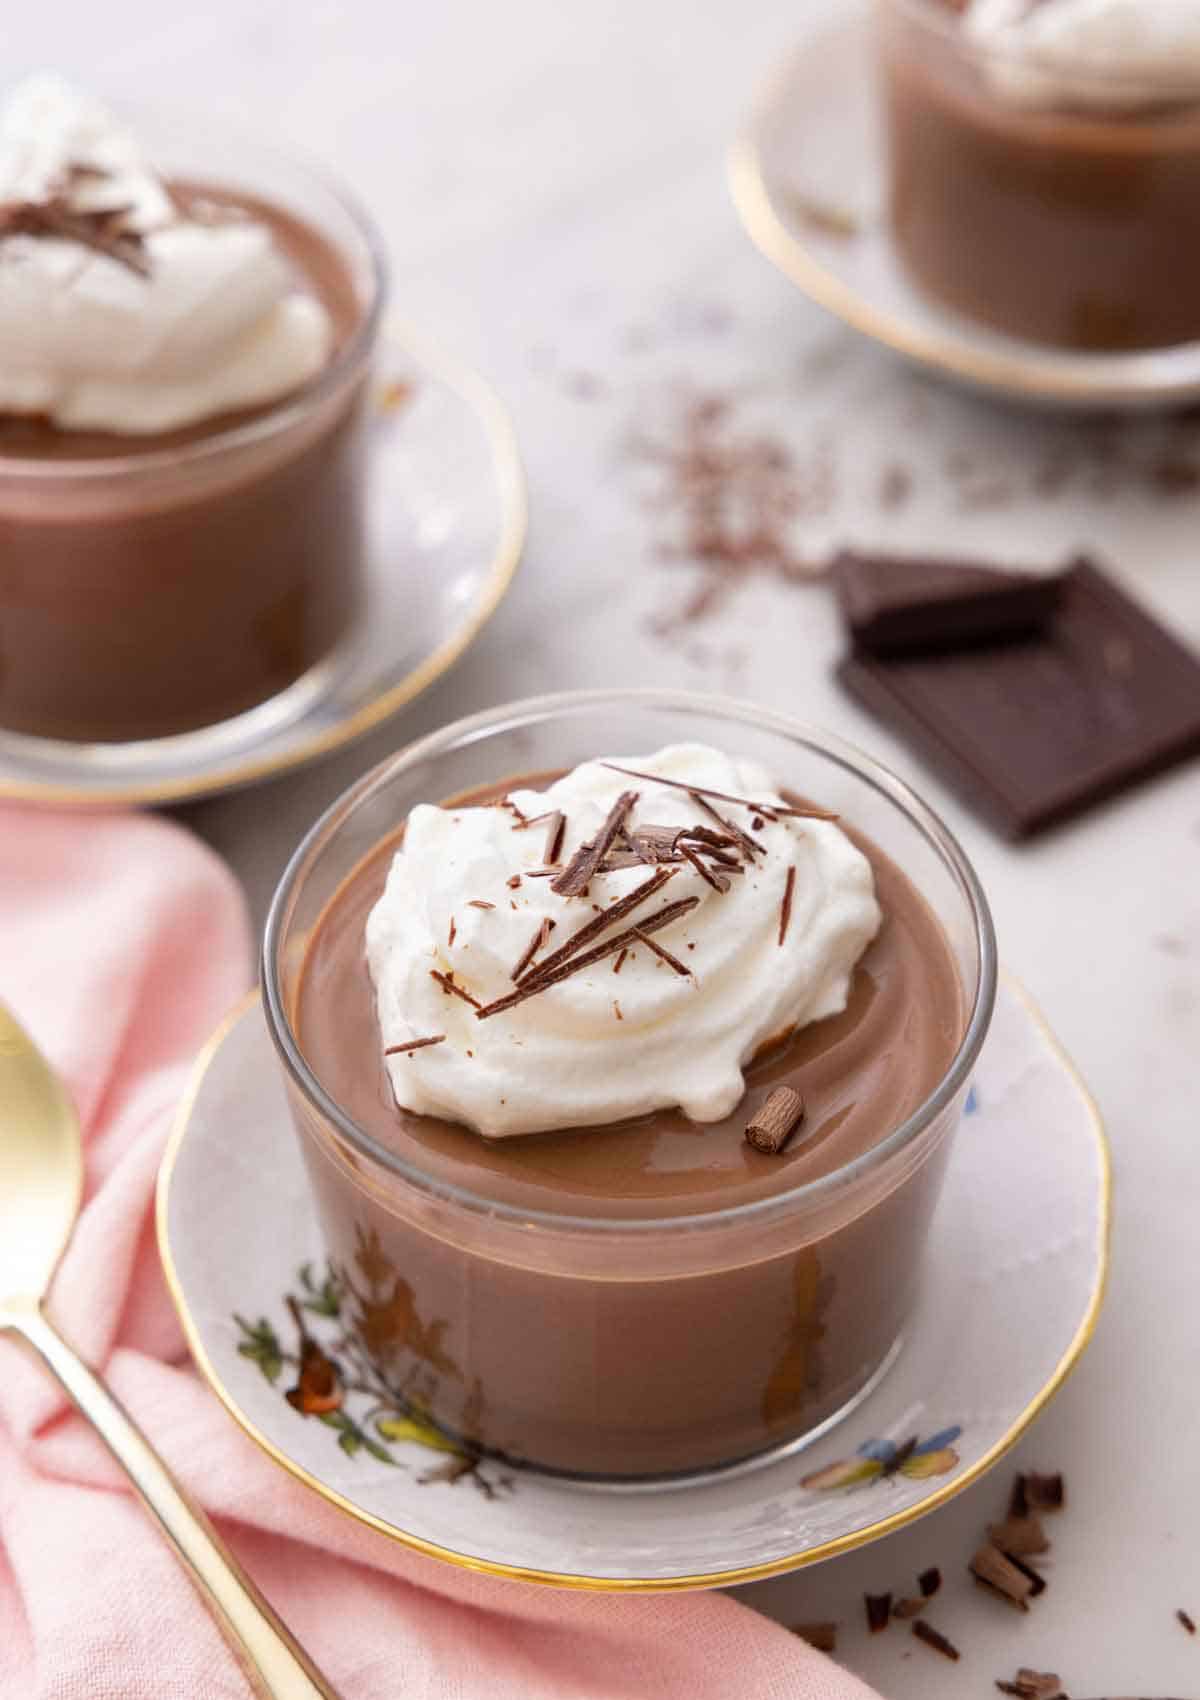
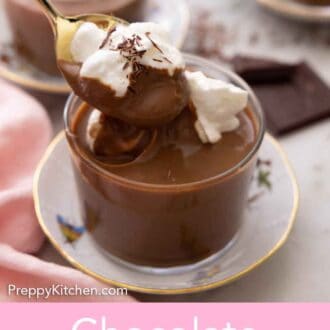
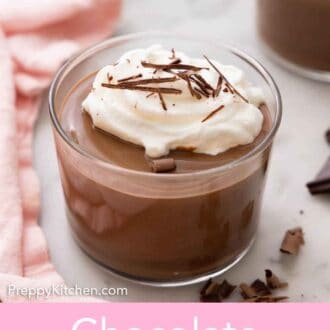
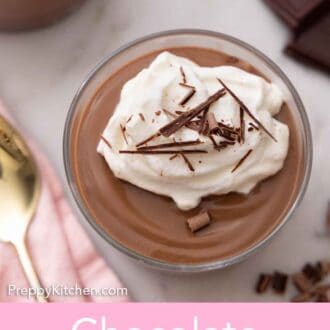
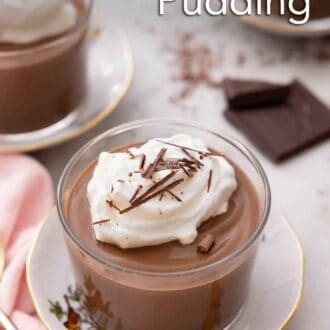
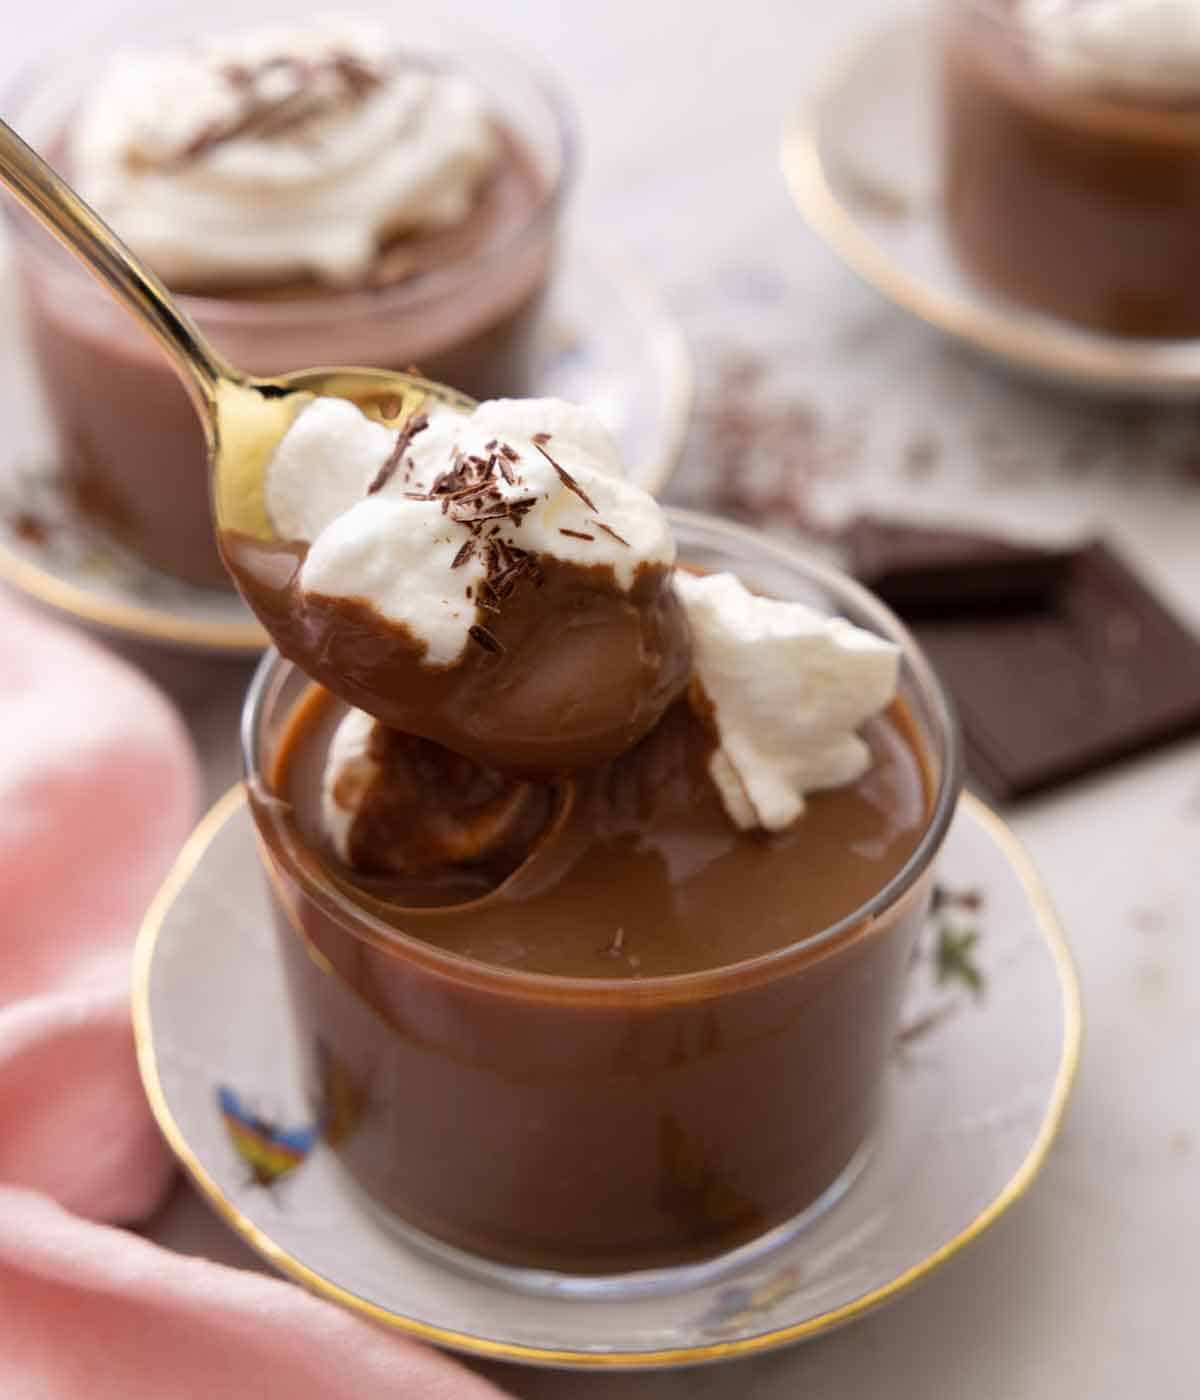
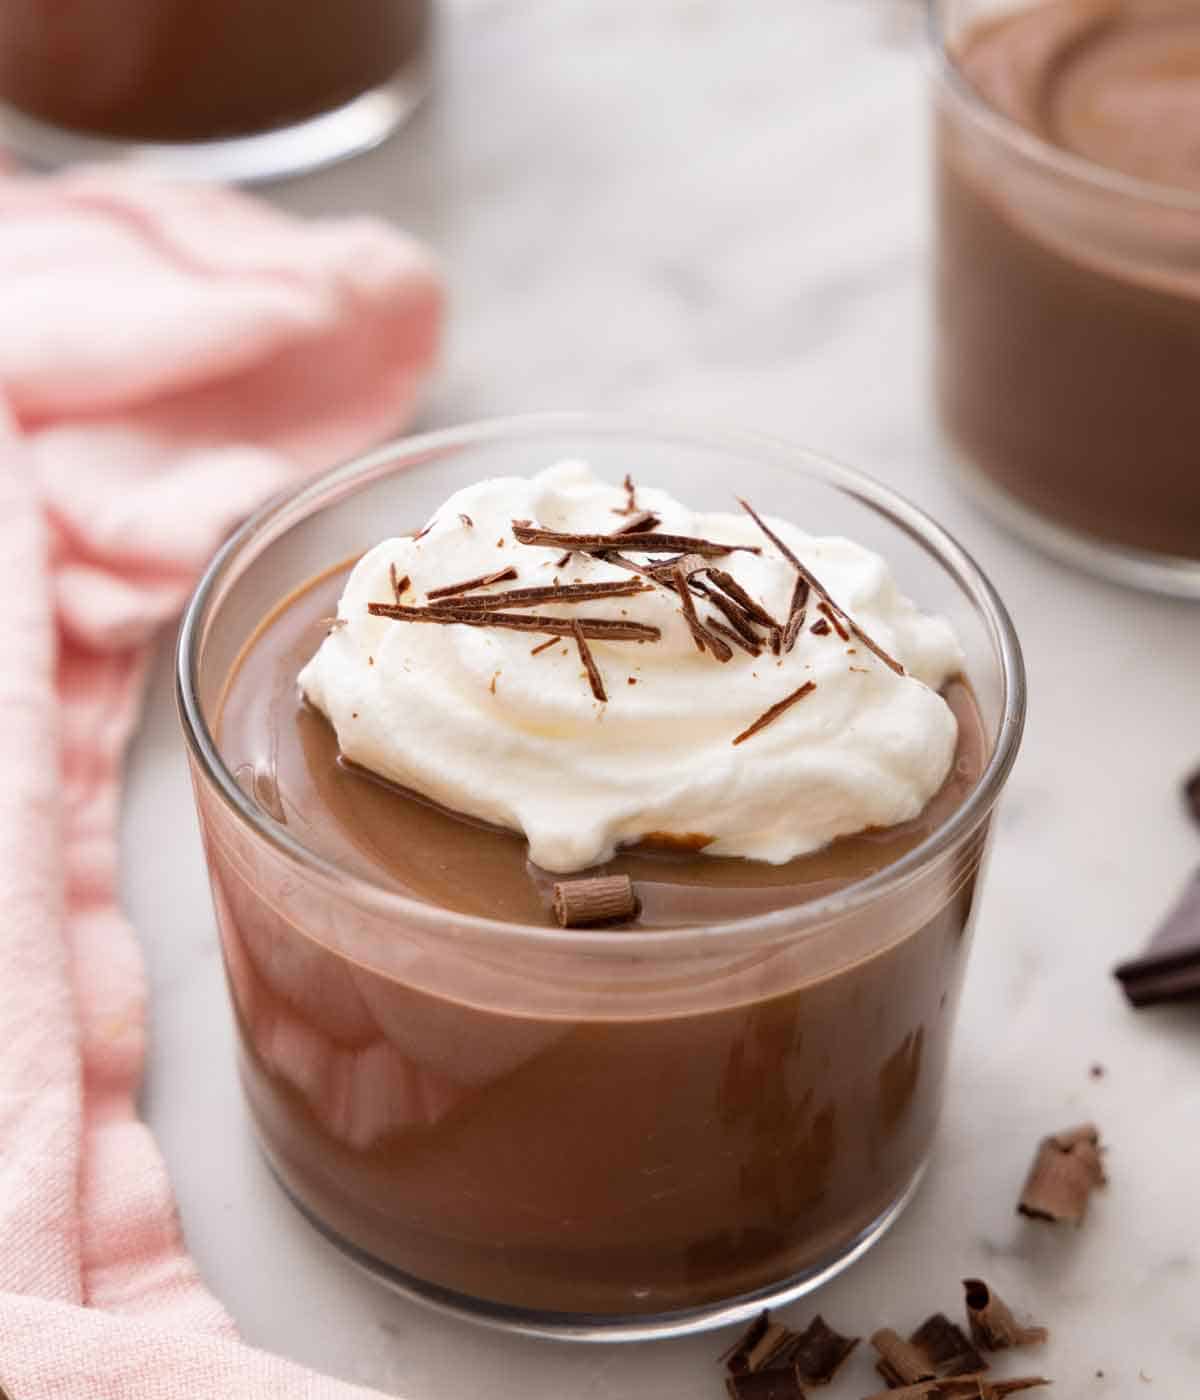
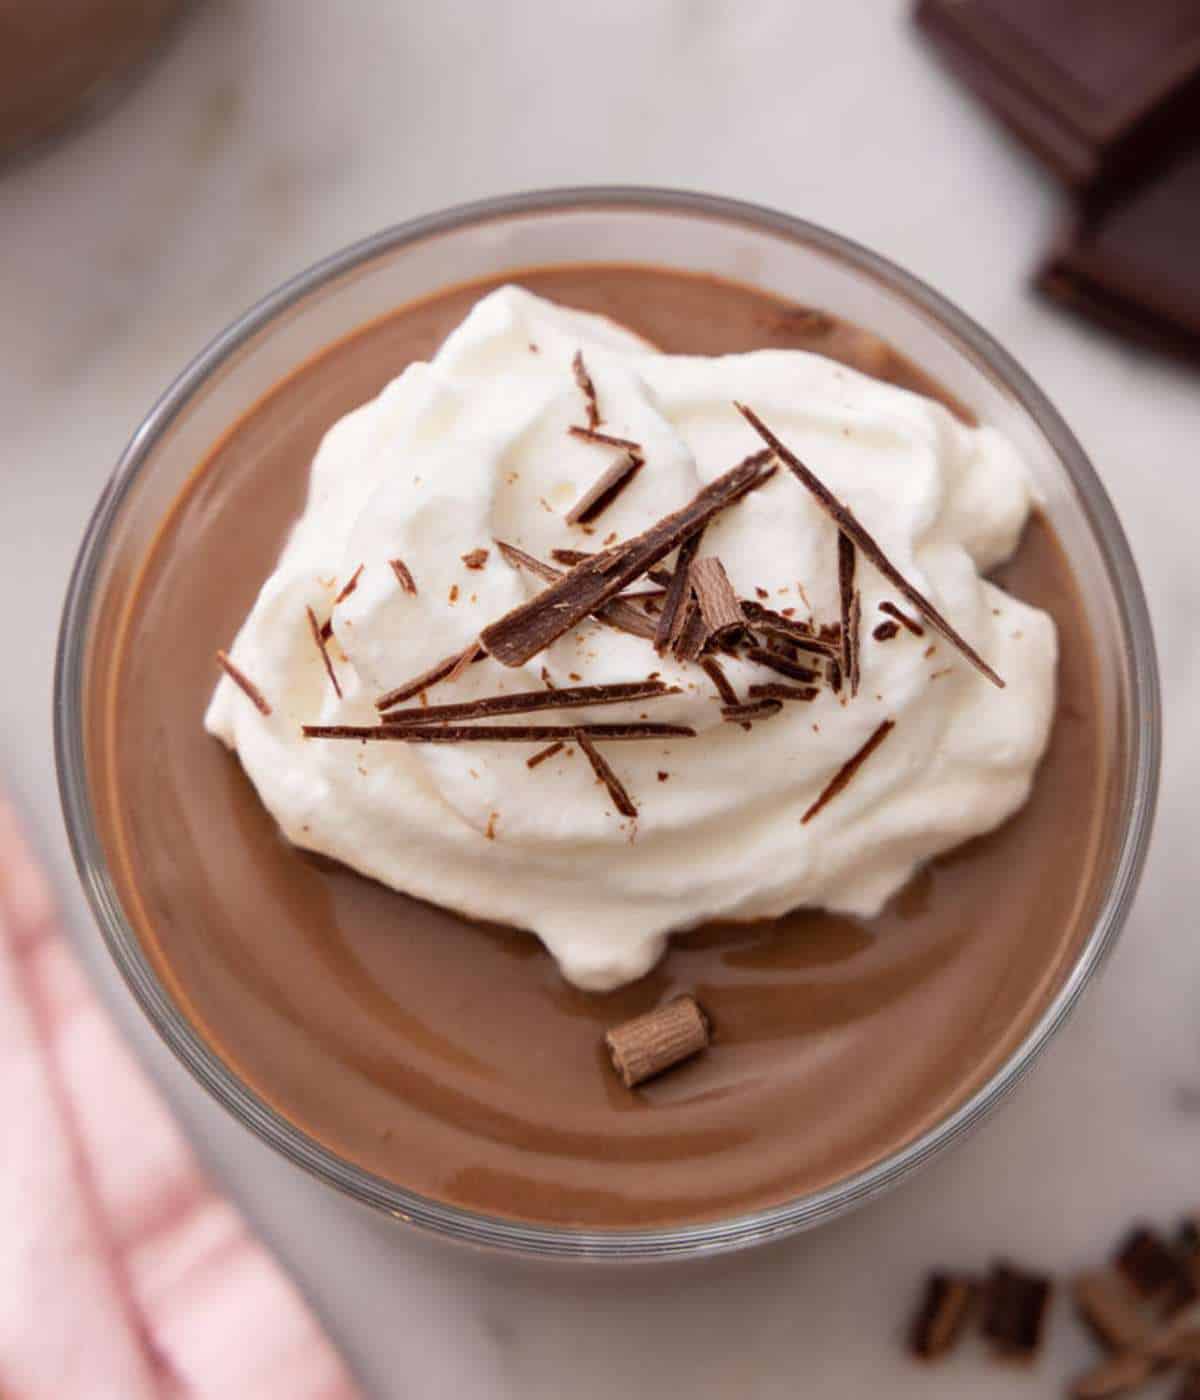
6. Spoon all the chocolate pudding into a bowl and press plastic wrap to the surface of the pudding to prevent a skin from forming. Refrigerate for about 3 hours until chilled, then give it a good stir. Serve plain, or dress it up with a big dollop of whipped cream and a sprinkle of chocolate shavings.

Chocolate Pudding Recipe
Video
Equipment
- Small saucepan
- Mixing Bowls
- Plastic wrap
Ingredients
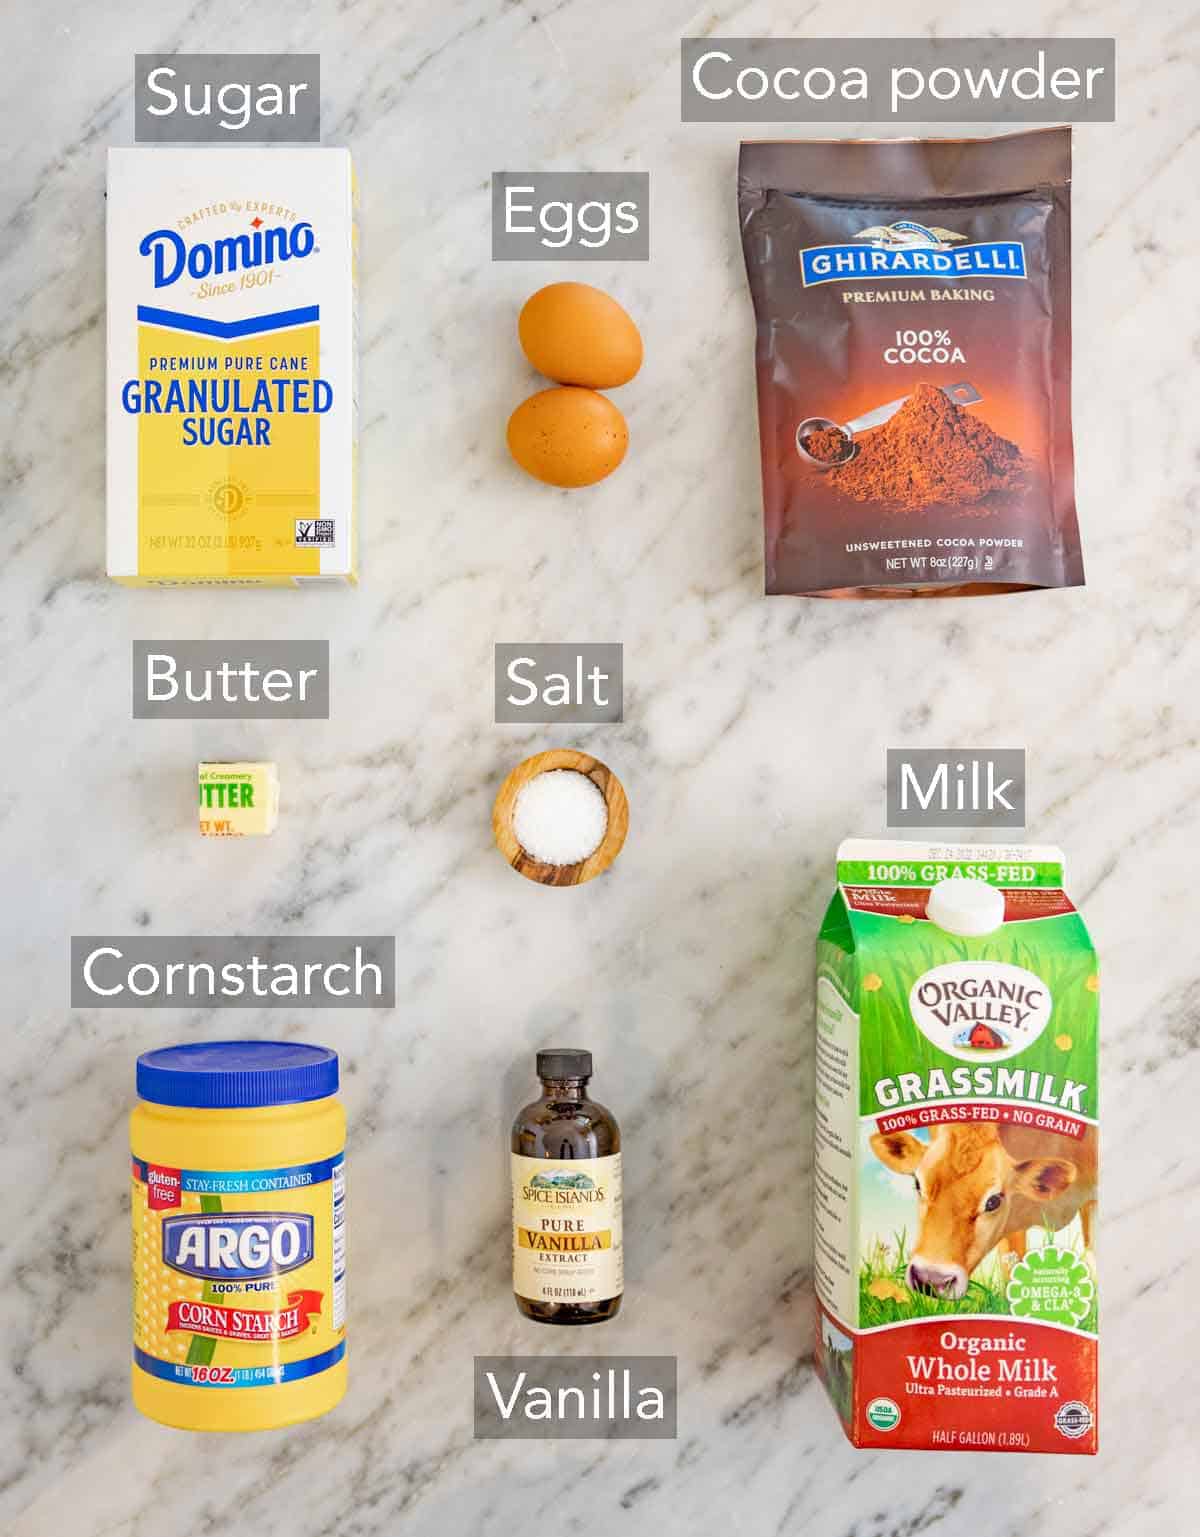
- 2¼ cups whole milk (540ml)
- ½ cup granulated sugar (100g)
- ⅓ cup unsweetened cocoa powder (33g)
- pinch of salt
- 2 large egg yolks
- 2 tablespoons cornstarch
- 2 tablespoons cold unsalted butter cubed
- 2 teaspoons vanilla extract
Instructions
- In a small saucepan, combine 2 cups (480ml) of milk, sugar, cocoa powder, and salt. Whisk until well combined. Cook over medium heat until very steam and just starting to simmer, stirring frequently.
- Meanwhile, in a large mixing bowl, whisk together the egg yolks, cornstarch, and remaining ¼ cup (60ml) of milk.
- When the chocolate milk mixture is hot, slowly whisk about a cup into the egg yolk mixture. (This tempers the eggs to keep them from scrambling.) Whisk in the remaining hot milk. Pour the mixture back into the saucepan.
- Place the saucepan back over medium heat and cook stirring constantly until the mixture bubbles. Continue cooking until thickened enough that the whisk leaves a trace when stirring in the mixture, about 3 minutes. (The temperature should also be about 170°F on an instant-read thermometer.) Remove from the heat and whisk in the butter and vanilla until melted and combined.
- Transfer the pudding to a bowl and press plastic wrap to the surface. Refrigerate until chilled, about 3 hours, or up to 4 days. Give it a good stir before dishing into serving bowls. Serve with whipped cream, if desired.
Notes
- Don’t overcook the pudding. Going above 180°F can cause the pudding to turn grainy as it cools. Sarah, my Executive Editor, cross-tested this and removed her pudding from the heat at 182°F. Once it cooled, it had a grainy texture from the eggs overcooking slightly. It tasted delicious, but the texture was less ideal and not as velvety smooth.
- As the pudding sets, it becomes a little dense. I like to stir the pudding before serving to help aerate it a bit and loosen the texture slightly.
- To make chocolate shavings for the topping, run a vegetable peeler down the side of a chocolate bar.
Nutrition
Serving Suggestions
Chocolate pudding is one of my favorite desserts to make because it delights kids as well as adults! You can serve it hot or chilled, and while it is wonderful plain, I love adding toppings to turn it into a more elevated dessert.
Top your bowl of chocolate pudding with whipped cream, chocolate shavings, fresh fruit, toasted pecans or toasted walnuts, cookie crumbs, caramel sauce, or raspberry sauce. You can even layer those items to make chocolate parfaits! (Check out my yogurt parfait recipe for how to layer everything. Just swap the yogurt for chocolate pudding.)
Or, try this homemade pudding in my easy dirt cake recipe in place of the vanilla pudding, or use it in chocolate lasagna!
Storage & Make-Ahead
Storage: Homemade chocolate pudding will keep well in an airtight container in the refrigerator for up to 4 days. When you first put it into the fridge to chill, be sure to press a piece of plastic wrap onto the surface of the pudding to prevent a skin from forming.
Do not freeze chocolate pudding! Milk-based pudding thickened with cornstarch does not hold up well after freezing. The pudding will turn grainy and loose once thawed. You could use the pudding to make pudding pops, but enjoy them frozen.
Frequently Asked Questions
It likely didn’t cook long enough. The mixture should reach 170-175°F to set the eggs and activate the cornstarch, which are the thickening agents. When the pudding is thick enough, you should see lines on the surface of the pudding when the whisk runs through it.
When setting the pudding to chill, make sure to press the plastic wrap directly onto the surface of the pudding. This prevents a skin from forming over the top of the pudding.
Yes! It is thickened with cornstarch, which is naturally gluten-free. Please check all of your ingredient labels to be certain, though.
More Chocolate Dessert Recipes To Try
If you’re a chocolate lover, try one of these dessert recipes next.
Fudgy, gooey homemade brownies are so easy to make from scratch with a few simple ingredients. Feel free to add toasted nuts for crunch.
Chocolate gravy is sweet and velvety, and so delicious over fluffy biscuits, pancakes, or waffles. It’s ready in about 7 minutes!
Crisp, crunchy chocolate biscotti are loaded with chocolate flavor and perfect for dunking into a warm drink.
Try this decadent chocolate bundt cake for your next gathering. Drizzle the melt-in-your-mouth cake with rich chocolate ganache for ultimate indulgence.
Chocolate soufflé is incredibly light and silky, not to mention impressive! It’s the perfect French dessert for date night or Valentine’s Day.
If you’ve tried this chocolate pudding recipe, then don’t forget to rate it and let me know how you got on in the comments below. I love hearing from you!
Pauline says
I’ve tried a few different 5.0 recipes and they have been too gritty. I wanted something smooth creamy and silky and this is the recipe if that is exactly what you’re looking for. I will not go to any recipes for chocolate pudding anymore this is my new go to and I even printed it
Christa Sutherland says
Heaven! My first thought was I’d actually like to bathe in this stuff which is more than a little weird but it’s is so simple and completely delicious. Simply delicious!
Allison S. Zhao says
I just made this today, and I found that I love it so much! I made half the recipe, but I find that it still works. I can’t wait to make it again someday.
Christie says
Loved it! It was so creamy and delicious. Just what I was looking for. Thank you!
Paula Scheck says
I made this for dessert and it was simple and quick. I did find the cocoa flavour a bit strong. I might cut it back to 1/4 c cocoa next time. It was creamy and st up nicely.
Vonni C says
Made this with oat milk and a couple of tablespoons more sugar. Was easy and delicious.