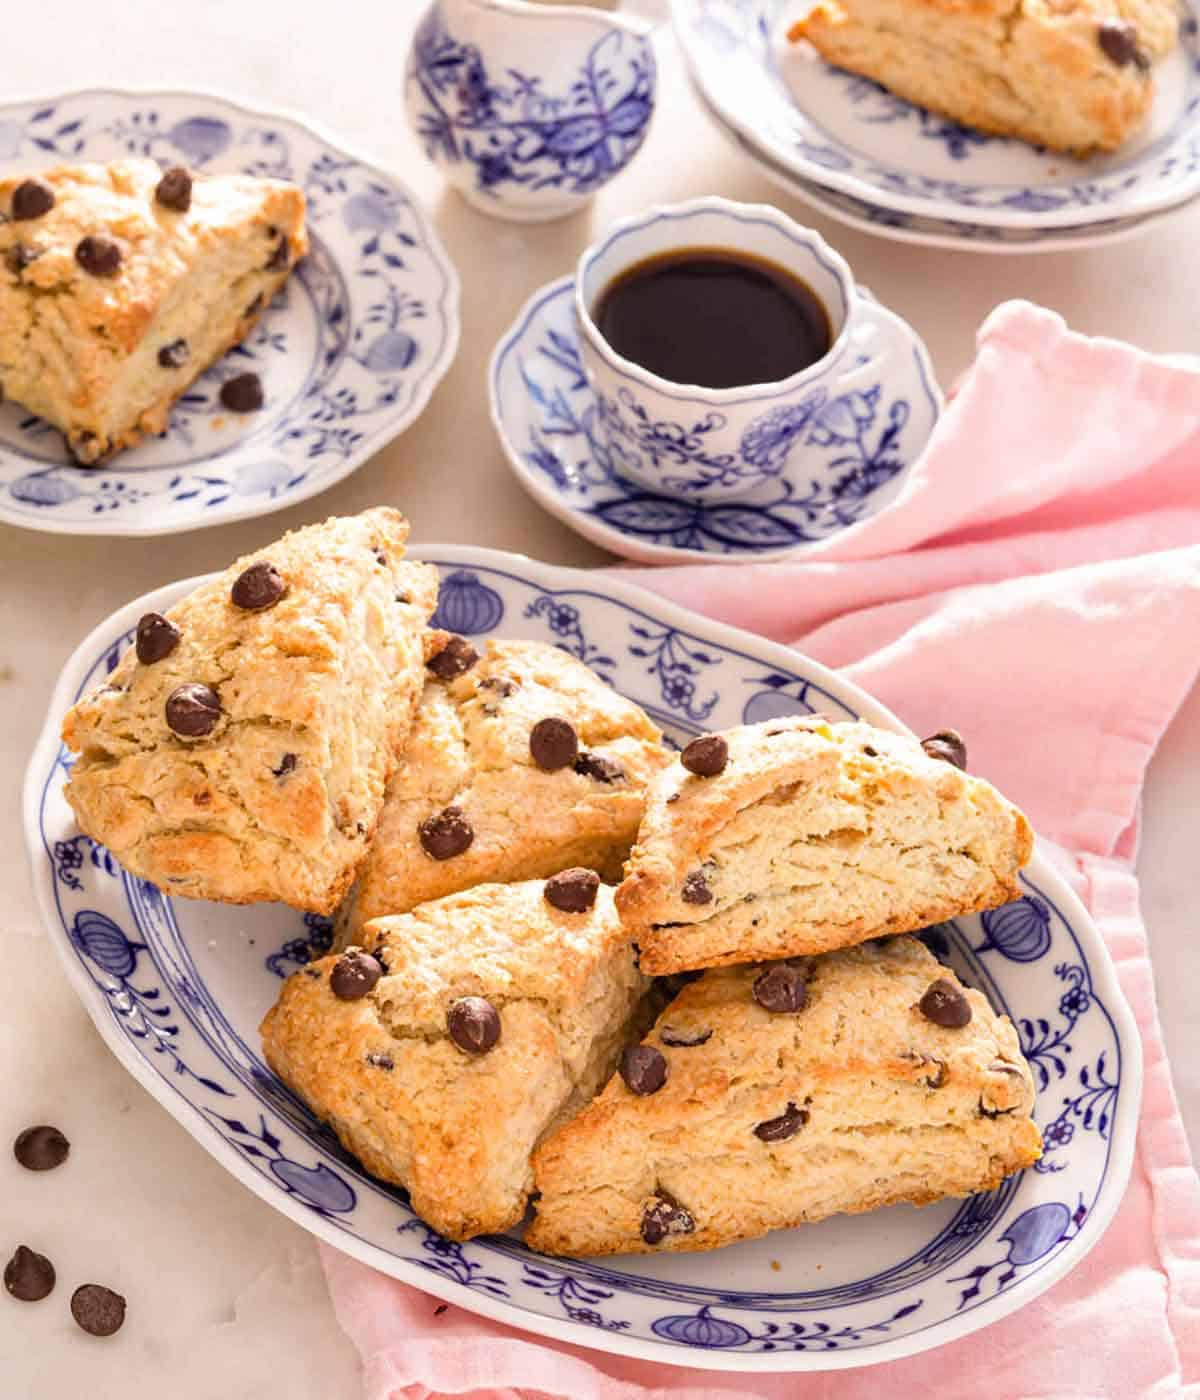
If you want to enjoy something that resembles chocolate chip cookies for breakfast, then you need to make these chocolate chip scones! They combine two of my favorite things to make a tender and flaky breakfast scone that disappears fast. This scone recipe will melt in your mouth as they’re soft and flaky inside and loaded with chocolate chips throughout.
Freshly baked scones from the oven are so moist and tender. While they taste great the day after, there’s nothing better than a warm scone from the oven. If you want to make an array of scones for an upcoming brunch, try my English scones recipe, blueberry scones recipe, and pumpkin scones recipe!
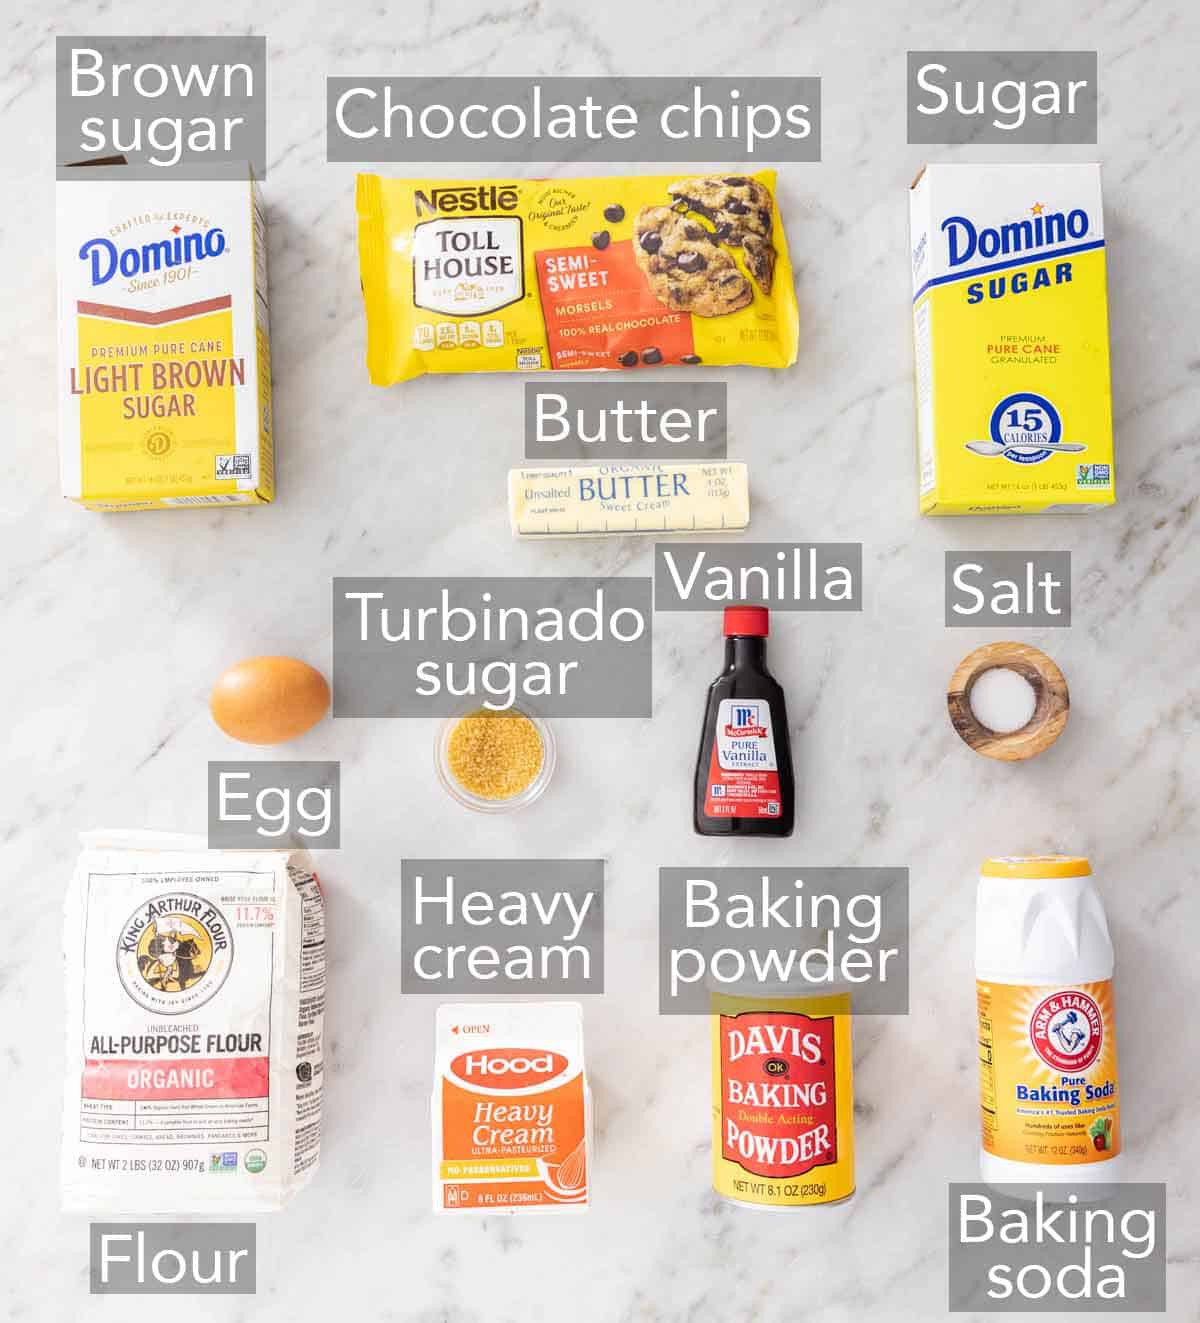
What You Need to Make This Recipe
Leavening agents — scones don’t have yeast, so the baking powder and baking soda will help your scones rise. Make sure they have not expired.
Butter — make sure your butter is super cold as you don’t want the butter to melt into the dough before you bake the scones. This way, the pieces of butter will melt, leaving you with flaky laters.
Sugar — white sugar adds sweetness and structure to the scones, whereas brown sugar adds a deep toffee-like flavor and keeps the center of the scones soft.
Heavy cream — heavy cream adds richness to the dough, so the scones stay tender and dry out slower. Do not use whole milk.
Chocolate chips — you can use regular chocolate chips or mini chocolate chips. You can also use any chips in this recipe, such as dark chocolate chips, white, milk chocolate chips, or even flavored chips like peanut butter or caramel morsels.
How to Make Chocolate Chip Scones
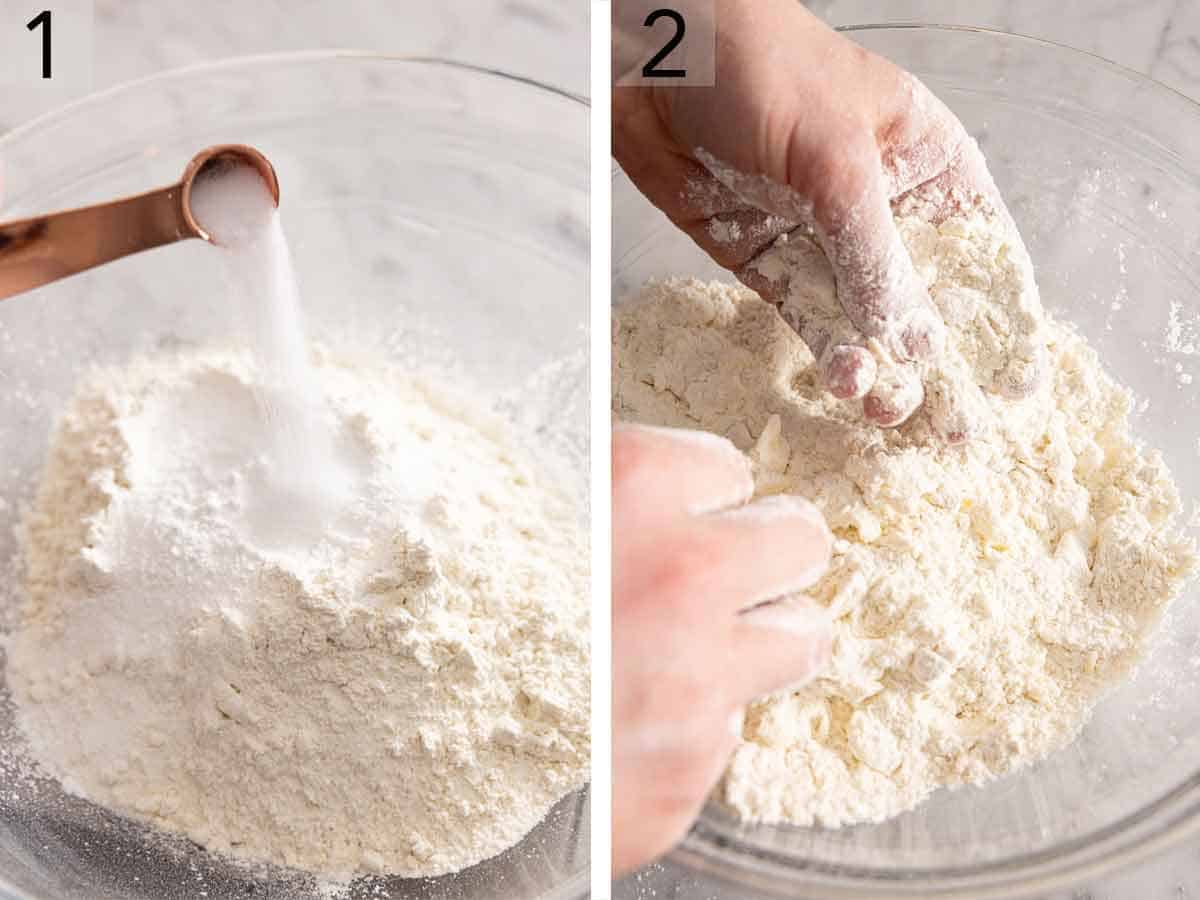
1. In a large mixing bowl, combine the flour, granulated sugar and light brown sugar, baking powder, baking soda, and salt.
2. Using a pastry cutter, cut in the cold butter until the pieces are no larger than the size of peas.
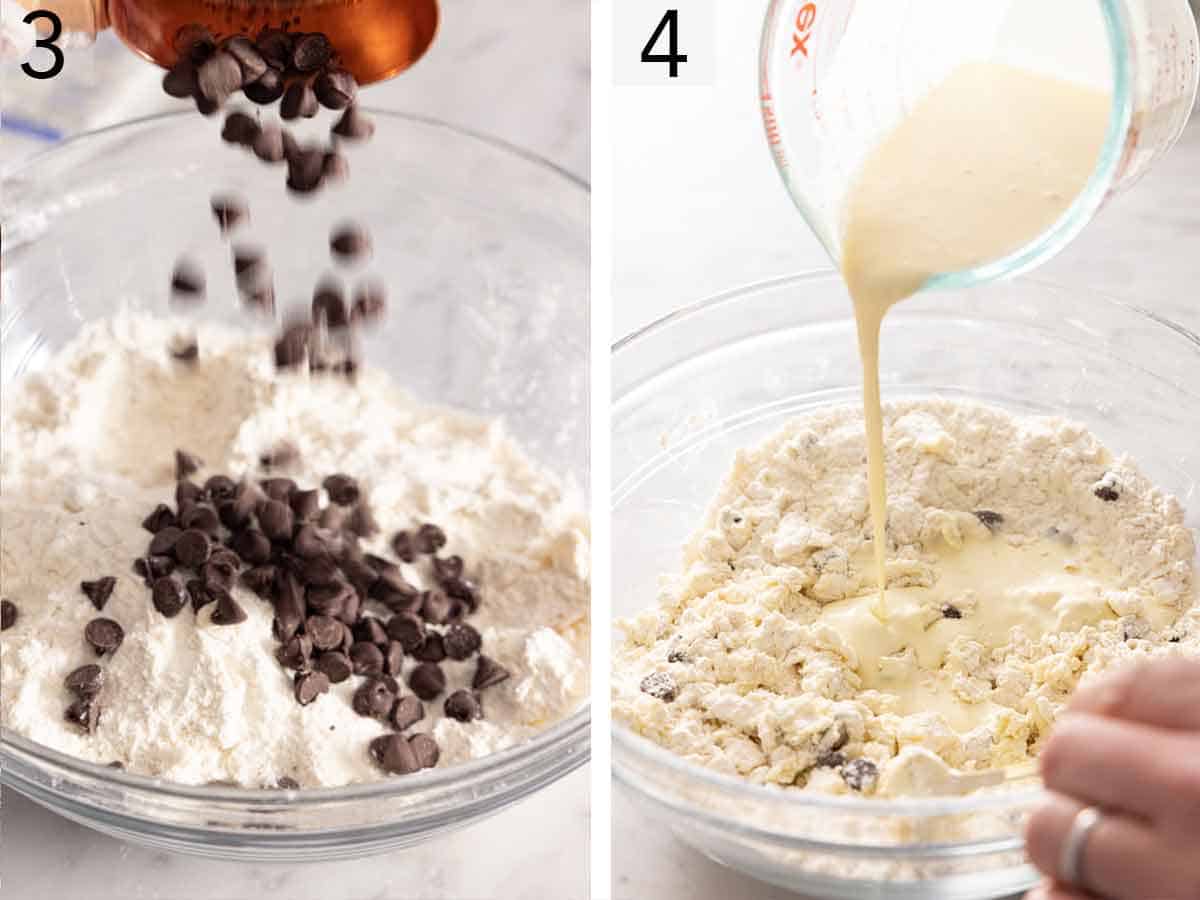
3. Toss in the chocolate chips.
4. Whisk together ¾ cup of heavy cream, egg, and vanilla in a small bowl. Then, add the cream mixture, using the pastry cutter to mix everything together until a shaggy dough forms.
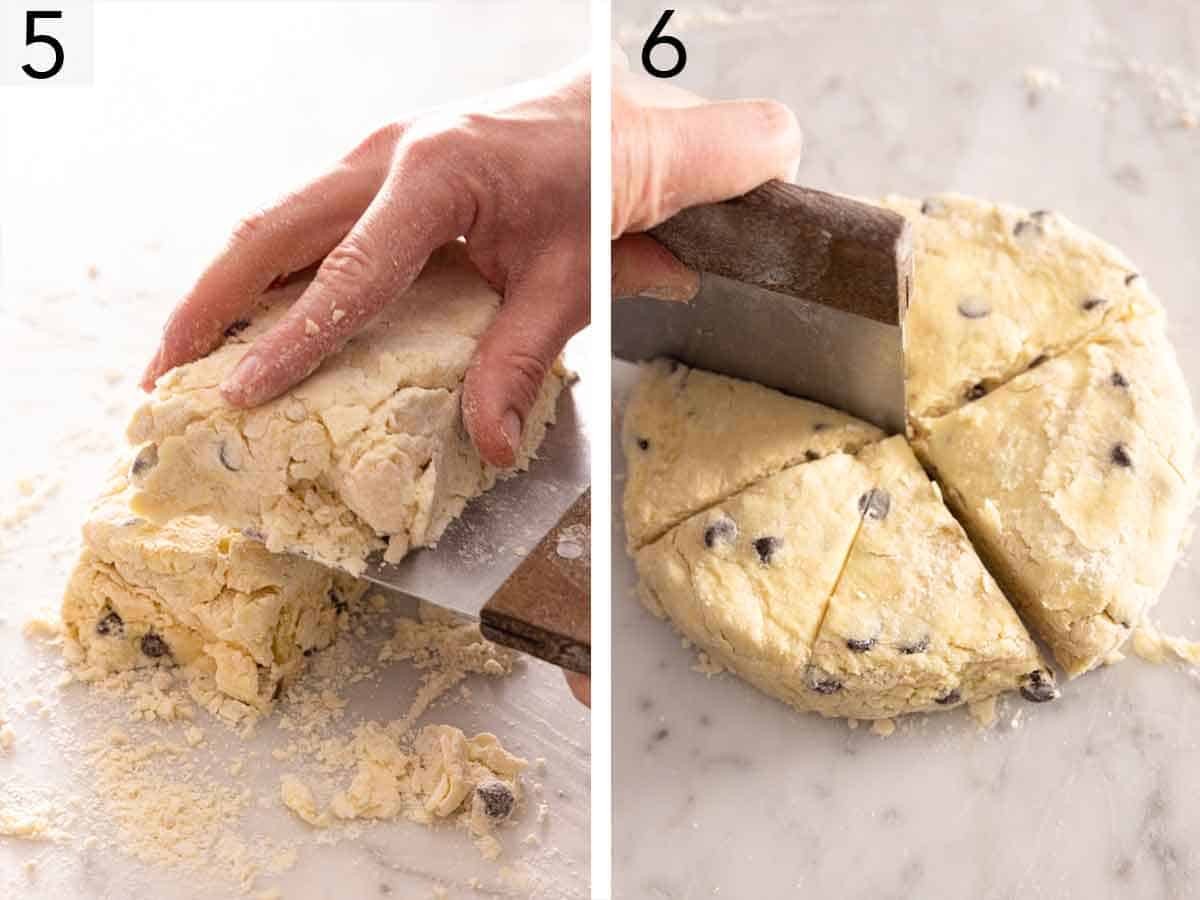
5. Turn out the dough onto a lightly floured surface and press the dough into a ¾-inch thick square. Cut the dough in half. Stack each half and press down. Repeat the cutting and stacking, then shape into a 7-inch disc.
6. Cut the disc into 8 equal triangles and place it on the prepared baking sheet about 2 inches apart.
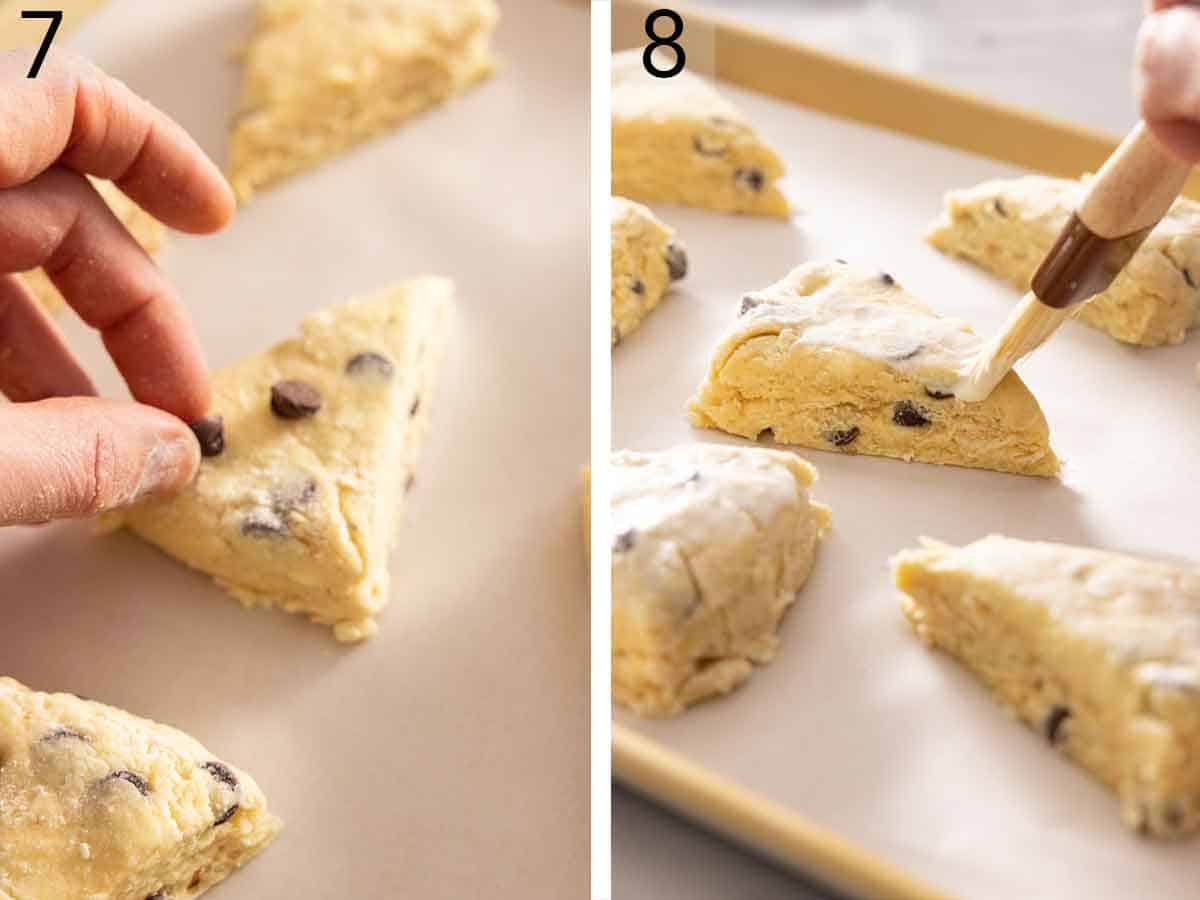
7. Add additional chocolate chips on top of the scones, if desired. Refrigerate for 15 minutes. Brush scones with the remaining 1 tablespoon of heavy cream and sprinkle the tops with turbinado sugar.
8. Bake for 10 to 12 minutes or until puffed, and the tops are lightly golden, rotating the baking sheet halfway through baking. Cool for at least 10 minutes before serving the chocolate chip scones.
Pro Tips for Making This Recipe
- Make sure to measure the flour correctly. If you add too much flour, the dough will become dry, and the scones won’t rise and become crumbly. The ideal way to measure flour is with a scale. If you don’t have one, then fluff your flour with a spoon, sprinkle it into your measuring cup, and use a knife to level it off.
- Press straight down with the cutter and don’t twist; twisting seals the edge and prevents the scones from rising properly.
- If your kitchen is warm, I recommend freezing and grating the butter. This helps the butter stay solid until the scones go into the oven so your scones with chocolate chips will have a flaky interior.
- Avoid over-working the dough. You don’t want gluten to form! The more you knead, the more gluten will form, and you’ll have chewy scones.
- When kneading the dough, work quickly so the warmth from your hands does not melt the butter.
- Do not skip refrigerating the dough before baking. It gives the gluten in the dough a chance to relax and the butter to firm up.
Frequently Asked Questions
What makes them not rise?
If you’ve followed the instructions, the scones should come out perfect. However, if your scones did not rise, it may be due to a few things. If the dough is too dry, the scones won’t rise and will be crumbly. If the scones are too wet, they won’t rise either as they’ll be weighed down. If you do not fully heat the oven to 400°F, that will also affect the rise.
Can I make scones ahead of time?
You can prepare the dough for the scones the night before, cover it, store it in the fridge overnight, and bake it in the morning. Hold off on cutting the dough and brushing the cream until ready to bake.
Can I freeze scones?
You can! Once cooled, freeze the baked scones for up to 2 months. Then when ready to enjoy, thaw the scones overnight in the fridge and reheat in the oven.
If you’ve tried this Chocolate Chip Scones recipe, then don’t forget to rate the recipe and let me know how you got on in the comments below, I love hearing from you!

Chocolate Chip Scones
Video
Equipment
- Mixing Bowls
- Pastry blender or cutter
- Baking Sheet
- Parchment paper
Ingredients
- 2½ cups all-purpose flour (300 grams)
- 2 tablespoons granulated sugar
- 2 tablespoons light brown sugar
- 2 teaspoons baking powder
- ¼ teaspoon baking soda
- ½ teaspoon kosher salt
- ⅓ cup cold unsalted butter cubed (76 grams)
- ⅓ cup chocolate chips (60g)
- ¾ cup plus 1 tablespoon heavy whipping cream divided (195ml)
- 1 large egg
- 1 teaspoon vanilla extract
- 1 tablespoon turbinado or sparkling sugar
Instructions
- Preheat the oven to 400°F. Line a baking sheet with parchment paper.
- In a large mixing bowl, combine the flour, granulated and light brown sugars, baking powder, baking soda, and salt. Using a pastry cutter, cut in the cold butter until the pieces are no larger than the size of peas. Toss in the chocolate chips.
- In a small bowl whisk together ¾ cup heavy cream, egg, and vanilla. Slowly add the cream mixture, using the pastry cutter to mix until a shaggy dough forms. Turn out the dough onto a lightly floured surface and press into a ¾-inch thick square. Cut the dough in half. Stack each half and press down. Repeat the cutting and stacking, then shape into a 7-inch disc. Using a floured knife, cut the disc into 8 equal triangles and place on the prepared baking sheet about 2 inches apart. Sprinkle the tops with additional chocolate chips, if desired. Refrigerate for 15 minutes.
- Brush scones with the remaining 1 tablespoon of heavy cream and sprinkle with turbinado sugar.
- Bake for 10 to 12 minutes or until puffed and the tops are lightly golden, rotating the baking sheet halfway through baking. Cool for at least 10 minutes before serving. Scones can be stored in an airtight container at room temperature for up to 4 days, or frozen for 2 months.
Notes
- Make sure to measure the flour correctly. If you add too much flour, the dough becomes dry, and the scones won’t rise and become crumbly. The ideal way to measure flour is with a scale. If you don’t have one, then fluff your flour with a spoon, sprinkle it into your measuring cup, and use a knife to level it off.
- Press straight down with the cutter and don’t twist; twisting seals the edge and prevents the scones from rising properly.
- If your kitchen is warm, I recommend freezing and grating the butter. This helps the butter stay solid until the scones go into the oven.
- Avoid over-working the dough. You don’t want gluten to form! The more you knead, the more gluten will form, and you’ll have chewy scones.
- When kneading the dough, work quickly so the warmth from your hands does not melt the butter.
- Do not skip refrigerating the dough before baking. It gives the gluten in the dough a chance to relax and the butter to firm up.


