
This post may contain affiliate links. Please read our disclosure policy.
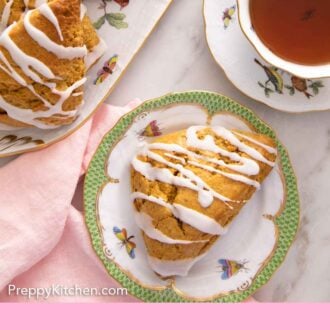

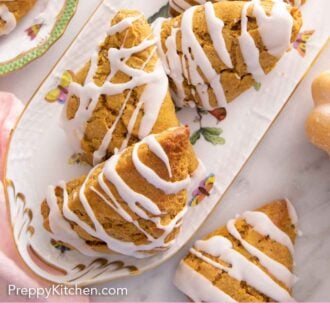

Perfectly spiced with your favorite fall flavors, these homemade pumpkin scones are a delightful, cozy treat. You’ll love the crisp, golden tops slathered with sweet icing and the flaky, buttery middles!
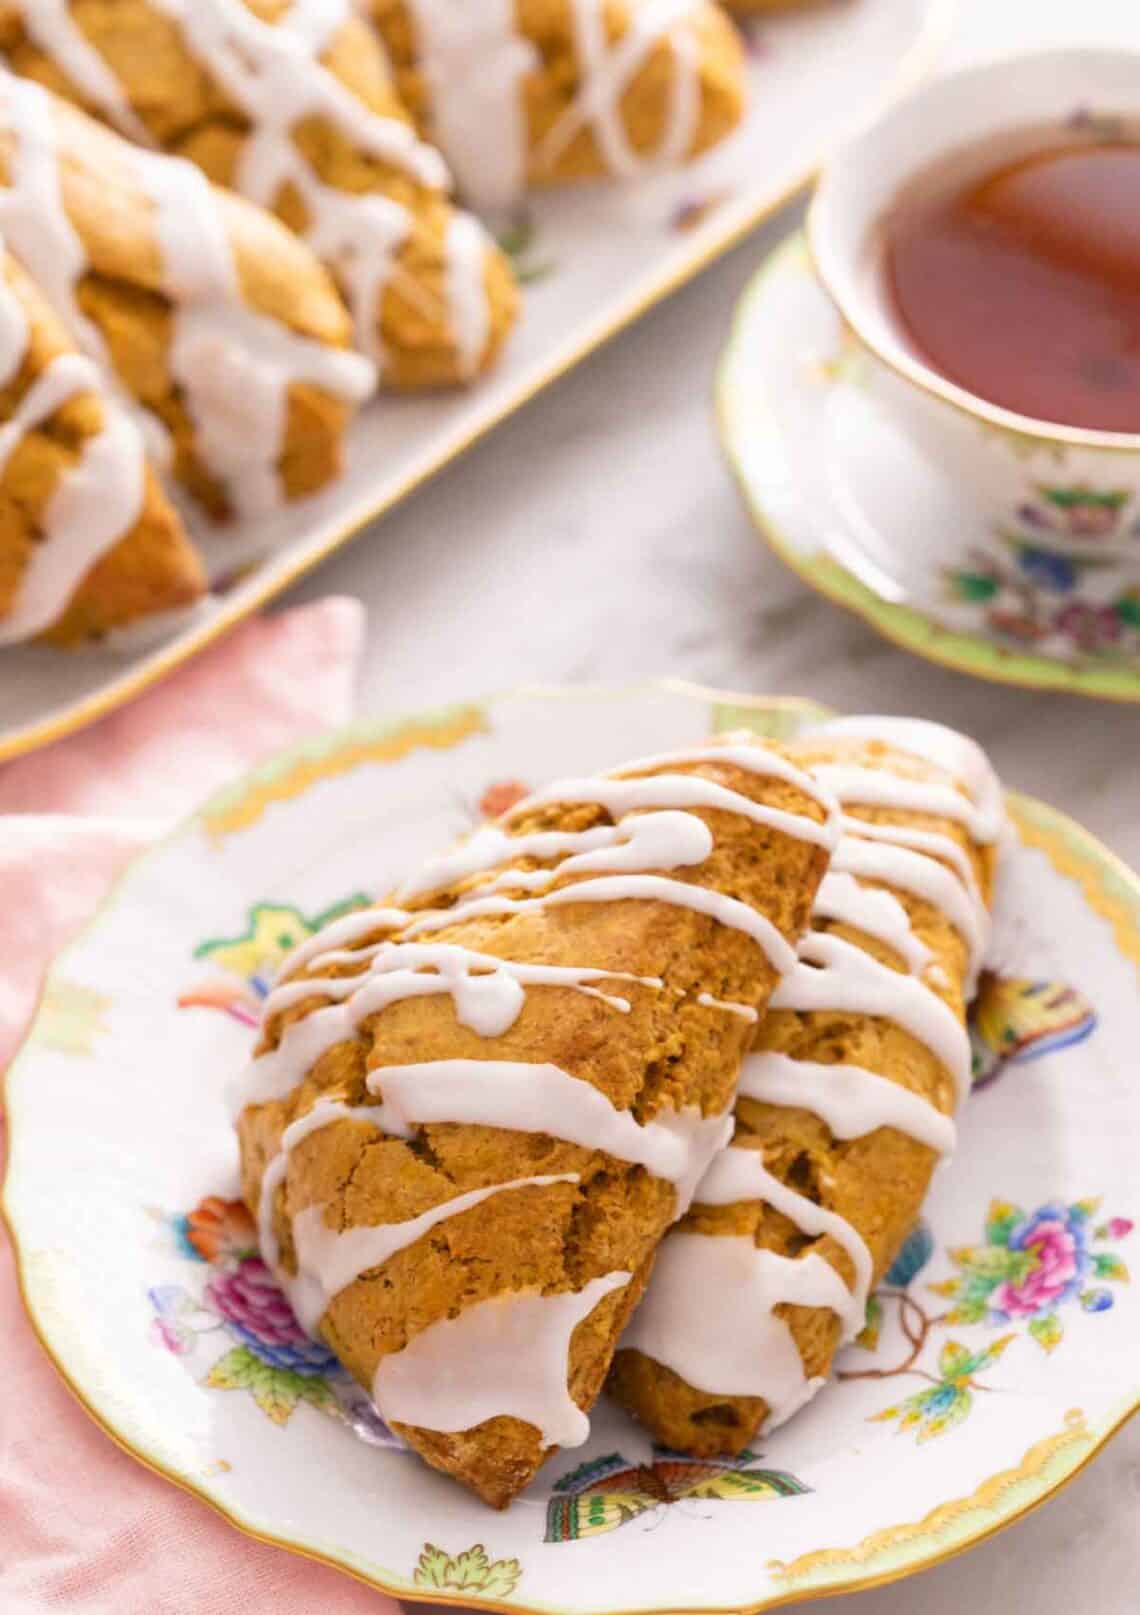
When pumpkin season arrives, I make this easy pumpkin scones recipe over and over again! Enjoy them with a hot cup of coffee in the mornings or as a snack whenever the mood strikes. Pumpkin scones are brimming with warm fall flavors from cinnamon and pumpkin pie spice, and the simple glaze is a sweet finishing touch.
For the best pumpkin scones, make sure to chill the scones after shaping so your butter is as cold as possible. As it melts in the oven, it helps to create tender, flaky layers that will melt in your mouth! Be sure to check out all my tips and tricks so your scones turn out perfect every time. For more fall baking recipes, try my Apple Cider Donuts, Pumpkin Bread, or Pear Crisp.
Ingredients
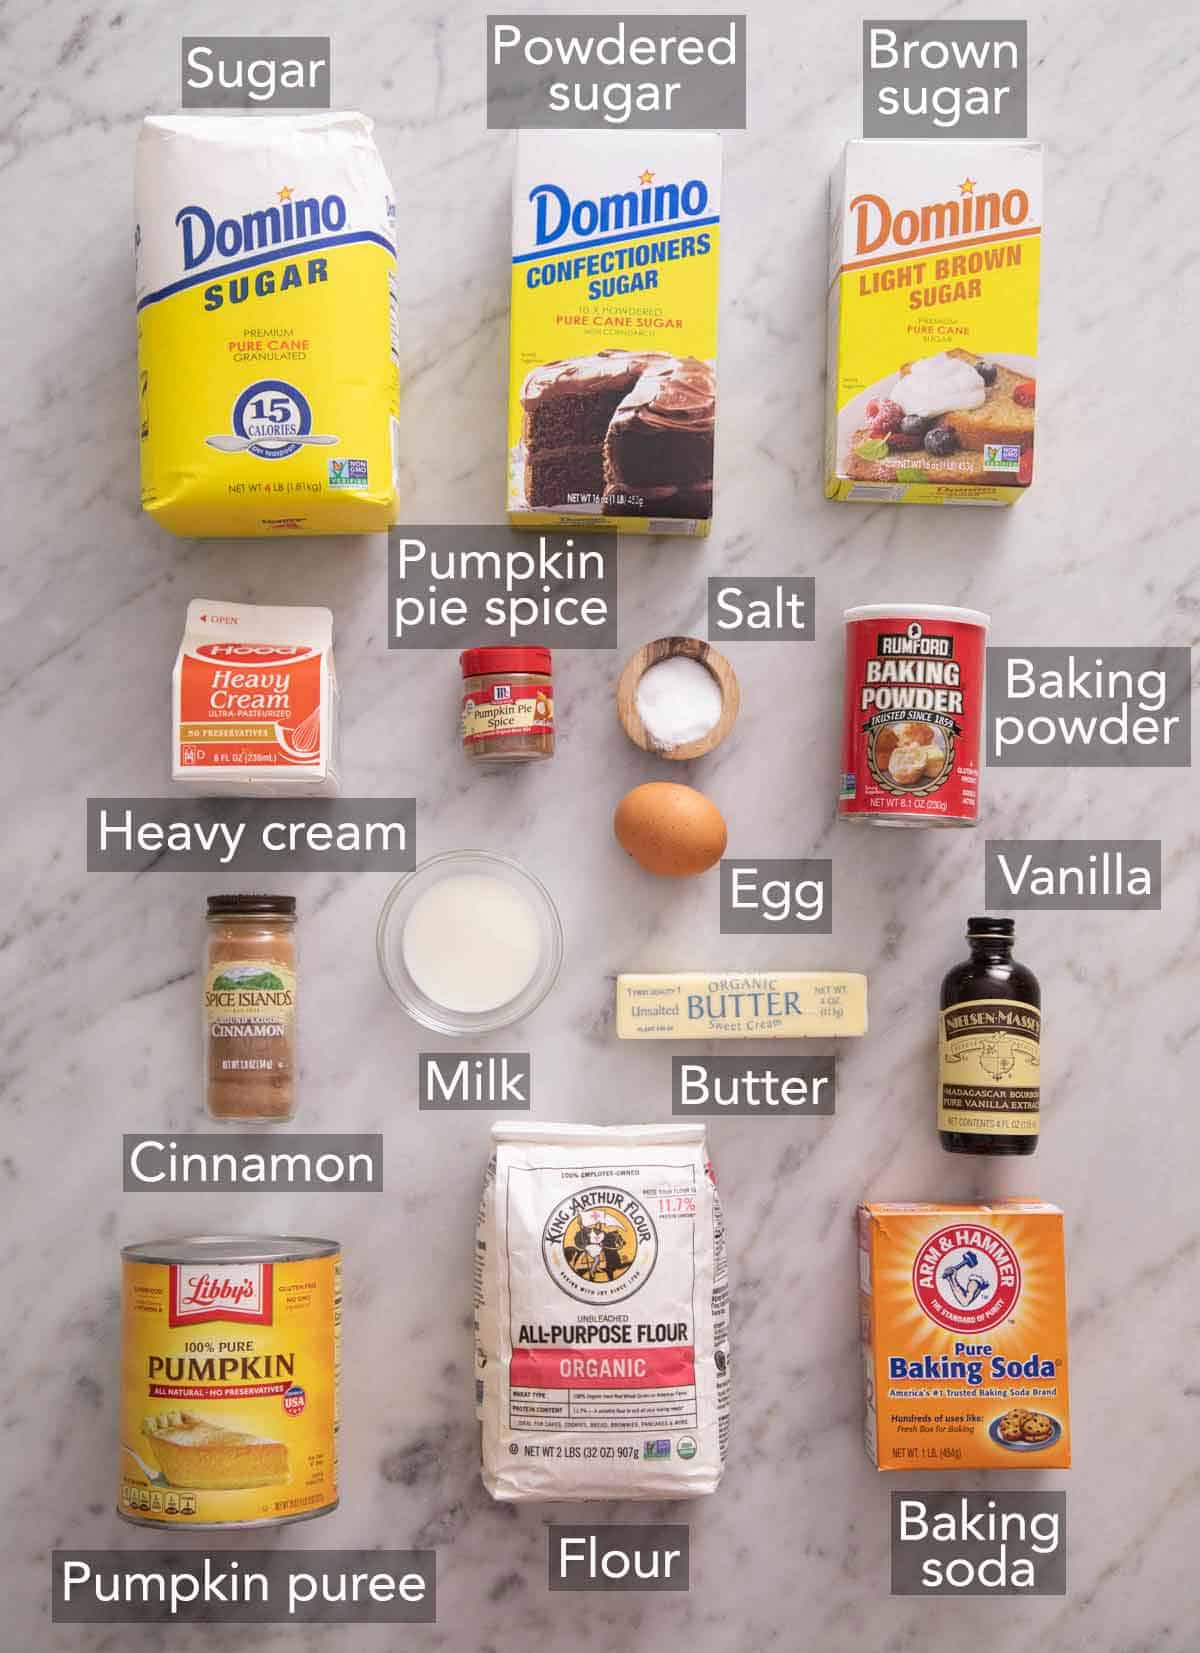
Butter — you need cold unsalted butter. It needs to be as cold as possible so it doesn’t melt into the dough before you bake the pumpkin scones.
Sugar — you need granulated sugar and brown sugar for these pumpkin scones. Light or dark brown sugar will work, depending on how much of a molasses, caramel-like flavor you want the scones to have.
Leavening — baking powder and baking soda ensure the scones are tall and fluffy.
Spices — pumpkin pie spice, ground cinnamon, and a little salt add plenty of cozy flavor.
Pumpkin — for best results, use canned pumpkin purée.
Heavy cream — heavy cream is a must for soft, tender scones.
Egg — an egg helps bind the scone dough and create tender scones.
Vanilla — use high-quality store-bought or homemade vanilla extract for the best flavor.
Glaze — all you need for the simple icing is powdered sugar and milk.
How To Make Pumpkin Scones
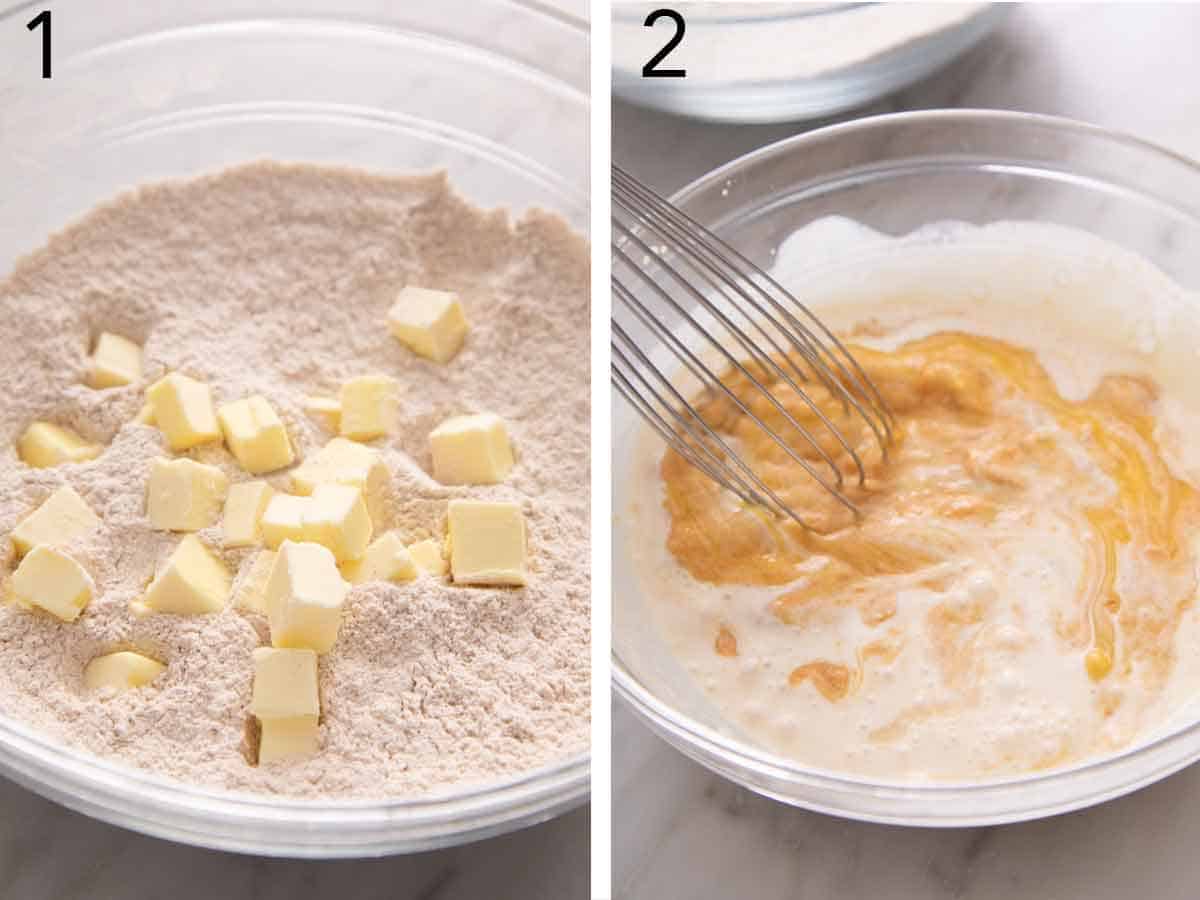
1. Cut the butter into small cubes and freeze for 10 minutes. Then, whisk together all-purpose flour, granulated sugar, baking powder, spices, salt, and baking soda in a large bowl. Add the cold butter to the flour mixture and toss to coat the cold cubes.
2. In a separate mixing bowl, whisk together pumpkin purée, heavy cream, brown sugar, egg, and vanilla extract until the pumpkin mixture is smooth.
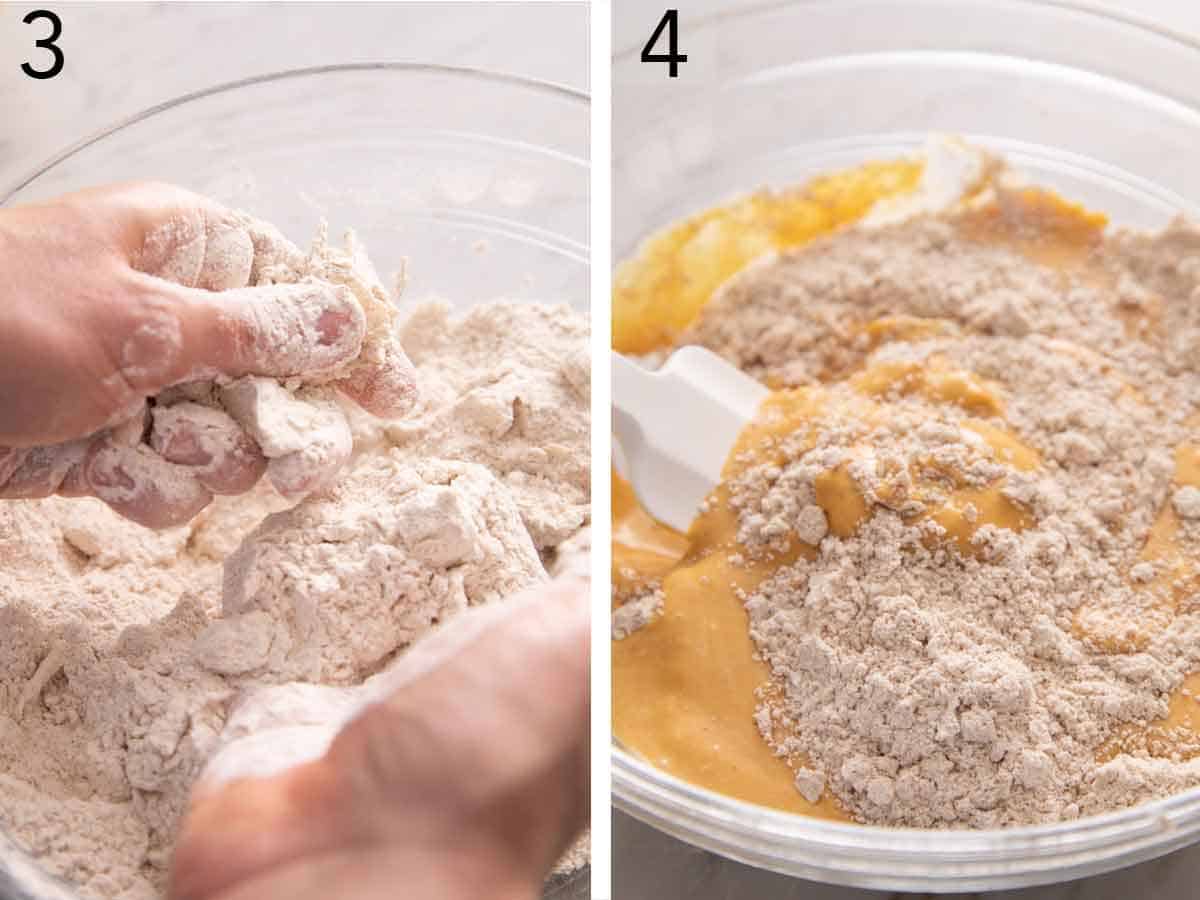
3. Using a pastry cutter or by rubbing the pieces between your fingers, cut the butter into the flour mixture until pea-sized pieces form.
4. Fold the wet ingredients into the dry ingredients until no large flour pockets remain.

5. Turn out the dough onto a well-floured surface. Flour your hands and pat the dough into an 8-inch square.
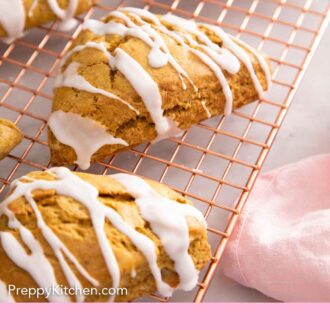
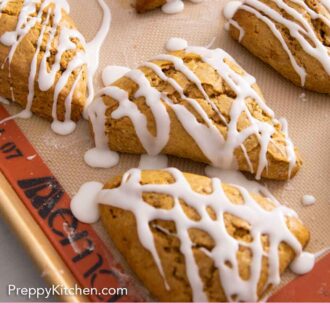
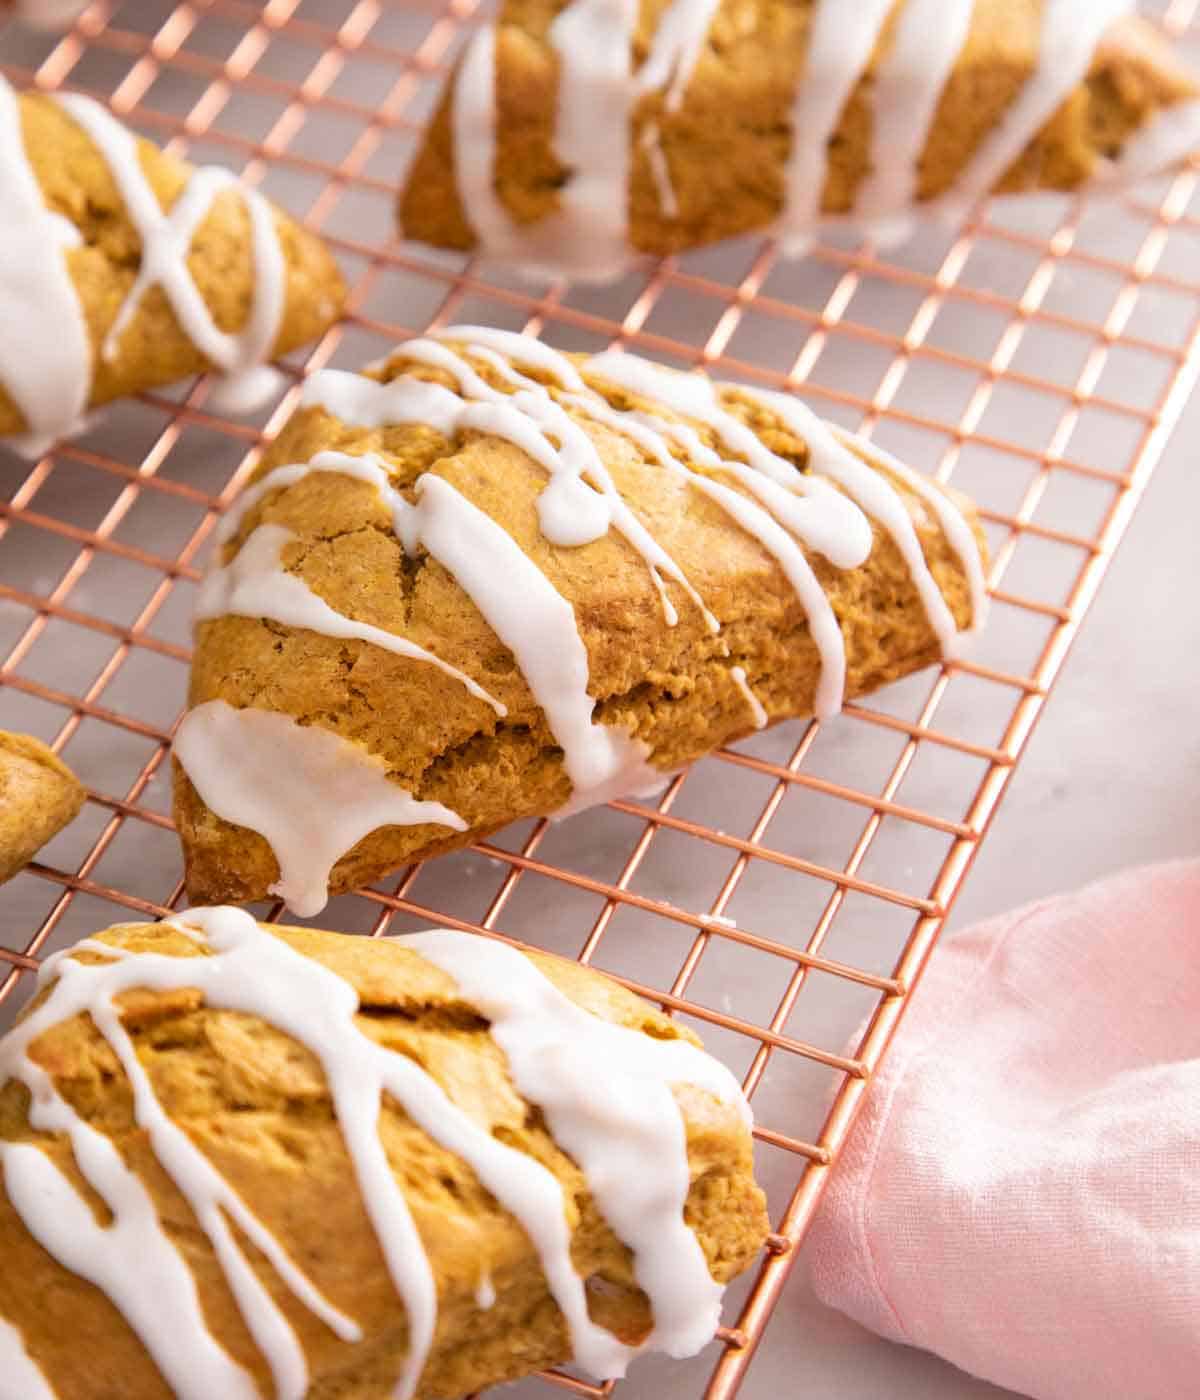
6. Cut the dough into quarters, and cut each quarter in half diagonally, creating 8 triangles. Line a baking sheet with parchment paper and transfer the pumpkin scones to the prepared baking sheet. For best results, freeze the unbaked scones for 20 to 30 minutes. Then, brush the tops lightly with heavy cream. Bake at 400°F for 20 minutes for softer scones or 25 minutes (or until the edges and tops are golden brown) for crisper, denser scones. Transfer to a wire rack and let the scones cool while making the glaze.
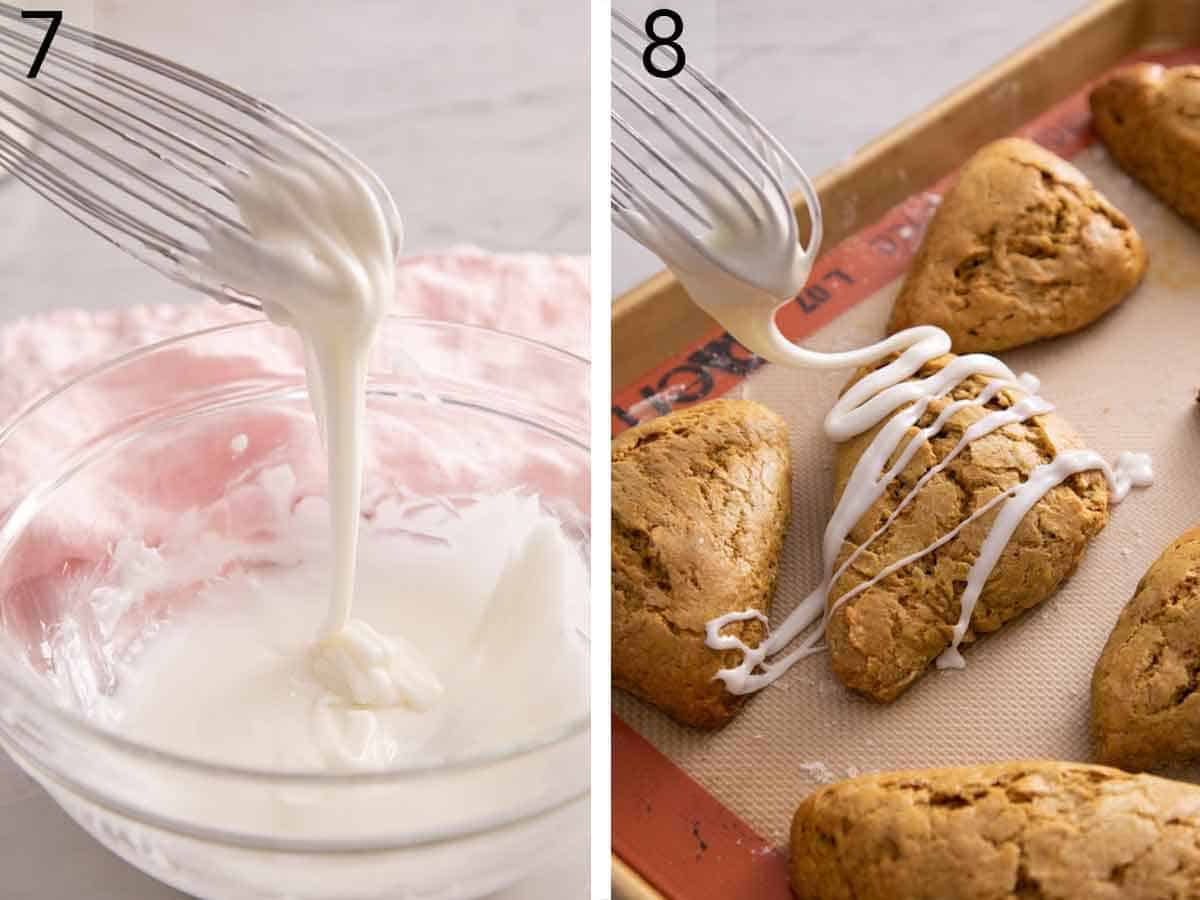
7. To make the easy icing, sift the powdered sugar into a bowl and whisk in the milk until smooth.
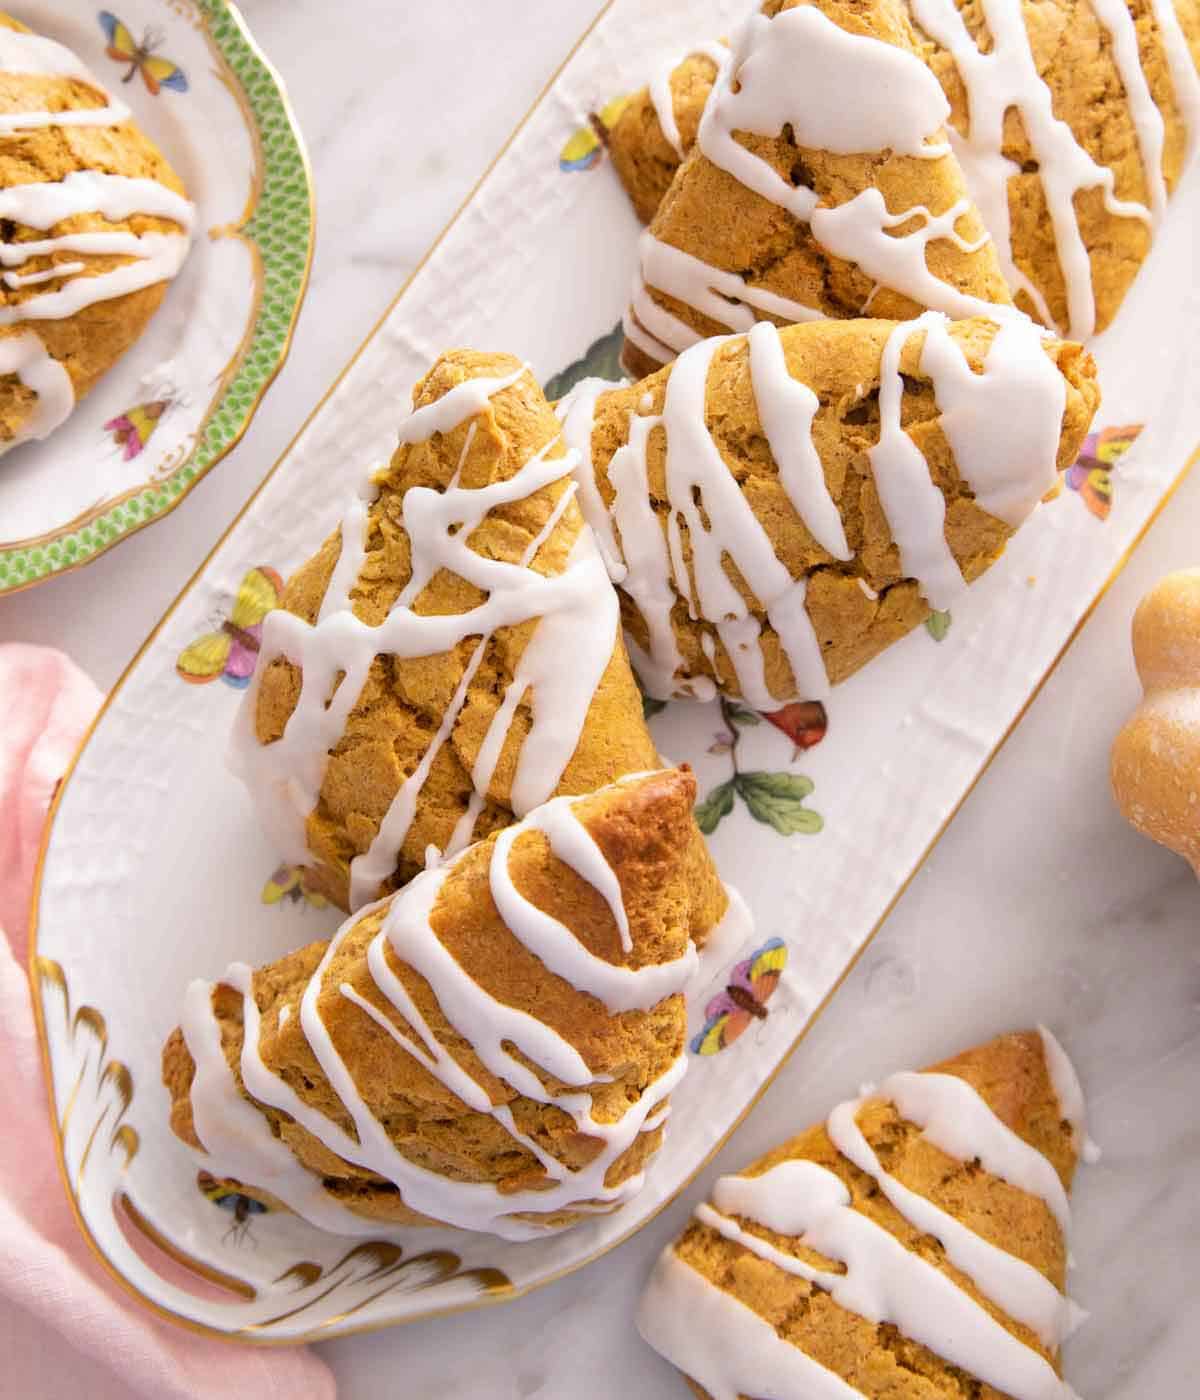
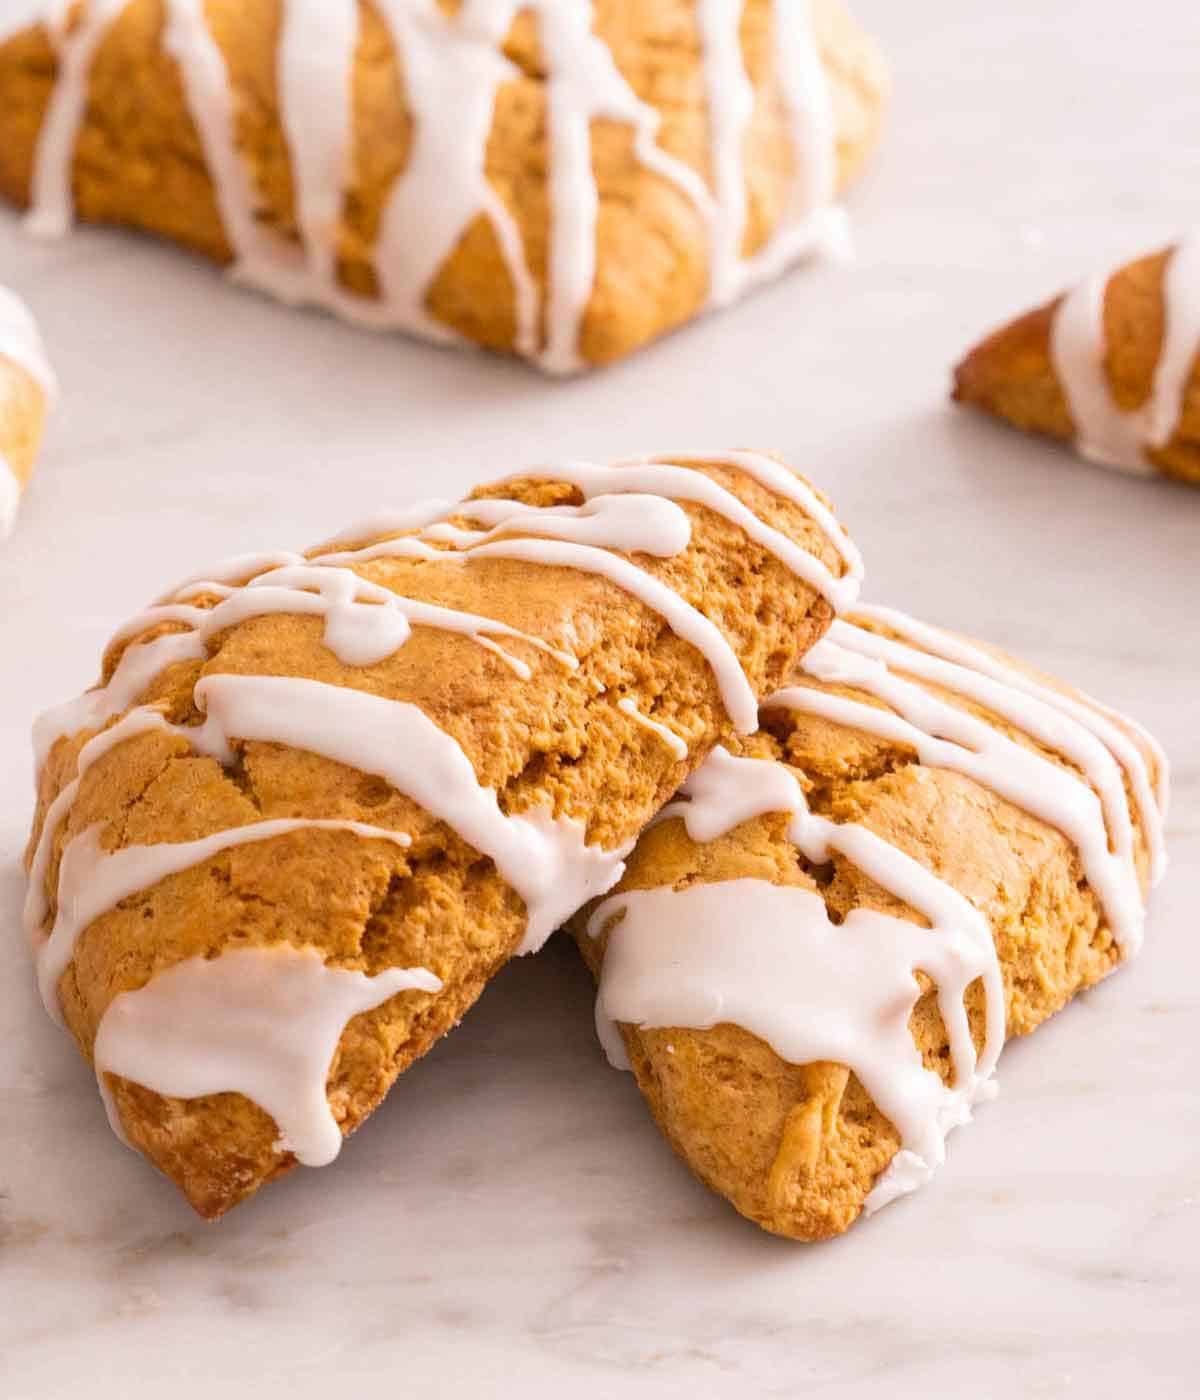
8. Spread the plain glaze over the tops of the warm scones with the back of a spoon, or drizzle it over using the whisk. Let the glaze set for about 30 minutes before enjoying.
Canned Pumpkin Puree Versus Pumpkin Pie Filling
Canned pumpkin puree has one ingredient: pumpkin. It is my preferred choice for baking and for this classic pumpkin scones recipe because I can control the spices I add, as well as how much I sweeten them.
Pumpkin pie filling also comes in a can, but it is quite different to plain pumpkin puree. Canned pumpkin pie filling contains sugar and spices, as a shortcut to making pumpkin pie filling from scratch. Do not use it as a substitute for pumpkin puree in this recipe.
Recipe Variations
- Different spices: You can add ground cardamom, allspice, ground cloves, or freshly grated nutmeg to the dough.
- Add nuts: Toasted pecans or walnuts add a lovely crunch to the scones.
- Add chocolate chips: For a little extra sweetness, you can add ½ cup of semisweet chocolate chips or your favorite kind to the dough.
- Skip the icing: If you don’t want to glaze the baked spiced pumpkin scones, sprinkle the cream-brushed scones with white sugar or sparkling sugar before baking for extra sweetness and a crunchy top.
- Spiced glaze: For an optional spiced glaze to layer on top of the plain glaze, transfer about a third of the glaze into another bowl. Whisk in 1 tablespoon of pumpkin purée and ¼ teaspoon of pumpkin pie spice. Drizzle the spiced glaze over the top of the plain glaze, then let it set for about 30 minutes.
- Maple glaze: Replace 1 tablespoon of milk with maple syrup in the glaze.
Make Mini Pumpkin Scones
For smaller pumpkin scones, divide the dough in half and then form it into two 5- to 6-inch rounds, about ¾ inch thick. Cut each round into 6 or 8 triangles. Follow the rest of the recipe as written, but only bake the scones for about 10 to 12 minutes or until the tops are golden brown and the insides are no longer doughy.
Why are my scones tough?
Overworking the dough will lead them to be tough. The more you knead, the more gluten will form, and you’ll be left with tough, chewy scones instead of flaky, tender scones.
In addition, letting the dough become too warm can cause them to bake up flat and tough because the butter will melt very quickly in the oven and seep out of the scones. That’s why I recommend freezing the shaped scones before baking.
How to Store
Store cooled pumpkin scones in an airtight container at room temperature for up to 3 days. They will start to dry out as time passes, so I recommend enjoying them as soon as possible (which is very easy to do in my house!).
Pro Tips For Making This Recipe
- Weigh the flour. If you add too much flour, the scones will turn out dry and crumbly. The best way to measure flour is with a kitchen scale. If you don’t have one, fluff your flour with a spoon, sprinkle it into your measuring cup, and use a knife to level it off. Do not scoop directly from the flour container.
- To prevent sticking: Flour the sharp knife or bench scraper to help keep the dough from sticking when cut.
- Freeze the scones for 20 to 30 minutes before baking: Keeping the dough as cold as possible will help the scones rise nice and tall in the oven.
- For a thinner glaze, add 1 or 2 teaspoons more milk and drizzle the glaze over the scones.
Frequently Asked Questions
You can freeze pumpkin scones before or after baking. To freeze unbaked scones, place the scone triangles on a lined baking sheet and freeze until solid. Transfer to an airtight container and freeze for up to 1 month. Bake from frozen, adding about 2 minutes to the bake time.
To freeze baked scones, don’t glaze them. Once they are completely cool, freeze them in a freezer-safe container for up to 2 months. Thaw the scones overnight in the fridge or at room temperature for a few hours, and warm them up in the oven at 350°F for about 5 minutes before adding the glaze.
Freeze it: If you don’t want to use the leftover canned pumpkin soon, transfer it to a small freezer-safe container and freeze it for up to 3 months.
Make more pumpkin recipes: My pumpkin dip, pumpkin cookies, and pumpkin donuts are all delicious ways to use leftover pumpkin puree.
Use it as a flavoring: stir a few tablespoons into cream cheese frosting for a tasty fall cupcake topper!
I don’t recommend using fresh pumpkin puree in this pumpkin scone recipe because it is inevitably much more watery than its canned counterpart. However, if you do want to use it, be sure to blot the fresh pumpkin puree with paper towels to remove excess moisture. You can follow the method in my pumpkin chocolate chip cookies recipe.
If you’ve tried this pumpkin scones recipe, then don’t forget to rate it and let me know how you got on in the comments below. I love hearing from you!
Pumpkin Scones Recipe

Equipment
- Baking Sheet
Ingredients
For the Scones:
- ½ cup unsalted butter (1 stick/113g)
- 2 ¼ cup all-purpose flour (270g)
- ¼ cup granulated sugar (50g)
- 1 ½ teaspoons baking powder
- 1 ½ teaspoons pumpkin pie spice
- 1 ½ teaspoons ground cinnamon
- ½ teaspoon salt
- ¼ teaspoon baking soda
- ½ cup pumpkin purée (122g)
- ½ cup heavy cream plus more for brushing
- ¼ cup light brown sugar (55g)
- 1 large egg
- 1 ½ teaspoons vanilla extract
For the Glaze:
- 1 ½ cups powdered sugar (180g)
- 2 tablespoons milk
Instructions
- Preheat the oven to 400F. Line a baking sheet with parchment paper.
For the Scones:
- Cut the butter into small cubes and freeze while continuing or for 10 minutes.
- In a large bowl, whisk together flour, granulated sugar, baking powder, spices, salt, and baking soda.
- In another bowl, whisk together pumpkin purée, cream, brown sugar, egg, and vanilla until smooth.
- Toss the frozen butter in the flour mixture to coat the pieces. Using a pastry blender or by rubbing the pieces between your fingers, cut the butter into the flour until it is about the size of peas. Fold the pumpkin mixture into the flour mixture until moistened and no large flour pockets remain.
- Turn out the dough onto a well floured surface. Working with floured hands, pat the dough into an 8-inch square. Cut into quarters, and cut each quarter in half diagonally, creating 8 triangles. (Or, pat the dough into an 8-inch round and cut into 8 triangles.) Transfer scones to the prepared baking sheet. For best results, freeze for 20 to 30 minutes.
- Brush the tops lightly with heavy cream.
- Bake for 20 for softer scones and 25 minutes or until the edges and tops are golden brown for crisper, denser scones. Transfer to a wire rack and cool while making the glaze.
For the Glaze:
- Sift the powdered sugar into a bowl. Whisk in the milk until smooth. (For a thinner glaze, add 1 or 2 teaspoons more milk.)
- Spread the plain glaze over the tops of the warm scones with the back of a spoon. Let scones cool until glaze is set, about 30 minutes. Store in an airtight container at room temp for up to 3 days.
Notes
- Weigh the flour. If you add too much flour, the scones will turn out dry and crumbly. The best way to measure flour is with a kitchen scale. If you don’t have one, fluff your flour with a spoon, sprinkle it into your measuring cup, and use a knife to level it off. Do not scoop directly from the flour container.
- To prevent sticking: Flour the sharp knife or bench scraper to help keep the dough from sticking when cut.
- Freeze the scones for 20 to 30 minutes before baking: Keeping the dough as cold as possible will help the scones rise nice and tall in the oven.
- For a thinner glaze, add 1 or 2 teaspoons more milk and drizzle the glaze over the scones.
Nutrition
Have you tried this recipe? Tag me today!
Mention @preppykitchen and tag #preppykitchen!


