

This post may contain affiliate links. Please read our disclosure policy.


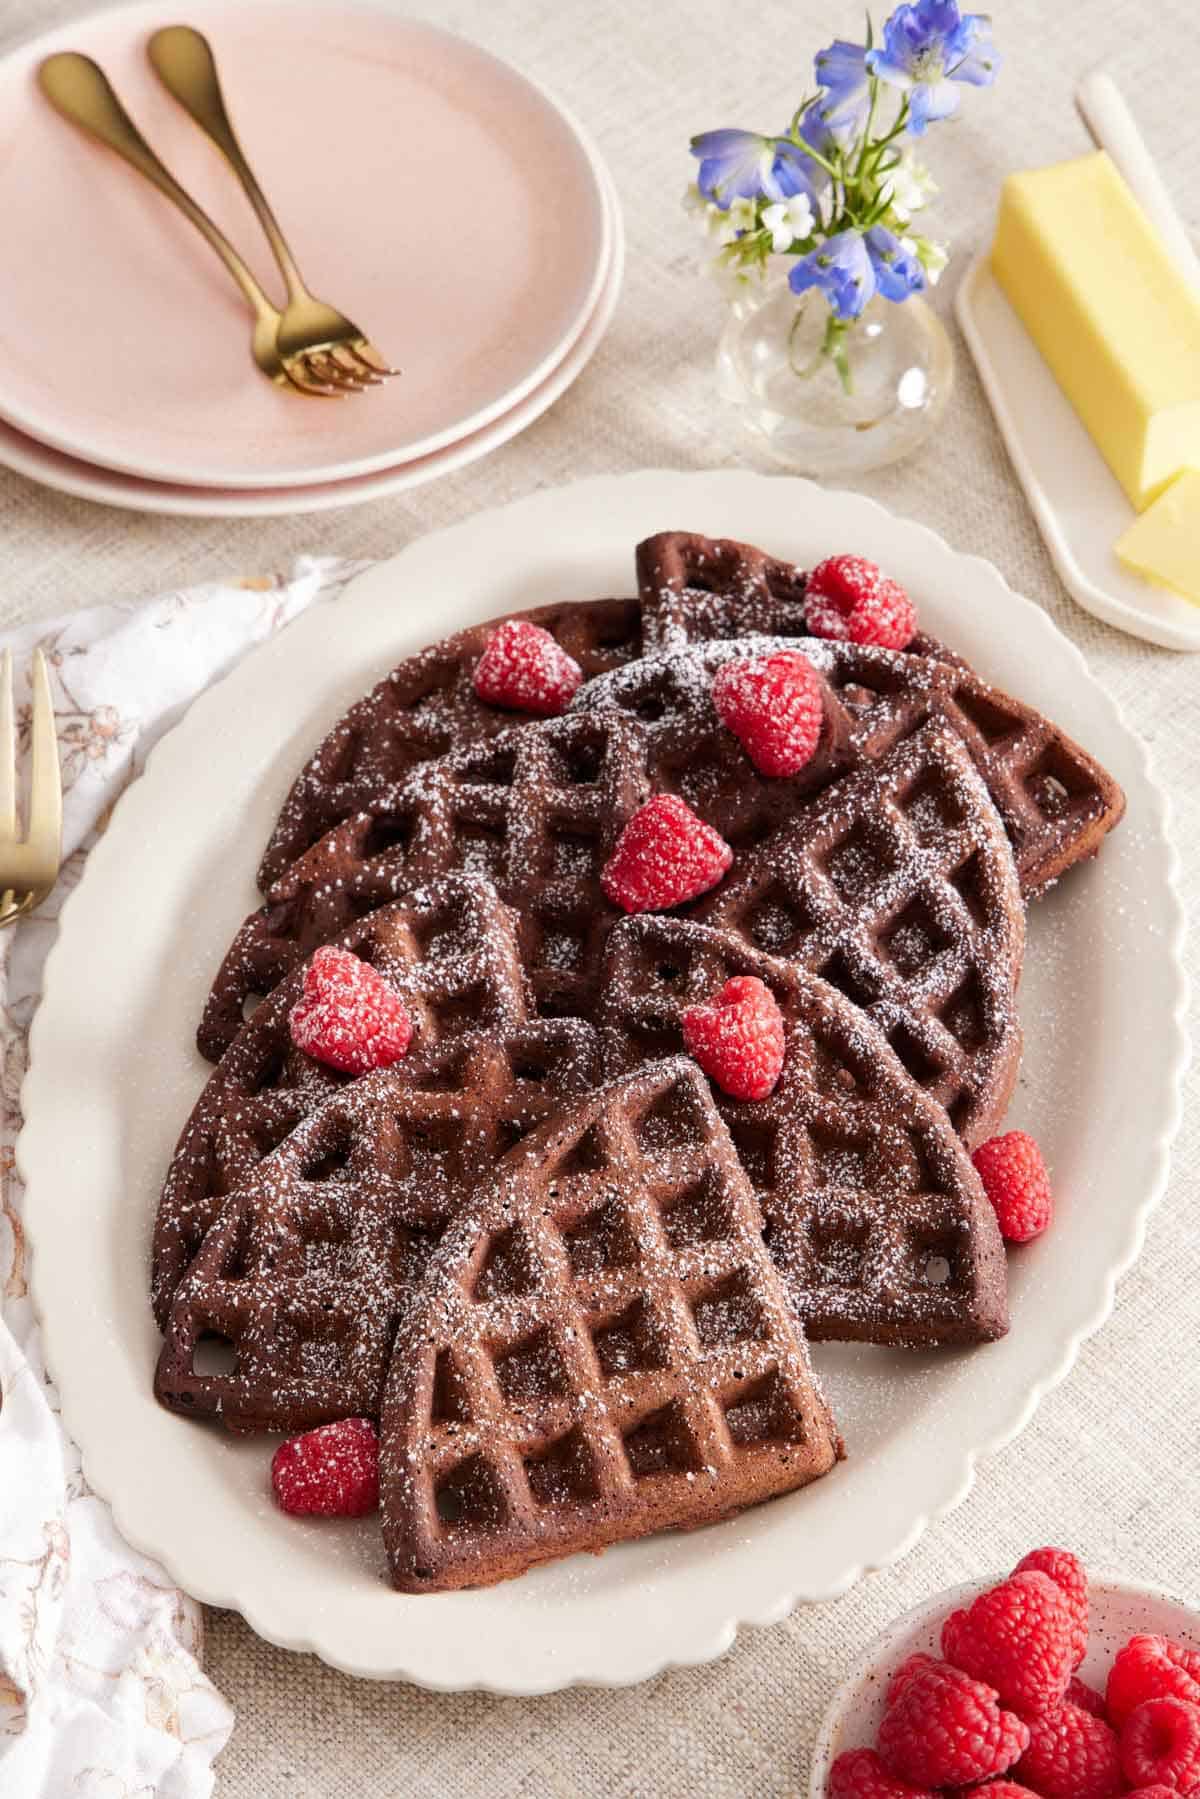
My easy chocolate waffles have deep cocoa flavor, a crisp shell, and a tender middle. Cocoa hides the golden-brown cue, so chocolate waffles often get pulled early and turn soft. Here’s how I test doneness and the ingredients I use in the batter to help it turn crisp!
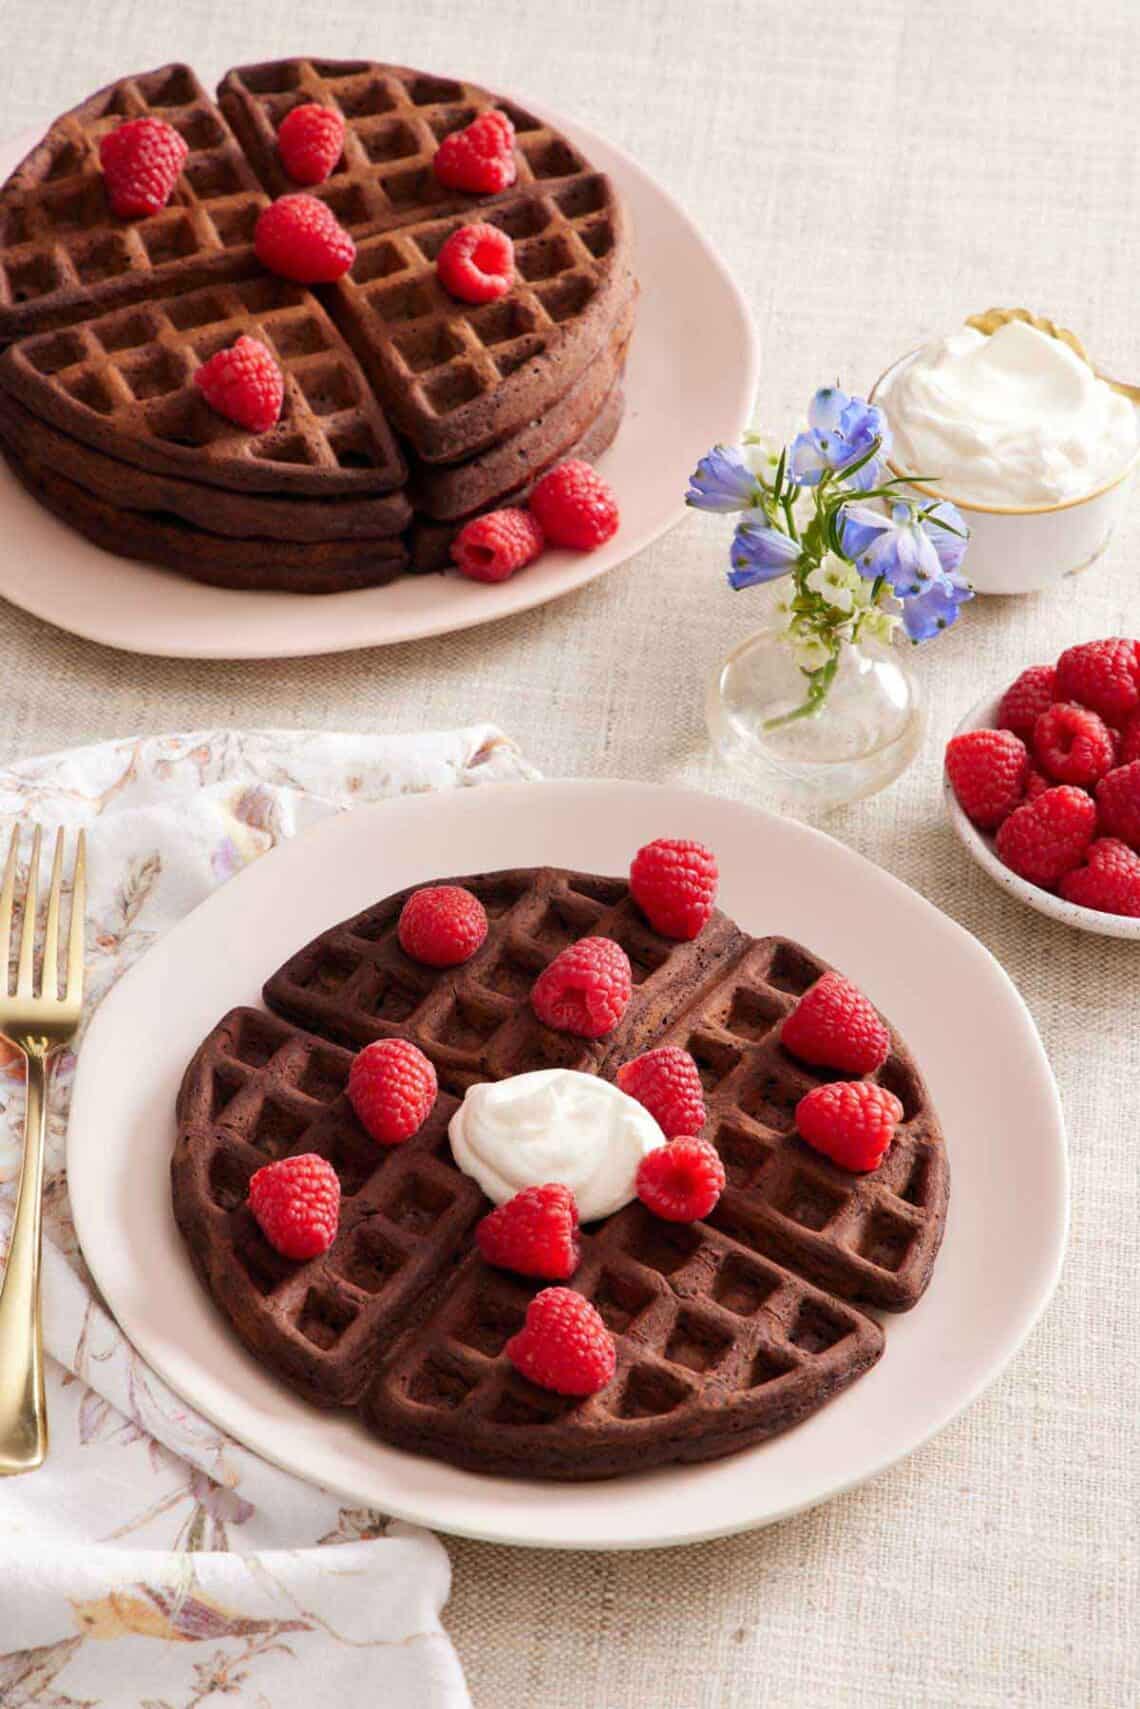
Chocolate waffles have one problem that plain waffles don’t: you can’t see when they’re done. With a classic waffle, you wait for the crust to turn golden brown to tell you when it’s done. Cocoa makes the batter very dark brown from the start, so the visual cue we typically rely on is gone. Most people open the iron too early, get a waffle that looks right, and end up with something that turns soft and cakey and collapses as it cools.
During testing, I engineered the batter to bake up crisp and found three doneness cues that actually work when color can’t help you. Plus, there are multiple variations to the recipe that you can use to add mix-ins or switch up the flavor to make your favorite weekend waffle breakfast!
“Super good with whipped cream and strawberries or ice cream. Can freeze and pop in toaster too. We love this recipe in my house. We use a mini waffle iron. Perfect amount of chocolately-ness!!!”
Marianne
Why These Waffles Get Crispy
My first test batch of these didn’t work the way I wanted. The waffles came out flat and a little soft—they tasted like chocolate, but they didn’t have that crisp shell that makes waffles so unique and delicious. I made two changes on the next batch: I added baking soda and more butter. The results produced crispy waffles that were fluffy inside and tasted delicious. Here’s why those changes mattered:
The extra butter crisps the exterior. Fat in contact with a hot iron almost “fries” the exterior of a waffle rather than steaming it. The cocoa powder brings extra starch and dryness into the batter that a plain waffle doesn’t. Going from 6 tablespoons of butter to 8 balanced the fat and starch better, and made the biggest difference between a waffle that bent and one that snapped.
Baking soda is doing two jobs. It lifts the batter, which is why the interior is tender and somewhat fluffy instead of dense and gummy. It also raises the batter’s pH, and a more alkaline batter browns faster and better. The starches in the flour react with the sugar at a lower temperature and caramelize faster. Even though this doesn’t matter for visual color, it matters a great deal for texture. The faster browning sets the exterior before the inside overcooks. It also works in tandem with the added fat to increase the browning so the exterior caramelizes more. Both result in a crispier, more flavorful waffle.
Ingredient Notes
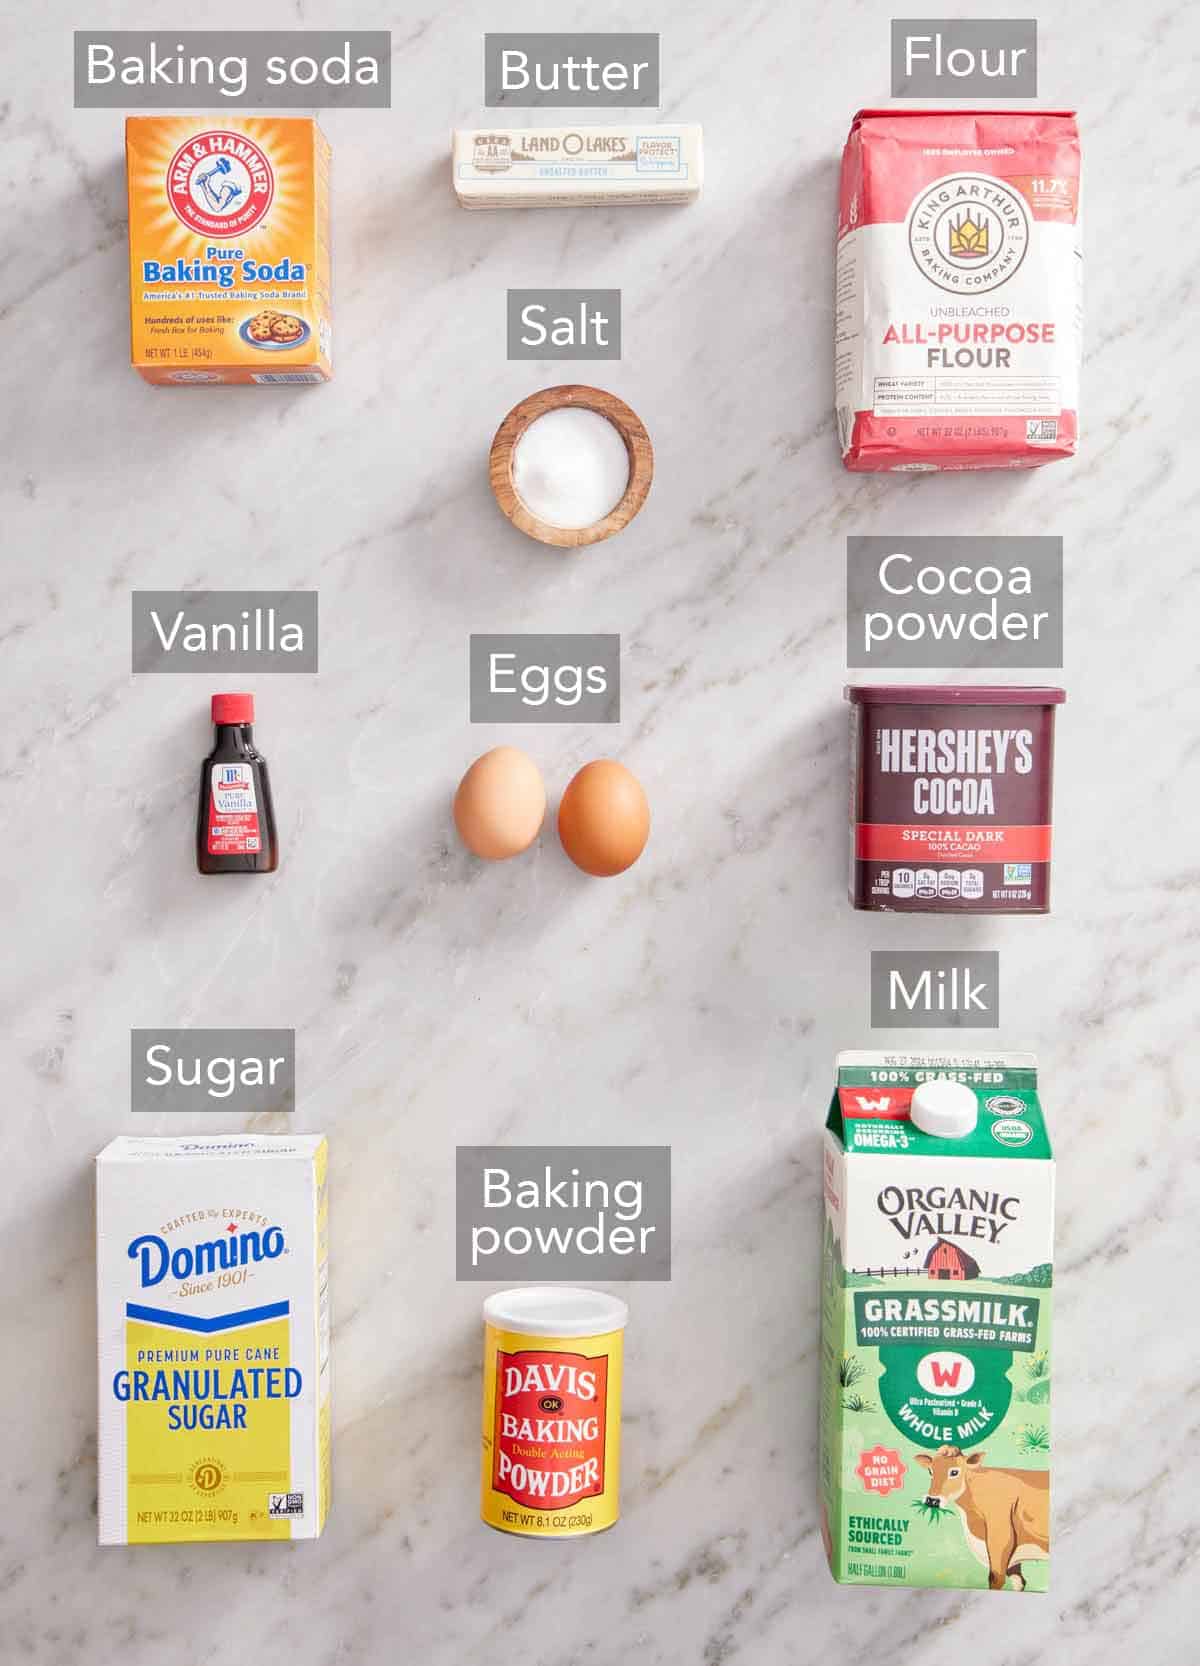
These are the main ingredients you need to make chocolate waffles. You can find the full list of ingredients and measurements in the recipe card below.
Cocoa powder — the ingredient that gives the chocolate flavor to this recipe. I use Dutch-processed for a darker color and a richer, less sharp chocolate flavor. Natural unsweetened cocoa works too and gives you a fruitier, more acidic chocolate note. In testing, I made a batch with both natural cocoa powder and Dutch-process cocoa powder. Natural cocoa produced a lighter color and a slightly less crisp waffle. Natural cocoa is more acidic than Dutch cocoa, so the pH of the batter is lower. With Dutch, the pH of the batter is higher, so it works even better with the baking soda to crisp up the waffles.
All-purpose flour — the cocoa replaces some of the flour you’d otherwise have in the batter, so there’s less gluten here than in a plain waffle. This doesn’t matter too much in the finished waffle, other than it tolerates being stirred a little longer without turning rubbery, so it’s harder to overmix.
Sugar — you will use a bit more in the batter than in my classic waffle batter. It’s there for flavor, offsetting the bitter cocoa powder, but it’s also there to help the outside set crisp. It’s the reason these darken faster than a plain waffle and the reason a very high iron setting will take them past done quickly.
Butter — you will melt unsalted butter for the batter, but make sure it has cooled slightly. If it’s still hot when it meets the eggs, you can scramble them. I typically melt it, then measure out my dry ingredients and wet ingredients before adding it. That usually gives it a few minutes to cool.
Milk — I always use whole milk, but 2% works, or you can use non-dairy milk. I do suggest using one that contains fat, though, so the waffles still crisp up.
How To Make Chocolate Waffles
Below, I’ve highlighted portions of the recipe in step-by-step process images along with instructions for making crispy chocolate waffles. You can find the full set of instructions in the recipe card below.
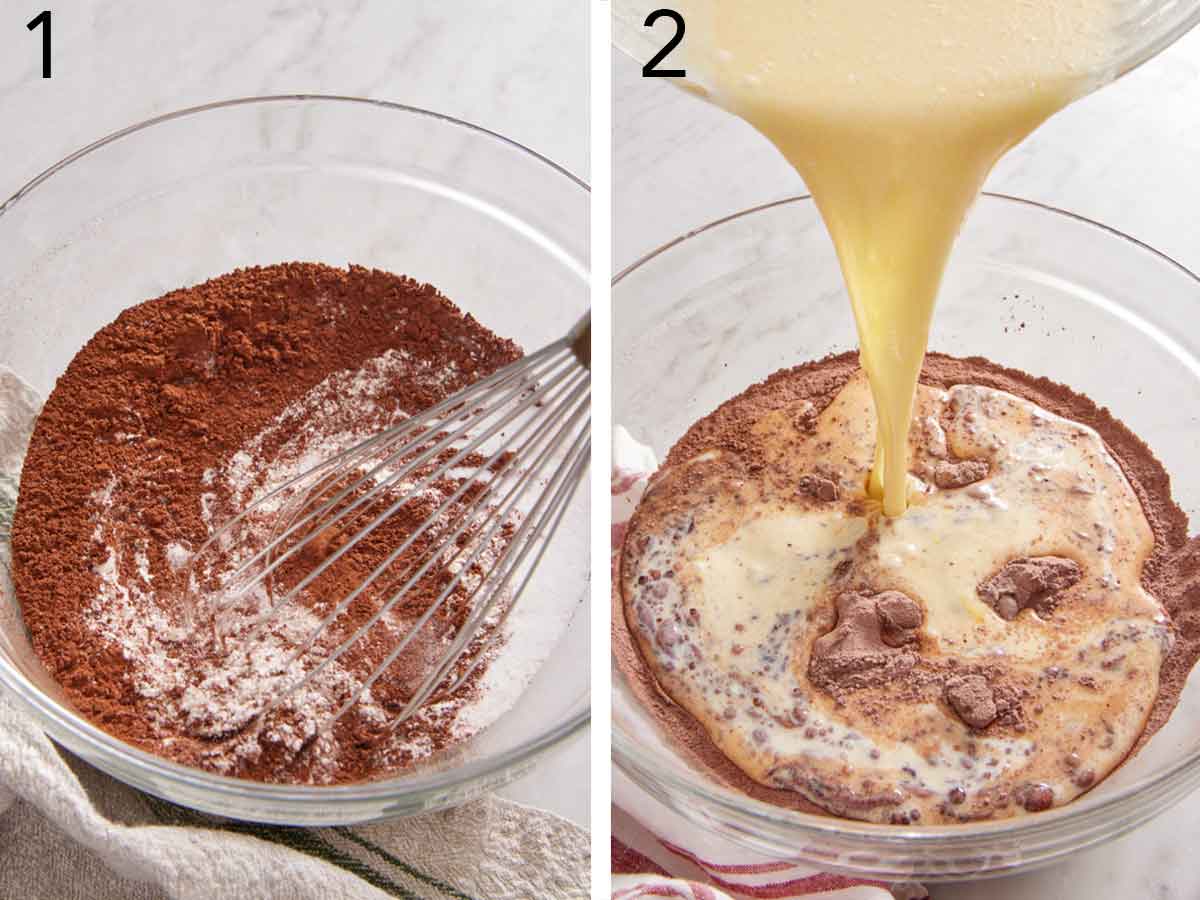
1. Combine the flour, sugar, baking powder, baking soda, and salt together in a large bowl. Add the cocoa to a sifter and sift it into the flour mixture, then whisk everything together. Cocoa clumps very easily, and a lump of dry cocoa in a finished waffle is unpleasant!
2. In a medium bowl, whisk the milk, melted butter, eggs, and vanilla. Pour the wet mixture into the dry and stir with a spatula just until combined. A few lumps are fine! Set the batter aside while you heat the iron. This gives time for the flour to hydrate so the batter thickens up slightly and the waffles turn out fluffier inside.
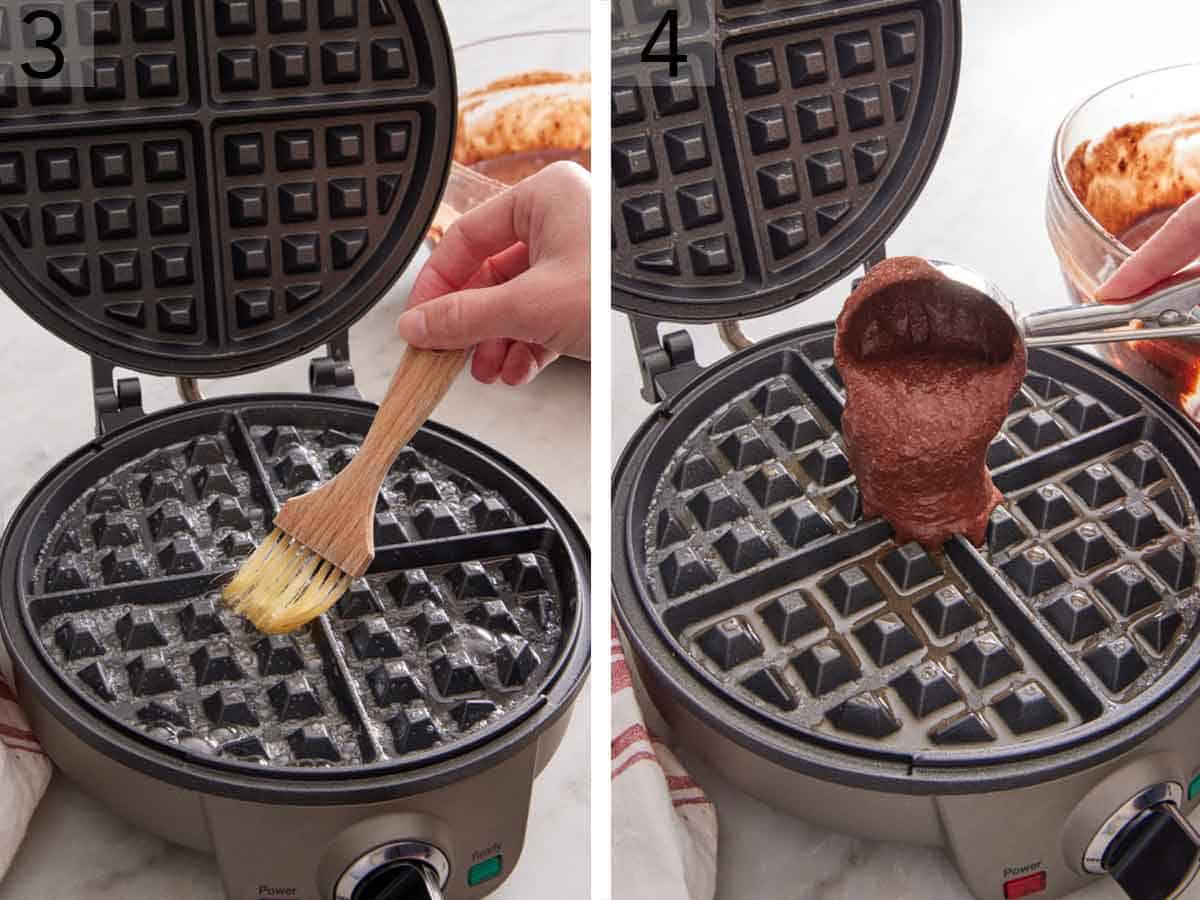
3. Preheat the waffle iron on High (or extra crispy, depending on your waffle iron settings), and brush it with melted butter or spray it with nonstick cooking spray once it’s hot. Grease it every time you cook a new waffle, not just the first. Cocoa batter sticks more than plain batter since it’s a bit higher in sugar.
4. Add up to 1 cup of batter to the waffle maker. The exact amount is going to depend on the size of your waffle maker. (You can check the brand’s instruction book for recommendations.) Cook for 3 to 4 minutes, or until the steam has subsided. Place the waffle on the wire rack to prevent the cooked waffles from turning soggy while you continue cooking the rest of the batter.
How To Tell When A Chocolate Waffle Is Done
These tips were the most important details to come out of my recipe testing because color is off the table. Here are three cues ranked by importance:
Watch the steam. A waffle iron vents steam out the sides as the waffle cooks and water leaves the batter. It will come out hard for the first couple of minutes. When that plume drops off noticeably, the waffle is close to being done. Once it has mostly subsided, it’s likely ready! This is the most reliable cue because it tells you that moisture has left the batter, which indicates a crispier crust.
Tap the top. Open the iron and tap the surface with fork tines or a knife. It should feel firm and make a thumping sound. If it gives, it’s not done—close the lid and give it another 30 to 60 seconds, then check it again.
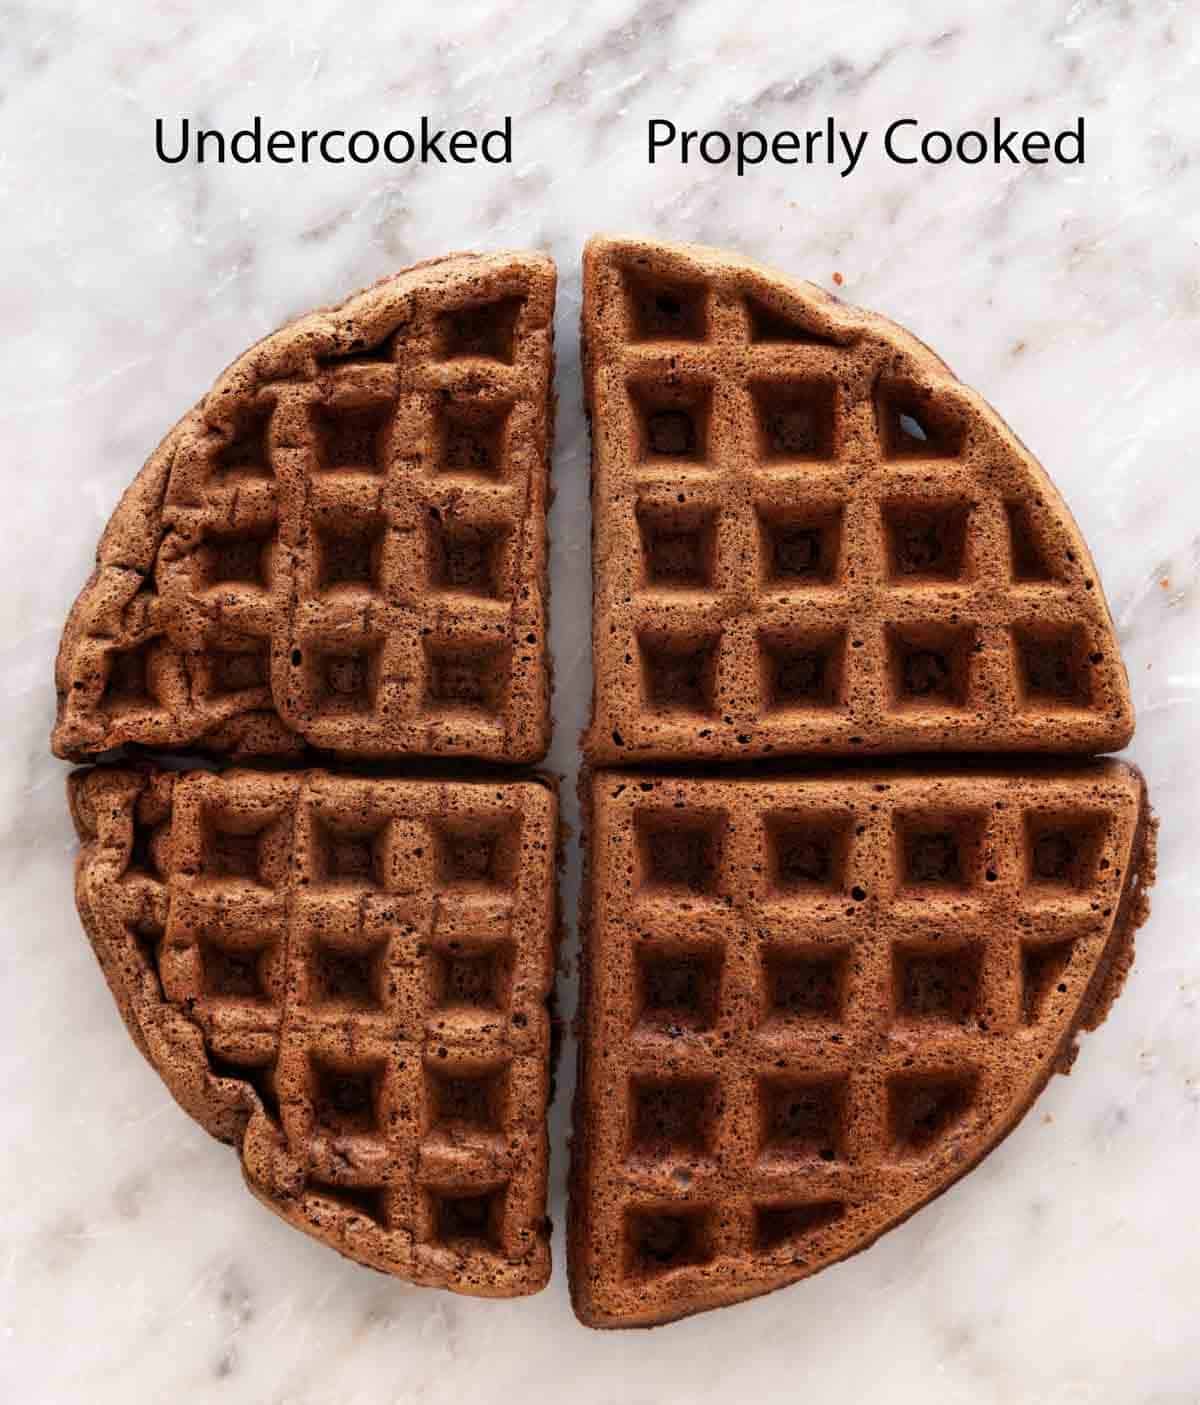
The clock is a guide, not a hard-and-fast rule. Three to four minutes is where these land in my iron, but I’ve never once had a chocolate waffle come out burnt at 5 minutes. If you’re unsure, err on the longer side. Too little time, though, and the waffle will be soft and soggy. I tested the cook times to show you a waffle pulled at 2½ minutes versus a waffle pulled at 4 minutes. The waffle pulled early looked cooked, but it shrank as it cooled, turning wrinkly and soft. The waffle pulled at 4 minutes kept its shape with tall ridges and a crispy exterior once cooled.
Variations
Double chocolate waffles. Fold ½ cup of mini chocolate chips into the finished batter. Mini chips are best over standard chips since they’re smaller and less likely to sit against the iron and scorch.
Mocha. Swap ½ cup (120ml) of the milk for cold-brewed coffee, or whisk a tablespoon of instant espresso powder into the dry ingredients. You may get a mild coffee flavor here, but the best part is that the coffee deepens the cocoa’s flavor.
Belgian-style. If you have a deep-pocket Belgian waffle iron, this batter works in it, too. You’ll just use more batter per waffle and get fewer waffles overall. Check out my Belgian waffles recipe for more tips on using that style of waffle iron.
Pro Tips For Making This Recipe
Weigh the flour. A kitchen scale is the most accurate way to measure flour. If you don’t have one, fluff the flour in its container, spoon it into your measuring cup, and use a knife to level off the top. My Academy lesson: How to Measure Ingredients Correctly shows you the fluff and level method step-by-step and how to use a scale.
Don’t over-mix the batter. A few lumps are okay and will actually encourage a fluffier waffle. Mixing it too much will overwork the batter and cause more gluten to develop, creating dense and chewy waffles.
Let the iron warm back up between waffles. A waffle iron loses heat when you open it and as it cooks. I give mine at least 30 to 60 seconds, closed, to recover before the next cup of batter goes in. The next waffle can stick or take longer to cook without it. Your waffle iron likely has a light on it too, telling you when it’s heated back up and ready to use.
Storing And Reheating
Refrigerator: cool completely, then store in an airtight container for up to 3 days. That sits within the USDA’s guidance of 3 to 4 days for cooked leftovers held at 40°F or below (FoodSafety.gov Cold Food Storage Chart).
Freezer: freeze in a single layer on a sheet pan until solid, then transfer to a freezer bag with parchment between layers. They are best if eaten within 2 months.
Reheating: the toaster, straight from frozen, is the best option. The microwave isn’t ideal because it makes them soft and chewy, and after all the work of getting the shell right, that’s a waste. The oven or air fryer at 350°F for 3 to 5 minutes also works if you’re doing a larger batch or don’t have a toaster.
Chocolate Waffles Recipe
Equipment
- Waffle Maker
Ingredients
- 1¾ cups all-purpose flour (210g)
- ½ cup granulated sugar (100g)
- 2 teaspoons baking powder
- ½ teaspoon baking soda
- ½ teaspoon salt
- ½ cup unsweetened cocoa powder (50g)
- 1¾ cups whole milk (420ml)
- ½ cup unsalted butter melted and cooled slightly (113g)
- 2 large eggs room temperature
- 2 teaspoons vanilla extract
Instructions
- In a large mixing bowl, combine the flour, sugar, baking powder, baking soda, and salt. Sift in the cocoa powder, then whisk everything together.
- In a medium bowl, whisk together the milk, melted butter, eggs, and vanilla. Pour the milk mixture into the flour mixture and stir until combined. (A few lumps are okay.) Set aside.
- Preheat the waffle iron on High. Once hot, brush the iron with more melted butter or spray with nonstick cooking spray.
- Add ¼ to 1 cup of batter to each cavity of the hot waffle iron. (The amount will depend on the size and shape of your waffle maker- you may need to adjust the amount. A large round iron will use about 1 cup per waffle. Smaller square waffles will use ¼-⅓ cup per cavity.)
- Cook for 3 to 4 minutes, or until steaming and darker brown in color. Place on a wire rack until ready to serve. Serve hot with berries, maple syrup, and butter or your favorite toppings.
Notes
- On yield: my iron is round and 7 inches across with four cavities, and it takes a full cup of batter to fill all four, which makes one large round waffle. That gives me five waffles from this batch. Your iron will almost certainly be different, so treat the cup measurement and the waffle count as a rough guide. Test the first waffle and adjust as needed.
- Use room temperature ingredients if possible. If you have time, set the eggs and milk out about 30 minutes to 1 hour before you start on the homemade waffles. They will still be delicious if you don’t have the time!
- To keep waffles warm between batches, you can preheat your oven to 200°F and place a wire rack inside. Once a waffle is done, place it on the rack in the warm oven until you are ready to serve.
- For the ultimate chocolaty breakfast, fold ½ cup of mini chocolate chips into the batter.
Nutrition
Have you tried this recipe? Tag me today!
Mention @preppykitchen and tag #preppykitchen!
Topping Ideas
These aren’t sweet enough to stand alone as dessert, which means they’ll take a variety of toppings.
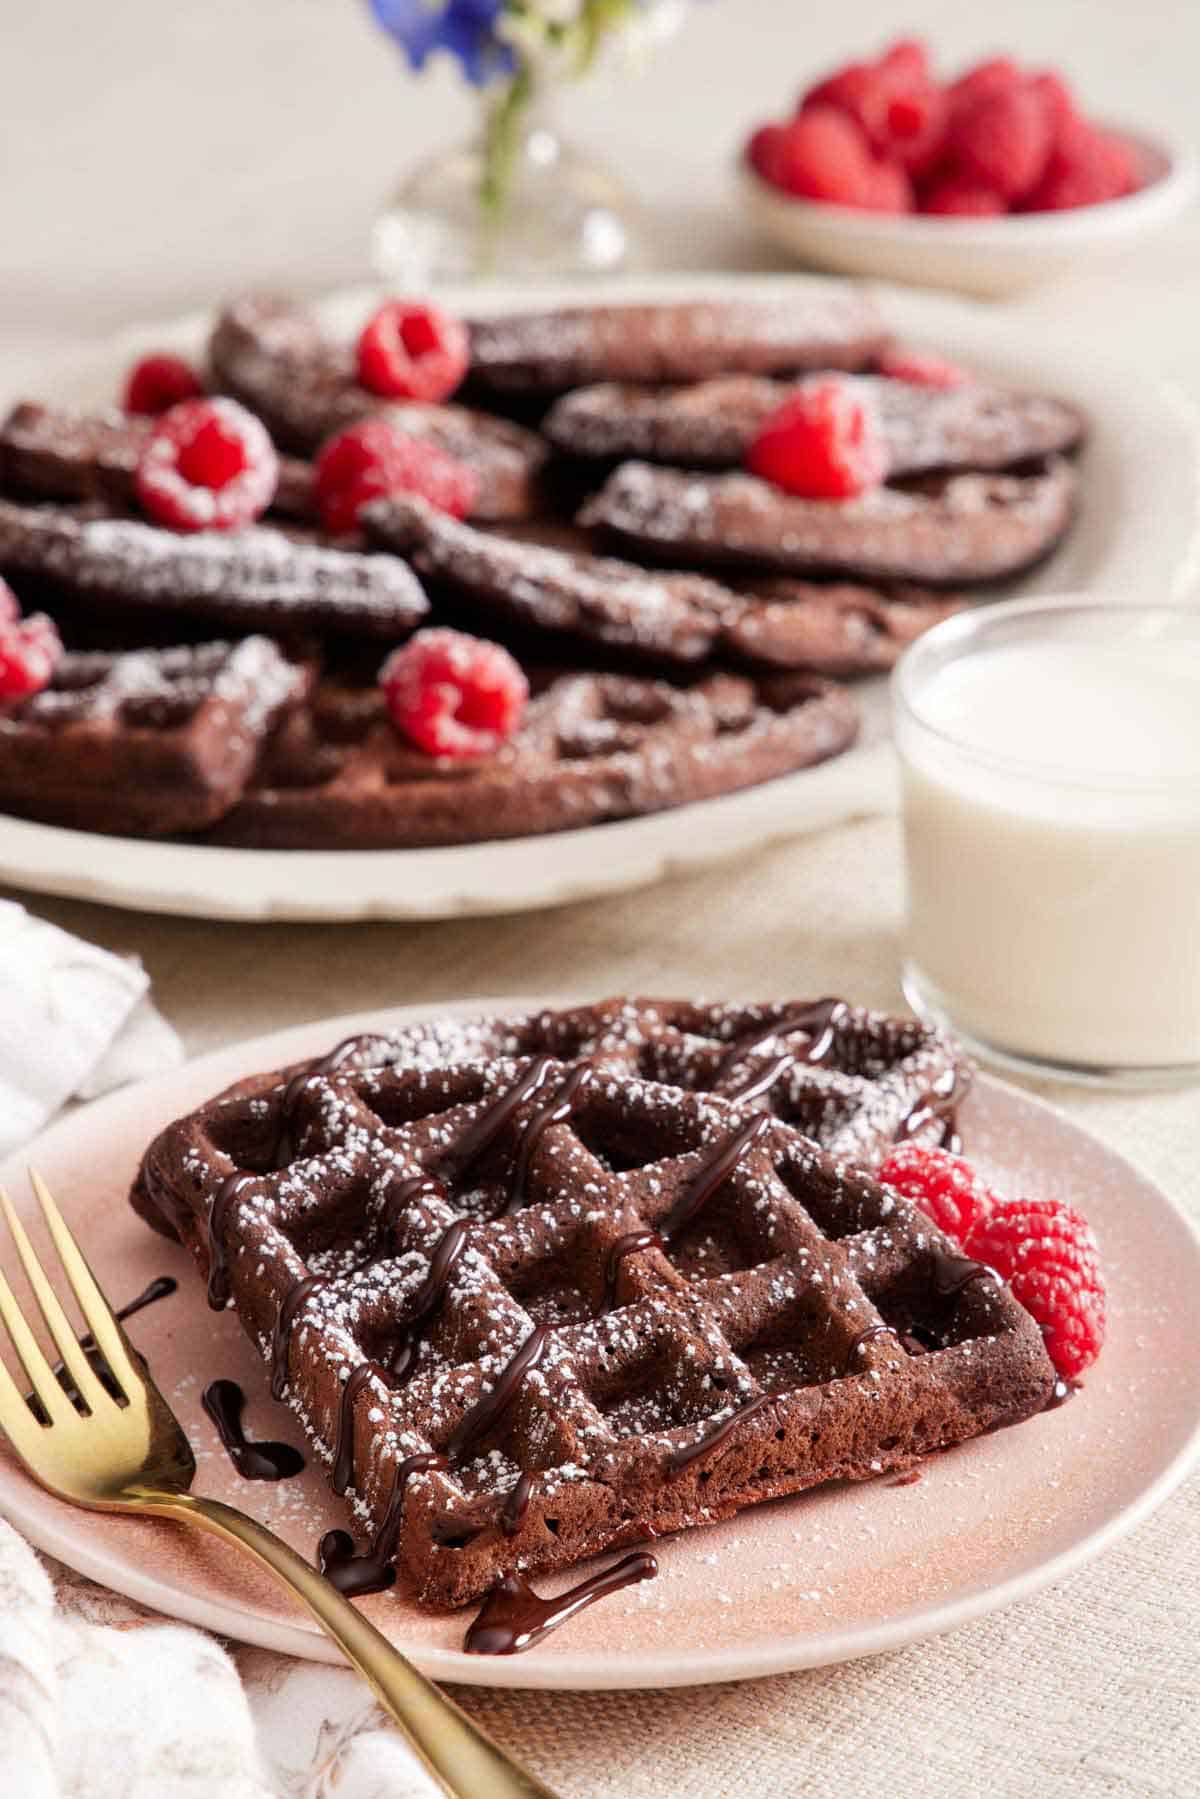
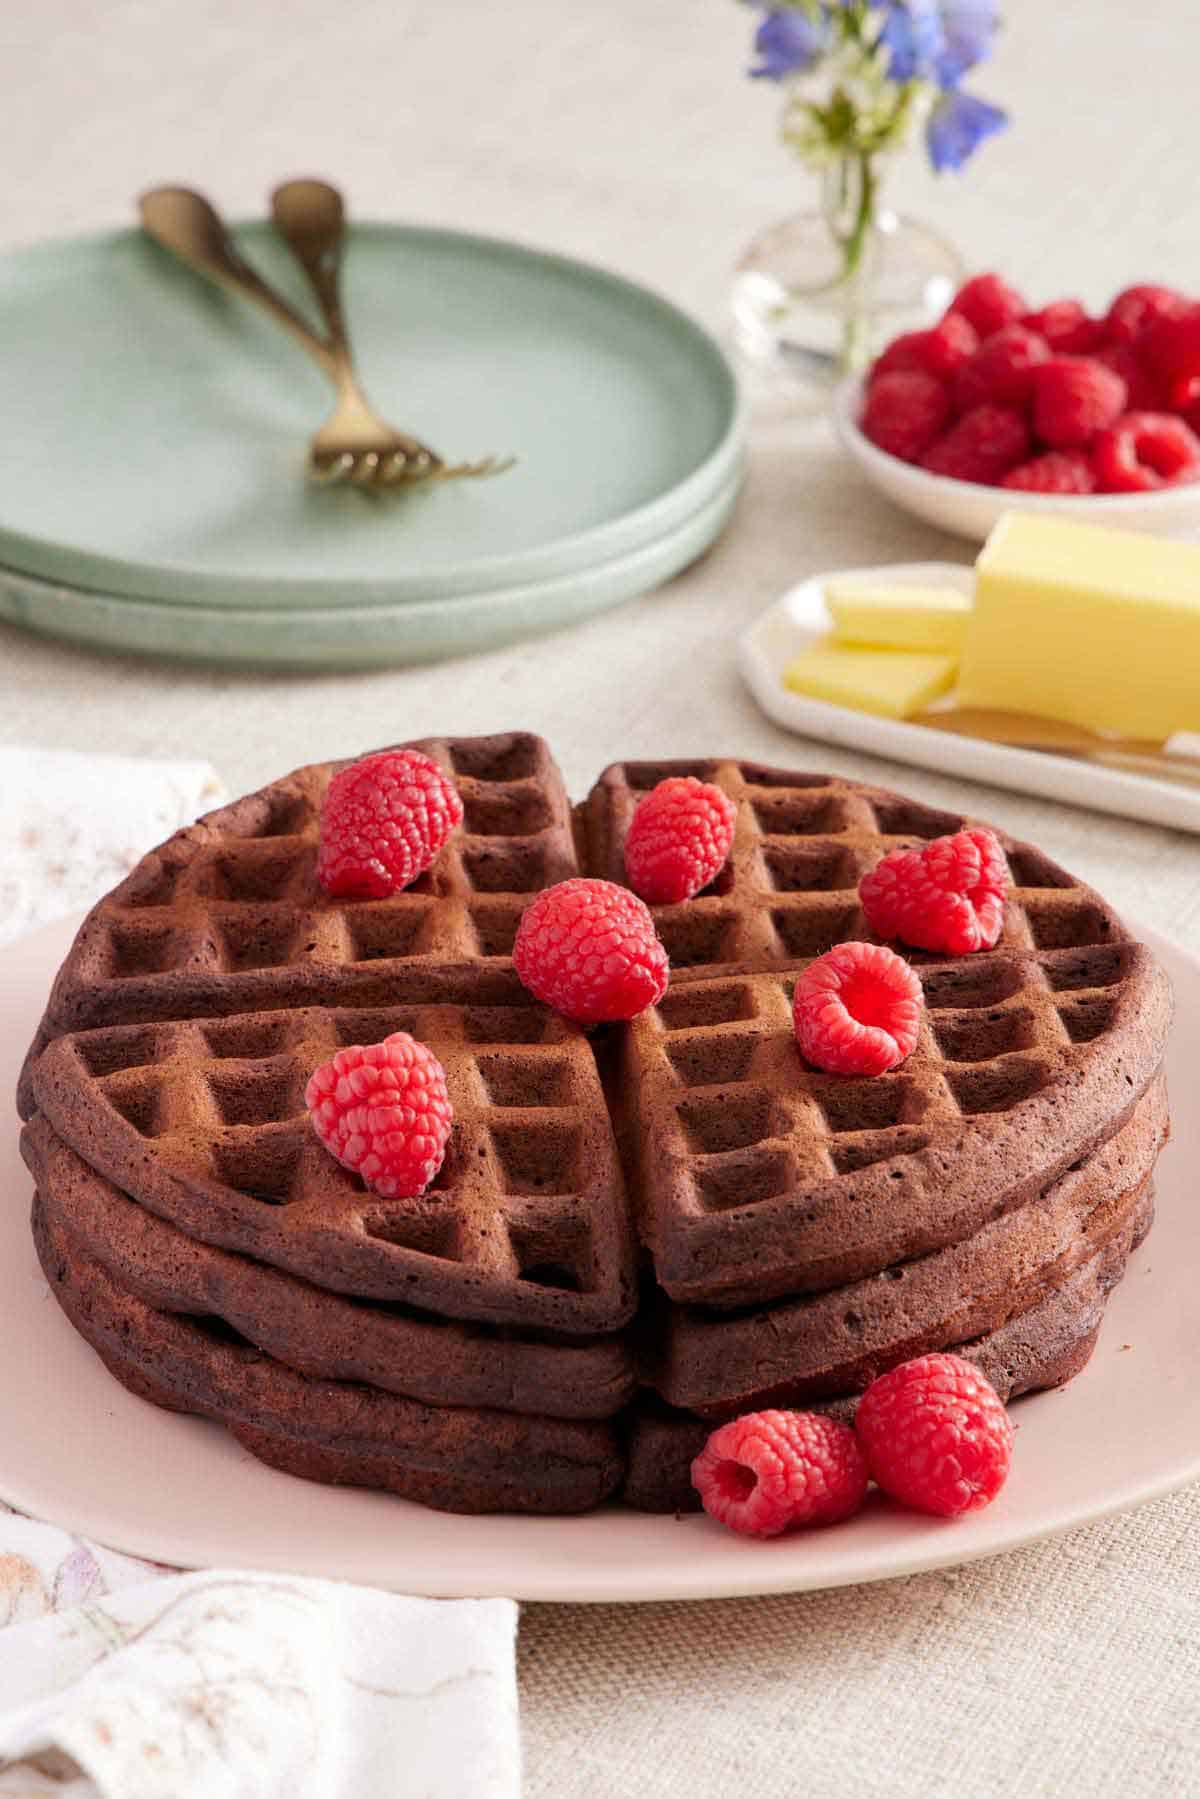
Butter and maple syrup are how my family enjoys them most often. Whipped cream and raspberries are a fun way to elevate them or serve them for Mother’s Day or Valentine’s Day breakfast.
Beyond that: a drizzle of chocolate ganache or caramel sauce instead of syrup, a dusting of powdered sugar, peanut butter or Nutella spread on top while hot, or a scoop of vanilla ice cream and hot fudge if you’re taking these into dessert territory outright.
Frequently Asked Questions
You can’t just simply add it to a dry mix. Cocoa is a dry ingredient with its own starch, so it has to replace flour or adjust the wet ingredients too, rather than join it. If you are making a recipe from scratch, swap out the same volume of flour for cocoa powder. You’ll also want a bit more sugar, because unsweetened cocoa is bitter, and a little more fat, because cocoa dries the batter out. That set of adjustments takes some testing and is essentially what this recipe already is, which is why I’d start here instead!
This is almost always because they came out of the waffle maker too early (see the doneness cues above). Two other usual causes are a batter that’s too thin from mismeasured ingredients, and stacking the waffles on a plate. Stacking causes them to steam and go soft as they cool. Cool them in a single layer on a wire rack, or hold them on a rack in a 200°F oven if you’re trying to keep them warm.
I don’t recommend it. The baking soda starts working the moment it meets the liquid, and a batter that’s sat overnight may not turn out as fluffy inside. Whisk the dry ingredients together the night before, cover them, and add the wet in the morning—that gets you most of the time savings with none of the texture cost.
The batter is okay to sit for 30 minutes, though, if you want to stir it together shortly before cooking them.
Readers have made these with granulated sugar substitutes and been happy with the result. Be aware that sugar is doing structural work here, not just sweetening (it’s part of why the exterior crisps), so expect a softer shell. I have not tested these substitutes, but one reader mentioned she made it with Splenda instead of sugar and loved the waffles!
More Waffle Recipes To Try
Try one of my other waffle recipes, from the classics to flavored waffles:
- Belgian Waffles — the deep-pocket version, leavened with whipped egg whites instead of baking soda for a lighter interior.
- Waffle Recipe — my classic buttery waffle, and the batter this chocolate version is built on.
- Sourdough Waffles — a tangy, crisp waffle that puts a discard starter to work.
- Chicken and Waffles — the savory direction, with fried chicken and hot honey.
- Banana Waffles — fluffy batter packed with ripe bananas; perfect for a weekend waffle breakfast.
If you’ve tried this chocolate waffle recipe, then don’t forget to rate it and let me know how you got on in the comments below. I love hearing from you!





