
This post may contain affiliate links. Please read our disclosure policy.
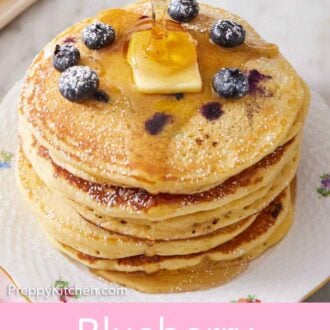
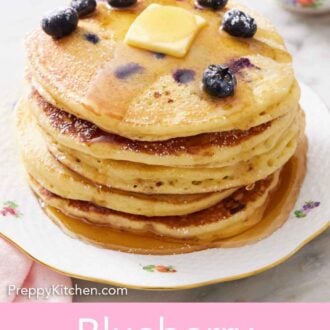

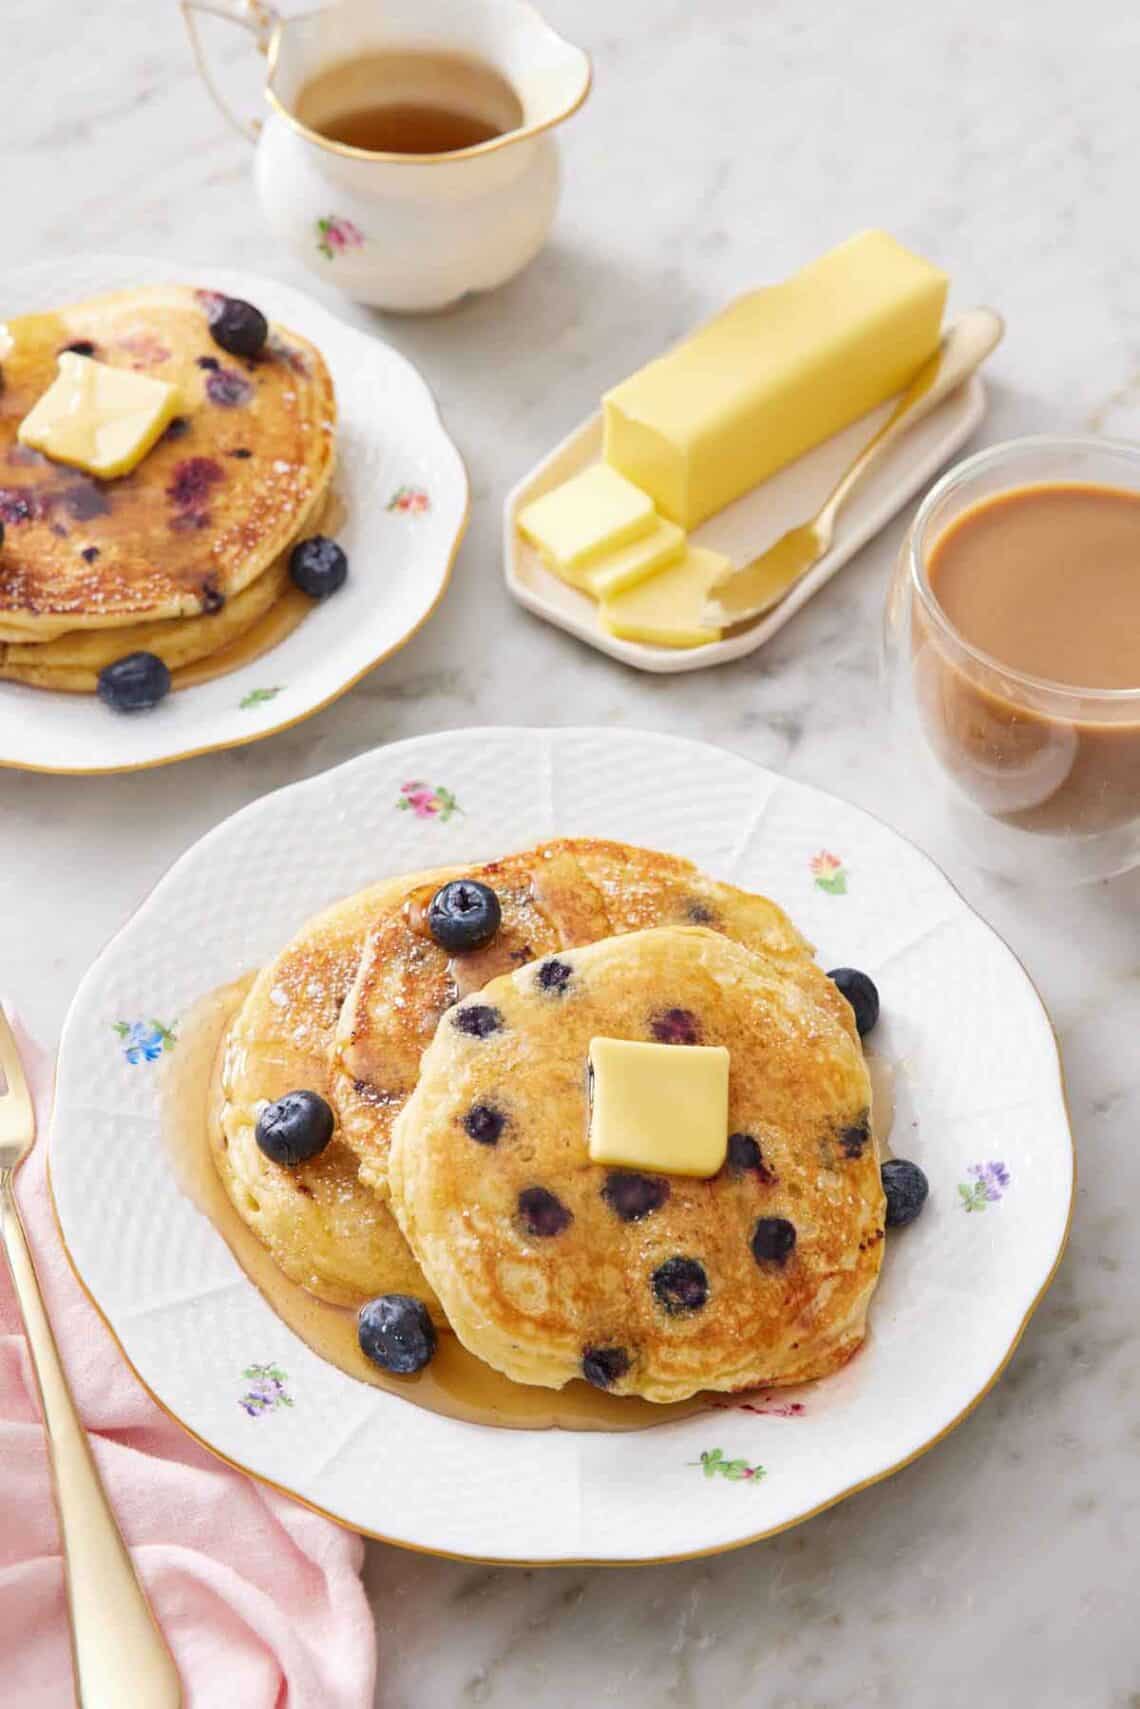
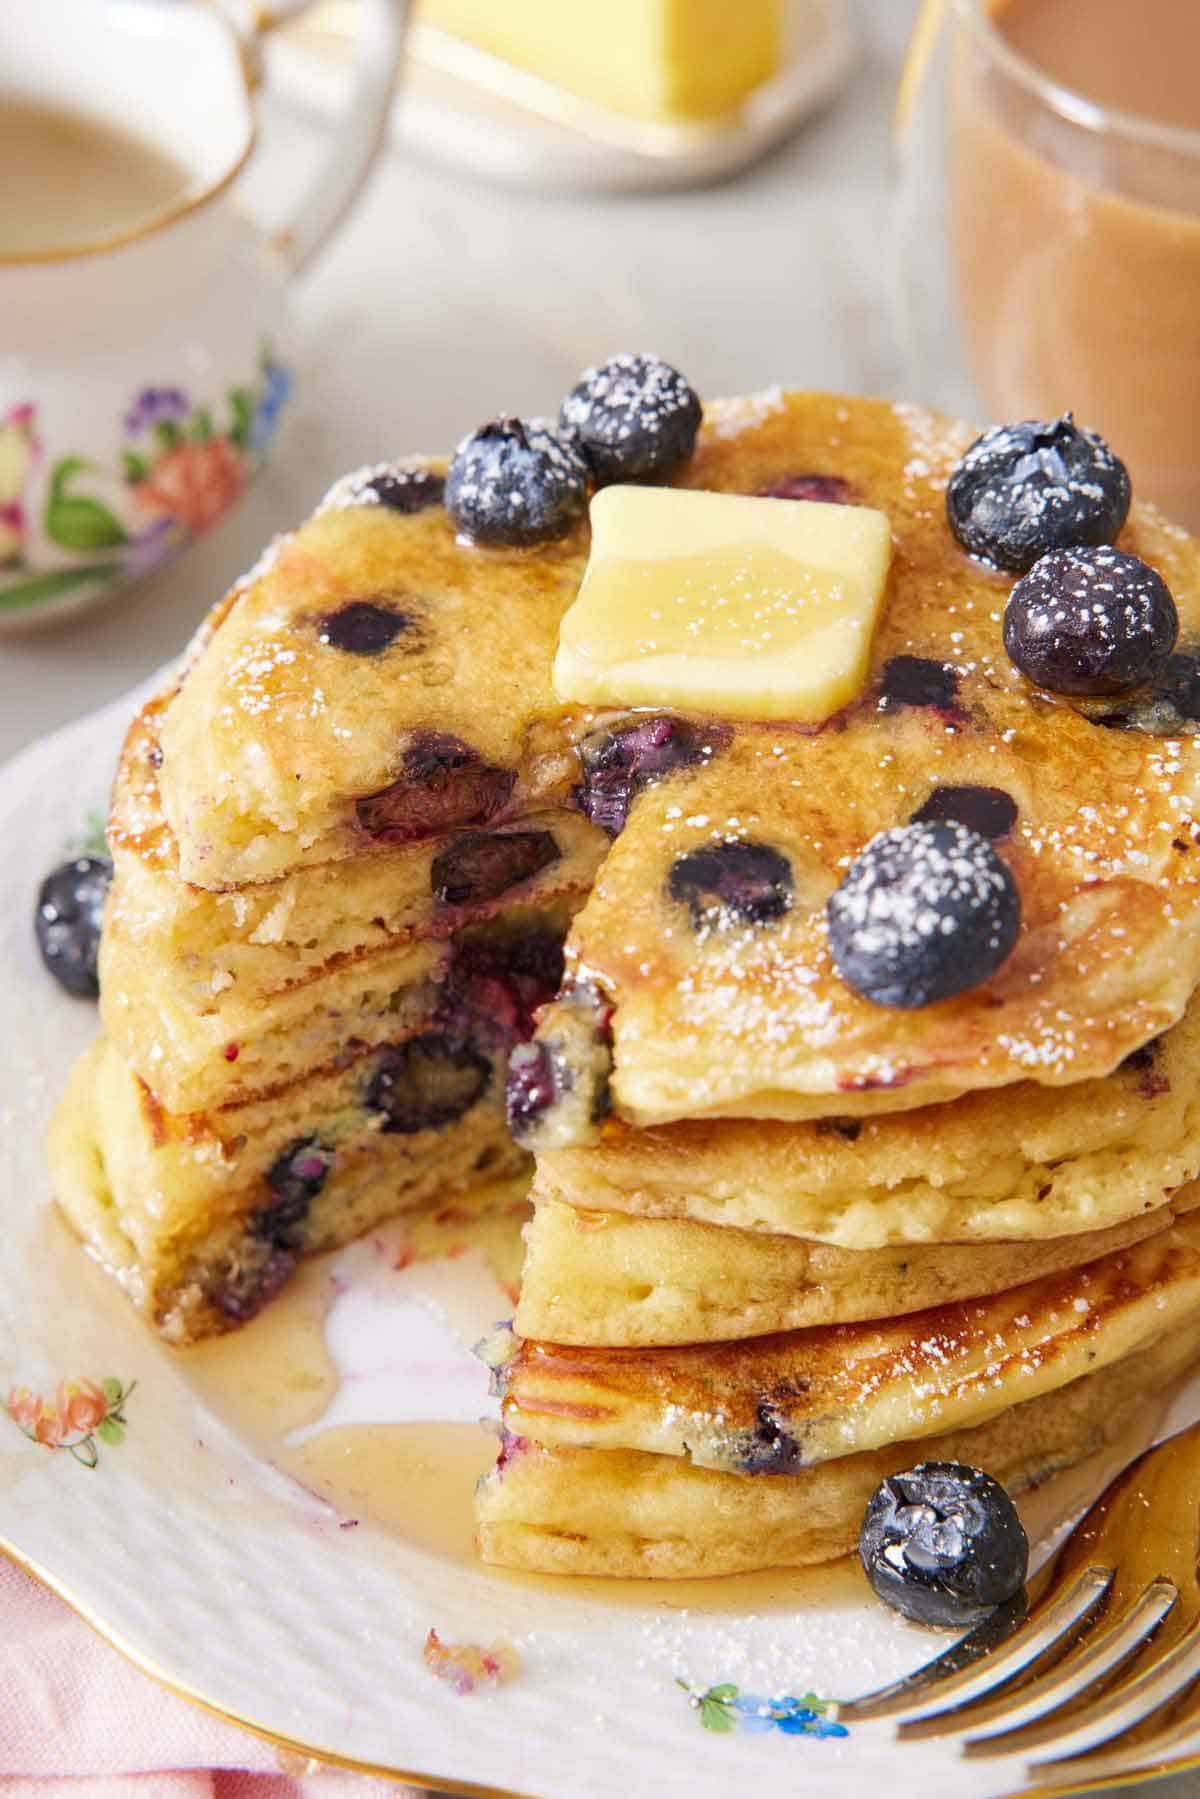
My Blueberry Pancakes are fluffy and golden with a burst of warm berry in every bite. I tested different heat settings, a technique for mixing the batter for the fluffiest pancakes, and the tip that keeps your batter from turning blue.
Blueberry pancakes are so easy to make, starting with a classic batter—simply whisk the wet ingredients into the dry ingredients and let the batter sit while you heat your pan. The trick for perfect pancakes from there is all about how you add the fruit. Most blueberry pancake recipes mix the berries right into the batter and then scoop it onto the skillet. I tested this and changed my technique.
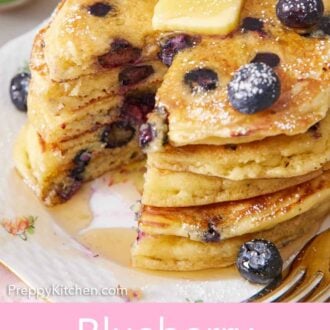
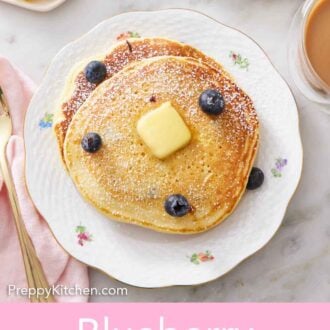
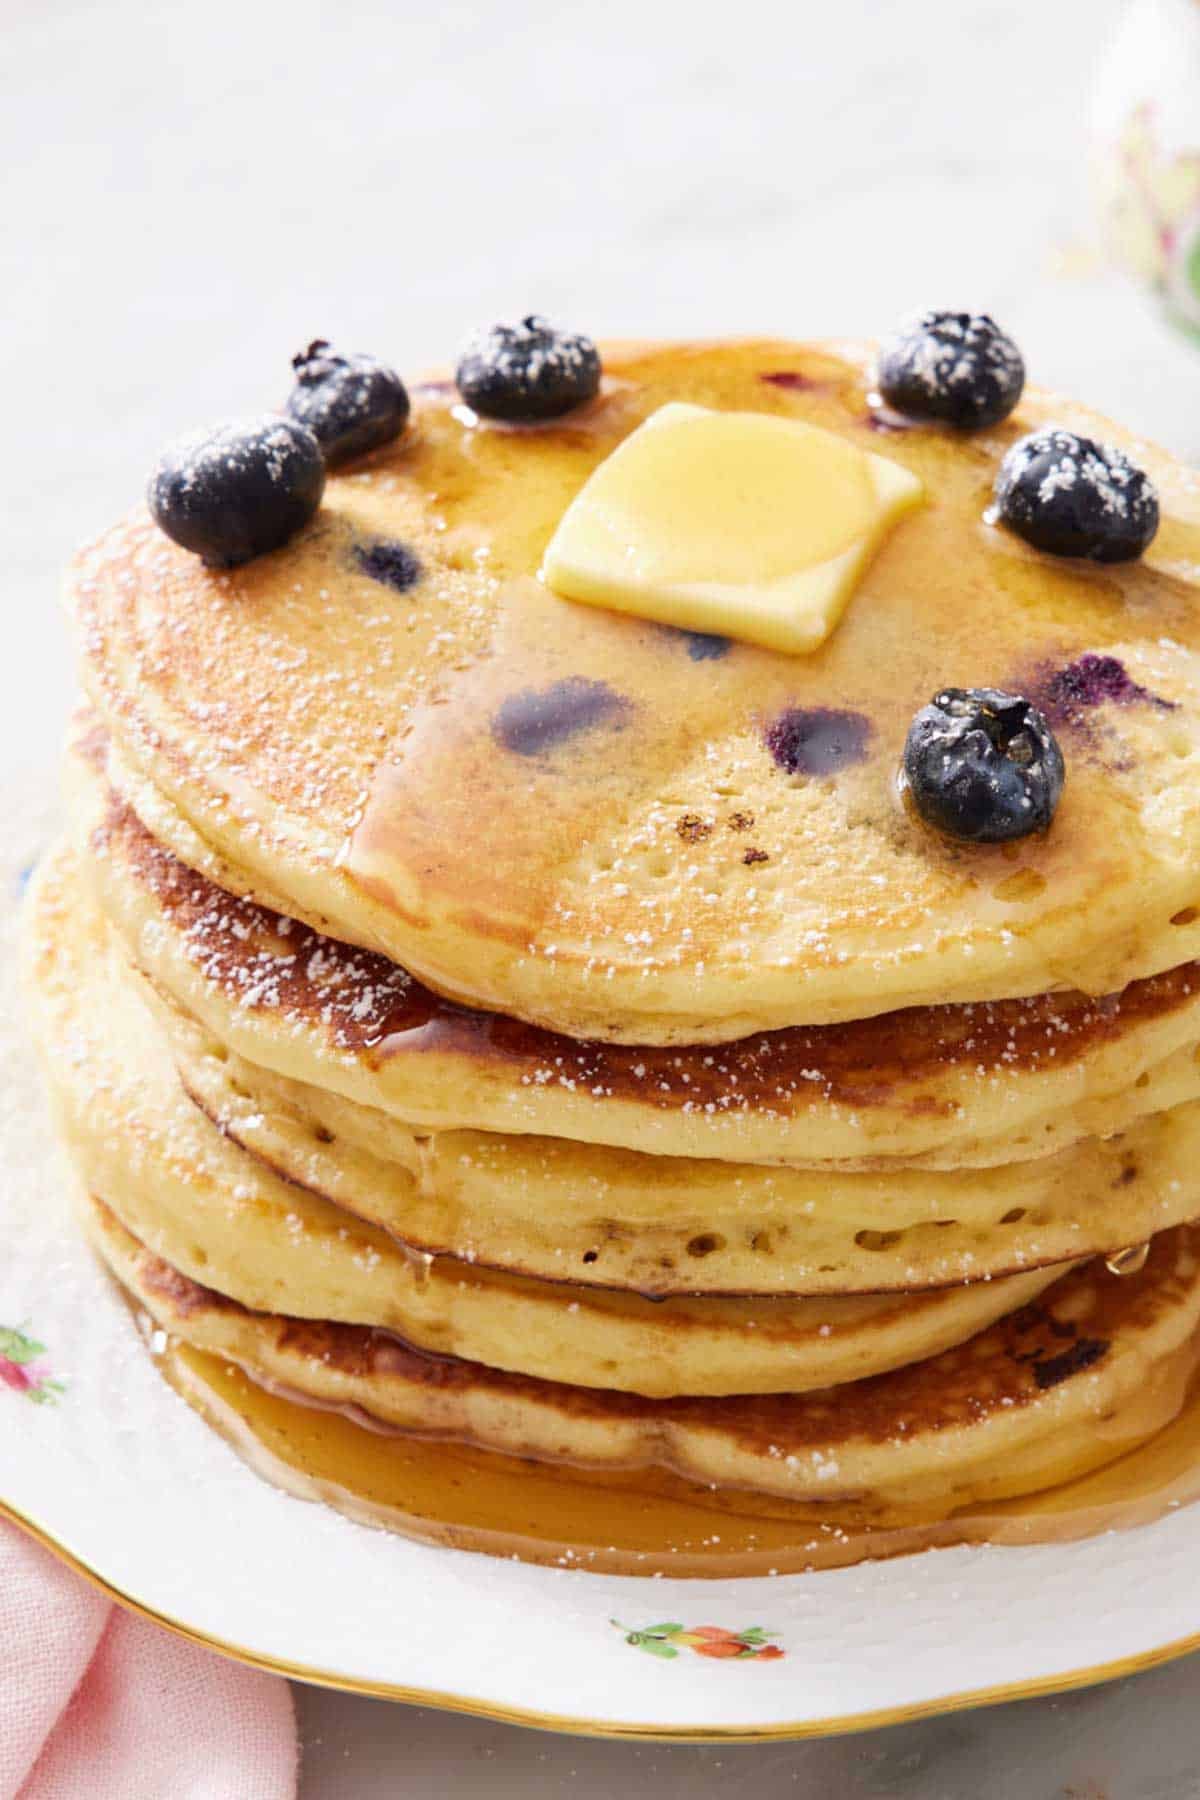
Now, I sprinkle the blueberries onto each pancake right after I scoop the batter into the skillet. Every blueberry settles into the surface as the batter puffs and cooks. The blueberries warm through and burst as the pancake cooks, and you get an even distribution of fruit throughout each one for a burst of fruit in every bite. It was a small decision, but it made a big difference in the finished stack. You can make the perfect blueberry pancakes with my recipe from start to finish in just about thirty minutes!
“I tried and tried so many times with other recipes. But the first time, my pancakes are so amazing, I can’t believe I can make better pancakes than restaurants. Thank you so much. I’m your fan now.”
Kim

The Sprinkle-On-Top Method (And Why It Matters)
Almost every blueberry pancake recipe I’ve read calls for folding the blueberries into the batter before cooking. I tested both methods, and the difference was significant enough that I’ve switched to sprinkling them on top ever since.
Folded into the batter: the first time I made these pancakes I mixed them the standard way—folding fresh blueberries into pancake batter. I ended up with an uneven stack of pancakes with blueberries that weren’t evenly dispersed throughout each scoop. The blueberries don’t stay suspended in the batter, so each scoop has an uneven amount of berries that can clump together in one spot.
I did this a second time with frozen blueberries—thinking the cold may help suspend them—and I ended up with a stack of grey-purple disks. Frozen blueberries start to thaw and release juice. That juice bleeds into the surrounding batter, spreading each time you scoop for new pancakes, and it turns it from cream to a greyish purple. The pancakes still tasted good, but they didn’t look as appealing, and you didn’t get a burst of fruit in every bite.
Sprinkled on top: I switched the method to sprinkling the berries onto the batter in the skillet once each pancake was scooped. The blueberries sit on the uncooked surface for the first minute, warming through. As the pancake bubbles, the berries gently sink into the batter. When you flip, the berries finish cooking in the pan for the final minute or two, getting a slight caramelization and turning extra juicy. The batter stays cream-colored, the pancake shows visible berries throughout, and you are guaranteed fruit in every bite.
The one caveat: be sure to wipe the pan clean between batches or as needed. The berries may not fully sink into the batter, and some of the juices can caramelize onto the skillet after flipping them. This makes the pancakes delicious, but can cause future batches to stick. Hold a damp paper towel with tongs, wipe the skillet, and rebutter.
Ingredient Notes
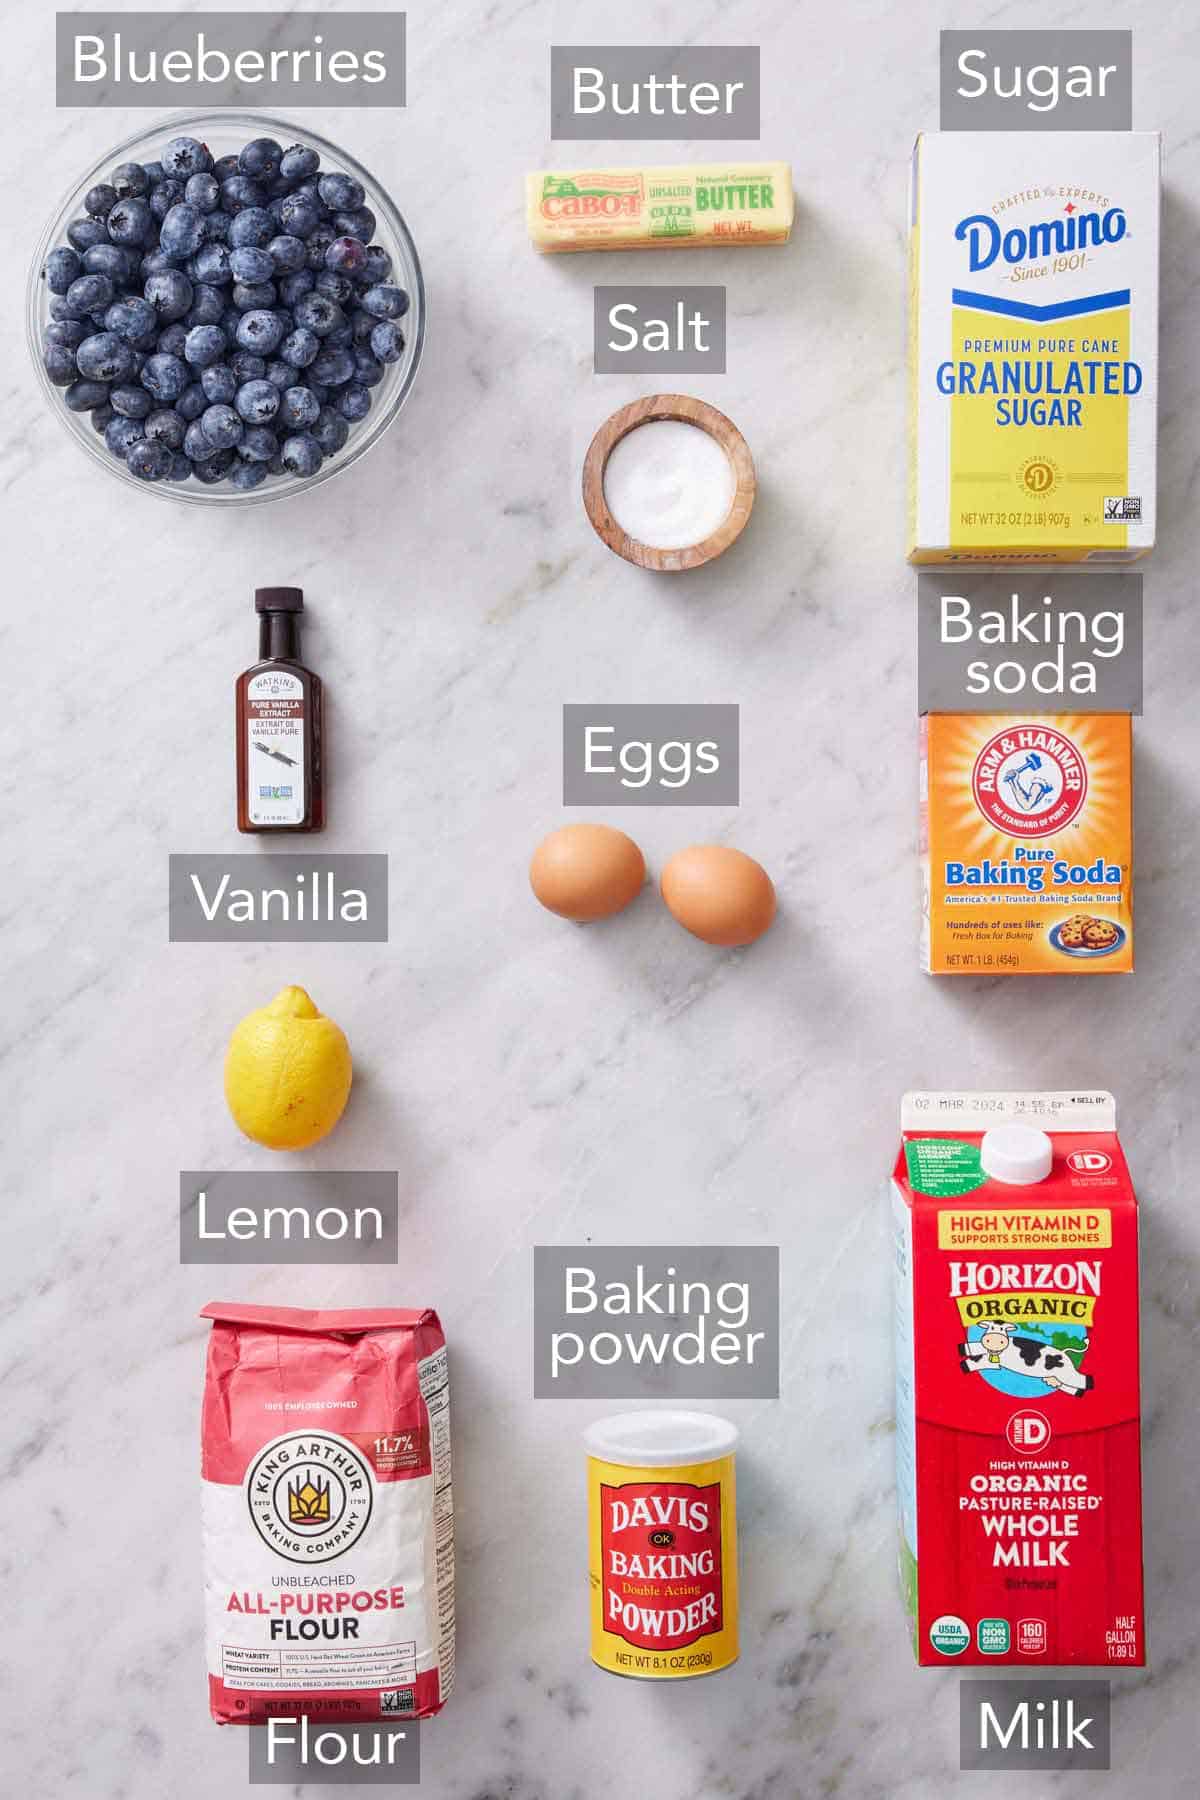
Here are the key ingredients and why you use them to make fluffy blueberry pancakes. Full quantities are in the recipe card below.
Whole milk plus lemon juice = quick buttermilk — you’ll see this faux-buttermilk trick in a lot of pancake recipes, and it works great. The lemon juice (acid) reacts with the milk’s casein proteins and produces a slightly thickened, tangy liquid that’s chemically close to real cultured buttermilk. The acid activates the baking soda for the chemical leavening that gives you tall, fluffy pancakes. White vinegar substitutes for lemon juice 1:1 if that’s what you have. You can also use real buttermilk. Swap the milk and lemon juice for an equal volume of cultured buttermilk and skip the resting step. If you want the full breakdown of buttermilk substitutions, see my guide on how to make buttermilk.
Baking powder AND baking soda — most pancake recipes use just baking powder. I use both because they do different jobs. Baking powder gives a steady, slow rise that lifts the pancake while it cooks. Baking soda needs an acid (the lemon juice and milk combo) and reacts immediately on contact, kicking the batter into a faster rise before the pancake sets. The baking soda also helps the pancakes develop a more golden exterior, which makes them more flavorful. Drop either one and you’ll notice a flatter, less tasty pancake.
Granulated sugar — pancakes get drowned in maple syrup at the table, so the batter doesn’t need much sweetness. Three tablespoons give you just enough sugar to brown nicely (sugar caramelizes at the pan’s surface and contributes to the golden color) without making the pancake itself read as overly sweet. It also enhances the flavor of the blueberries.
Unsalted butter — use unsalted so you control the saltiness. You will whisk melted butter into the batter and use additional butter to grease the pan when cooking the pancakes.
Vanilla extract — I use a bit more than most pancake recipes call for. Without vanilla, the pancakes taste flat and one-dimensional, so it’s a worthy addition in a noticeable amount.
Salt — the salt amplifies the butter, milk, and vanilla flavors in the pancake batter. The pancakes won’t taste salty or savory, but they would taste flat without the salt. Use a fine sea salt, table salt, or other fine salt.
Blueberries — fresh or frozen, both work. I use fresh when they are in season and frozen outside of summer for the best flavor. See the full discussion just below in “Fresh Blueberries vs. Frozen.”
Fresh Blueberries vs. Frozen
I have tested this recipe with both fresh and frozen berries, and it works great either way. I prefer fresh only because the pancakes cook a bit faster since the fruit isn’t as cold. But seasonally, if blueberries are out of season, I will often choose frozen. The frozen blueberries tend to have better flavor than the imported winter blueberries I get at my local grocery store.
Use frozen blueberries straight from the freezer—don’t thaw. This may feel counterintuitive, but frozen blueberries actually work better than thawed berries for a specific reason: they’re solid until the moment they hit the heat, which means they don’t bleed juice into the batter when you sprinkle them on. If you thaw frozen blueberries first, the juices bleed everywhere—into the batter, onto the pan, across the pancake—turning the pancakes grey. Thawed berries are also very soft and very wet, which means they can hinder how well the pancakes cook in the center.
The trade-off is that frozen blueberries take an extra minute or so to warm through during the cook. I leave them on the first side a bit longer before flipping, but that’s the only adjustment you need!
Wild blueberries (the small, intensely-flavored variety often sold frozen) are the ideal blueberry for pancakes if you can find them. Since they’re naturally smaller, you can fit more berries in each pancake without overloading and pack more flavor into every bite.
How to Make Blueberry Pancakes
Here are step-by-step images highlighting portions of the recipe. The full instructions and ingredient amounts are in the recipe card below.
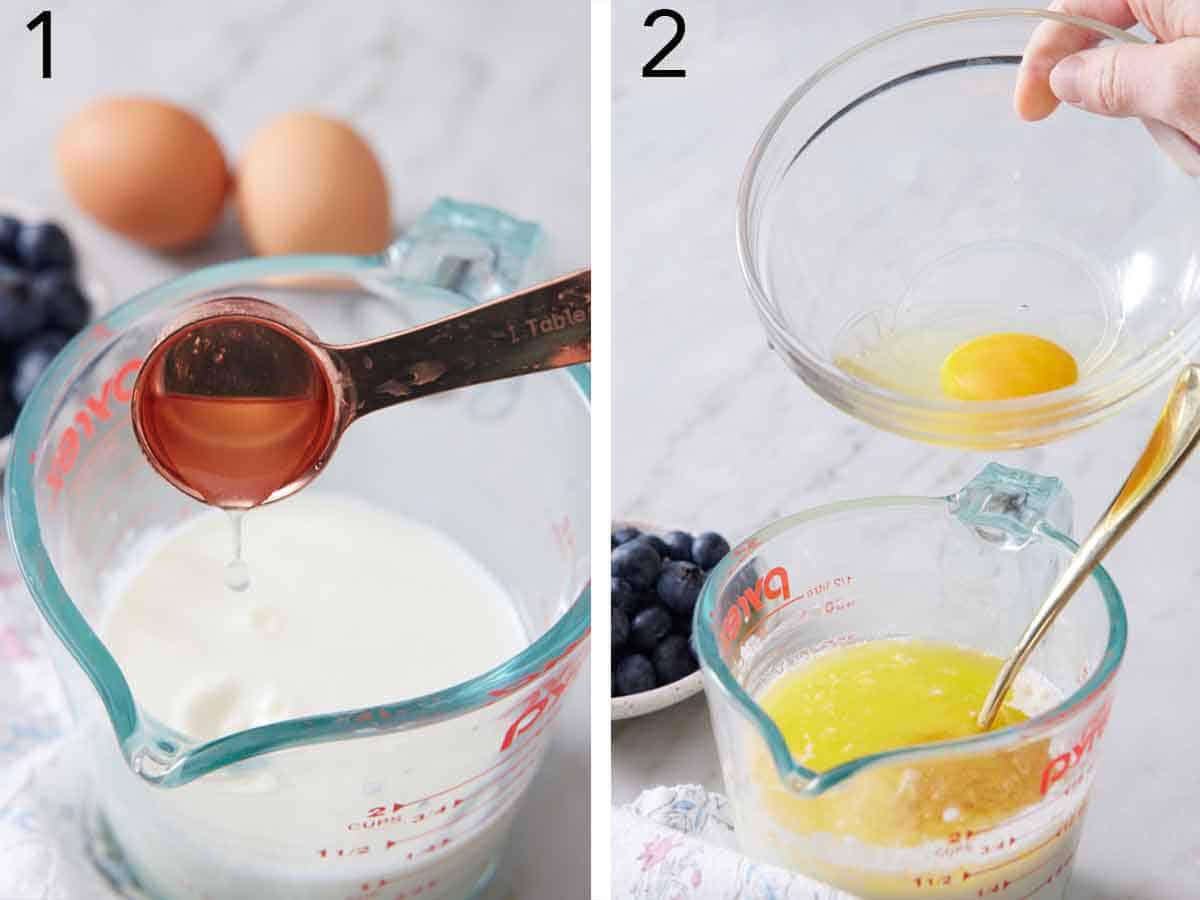
1. Make the buttermilk substitute. Whisk the milk and lemon juice together in a medium bowl or large measuring cup. Let it sit for 5 minutes. You’ll see it thicken slightly and pick up a faint curdled appearance. That’s the casein doing its work!
2. Mix the wet ingredients. Once the milk has rested, whisk in the eggs, melted butter, and vanilla to make your wet ingredient mixture. This will bind the batter together.
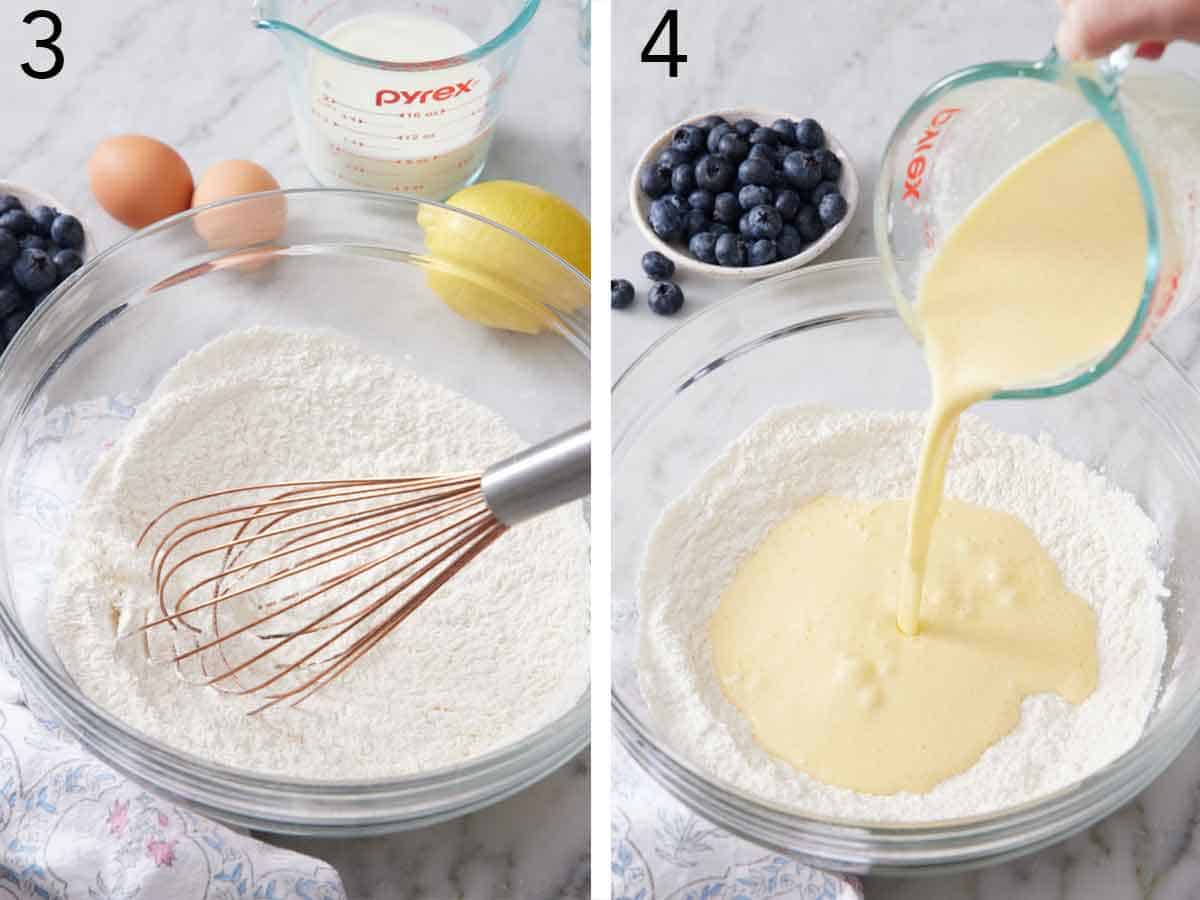
3. Whisk the dry ingredients. In a large bowl, whisk together the flour, sugar, baking powder, baking soda, and salt until fully combined. Whisking the dry ingredients separately distributes the leaveners evenly through the flour, eliminating pockets of concentrated baking powder and baking soda that can taste metallic.
4. Combine and rest the batter. Pour the wet into the dry and stir with a spatula until just combined. A few lumps are fine. If there are visible streaks of dry flour, keep going; if there are visible lumps but without dry streaks or pockets, stop. Continuing to mix until smooth will overdevelop the gluten and make your pancakes dense or rubbery. Set the bowl aside for 5-10 minutes while the pan heats. The flour finishes hydrating during the rest, the gluten relaxes, and the leaveners get a head start on their chemical reaction. The pancakes will be visibly taller and fluffier after the short rest than if you cooked the batter immediately after mixing.
5. Heat the pan. Place a large skillet or well-seasoned cast-iron skillet or griddle over medium heat. Let it preheat for at least 3-5 minutes. Sprinkle a few drops of water on the pan. If they slowly dance around and evaporate within 10 seconds, the pan is ready. If they immediately spit and evaporate very fast, it’s too hot, so turn it down. If they just sit there, it is too cold, so continue letting the pan warm up. Lightly grease the pan with butter and swirl to coat.
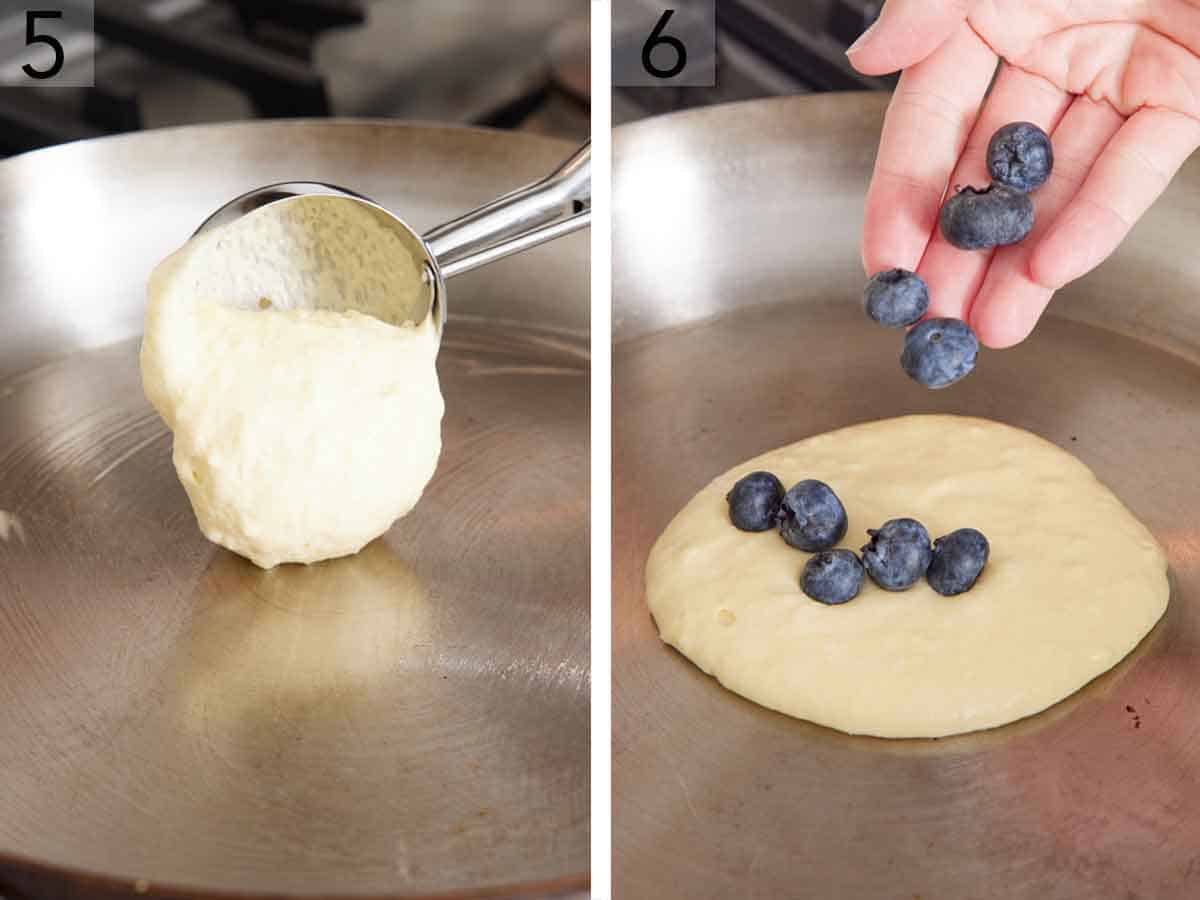
6. Cook the pancakes. Scoop batter into the pan using a measuring cup or spring-loaded scoop for even pancakes. The batter should sit up slightly (it’s a thick batter) rather than pooling flat and thin. Leave at least an inch between pancakes for room to flip. Immediately sprinkle 6-8 blueberries across the surface of each pancake. Flip when bubbles form and the edges set. After about 3-4 minutes, you’ll see bubbles forming across the surface of each pancake and the edges turning matte and dry. The bottom should be golden brown, not dark. Slip a thin spatula under and peek. (Adjust the heat if needed.) Flip carefully and cook for another 1-2 minutes until the second side is golden and the centers feel springy when you press the top. Wipe the pan with a damp paper towel between batches if any blueberry juice has caramelized on the surface, then add a fresh pat of butter and continue.
The Heat Problem (And the Fix)
One of the biggest challenges with cooking pancakes is controlling the skillet temperature. Here are the main issues and how to address them:
Pancakes are burning on the outside before cooking through: the pan is too hot. The exterior sets quickly, the sugars caramelize fast, and the inside hasn’t had time to cook. You’ll see the bottom go from gold to dark brown in about a minute, and the bubbles haven’t started yet on top. Drop the heat to medium-low and give the pan a minute or two to cool before the next batch.
Pancakes are pale and sad-looking: the pan is too cool. The batter sets without the Maillard browning that gives pancakes their characteristic golden crust. You’ll wait 5-6 minutes for bubbles to appear instead of the normal 3-4 minutes. Turn the heat up gradually. Don’t crank it too high all at once, or you’ll overshoot and start burning them.
The right pan temperature is roughly 350-375°F. If you have an infrared thermometer, point it at the pan surface. If you don’t, the water drop test is reliable: small drops of water sprinkled on the pan should dance on the surface and evaporate in about 10 seconds. Also, check your butter when you add it. If it browns instantly, the pan is too hot; if it just melts and pools without bubbling, it’s too cool. It should melt and turn foamy, but not brown.
The most common mistake is starting on medium-high to “preheat” and then never adjusting down. The pan continues heating throughout the first batch, and by pancake round number three, you’re far too hot and burning your batch. Be patient and start at medium, and adjust down rather than up if you see scorching.
Why Your Pancakes Aren’t Fluffy
If your pancakes are coming out flat and dense, three things are likely going wrong, and they’re easy to diagnose.
Over-mixing. This is by far the most common cause. Most pancake recipe failures trace back to mixing the batter until it is smooth. The moment you begin stirring wheat flour with liquids, you develop gluten—too much gluten is what makes pancakes tough and rubbery instead of tender. Whisking the batter until smooth overdevelops the gluten in the flour. Stop stirring the moment the dry flour disappears. Visible lumps in the batter are a feature, not a bug. Those little pockets will dissolve as the pancakes cook, leaving holes that contribute to the fluffy texture.
Old leaveners. Baking powder and baking soda don’t last forever. Baking powder loses potency 6-12 months after opening; baking soda lasts longer in a sealed box, but can taste off after a year of pantry exposure (it absorbs odors). Quick test: drop ½ teaspoon of baking powder into ¼ cup of hot water—it should bubble vigorously. Drop ½ teaspoon of baking soda into a tablespoon of vinegar—it should do the same. No bubbles? Then it’s time to replace it.
Skipping the batter rest. The 5-10 minute rest after combining wet and dry isn’t optional for fluff. During that rest, the flour fully hydrates, the gluten relaxes (recovering from the stirring), and the leaveners begin their chemical reaction. Pancakes cooked from rested batter rise visibly more during the cook than pancakes from fresh-mixed batter. This rest time is naturally built into my recipe by starting the pan preheat once the batter is done. This way, the batter has sufficient time to sit as you wait for your pan to come up to temp.

Pro Tips From My Kitchen
Resting the batter is the biggest move for fluffy pancakes. I cannot say this enough. This is the step many pancake recipes skip, or don’t highlight as an important part of the process. Five to ten minutes between mixing and cooking hydrates the flour. The batter visibly thickens during the rest, the leaveners start to react, making the batter bubbly, and the pancakes that come from rested batter are noticeably taller. Just let the bowl sit on the counter while your pan preheats—it’s that easy!
Wipe the pan between batches. Some blueberry juice will land on the pan when you flip the pancakes. After every two or three pancakes, take 5 seconds to wipe the pan with a folded, damp paper towel before adding fresh butter. Otherwise, the next batch browns over a layer of burned fruit that can stick and tastes bitter.
Use a ¼ cup measure for consistency. Eyeballing each scoop of batter gives you wildly different pancake sizes that all need different cook times. A ¼ cup scoop produces pancakes about 4 inches across that finish at the same time on each side. If you want bigger pancakes, ⅓ cup works, just add 30-60 seconds to each side.
Hold finished pancakes at 200°F. A wire rack in a low oven keeps the pancakes warm and crisp without continuing to cook them. Don’t stack them on a covered plate—they steam against each other and go soggy. Transfer the cooked pancakes to the oven right after cooking them, while you finish the rest of the batches.
The first pancake is always the test pancake. Pan temperature, batter consistency, sprinkle distribution—the first one will be slightly off. Eat it immediately, adjust the heat or the blueberry sprinkle count if needed, and the rest of the batch will be perfect!
Add lemon zest for blueberry-lemon pancakes. Grate the zest of one lemon into the wet ingredients. Lemon and blueberry are a perfect flavor pairing! See my blueberry lemon cake and blueberry scones for the same combination in different formats.
Blueberry Pancakes Recipe
Equipment
- Large skillet
- Mixing Bowls
Ingredients
- 1½ cups all-purpose flour (180g)
- 3 tablespoons granulated sugar
- 2 teaspoons baking powder
- ¼ teaspoon baking soda
- ¾ teaspoon salt
- 1 cup whole milk (300ml)
- 1 tablespoon fresh lemon juice
- 2 large eggs
- 4 tablespoons unsalted butter melted plus more for cooking (56g)
- 2 teaspoons vanilla extract
- 1 cup fresh or frozen blueberries (158g)
Instructions
- In a medium bowl, whisk together the milk and lemon juice, and let it sit for 5 minutes. Add the eggs, melted butter, and vanilla extract and whisk until well combined.
- In a large mixing bowl, whisk together the flour, sugar, baking powder, baking soda, and salt. Pour the wet mixture into the dry mixture and stir together until combined. (A few lumps in the batter are okay and actually result in fluffier pancakes, so don’t try to stir it until smooth.)
- Heat a large nonstick pan or griddle over medium heat. Lightly grease with butter. Working in batches, drop the pancake batter into the hot skillet using about ¼ cup per pancake. Sprinkle the top of each pancake with blueberries. Cook until the edges are set and lots of bubbles have formed on top of each pancake, 3 to 4 minutes.
- Carefully flip and continue cooking until golden brown, and the centers feel springy when you press on them, 1 to 2 minutes. Transfer to a plate and keep warm while you cook the rest of the pancakes. Butter the skillet for each new batch. (You may have to occasionally wipe the skillet clean from caramelized blueberry juices.) Serve hot with butter and maple syrup.
Notes
- Don’t over-mix the batter. A few lumps in the batter are okay, and actually result in fluffier pancakes, so don’t try to stir the batter until it’s smooth. Over-mixing will yield dense, tough blueberry pancakes.
- To prevent discolored pancakes: Wipe the skillet clean between batches to remove caramelized blueberry juices from the pan. If using frozen blueberries, do not thaw them beforehand. The juices will bleed into the batter, turning the pancakes a strange color.
- To prevent sticking: Butter the skillet between batches to prevent the pancakes from sticking. I also recommend using a large skillet that is nonstick or a well-seasoned cast-iron skillet.
- For blueberry buttermilk pancakes: Swap the whole milk out for an equal amount of buttermilk, and leave out the lemon juice.
- For extra flavor, add the grated lemon zest of 1 lemon or a splash of almond extract to the wet ingredients before mixing the batter.
Nutrition
Have you tried this recipe? Tag me today!
Mention @preppykitchen and tag #preppykitchen!
Frequently Asked Questions
Watch for two signs: bubbles forming across the surface of the pancake and in the center (not just at the edges), and the edges going from glossy to matte. Slip a thin spatula under and peek at the bottom—it should be golden brown, not dark or black. Then, flip carefully and cook for another 1-2 minutes until springy in the center. The whole timing usually runs 3-4 minutes on the first side and 1-2 minutes on the second.
I don’t recommend it. Pancake batter relies on the chemical leaveners (baking powder and baking soda) reacting fresh. If you let the batter sit overnight, the baking soda will be spent before the pancakes hit the pan, leaving you with flatter, denser pancakes. If you want to prep ahead, mix the dry ingredients together in one bowl. Mix the wet ingredients in the morning and combine.
Refrigerate leftover pancakes in an airtight container for up to 4 days. To reheat, the toaster oven or air fryer at 300°F for 3-4 minutes gives you the best texture as the exterior crisps back up. A microwave at 50% power in 20-second bursts works in a rush, but the pancakes go soft and can turn chewy.
Yes, and they freeze beautifully. Cool the pancakes completely on a wire rack first, then arrange them in a single layer on a parchment-lined sheet pan and freeze for an hour until solid. Transfer to a freezer-safe zip-top bag with parchment between any stacked pancakes. They keep for up to 2 months. Reheat from frozen in a toaster oven or air fryer at 350°F for 5-6 minutes so the crisp edges come back. The microwave also works here if you’re in a hurry, but the pancakes won’t be crisp.
More Recipes To Try
If you want more delicious breakfast recipes, try one of these next:
- Pancake Recipe — the fluffiest stack of classic pancakes
- Banana Pancakes — another fruit-filled pancake favorite that our family loves
- Buttermilk Pancakes — like this recipe without the fruit
- Blueberry Muffins — another blueberry-packed breakfast classic
- Belgian Waffles — a crispy cousin to fluffy pancakes
If you’ve tried this blueberry pancake recipe, then don’t forget to rate it and let me know how you got on in the comments below. I love hearing from you!


