
This post may contain affiliate links. Please read our disclosure policy.


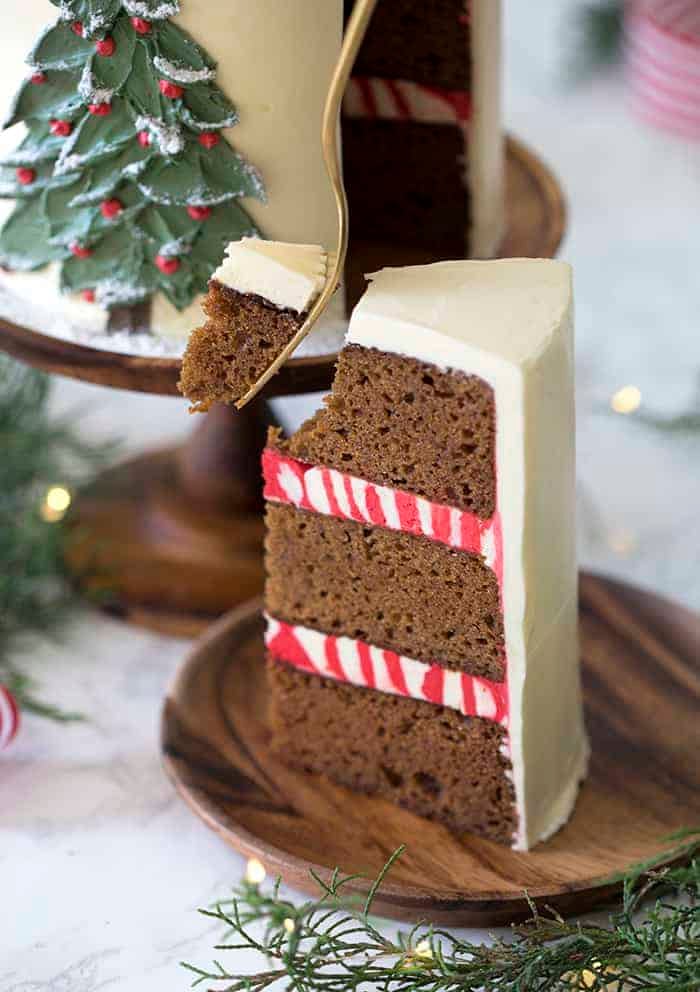
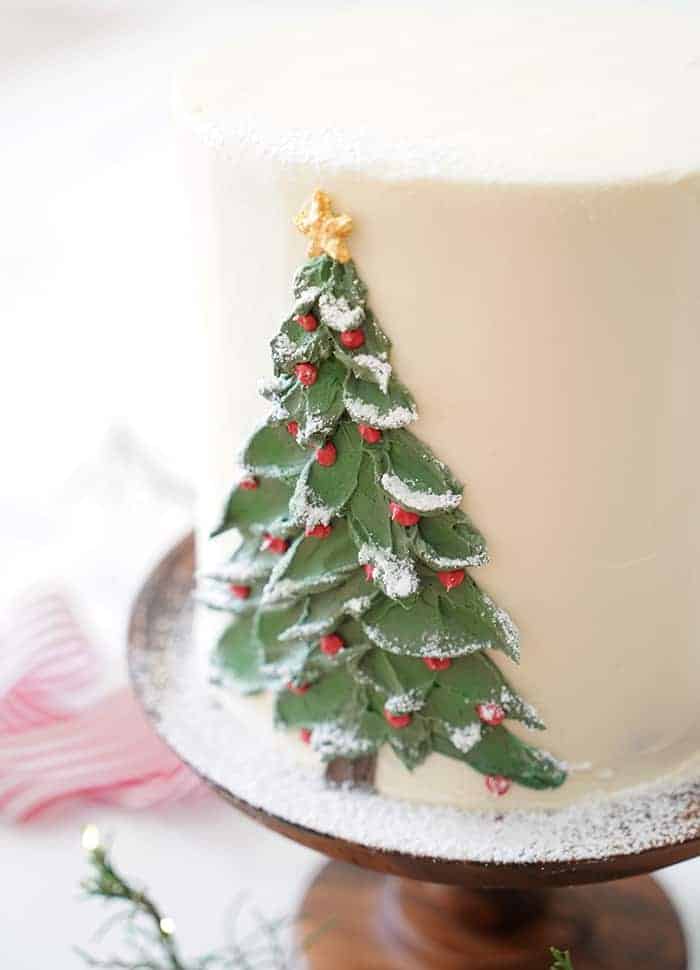
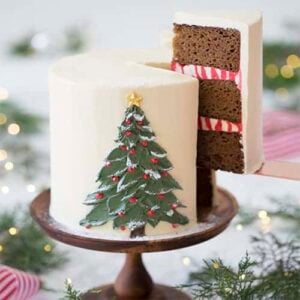
A moist and richly spiced gingerbread Christmas cake filled with and covered in silky Italian buttercream, faced with a beautiful buttercream Christmas tree.
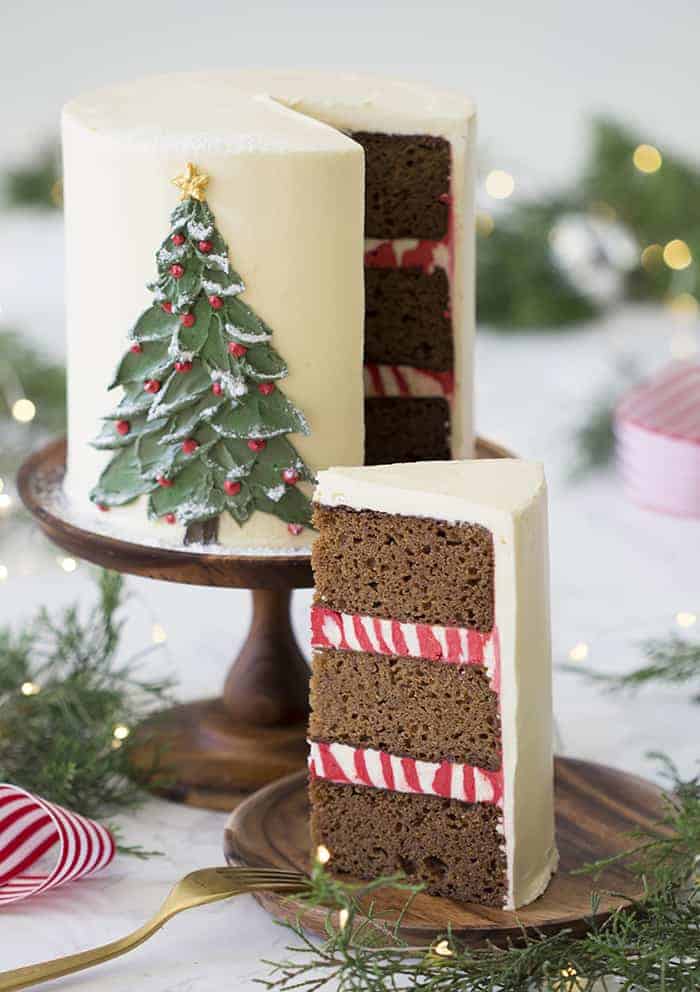
This Christmas tree cake is fluffy, moist and has ALL the holiday spices you could ever desire. I wrapped it in the smoothest buttercream ever and added a whimsical red and white swirl inside. I spiced the red buttercream but you could add spices to the other batches too!
How to Make a Christmas Cake
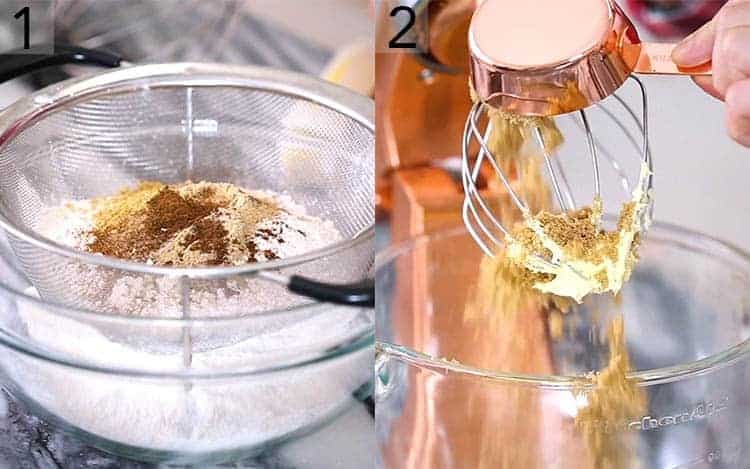
1. Preheat oven to 350F. Butter and flour three 6″ cake pans. Use damp baking strips for even layers. You may have some leftover batter so prepare a cupcake tin with cupcake papers. Combine boiling water and baking soda in a medium bowl. Sift together the flour, baking powder, ground ginger, cinnamon, cloves, nutmeg, and salt into a large bowl.
2. Using a stand mixer fitted with a whisk attachment beat the butter on high until light and fluffy. Add the sugar and beat for about two minutes.
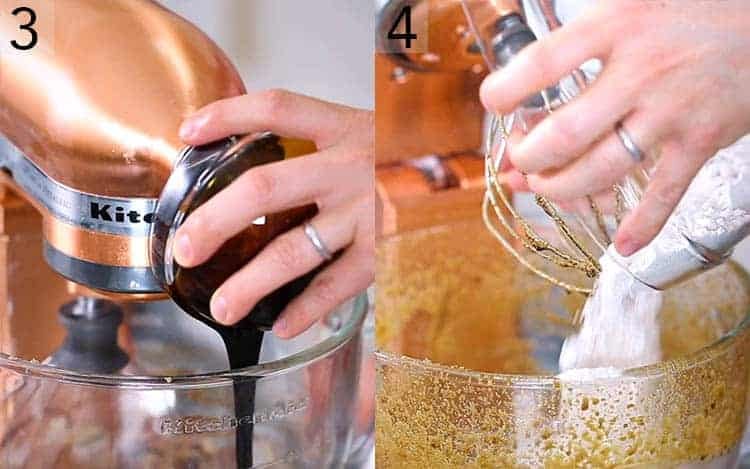
3. Add the molasses, ginger, baking soda mixture to the bowl and beat on medium for a bit then scrape the bowl down and beat again until relatively uniform.
4. Add the flour mixture. Beat in the eggs. Divide the batter evenly between the three pans and bake from about 30-35. You’ll have some left over batter. Use it to make a few cupcakes and bake them for about 15 – 20 minutes. Allow cake layers to cool in the pans for about 10 minutes then turn out onto wire racks to cool completely.
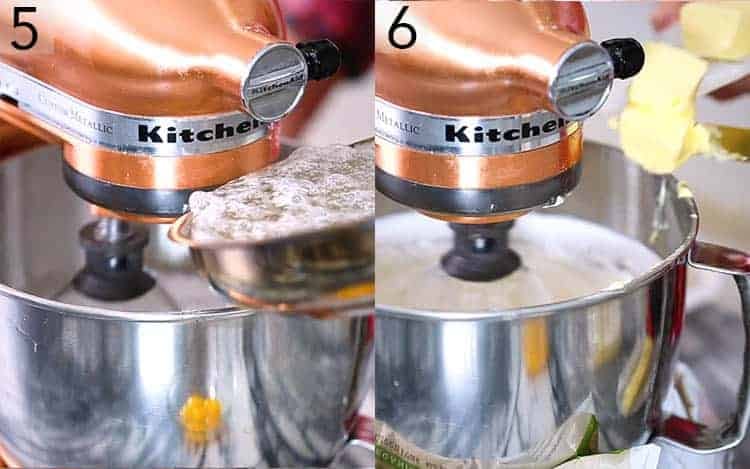
5. Beat the egg whites and ½ cup of sugar until soft peaks form. In a medium saucepan add the remaining 1 cup sugar and 1/3 cup water then place on low heat. Stir until sugar melts and becomes clear. Maintain at medium high heat until temperature reads 235-240F.
6. Drizzle the sugar into the mixer immediately. Run mixer until merengue is cool/tepid. Add room temperature butter into running mixer one tablespoon piece at a time. Add the salt and vanilla. Beat until butter is combined and mixture has reached a silky consistency. Divide buttercream into 3 bowls (largest batch for the white buttercream, smaller amount for the red and smallest for the green.) Use red food coloring to get a desired deep red color for the swirl. Add spices, mix until combined, transfer to a piping bag and snip off the tip.
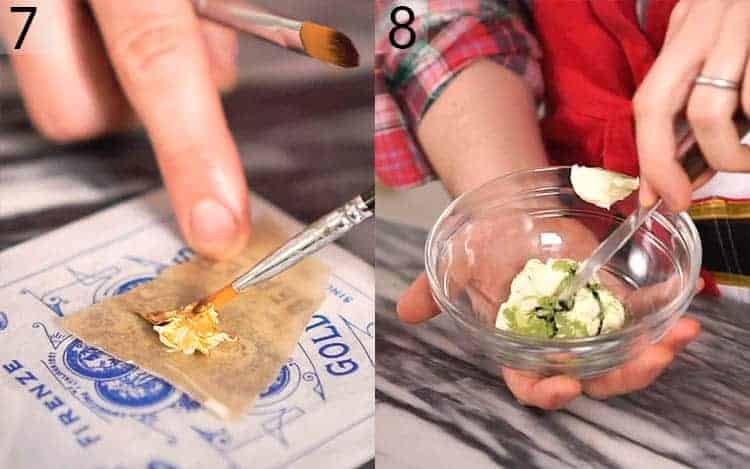
7. Smear on a layer of buttercream to a piece of parchment paper and freeze for about 5-10 minutes. Use an sharp knife to cut out a star shape. Remove the excess and freeze again. Add gold leaf to the star and transfer back to the freezer to store until ready to use.
8. Use the matcha powder, as well as black and brown gel food coloring to get a deep green tree color. Dye a tablespoon of the buttercream with cocoa powder or brown food coloring for the stump of the tree.
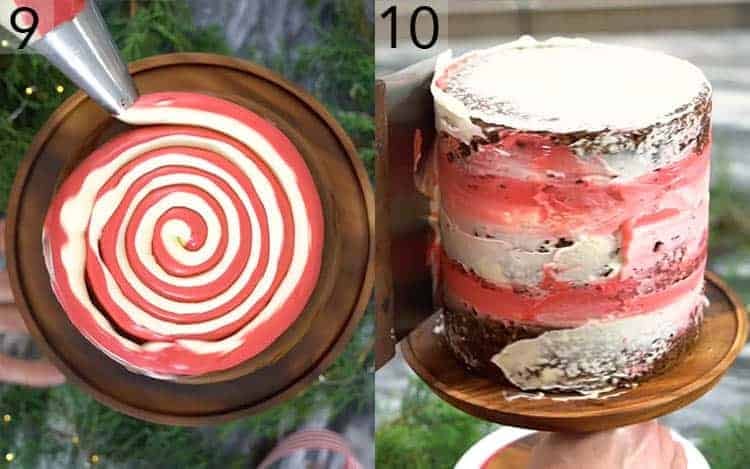
9. Transfer some plain white buttercream to a piping bag and snip off the tip. Add the red and white to a piping bag and snip off the tip. Place both bags inside of a third bag fitted with a large round tip or with the tip snipped off. Pipe a red and white swirl between each layer as you assemble the cake.
10. Use the leftover red and white buttercream to pipe a thin layer onto the cake and then smooth out. Chill the cake to until the frosting sets before adding the final layer.
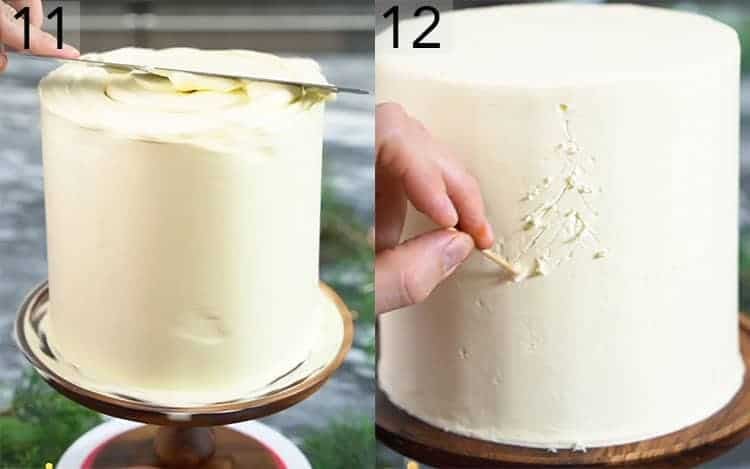
11. Cover in plain white buttercream and smooth with an offset spatula and bench scraper. Chill the cake until the frosting hardens.
12. Sketch out a tree using a toothpick or skewer.
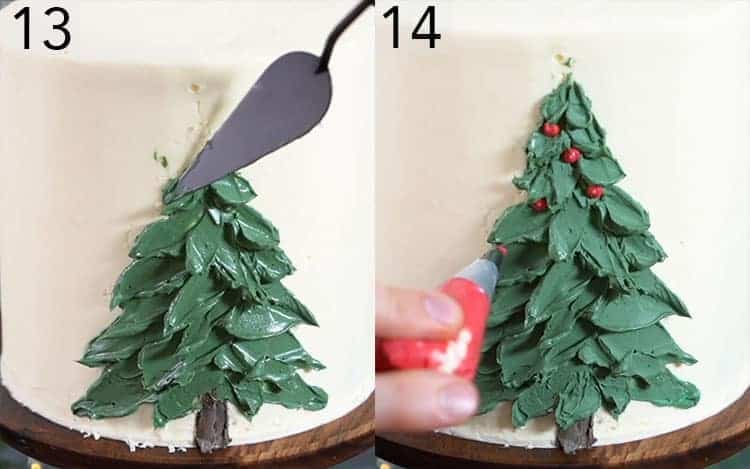
13. Use a palette knife to add layers of green to create a tree. Then chill the cake until the frosting hardens.
14. Transfer the rest of the red food coloring to a piping bag fitted with a small round tip. Pipe red ornaments on the tree. Dust with confectioners sugar and apply the buttercream star using a small dollop of buttercream as glue.
Frequently Asked Questions
How Do You Paint With Buttercream?
- Using a pallet knife to apply buttercream and create an image with depth and character is actually pretty easy.
- Chill the cake first. It’s much easier to work on a stable surface.
- Draw a quick sketch of your tree using a toothpick or skewer to serve as a guide.
- Practice on a plate first so you can get used to how much buttercream to add you your knife and how to swipe it on to simulate the look of pine tree branches.
- If you mess up it’s pretty easy to remove mistakes with a small knife and start over.
- remember to apply the buttercream with the tip of your knife then swipe up to create that depth. there’s a flick of the wrist involved.
How do you decorate a cake?
If you find cake decorating to be a bit intimidating then check out my How to Decorate a Cake post, it has lots of helpful tips and a full how to video.
When should you make your Christmas cake?
I suggest making the layers and buttercream a day or two ahead, wrap well and keep in the fridge, then assemble the day before or day of. Allow your cake to come to room temperature before serving and enjoy!
DON’T let Italian meringue buttercream intimidate you!! It’s so much easier than you think! If you haven’t made it before check out my How to Make Italian Buttercream post. It has a FULL how to video and should answer all of your questions.
Pro Tips for the Best Christmas Cake
- Measure your flour correctly! Adding too much flour to the recipe is the most common mistake. The best, and easiest way to measure flour is by using a scale. If you don’t have one then fluff your flour with a spoon, sprinkle it into your measuring cup, and use a knife to level it off.
- If you’re not using 6-inch pans, double the recipe for 8-inch pans or triple the recipe for 9-inch pans.
- I chose some nice vanilla extract to flavor the buttercream this time but you could add the minced zest of a lemon in for a nice bit of zing or try using a little peppermint extract for a some holiday flair!
- To get FLAT layers that are moist inside and out try using cake strips! You can buy a set on the shop page or make your own from foil and paper towels at home. I made a whole blog post on it so check it out if you’re interested!
- If you don’t want to make Italian buttercream you can use the American variety. I just prefer the smoothness and taste of the Italian variety. I know it’s a bit more work than some people are used to though.
- Not a fan of gingerbread? Sub the cake recipe out for my Ultimate Chocolate Cake! You will halve the recipe for 6 inch pans. You can add some cinnamon and other spices to make it more holiday-flavored if desired.
If you’ve tried this Christmas cake then don’t forget to rate the recipe and let me know how you got on in the comments below, I love hearing from you!
Christmas Cake
Ingredients
INGREDIENTS:
For the Cake
- 2 cups all-purpose flour 240g
- 3/4 cup boiling water 177ml
- 1 tbsp baking soda
- 1 tbsp baking powder
- 1 tbsp ground ginger
- 1/2 cup butter 113g, unsalted, room temperature
- 2 1/2 tsp ground cinnamon
- 3/4 tsp ground cloves
- 3/4 tsp nutmeg
- 1/4 tsp allspice
- 1/2 tsp cardamom
- 3/4 tsp kosher salt
- 1/2 cup packed light-brown sugar 100g
- 2/3 cup unsulfured molasses 157ml
- 1 1/2 tbsp ginger grated (Optional!)
- 2 eggs medium room temperature
For the Italian Buttercream
- 6 egg whites room temperature
- 2 1/4 cups sugar 425g, divided
- 2/3 cup water 60ml
- 1 tsp cardamom
- 1 tsp cinnamon
- 1/2 tsp all-spice
- 1/4 tsp ground cloves
- 2 cups unsalted butter 454g
- Red and black food coloring
- Matcha powder optional
For the Assembly
- 1 sheet edible gold leaf
- 2 tbsp confectioners sugar for dusting
Instructions
INSTRUCTIONS:
For the Cake:
- Preheat oven to 350F. Butter and flour three 6" cake pans. Use damp baking strips for even layers. You may have some leftover batter so prepare a cupcake tin with cupcake papers.
- Combine boiling water and baking soda in a medium bowl.
- Sift together the flour, baking powder, ground ginger, cinnamon, cloves, nutmeg, and salt into a large bowl.
- Using a standing mixer with a whisk attachment beat the butter on high until light and fluffy. Add the sugar and beat for about two minutes. Add the molasses, ginger, baking soda mixture, and flour mixture. Beat in the eggs.
- Divide the batter evenly between the three pans and bake from about 30-35. You’ll have some left over batter. Use it to make a few cupcakes and bake them for about 15 - 20 minutes.
- Allow cake layers to cool in the pans for about 10 minutes then turn out onto wire racks to cool completely.
For the Italian Buttercream:
- Beat the egg whites until foamy then add in a 1/4 tsp cream or tartar and slowly add ½ cup of sugar while the mixer is running. Increase speed to medium-high and beat until soft peaks form.
- In a medium saucepan add the remaining 1 3/4 cup sugar and 1/2 cup water then place on low heat.
- Stir until sugar melts and becomes clear.
- Maintain at medium high heat until temperature reads 235-240F.
- Drizzle the sugar into the mixer immediately.
- Run mixer until merengue is cool/tepid.
- Add room temperature butter into running mixer one tablespoon piece at a time.
- Add the salt and vanilla if using
- Beat until butter is combined and mixture has reached a silky consistency.
- Divide buttercream into three bowls. one for the white, one smaller batch for the red swirl and the smallest batch for the green tree
- Use red food coloring to get a desired deep red color for the swirl. Add spices, mix until combined, transfer to a piping bag and snip off the tip.
- Use the matcha powder, black and brown to get a deep green tree color. Dye some with cocoa powder or brown food coloring for the stump of the christmas tree.
For the Assembly:
- Transfer some plain white buttercream to a piping bag and snip off the tip. Add the red and white to a piping bag and snip off the tip.
- Pipe a red and white swirl between each layer.
- Cover in plain white buttercream and smooth with an offset spatula and bench scraper.
- Use a palette knife to add layers of green to create a christmas tree.
- Transfer the rest of the red food coloring to a piping bag fitted with a small round tip.
- Pipe red ornaments on the tree.
- Schmear on a layer of buttercream to a piece of parchment paper and freeze for about 5-10 minutes.
- Use an exacto knife to cut out a star shape. Free again.
- Add gold leaf to the star and transfer to the top of the tree.
- Dust with confectioners sugar.
Notes
How Do You Paint With Buttercream?
- Using a pallet knife to apply buttercream and create an image with depth and character is actually pretty easy.
- Chill the cake first. It's much easier to work on a stable surface.
- Draw a quick sketch of your tree using a toothpick or skewer to serve as a guide.
- Practice on a plate first so you can get used to how much buttercream to add you your knife and how to swipe it on to simulate the look of pine tree branches.
- If you mess up it's pretty easy to remove mistakes with a small knife and start over.
- remember to apply the buttercream with the tip of your knife then swipe up to create that depth. there's a flick of the wrist involved.
Nutrition
Have you tried this recipe? Tag me today!
Mention @preppykitchen and tag #preppykitchen!


