
This post may contain affiliate links. Please read our disclosure policy.


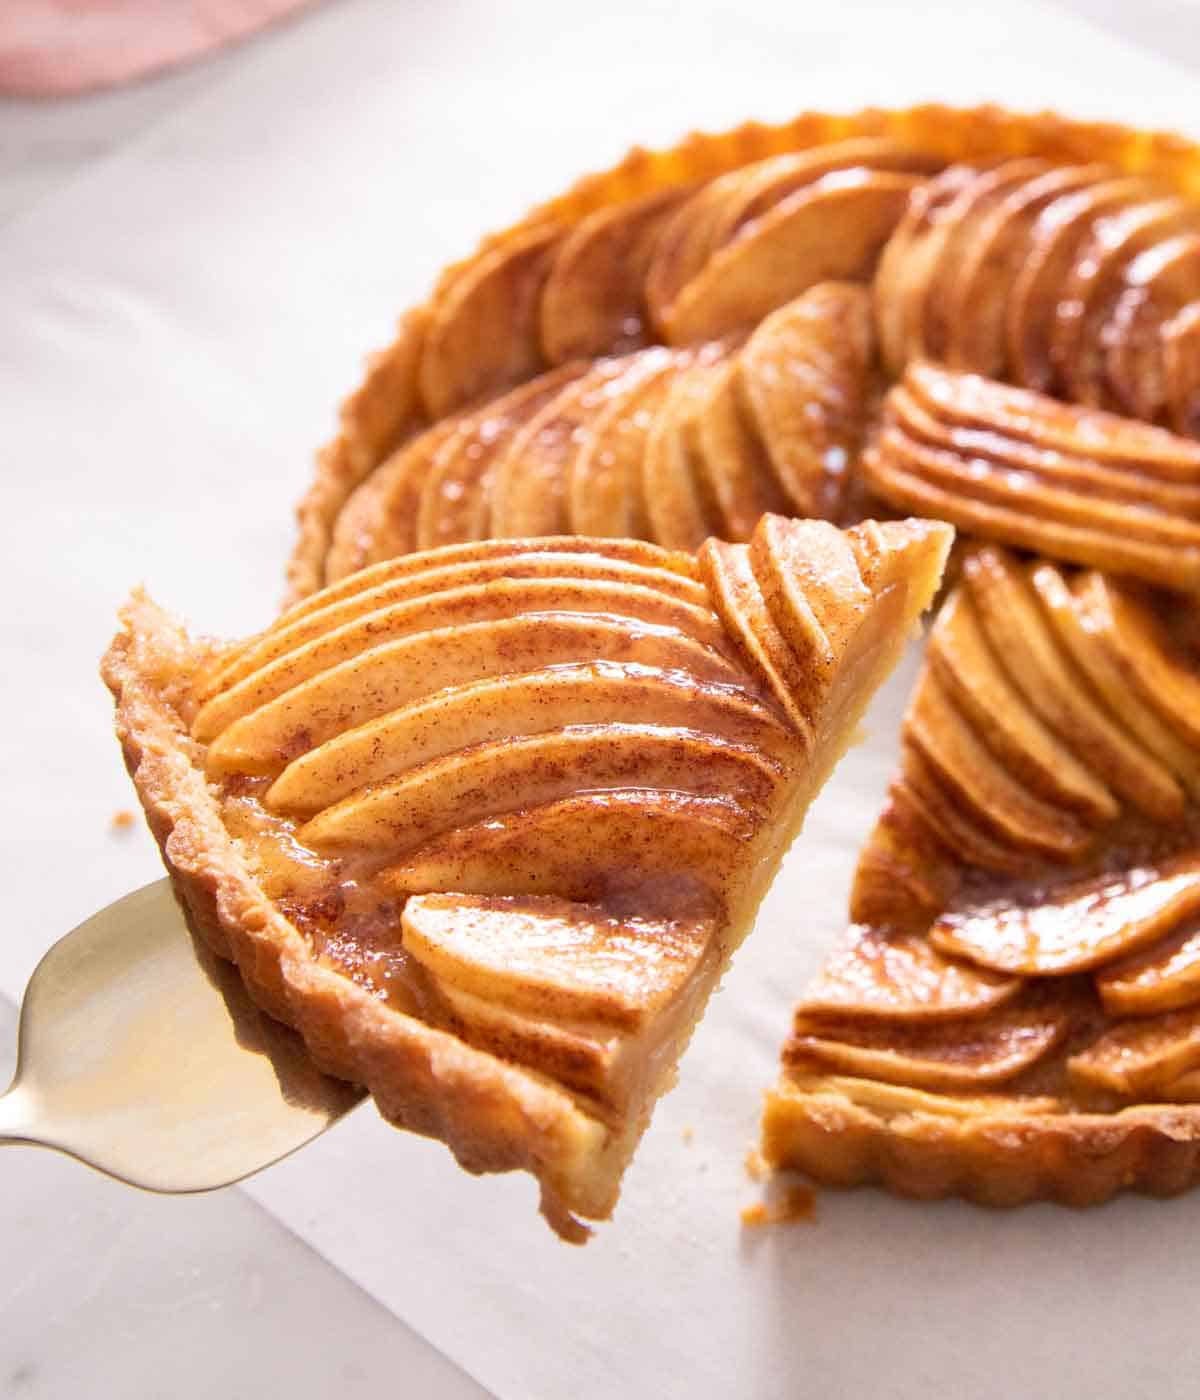
This beautiful Apple Tart tastes as good as it looks! Made with freshly sliced apples and a homemade crust that’s flaky and buttery, this elegant apple tart is a classic dessert. It’s so simple yet so delicious!

This apple tart is full of fall flavors, thanks to the apples and cinnamon. It may look complicated due to the shingling of the apple slices, but it’s surprisingly easy, but that’ll be our secret as you bring out this dessert to impress your guests. This apple tart is my go-to recipe whenever I need something easy but fancy-looking. The crust comes together quickly with a food processor, and the apples don’t require a ton of prep work. You can even prepare the tart crust ahead of time.
It’s a tart that’s perfect for any occasion, especially for when there’s an abundance of apples. Went apple picking and need more delicious apple recipes? Try making my Apple Pie Recipe or my Fried Apples!
WHAT YOU NEED TO MAKE THIS RECIPE
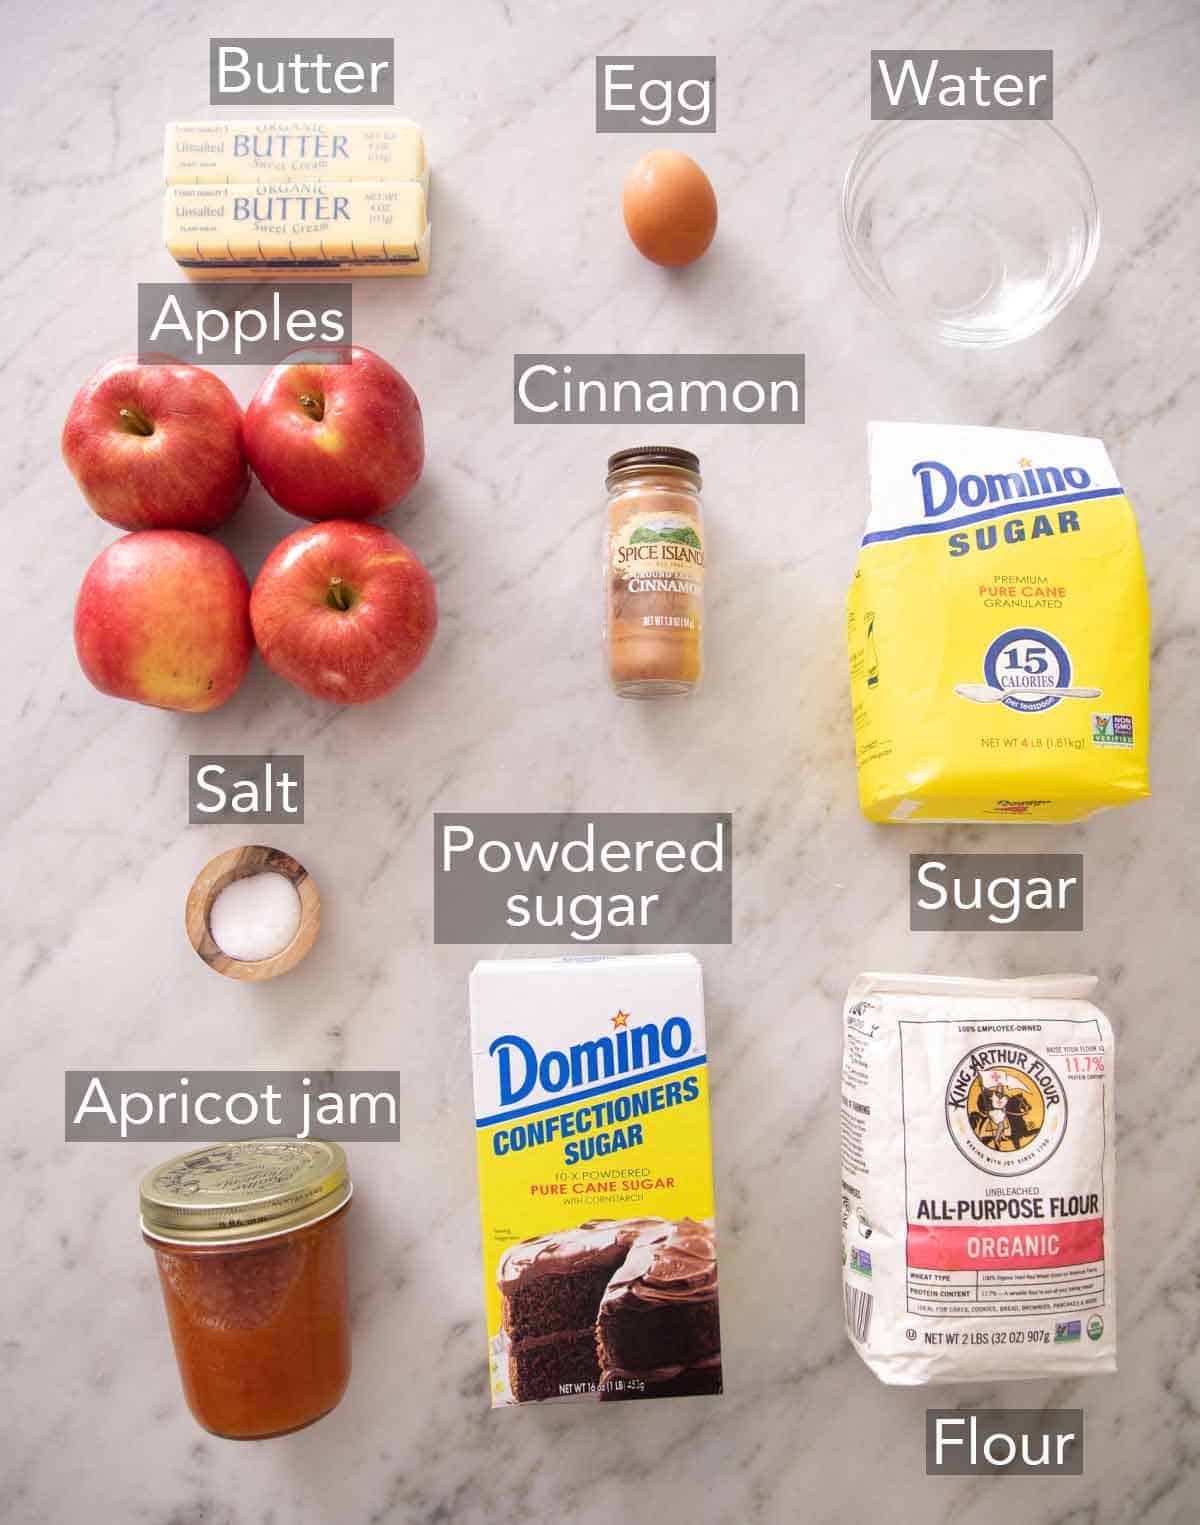
Butter — you need unsalted butter for the apple tart’s crust and filling. Make sure your butter is super cold for the crust so the butter can melt inside of the pastry crust as they bake. The steam that forms inside your crust as the butter melts is what makes it flakey.
Apples — you want to get apples that will hold up when you bake them, as some types can get mushy or grainy in the oven. The best apples to bake with are Granny Smith, Honeycrisp, or Pink Lady.
Sugar — don’t try to cut the sugar for this apple tart recipe. The sugar, when melted, helps bind the apples together on the top of your tart.
Apricot jam — the jam gives the tart a beautiful glossy finish that rivals the tarts you’ll find at a French bakery.
HOW TO MAKE AN APPLE TART
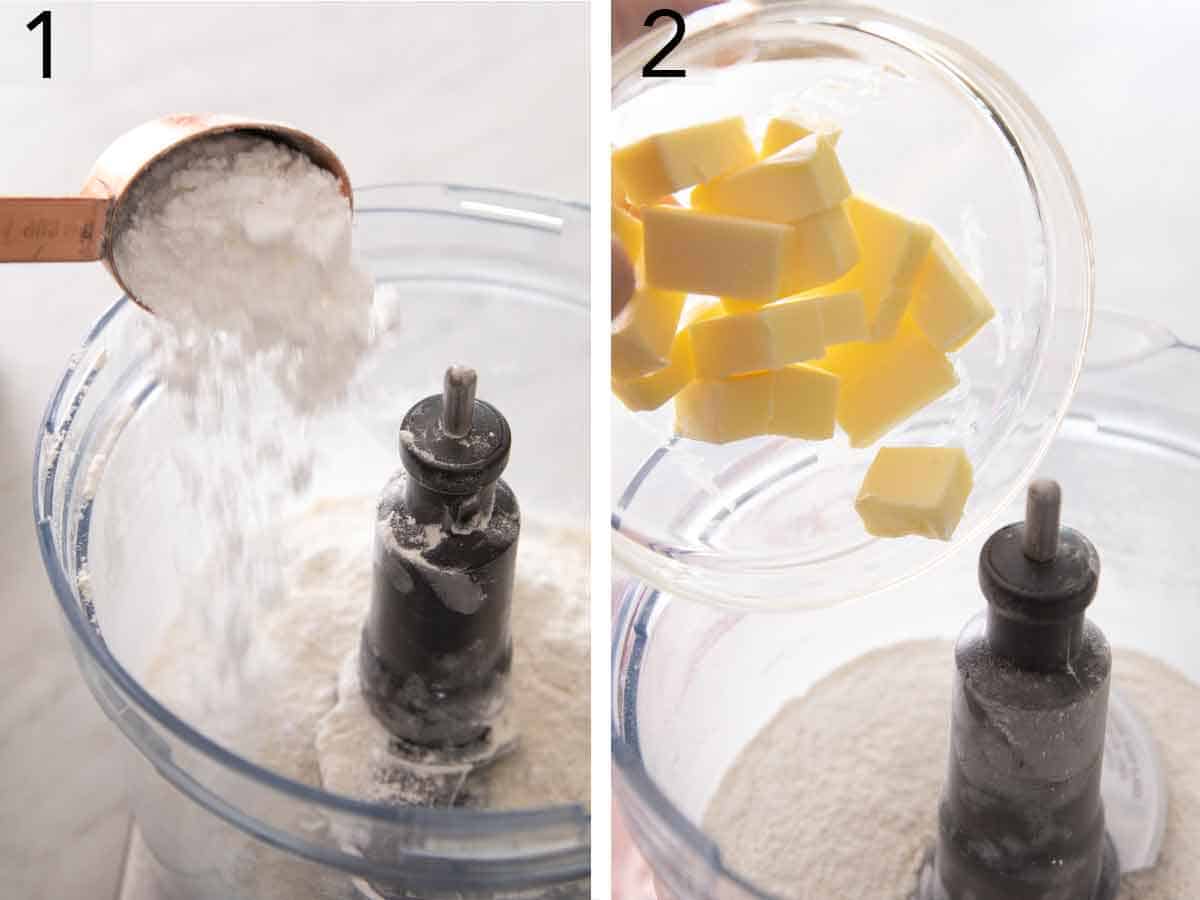
1. In a food processor, add flour, sugar, and salt. Pulse a few times to combine.
2. To the food processor, add the butter. Pulse 4 to 5 times or until the butter is in pea-sized pieces.
3. Whisk the egg yolk and 2 tablespoons of water together. While pulsing, slowly add the wet mixture into the food processor. Pulse until a crumbly dough forms and is wet enough to hold together well when squeezed.
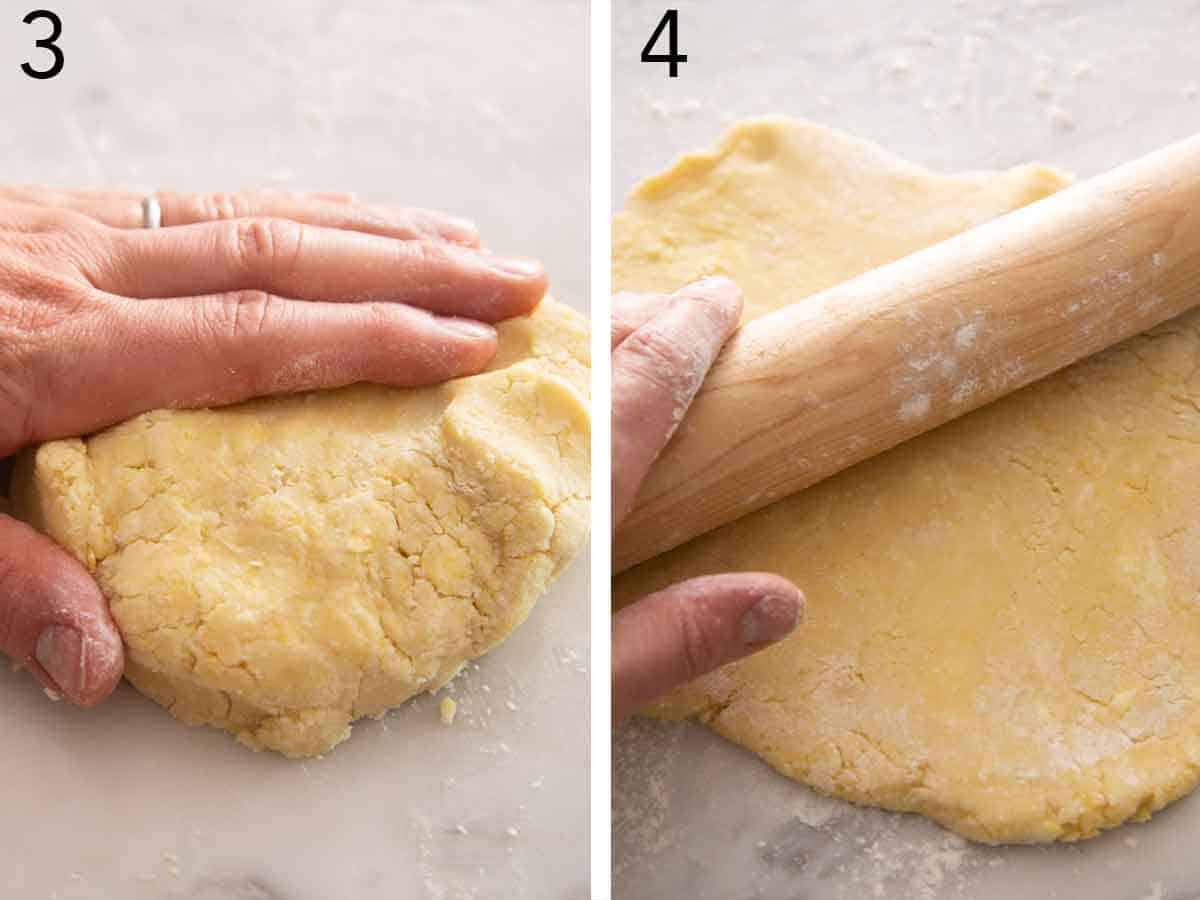
4. Transfer the dough to a floured surface and knead a few times until it comes together in a ball. Flouring your surface and rolling pin well, roll the dough into a 12-inch circle.
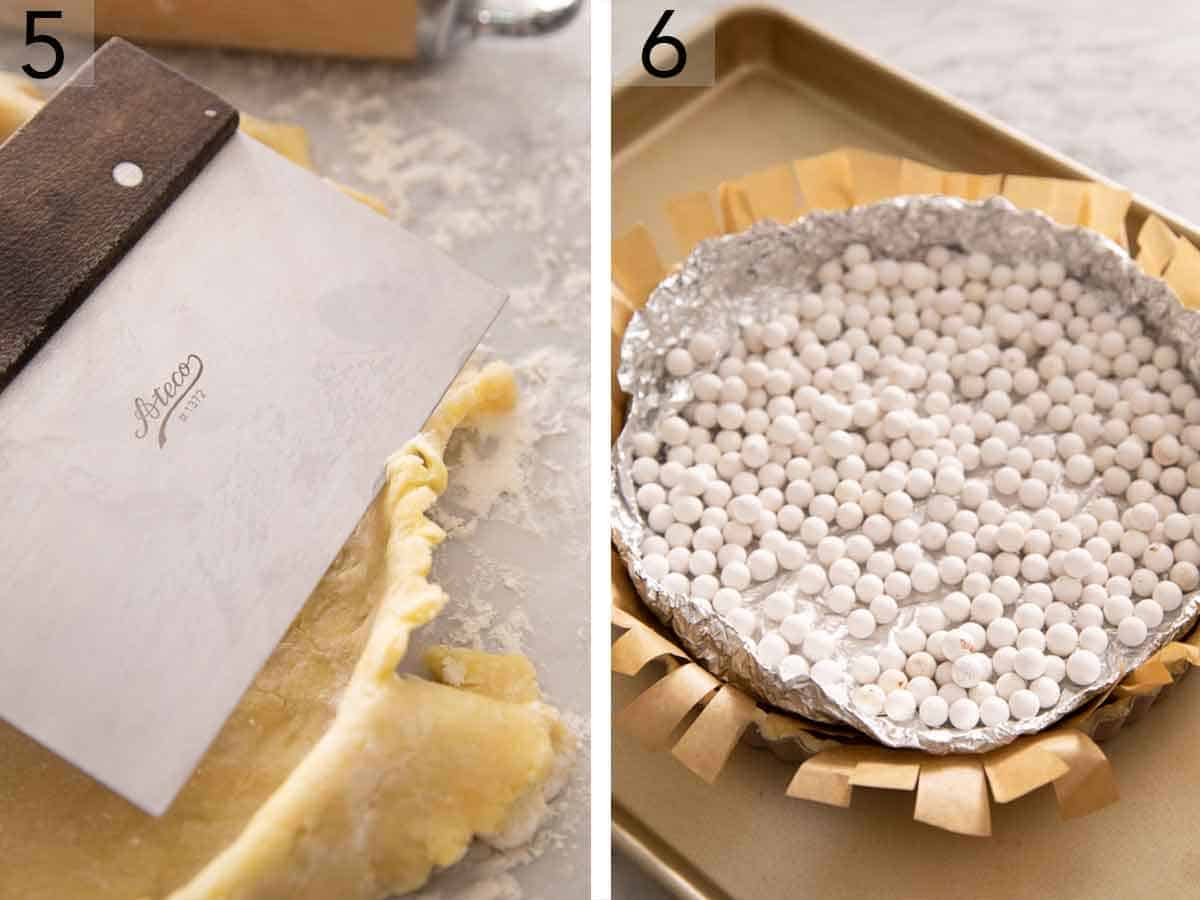
5. Roll the dough up around the rolling pin to transfer it to the tart pan. Unroll the dough over the pan and press into the bottom and sides. Use a sharp knife to cut off the excess dough. Freeze until solid, about 45 minutes.
6. Line the tart crust with parchment paper and fill with pie weights. Place on a rimmed baking sheet and then bake for 15 minutes. Carefully remove the paper and weights. Let cool.
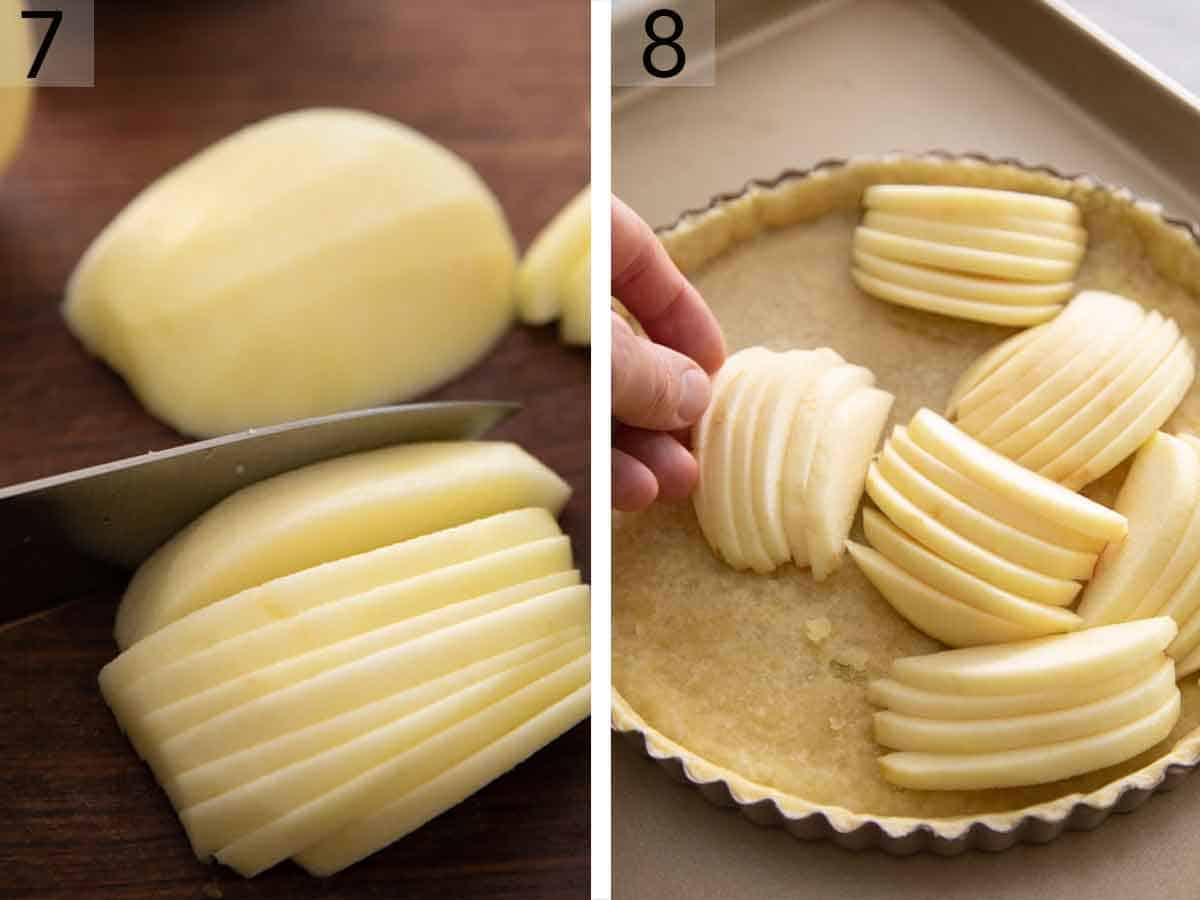
7. Peel the apples and core them by standing the apple up onto its stem end and cutting the apple around the core, creating pieces with flat bottoms. Thinly slice the apple pieces into half-moons.
8. Sprinkle 1 tablespoon cinnamon-sugar over the bottom of the tart crust. Arrange the apples in the frozen tart shell by placing groups of slices in the shell, flat sides down, and gently pushing them in one direction to create a shingled effect.
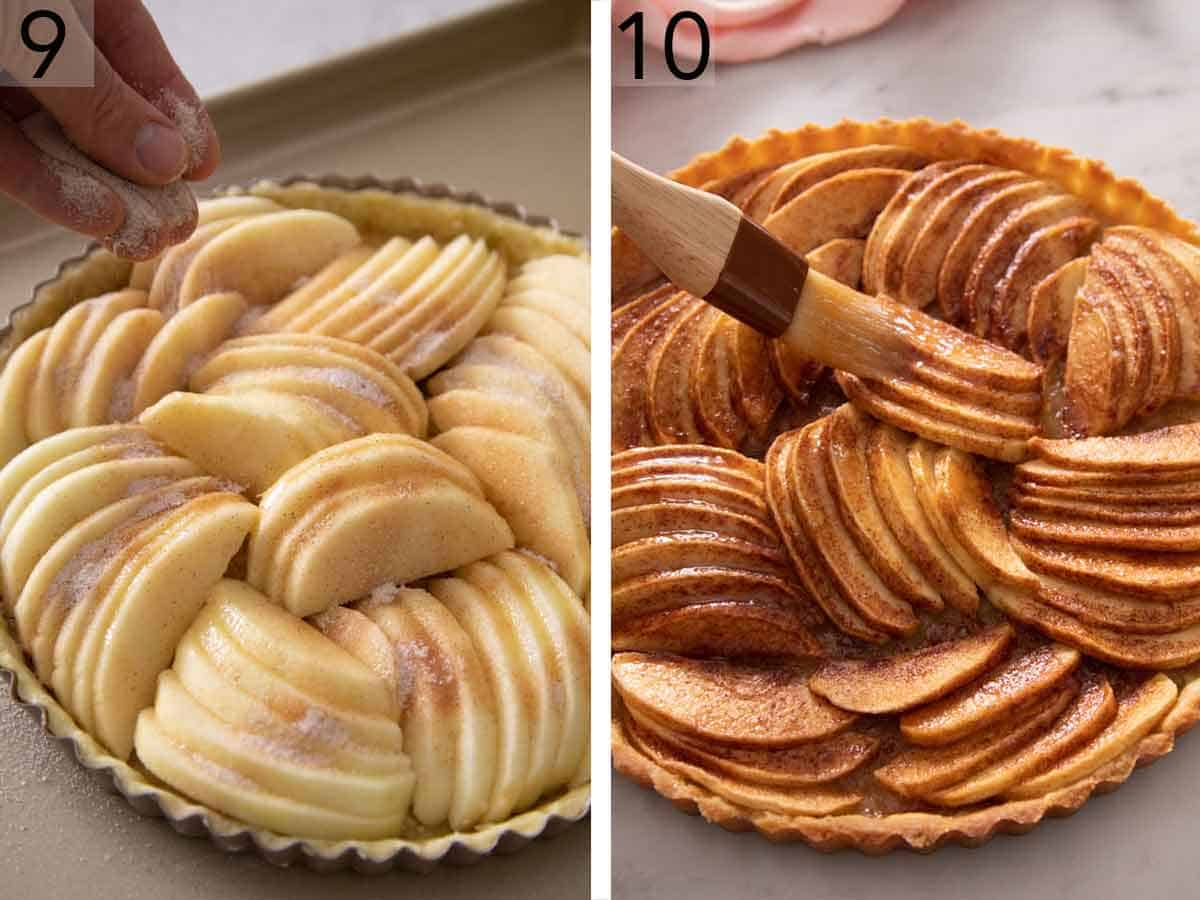
9. Drizzle with melted butter. Sprinkle remaining cinnamon-sugar all over the apples
10. Bake for 45 minutes or until the apples are very bubbly. Brush the apples with the melted jam. Let cool completely before removing the apple tart from the pan.

PRO TIPS FOR MAKING THIS RECIPE
- The apples will shrink when you bake them, so arrange as closely as possible, so there aren’t any exposed spots in the tart.
- If your apples are small, arrange a single layer of slices on the bottom of the crust before shingling the rest. This will help your apples fill the tart shell.
- Measure your flour correctly! Adding too much flour to the recipe is the most common mistake. The best and easiest way to measure flour is by using a scale. If you don’t have one, then fluff your flour with a spoon, sprinkle it into your measuring cup, and use a knife to level it off.
- Make sure you work fast, and your kitchen is not too hot. You want distinct bits of butter in the dough (not melted into the dough), so the crust is flakey.
- If you want to save time and skip the homemade crust, you can use store-bought instead.
- Be careful not to overwork the pastry dough. If you knead your dough too much, gluten will develop, and when baked, the apple tart crust will shrink.
FREQUENTLY ASKED QUESTIONS
Do I have to blind bake a tart?
Yes, this is not a step you should skip. It’s very important because blind baking ensures the tart is baked through, and you don’t end up with a soggy middle when the apple filling melts into the crust.
What’s the difference between apple pie and tart?
An apple tart is baked in a shallow tart pan, giving it its iconic edges. Tarts only have the bottom crust, and it’s a much thicker crust than a traditional pie crust.
Do I have to peel my apples?
You do not have to peel the apples, but I prefer to. You save some time by not peeling the apples, but they add texture to the apple tart and the skin can look a little wrinkly after it’s baked.
How long does this last?
You can keep your apple tart covered on the counter for 2 to 3 days. It will last longer if kept in the refrigerator. Apple tarts do not freeze well so I recommend making them fresh.
If you’ve tried this Apple Tart recipe, then don’t forget to rate the recipe and let me know how you got on in the comments below, I love hearing from you!
Apple Tart

Equipment
- 10-inch tart pan
- Rolling Pin
Ingredients
For the Crust:
- 1 ¼ cups all-purpose flour (150g)
- ¼ cup powdered sugar (30g)
- ½ teaspoon salt
- ½ cup cold unsalted butter cubed (113g/1 stick)
- 1 egg yolk
- 2 to 3 tablespoons water
For the Filling:
- 3 to 4 apples such as Granny Smith or Honeycrisp
- 4 tablespoons unsalted butter melted (57g)
- ¼ cup granulated sugar (50g)
- ½ teaspoon cinnamon
- 4 tablespoons melted apricot jam
Instructions
For the Crust:
- In a food processor, add flour, sugar, and salt. Pulse a few times to combine. Add the butter. Pulse 4 to 5 times or until the butter is in pea-sized pieces.
- Whisk the egg yolk and 2 tablespoons of water together. While pulsing, slowly add the wet mixture into the food processor. Pulse until a crumbly dough forms and is wet enough to hold together well when squeezed.
- Transfer to dough a floured surface and knead a few times until it comes together in a ball. Flouring your surface and rolling pin well, roll the dough into a 12-inch circle. Roll the dough up around the rolling pin to transfer it to the tart pan. Unroll the dough over the pan and press into the bottom and sides. Use a sharp knife to cut off the excess dough.
- Freeze until solid, about 45 minutes. (Crust can be frozen for up to 2 days.)
- When ready to bake, preheat the oven to 400F. Line the tart crust with parchment paper and fill with pie weights. Place on a rimmed baking sheet.
- Bake for 15 minutes. Carefully remove the paper and weights. Let cool
For the Filling:
- Reduce oven temperature to 350F.
- Peel the apples and core them by standing the apple up onto its stem end and cutting the apple around the core, creating pieces with flat bottoms. Thinly slice the apple pieces into half-moons.
- In a small bowl, whisk together the sugar and cinnamon. Sprinkle 1 tablespoon cinnamon-sugar over the bottom of the tart crust.
- Arrange the apples in the frozen tart shell by placing groups of slices in the shell, flat sides down, and gently pushing them in one direction to create a shingled effect. Drizzle with melted butter. Sprinkle remaining cinnamon-sugar all over the apples
- Bake for 45 minutes or until the apples are very bubbly. Brush the apples with the melted jam. Let cool completely before removing the tart from the pan.
Notes
- The apples will shrink when you bake them, so arrange as closely as possible, so there aren’t any exposed spots in the tart.
- If your apples are small, arrange a single layer of slices on the bottom of the crust before shingling the rest. This will help your apples fill the tart shell.
- Measure your flour correctly! Adding too much flour to the recipe is the most common mistake. The best and easiest way to measure flour is by using a scale. If you don’t have one, then fluff your flour with a spoon, sprinkle it into your measuring cup, and use a knife to level it off.
- Make sure you work fast, and your kitchen is not hot. You want distinct bits of butter in the dough (not melted into the dough), so the crust is flakey.
- If you want to save time and skip the homemade crust, you can use store-bought instead.
- Be careful not to overwork the pastry dough. If you knead your dough too much, gluten will develop, and when baked, the apple tart crust will shrink.
Nutrition
Have you tried this recipe? Tag me today!
Mention @preppykitchen and tag #preppykitchen!


