

This post may contain affiliate links. Please read our disclosure policy.
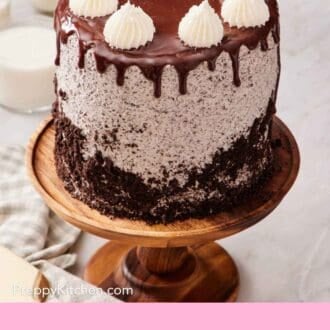
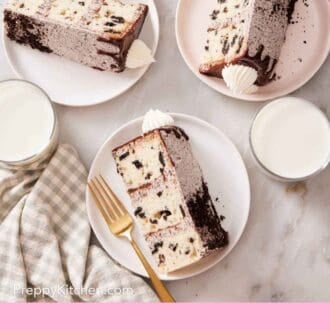
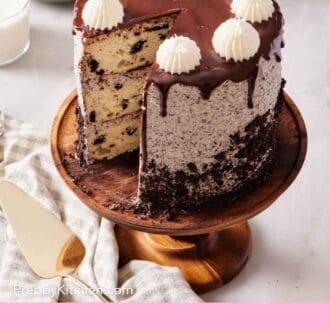
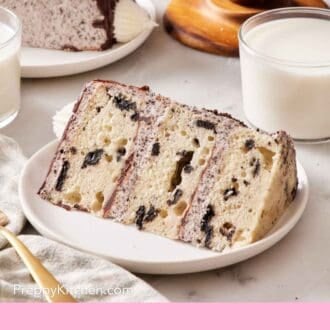
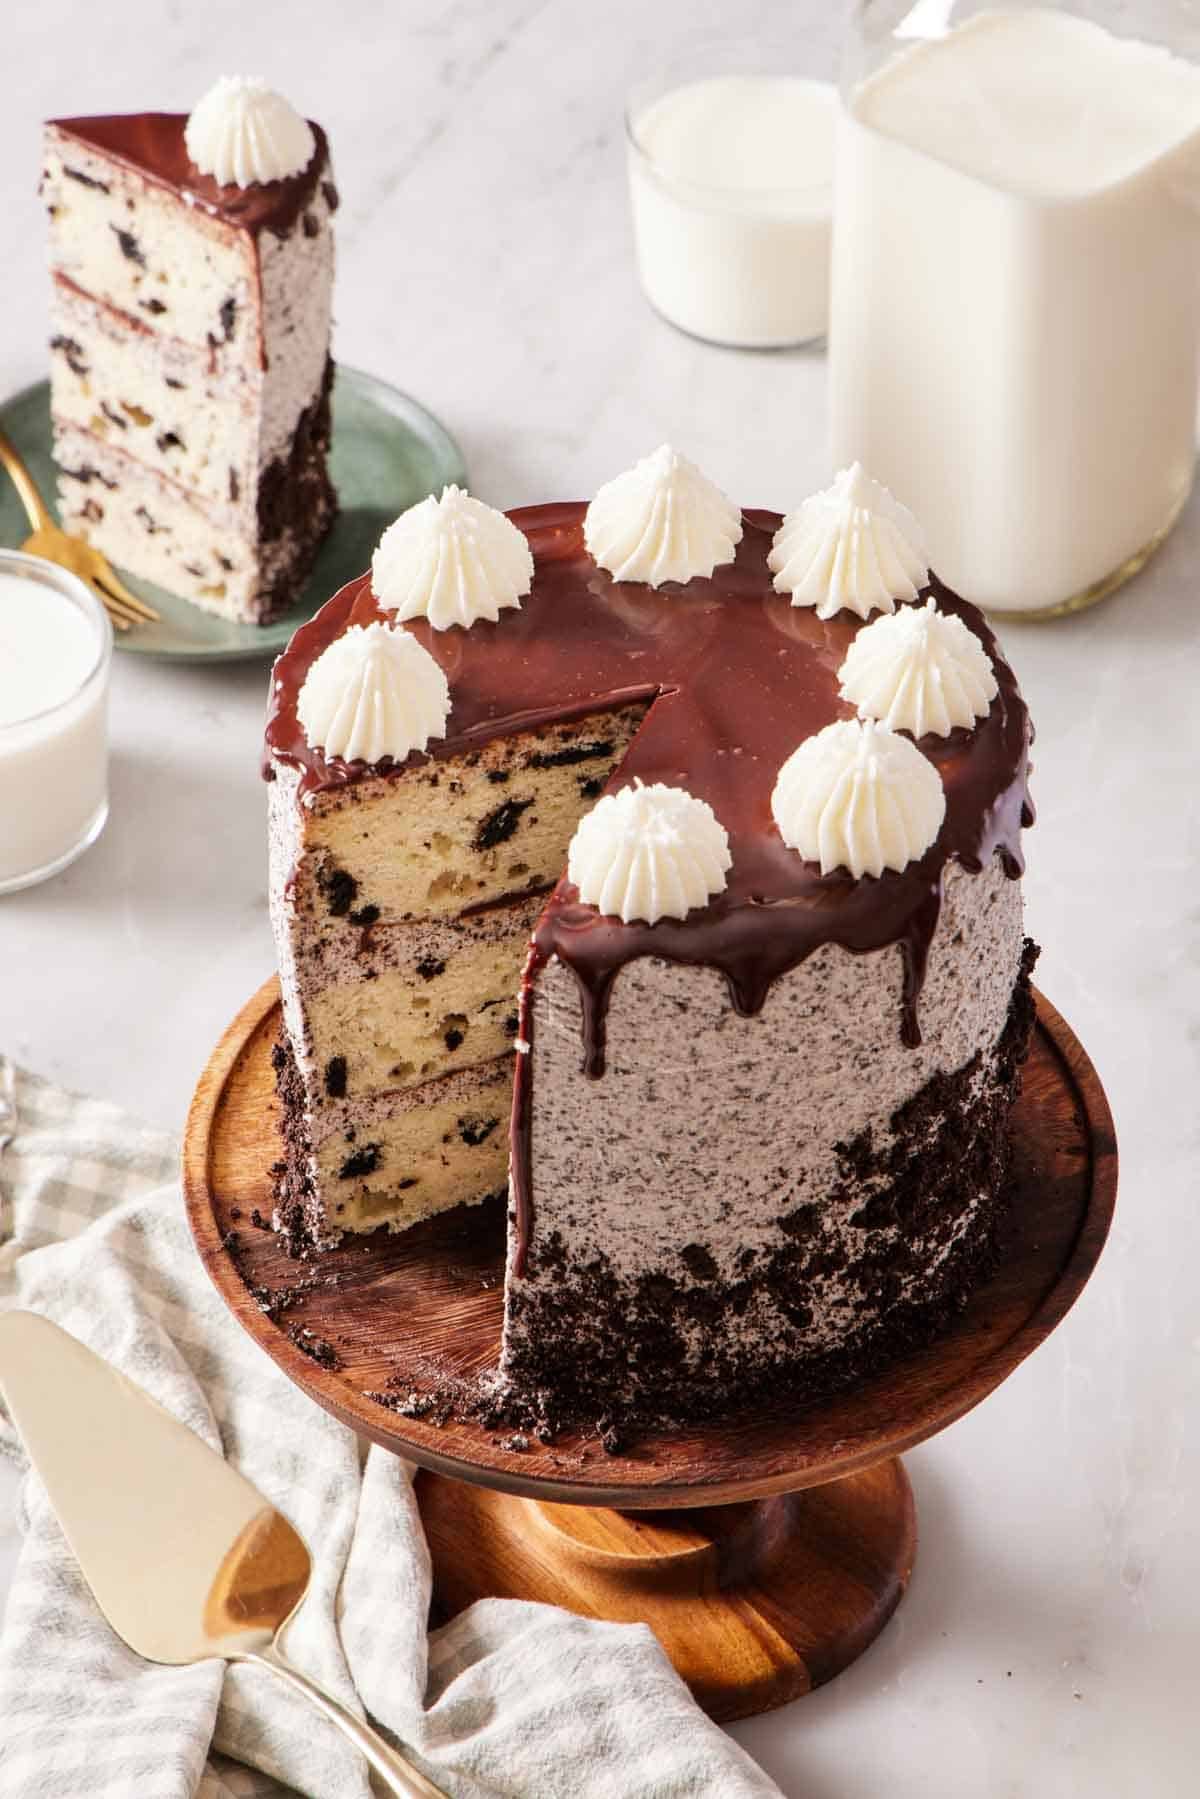
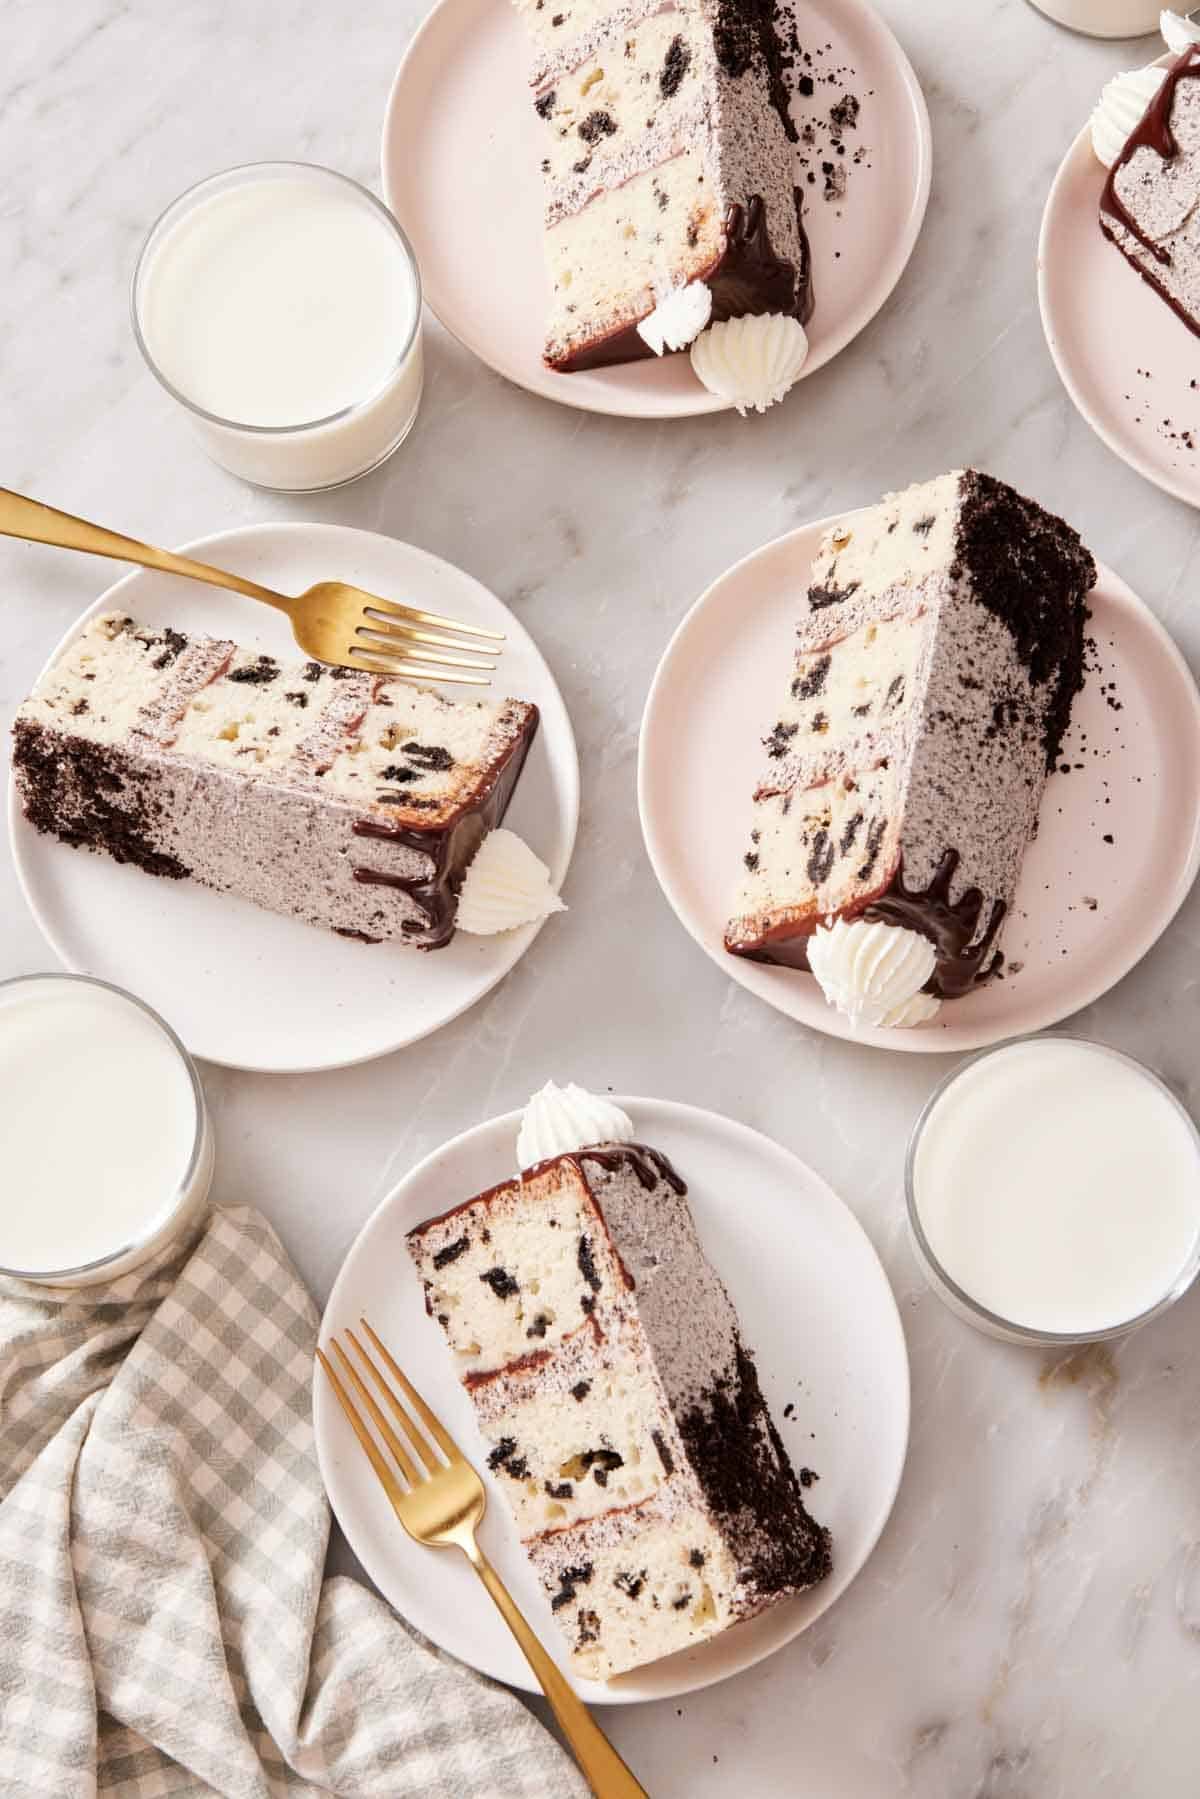
This delicious Oreo cake is made from three layers of tender white cake packed with chopped Oreos, wrapped in Oreo buttercream and finished with a chocolate ganache drip. It’s a dreamy cookies-and-cream cake that’s one of my most-made recipes!
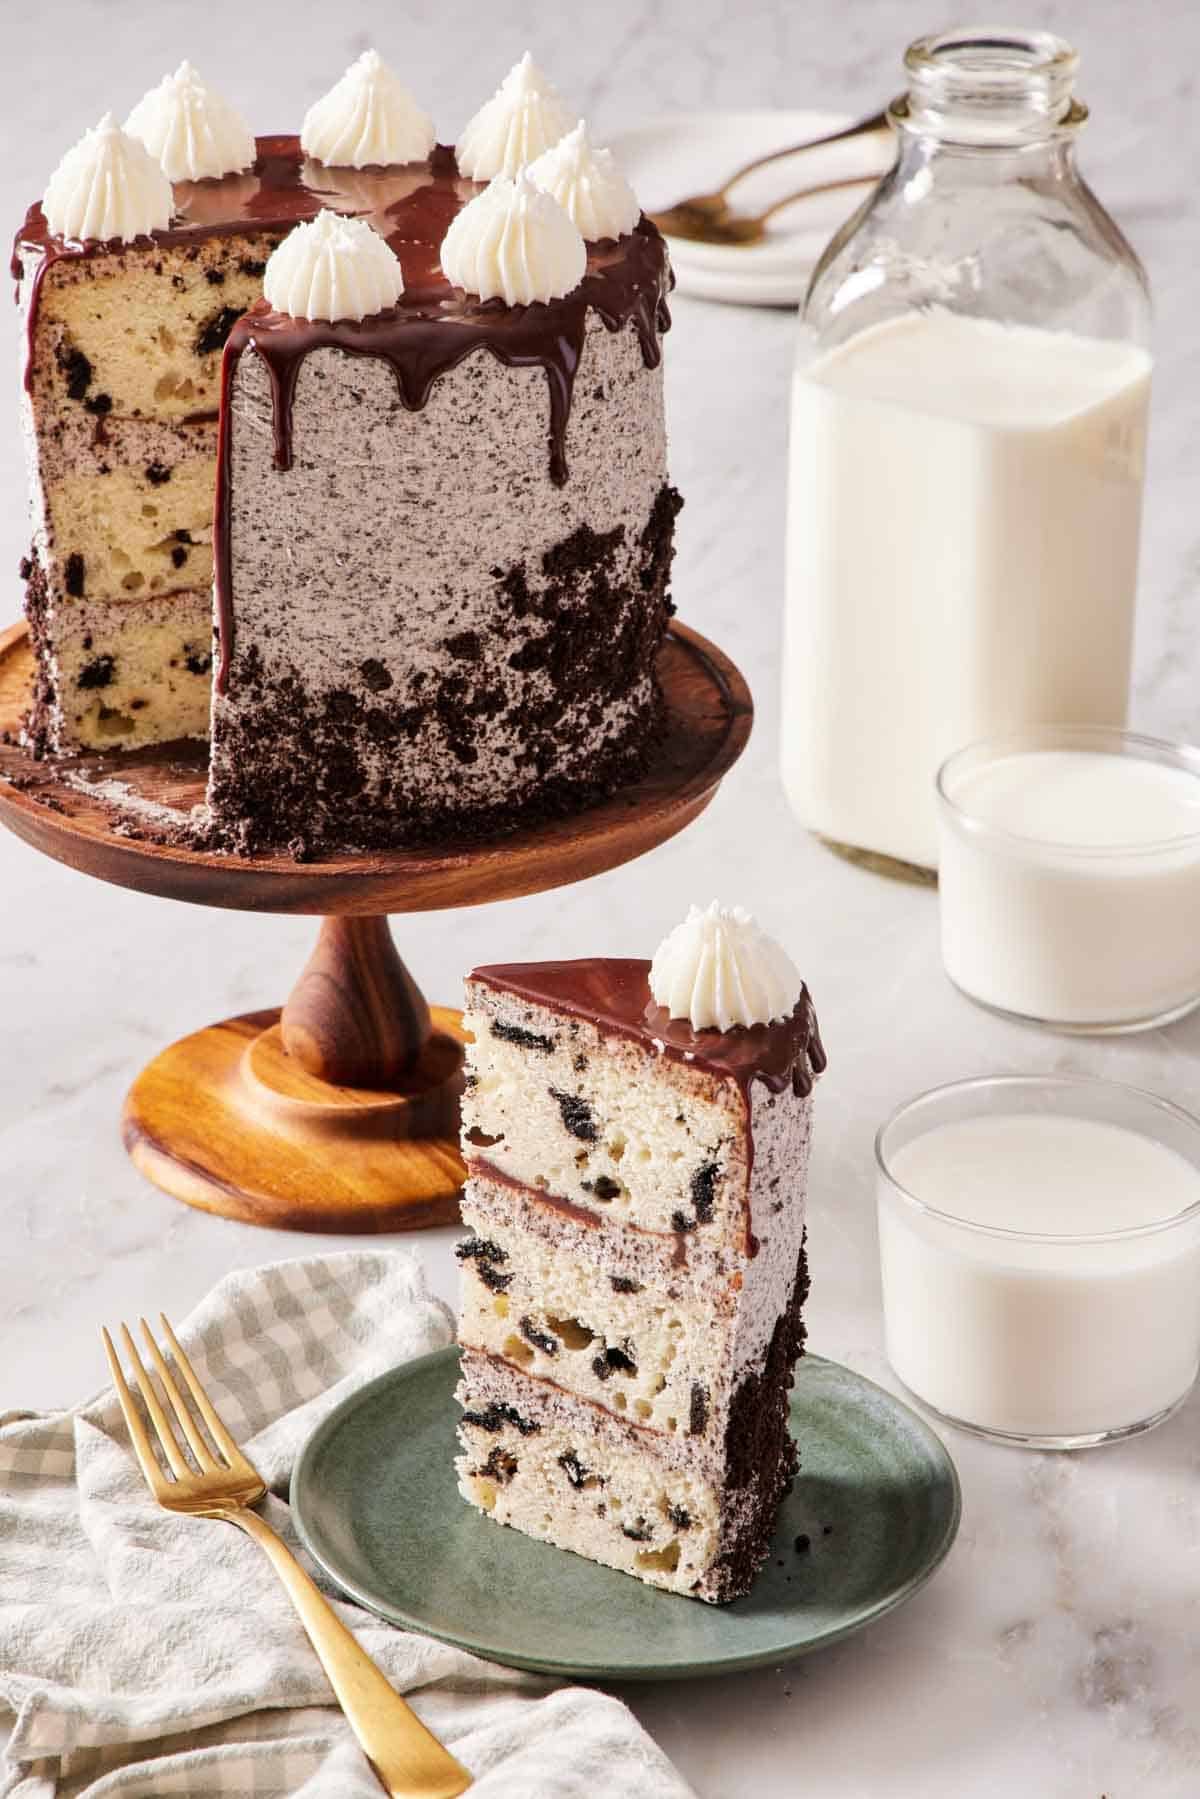
This Oreo cake started with a birthday several years ago. My husband Brian asked for a cookies-and-cream cake, so I took my moist white cake batter recipe, folded in a heaping pile of chopped Oreos, coated the whole thing in Oreo buttercream, and finished it with a chocolate ganache drip. He loved it! After a few more recipe tests, I decided to share it with all of you, and it’s been one of the top recipes on the site ever since!
The reason is the contrast in texture and flavor: a tender, snow-white crumb speckled throughout with dark chocolate cookie pieces, creamy frosting with real cookies flavoring it, and just enough ganache to tie it together without chocolate completely taking over. It is a tall layer cake with a few elements to it, so I’ll walk you through the parts people find intimidating, from getting flat layers to tweaking the ganache drip for the perfect finish.
“I made this cake for a friend’s birthday and let me tell you, it blew both of us away! This is the most delicious cake I’ve ever eaten or made. Don’t skip the buttercream, people, it brings an already delicious cake to another stratosphere of flavor and decadence!”
Karen
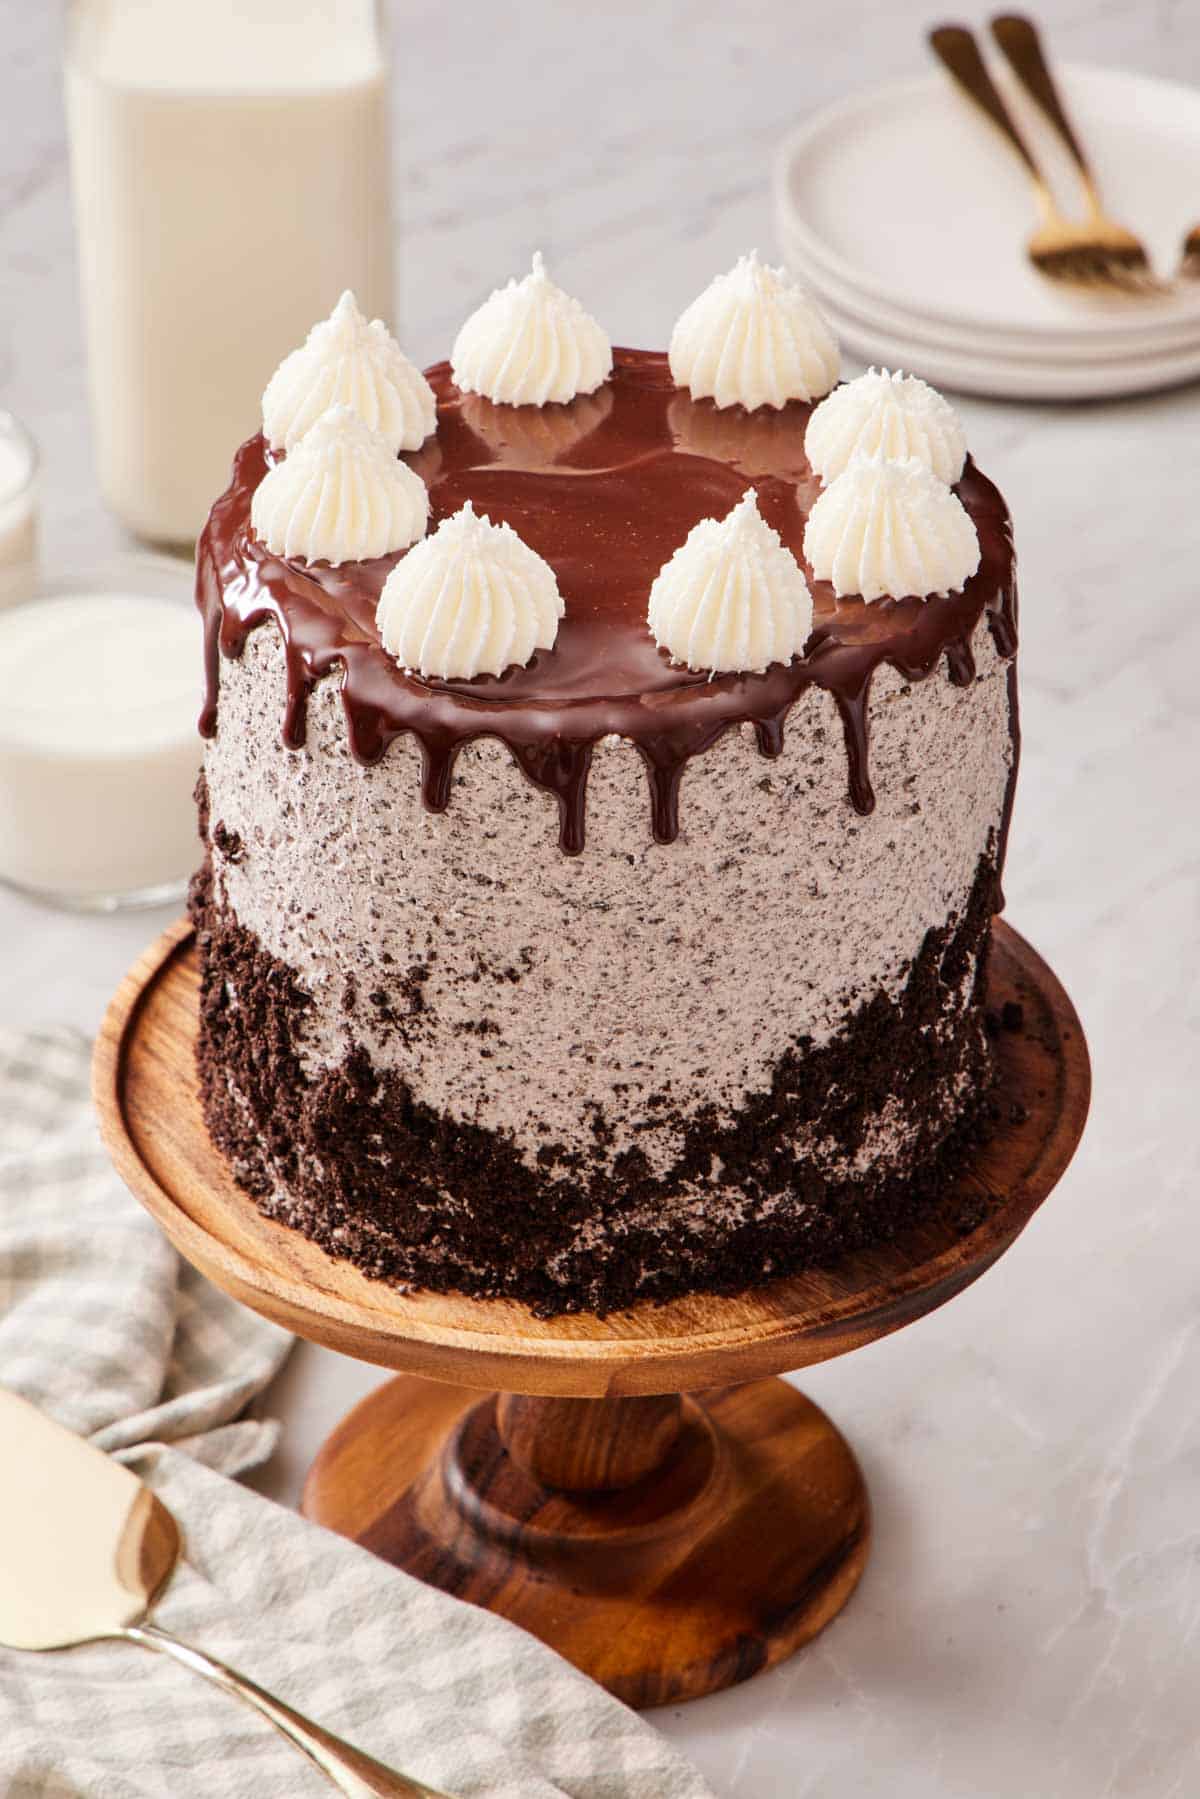
Why This Oreo Cake Works
A few things that make this version different from most Oreo cakes on the internet:
Chopped cookies, not crushed, in the cake layers. The first time I made this cookies-and-cream cake, I crushed the Oreos to fine crumbs and folded them into the batter. The taste was delicious, but the cake layers came out looking grey and had no defined cookie pieces or crunch. In my new test, I tried a simple fix: I chopped the Oreos into rough pieces by hand, anywhere from quartered to halved, and folded them in at the very end. The cookie texture stood out, and the cake stayed white with defined cookie pieces throughout. It was perfect!.
Crushed, not chopped, in the buttercream. For the frosting though, it’s the opposite! You want the cookies to be crushed into a crumb that disperses through the buttercream so every bite tastes like cookies-and-cream filling.
American buttercream, not cream cheese frosting. A lot of Oreo cake recipes go with cream cheese for tang. I tested both side by side on the same batch of cake. The cream cheese version was delicious but tasted more like cheesecake; the American buttercream tasted more like the actual cream filling of an Oreo, which is what most people want when they ask for “cookies and cream.” It’s also Brian’s favorite type of frosting, so it was a win-win!
Three 6-inch layers. A taller, narrower cake gives you a more even cake-to-frosting ratio in every bite, and it is so impressive. An 8-inch round of the same volume of batter would give you a shorter, wider cake, which is perfectly fine, but less impressive on a stand. I have several tested conversions below if you’d like to use other pan sizes!
Key Ingredients
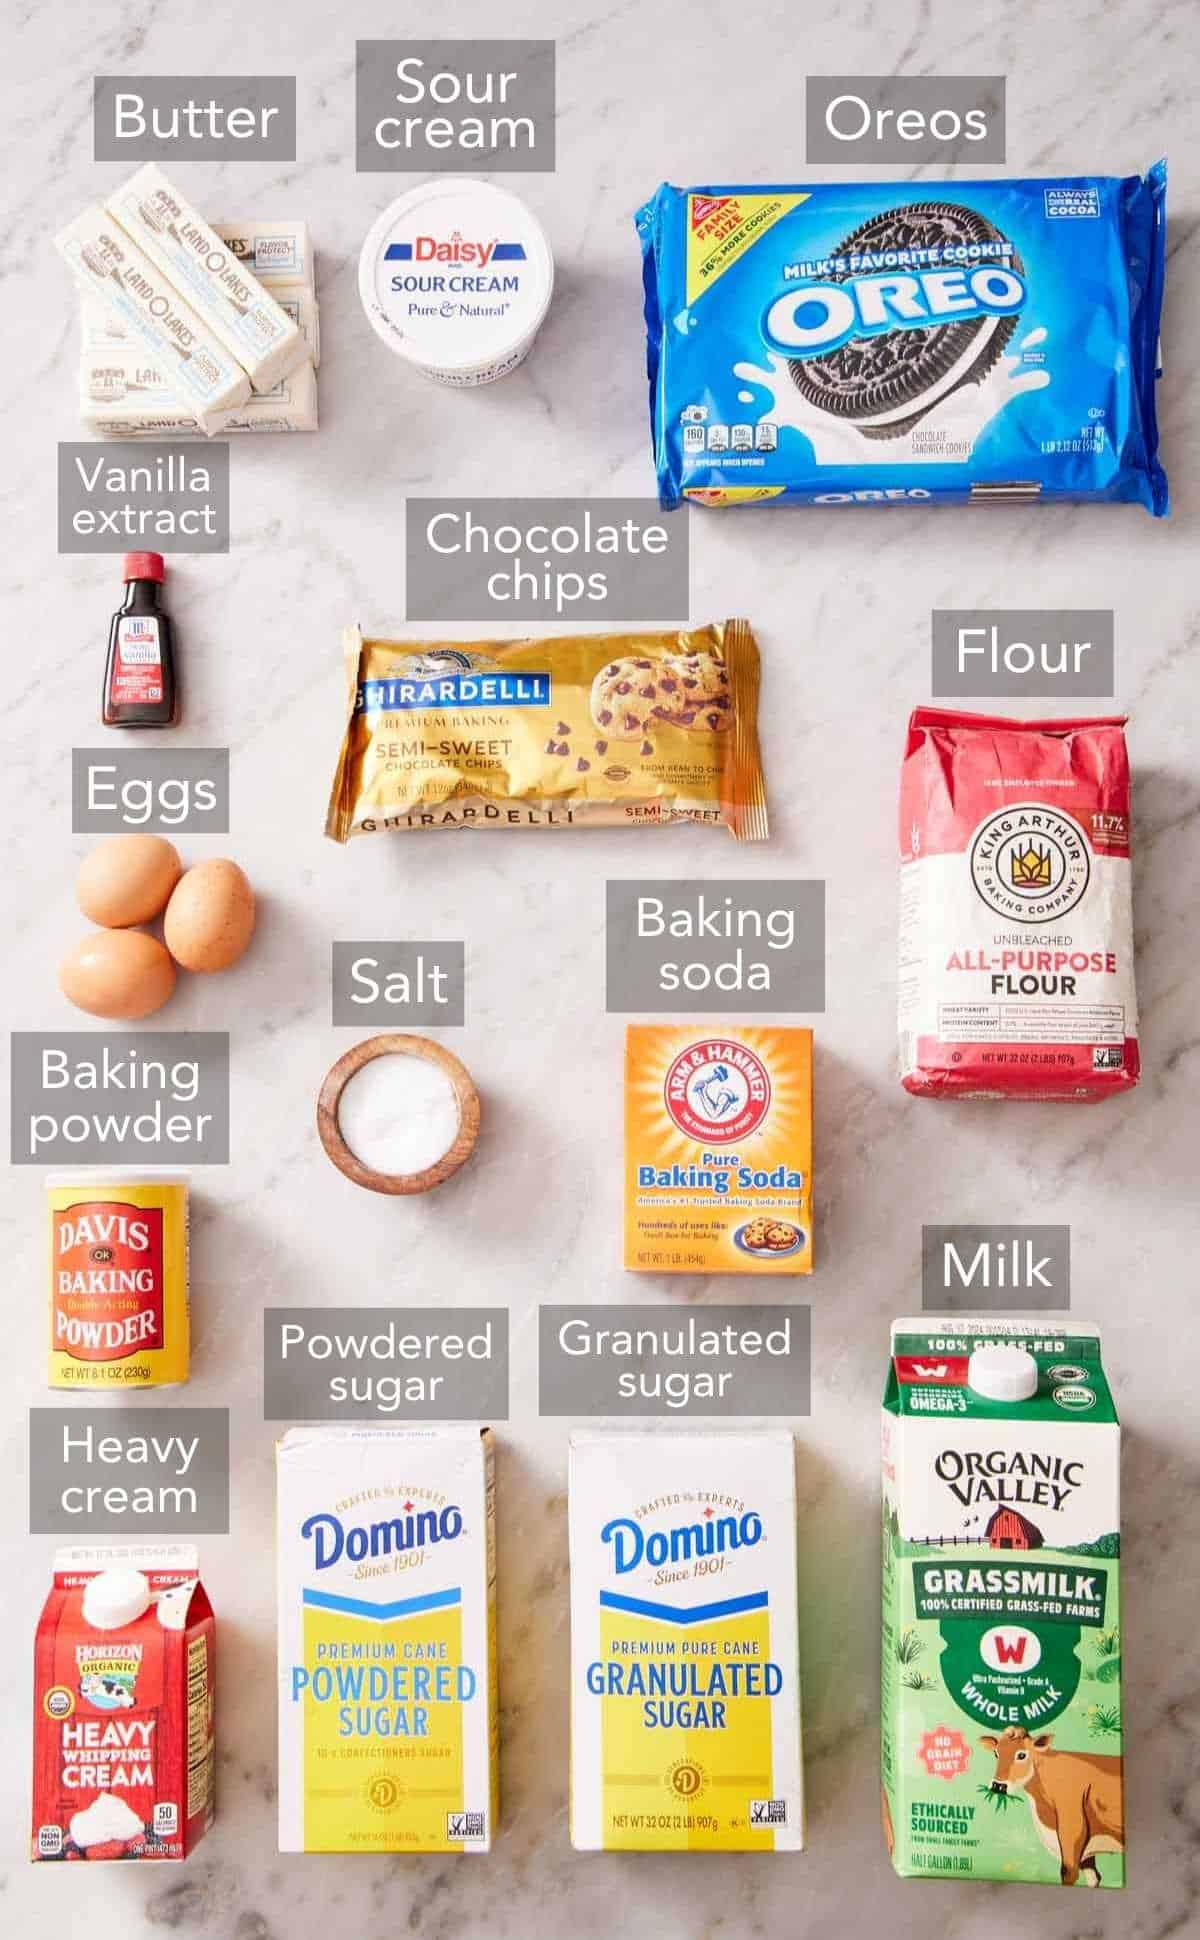
These are the main ingredients you need to make my Oreo cake. You can find the full list of ingredients and measurements in the recipe card below.
Oreos — use regular Oreo cookies, not Double Stuf. During testing I found the extra filling in Double Stuf throws off the cookie-to-cream balance and can make the frosting greasy, and the cake bakes up in an odd way with the added sugar. You’ll chop some into chunks for the batter and crush more into fine crumbs for the buttercream and decorating (optional). You don’t need to remove the filling either!
All-purpose flour — I tested cake flour in this recipe, and it gave a lighter, finer crumb, but the cake gets so tender it can’t hold the chopped Oreos in suspension easily. They sink to the bottom of the pan during baking. Plus, the layers were almost too tender to easily handle when assembling the cake. AP flour has just enough structure to grip the cookie pieces and keep them distributed, as well as hold up to the frosting and ganache without the cake texture getting compressed.
Egg whites — this is what keeps the cake a clean white so the dark Oreo pieces stand out. Separate the eggs while they are cold, then cover the bowl of whites and bring them to room temperature (about 30 minutes).
Sour cream and whole milk — the combination is what keeps this cake moist instead of turning dry. Sour cream’s fat and acidity tenderize the gluten; whole milk’s fat carries flavor and keeps the crumb soft for several days. I’ve tried this with Greek yogurt in place of the sour cream and the cake came out a bit drier—the higher fat in sour cream really made a difference, but the yogurt works fine in a pinch.
Unsalted butter — make sure your butter is softened for both the cake and the buttercream. Cold butter won’t aerate when you beat it. You want it pliable enough that your finger leaves a clear dent without going through. About 68°F is the sweet spot. If you’re short on time, use one of my tricks to quickly soften butter in 10 minutes or less.
Confectioners’ sugar — be sure to sift it if it’s clumpy at all so your frosting turns out smooth. American buttercream needs a high sugar-to-fat ratio to be sturdy enough to pipe and hold its shape on a cake outside the fridge, so I don’t recommend reducing it much if you don’t like sweet frosting. Add another pinch of salt to balance the sweetness if desired.
Semisweet chocolate + cream — just two simple ingredients to make the ganache. Semisweet keeps the ganache from tasting too bitter against all that sweet buttercream, but isn’t so sweet that it overwhelms the flavor.
The Reverse Creaming Method
I use a reverse creaming cake mixing method here, and it’s worth understanding why, especially if it’s a new method to you. Instead of creaming butter and sugar together (known simply as the creaming method), you beat the butter only until it’s creamy, mix the dry ingredients (including the sugar) into it, and then add the wet. This coats the flour in butter (fat) before any liquid hits it, limiting gluten development.
The result is a fine, velvety, tender crumb structure that is stable, and the layers bake with flatter tops so they stack cleanly. With the reduced gluten, the reverse creaming method also reduces the risk of overmixing the batter, so it’s a great technique for new cake bakers! Some people describe reverse creamed cakes as denser than a classic creaming method, but it’s not dense in the sense that the cake is firm or tough. The little gaps in the cake texture (that make it look like a sponge) are just smaller, so the texture is finer, making it look more dense without eating like a dense cake.
One reader mentioned switching to a traditional creaming method and liking it—that works too and gives a slightly airier, more open crumb. (Just add the sugar to the butter and beat it until fluffy, then alternate adding the wet and dry ingredients.) I prefer the reverse-cream option for its sturdiness and more tender texture, though.
How To Make an Oreo Cake
Learn how to make the three components—cake, Oreo buttercream, ganache—plus the assembly. None of them are hard, but they take a little patience! You can find the full set of instructions in the recipe card below.
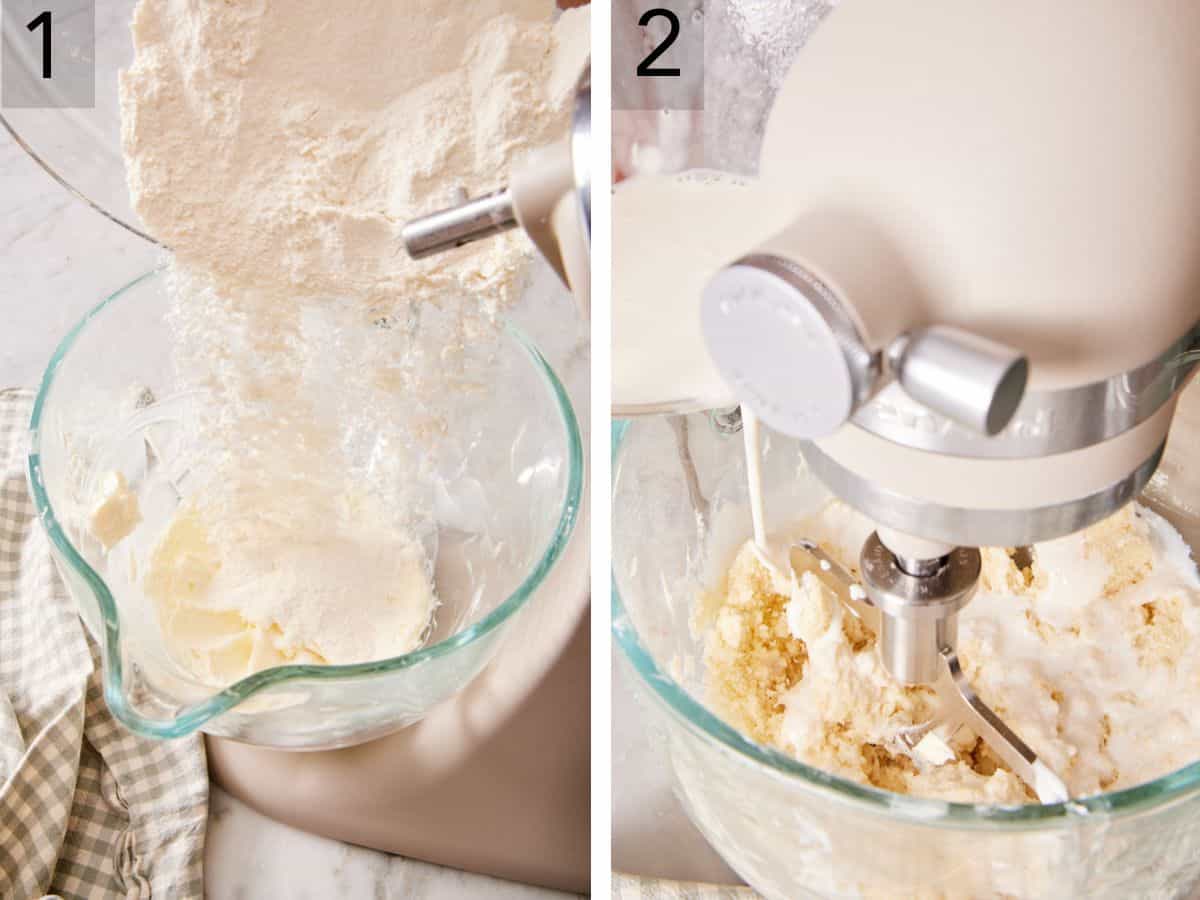
1. Reverse creaming the cake batter. Start by beating the butter in a mixing bowl until it is smooth and creamy. Mix together the all-purpose flour, sugar, baking powder, baking soda, and salt. Add it to the butter and mix on low speed until the mixture looks crumbly. It should not be pasty like a cookie dough—don’t mix it too much! You’ll want to stop and scrape down the bowl at least once to make sure all of the butter is incorporated.
2. Add the wet ingredients. Whisk together the egg whites, sour cream, milk, and vanilla, then with the mixer on low, slowly pour in the wet ingredients. Mix just until everything is combined and the batter is thick and looks fluffy. Give it a stir by hand to make sure it’s all incorporated throughout the bowl.
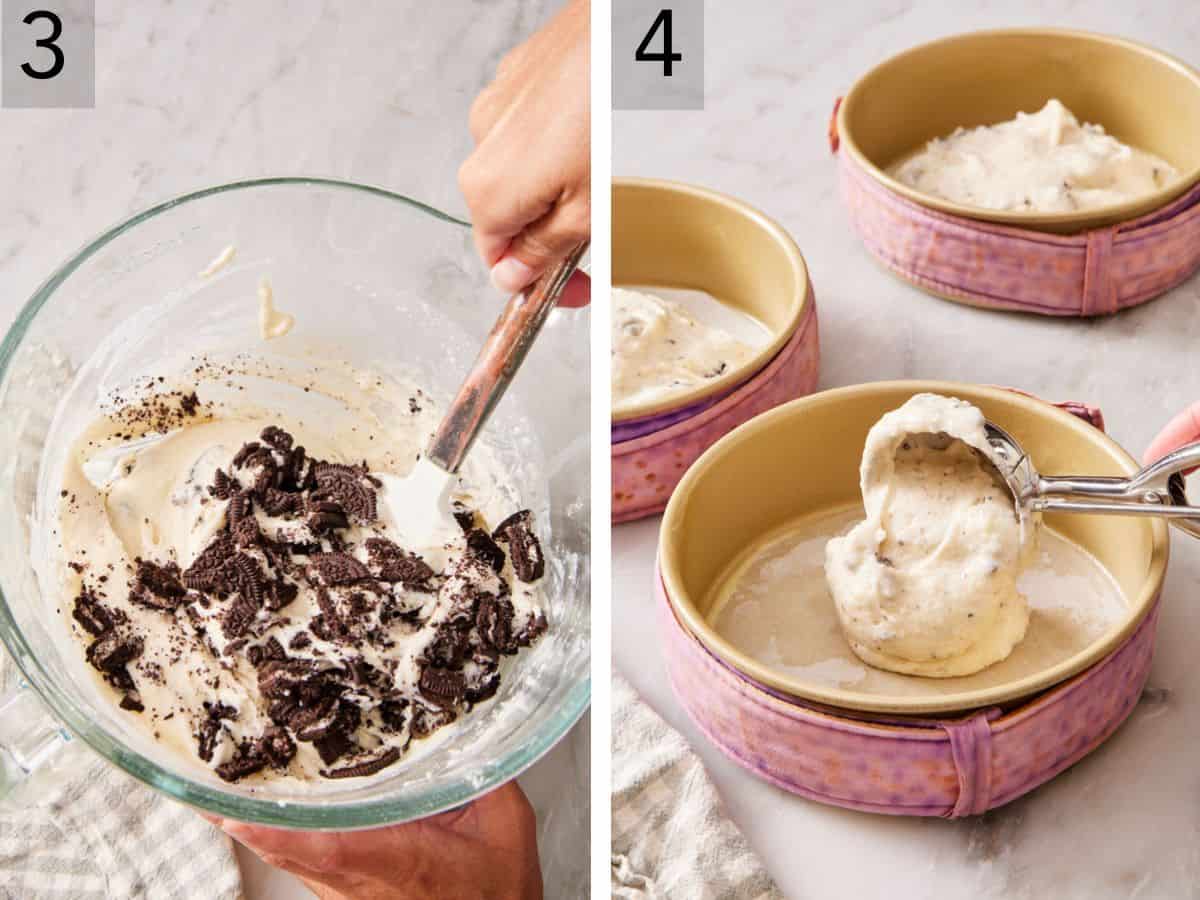
3. Add the chopped Oreos, and stir them in by hand. Don’t chop them too fine or they will dissolve into the batter, and you lose the cookies-and-cream texture (that’s the whole point!). Make sure they are well distributed throughout the batter so you have cookie pieces in every bite. Butter and flour three 6-inch cake pans, line the bottoms with parchment paper, and wrap fabric cake strips around the outside so the cake layers bake flat and with softer edges.
4. Divide the batter between each pan and bake at 350°F for 25-30 minutes, or until the centers spring back. Cool fully in the pans, then remove the cakes and peel off the parchment paper.
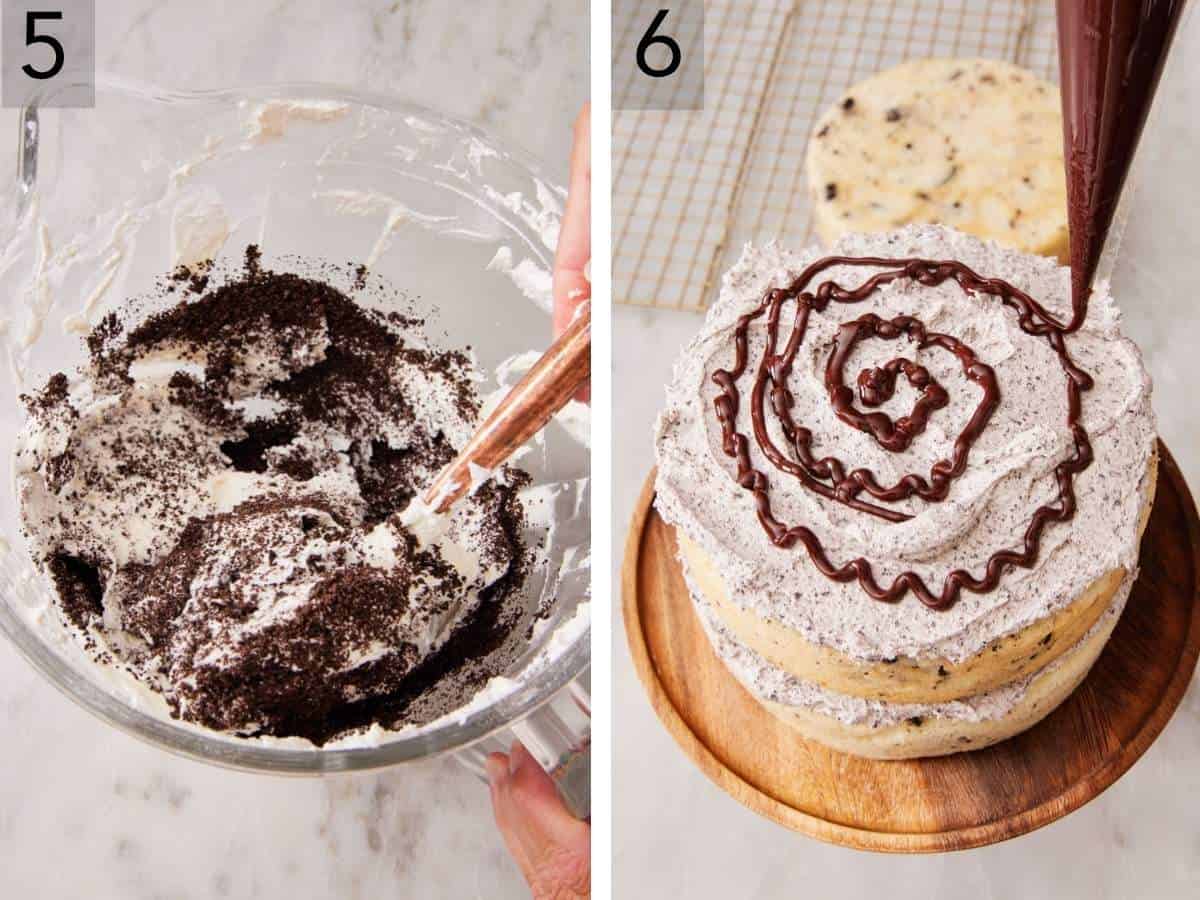
5. Make the frosting. Beat the butter until lightened, then gradually add the confectioners’ sugar and cream and beat until smooth and fluffy, about 2 minutes. Don’t skip this step: reserve about a cup of plain vanilla buttercream before adding the Oreos. That plain white is what you’ll pipe as the dollops on top—the crushed-Oreo buttercream is speckled gray, so the clean white dollops give you contrast in the finished look. Then, mix the crushed Oreos into the rest of the frosting.
6. Make the ganache and assemble. Heat the cream, pour it over the chocolate, and microwave at 50% power in short bursts and stir until smooth. That’s it! The consistency is key for the drip, so set it aside to cool while you assemble the cake. Start by adding one cake layer to a serving plate or cake stand and spreading some frosting on top. Drizzle a bit of the ganache on top, then add another cake layer.
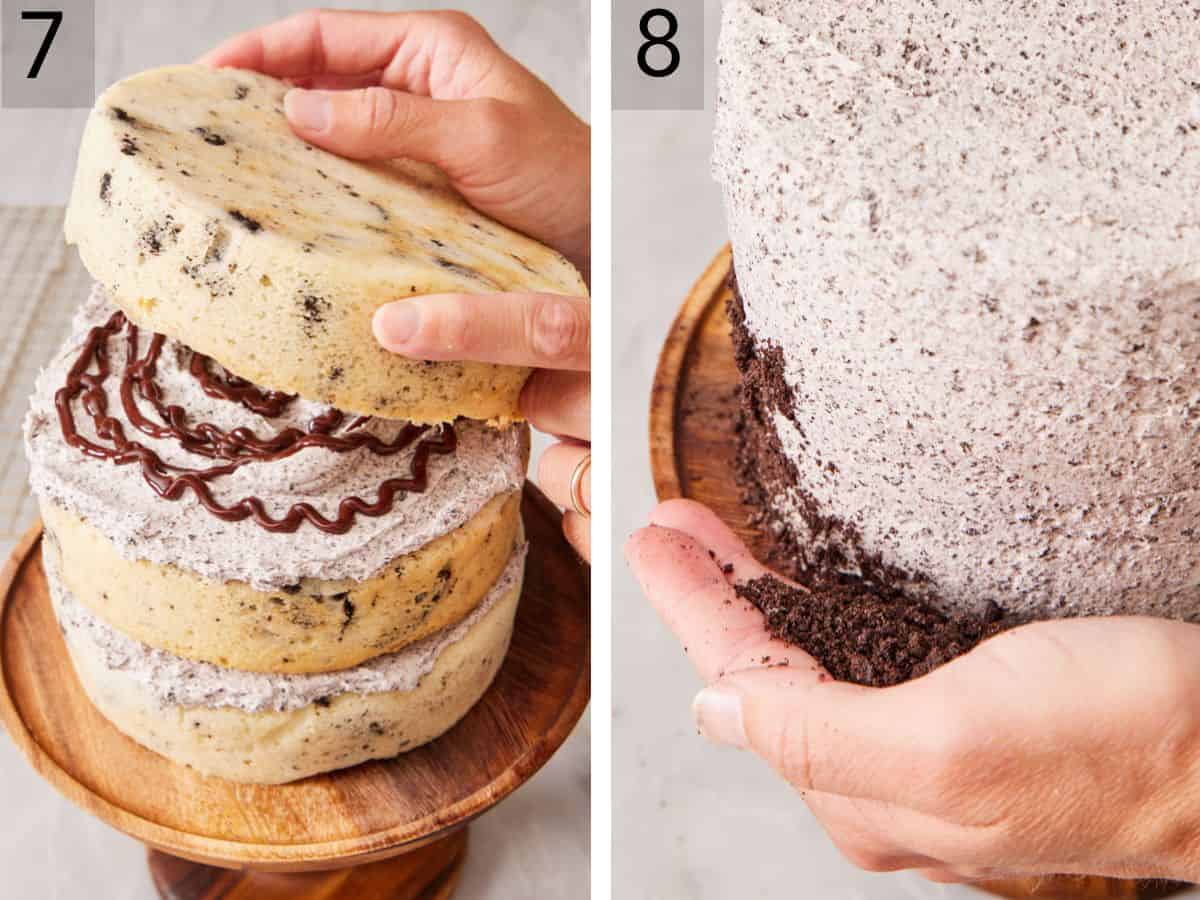
7. Repeat the stack with more Oreo buttercream and a swirl of ganache between each—go light on the ganache between layers, or it overpowers the cookies-and-cream flavor. Add the top cake layer, coat the outside in buttercream, and smooth it. An offset spatula works well for this!
8. Optional decoration: Press a skirt of Oreo crumbs around the bottom if you like. Finely crush some Oreos and then press them to the bottom edge of the cake before the frosting sets or chills; otherwise, the cookie crumbs won’t stick.
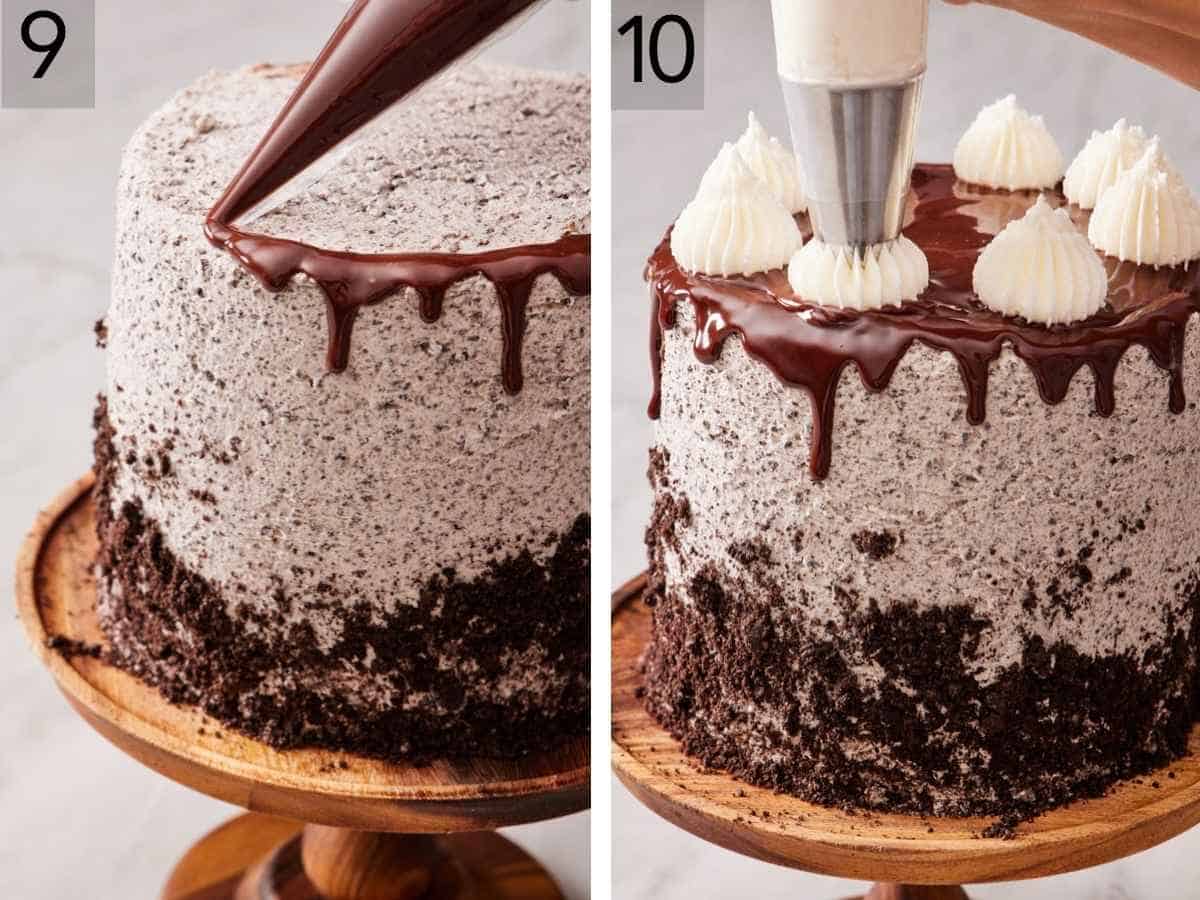
9. To make the ganache drip, pour the ganache on top and spread it to the edges, letting it drip down the sides. If you’d like, you can also put the ganache in a piping bag, pipe drips on the edge, then pour the rest of the ganache on top and spread it to meet the drippy edge. Both work, but the piping bag gives you more precise control.
10. Finish with dollops of white buttercream using a large open star tip. Chill the cake for an hour before slicing so the layers set and cut cleanly.
Pro Tips For Making This Recipe
Use cake strips for flat, tender layers. Wrapping damp cake strips around the pans slows the baking on the edges so the layers bake flat instead of domed, with more tender sides. This means no trimming and cleaner stacking! You can buy them or make your own; I broke it down in my flat cake layers post.
I tested baking the same batter in one pan with a cake strip and in one pan without the strip. The cake layer without the strip had noticeably browned sides and edges with a crispy texture. The top also developed a slight dome, though not too dramatic since the batter is reverse creamed to start. The cake strips help keep the cake soft and tender, but if you don’t have them, your layers will still turn out great!
Get the drip consistency right by testing it. This is where drip cakes can go wrong! Test the ganache before you put it on your cake if you are nervous. Hold a plate vertically, or use the rim of a tall glass, and spoon some ganache onto it. You want it to slide down slowly and stop partway, not race to the bottom in a thin sheet. If it’s too thin, let it cool longer or pop it in the fridge for 5 minutes. If it’s too thick, add a tablespoon of warm cream or warm the ganache slightly.
Chill before the drip. If you have time, this helps the ganache drip set up quickly. If the buttercream is soft when the warm ganache hits it, everything can slide off because the ganache will melt the butter in the frosting. A cold, firm surface will produce more crisp, controlled drips. I have a whole post on how to decorate a cake with more tips on frosting a layer cake and adding a decorative drip, if you want more guidance.
Weigh your batter into the pans. Even layers bake evenly and stack level—a scale takes the guesswork out! Weigh the main batch of batter first, then divide it by three to know how much you should have in each pan.
Different Pan Sizes
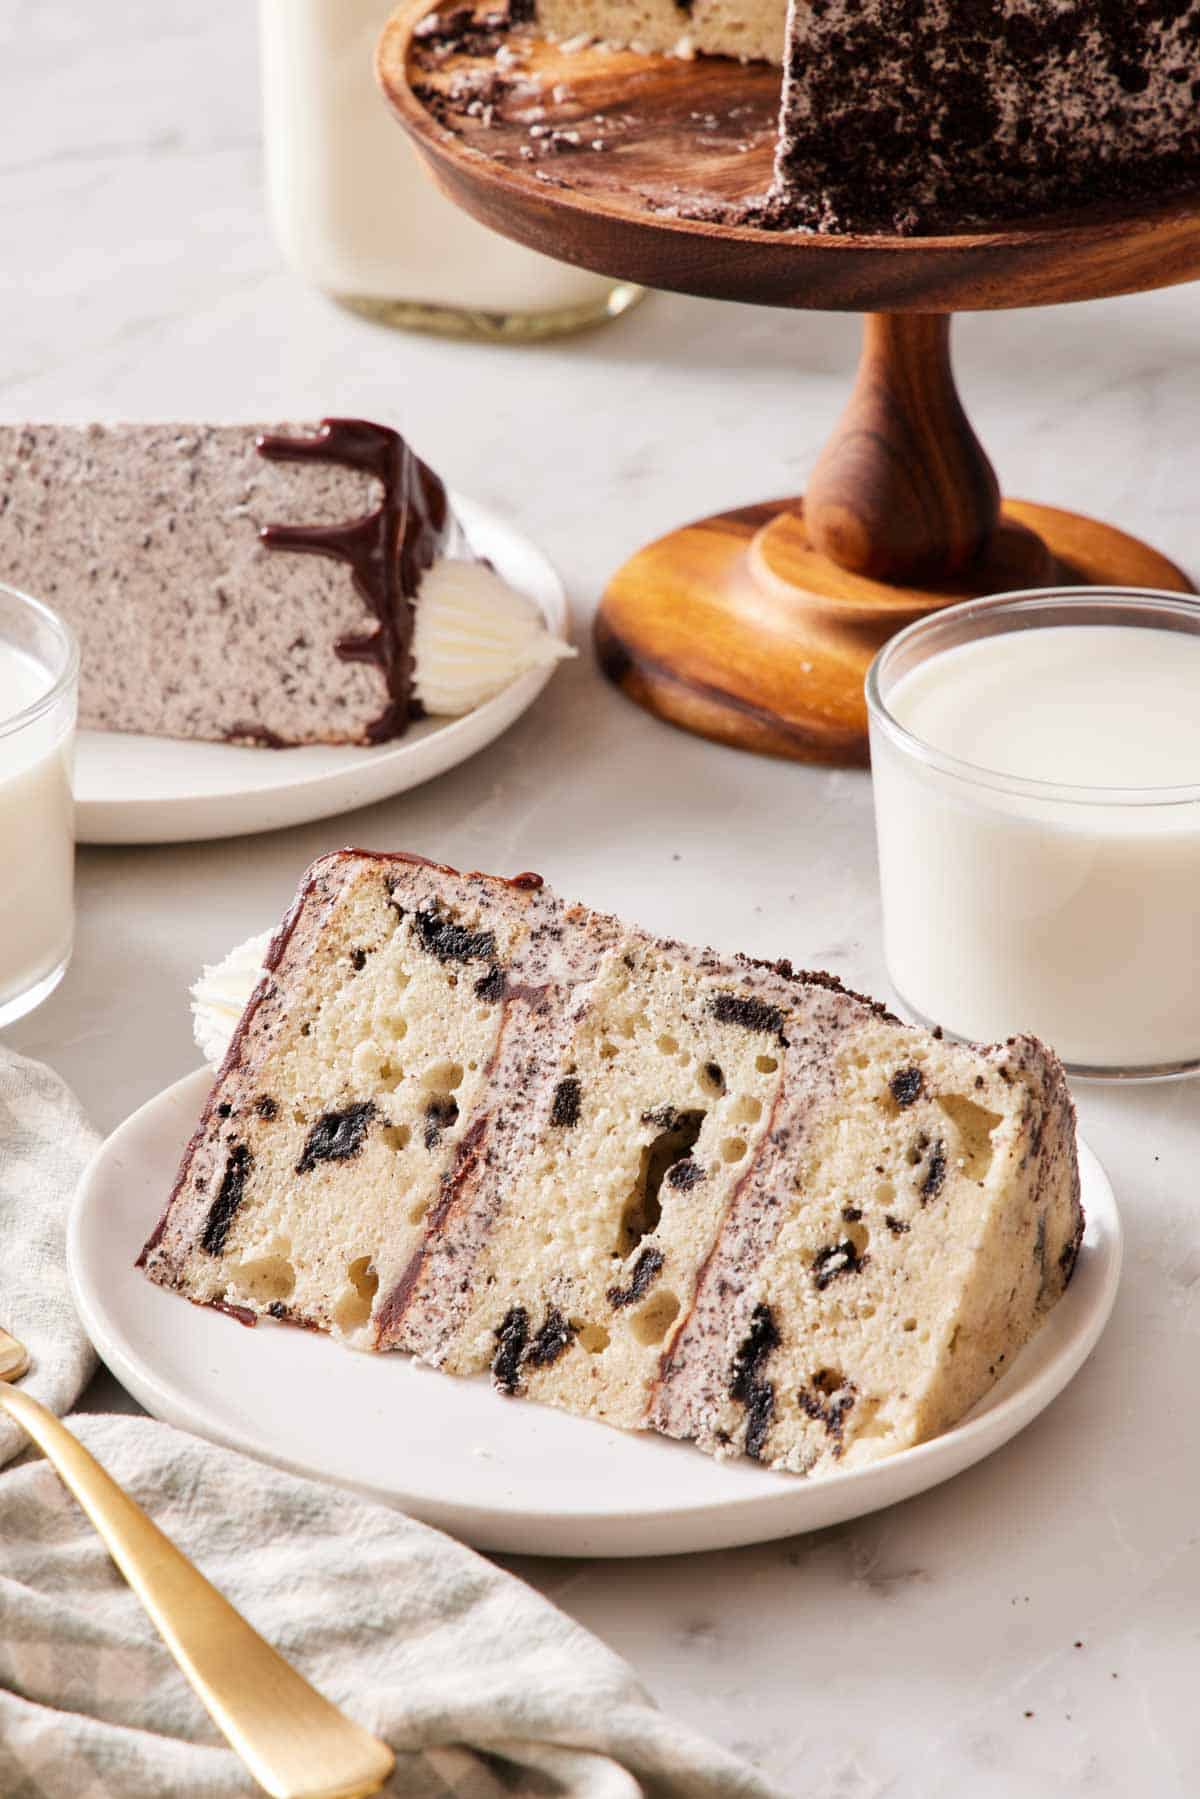
This recipe makes three 6-inch layers for a tall, dramatic cake. To make it in other pan sizes, follow these adjustments to the recipe and bake times:
- Two 8-inch: Make the recipe as written and bake for 20-25 minutes (the layers will be slightly thinner).
- Two 9-inch pans: double the entire recipe. Bake time is around 30-35 minutes. (One reader, Emily, recently confirmed this scaling works well—she doubled the cake portion to make two 9-inch layers and reported it came out moist with everyone complimenting the texture.)
- Three 8-inch pans: 1.5x the cake recipe. This makes a big celebration cake! Don’t forget you’ll need to 1.5x the buttercream and ganache too.
- 9×13-inch sheet cake: double the entire recipe. Bake time will increase to 40 to 45 minutes, but check the center and don’t remove it from the oven until it springs back when gently pressed. Since there aren’t layers to fill, you can make the ganache and spread it on top of the cake before adding the frosting. For less frosting, you make half of the recipe.
- Cupcakes: This was such a popular request that I turned this recipe into cupcakes! Check out my cookies and cream cupcake recipe for exact baking instructions.
Oreo Cake Recipe
Ingredients
For the Cake:
- 2 cups all-purpose flour (240g)
- 1 cup granulated sugar (200g)
- ¼ teaspoon baking soda
- 1 teaspoon baking powder
- ¼ teaspoon kosher salt
- ¾ cup unsalted butter room temp (170g)
- 3 large egg whites
- 1 teaspoon vanilla extract
- ½ cup sour cream room temperature (120g)
- ½ cup whole milk room temperature (120ml)
- 1 cup chopped Oreos (120g)
For the Buttercream:
- 1½ cups unsalted butter room temperature (340g)
- 5 cups confectioners’ sugar (600g)
- 1⅓ cups crushed Oreos (165g)
- ¼ cup heavy cream (60ml)
- Pinch salt
For the Ganache:
- 1 cup semisweet chocolate chips (180g)
- ½ cup heavy cream (120ml)
Instructions
For the Cake:
- Preheat the oven to 350°F. Butter and flour three 6-inch pans and line the bottom with parchment paper. (I use soaked fabric cake strips on my pans for flat, softer cake layers.)
- Sift the flour, sugar, baking soda, baking powder, and salt together in a large bowl.
- In a stand mixer fitted with a paddle attachment, beat the butter on medium speed until light and fluffy, about 1 minute. Add the dry ingredients into the butter, and mix on low speed until well incorporated. Stop and scrape the bowl at least once during mixing. (The mixture should look crumbly.)
- Combine the egg whites, sour cream, milk, and vanilla together in a medium bowl. Whisk until well combined.
- With the mixer on low speed, add the wet ingredients to the butter and flour mixture and beat until combined and fluffy, about 30 seconds. Fold in the crushed Oreos until just combined. Divide the mixture evenly into the prepared cake pans.
- Bake for 25 to 30 minutes or until the centers are springy to the touch. Let the cakes cool completely in the pans, then remove them.
For the Buttercream:
- Beat the butter on medium speed using a hand mixer or stand mixer fitted with the paddle attachment, until light and fluffy, about 2 minutes.
- With the mixer on low speed, gradually add the confectioners’ sugar and cream. Continue mixing until smooth and fluffy.
- Reserve about a cup of the buttercream for the white dollops. Place in a piping bag fitted with an open star tip (#869 tip). Mix the crushed Oreos into the remaining buttercream.
For the Ganache:
- Heat the cream in the microwave until it is steaming, about 1 minute.
- Combine the chocolate and hot cream together in a small microwave safe bowl. Microwave at 50% power in 20-second intervals, stirring between each one, until smooth and combined (about 40 seconds). Set aside to cool slightly.
For the Assembly:
- Spread a layer of Oreo buttercream on top of one cake layer (a heaping ⅓ cup), and add a swirl of chocolate ganache. (Don’t go overboard with the ganache as it will overpower the other flavors.) Top with another cake layer, buttercream and ganache.
- Add the final cake layer, then coat all over the outside of the cake with buttercream. (You can add a skirt of crushed Oreos at the bottom of the cake, if desired, by pressing Oreo cookie crumbs to the bottom of the cake with your hand.)
- If you have time, chill the cake for 30 minutes. Rewarm the ganache for 5-10 seconds in the microwave if it’s too thick, then pour the ganache on top, spread it out to the edge, and allow it to drip down the side. Smooth the top with an offset spatula.
- Pipe white buttercream dollops on top with an 869 tip. Chill the cake for 1 hour before slicing.
Notes
- Try not to chop the Oreos too finely. You want some crunch in the cake after baking, and bigger pieces prevent the cake from turning grey.
- Don’t remove the Oreo filling! It’s part of the flavor of the cake, and it saves you a lot of time.
- Feeding a crowd? Learn how to cut a round cake to cut more even slices and maximize the servings.
Nutrition
Have you tried this recipe? Tag me today!
Mention @preppykitchen and tag #preppykitchen!
Make Ahead & Storage
This is a great make-ahead cake. Bake the layers, cool, and tightly wrap them in plastic wrap. Keep them at room temperature for a day. Or wrap them in a second layer of foil and freeze them for up to two months. Thaw them in the fridge overnight or on the counter for a few hours before unwrapping them.
The assembled, frosted cake keeps in the fridge for 3 to 4 days. Bring slices to room temperature before serving so the buttercream softens.
Frequently Asked Questions
Either your confectioners’ sugar wasn’t sifted (and you’ve got lumps), or you didn’t beat the butter long enough at the start. Beat the finished buttercream another two minutes on medium-high—the friction usually breaks down minor lumps. The cookie crumbs will also add texture to the Oreo buttercream, so it won’t be perfectly smooth anyway. I have lots of other troubleshooting tips in my buttercream recipe if you run into other problems.
Yes! This works great for the cake layers and buttercream. Mint Oreos, birthday cake Oreos, and peanut butter Oreos are all fantastic options. Golden Oreos aren’t the best option—they visually disappear into the vanilla cake, and you lose the contrast, and their flavor doesn’t stand out as much against the vanilla cake.
You over-mixed the chopped Oreos into the batter or chopped them too fine. Keep the cookies in bigger pieces, fold them in by hand so the mixer doesn’t crush them more, and stop right when they’re distributed.
More Oreo Recipes to Try
These other dessert recipes are popular with their cookies-and-cream flavor, too:
- Oreo Cheesecake — a rich, creamy cheesecake packed with Oreos on an Oreo crumb crust; one of my most popular Oreo desserts.
- Cookies and Cream Cookies — soft, chunky cookies loaded with Oreo pieces and white chocolate for double the cookies-and-cream flavor.
- Oreo Pie — a no-bake Oreo cream pie in an Oreo cookie crust for when you want the flavor without turning on the oven.
- Chocolate Covered Oreos — an easy, decoratable treat that’s perfect for holidays and party platters.
- Oreo Cheesecake Bars — all the Oreo cheesecake flavor in an easy, sliceable bar form.
If you’ve tried this Oreo cake recipe, then don’t forget to rate it and let me know how you got on in the comments below. I love hearing from you!






