
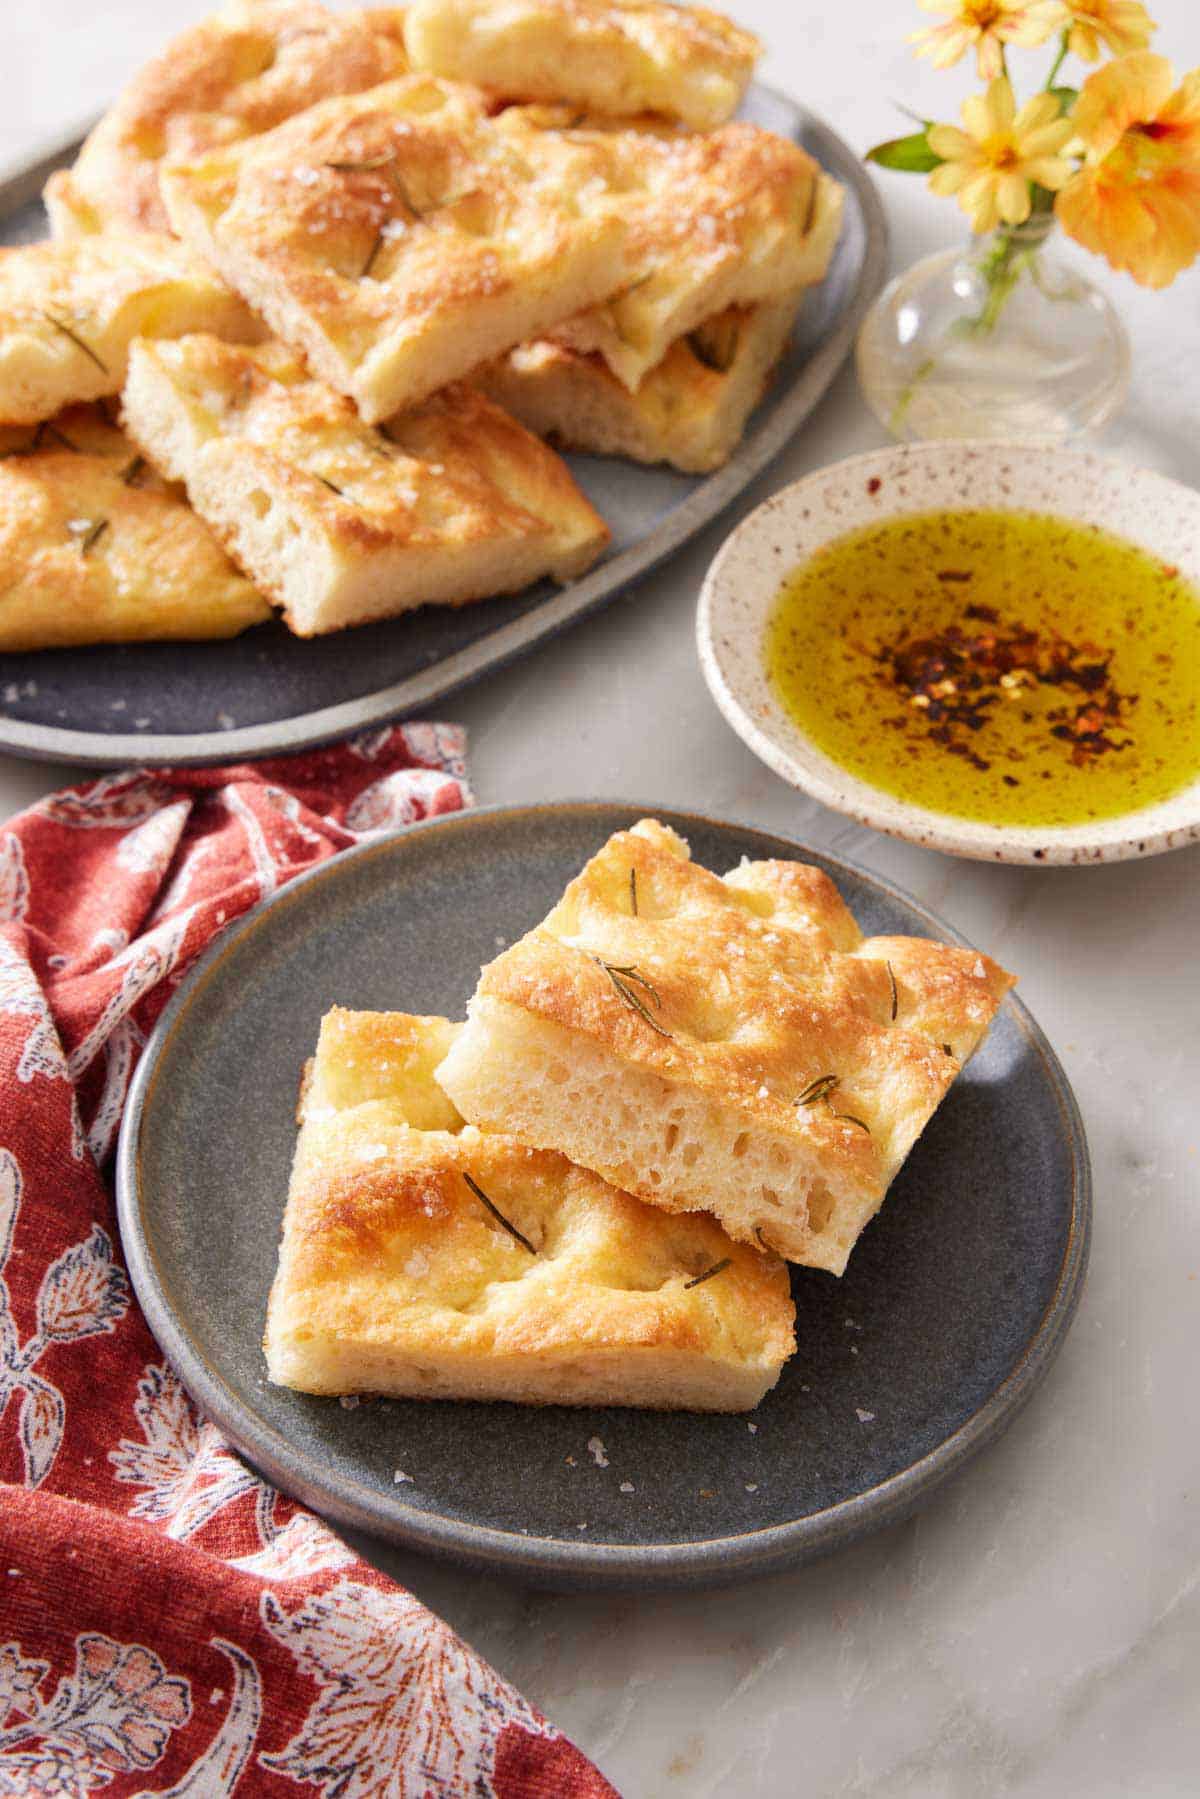


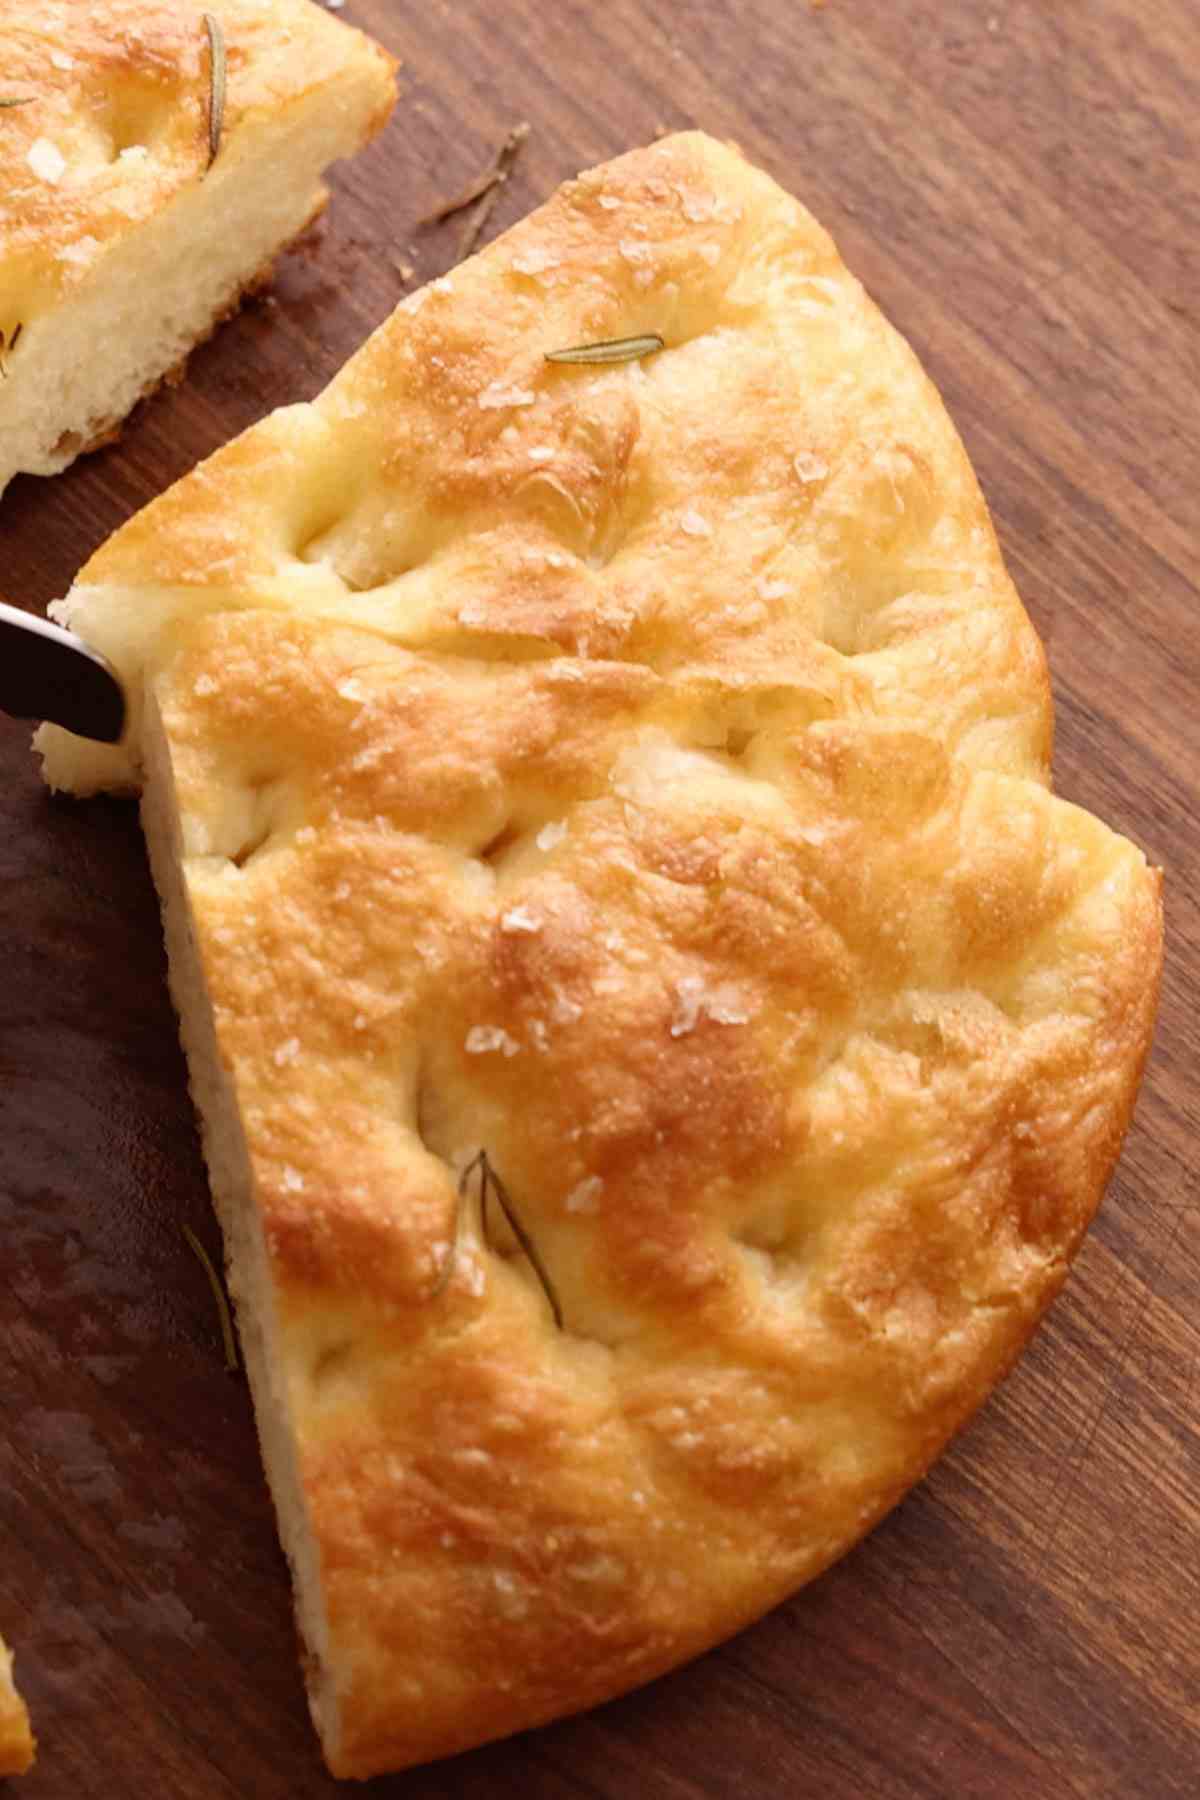
My golden, fluffy, easy Focaccia bread is golden brown and perfectly crisp on the bottom! Known for its large and pillowy air bubbles, you can flavor it simply with olive oil, salt, and herbs, or adapt it to fit your menu. It comes together with simple ingredients, very little hands-on time, and no special equipment! I’ve tested this homemade focaccia recipe several times and, technically, you can make focaccia in one day. But I have determined the overnight rise is the true key to baking a loaf with deep flavor and the best texture.
A reader, Cher, says: “I’ve made this focaccia over 5 times now. Delicious every time…I love playing around with different flavored oils and herbs. If I want a bit more chew to the bread, I use a 50/50 mix of bread flour and pizza flour instead of all-purpose. Can’t go wrong with this recipe and instructions!” ★★★★★
Table of Contents
- My Secret To This No-Knead Focaccia
- Key Ingredients
- Choose Your Preferred Pan Size
- Chill The Dough For The Best Focaccia
- Variations— Flavor Focaccia Any Way You Want
- Can I Make This With Sourdough Starter?
- FAQs To Know Before You Start
- Pro Tips For Making The Best Focaccia
- How To Make Focaccia
- How To Store & Reheat Focaccia
- Serving Ideas
- More Bread Recipes To Try
My Secret To This No-Knead Focaccia
Focaccia is a tender, light, and airy bread thanks to a specific technique of folding the dough onto itself, rather than a more classic kneading technique used for many yeasted breads. Folding the dough several times over itself develops gluten (essential to bread’s chewy texture when baked) and creates a sturdy enough structure to hold the big gas bubbles created from the growing yeast.
Unlike an aggressive dough kneading method using a stand mixer or by hand, this folding technique builds this structure gradually and gently, keeping the bread light, airy, and fluffy. This is a great recipe for beginner bread bakers or anyone who might be intimidated by kneading dough. I’ll walk you through just how to perform this technique in the How-To steps below.
Key Ingredients
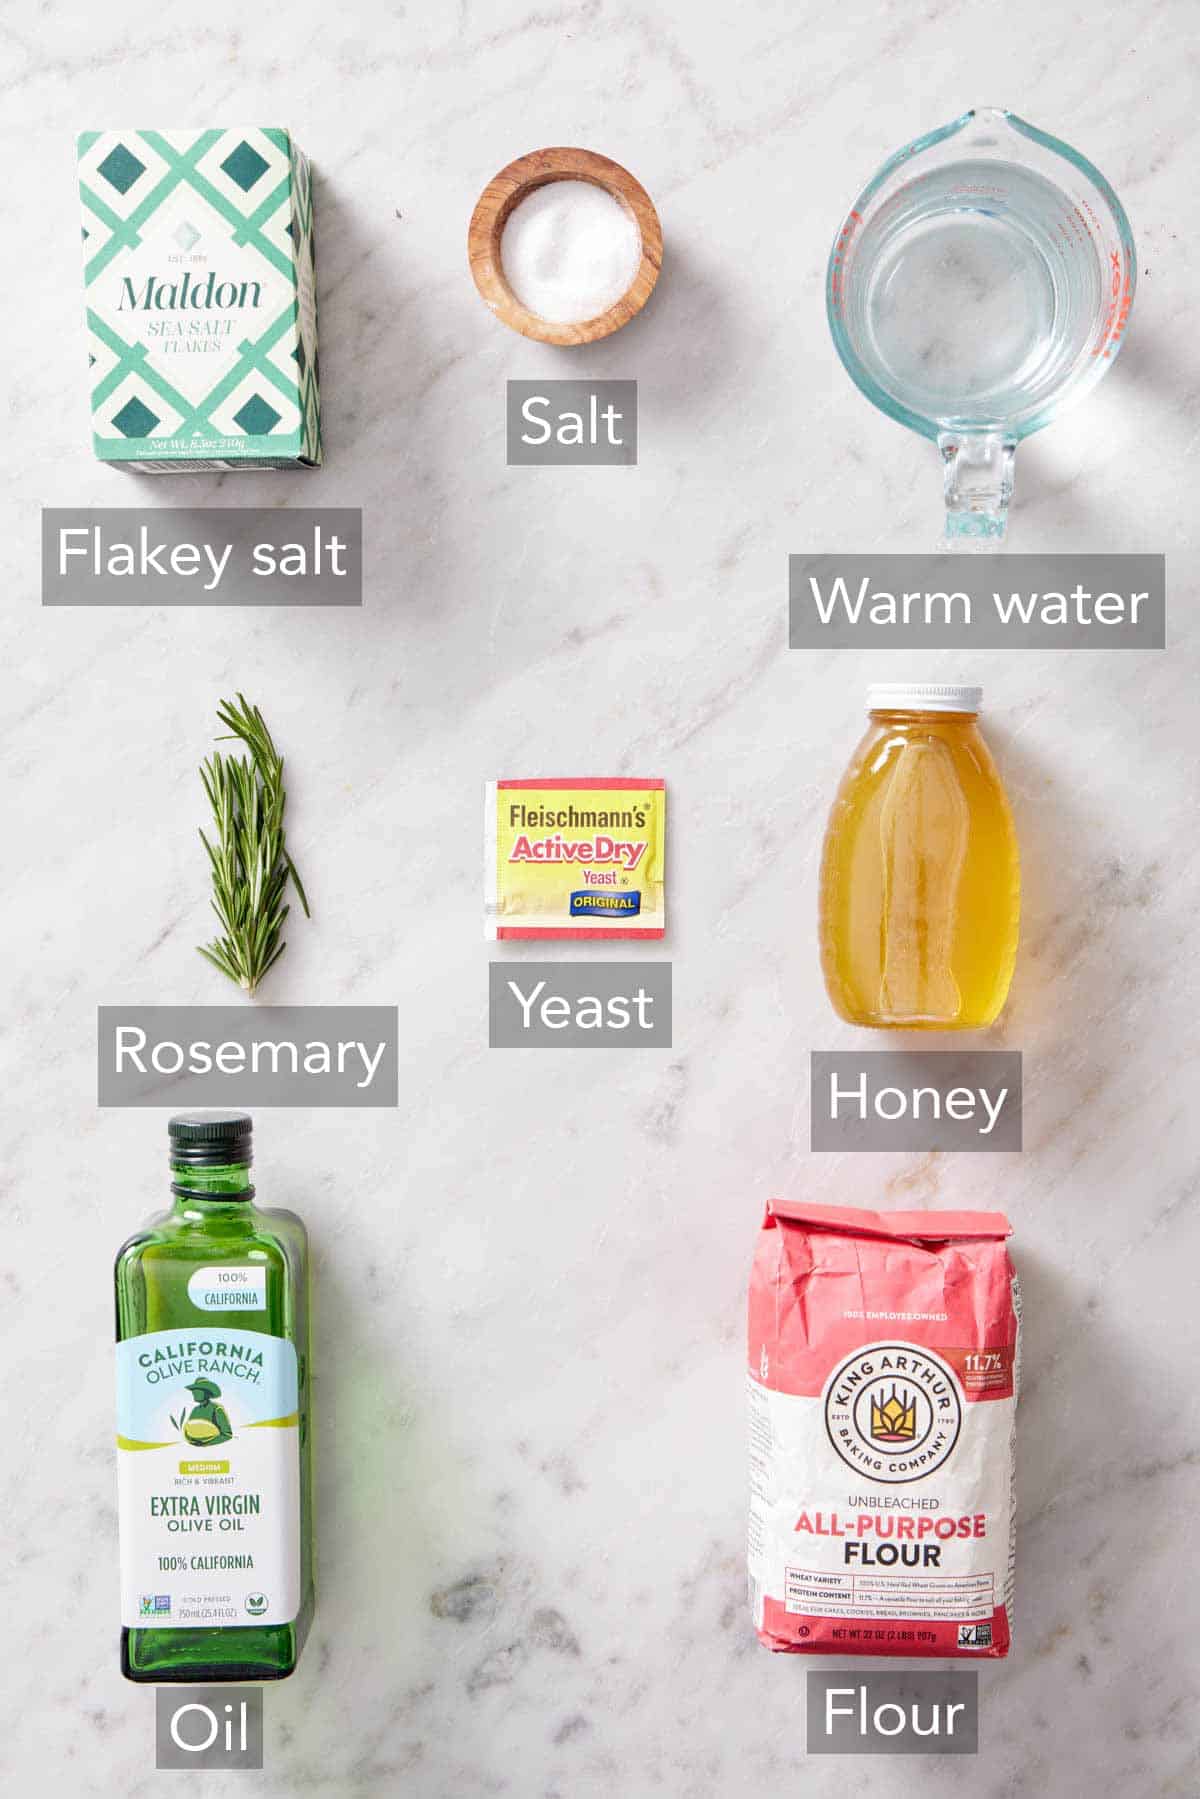
These are the main ingredients you need to make fluffy focaccia. You can find the full list of ingredients and measurements in the recipe card below.
All-purpose flour — this basic pantry staple makes an excellent focaccia! For a chewier, stretchier focaccia bread, you can use bread flour in place of half or all of the all-purpose flour. Its high gluten percentage is perfect for creating a chewier texture. For the best results, measure the flour by weighing or gently scooping it into measuring cups before leveling off the top. (This helps prevent you from accidentally overpacking your measuring cup and using too much flour.)
Active dry yeast — this type of yeast needs to be bloomed in a warm liquid before mixing it into the dough. I prefer using active dry yeast for focaccia because it can be proofed for longer periods, allowing for slower fermentation that results in a lighter texture and better flavor.
Honey — for a very light sweetness and sugar to help the yeast grow. If needed, you can substitute two teaspoons of white or cane sugar. If you prefer, you can simply omit the sweetener. Since the dough has such a long rise time, the yeast doesn’t necessarily need the jump-start that honey or sugar provides. Keep in mind that the small amount of honey doesn’t yield a sweet bread; rather, there is a very subtle sweetness that complements the savory flavors.
Extra virgin olive oil — essential to an authentic focaccia! Olive oil adds richness and helps bake a slightly crisp crust on the bottom of the loaf. It also protects the bread from sticking to the pan. Use high-quality olive oil for the best flavor. You can even use a flavored oil for a twist!
Salt — you will need one tablespoon of fine sea salt to season the dough and a generous sprinkle of flaky sea salt on top. Salt is an essential flavor agent in this recipe, as well as aiding in strengthening the gluten structure so the focaccia can hold those large bubbles produced by the yeast; do not reduce it!
Herbs — fresh or dried herbs, such as rosemary, oregano, or thyme, add savory flavor to the bread. You will need 1-2 tablespoons of fresh herbs or 1-2 teaspoons of dried. If you want even more herbal flavor in your focaccia dough, you can add the same amount of fresh or dried herbs to the flour in Step 2.
Choose Your Preferred Pan Size
My team and I have tested it in a variety of pan sizes, so you can choose your preferred style!
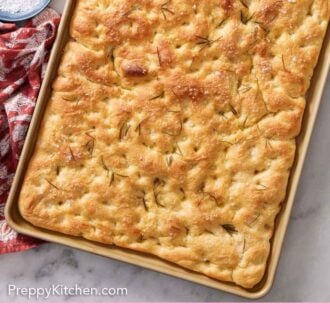
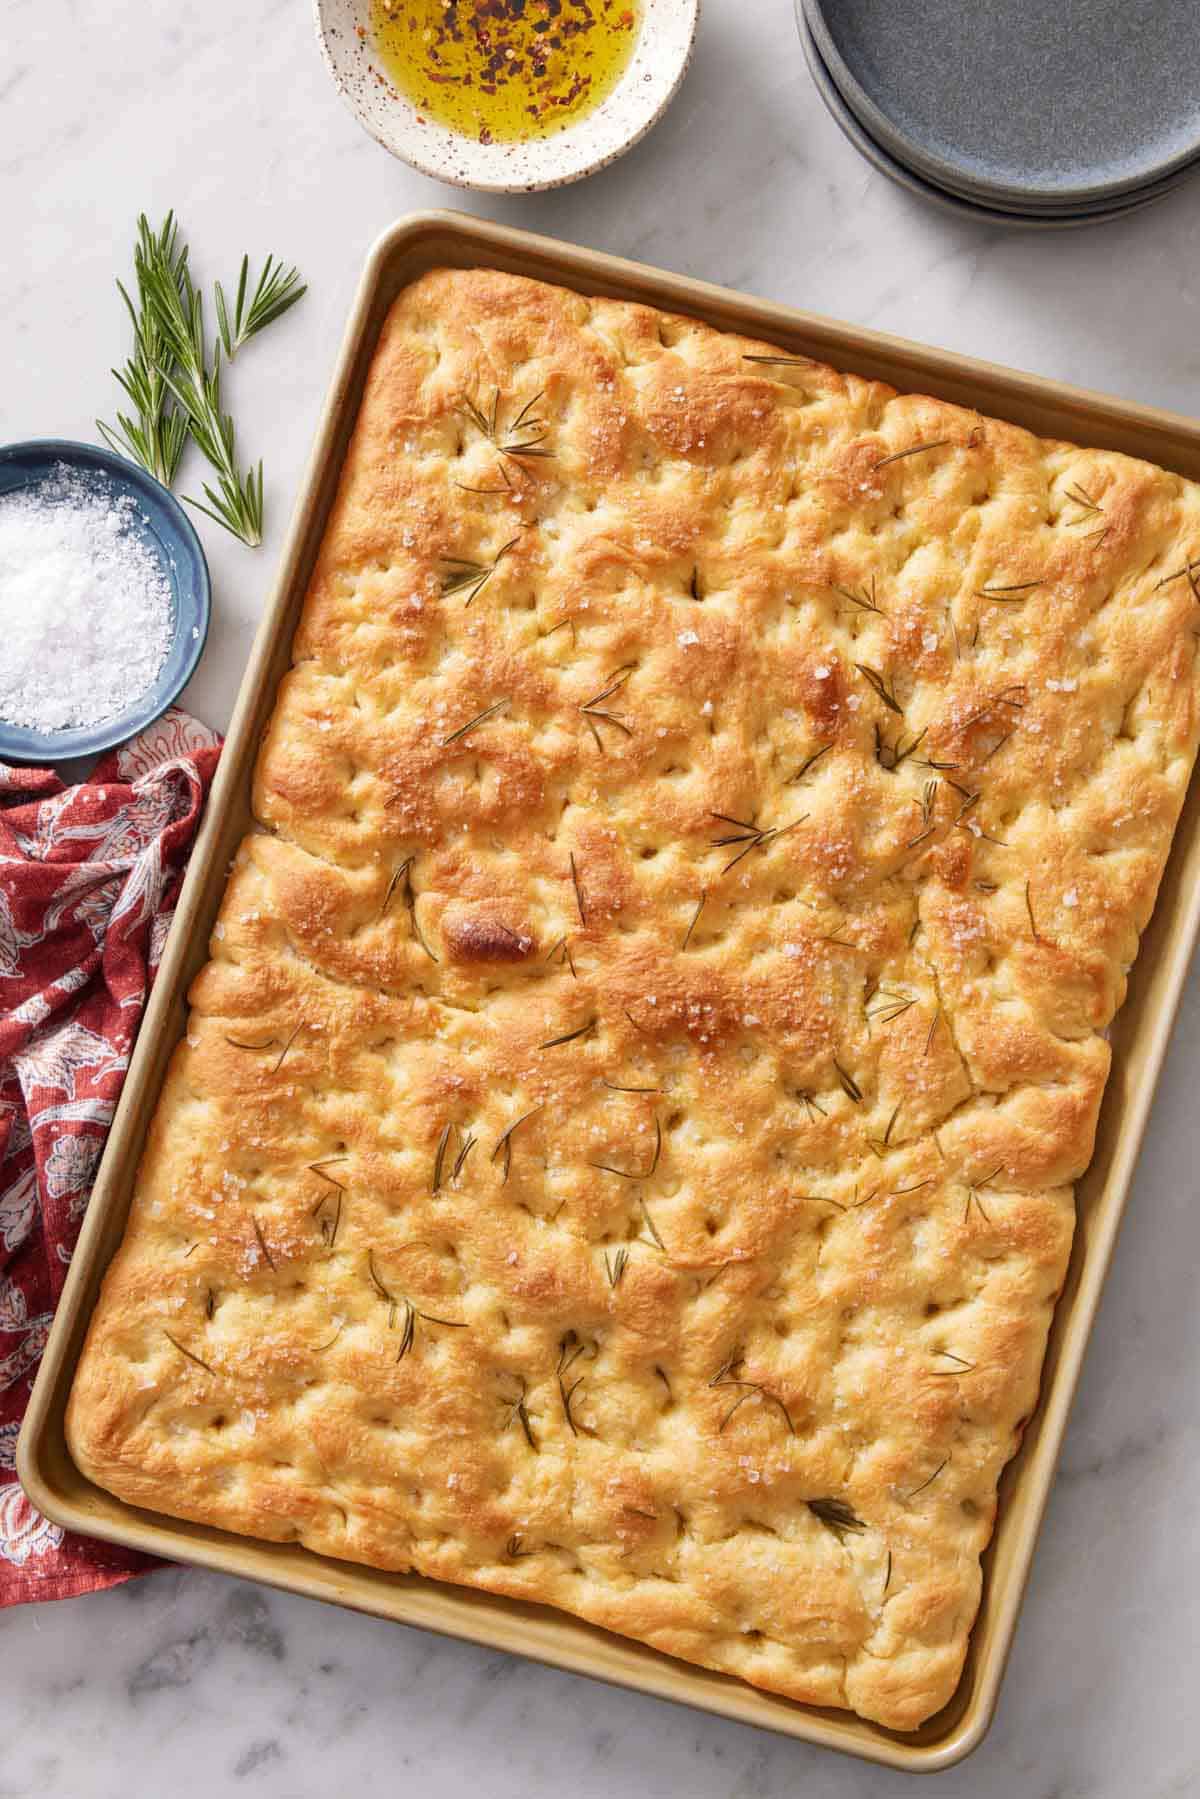
18×13-inch rimmed baking sheet (half sheet pan) or two 9×13-inch pans: I developed this recipe to be baked in either of these. This makes the focaccia slightly thinner, which I prefer for a super crisp crust.
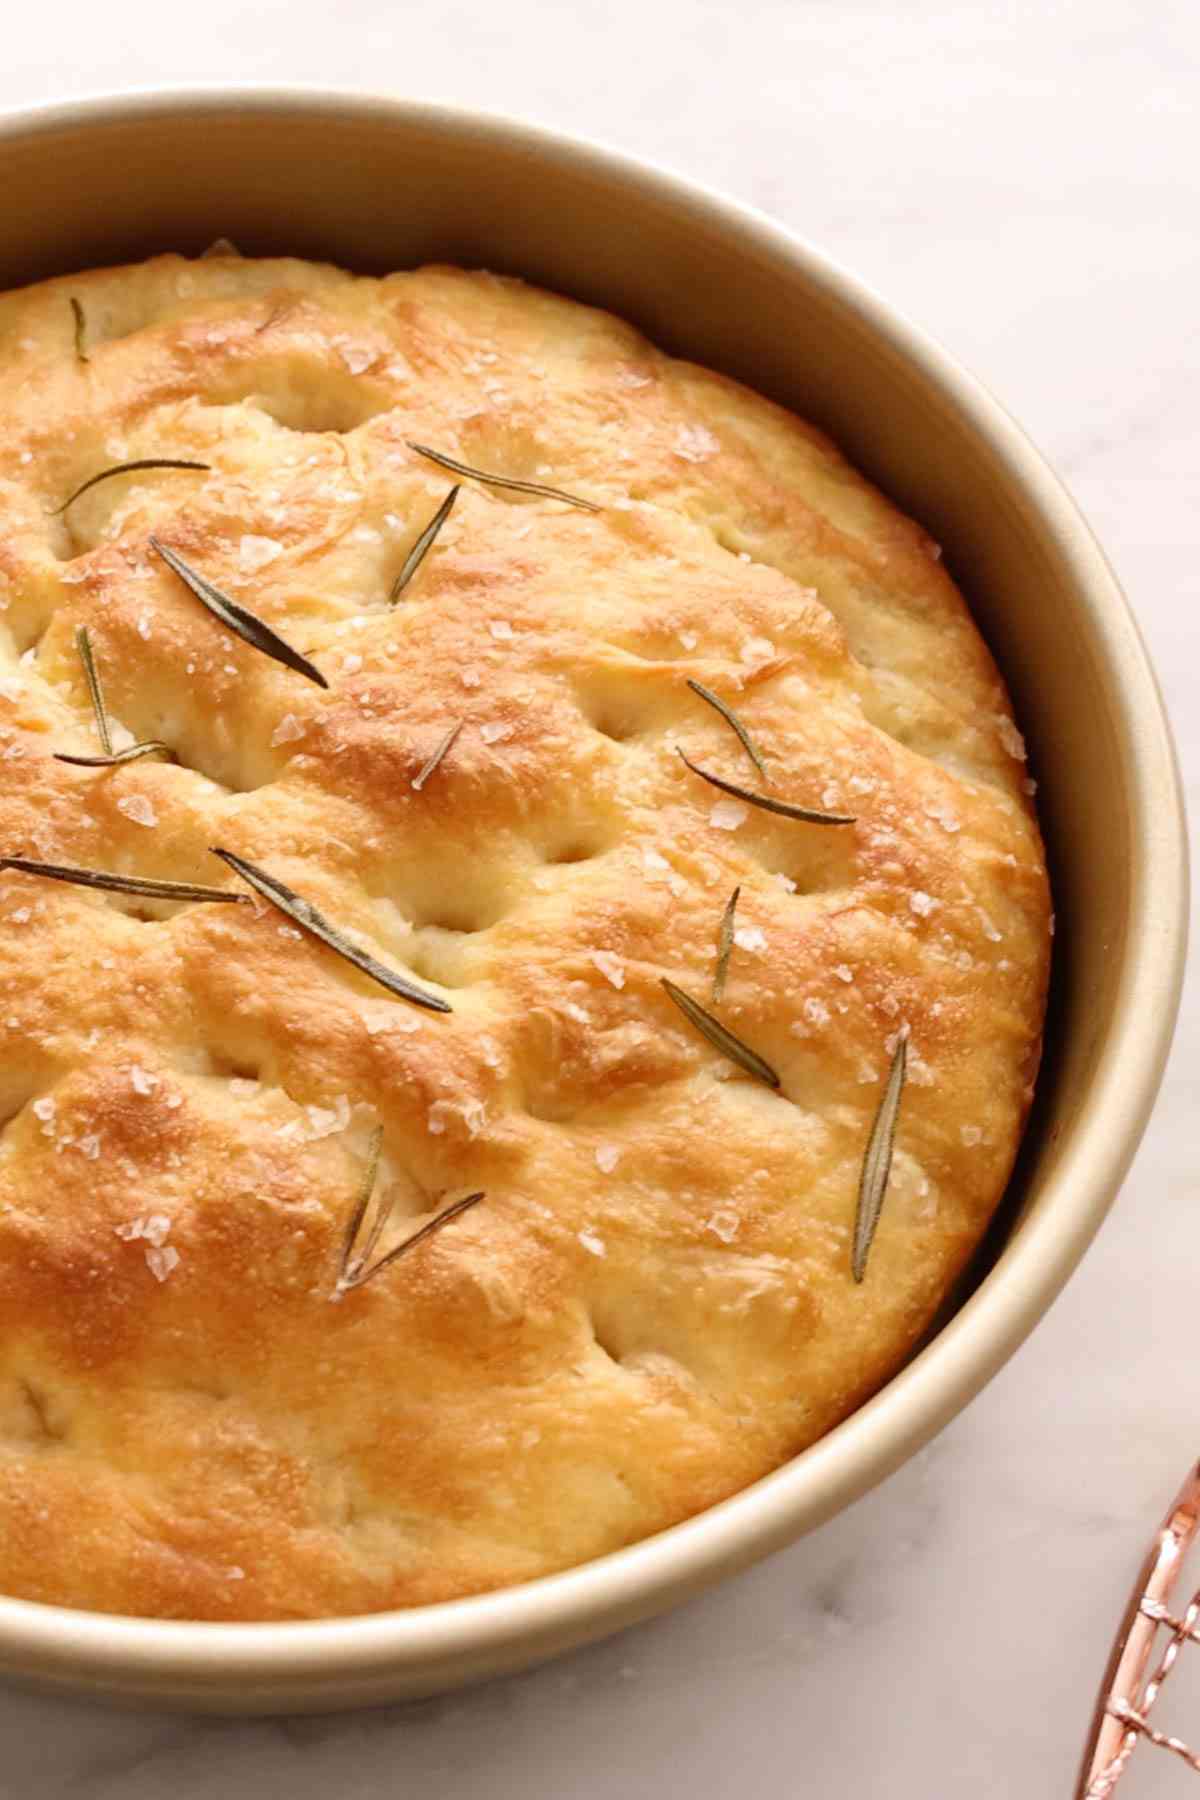
9×13-inch cake pan or two 9-inch round pans: If you want thick and fluffy loaves, ideal for sandwiches, bake the focaccia in one of these pans. Increase the baking time by 5 to 10 minutes.
Chill The Dough For The Best Focaccia
A long and slow fermentation process is essential for the best focaccia. I tested this recipe by making it all in one day, and it worked well; however, my testing showed the best flavor and texture was developed by letting the dough chill overnight in the fridge.
How does this work? Yeast needs a warm environment to grow quickly. When it’s in the fridge or a cold environment, the yeast will grow much more slowly. This means the yeast has more time to break down the sugars and proteins into flavorful compounds, producing a deeper flavor in the baked bread.
The best part is that this extra time doesn’t require more of your hands-on time. Just place it in the fridge and let it rise on its own in the refrigerator for 8-12 hours. I often like to prepare the dough in the evening, let it rise in the fridge overnight, and then stretch and bake it the next day.
Variations— Flavor Focaccia Any Way You Want
Focaccia is a great bread to flavor the way you want! If you add toppings, be sure to add them on top after the dough has been stretched and risen in the pan. And don’t overcrowd the top. Too many toppings will weigh the dough down, causing the focaccia to be dense; a light scattering is great! Here are some of my favorite flavor combinations to get you started:
- Red Onion, Gruyere, and Rosemary: Add 2 teaspoons of chopped fresh or dried rosemary to the dough. After dimpling the dough, sprinkle thinly sliced red onion on top with diced gruyere and more fresh rosemary.
- Roasted Garlic, Olives, and Thyme: Squeeze air fryer roasted garlic cloves out of their skin and scatter them on top of the dough before dimpling it. After it’s dimpled, sprinkle your favorite olives on top with fresh thyme leaves. You could add sliced sweet peppers or roasted peppers to this, too!
- Cherry Tomatoes, Pesto, and Parmesan: Spread pesto over the stretched and risen dough before dimpling it. Once dimpled, scatter the top with halved or whole cherry tomatoes and grated parmesan cheese. You could also swap the tomatoes for thinly sliced squash, zucchini, or cubes of roasted butternut squash!
- Fig, Goat Cheese, and Honey: Dimple the dough, then sprinkle crumbled goat cheese on top. Scatter halved fresh figs or small dollops of fig preserves over the top. Once baked, drizzle the bread with honey and sprinkle with black pepper and flaky salt. When figs are out of season, try this with blueberries, peaches, or apricots.
Can I Make This With Sourdough Starter?
Yes! Sourdough focaccia is so delicious and can easily be made with an active sourdough starter instead of dry yeast. Here are the amounts to use if substituting starter (100% hydration) for one packet (7g) of dry yeast in my focaccia recipe (the remaining ingredients remain the same as in the original recipe):
- 120g active sourdough starter
- 410g (410ml) warm water (90-95°F)
- 540g all-purpose flour
To make the dough, skip blooming the yeast and stir the starter directly into the warm water until it is mostly dissolved. Then, proceed by adding the other ingredients and mixing the dough together. Continue with the recipe as directed, but keep in mind that the time it takes your dough to rise will be longer. The first rise may take 4 to 6 hours at room temperature or up to 24 hours in the fridge. For the second rise, 2 to 4 hours.
FAQs To Know Before You Start
Yes, you can substitute up to 100% bread flour or 50% whole wheat for the all-purpose flour. If using whole wheat, add 2 extra tablespoons of water per cup of flour substituted.
I don’t recommend it because a slower fermentation process creates the best focaccia texture. But, if you need to speed up the process to make it quickly in one day, you can use rapid-rise yeast (also known as instant yeast). If using it, just add it directly to the mixing bowl with the water, honey, flour, and salt, skipping the blooming step.
Dimpling the bread makes the bread’s air bubbles rise to the surface, contributing to the focaccia’s signature appearance and distributing the air pockets evenly throughout the loaf (which makes it light and fluffy). You do this by oiling your fingers, then spreading them apart slightly, and pressing them straight into the dough (but not through the dough!). As you press it, you will see the bubbles pop up. It’s a fun activity to do with the kids, too!
Be sure to dimple the bread right before baking. If the bread continues to rise after, the dimples will disappear.
Yes, this recipe makes a delicious Roman-style pizza dough! Make the dough as directed, and par-bake it for 15 minutes. Remove the pan from the oven and top the crust with your favorite sauce and pizza toppings. Bake the pizza for 13-18 minutes until the center temperature reaches 205°F and the cheese is melted and golden on top.
Pro Tips For Making The Best Focaccia
The dough will be soft and sticky — don’t fret! This bread has a high moisture content, meaning it will likely stick to your hands and the bowl a bit at the beginning of the process. Oil the bowl and your hands well, but don’t worry if it sticks occasionally.
Don’t be timid when stretching and dimpling the bread. Intentionally work the dough as you stretch it to fill the pan, as the dough will be a bit elastic and spring back when stretched. Don’t be afraid to press into the dough when dimpling! You don’t want to poke holes through the dough, but you should press your fingers down until you feel the bottom of the pan.
For an extra crispy crust and added prevention against the crust sticking to the pan, rub the bottom of the pan or pans with 2 tablespoons of softened butter before drizzling with olive oil (in Step 5).
How To Make Focaccia
Below, I’ve highlighted portions of the recipe in step-by-step process images along with instructions for making homemade focaccia. You can find the full set of instructions in the recipe card below.
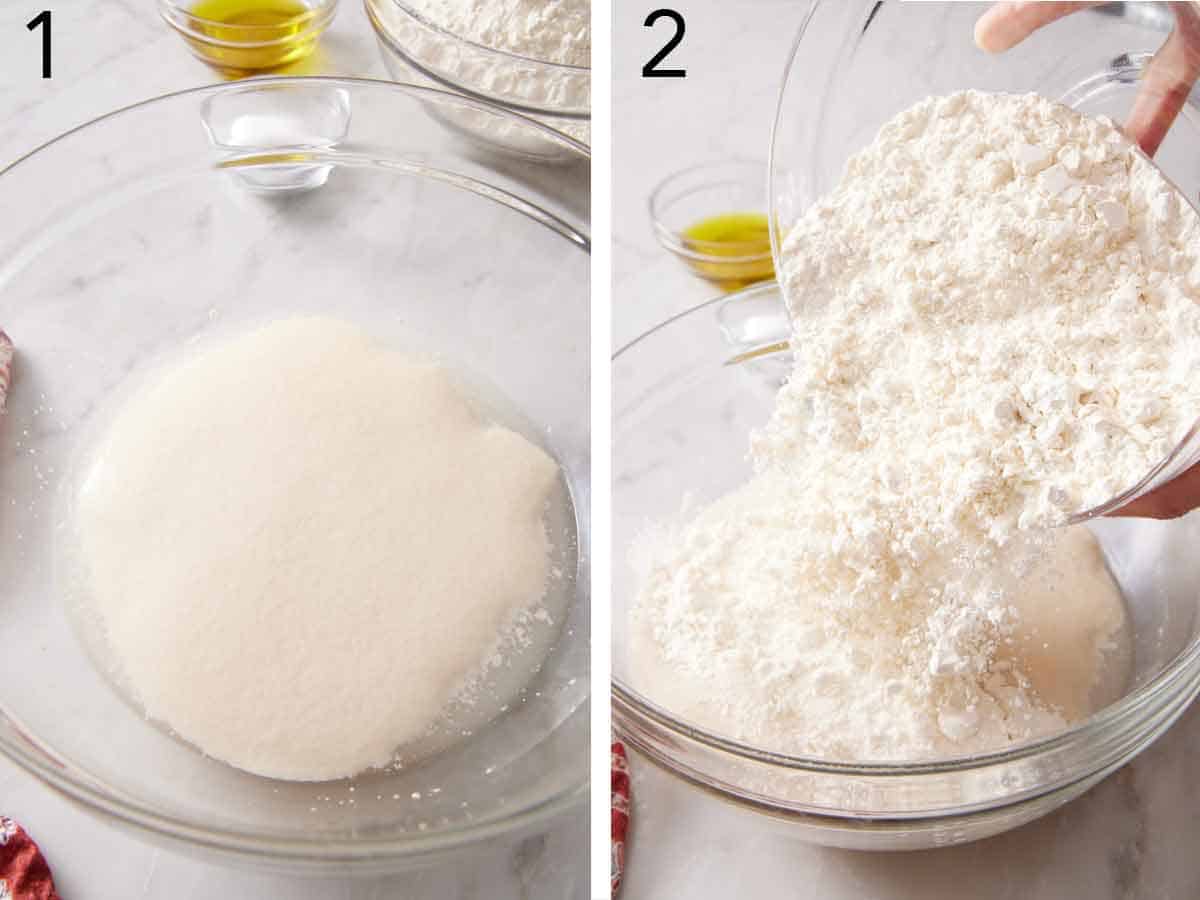
1. To bloom the yeast, whisk together the warm water, yeast, and honey in a large bowl. Let it stand until very foamy, about 5 minutes.
2. Then add the all-purpose flour and salt to the bowl. Stir with a spatula until the flour moistens and a sticky dough forms. Since this is a high-hydration dough, it will seem very sticky, but that’s good!

3. To help prevent sticking, coat another large bowl with olive oil. Add the dough to the bowl and turn it to coat in oil. Cover the bowl with plastic wrap or a kitchen towel and refrigerate for 12 to 18 hours to let the dough rise slowly.
4. Once risen, lightly oil your hands. Tuck your fingers under one side of the dough, and fold the dough up and over itself. Rotate the bowl a quarter turn, and repeat. Turn and fold 2 more times for a total of 4 folds. This method gently develops the gluten while creating a light, airy texture.
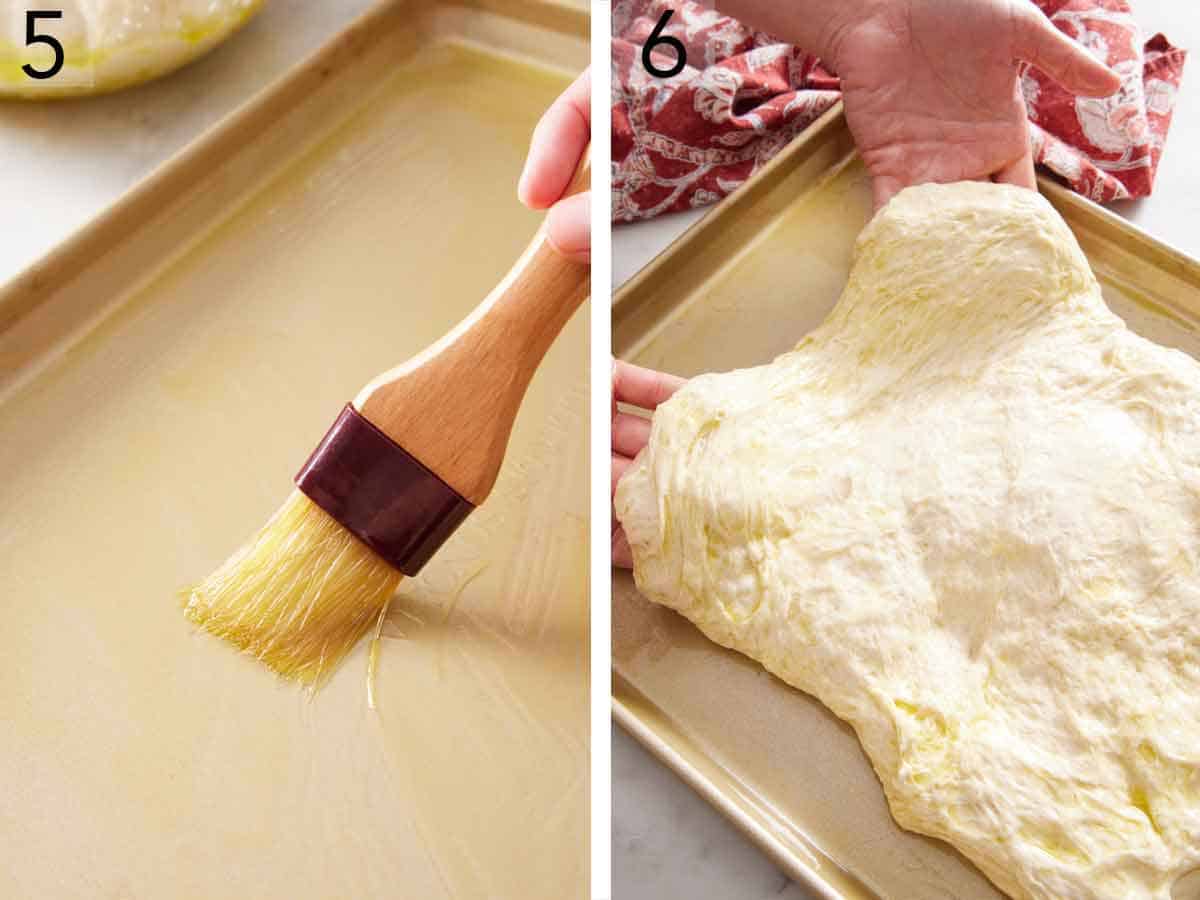
5. Brush your pan (or pans) of choice with olive oil to prevent the dough from sticking and to help crisp up the crust.
6. Gently stretch the dough to the edges of the prepared pans and let it rise again for an hour or 2 until it’s puffed up and bubbly. Stretch the dough every 30 minutes until it fills the pan (as it might spring away from the edges at first).
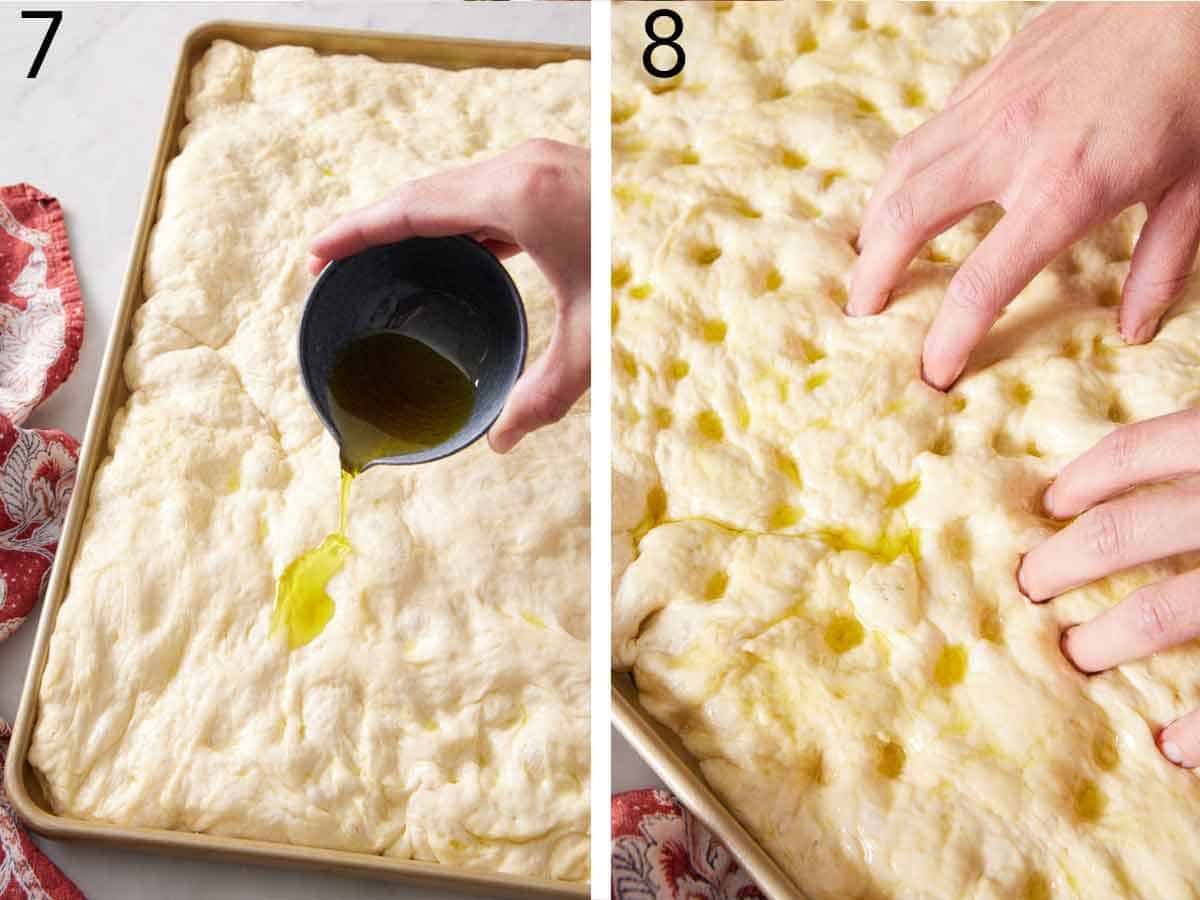
7. After about 1 hour into the second rise, preheat the oven to 450°F. Drizzle the risen focaccia dough with extra virgin olive oil. Use your fingers to spread the oil so it coats the surface of the dough.
8. Press your fingertips into the no-knead focaccia dough, creating dimples all over. Be careful not to poke through the dough.
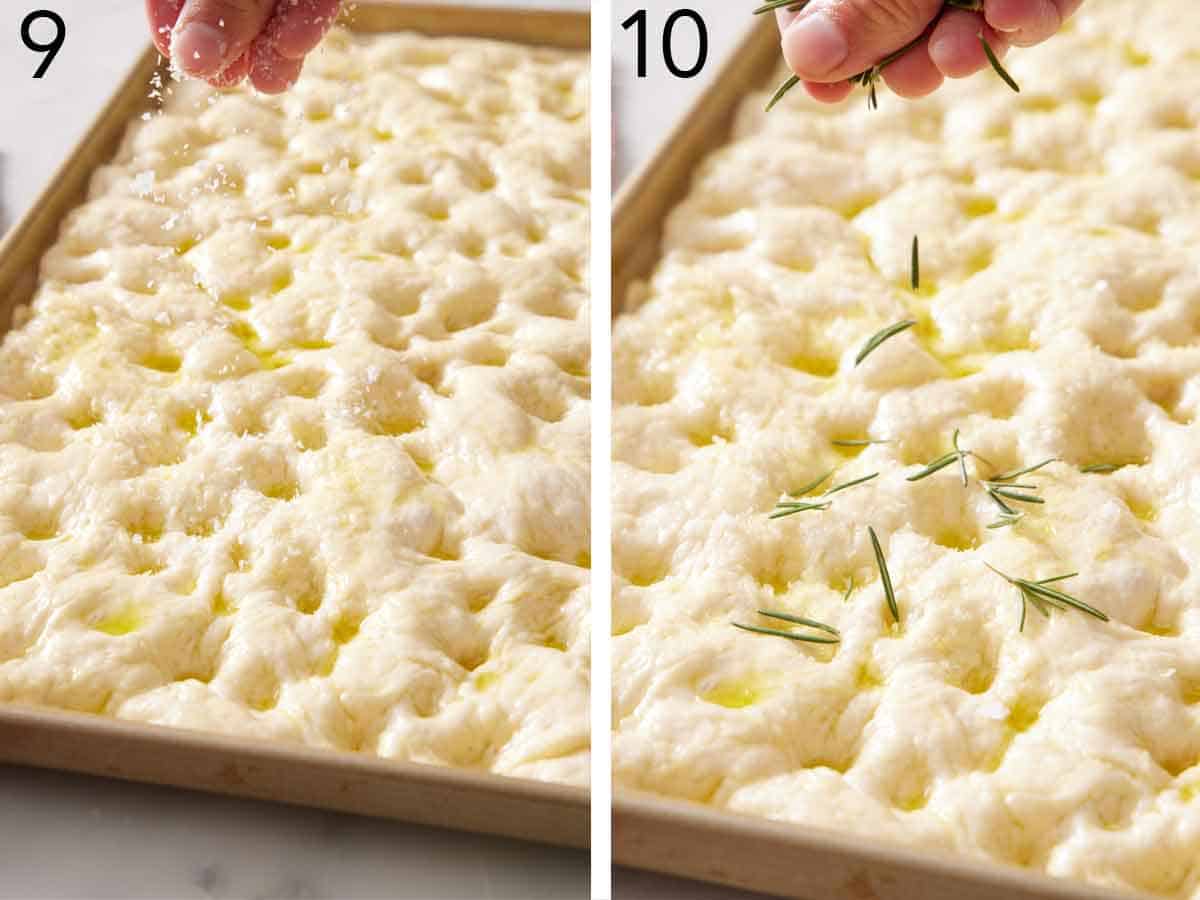
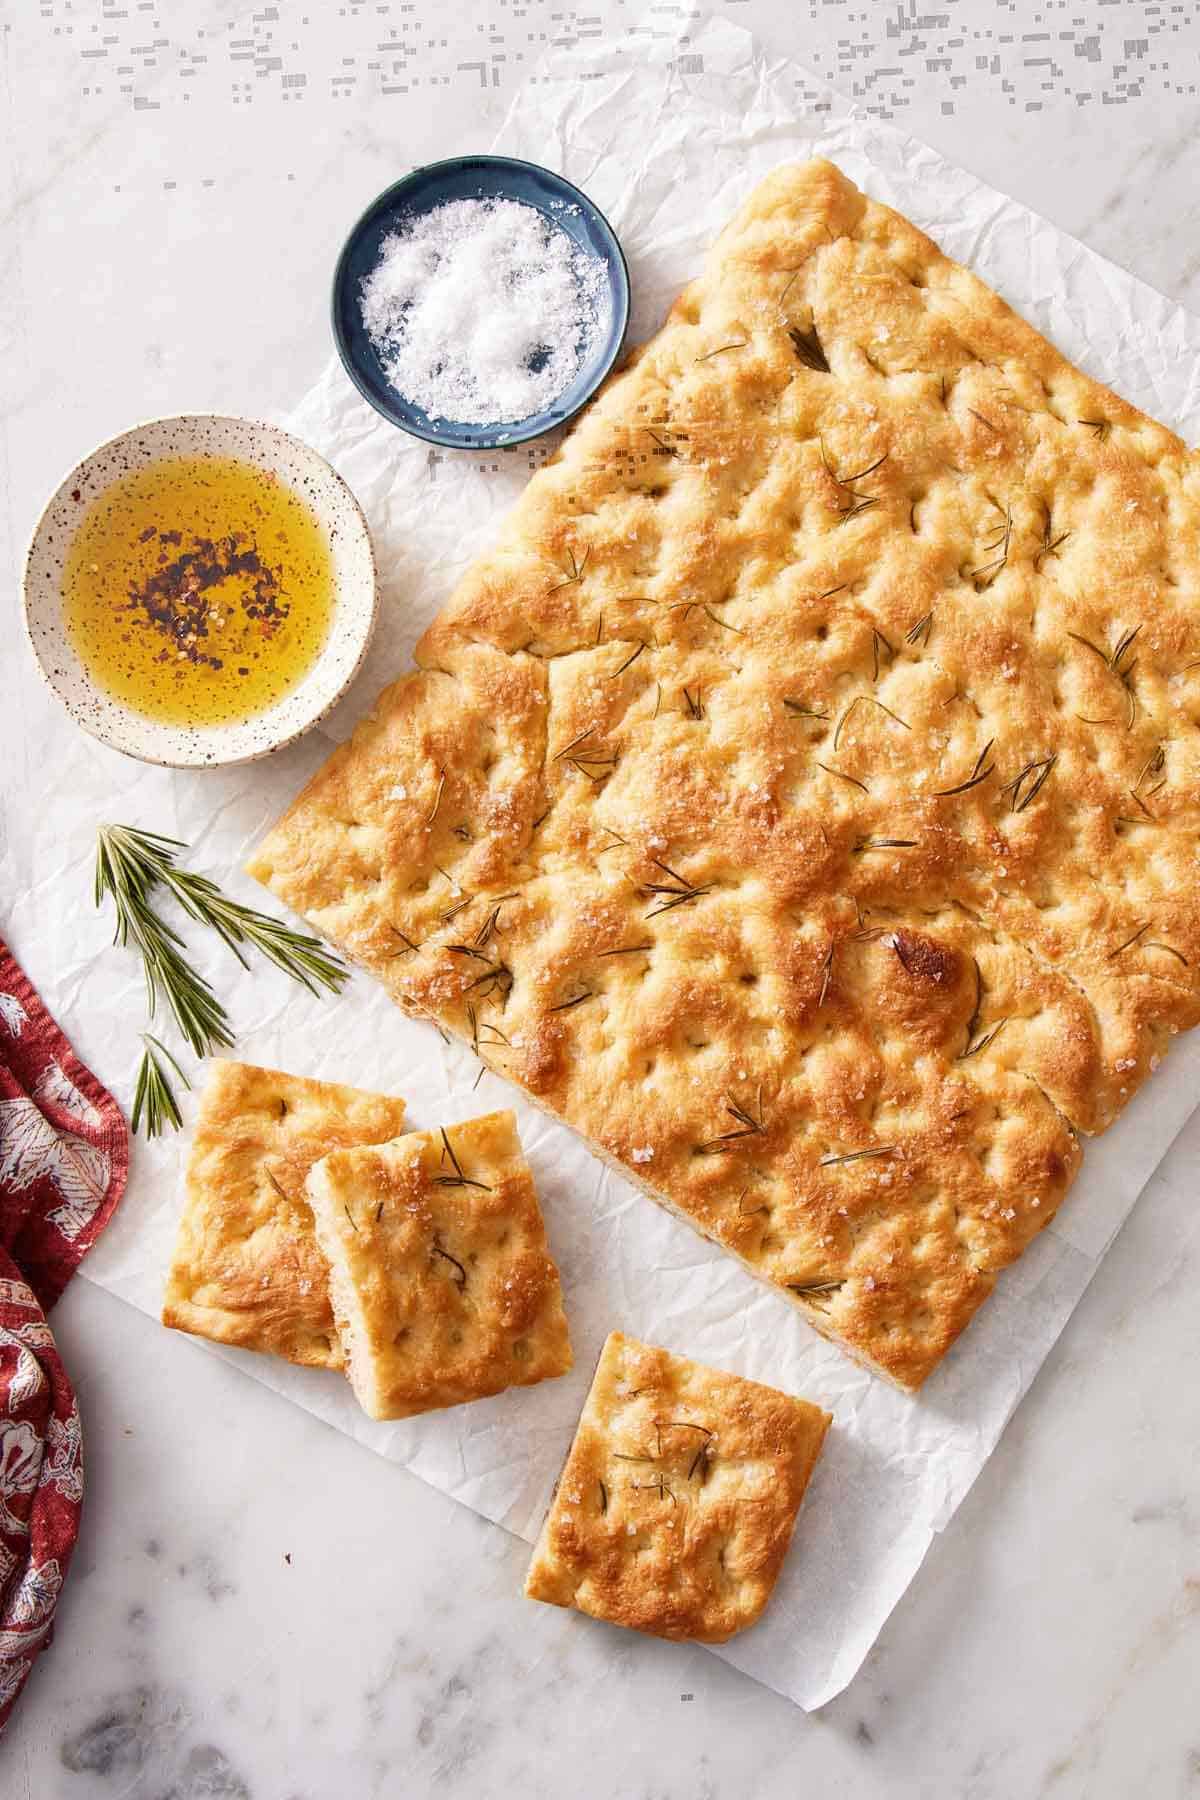
9. Sprinkle the dimpled dough with flaky sea salt.
10. Then sprinkle with fresh or dried herbs of your choice for a more fragrant focaccia bread. You can also omit the herbs for plain bread. Bake until the top and sides are golden brown. If you’re an olive oil fan, you can drizzle the hot bread with more oil straight out of the oven. Then cool the focaccia bread in the pan for 5 to 10 minutes before carefully transferring it to a wire rack. You can serve the bread warm or let it cool completely on the wire rack.

Focaccia Recipe
Video
Equipment
- Baking Sheet
Ingredients
- 2 cups (480mL) warm water 110-120°F
- 1 (.25-ounce/7g) packet active dry yeast (2¼ teaspoons)
- 1 tablespoon honey
- 5 cups all-purpose flour or half bread and half all-purpose (600g)
- 1 tablespoon salt
- 8 to 10 tablespoons extra virgin olive oil divided (120 to 135ml)
- Flakey salt
- Dried or fresh herbs (such as rosemary or thyme)
Instructions
- In a large mixing bowl, whisk together the water, yeast, and honey. Let stand until very foamy, about 5 minutes.
- To the bowl, add the flour and salt. Stir together with a spatula until all of the flour is moistened and a very sticky dough forms.
- Coat another large bowl with 4 tablespoons of the olive oil. Add the dough to the bowl and gently turn it a couple of times to coat in oil. Cover and chill for 12 to 18 hours. Alternatively, rise at room temperature until doubled in size, about 2 hours. (A long fridge rise will result in a more flavorful bread, but both will be delicious!)
- Once risen, lightly oil your hands. Tuck your fingers under the dough on one side and fold the dough up and over itself. Turn the bowl a quarter-turn, and repeat. Turn and fold 2 more times for a total of 4 folds.
- Brush two 13×9-inch baking pans each with 1 tablespoon olive oil or an 18×13-inch rimmed baking sheet with 2 tablespoons olive oil. Transfer dough to the baking pans, dividing it in half if using 2 pans. Gently stretch the dough to the edges of the pans by tucking your fingers under the dough and gently lifting up and pulling it. (The dough may spring back and not totally touch the edges.)
- Let the dough rise again until puffed and bubbly, 1 to 2 hours, stretching the dough every 30 minutes until it fills the pan.
- Preheat the oven to 450°F after about 1 hour into the second rise.
- Drizzle the risen focaccia with the remaining 2 tablespoons of olive oil. Gently spread the oil to coat the top of the dough with your fingers. Stretch and push the dough to touch the edges if it hasn’t filled the pan during the last rise. Press your fingertips into the dough creating dimples all over. (You can be aggressive!)
- Sprinkle with flaked salt and herbs, if desired.
- Bake for 20 to 25 minutes until the top and sides or golden brown. You can drizzle the bread right out of the oven with a few more tablespoons of oil, if desired. Cool in the pan for 5 to 10 minutes, then carefully transfer the loaf to a wire rack. Serve warm or cool completely on the rack. Store leftovers in an airtight container or tightly wrap and freeze for up to 2 months. Toast leftovers before serving again.
Notes
- If you wish to shape your focaccia but hold it to bake it the next day, do the first rise at room temperature. Then, fill the pan with the dough, stretching it out as much as it will allow. Tightly cover and immediately refrigerate. The dough should relax and rise to fill the pan in the fridge. The next day, let the pans sit out in a warm spot or in a proofing drawer for 1 to 2 hours. Pull and stretch the dough as needed to fill the rest of the pan.
- Transferring the hot focaccia to a wire rack preserves the crisp crust. If the bread stays in the pan, steam will soften the crust as it cools.
Nutrition
How To Store & Reheat Focaccia
Room temperature: This homemade focaccia is best enjoyed within two days of baking. Keep it covered in an airtight container. Do not refrigerate the homemade bread, as it will dry out faster than if left at room temperature.
Freezing: To preserve peak freshness beyond 1-2 days, freeze the bread in a freezer-safe container for up to 3 months. Defrost the bread at room temperature for 1-2 hours.
Reheating: Wrap the focaccia in foil and place it in the oven at 350°F for 10 minutes. If you want to recrisp the crust, I recommend placing it in a skillet over medium heat for about 5 minutes, or reheating it in the air fryer for 3 to 5 minutes.
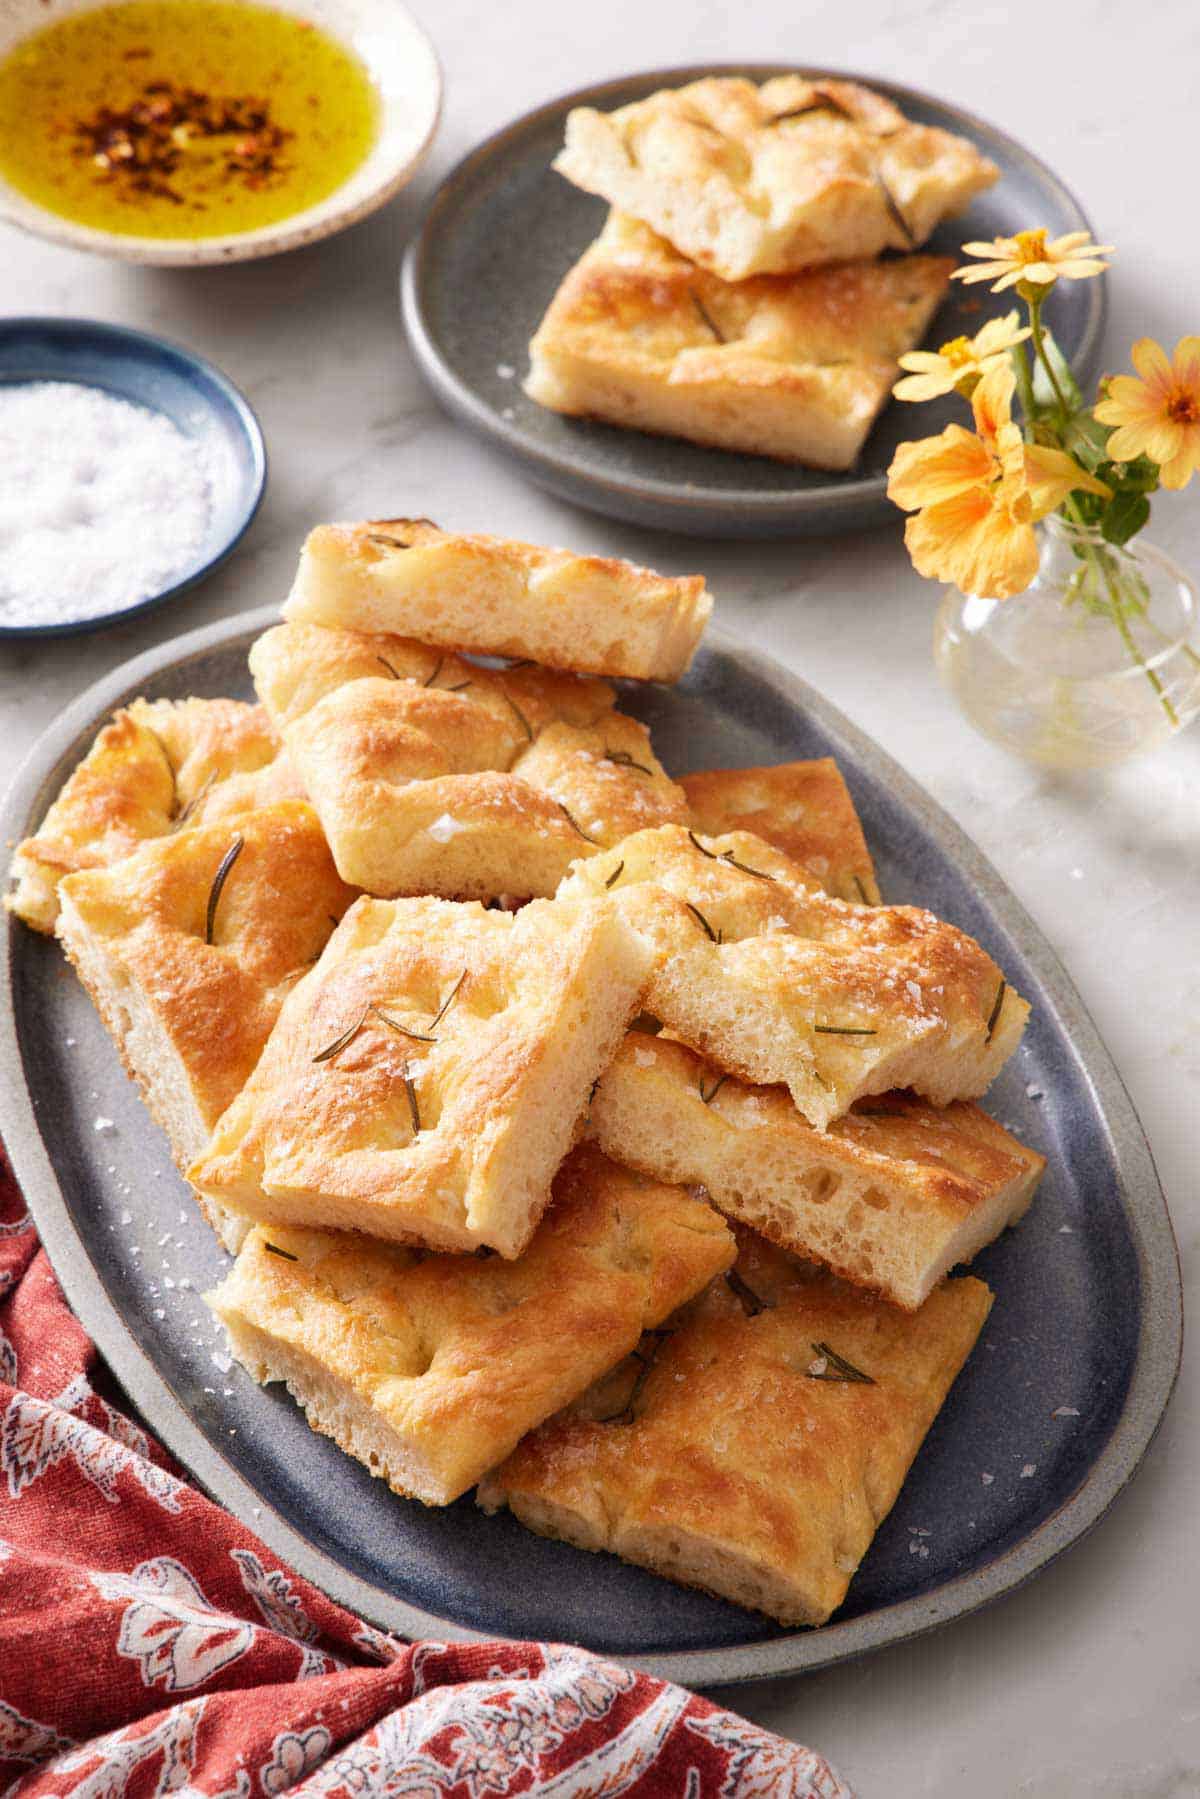
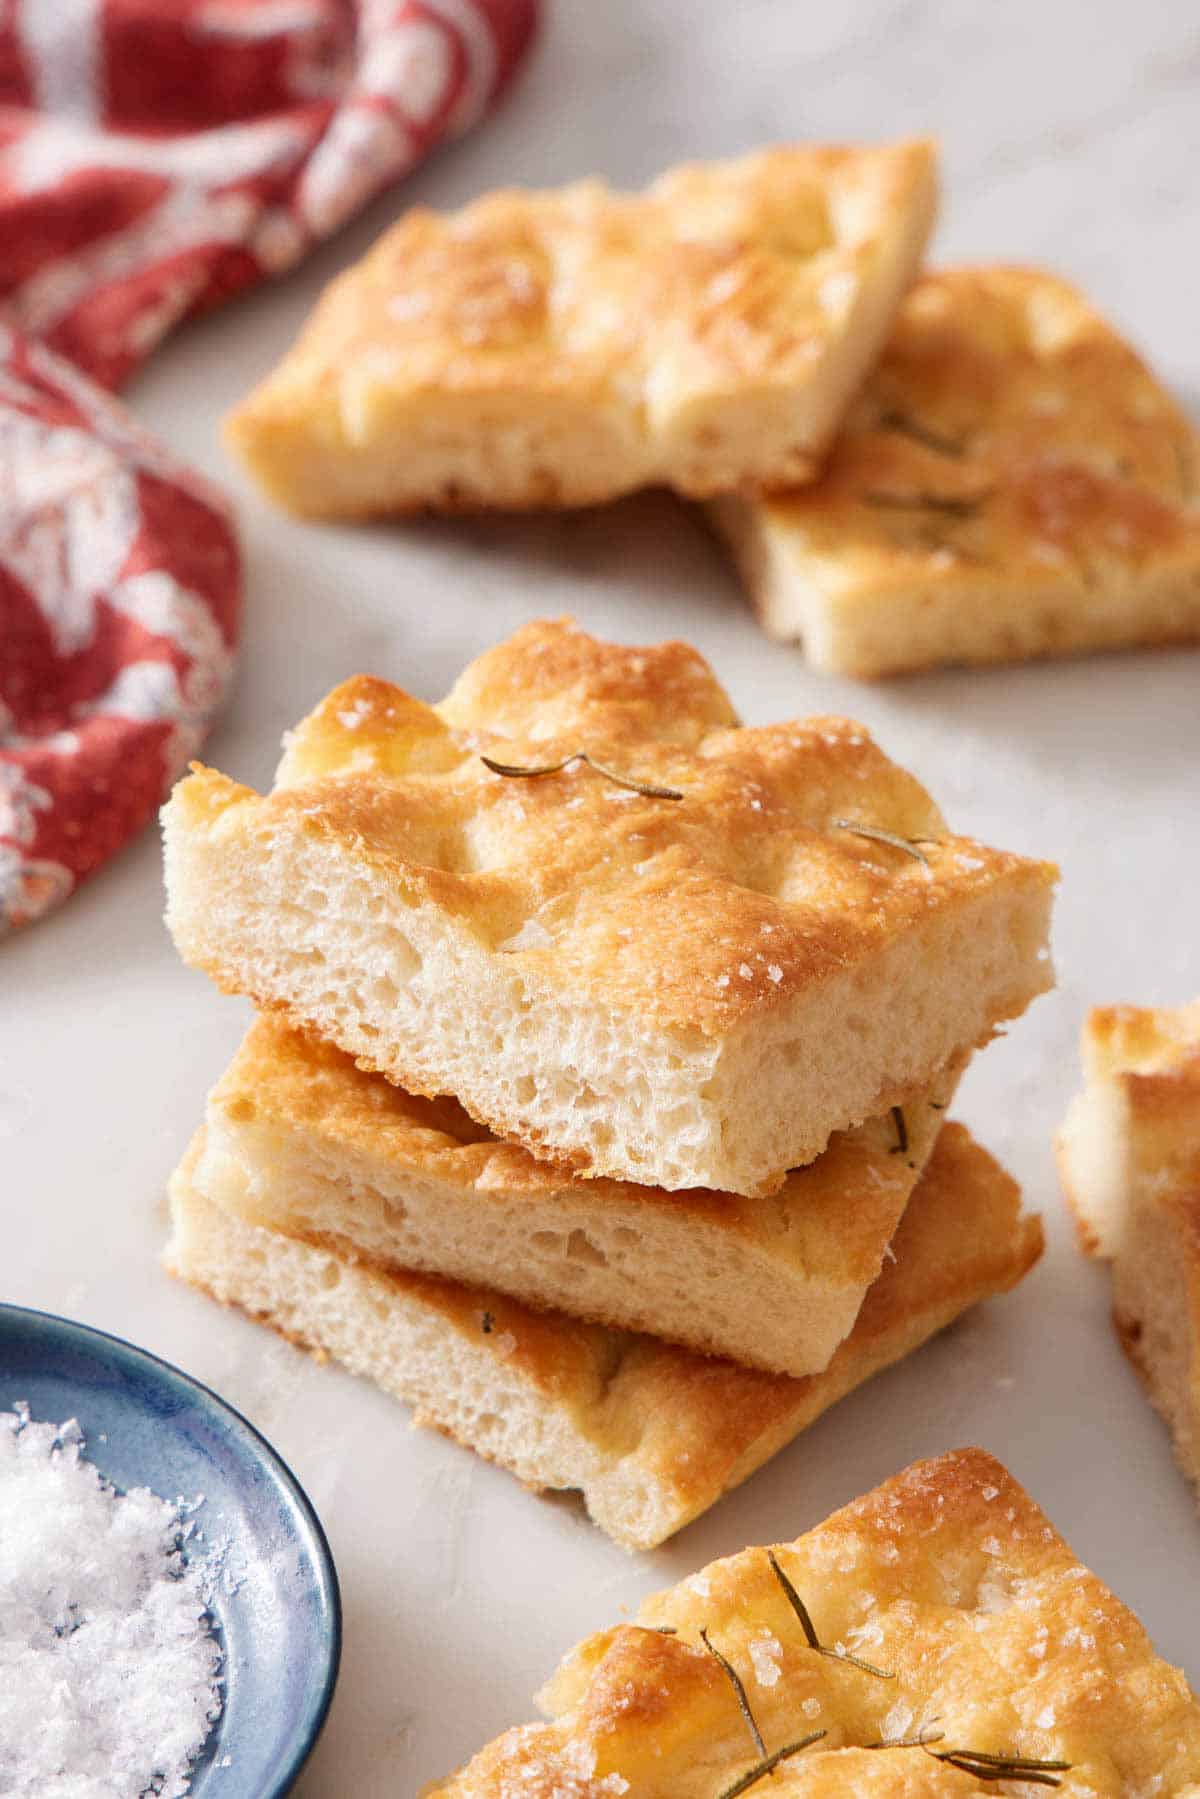
Serving Ideas
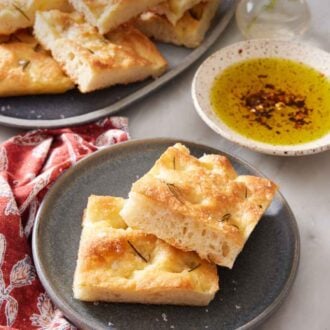
My favorite way to serve focaccia bread is to slice it into squares or strips to dip into herb-infused olive oil, perhaps with a dash of balsamic vinegar. But it is also wonderful as a side next to chicken pesto pasta, or dipped into tortellini soup and Italian wedding soup.
To make irresistible focaccia sandwiches, cut the loaf into squares or wedges and split them by cutting them in half through the center (like you would a hamburger bun). If you want to use focaccia to make sandwiches, I recommend making a thicker loaf. See the “Choose Your Preferred Pan Size” section for more details.
And don’t let leftovers go to waste! If the bread becomes stale and a bit dry, turn it into croutons or stuffing!
More Bread Recipes To Try
Try these homemade bread recipes next!
Soft on the inside with a chewy crust, Italian bread is great served alongside soups and entrees! And since my recipe yields 2 loaves, you can freeze 1 for later.
Beginner-friendly artisan bread only requires 4 ingredients. For a more robust flavor, you can refrigerate the dough overnight (like I do in this focaccia recipe!).
My sourdough bread recipe takes out all the guesswork! I give step-by-step instructions and lots of guidance for a loaf that is slightly tangy with the perfect texture.
Like this recipe, ciabatta bread comes together with a no-knead dough and a little patience. I even share a schedule for making ciabatta so you can time it just right!
For sandwiches or a delicious slice of toast, try my white bread recipe. It’s easier than you think, and there’s lots of info in the post about proper rising time, how to tell if the loaf is baked, and more!
If you’ve tried this focaccia bread recipe, then don’t forget to rate it and let me know how you got on in the comments below. I love hearing from you!
Sarah says
This was SO good!!! Preppy Kitchen is my go-to for all recipes!! I know for a fact it’ll always turn out delicious and this focaccia is a perfect example of that.
Cher says
I’ve made this focaccia over 5 times now. Delicious every time! Whenever we have a visitor I make it for sandwiches and they are always impressed. I love playing around with different flavored oils and herbs. If I want a bit more chew to the bread, I use a 50/50 mix of bread flour and pizza flour instead of all purpose. Can’t go wrong with this recipe and instructions!
Sophie says
Hi, just made this and it’s absolutely delicious. 100% would recommend this awesome recipe. I frickin love focacciaaaaa
Alexa says
i love this recipe, ive made it twice and it always comes out amazing!! question – i kinda want to try making this into 1 LARGE sheet. what size sheet would you recommend?