
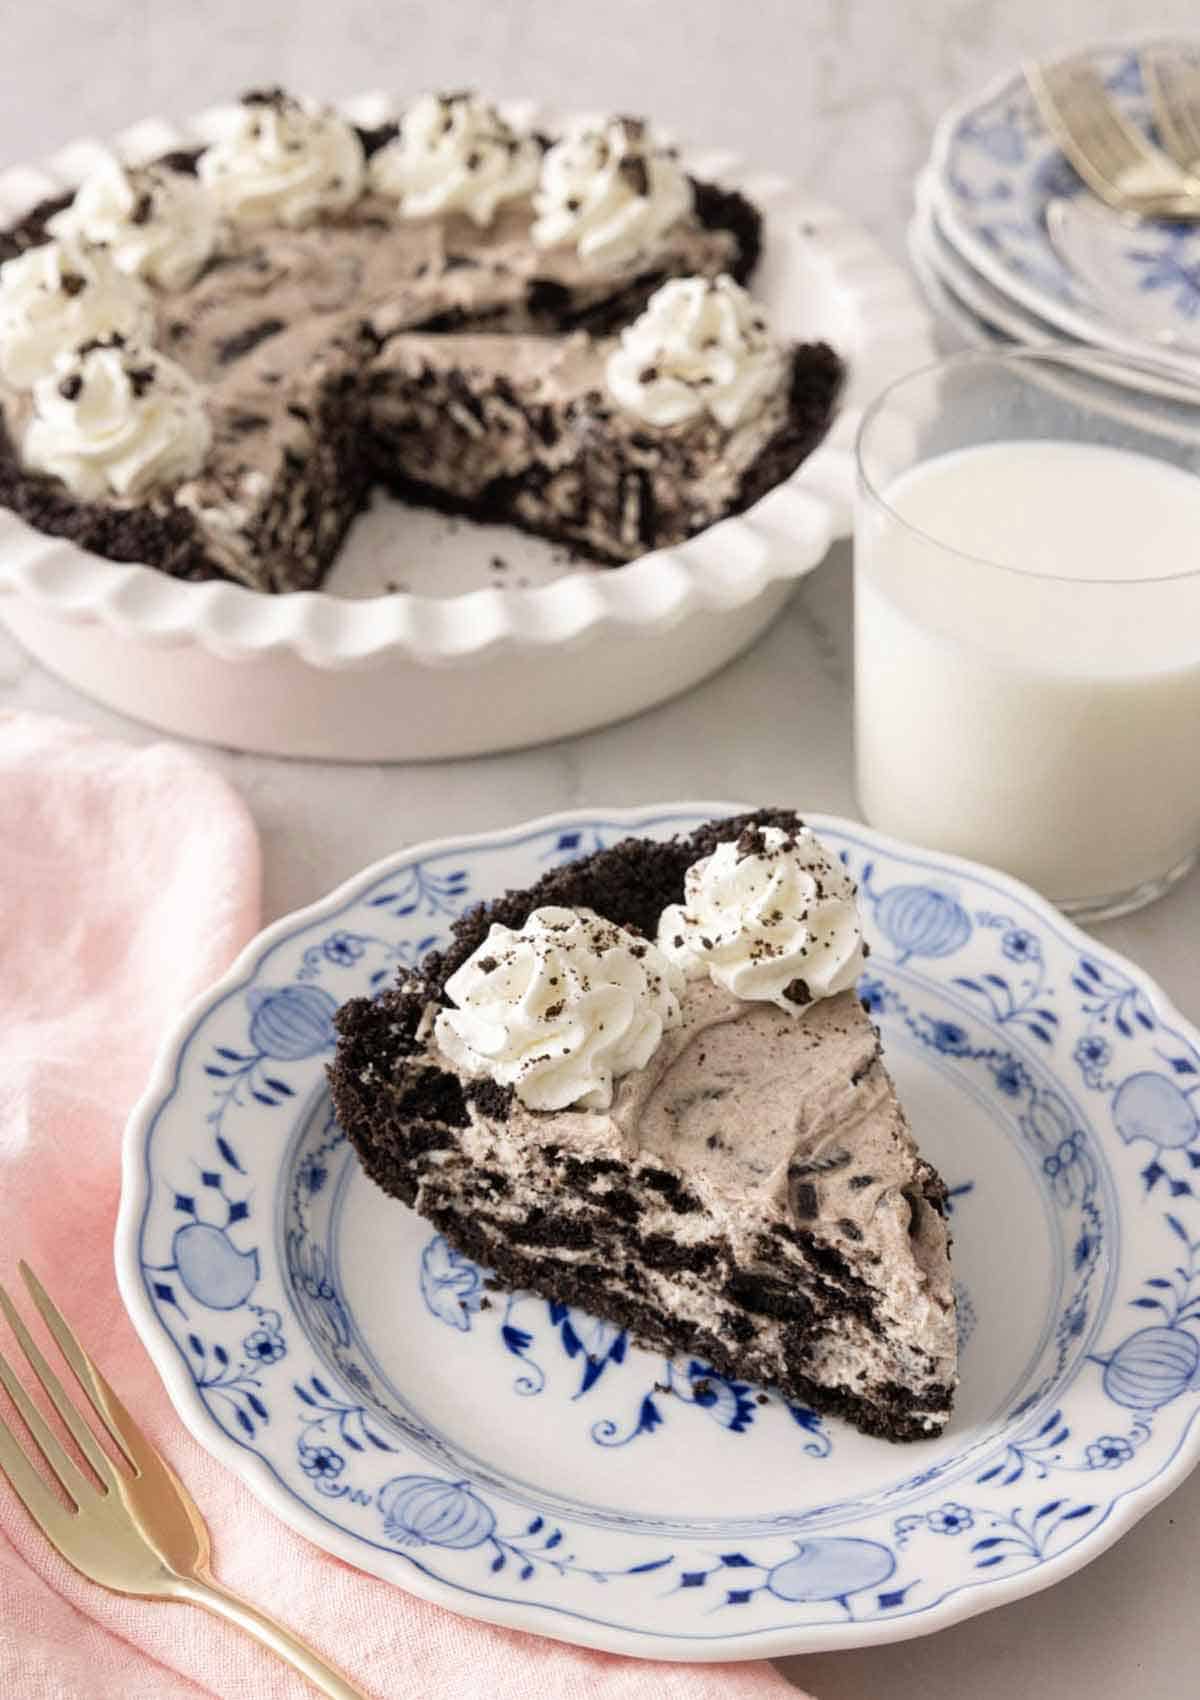
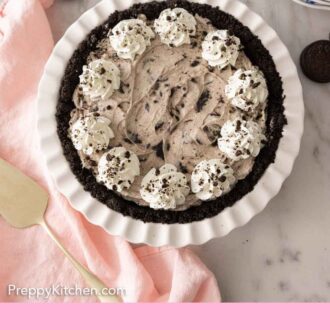
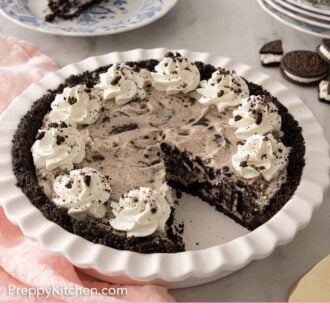
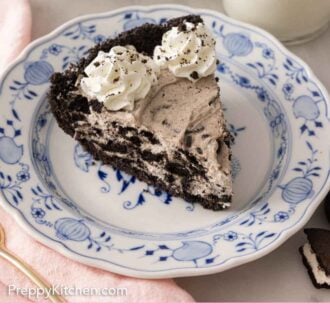
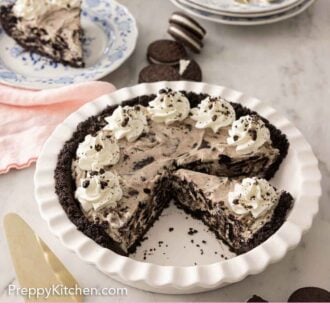
Easy Oreo pie is one of my favorite desserts. It doesn’t take much time or prep (it’s seriously one of the easiest pie recipes!), and it can be frozen or made ahead of time— super helpful during the busy holiday months. The simple crust is crisp and sweet, and the filling has a subtle tang from cream cheese that complements the chopped Oreos. The addition of cream cheese also stabilizes the whipped filling so it holds up well when sliced.
I’ve updated the post to answer some common reader questions to help you troubleshoot common mistakes and make the perfect pie every time. And I share some simple Oreo pie variations. It’s so easy to change up the flavor of this no-bake pie with basic swaps and additions!
A reader, Bridget, says: “I just made this over the weekend, and my partner and I ate it all within two days. Absolutely delicious!! And SO easy to make” ★★★★★
Table of Contents
No-Bake Oreo Pie Ingredients & Substitutions

These are the main ingredients you need to make this easy Oreo pie recipe. You can find the full list of ingredients and measurements in the recipe card below.
Oreos — you need Oreos for the pie crust and the filling (a total of 44 Oreos). One family-size package of Oreos contains about 48 cookies, enough for the crust and pie filling with a few left to garnish the pie (or to snack on!).
Heavy cream — whipped cream is needed for both the filling and the topping. For an easier option or one that’s more stable in warmer temperatures, swap the homemade whipped cream for Cool Whip. You won’t need any heavy cream for the recipe if you go with that option.
Cream cheese — cream cheese beaten with confectioners’ sugar and vanilla extract creates a thick, velvety mixture with a slightly tangy flavor that balances the sweetness of the cookies. Use brick-style full-fat cream cheese, not the spreadable kind that comes in a tub. Tub cream cheese has a thinner and gummier consistency when beaten and can cause the pie to not set properly.
How A No-Bake Pie Sets
For creamy no-bake pies, the filling base is made of a whipped cream or frozen whipped topping. Those items will deflate within hours and at warmer temperatures, so you need to add another ingredient to stabilize the cream. In my recipe, I use a block of cream cheese. Cream cheese is a very stable fat— it is firm but still sliceable when cold and softens but keeps its integrity at room temperature.
When beaten to make it a bit airy and then combined with whipped cream, the stable fat of the cream cheese combines with the less table fat of the whipped cream to hold onto the air and keep its structure for longer. So, adding cream cheese to a creamy no-bake pie makes the filling sliceable and prevents the whipped cream from weeping or deflating.
Quick & Easy Variations Using Other Oreo Flavors
By simply changing the type of Oreo you use and adding 1 or 2 other pantry ingredients, you can totally change the flavor of this pie! Here are some ideas:
- Mint Oreo Pie: Use mint Oreos and add 1 teaspoon of peppermint extract to the filling along with the vanilla.
- Peanut Butter Oreo Pie: Use peanut butter Oreos and add ½ cup of your favorite creamy no-stir peanut butter to the filling with the cream cheese. Garnish with chopped peanuts or peanut butter cups for extra peanutty goodness.
- Gluten-free Oreo Pie: Just use gluten-free Oreos instead of regular ones! The other ingredients in this no-bake pie are naturally gluten-free.

Pro Tips For Making The Best Oreo Pie
Do not remove the Oreo filling! The cookie filling is important for the homemade Oreo crust as it acts like a binder. In the pie filling, the Oreo middles add flavor and sweetness.
Crushing the cookies: Use one of two methods— a food processor or a Ziploc bag with a rolling pin. The food processor method is super easy: Toss whole Oreos into the bowl of your food processor and grind them for about 30 to 45 seconds or so, until fine crumbs form. If you don’t have a food processor, place the Oreos into a ziploc bag, press out the air, and seal. Then crush them with a rolling pin or mallet.
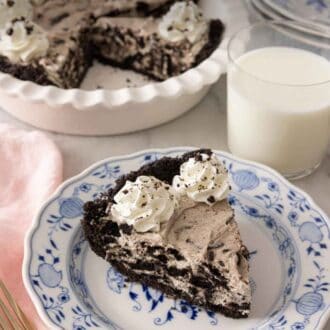
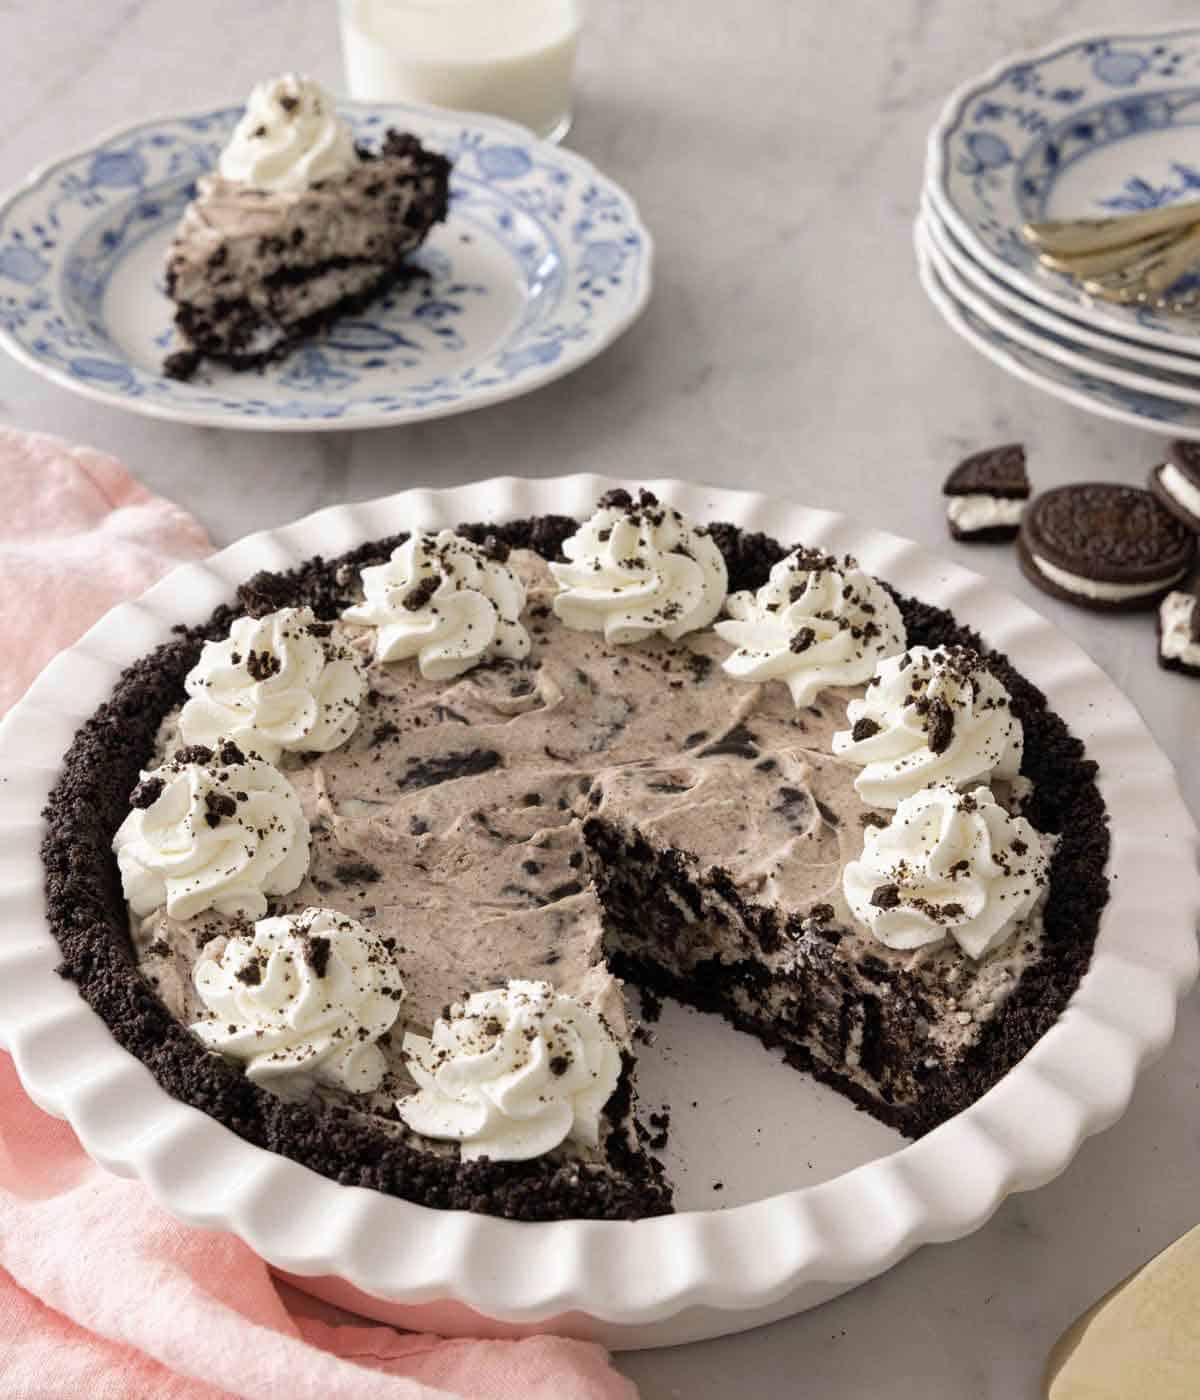
For clean slices, use a hot knife. Pies such as this one with a creamy filling can get messy when you slice them. To prevent this, run your sharp knife under hot water for a few seconds to heat it. And wipe the knife clean between slices. This will keep the slices picture perfect!
How To Make Oreo Pie
Below, I’ve highlighted portions of the recipe in step-by-step process images along with instructions for making this no-bake Oreo pie. You can find the full set of instructions in the recipe card below.
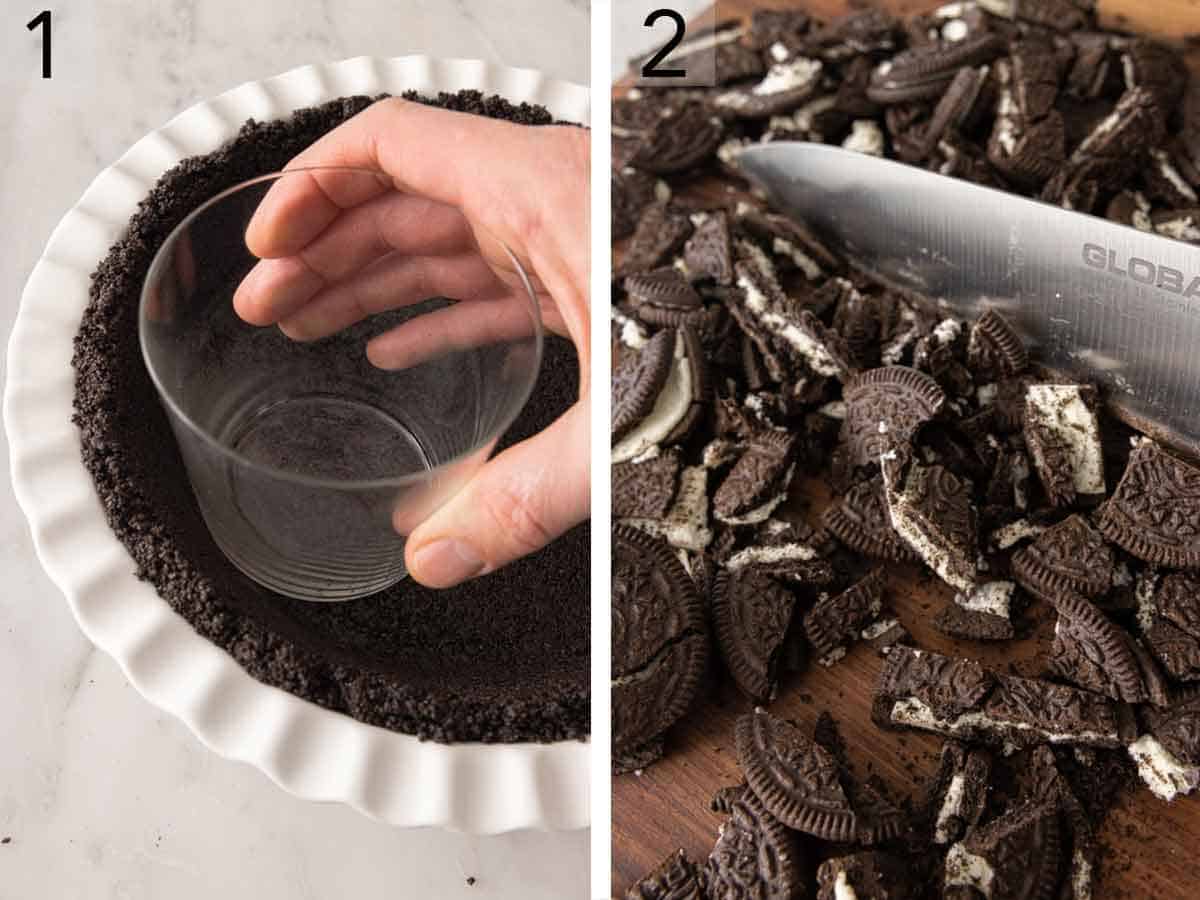
1. Make the Oreo pie crust by stirring together finely ground whole Oreos and melted butter. Place the mixture in a 9-inch pie pan lightly sprayed with cooking spray. Press the Oreo mixture into the bottom and up the sides of the pie pan using a flat-bottomed glass. Freeze the pie crust while preparing the filling, or for at least 30 minutes. While you can use a pre-made Oreo pie crust, I prefer making my own because it’s so quick and easy!
2. Use a sharp chef’s knife to roughly chop up Oreos for the filling. Set aside for the moment.
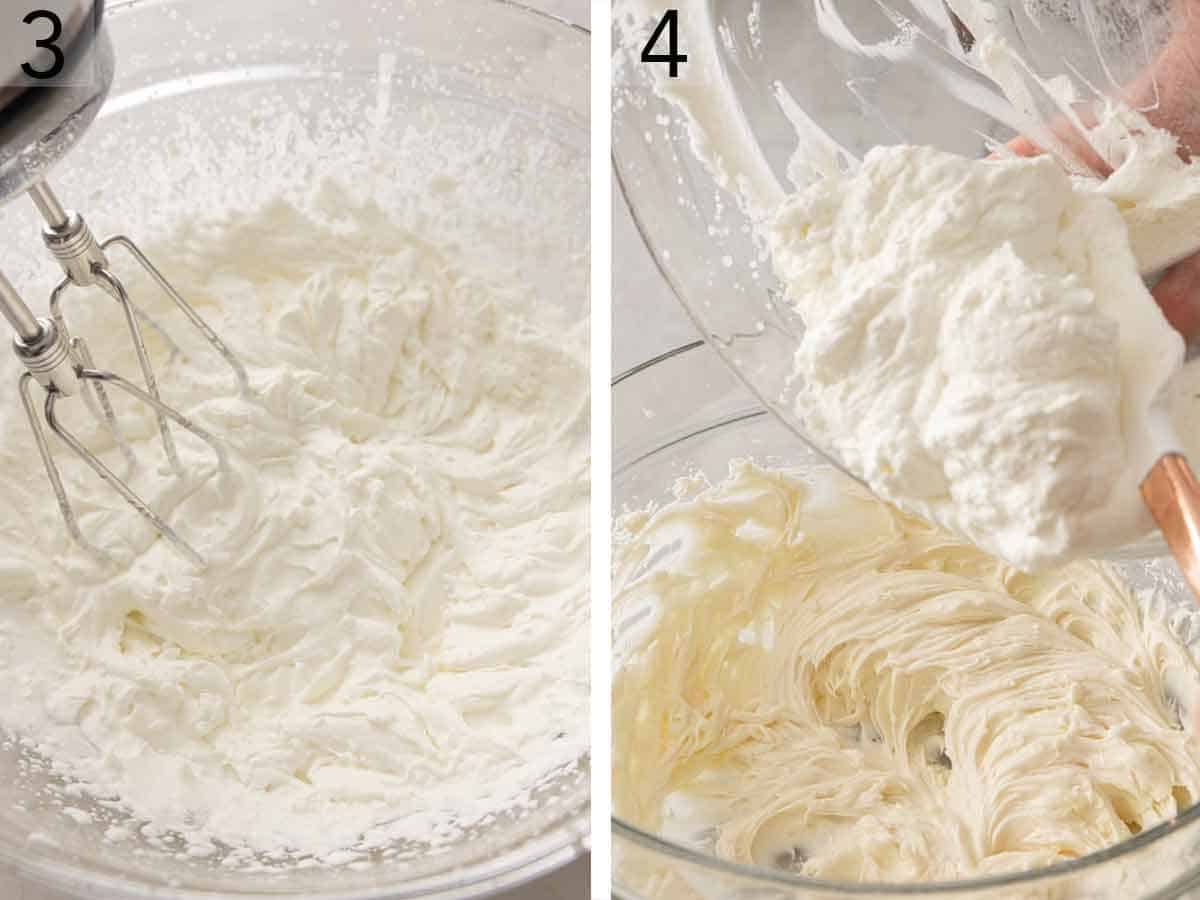
3. Beat the heavy cream in a large bowl using an electric hand mixer until stiff peaks form. You can test the peaks by turning off the mixer and pulling the beaters out. The little peaks left by the beaters should hold their shape; if they don’t, beat for a few more seconds and test again.
4. In another large bowl, use the same mixer (no need to clean it after whipping the cream) to beat the cream cheese on medium-high speed until smooth. Add the powdered sugar and vanilla extract and beat again. Add the whipped cream.
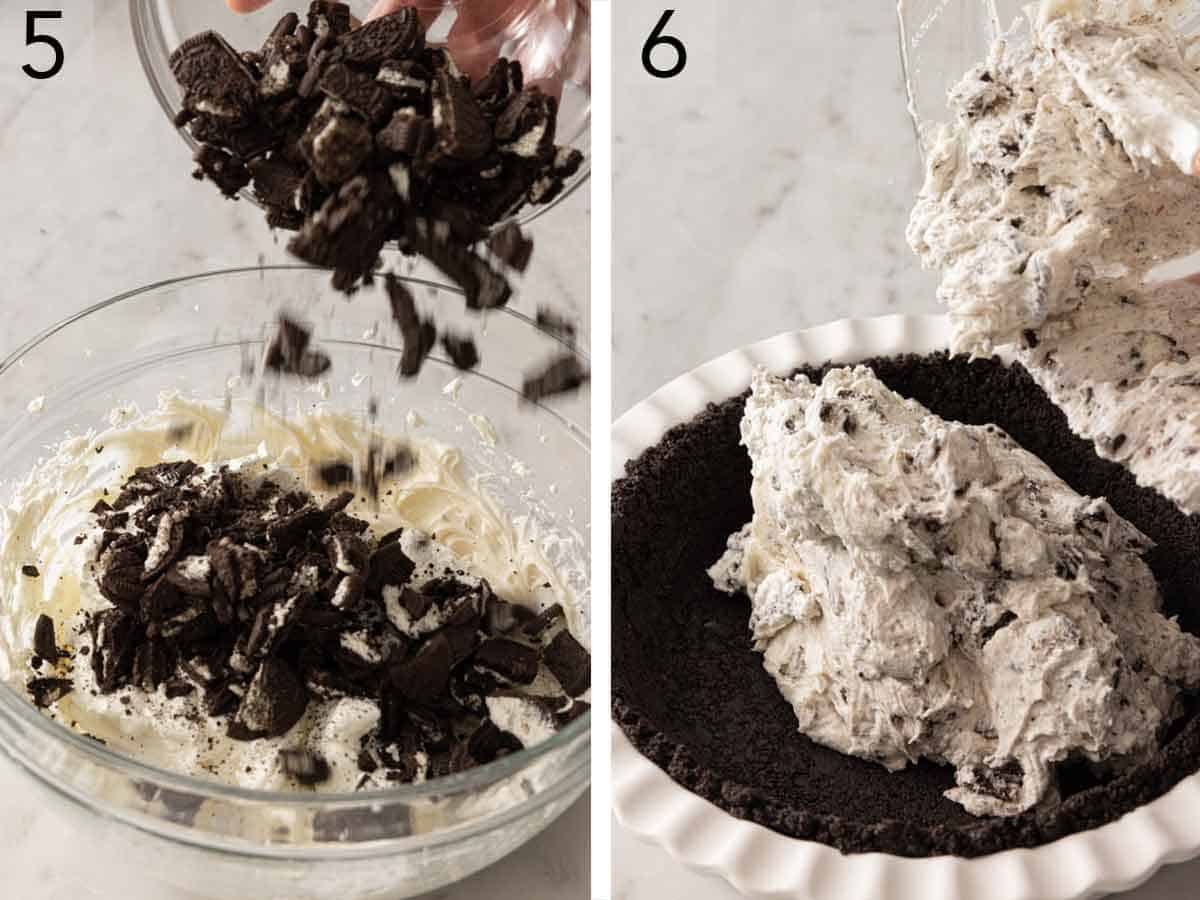
5. Then add the chopped Oreos and fold together gently until combined.
6. Remove the pie crust from the freezer and spoon the Oreo filling into it.
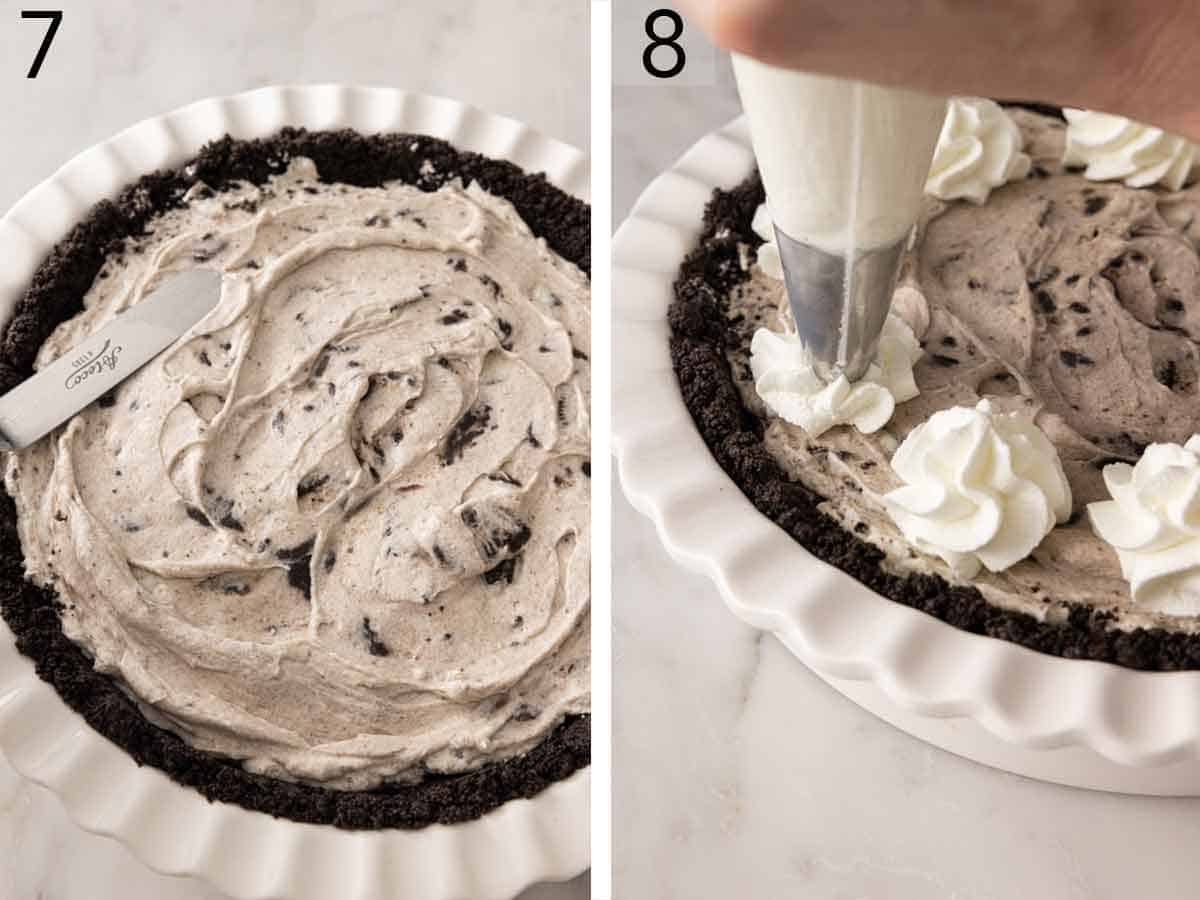
7. Smooth the filling into an even layer, then loosely cover and refrigerate for at least 6 hours to set.
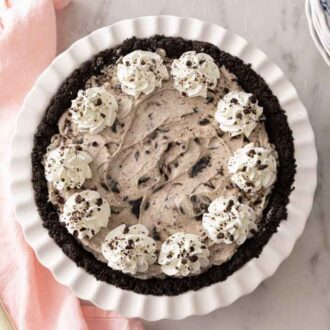
8. Before serving, top the cookies and cream pie with more whipped cream and Oreos for garnish if desired.
Oreo Pie Recipe
Video
Equipment
- Food processor (optional – see notes)
- Stand or electric mixer
- 9-inch pie plate
Ingredients
For the Crust:
- 24 Oreos (275g)
- ¼ cup unsalted butter melted (56g)
For the Filling:
- 1 cup heavy whipping cream (240mL)
- 1 (8-ounce/226g) block cream cheese room temperature
- ¾ cup confectioners’ sugar (90g)
- 1½ teaspoons vanilla extract
- 20 Oreos chopped, plus more for garnish (230g)
- Whipped cream for serving
Instructions
For the Crust:
- Lightly spray a 9-inch pie pan with cooking spray.
- In the bowl of a food processor, process the Oreos until finely ground, about 30-45 seconds. Place in a medium bowl, and stir in the melted butter until well combined. Press the mixture into the bottom and sides of the pie pan. Freeze while preparing filling, or at least 30 minutes and up to 3 days.
For the Filling:
- In a large bowl using a handheld electric mixer, beat the cream on medium-high speed until stiff peaks form, about 2 minutes.
- In another large bowl, beat the cream cheese on medium-high speed until smooth and fluffy, about 2 minutes. (No need to clean beaters between the cream and cream cheese.) Add the confectioners’ sugar and vanilla, beating until smooth, about 1 minute. Gently fold in the whipped cream and chopped Oreos until combined. Spoon the filling into the frozen crust, spreading it into an even layer. Loosely cover and refrigerate until set, at least 6 hours or up to 2 days.
- When ready to serve, top with additional whipped cream and Oreos, if desired.
Notes
- An easy way to press the pie crust into the pan is to use the bottom of a glass or measuring cup. Make sure it has a flat, smooth bottom. Use firm but gentle pressure when pressing the crumbs into the pie pan, as the crumbs won’t stick together if pressed too lightly. Pressing too hard can force the cup through the crumbs and form holes.
- Topping ideas: Add sprinkles to the top to add a festive touch for any holiday. (You can even make homemade sprinkles!) Scatter chocolate curls, mini chocolate chips, or crushed Oreos on top. Drizzle with hot fudge sauce or chocolate ganache.
- If you don’t have a food processor for making the crust, place the Oreos in a large zip top bag and seal. Crush with a rolling pin until finely crumbled.
Nutrition
Make-Ahead and Storing
Oreo pie is an excellent dessert to make ahead of time! There are two options:
Refrigerating: After you add the pie filling to the pie crust, it needs to set for several hours in the refrigerator. So feel free to make it a day or two in advance and store it, covered, in the fridge. Only add the whipped topping when you’re ready to serve, as it can deflate and turn watery as time passes. You can also make the pie crust ahead and store it in the freezer for up to a month.
Freezing a whole Oreo pie: Freezing the no-bake Oreo pie is a great way to save it to serve another day. I recommend freezing it without the topping, as the pie is easier to wrap without it. Wrap the cookies and cream pie tightly in plastic wrap and aluminum foil to prevent freezer burn and freeze for up to 3 months. Thaw in the fridge for at least 6 hours before topping and serving.
To freeze individual slices, flash-freeze them for a few hours on a baking sheet to firm up the whipped cream topping. Then wrap each one well with plastic wrap. Pop them into a freezer bag or freezer-safe container. Oreo pie slices freeze well for up to 3 months. Let it soften for a couple of hours in the refrigerator before enjoying.
Storing Leftover Oreo Pie
Cover leftovers with plastic wrap or transfer to an airtight container, and store in the refrigerator for up to 5 days.
Frequently Asked Questions
You can use Double Stuf Oreos for the pie filling, but I don’t recommend it for the pie crust, as the extra cookie filling can make the crust turn out greasy.
Yes, you can use a 9-inch springform pan and press the cookie crumbs 1 inch up the sides of the pan. Keep the pie in the pan until you are ready to serve it, then remove the sides and transfer it to a plate.
This can happen when the cookies are drier or not ground finely enough. The Oreo crumbs should look and feel like wet sand before you add the butter. An easy way to tell if the crust will hold together is by doing the pinch test.
Grab some of the ground Oreo and butter mixture between your index finger and thumb, and pinch it together. If it holds together, you’re good to go! If it crumbles apart, add another tablespoon of melted butter and pulse a few more times. Then repeat the pinch test.
More Oreo Recipes To Try
In the mood for more Oreo dessert recipes? Try one of these next!
Another one of my favorite no-bake desserts, Oreo balls, is beyond easy to make. Blend together crushed Oreos and cream cheese, roll the mixture into balls, dip in chocolate, and allow to set!
No-bake dirt cake is a nostalgic, whimsical treat for adults and kids alike! Don’t forget to add gummy worms on top to complete the “dirt and worms” look.
My homemade ice cream cake with chopped Oreo cookies is a show-stopper and so easy to make. It’s the perfect dessert for summer.
Oreo cheesecake is an indulgent treat that uses the same pie crust as this recipe! You just need to bake it for a few minutes before adding the rich, Oreo-loaded cheesecake filling.
I love making a batch of chocolate-covered Oreos for an easy dessert. Dip Oreo cookies into melted chocolate and decorate with a melted chocolate drizzle, sprinkles, chopped nuts, and more.
If you’ve tried this Oreo pie recipe, then don’t forget to rate it and let me know how you got on in the comments below. I love hearing from you!
margie says
This looks so good, I’m going to make it for Easter. Thank you for this recipe!! I don’t like cool whip and this is right up my alley, your awesome
Bridget says
I just made this over the weekend and my partner and I ate it all within two days. Absolutely delicious!! And SO easy to make.
Maria Lara says
The kids and family loved it on New Years. I actually chose to freeze the leftovers to see how it tasted and tell me why it was even BETTER!!😭 thank you so much, John. My partner (despite being lactose) could not stop munching.
Marcela says
Delicious Oreo Pie slice resting on the legendary “blue onion” porcelain plate from the Czech Republic. Great choice, John!