
This post may contain affiliate links. Please read our disclosure policy.
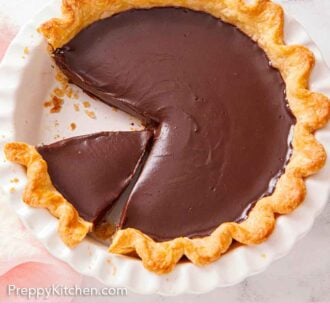

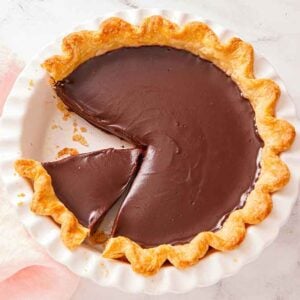
This Chocolate Pie is a classic dessert recipe that everyone will love. A tender, buttery pie crust is filled with a decadent chocolate filling—it’s smooth, silky, and rich! This pie is the perfect make-ahead dessert for the holidays or any occasion.
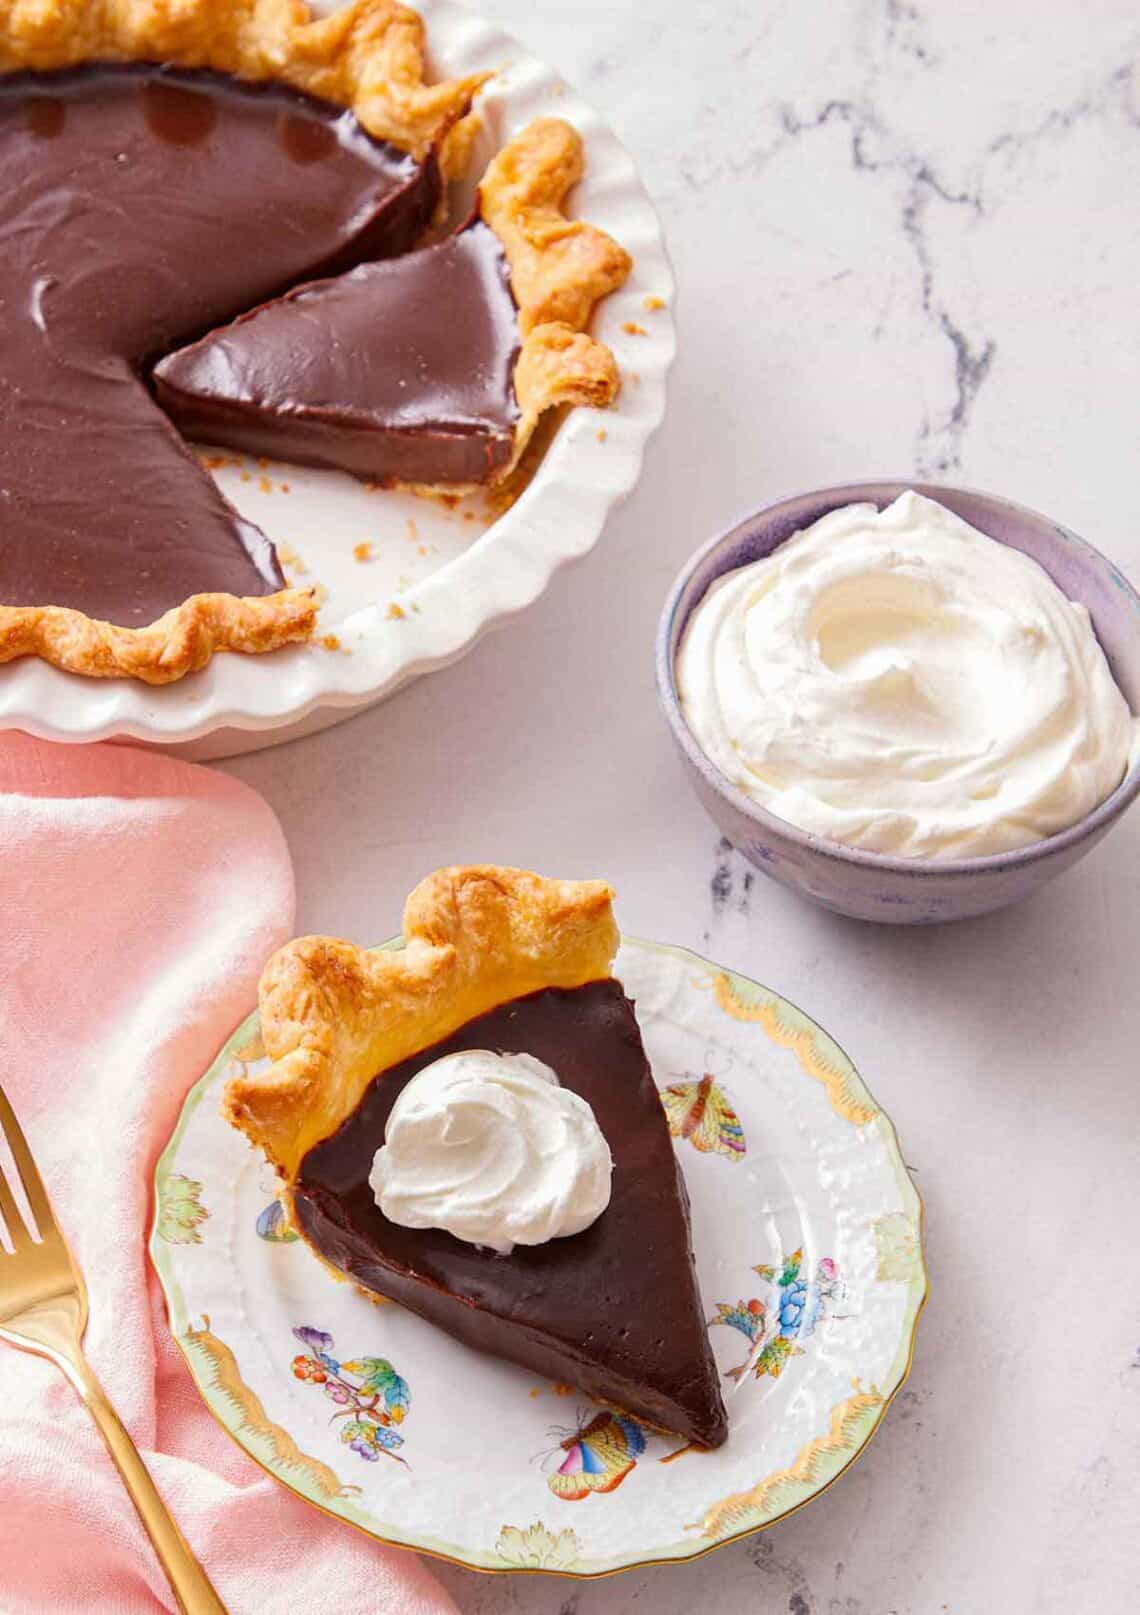
My classic chocolate pie recipe is rich, velvety, and loaded with chocolate flavor. It features an easy stove-top filling you can quickly make from scratch (ditch the box mix for this one!). This pie tastes just like chocolate pudding paired with a crisp, buttery crust!
I tested the recipe to perfect how to get the best chocolate flavor in the filling with a very easy method. The secret is cooking a chocolate custard with egg yolks and flour, so the filling is plenty rich while also setting beautifully in the fridge. You can also easily adapt my base recipe for different crusts and toppings!
“I made this pie for after dinner tonight with a graham cracker crust, and it was DELICIOUS. I thought it tasted a bit like a brownie batter pie. I’ll definitely be making it again.”
Sera
Simple Chocolate Pie Ingredients & Substitutions
These are the main ingredients you need to make this easy chocolate pie. You can find the full list of ingredients and measurements in the recipe card below.
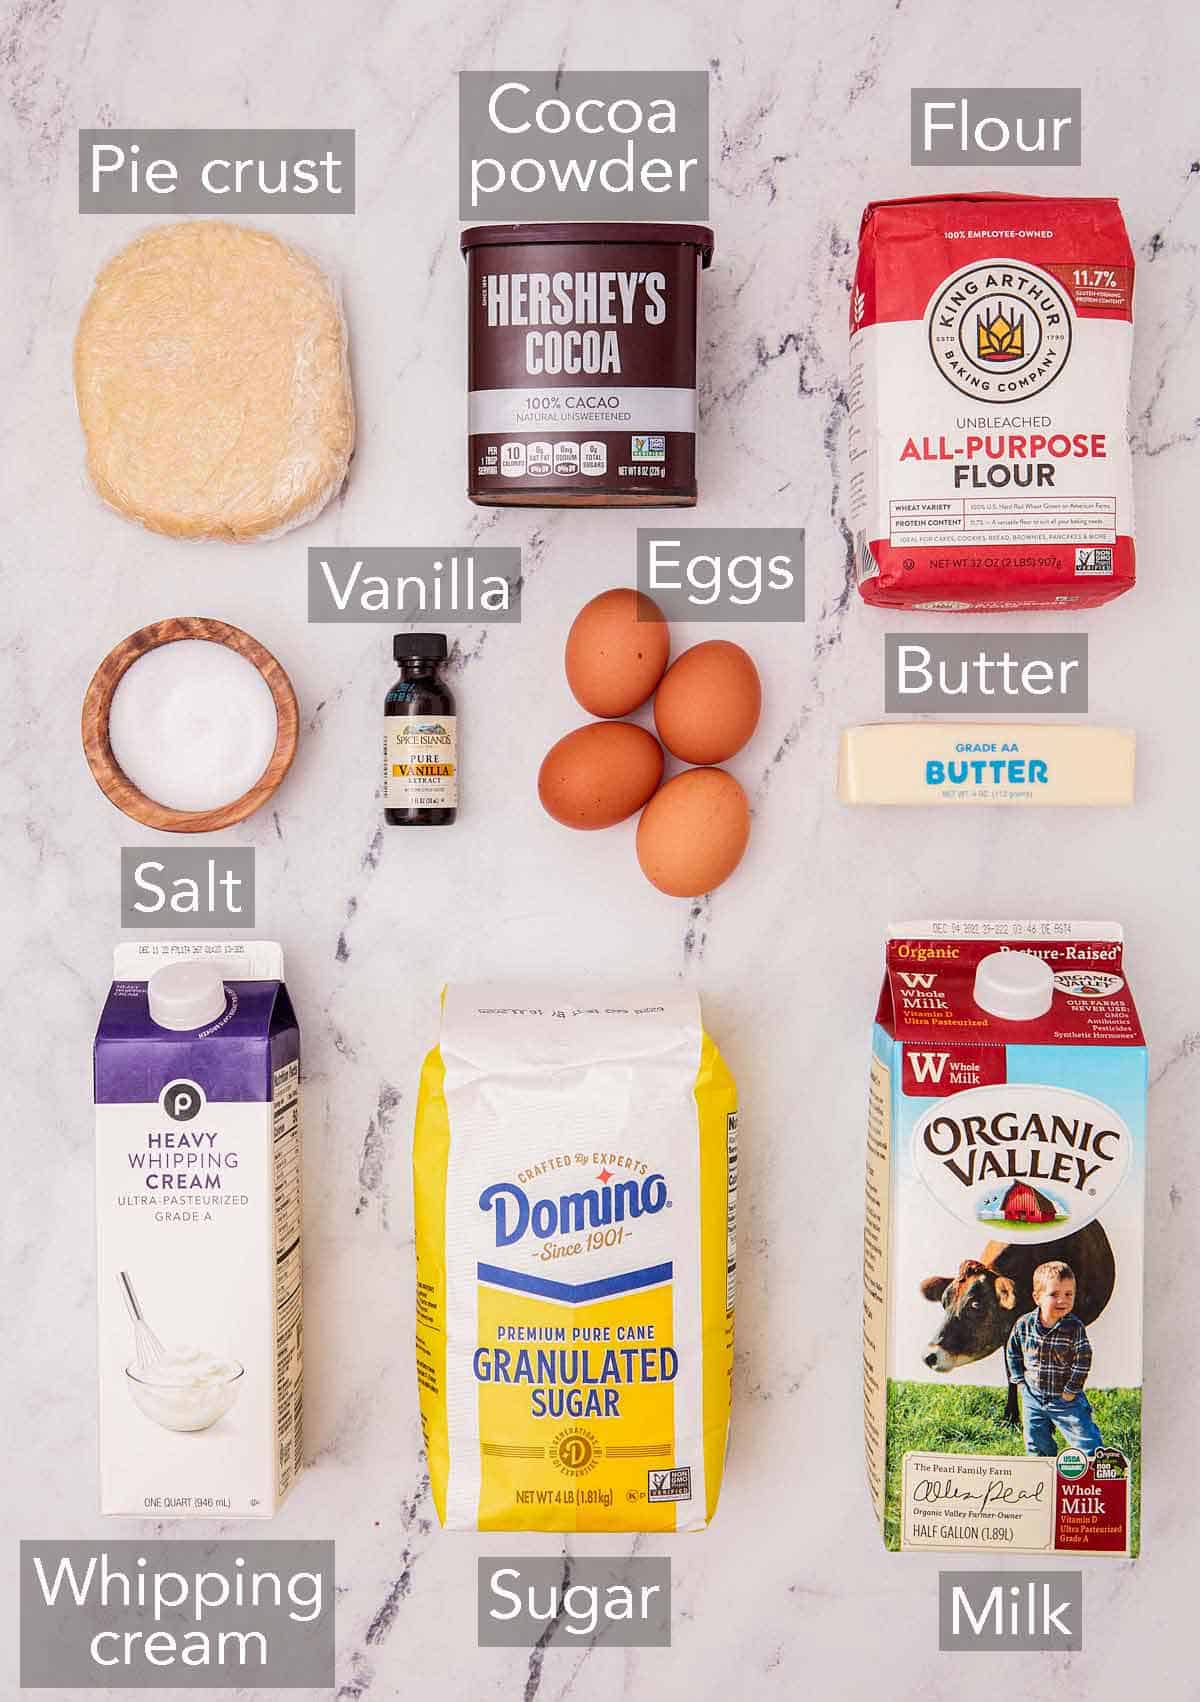
Pie crust — I recommend using my buttery, flaky, easy homemade pie crust recipe! It’s my favorite pie crust. You want a sturdy base to hold up the chocolate filling, and my pie shell recipe delivers that.
Sugar — granulated sugar sweetens the filling and helps with the structure of the custard so it sets properly. When sugar is added to eggs for custard, it disperses the egg protein molecules and raises the temperature when they coagulate (thicken/set). This allows the egg yolks to combine with the milk and other ingredients in the custard and set slowly into a silky and stable consistency.
Cocoa powder — any type of unsweetened cocoa powder will work in this recipe. For a dark chocolate pie, use Dutch-processed. For a super chocolatey pie, use half Dutch and half black cocoa powder.
Milk — for the milk in the filling, you can use whole milk or evaporated milk. I recommend avoiding skim milk, as it won’t set up as thick because it lacks the fat needed to help it bind with the egg yolks.
Egg yolks — egg yolks are a vital ingredient in chocolate pie filling, as they create a rich, smooth, velvety custard with a lot of flavor. The proteins in the yolks play the starring role in turning how custard sets, firming up and thickening the mixture so the filling becomes stable enough to slice once it’s chilled in the fridge.
Flour — I added flour as an additional thickener for the chocolate filling. It binds with the egg yolks and thickens with heat, so the filling firms up and is sliceable. Use cornstarch instead for a gluten-free filling. Dissolve the cornstarch in 2 tablespoons of milk or water to make a slurry before adding it to the egg yolks in Step 5.
Butter — stirring butter into the filling at the end gives it a glossy finish and extra richness in flavor.
Can I use a store-bought pie crust?
Yes. Look for a deep dish label on the crust, if possible, so it can hold all the chocolate pudding pie filling. If not, you may be able to fill two pie crusts, since store-bought pie crusts are typically shallower than a standard pie pan or a homemade crust. Blind bake the shell according to the package directions before filling it.
How do I prevent a runny pie filling?
Cooking the custard enough to thoroughly cook the eggs and activate the flour to thicken the pudding is key. The mixture should reach 185°F, which is a high enough temperature for the proteins in the eggs to set and for the flour to gelatinize. (Flour reaches its peak thickening power at 185°F.) If the custard is undercooked, the pie filling will be looser and runnier.
Crust and Topping Variations
Try these easy variations of this classic, old-fashioned chocolate pie recipe.
- Crumb crust: Swap the shortcrust for an Oreo pie crust or graham cracker crust.
- Meringue: Make the topping from my lemon meringue pie for a beautiful, decorative pie topping. Use the egg whites saved from separating the yolks!
- Chocolate whipped cream: Top the chocolate pie with chocolate whipped cream—use the recipe from my chocolate cheesecake. All you need to make it is cream, powdered sugar, vanilla, and cocoa powder.
- No-bake option: To make a no-bake chocolate pie, pour the filling into the no-bake crusts I use in my no-bake cheesecake or Oreo pie.
Pro Tips For The Best Chocolate Pie
Separate the egg yolks when the eggs are cold. Cold egg yolks are easier to separate from the egg whites. Room temperature yolks are more likely to break than cold ones, so I like to separate them straight from the fridge.
Temper the eggs with care. Slowly add the hot milk mixture to the egg mixture while whisking. The slower, the better at the start. If you add the milk too quickly, the yolks will curdle, and you’ll end up with scrambled eggs. Once you have about ½ cup of hot milk in the eggs, you can pour the rest in while stirring without issue.
How To Make Chocolate Pie
Below, I’ve highlighted portions of the recipe in step-by-step process images along with instructions for making chocolate pudding pie. You can find the full set of instructions in the recipe card below.
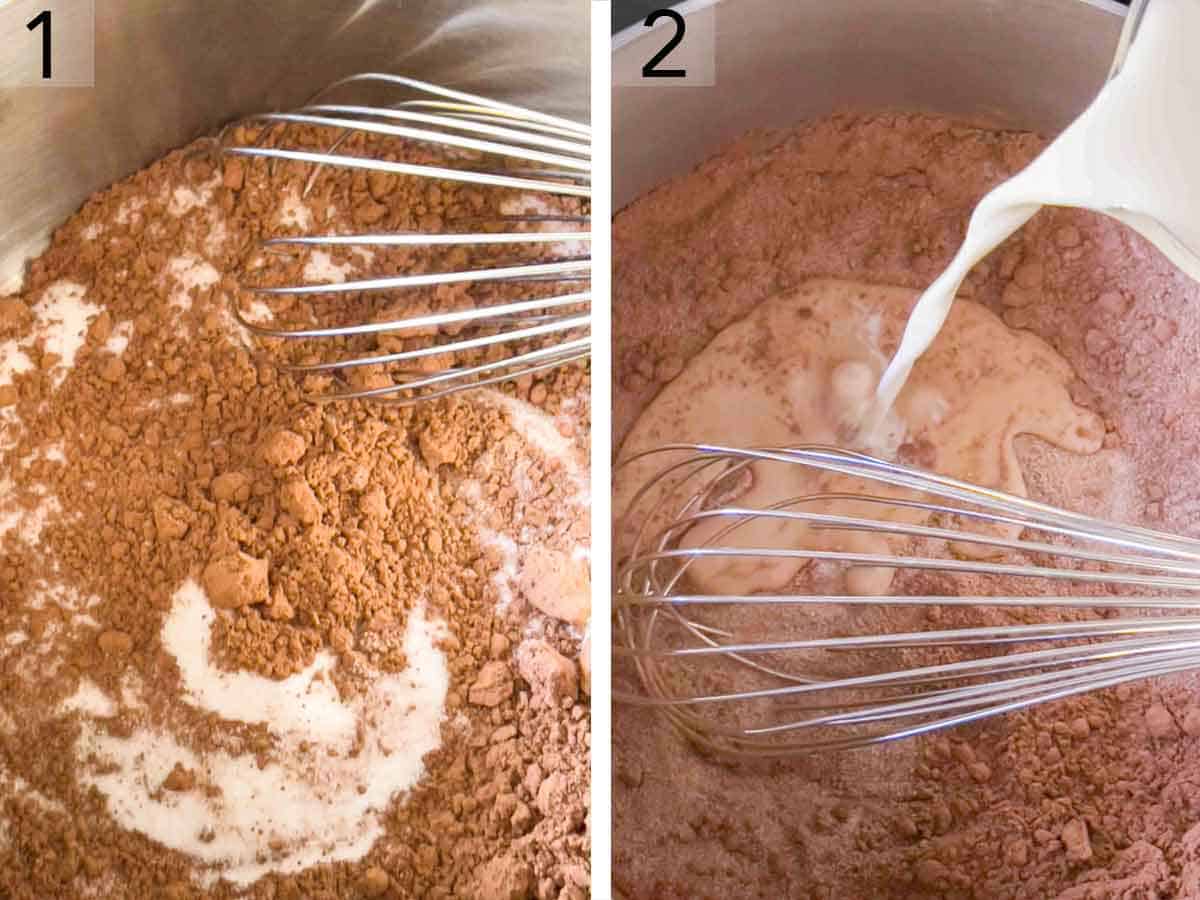
1. Place the pie crust in a pie dish (crimping the edges as you like), line it with parchment paper, and fill it with pie weights before blind-baking it at 400°F for 20 minutes. Then remove the weights and parchment paper and bake for another 10 or so minutes. Set aside to cool completely. Whisk together the sugar and cocoa powder in a medium saucepan.
2. Whisk 1½ cups of milk into the dry ingredients and place the mixture over medium-high heat. Bring to a simmer while stirring frequently, then reduce the heat to medium-low.
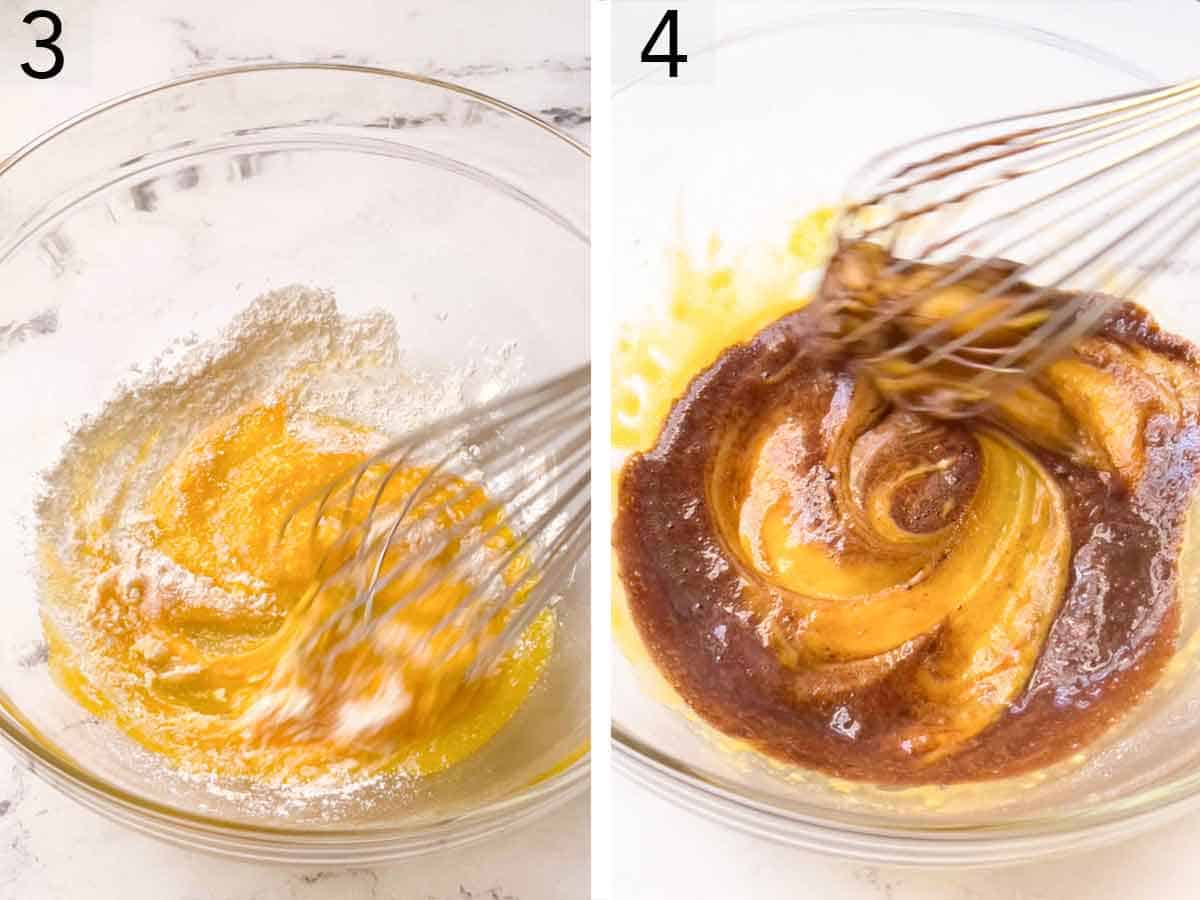
3. While the milk and cocoa powder mixture is on the stove, whisk together the rest of the milk, egg yolks, flour, and salt in a heatproof bowl.
4. When the cocoa mixture simmers, slowly whisk it into the egg mixture to temper the eggs so they don’t scramble. Then pour it all back into the saucepan.
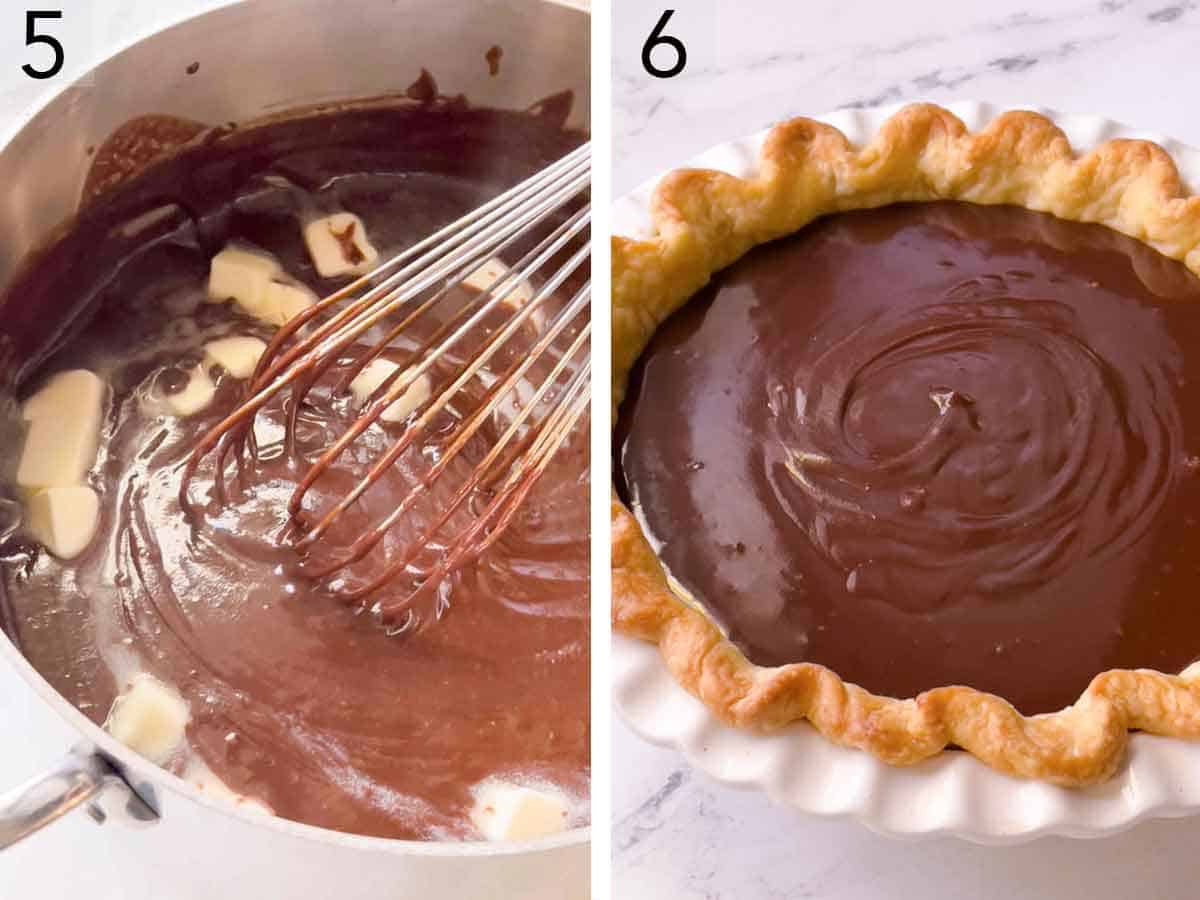
5. Cook the custard over medium-low heat. Stir constantly while the mixture cooks until it has thickened and bubbles. To ensure the filling sets properly, check the temperature of the custard with an instant-read thermometer or candy thermometer. It should read 185-190°F. Remove the pie filling from the heat, then stir in the butter and vanilla extract until completely combined.
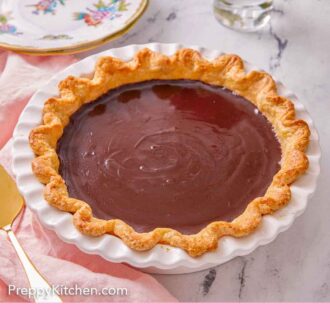
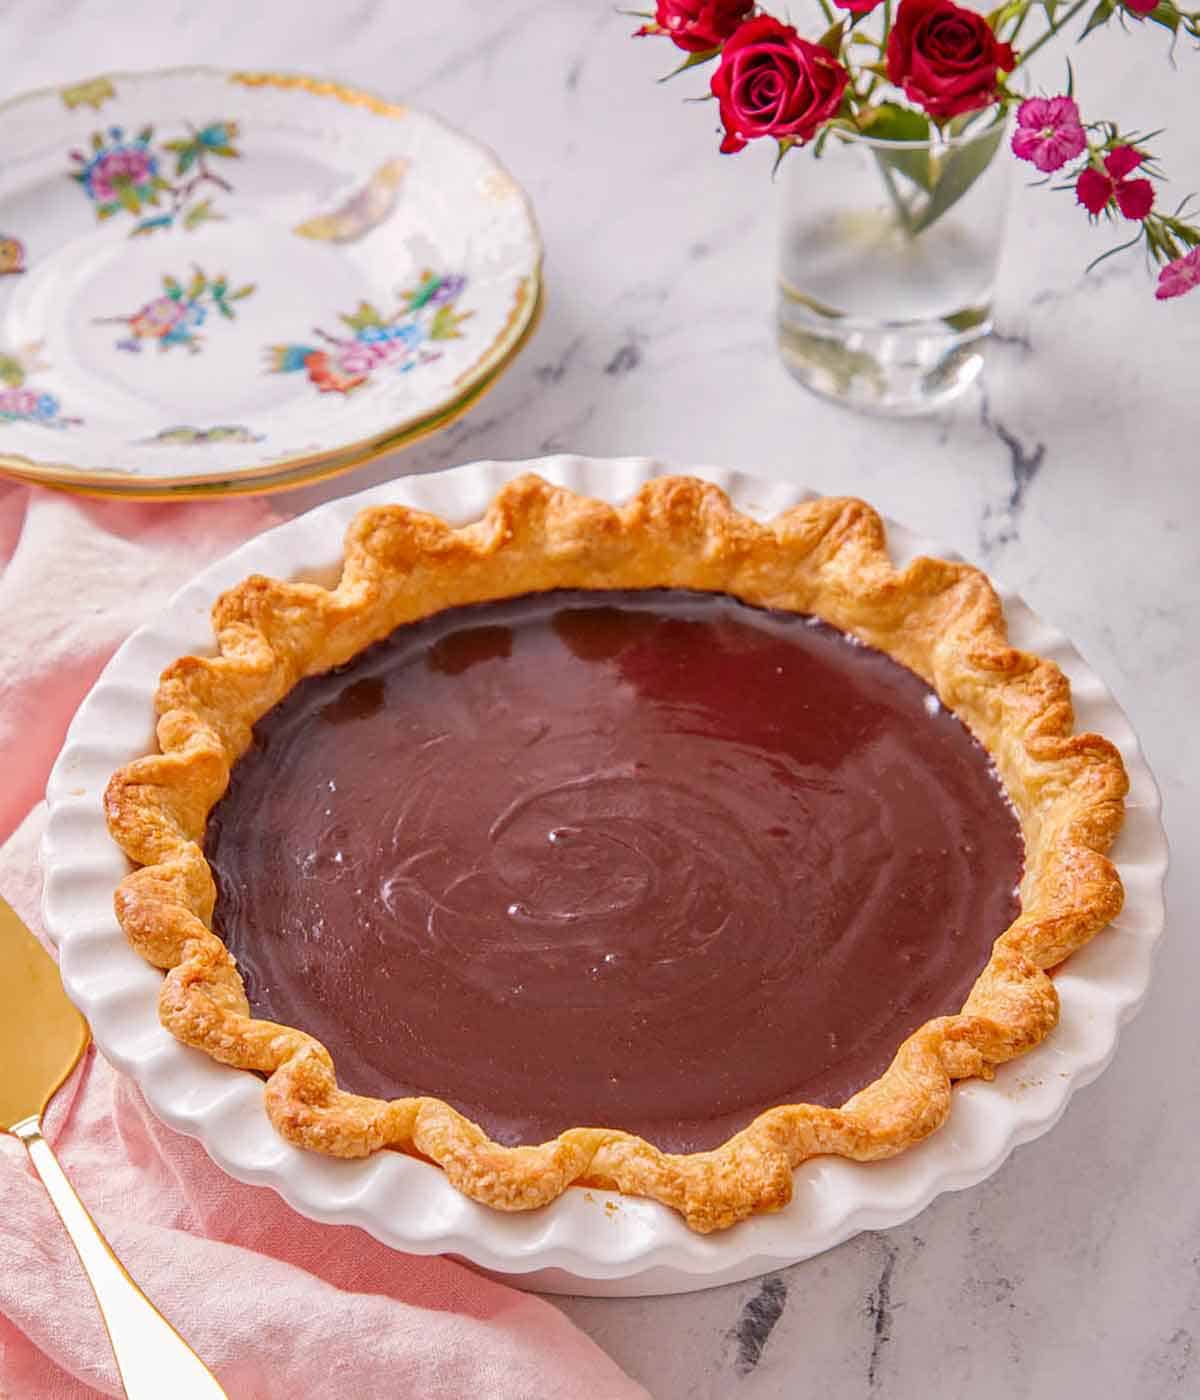
6. Pour the pudding into the cooled baked pie shell. Chill the pie in the refrigerator for at least 4 hours.
Chocolate Pie Recipe
Equipment
- 9″ deep-dish pie pan
- Parchment paper
- Pie weights or dried beans
- mixing bowl
- Saucepan
Ingredients
- 1 pie crust homemade or store-bought
- 1½ cups granulated sugar (300g)
- ½ cup unsweetened cocoa powder (50g)
- 2 cups whole milk or evaporated milk (480ml)
- 4 large egg yolks
- 3 tablespoons all-purpose flour
- ½ teaspoon salt
- ¼ cup unsalted butter cubed (57g)
- 1 teaspoon vanilla extract
- whipped cream for serving
Instructions
- Preheat the oven to 400°F.
- Line a 9-inch pie pan with pie crust and crimp as desired. Line the pie crust with parchment paper and fill it with pie weights. Place it on a rimmed baking sheet, and bake for 20 minutes.
- Remove the parchment and weights and continue baking until the edges and bottom are golden and appear dry, 10 to 15 minutes. Cool completely.
- In a medium saucepan, whisk together the sugar and cocoa powder. Slowly whisk in 1½ cups (360ml) of milk until well combined. Place over medium-high heat and bring to a simmer, stirring frequently. Reduce the heat to medium-low.
- Meanwhile, in a large heat-proof mixing bowl, whisk together the remaining ½ cup (120ml) of milk, egg yolks, flour, and salt until well combined. When the milk comes to a simmer, slowly whisk the hot milk into the egg mixture. Pour back into the saucepan.
- Cook over medium-low heat, stirring constantly until thickened and bubbling, about 5 minutes. (The custard should reach 185-190°F on a candy or instant-read thermometer to ensure it sets properly.)
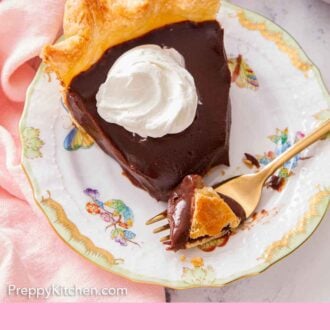
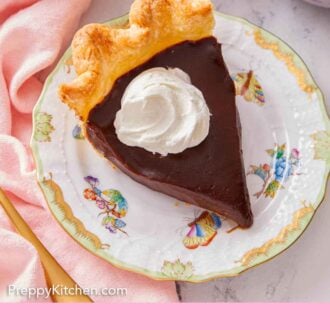
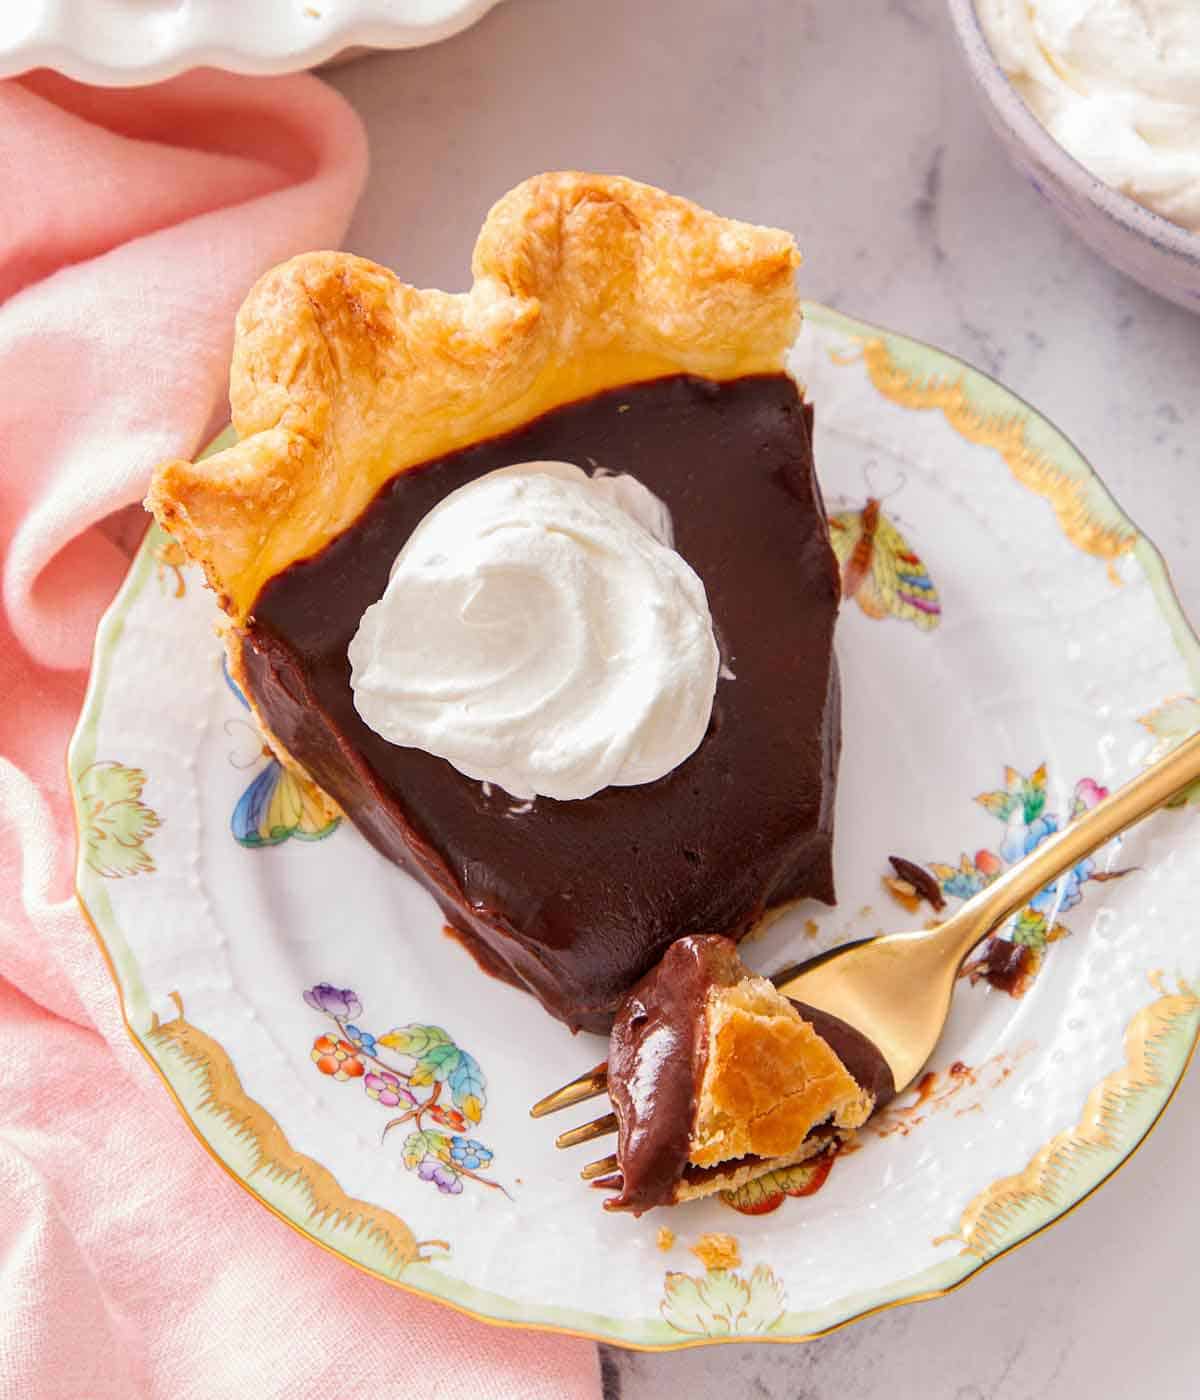
- Remove from the heat and stir in the butter and vanilla until melted and completely combined. Pour the pudding into the baked pie shell. (For an extra velvety filling, run the pudding through a fine mesh sieve before filling the pie.) Refrigerate the pie for at least 4 hours or overnight before slicing (cover it after 4 hours if chilling it overnight). Serve with whipped cream, if desired. Keep leftovers covered and refrigerated for up to 1 week.
Notes
- Make sure the pie chills long enough to set up. If it is still slightly warm, the filling won’t slice very well. The filling is a version of chocolate pudding, so it does have a softer texture and isn’t super firm, but it is sliceable if cooked and chilled properly.
- To make slicing the chocolate pie easier, warm the knife under hot water. Wipe the knife clean between each slice with a warm, wet paper towel.
- For a more decorative topping, you can add some chocolate shavings or chocolate chips on top of the fresh whipped cream or even make a chocolate ganache to drizzle over the pie.
Nutrition
Have you tried this recipe? Tag me today!
Mention @preppykitchen and tag #preppykitchen!
Make-Ahead and Storage Instructions
Make-ahead: This is an excellent pie to make in advance because you can chill it in the fridge for 24 hours before serving. Just be sure to cover the pie if chilling it for more than 6 hours, or the filling can develop a skin. The crust will start to soften with time and lose its crispness, so it’s best to initially serve it within a day of making it.
Storing: Refrigerate the chocolate pie for up to 1 week, loosely covered. The crust will become softer with time, but its flavor will still be lovely.
Freezing: Don’t freeze this pie. The velvety texture of the filling will likely split or turn grainy when thawed.
How do I prevent the filling from forming a skin?
Cover the pie with plastic wrap if you are chilling it for more than 6 hours. The filling will start to dry out the longer it sits in the fridge, and will form a rubbery skin on top. Covering it prevents that from happening.
If you plan to cover the filling completely with a topping, you can press plastic wrap directly to the surface of the filling at the start of chilling. This will mark the surface, so I don’t do this if I’m leaving the pie plain. But if you add a topping, it will cover up the imperfections on the surface of the filling.
More Dessert Recipes To Try
Looking for more decadent chocolate dessert recipes? Try one of these next!
Chocolate Bundt cake is always a show-stopper. Soft and fudgy, it’s topped with a rich chocolate ganache.
A Southern classic, chocolate chess pie has a custard filling similar to chocolate pie, but the decadent pie filling is baked and becomes more brownie-like in texture. Delicious!
Four-ingredient chocolate mousse is rich, fluffy, and airy. It’s so easy to make restaurant-quality mousse in the comfort of your own kitchen!
Flourless chocolate cake is so simple to put together — no mixer needed! — and will wow your loved ones every time. Its texture is almost like a chocolate truffle. Plus, it’s naturally gluten-free!
My easy mud pie has a buttery Oreo crust, a fudgy brownie layer, silky chocolate pudding, and fluffy whipped cream topping. What’s not to love?
If you’ve tried this chocolate pie recipe, then don’t forget to rate it and let me know how you got on in the comments below. I love hearing from you!


