
This post may contain affiliate links. Please read our disclosure policy.
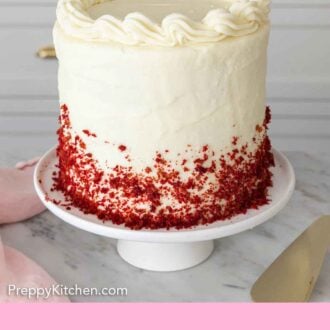
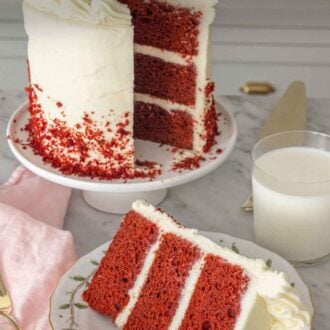
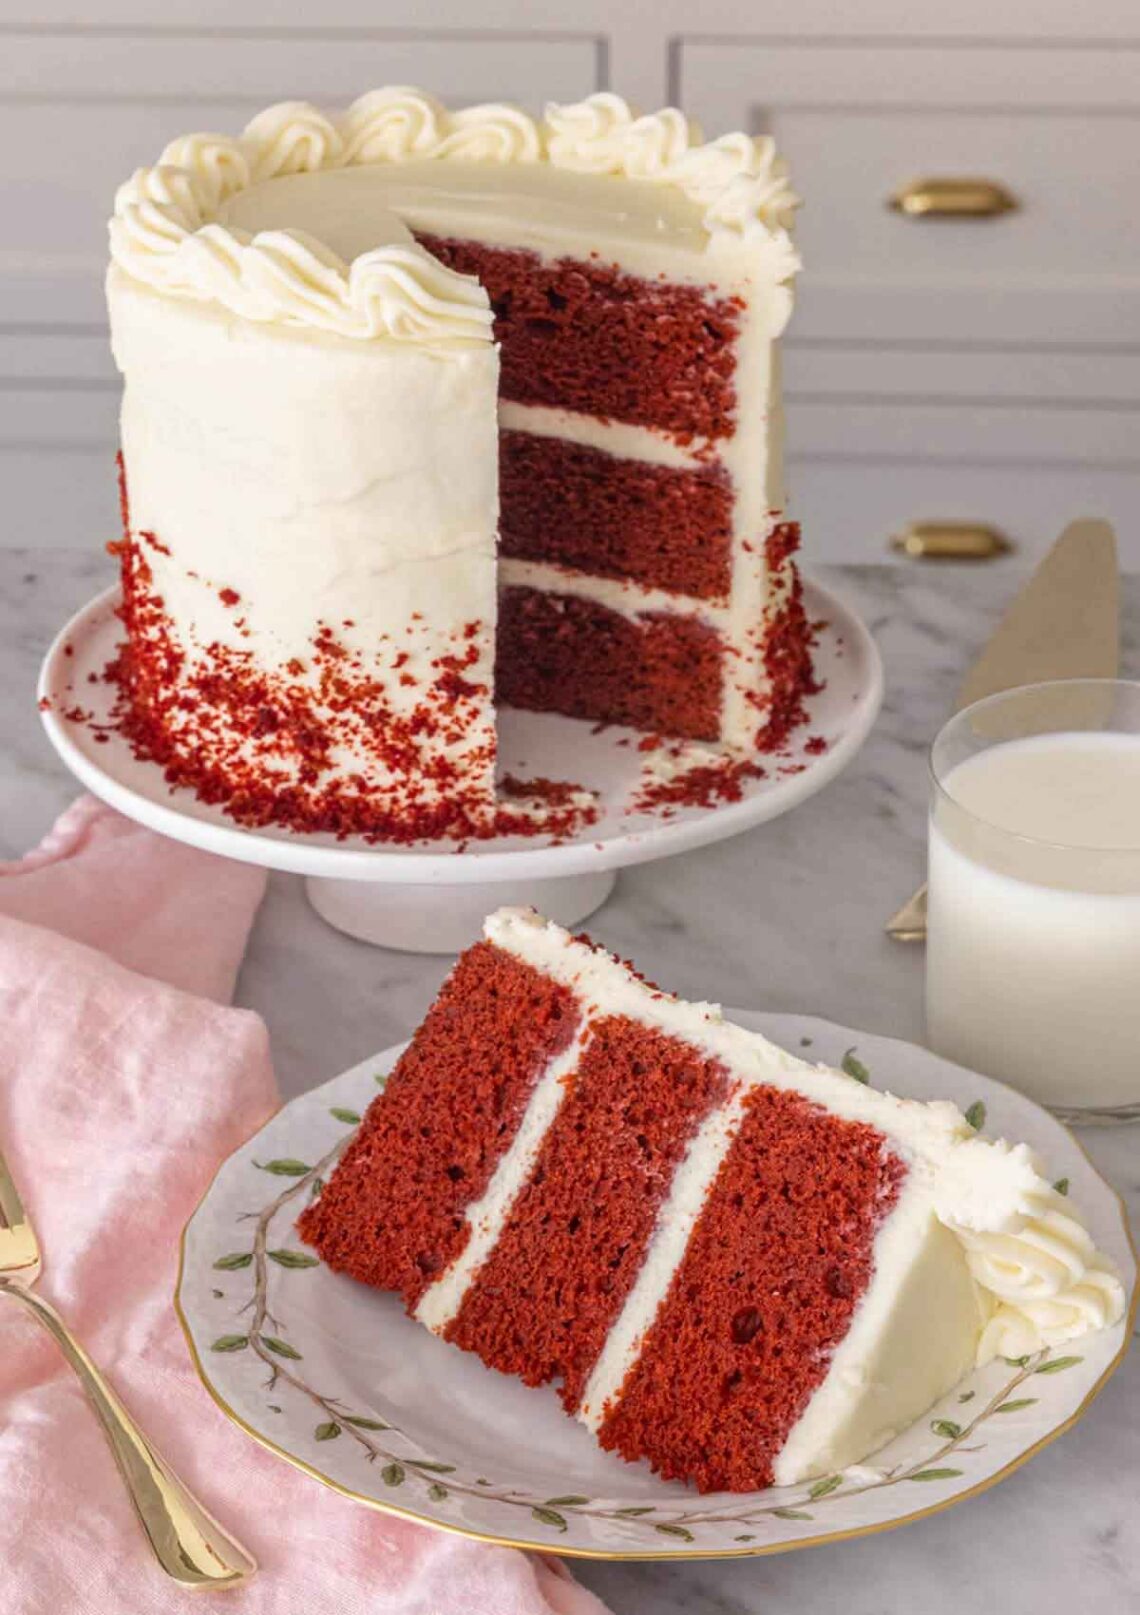
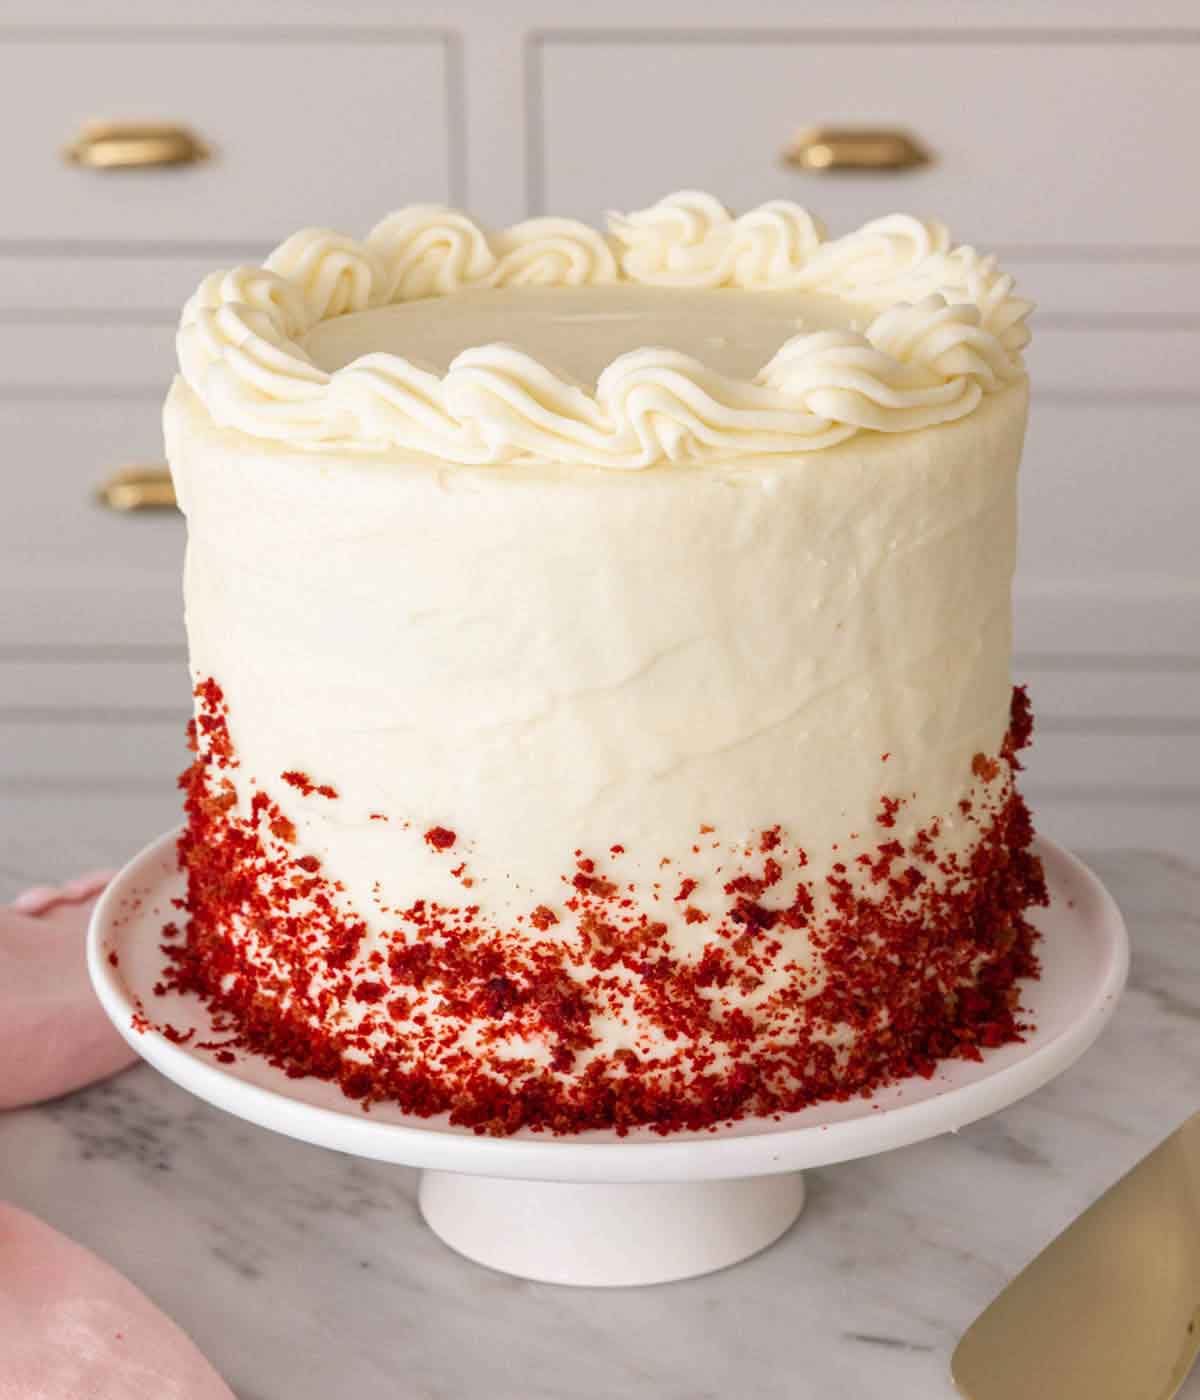
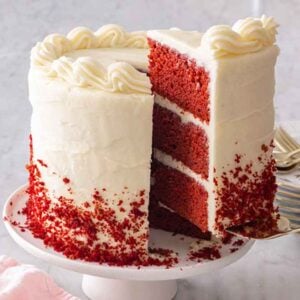
You won’t believe how easy it is to make this classic Red Velvet Cake recipe from scratch! This cake is so incredibly soft, tender, moist and pairs wonderfully with my tangy and sweet cream cheese frosting. With its wonderful velvety texture and fluffy frosting, you won’t be able to get enough of this irresistible cake.
Whether you are looking for a stunning red cake for Valentine’s Day or just need a showstopping cake for birthdays, holidays, or any other occasion, this red velvet cake recipe fits the bill. More than just a red-tinted vanilla cake, this cake is tangy and buttery, with a mild cocoa and sweet vanilla flavor.
Red velvet cake is said to have originated during the Great Depression with the popularization of red food coloring and is a popular dessert in the Southern United States. It is such a unique cake that everyone will love. It’s definitely worth the effort to make from scratch as it’s far superior to any box mix. The cake’s dense and soft but still moist with a velvety crumb. It’s always a crowd-pleaser! Want to make another cake recipe from scratch? Try my lemon cake recipe, strawberry cake recipe, or naked cake recipe.
What You Need to Make This Recipe
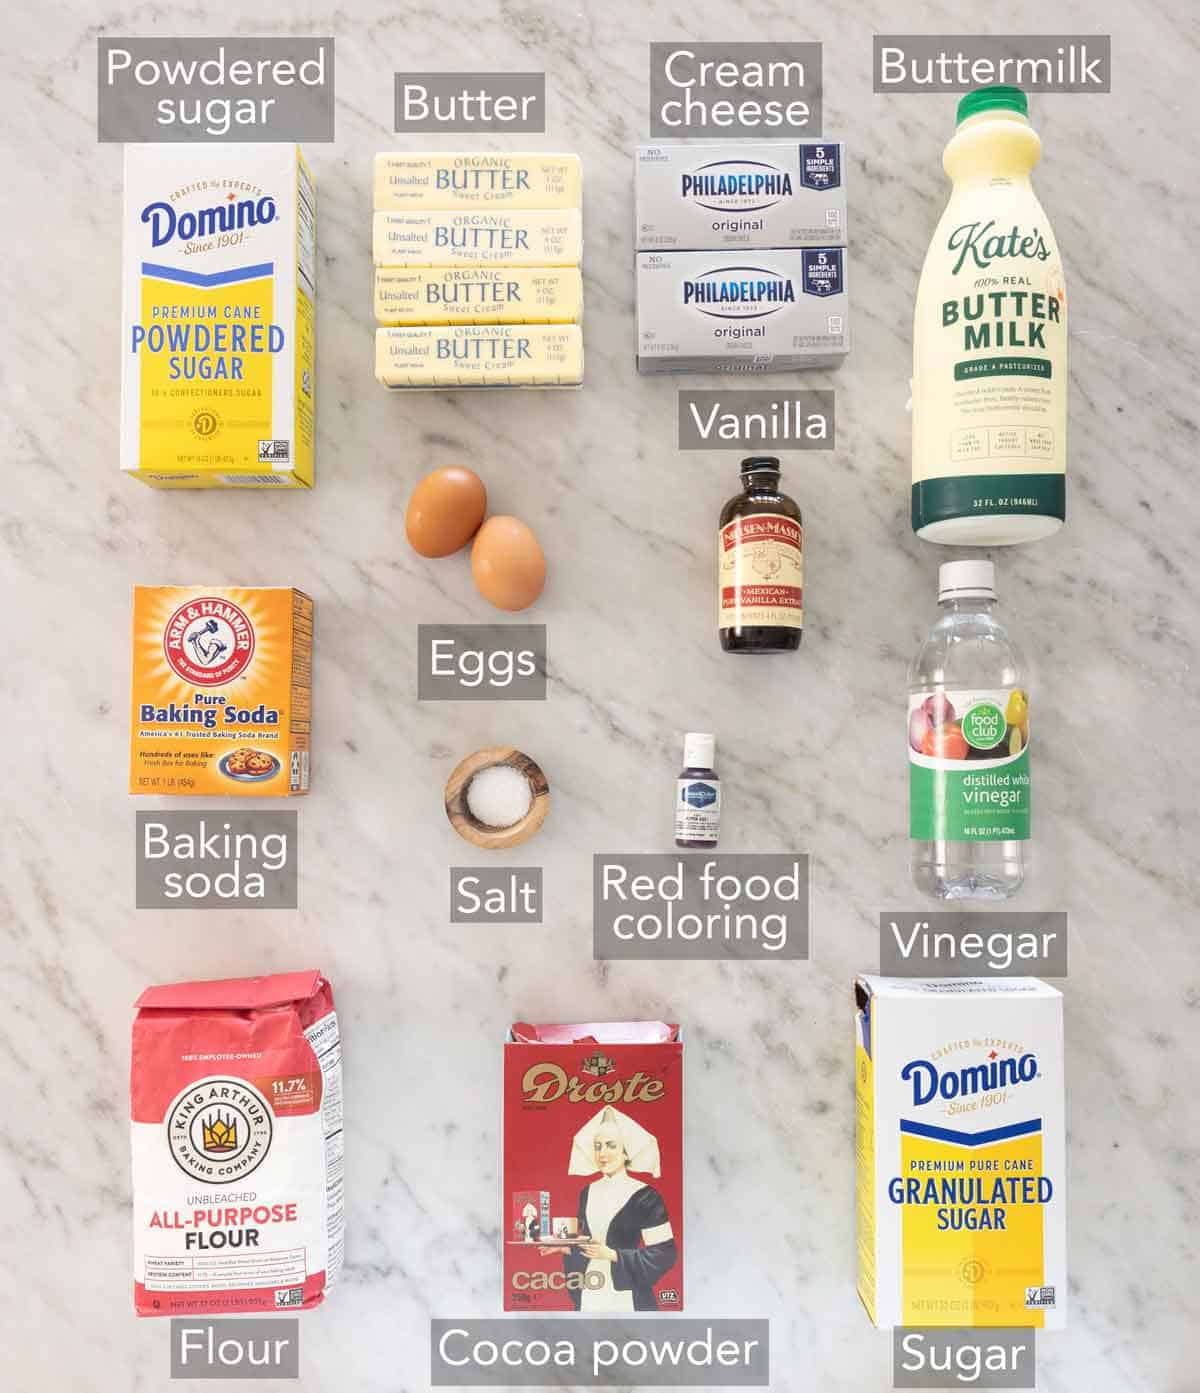
Baking soda — always double-check that the baking soda you have on hand is not expired.
Butter — buy unsalted butter to control the amount of salt added to the cake. Make sure the butter is at room temperature so it’ll be easier to cream.
Cocoa powder — this recipe doesn’t call for a lot of cocoa powder, so it doesn’t overpower the other flavors in the cake. Make sure to use natural cocoa powder and not Dutch-processed cocoa powder.
Buttermilk — this adds a tangy flavor and moisture to the cake. Also, the buttermilk activates the baking soda to help the cake rise and give it its light and fluffy crumb. Furthermore, as buttermilk is acidic, it reacts with the cocoa powder and turns it red!
Vinegar — just like the buttermilk, the vinegar helps activate the baking soda and brings out the red tones in the cocoa powder.
Red food coloring — this will help enhance the red tones in the red velvet cake.
Cream cheese — make sure you use full-fat blocks of cream cheese to make this frosting. You do not want to use the cream cheese sold in a tub. Try to use the best quality cream cheese available. Some generic brands of cream cheese may not be as thick, leading to a runny frosting.
Powdered sugar — you must use powdered sugar as it’ll quickly dissolve into the cream cheese frosting, making it creamy and sweet. If you only have regular sugar, see my post on how to make powdered sugar with it!
How to Make Red Velvet Cake
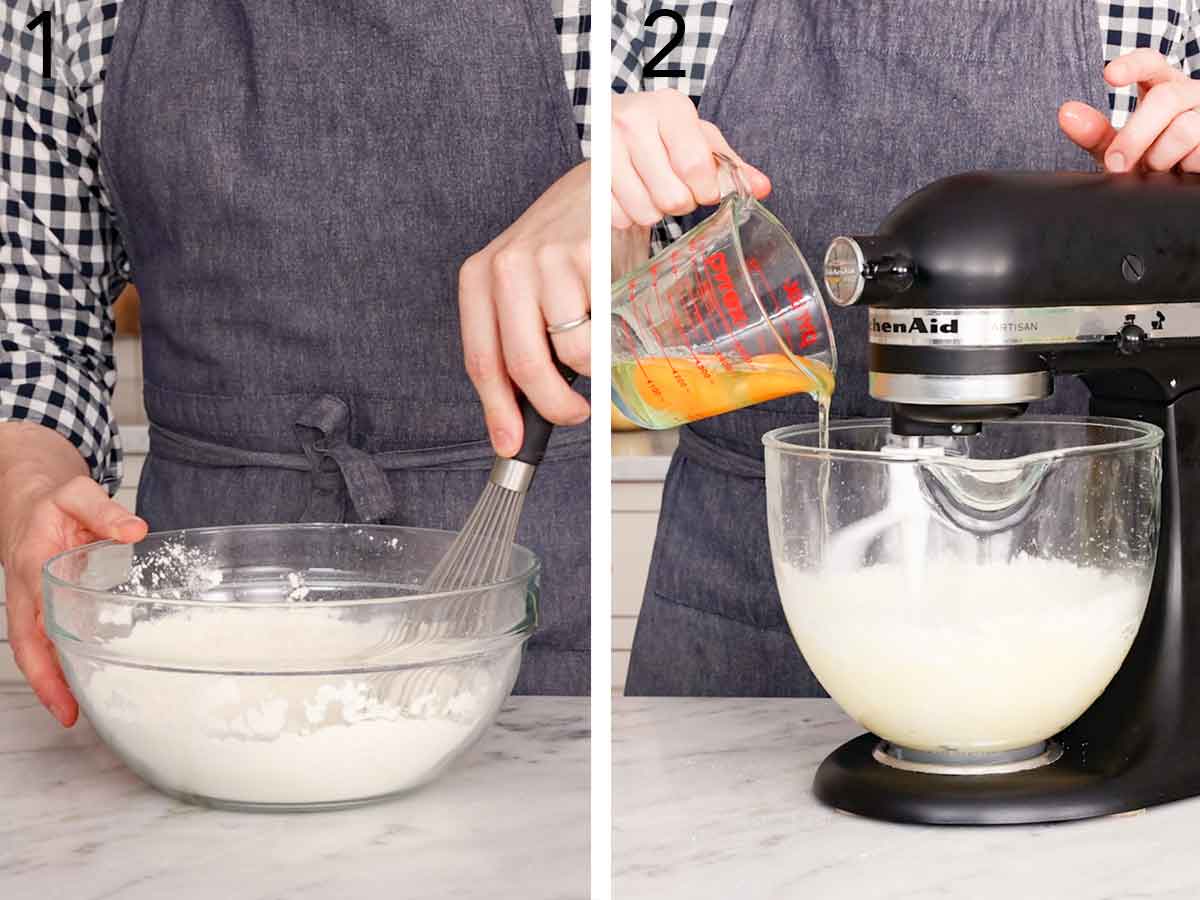
1. In a medium bowl, sift the flour, salt, and baking soda together.
2. Cream the butter on medium speed in the bowl of a stand mixer fitted with a paddle attachment. Add in sugar and mix on medium until light and fluffy. Add the eggs in one at a time, beating each until well combined.

3. Beat in the vanilla, then sift the cocoa powder into the butter mixture. Beat just until combined. Scrape down the bowl.
4. In a liquid measuring cup, combine the buttermilk, vinegar, and red food coloring. (The more you use, the brighter the color when baked.)
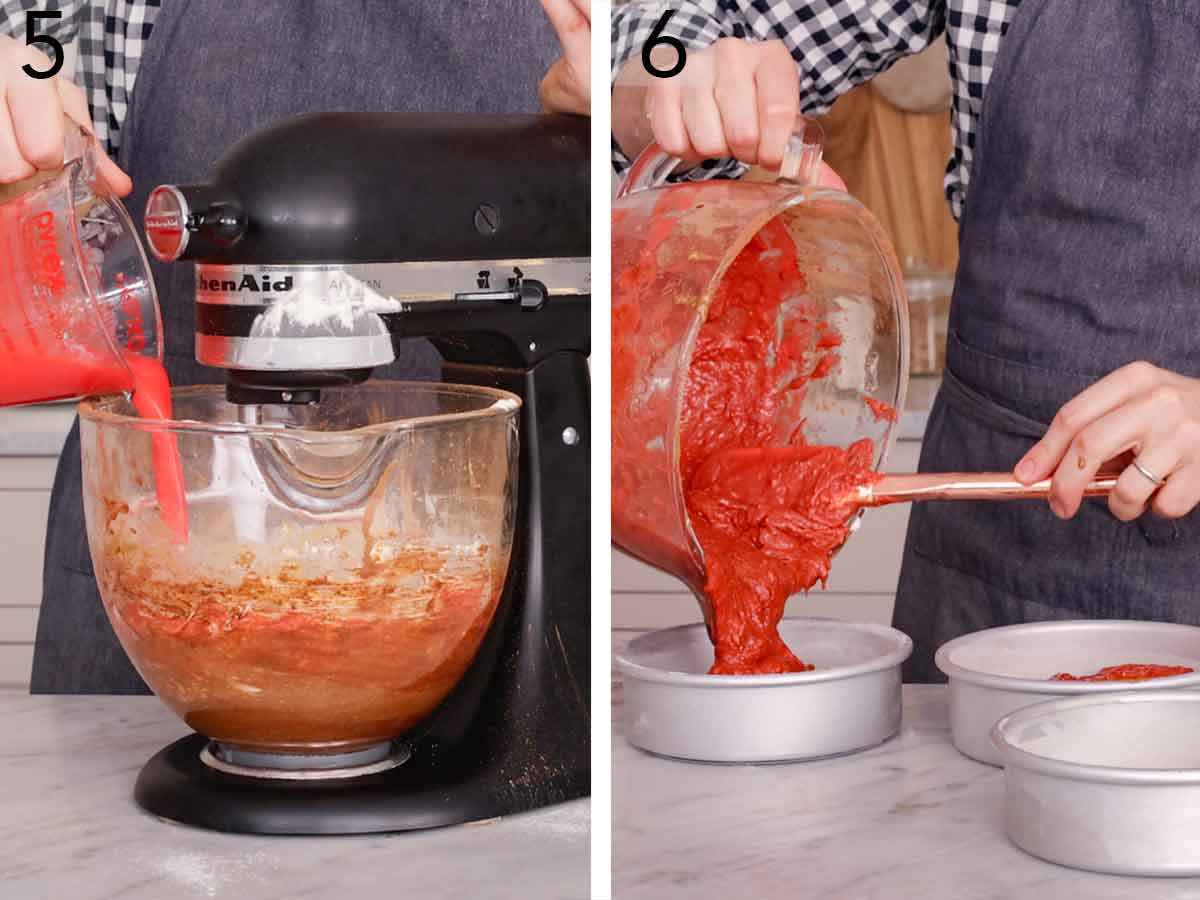
5. With the mixer on low speed, add half of the flour mixture followed by half of the buttermilk mixture to the mixing bowl, beating just until combined. Repeat with the remaining flour and buttermilk. Stop and scrape down the bowl occasionally.
6. Divide the batter among three buttered 6-inch pans and bake for about 30 to 35 minutes or until the centers are springy to the touch.
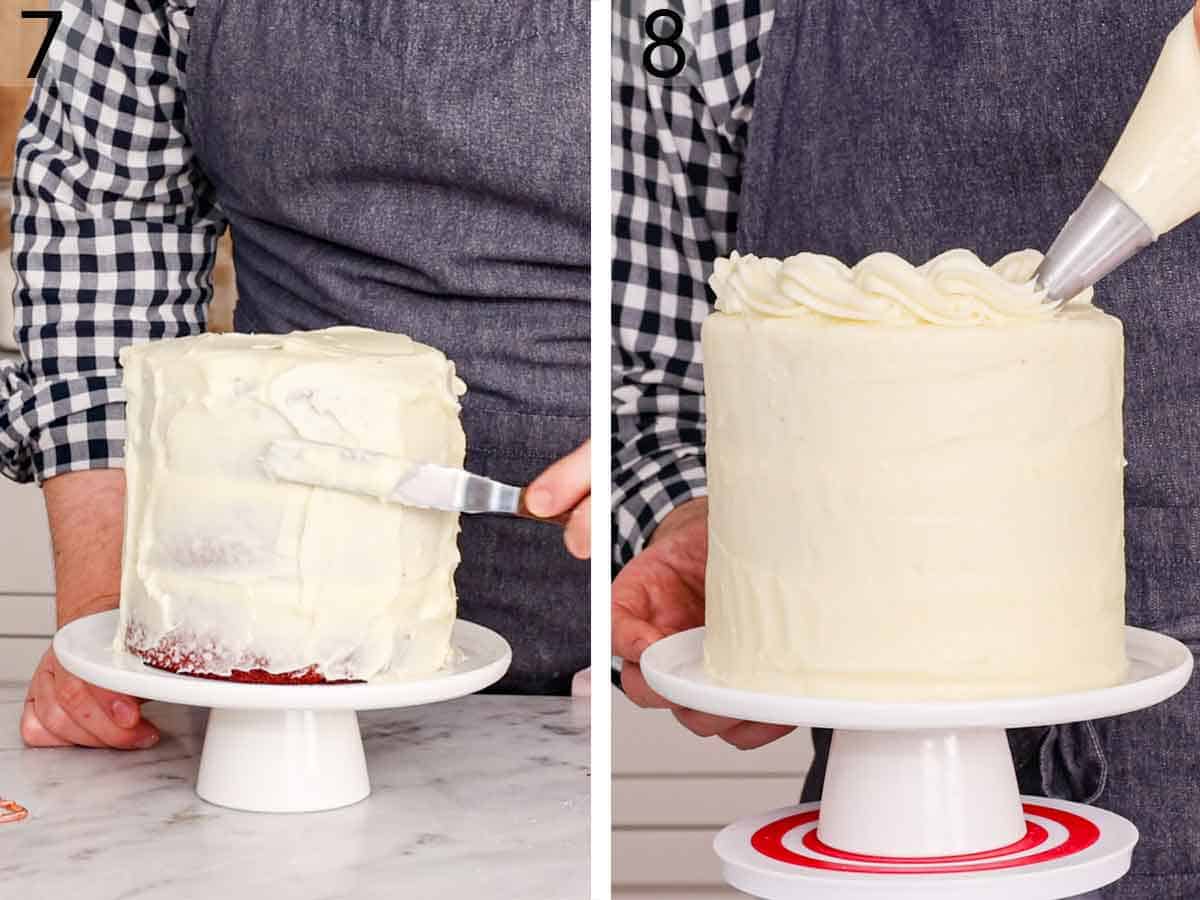
7. To make the cream cheese frosting, beat the butter, cream cheese, vanilla, and salt together until smooth and fluffy. Gradually add the sifted powdered sugar to the mixer and continue mixing until incorporated. Set aside a cup. Place a cake layer on the cake stand and evenly spread ½ cup of frosting on top. Continue with the rest of the layers, then use the remaining frosting to coat the outside of the cake.
8. Place the cup of frosting into a piping bag with a decorative tip. Pipe a decorative border on top of the cake or as desired. Place the red velvet cake in the fridge and chill for about 1 hour or until the frosting is set.
Pro Tips for Making This Recipe
- If the tops of your red velvet cake layers are domed, use a serrated knife to cut off the top of the domes so you can stack them evenly. Alternatively, use cake strips to help your cake layers come out evenly. Cake strips work by keeping the outside edge of the pan cooler to ensure that the entire cake rises at the same rate, preventing a dome from forming in the middle. If you don’t want to buy cake strips, I have a post on how to DIY cake strips.
- I highly recommend using a scale to measure your flour as it’s the most accurate method. If you don’t have a scale, fluff your flour with a spoon and spoon it into your cups before leveling it off with a knife. This method prevents you from overpacking the measuring cup.
- If the ingredients were refrigerated, such as the eggs, milk, and cream cheese, it’s best to bring them to room temperature before using them so they mix effortlessly without overmixing.
- Be gentle when handling the layers during assembly, as the cake is very tender.
- The best way to let your butter come to room temperature is to bring it out of the fridge 1 to 2 hours beforehand and allow it to sit on your kitchen counter. Softening the butter in the microwave will carry the risk of it melting and making the cream cheese frosting runny. To speed up the process of the butter coming to room temperature, you can cube it instead of leaving the sticks whole.
- Make sure to sift the dry ingredients to remove any lumps. This will help to keep the cake’s crumb soft and light.
- For a large cake, divide the batter among two 9-inch round cake pans. The layers will be a bit thinner, so the bake time will decrease by about 5 minutes.
- If you do not have any buttermilk, see my post on how to make buttermilk with only two ingredients.
Frequently Asked Questions
How do I store this?
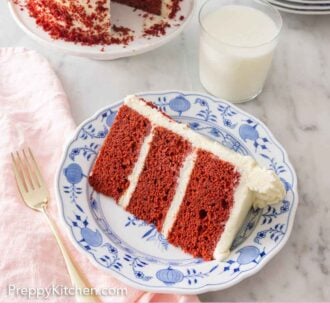
Due to the cream cheese frosting, I recommend storing the red velvet cake in the fridge if you want to keep it longer than 2 days. Place the cake under a cake dome or lightly cover with plastic wrap. The cake keeps for 5 days. Before serving, bring the cake to room temperature.
Can I make this ahead of time?
If you’d like to make the cake ahead and store it in the fridge, swap the butter for the same amount of vegetable oil! Simply mix all the dry ingredients together in a bowl and all the wet ingredients in a separate bowl, then pour the wet into the dry and mix until combined. Bake as directed. The vegetable oil won’t firm up in the fridge like butter does, making a cold cake feel more moist and tender.
You can also bake the cake layers, and once cooled, wrap them in plastic before freezing them for up to 3 months. Thaw the cake layers and make the frosting when ready to assemble.
Can I freeze this cake?
Yes! You can freeze the assembled cake or individual slices. Wrap the cake or slices in a couple of layers of plastic before freezing for up to 3 months. Bring the cake to room temperature before you serve it.
What is the difference between red velvet and chocolate cake? Is this just a chocolate cake?
This cake is much lighter than chocolate cake with a tangy note from the cream cheese frosting. Some people have stopped adding chocolate to the batter as it interferes with the desired bright red color. Originally the cakes had a dusty maroon hue from the acid reacting with cocoa powder, but as time went on, that became a bright red color with the addition of red dye to the batter. Unlike chocolate cake, red velvet cake has vinegar, which makes a huge difference as the acid reacts with the leavening agents to give you a fluffier cake.
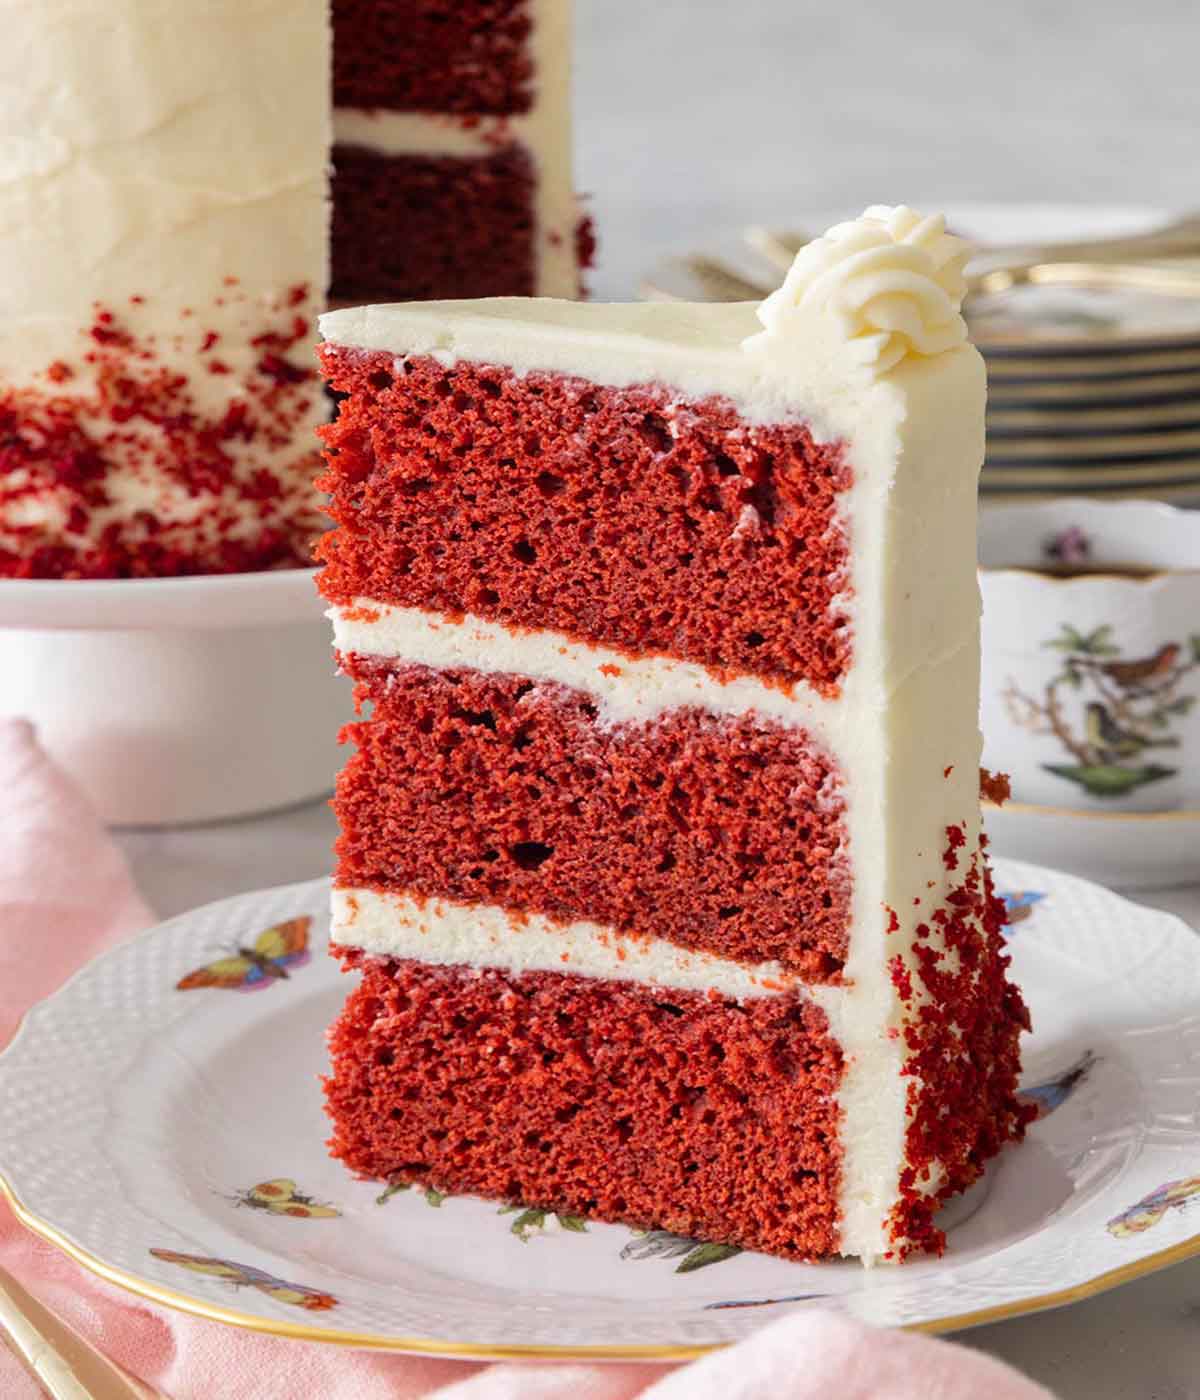
What is the actual flavor of this cake?
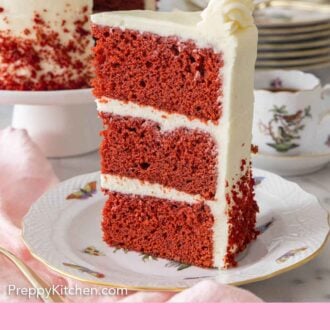
Red velvet has a very mild chocolate and vanilla flavor with a tangy edge, thanks to the buttermilk, vinegar, and cream cheese. The main flavor note actually comes from the frosting. However, the cake’s most attractive aspect is the texture! You’re getting bites of fluffy, moist cake with a very creamy delicate frosting giving a delightful mouthfeel.
If you’ve tried this Red Velvet Cake recipe, then don’t forget to rate the recipe and let me know how you got on in the comments below, I love hearing from you!
Red Velvet Cake
Equipment
- 6-inch or 9-inch cake pans
- Mixing Bowls
- Electric hand or stand mixer
- Wire cooling rack
- Piping bag and tip
Ingredients
For the Cake:
- 2 ½ cups all-purpose flour (300g)
- 1 teaspoon salt
- 1 teaspoon baking soda
- ½ cup unsalted butter room temperature (113g)
- 1 ½ cups granulated sugar (300g)
- 2 large eggs room temperature
- 2 teaspoons vanilla extract
- 2 tablespoons cocoa powder
- 1 cup buttermilk room temperature (240ml)
- 1 tablespoon white vinegar
- 1 to 2 tablespoons liquid red food coloring
For the Cream Cheese Frosting:
- 2 8-ounce blocks cream cheese room temperature (454g)
- 1 ½ cups unsalted butter room temperature (340g)
- 1 teaspoon vanilla extract
- Pinch kosher salt
- 1 ½ pounds confectioners sugar sifted (5½ cups/675g)
Instructions
For the Cake:
- Preheat the oven to 350 degrees F. Butter and flour three 6-inch cake pans. (See notes about using two 9-inch cake pans.)
- In a medium bowl, sift together the flour, salt, and baking soda.
- In a large mixing bowl or the bowl of a stand mixer fitted with a paddle attachment, cream the butter on medium speed. Add in sugar and mix on medium until light and fluffy, about 3 minutes. Add the eggs in one at a time, beating each until well combined. Beat in the vanilla.
- Sift the cocoa powder into the butter mixture and beat just until combined. Scrape down the bowl.
- In a liquid measuring cup, mix together the buttermilk, vinegar, and red food coloring. (The more you use the brighter the color when baked.)
- With the mixer on low speed, add half of the flour mixture followed by half of the buttermilk mixture to the mixing bowl, beating just until combined. Repeat with the remaining flour and buttermilk. Stop and scrape down the bowl occasionally. Divide the batter among the prepared pans.
- Bake for about 30 to 35 minutes or until the centers are springy to the touch. When done, let them cool in their pans for about 10 minutes, then turn them out onto a wire rack to cool completely.
For the Cream Cheese Frosting:
- In a large mixing bowl or the bowl of a stand mixer fitted with the paddle attachment, beat the butter and cream cheese together on medium speed until smooth and fluffy, about 3 minutes.
- Add the vanilla and salt and beat until combined.
- Sift the confectioner's sugar into a large bowl.
- With the mixer on low speed, gradually the sugar into the butter mixture until combined. Stop and scrape down the bowl occasionally. Increase speed to medium and beat until fluffy, about 1 minute. Place about a cup of frosting to a piping bag with a decorative tip.
For the Assembly:
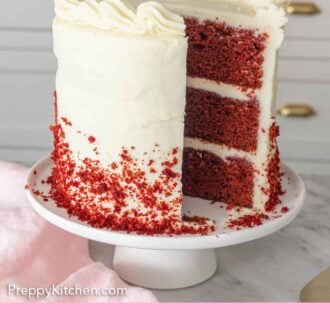
- Place a cake layer on a cake stand or serving plate. Spread about ½ cup of frosting on top of the cake. Place another cake layer on top and repeat with the frosting. Top with the final cake layer and spread the remaining frosting all over the top and sides of the cake.
- Use a bench scraper or offset spatula to smooth out the cake. Pipe a decorative border on top of the cake or as desired. Chill the cake for about 1 hour or until the frosting is set. Any leftover cake should be covered and can be stored at room temperature for up to 2 days or refrigerated for up to 1 week.
Notes
- If the tops of your cake layers are domed, use a serrated knife to cut off the top of the domes so you can stack them evenly. Alternatively, use cake strips to help your cake layers come out evenly. Cake strips work by keeping the outside edge of the pan cooler to ensure that the entire cake rises at the same rate, preventing a dome from forming in the middle. If you don’t want to buy cake strips, I have a post on how to DIY cake strips.
- I highly recommend using a scale to measure your flour as it’s the most accurate method. If you don’t have a scale, fluff your flour with a spoon and spoon it into your cups before leveling it off with a knife. This method prevents you from overpacking the measuring cup.
- If the ingredients were refrigerated, such as the eggs, milk, and cream cheese, it’s best to bring them to room temperature before using them so they mix effortlessly without overmixing.
- Be gentle when handling the layers during assembly, as the cake is very tender.
- The best way to let your butter come to room temperature is to bring it out of the fridge 1 to 2 hours beforehand and allow it to sit on your kitchen counter. Softening the butter in the microwave will carry the risk of it melting and making the cream cheese frosting runny. To speed up the process of the butter coming to room temperature, you can cube it instead of leaving the sticks whole.
- Make sure to sift the dry ingredients to remove any lumps. This will help to keep the cake’s crumb soft and light.
- For a large cake, divide the batter among two 9-inch round cake pans. The layers will be a bit thinner, so the bake time will decrease by about 5 minutes.
- If you do not have any buttermilk, see my post on how to make buttermilk with only two ingredients.
Nutrition
Have you tried this recipe? Tag me today!
Mention @preppykitchen and tag #preppykitchen!


