
This post may contain affiliate links. Please read our disclosure policy.
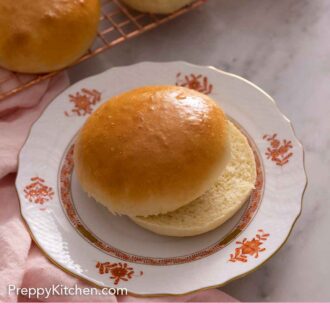


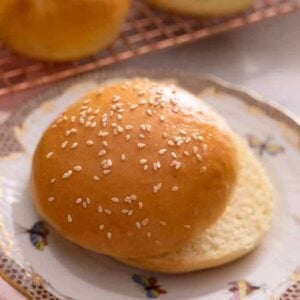
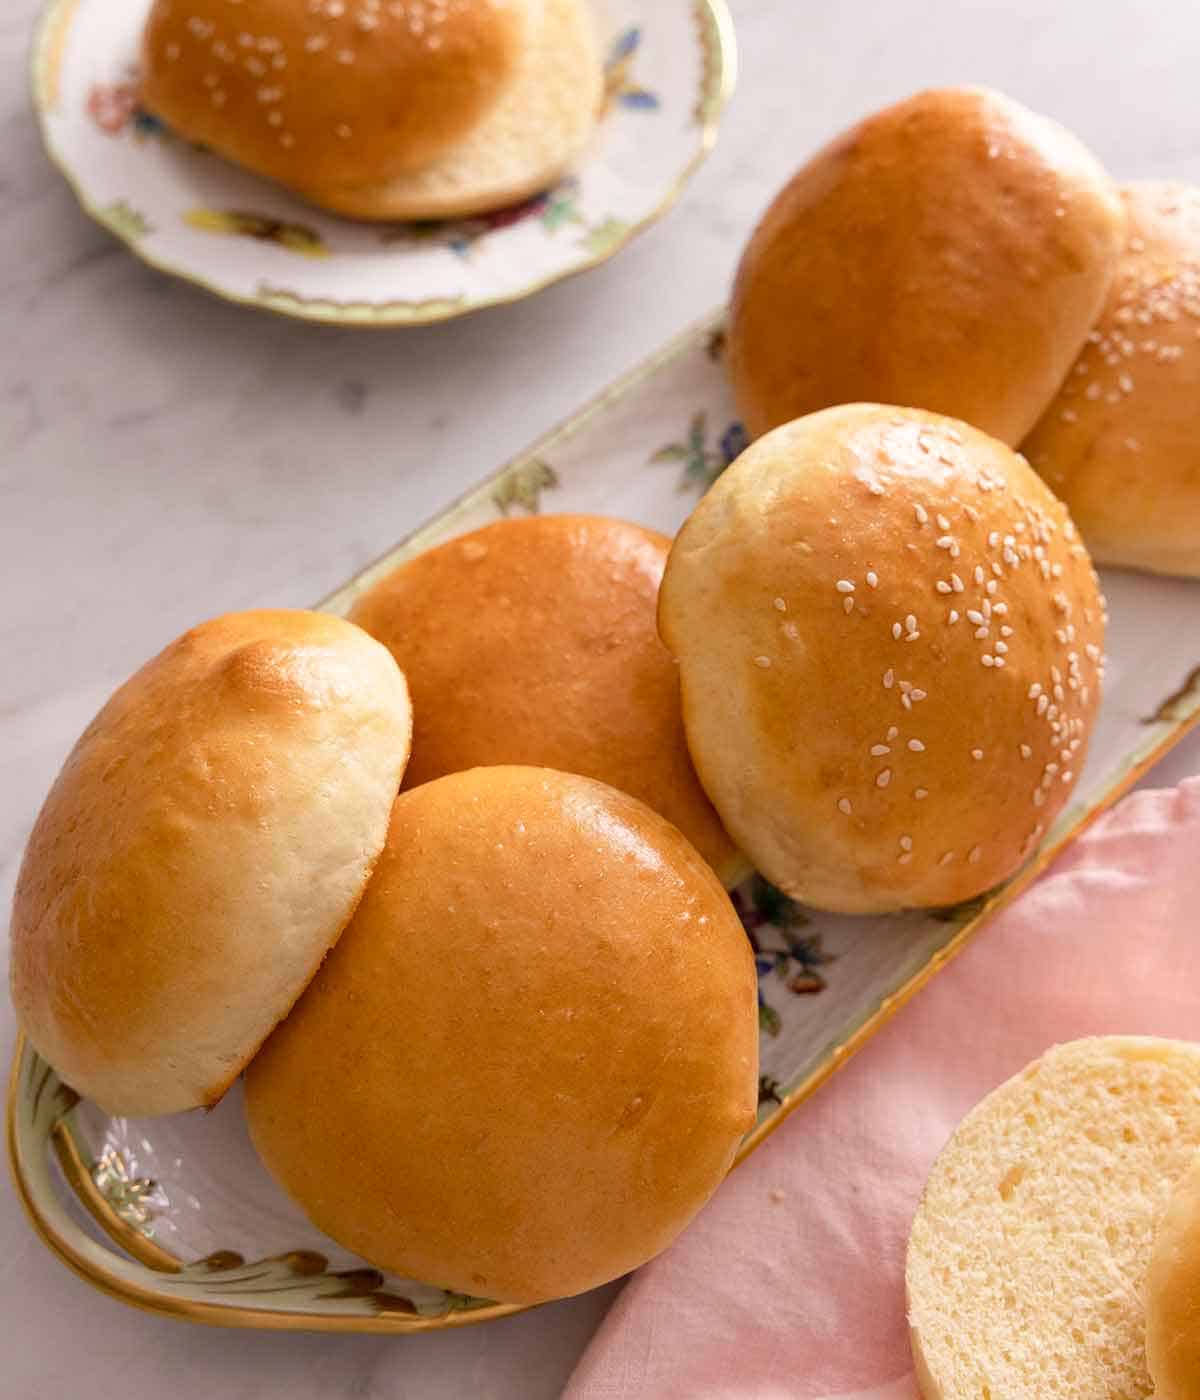
These brioche buns are soft, buttery, and golden. Once you realize how easy it is to make homemade brioche buns, you won’t buy from the store again!
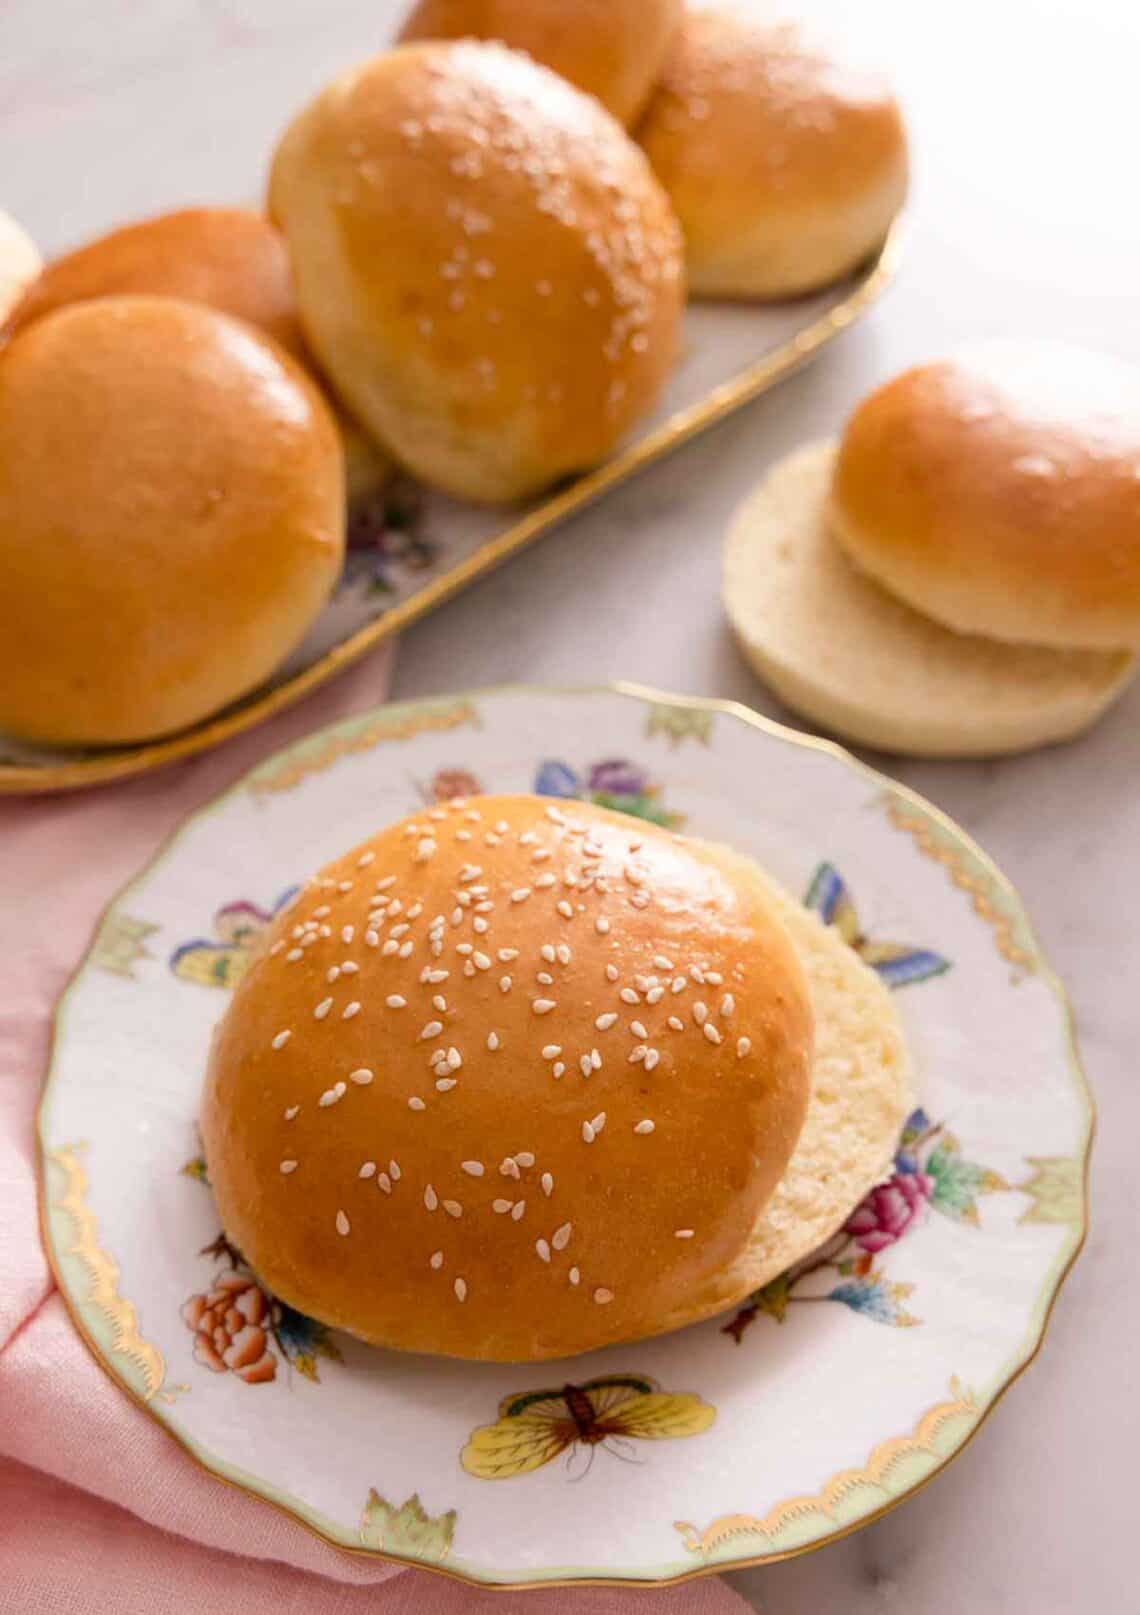
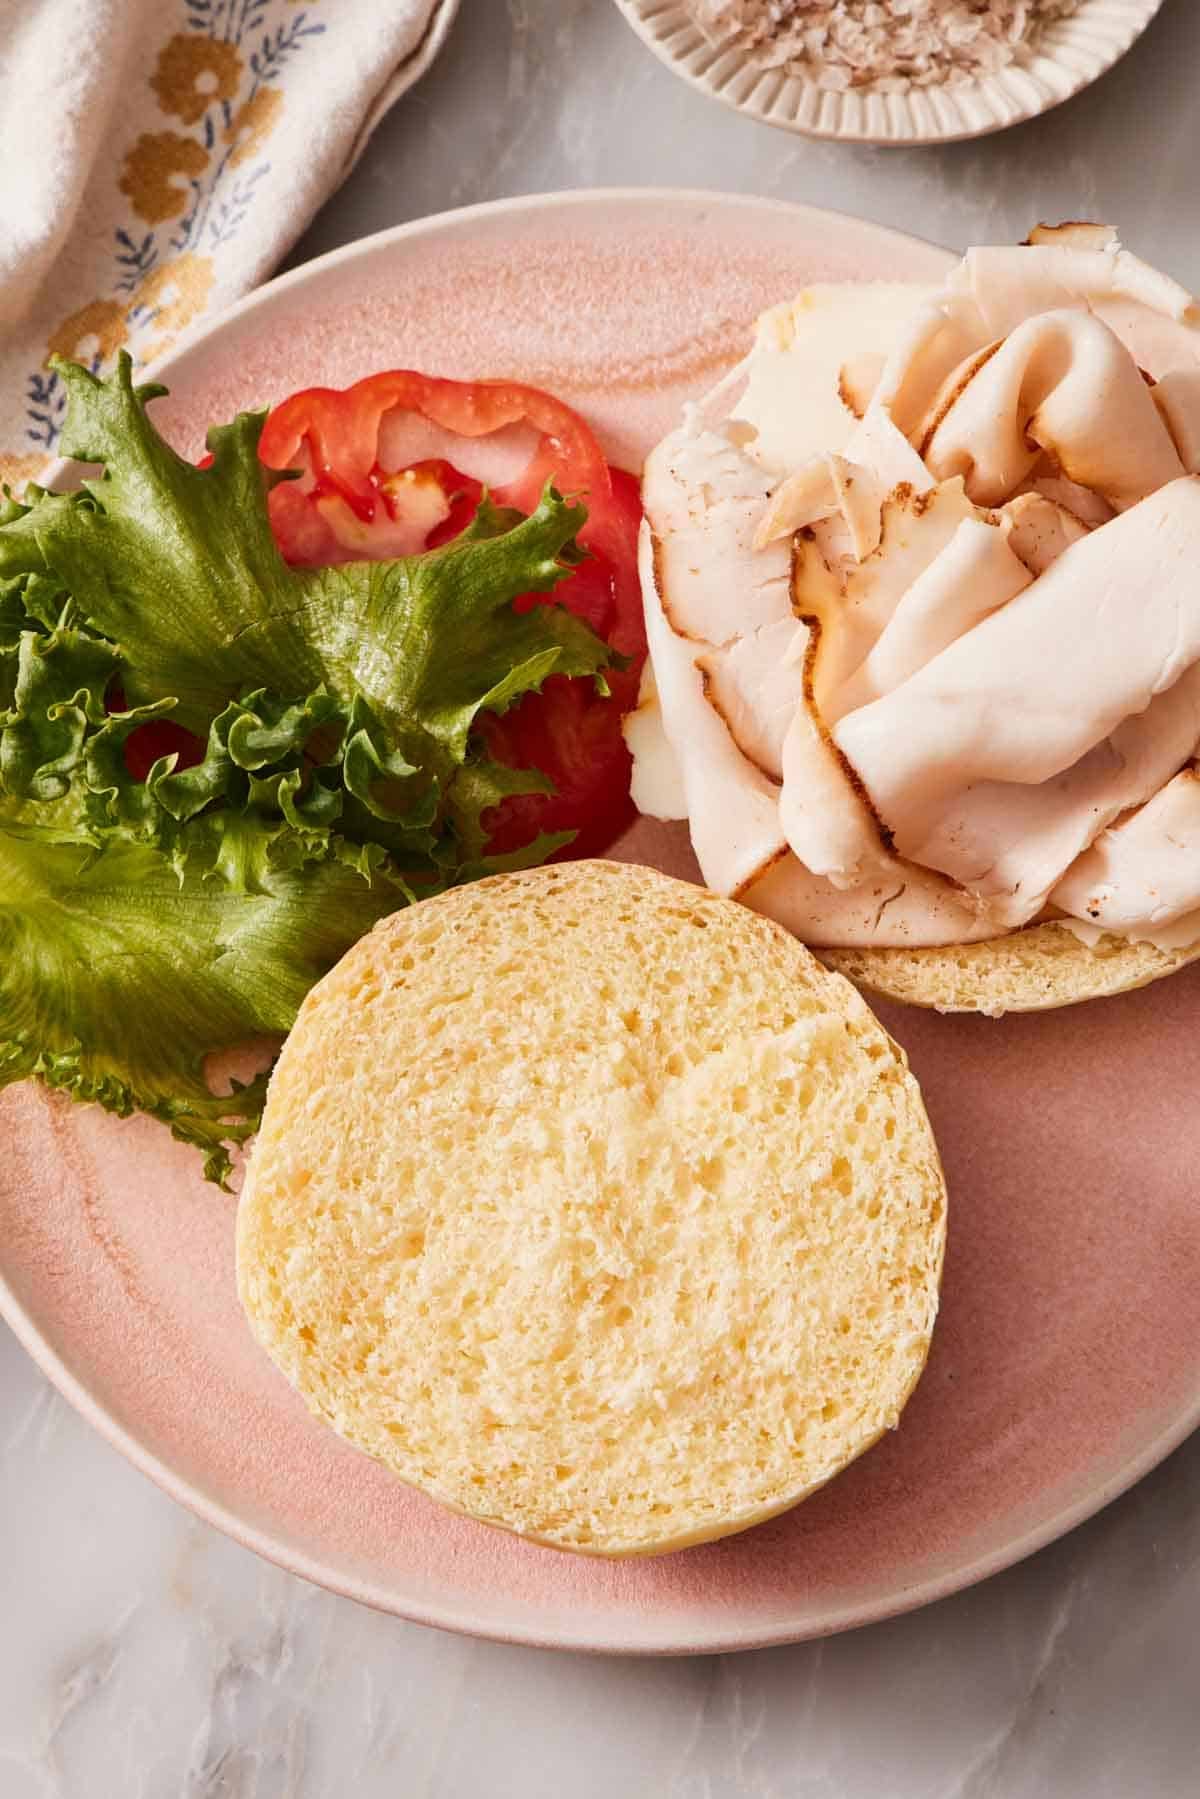
A good brioche bun is the difference between a burger and a great burger. It’s soft and faintly sweet, rich with butter and egg, golden and glossy on top. The texture is fluffy inside, but it holds together under a juicy patty instead of dissolving into mush. These are the ones I make for every cookout, and once you’ve pulled a tray of them out of the oven, the plastic-wrapped store version is hard to go back to.
True French brioche runs heavy on butter and eggs—often three or more eggs and a stick or two of butter per loaf. These buns are a slightly lighter cousin: rich enough to read as brioche, but with just two eggs and four tablespoons of butter, so they stay sturdy enough to do their actual job of holding fillings. That balance is what I dialed in over a stack of test batches, and why I updated this recipe.
“They came out perfect. This is my new go to recipe for hamburger buns. I’ll definitely be making these again and again.”
Arlene
What Makes These Brioche Buns Work
Three things set a brioche bun apart from plain white bread rolls: eggs, butter, and milk. The eggs give the crumb its tender, slightly springy structure and the dough its golden color. The butter makes it rich and keeps it soft for days. The milk (instead of water) adds a little more fat and produces a finer crumb. Skip any one, and you’ll drift back toward an ordinary dinner roll.
The mix of bread flour and a little all-purpose is also deliberate. Bread flour’s higher protein builds the gluten that gives these buns their plump, rounded lift and just enough chew and structure to hold up to a juicy burger patty or stacked turkey sandwich. A bit of all-purpose flour keeps them from turning too chewy and tough. The small amount of all-purpose flour is what keeps the crumb pillowy.
What You’ll Need
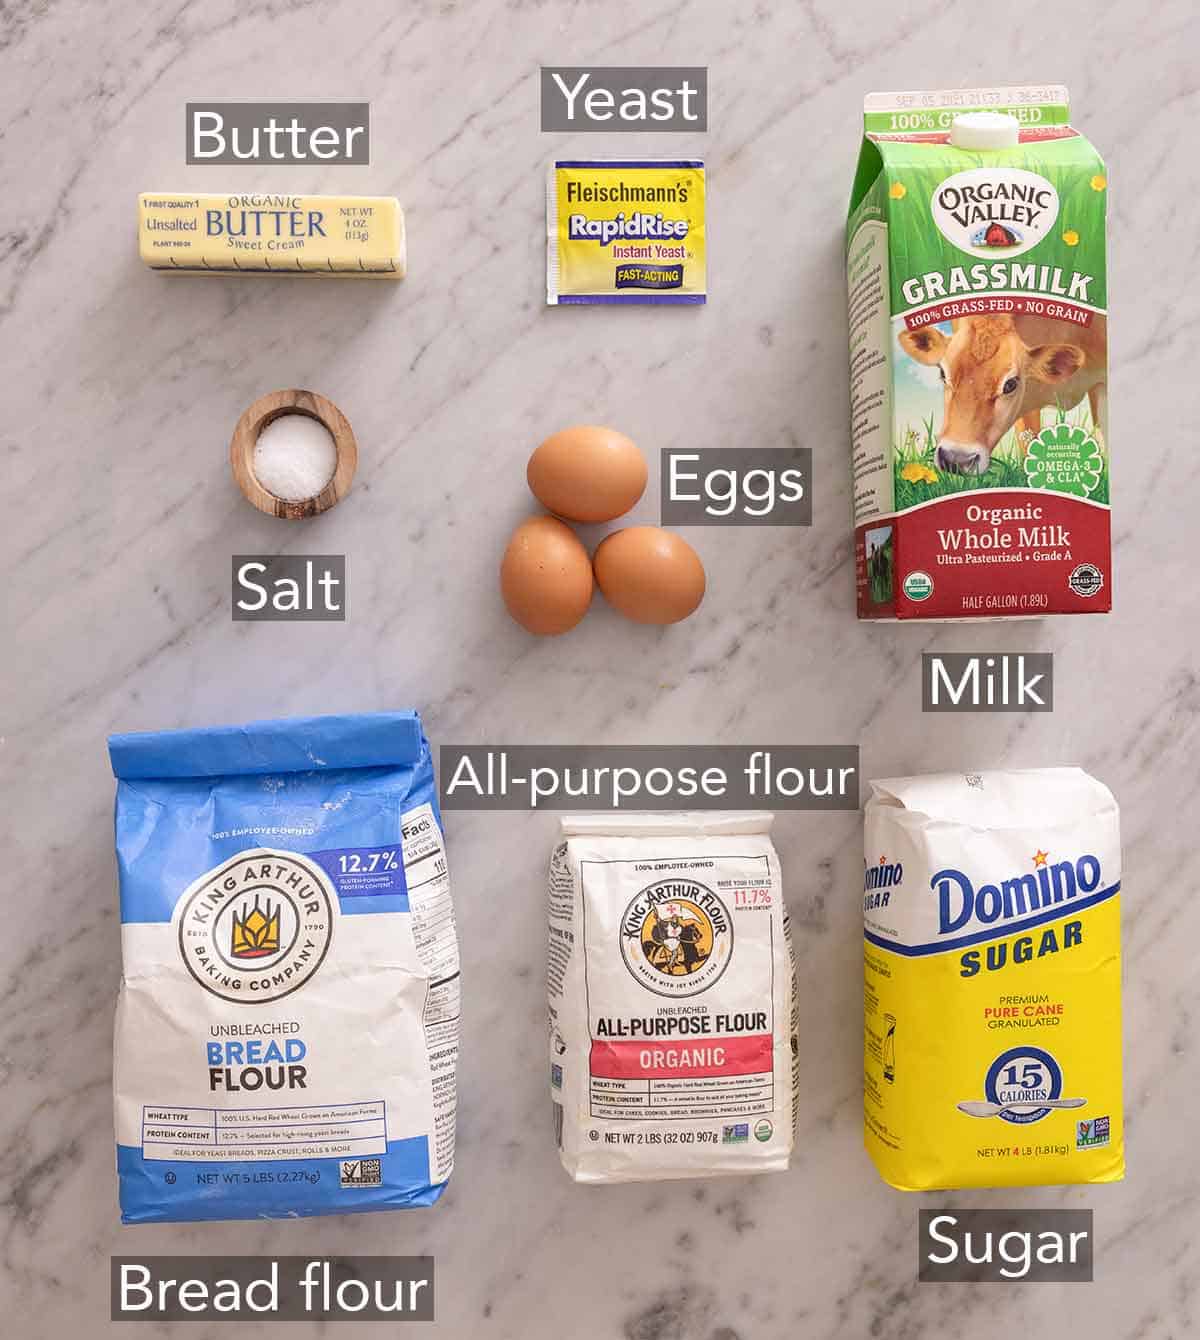
Here are the main ingredients to make brioche buns. Find exact measurements and the method in the recipe card below.
Bread flour + all-purpose flour — the bread flour does the structural work; the all-purpose keeps the crumb tender. You can use all of one kind if that’s what you have, but the texture will change. Only all-purpose flour will make the buns feel a bit cake-like. All bread flour will make them a bit tough, and less of that soft, fluffy texture that brioche is known for.
Instant yeast — no need to bloom it — it goes straight into the dry ingredients. If you only have active dry, dissolve it in the warm milk first until it foams up, and expect a slightly longer rise (almost twice as long).
Warm milk (110–120°F) — you want the milk warm enough to wake the yeast, but not so hot that it kills it. If it isn’t warm enough, the dough will take a very long time to rise, or may not at all. Testing your milk with a thermometer takes the guesswork out!
Eggs — you need two in the dough for richness and color. The additional egg is for the egg wash brushed on top of the buns, which gives the tops their bakery shine.
Unsalted butter — your butter should be soft enough to dent with a finger but not greasy or so soft that it spreads very easily. If it’s soft, it will work into the dough cleanly without making it too sticky. Unsalted lets you control the salt, since salted butter varies by brand. Check out more about why you use it and how to substitute with salted butter in my Academy lesson: Salted vs Unsalted Butter.
Sugar and salt — a little sugar is added for that signature faint sweetness of brioche and to feed the yeast. Salt brings out all of the rich flavor and helps produce a stable gluten network to hold the airy texture produced by the yeast.
How to Make Brioche Buns
Here’s a step-by-step guide to making these homemade brioche buns. Get the exact recipe in the recipe card below.

1. Mix the dough. In a stand mixer with the dough hook, whisk together both flours, the sugar, yeast, and salt. Since the recipe calls for instant yeast, you don’t need to bloom it first. It can be mixed directly with the dry ingredients.
2. Mix together the warm milk and eggs. Mixing them beforehand breaks down the eggs so that they incorporate more easily into the dough.
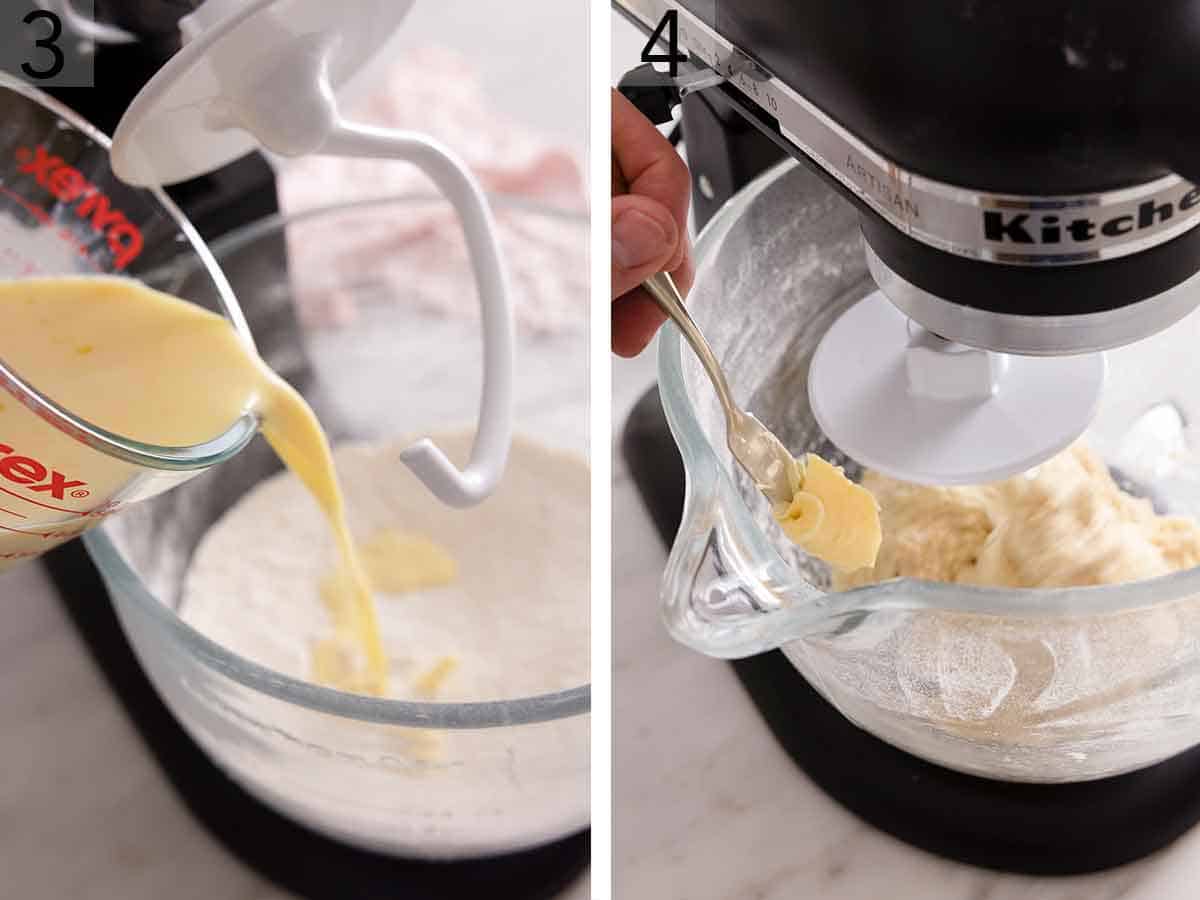
3. Add the milk mixture to the flour mixture, and knead on low until the dough comes together, about 2 minutes. There shouldn’t be any dry spots of flour in the bowl. Stop and scrape the bowl if needed.
4. Add the butter gradually. Add the butter a half-tablespoon at a time, letting each piece fully disappear into the dough before adding the next. This is the brioche signature method—adding soft butter slowly into already-formed dough is how you get that rich, even crumb instead of a greasy patch. Keep kneading until the dough is elastic and tacky, about 10 minutes.
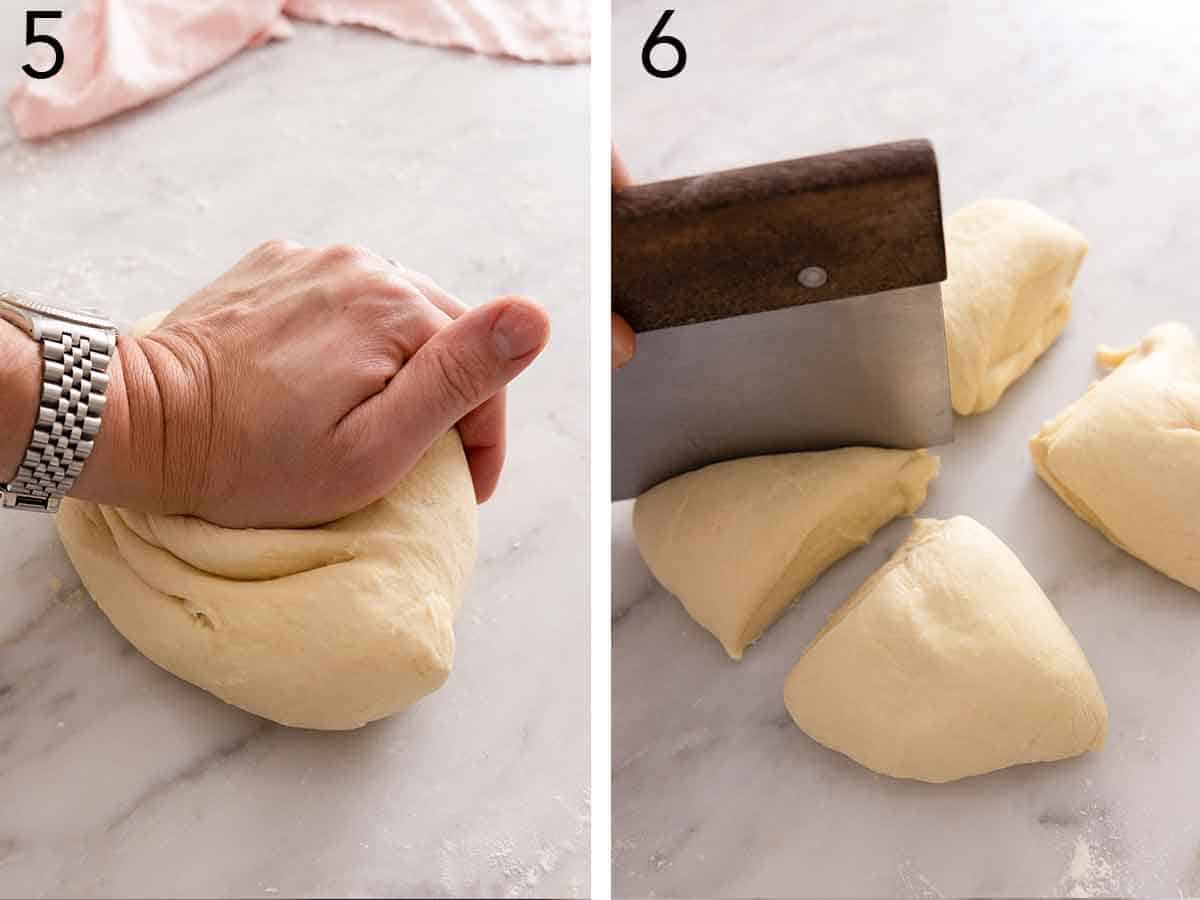
5. First rise (bulk). Transfer the dough to a lightly oiled bowl, turn to coat, and pat it into an even layer. Cover and let it rise somewhere warm until doubled, about 45 minutes.
6. Shape. Turn the dough out onto a lightly floured surface, press it into an even circle, and cut it into 8 equal pieces (about 100g each—checking them on a scale keeps them evenly sized). Pull the edges of each piece into the center, pinch to seal, flip seam-side down, and loosely round it into a smooth ball. You don’t need a tight, taut ball the way you would for dinner rolls—just smooth and round. Place them a few inches apart on a lined sheet and flatten each gently with your palm to about 3 inches wide.
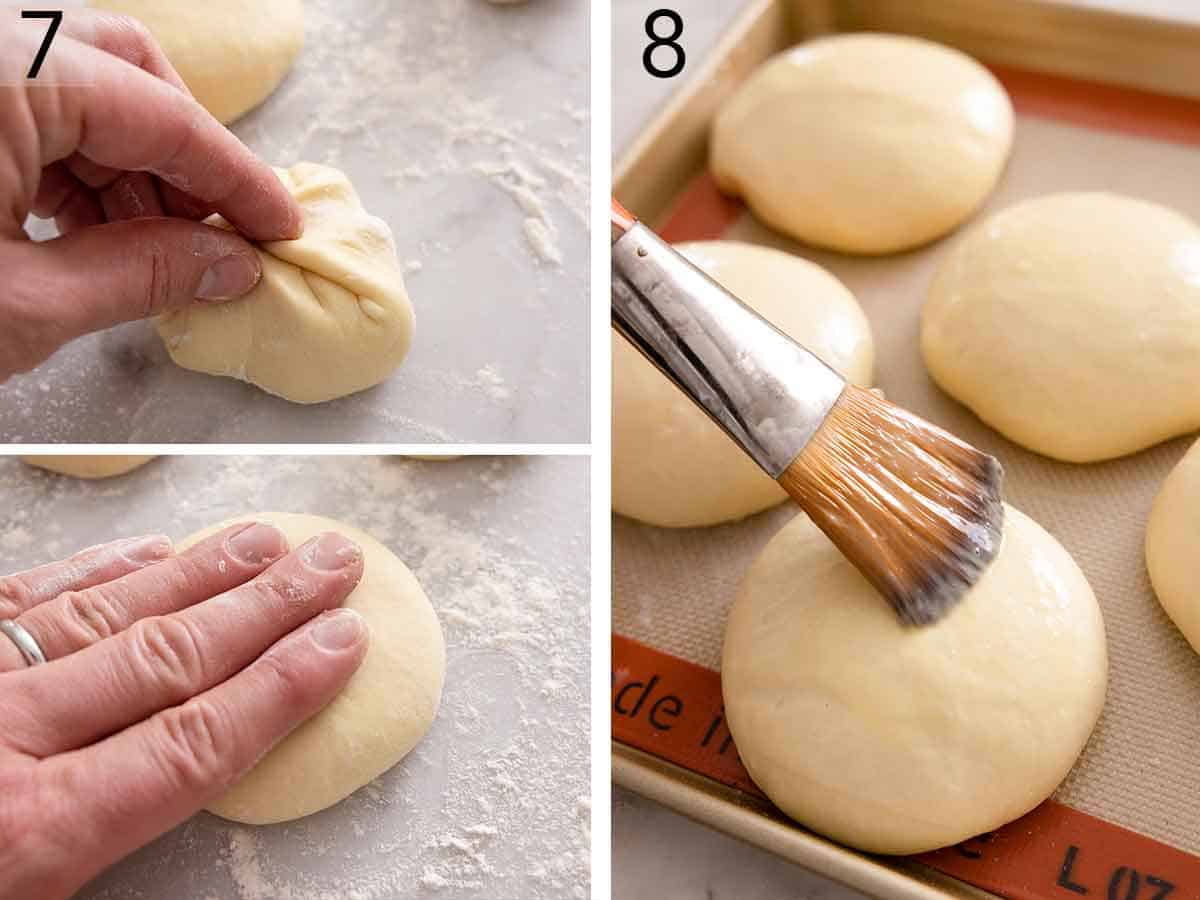
7. Second rise (shaped). Cover and let the shaped buns rise again until doubled, about 30 to 40 minutes. Preheat your oven while they rise.
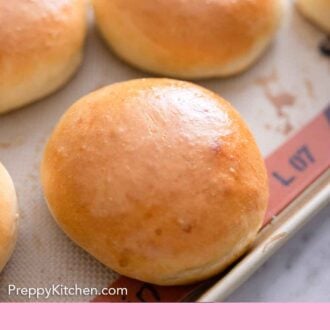
8. Egg wash and bake. Once risen, brush the tops lightly with egg wash and bake at 400°F for 12 to 15 minutes, until deep golden, rotating the pan halfway through for even color. Cool completely before slicing.
Why Two Rises Now
If you made these buns from my older version, you’ll notice this one rises twice: a bulk rise before shaping and a second rise after. I changed it on purpose because, through multiple recipe tests, I found that it improves the final texture and flavor. The first rise builds flavor and a more even, fine crumb. The second gives the shaped buns their lift, so they bake up fluffy and soft instead of dense.
The single-rise version was faster, but the two-rise method gives a noticeably lighter, more bakery-like bun, and the extra step is mostly just hands-off waiting. It’s a small change, but it took these from good to really great.
Shaping The Perfect Bun
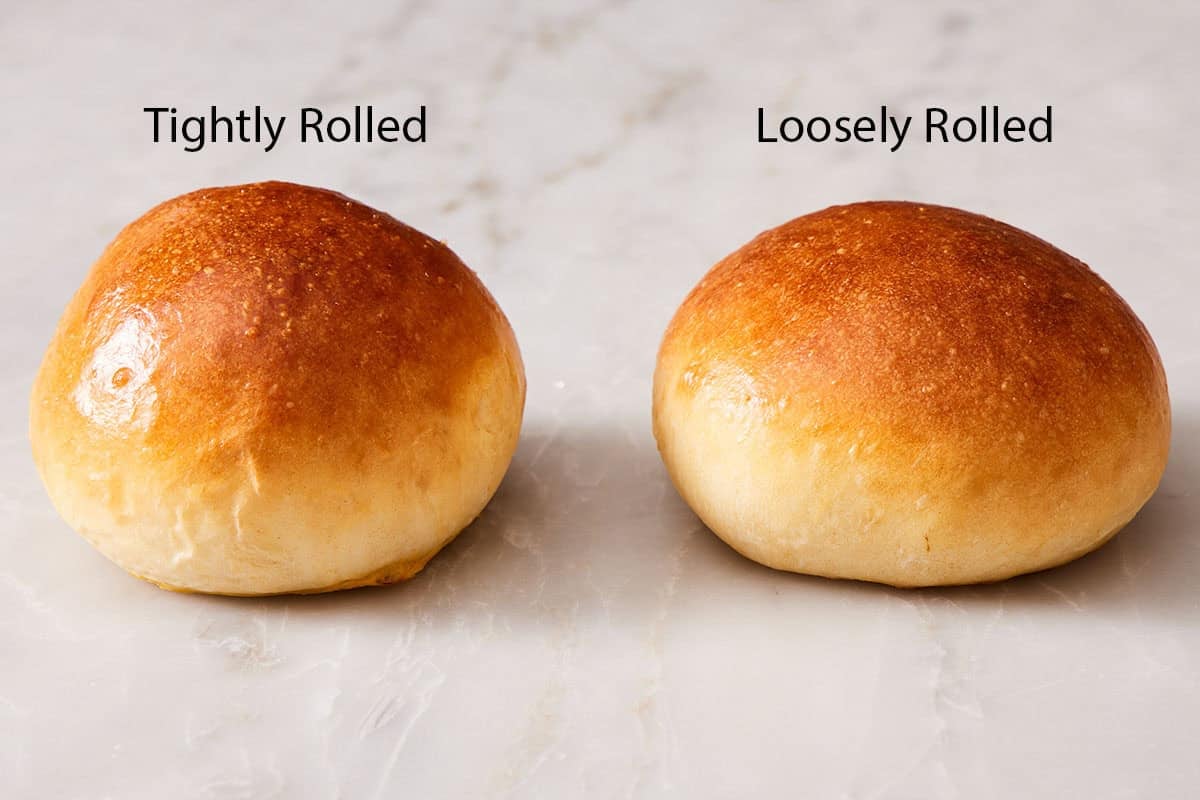
How you shape the dough balls is essential to getting a good bun that is wide enough to hold a good amount of fillings. Flattening each ball to about 3 inches is essential, but rolling it without getting it too tight and taunt is even more important. If you build a lot of surface tension, like you do when shaping dinner rolls, they will bake up as tall, round balls, even if you flatten them. When loosely shaped and pressed flat, they spread into proper bun shape with a wide, splittable top. You can see both shaping methods compared below, before baking. Because of the surface tension created on the outside of the dough ball, when you press it down, it springs back, holding a more ball-like shape:
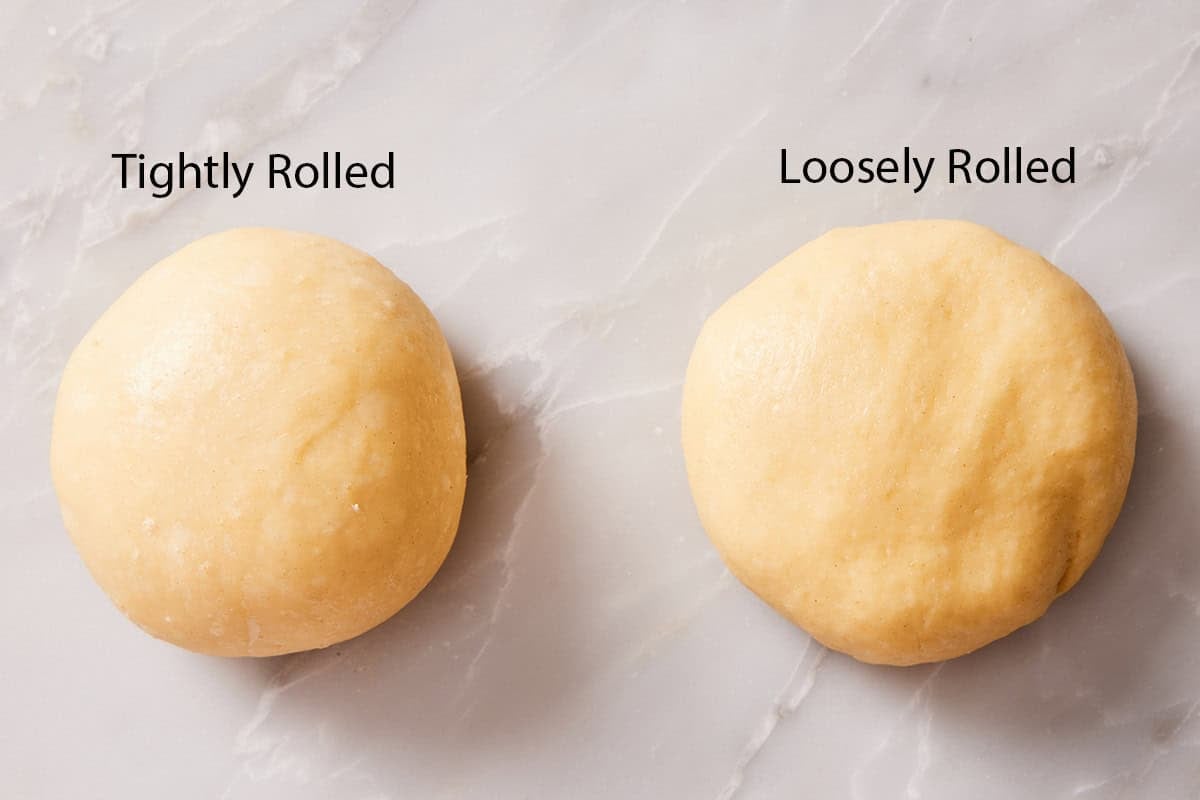
When baked, the tension pulls the sides in which pushes the center up, forming a rounder roll-like shape. If this happens with your buns, there isn’t anything wrong with them! They will still taste the same—it just makes them a bit taller than wider so they won’t fit a burger patty as well.
Troubleshooting: Sticky Dough, Flat Buns, Dense Crumb
Brioche dough is meant to be soft and a little sticky. The high fat and egg content is exactly why these buns are tender. The most common mistake, by far, is panicking at the stickiness and packing in extra flour. Too much flour will turn brioche buns tough and dry. The dough is ready when it’s tacky but doesn’t stick to a clean finger when you touch it; if it’s truly slack, add flour just a tablespoon at a time.
Buns came out flat or squat. This is usually a sign of underproofing. Make sure the shaped buns genuinely double on the second rise before they go in. The actual rise time depends on your kitchen, so watch the dough, not the clock. In a cold kitchen, set the tray in an off oven with the light on or on the bread proof setting for gentle warmth.
Dense, heavy crumb? Most often, it is inactive yeast (check the date) or underproofing. Keep the milk in the 110–120°F window so you don’t accidentally kill it before you start. And make sure to knead the dough to the right stage (tacky and elastic) so the gluten develops enough to trap the gas the yeast produces.

Make Sliders or Hot Dog Buns
This same dough can be used to make other shapes. For slider buns, divide the dough into 12 smaller pieces and shorten the bake by 3-5 minutes. For brioche hot dog buns, shape each piece into a 4- to 5-inch log instead of a ball, space them close so they kiss as they rise, and bake the same way. This is a flexible, enriched dough worth keeping in your rotation!
Pro Tips for Making This Recipe
Weigh your flour. Adding too much flour is a common brioche mistake. A scale is the surest fix and guarantees just the right amount of flour. If you don’t have a scale, learn the proper technique for measuring flour by volume in my Academy lesson How To Measure Ingredients Correctly.
Weigh the dough pieces too. About 100g each gives you eight evenly sized buns that bake at the same rate. Eyeballing them can leave you with bigger and smaller ones that burn or underbake. Trim off and add little pieces of dough as needed before shaping them.
Watch the dough, not the clock. Rise times can vary with your kitchen’s temperature. I have tested times, but be sure to judge your buns by doubling, not just by minutes. A colder kitchen will make them rise more slowly, and a warmer kitchen will speed up the rise.
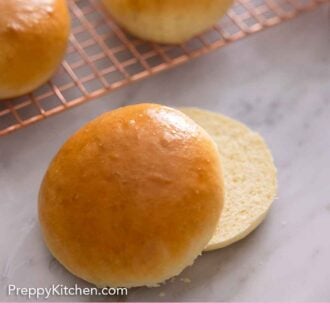
Cool before slicing. Cutting hot buns squashes the crumb and actually leads to a drier bun, since the steam escapes from the large cut sides. Let them cool down first, then slice and add your fillings.
Brioche Buns
Equipment
- Mixer
Ingredients
- 2½ cups (300g) bread flour, plus more for dusting
- ¾ cup (90g) all-purpose flour
- 2 tablespoons granulated sugar
- 2¼ teaspoons instant yeast (.25-ounce packet)
- 1½ teaspoons salt
- ¾ cup (180mL) warm milk (110-120F)
- 2 large eggs
- 4 tablespoons (57g) unsalted butter room temp
- Egg wash (1 large egg plus 1 tablespoon water or milk, beaten)
Instructions
Make the Dough:
- In the bowl of a stand mixer fitted with the dough hook attachment, whisk together flours, sugar, yeast, and salt.
- Add the warm milk and eggs. With the mixer on low speed, knead until the dough comes together, about 2 minutes. Add butter, a ½-tablespoon at a time, waiting to add the next pieces until the first is fully incorporated. Continue kneading until an elastic and tacky dough forms, about 10 minutes. (Dough will be soft and should feel sticky but not stick to a clean finger when touched. Add a tablespoon or two of additional flour if needed.)
- Lightly oil a large bowl, and transfer dough to the oiled bowl. Turn it once to coat the dough in oil and pat it into an even layer. Cover and let it rise in a warm spot until doubled in size, about 45 minutes to 1 hour.
Shape the Buns:
- Once the dough has risen, line a baking sheet with parchment paper or a silicone mat.
- Lightly flour your surface and turn out the dough. Press it into an even circle, then cut it into 8 pieces (about 100g each).
- Using flour as needed, pull the edges of each dough piece into the center and pinch together to create a ball. Turn over and round out with your hands. You don’t need to make the balls very tight, like when shaping dinner rolls. Just get them into a smooth round shape. Place the balls on the baking sheet, spacing them a few inches apart, then flatten them with your palm until they are about 3-inches wide.
- Cover with a clean tea towel or plastic wrap, and set aside to rise again until doubled in size, about 30-40 minutes.
Bake the Buns:
- Meanwhile, preheat the oven to 400F.
- Brush the tops of the risen dough balls lightly with egg wash. Bake for 12 to 15 minutes until tops are golden brown, rotating the pan halfway through baking for more even color. Let the buns cool completely before slicing. Store baked buns in an airtight container for up to 3 days or freeze for up to 3 months.
Notes
- Make sure the milk is between 110 and 120°F. Milk that’s too hot (130°F+) can kill the yeast, and milk that’s not warm enough won’t activate it.
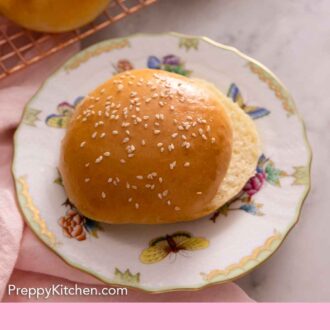
- Make seeded buns. Sprinkle the tops of the egg-washed buns with poppy seeds, sesame seeds, or everything seasoning before baking for a classic hamburger bun look.
Nutrition
Have you tried this recipe? Tag me today!
Mention @preppykitchen and tag #preppykitchen!
How to Store and Freeze
Keep cooled buns in an airtight container at room temperature for up to 3 days. A quick warm-up in the oven or on the grill brings back the just-baked softness. You can also split the buns, butter the cut side, and toast them in a skillet or on the grill!
To freeze, wrap each bun individually or place them in a freezer bag, and freeze up to 3 months. Thaw at room temperature and refresh in a warm oven. I slice mine before freezing, so they’re burger-ready straight from thawing.
Frequently Asked Questions
Brioche is an enriched dough, which means it has a generous amount of egg, butter, and milk added to the basic flour-yeast-salt formula. That’s what makes it richer, softer, more tender, and faintly sweet compared to a lean bread like a baguette. These buns are a lighter take than a classic brioche loaf, with enough richness to taste like brioche but enough structure to hold a burger patty.
Yes. Dissolve the active dry yeast in the warm milk first and let it sit until foamy (about 5 minutes), then proceed. Both rises will likely take a little longer than with instant yeast.
Not very well. The dough is soft, and the butter has to be worked in by hand with a wooden spoon. This will take 15-20 minutes by hand. A mixer makes it much easier, given the high fat content.
More Recipes to Try
Make one of my other bread recipes next!
- Brioche Bread — the same rich, buttery dough baked into a sliceable loaf, perfect for French toast.
- Hamburger Buns — a classic soft burger bun for when you want something a little less rich than brioche.
- Dinner Rolls — pillowy, pull-apart rolls for the table, made with a similarly soft but less enriched dough.
- Crescent Rolls — buttery, flaky homemade crescents that round out any dinner spread.
- English Muffins — craggy, nook-and-cranny stovetop muffins for breakfast sandwiches.
If you’ve tried this brioche bun recipe, then don’t forget to rate it and let me know how you got on in the comments below. I love hearing from you!


