
This post may contain affiliate links. Please read our disclosure policy.
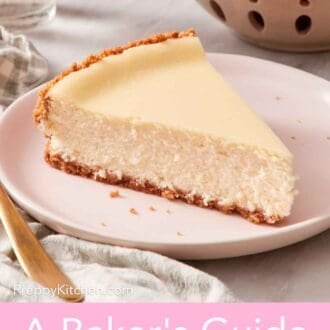
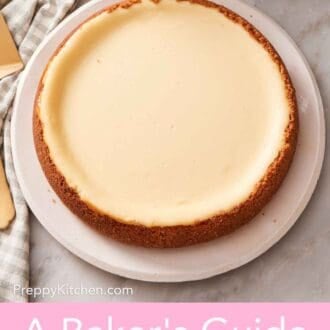
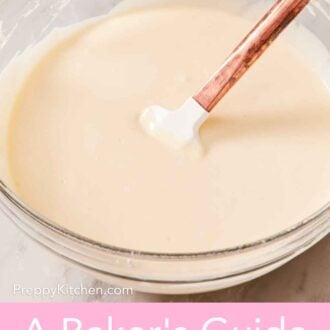
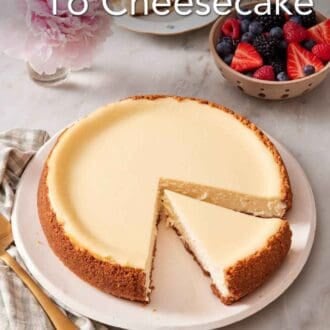
Cheesecake is one of the oldest desserts, and despite many centuries of perfecting recipes, it’s still one of the most temperamental. This is your complete guide to everything you need to know to make the perfect cheesecake: where it came from, how it works, regional styles you should know, and the six fundamentals to master for a slice that’s creamy and not cracked.
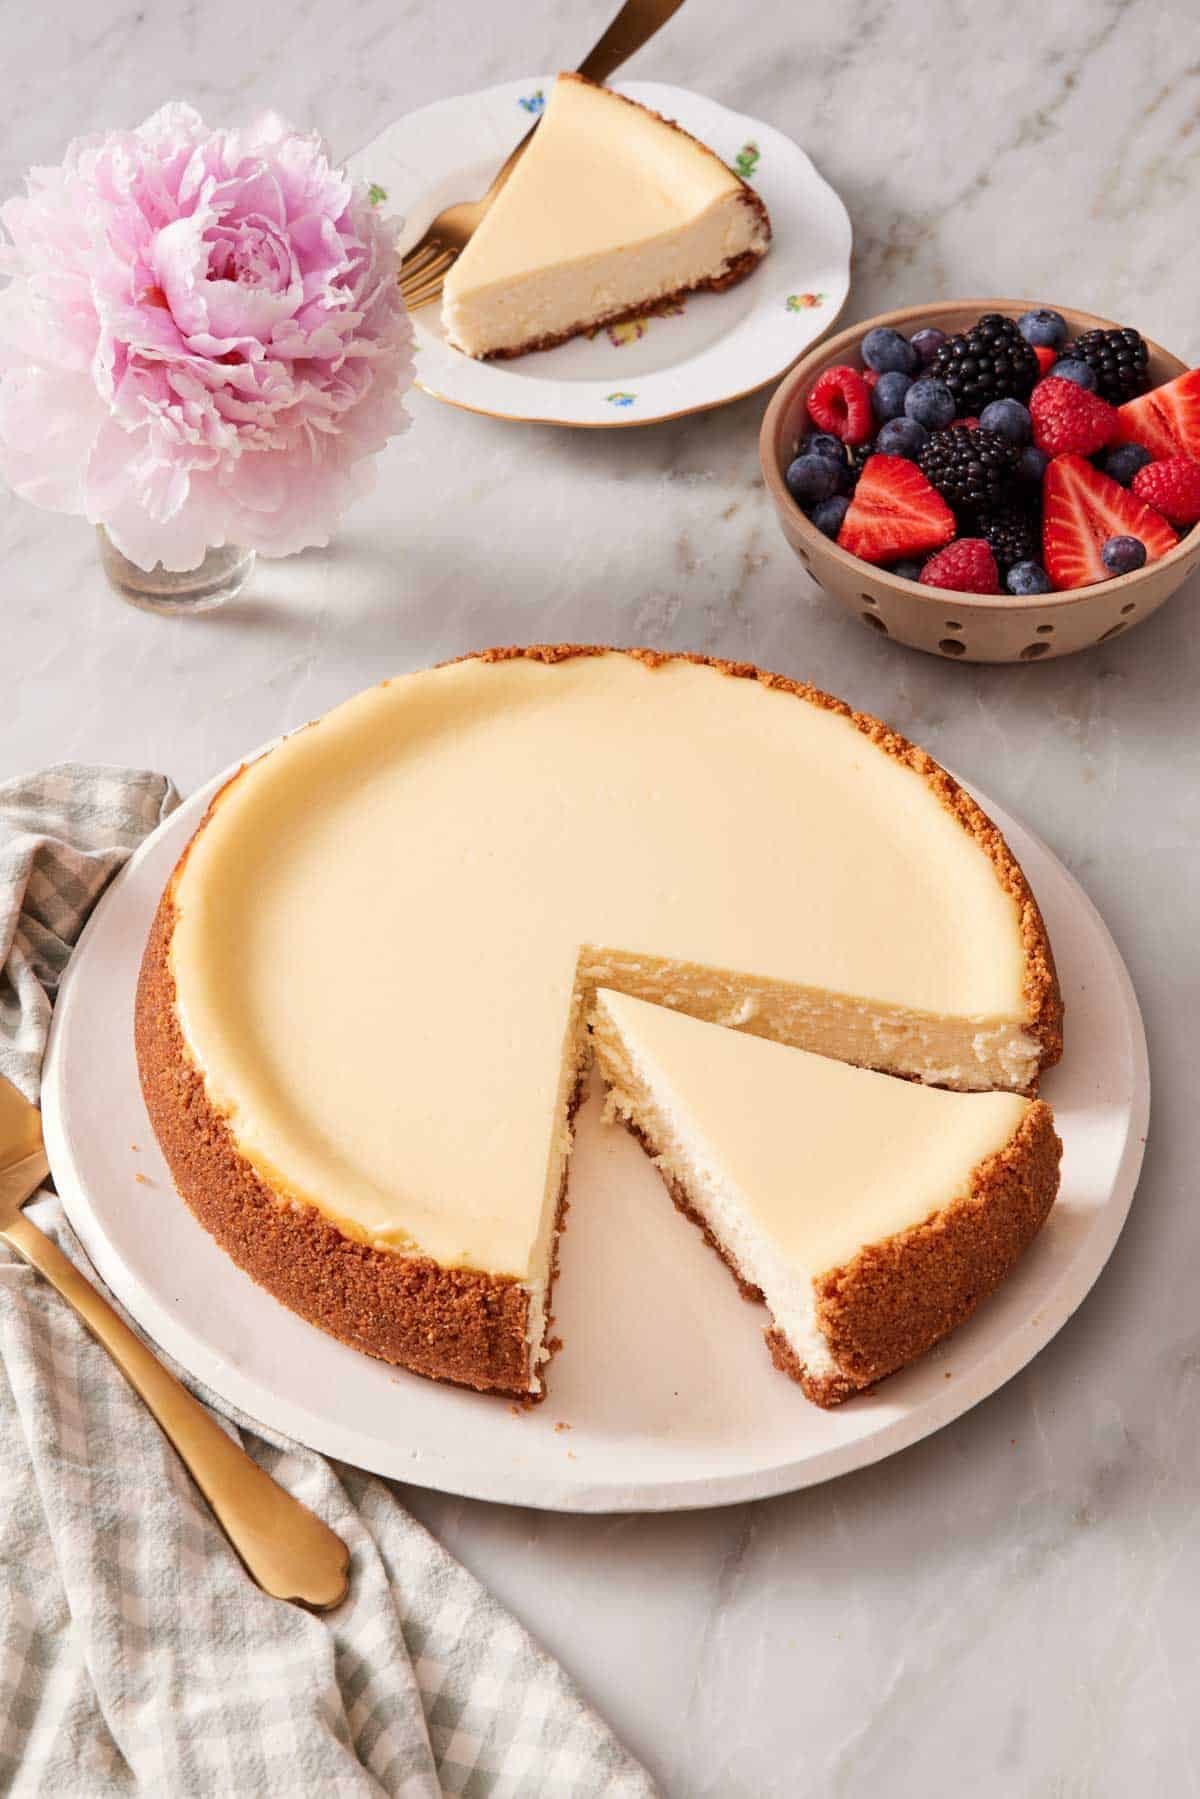
Cheesecake is an old dish made with fresh cheese, sweetened, and set with eggs that evolved into regional styles and traditions before standardized recipes existed. Many modern home-baking failures come from applying one region’s technique to another region’s recipe. This guide is the complete reference for all types of cheesecake!
In the first section, I cover the major regional styles so you understand what you’re actually making when a recipe says “New York-style” or “Basque” or “Japanese cotton cheesecake.” The middle sections cover the six fundamentals that apply to almost every cheesecake recipe—ingredients, crust, mixing methods, baking, doneness, and cooling. The last section covers the eight most common failures you’ll encounter and how to fix each one. By the end, you should be able to read any cheesecake recipe and understand what it’s actually trying to do, and bake a perfect, crack-free cheesecake!
“My son asked for a cheesecake for his birthday, so I decided to try [your classic cheesecake] recipe. O.M.G.!!! It is OUTSTANDING!! I made it exactly as directed, and it was not only delicious, it was gorgeous – perfectly smooth top, lovely creamy consistency.”
Rebecca
A Short History Of Cheesecake
Did you know cheesecake is older than most countries? The Greeks were making something cheesecake-like by 2,000 BC. Aegimus, a physician on Samos, wrote the first known cookbook devoted to it around 200 BC. Greeks baked these cakes using fresh cheese, honey, and wheat flour (as a binder) and served them at weddings and fed them to Olympic athletes. There was also a Roman version, libum, around 160 BC. It was savory and used in religious offerings, but structurally the same idea: fresh cheese with a binder baked in a form (pan).
As the recipe spread with the Roman Empire, it evolved differently over centuries in each region depending on the local cheese available: ricotta in Italy, quark in Germany, farmer’s cheese and tvorog in Eastern Europe, and eventually the famously simple burnt Basque cheesecake in northern Spain.
The American version is actually a 19th-century accident. In 1872, dairyman William Lawrence was trying to replicate French Neufchâtel in Chester, New York, and ended up with something richer and softer—he called it Philadelphia (cream cheese). By the 1920s, it had displaced curd cheese in American baking, and Arnold Reuben’s dense, smooth New York-style cheesecake (c. 1929) became the U.S. standard.
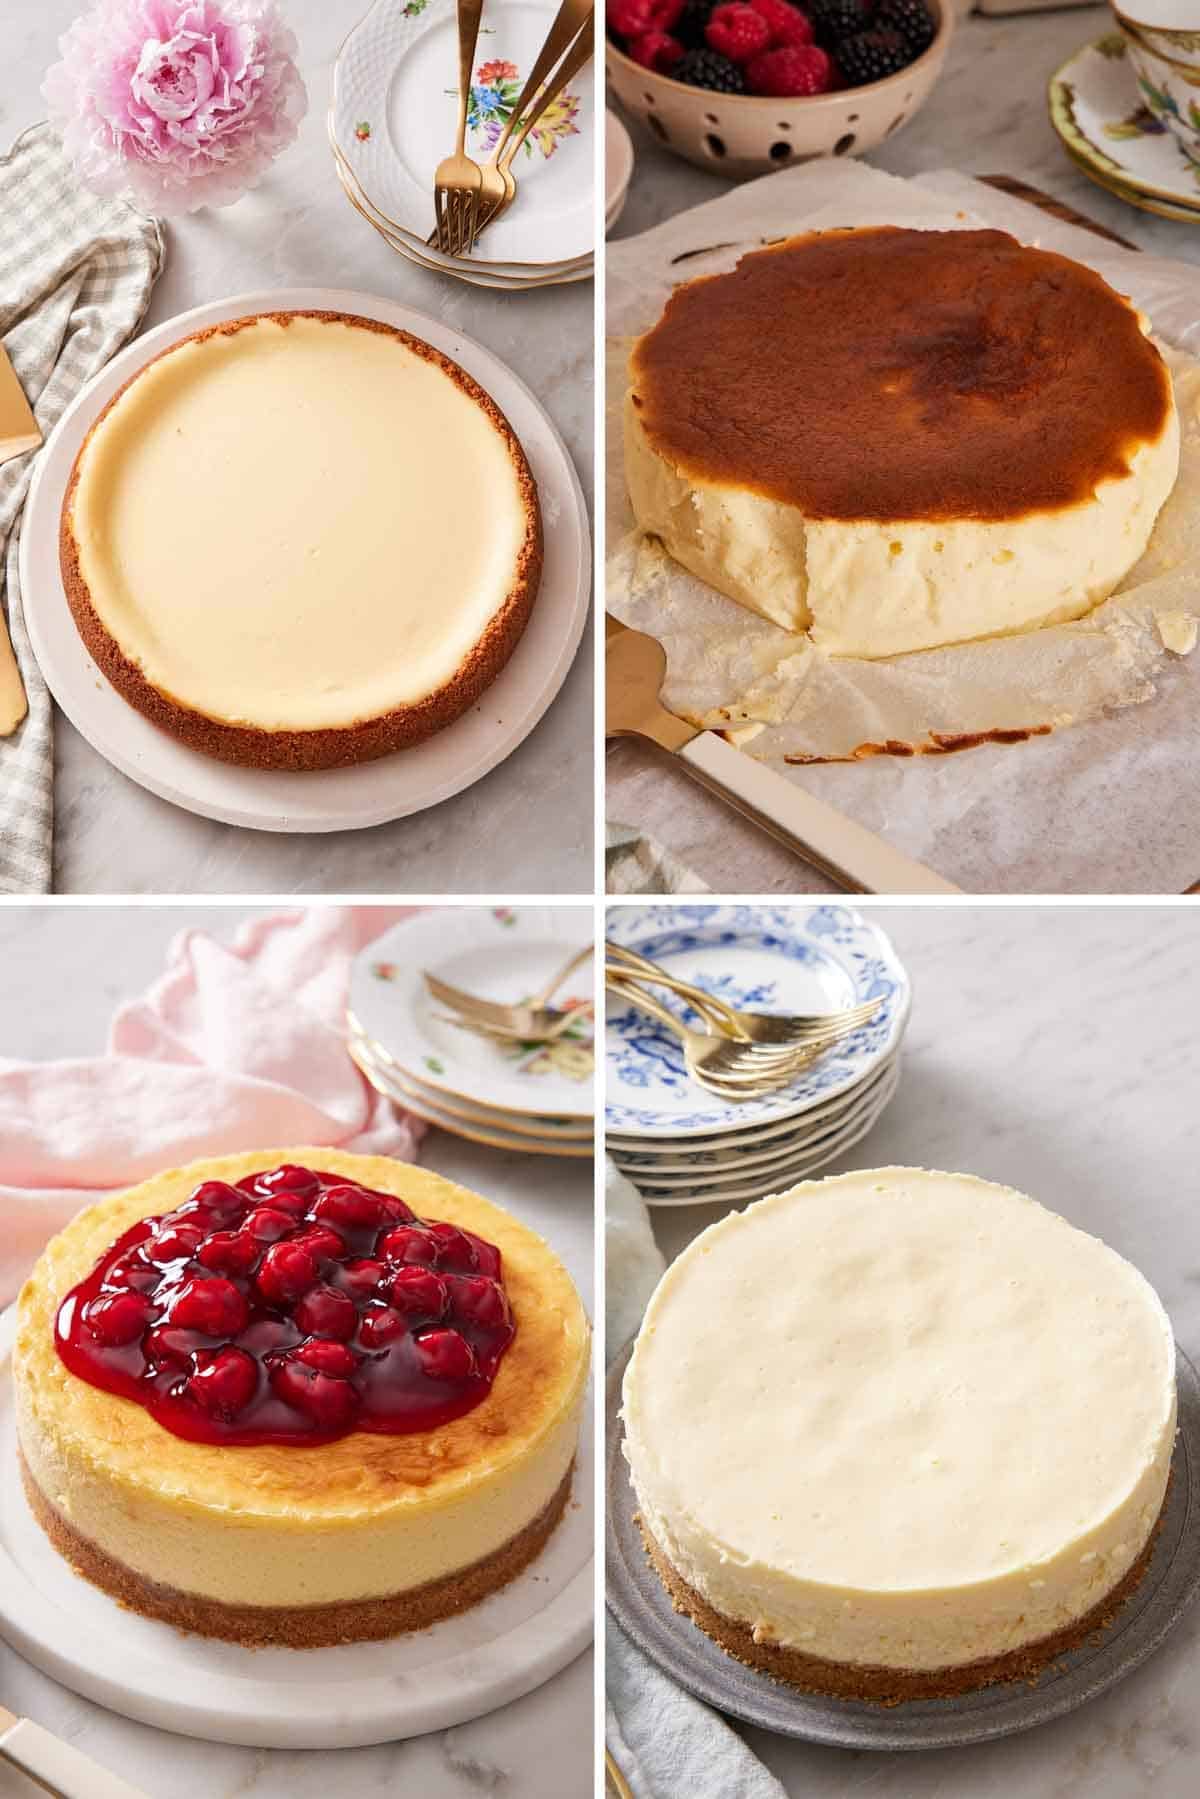
Most of the regional variety we see today is recent: the Basque cheesecake went global after chef Santiago Rivera served it at La Viña in San Sebastián in 1990; Japanese cotton-soft (soufflé) cheesecake took off worldwide in the 2010s; and no-bake cheesecake, a variant of American cheesecake, had its resurgence during the 2020 home-baking boom. A single 2,000-year-old dessert idea is now roughly ten distinct styles sharing one common ancestor.
10 Cheesecake Styles You Should Know
Each of these is a technically distinct kind of cheesecake using different cheeses, ratios, and baking methods, resulting in different textures. Knowing what style a recipe is will easily help you know what to expect when you make it.
| Style | Technique | Texture & Flavor |
| 1. New York-style (The American classic) | Baked low and slow in a springform pan, often with a water bath to prevent any cracks from forming in the filling. Made primarily with full-fat brick cream cheese (typically Philadelphia), the egg ratio is 1:1 with 8-oz blocks of cream cheese. This is the style my classic cheesecake recipe follows, but my recipe is designed to bake without a water bath! | Dense but tender, with a slight squeak on the fork. Rich, smooth, creamy, with a tang from sour cream or richness from heavy cream and a subtle citrus brightness from lemon. It’s sweetened with sugar, flavored with vanilla, and has a graham cracker crust. |
| 2. Basque (or burnt) cheesecake | The opposite of New York-style in nearly every way: no crust, baked at a very high temperature (450–475°F) until the top is deeply mahogany-brown, almost burnt. Cracks are expected and part of the aesthetic for this style! It originated at La Viña in San Sebastián. My Basque cheesecake recipe uses a parchment-lined springform with no graham cracker base. | Creamy with a singed outer edge and top. The interior stays creamy and slightly molten, while the caramelized top adds bittersweet complexity. |
| 3. Japanese cotton (soufflé) cheesecake | A radically different cake cheesecake—light, airy, and jiggly made with whipped egg whites folded into a cream cheese custard base. Baked in a water bath at a moderate oven temperature. It’s often called “jiggly cheesecake” because of how it wobbles when moved. | The texture is cloud-like, springy when pressed, and almost more soufflé-like than cheesecake. |
| 4. Italian (ricotta) cheesecake | Made with whole-milk ricotta in place of cream cheese, and sometimes mixed with mascarpone for richness. Visually, it looks rustic and similar to a Basque cheesecake with cracking, no crust, and a light amber top. | Lighter and slightly grainier than New York-style because of the ricotta’s natural curd texture. It is often flavored with citrus zest, vanilla, almond, or amaretto. Less sweet than American versions. |
| 5. German cheesecake (Käsekuchen) | Made with quark (a fresh, slightly sour curd cheese) instead of cream cheese. Often baked in a tart pan with a shortcrust pastry base rather than a graham crumb crust. It has a slightly rustic look because it is baked at a higher oven temperature for a lightly cracked, golden top. | Lighter in texture than New York-style with a distinct tartness (between Italian ricotta and New York-style). |
| 6. No-bake cheesecake | Set without eggs or heat, the structure comes from whipped cream folded into beaten cream cheese, sometimes with gelatin for extra firmness. My no-bake cheesecake skips the gelatin and gets its structure from the right cream cheese to whipped cream ratio. | Mousse-like and lighter than baked versions, slightly sweeter to compensate for less depth without the eggs. It holds a clean slice when properly chilled, but needs to stay cold to be firm. |
| 7. Mini cheesecakes | Not a regional style technically, but worth mentioning because the technique differs from larger cheesecakes. Baked in muffin tins with paper liners, set in about 20 minutes (vs. 50+ for a full cheesecake). There’s no water bath because the small portion size doesn’t have the same crack risk. My mini cheesecakes are super popular for a reason—they’re foolproof! | The texture can vary by recipe style, but most of them are New York-style cheesecakes with a dense but tender texture and a crumb crust on the bottom. They are perfect for adding all kinds of toppings like fresh fruit, lemon curd, pie filling, ganache, caramel sauce, and more. |
| 8. Cheesecake bars | Baked in a square pan and sliced into rectangles. Faster than a full cheesecake, easier to transport, and forgiving for new bakers. See my cheesecake bars recipe. | The base is a crumb crust with a New York-style cheesecake batter on top. The batter can be flavored or swirled with fruit jam. |
| 9. Instant Pot (pressure cooker) cheesecake | The pressure-cooker steam environment is essentially a built-in water bath, so the cheesecake bakes uniformly without the crack risk. Smaller (typically a 7-inch springform) and faster than oven baking once preheating is accounted for. My Instant Pot cheesecake is genuinely foolproof. | Creamy, dense version of New York cheesecake baked in a pressure cooker so the cheesecake stays fairly moist and has a slightly softer texture than the oven-baked version. |
| 10. Air fryer cheesecake | A newer style with the rise in air fryer popularity. The convection environment of an air fryer cooks small cheesecakes quickly and evenly. Best for smaller serving sizes. My air fryer cheesecake is the version I make when I want a small cheesecake without heating the full oven. | Varies depending on the recipe. The top tends to brown more because of the small space and hot circulating air, which makes it great for Basque-style or cheesecakes that have a topping. |
Dietary Variations To Note
There are common variations that account for dietary preferences, regardless of cheesecake style. Some of them require special recipes and others are easy to modify.
- Gluten-free cheesecake. This is mostly about the crust, but some cheesecakes contain flour in the filling to help it set. You can usually easily modify any type of cheesecake to make it gluten-free. Use gluten-free graham crackers or gluten-free cookies in the crust. If the filling isn’t naturally gluten-free, swap the flour for cornstarch.
- Vegan cheesecake. These are typically cashew-based fillings (soaked, blended cashews emulsified with coconut cream and lemon) replacing cream cheese or other dairy. The texture is creamy, but the flavor is distinctly nuttier. You cannot easily modify a baked cheesecake recipe made with dairy cheese to be vegan, because they also typically need to be set without eggs, too. A no-bake cheesecake adapts well to vegan/dairy-free ingredients using alternative vegan cream cheese and whipped coconut cream.
- Keto / low-carb cheesecake. Typically, they are made without cane sugar in the filling and a low-carb crust. Almond flour crust, erythritol or monk fruit sweetener replacing sugar in the filling is typically an acceptable swap, though the texture will be denser since the sugar does more than just sweeten the filling.
The 6 Fundamentals Of Cheesecakes
There are six main fundamentals that help you make a delicious cheesecake with great results. These apply to American-style cheesecake most directly, and that’s what I will focus on, but the principles can transfer to other styles as well (I’ll explain in each one).
In brief, these are the main things you need to know to make the best cheesecake: cream cheese, sour cream, and eggs should all be at room temperature so the batter mixes together smoothly. Pre-bake the crust so it stays crisp under the wet filling. Mix on medium-low to avoid whipping in air that turns into cracks. Bake low and slow for a smooth top and a creamy filling. Stop baking when the edges are set and the center jiggles like Jell-O (too firm and it will be overbaked and dry). Cool gradually: turn the oven off with the door closed for an hour, then chill to room temp for an hour, and then chill it in the fridge.
Below, I break down why each fundamental is important, what each one does, and what happens when you skip or shortcut one. One note: these are general best practices. Always follow your recipe’s instructions as they can vary depending on how that recipe was tested and developed.
Fundamental 1: Ingredients
Cheesecake needs surprisingly few ingredients—cream cheese, sugar, eggs, sour cream, vanilla, sometimes lemon juice, and the crust components. But the state of those ingredients matters the most.
Cream Cheese
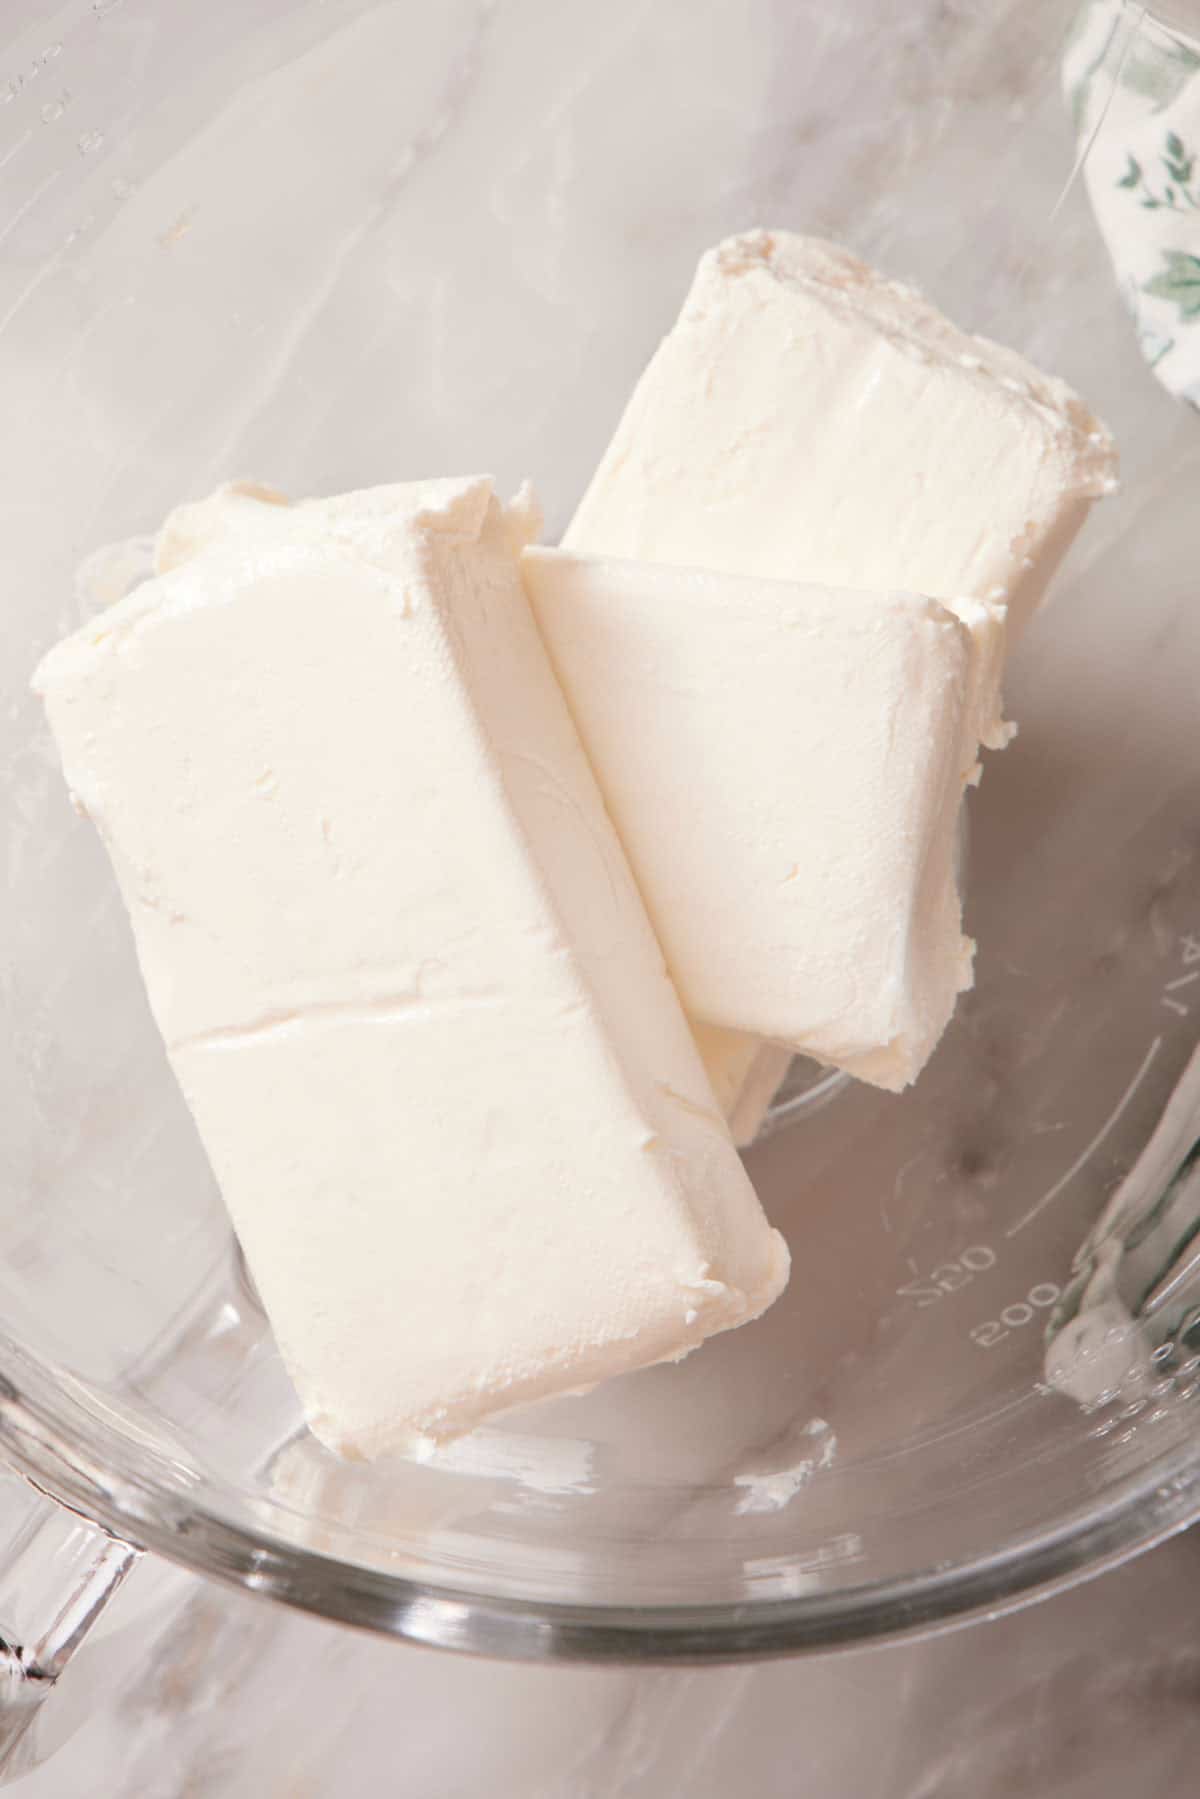
It’s important to use brick-style cream cheese (the kind that comes in a foil-wrapped 8-ounce block), not the spreadable kind from a tub. The tub version has more added water and stabilizers, both of which throw off the moisture balance of the filling. The result is a wetter batter that bakes denser and grainier, with a sometimes-soupy center that never sets properly. I almost always use Philadelphia brand for consistency and flavor, but any full-fat brick will work. Light cream cheese has roughly 30% more water by weight, and bakes similarly to tub cream cheese, so I also don’t use it.
Bringing your cream cheese to room temperature is non-negotiable! Cold cream cheese is firm and stiff. When you try to beat it smooth, the paddle just chops it into small lumps. Then, when you add sugar, eggs, or sour cream—all of which are wetter and softer—the lumps stay lumpy because everything around them is now slick and they have nothing to break against. Those small lumps survive the bake and show up as little white clumps in the slice. Plus, you’re more prone to over-mixing to try to remove the lumps, which whips air into the batter and causes cracks (more on that later).
Pull the cream cheese out of the fridge at least 2 hours before you start. In a cool kitchen, 3 hours is better. The brick should give easily when you press it with a finger and leave an indentation. If you forgot to take it out, here’s a hack to soften it fast: unwrap the brick, cube it, and place it on a microwave-safe plate. Microwave at 50% power in 20-second intervals until soft but not melting. Usually 40-60 seconds total is enough for 2-4 blocks. Do not let it actually melt! If cream cheese liquefies and re-solidifies, the texture is permanently grainy, and your cheesecake won’t be right.
Eggs and Sour Cream
Cold eggs and cold sour cream cause the same problem. When you add cold eggs or sour cream to room temperature whipped cream cheese, the cold temperature causes the cream cheese to seize back up around it, re-firming the fats, and now you have lumps again.
Set the eggs and sour cream out when you set out the cream cheese. If you forgot the eggs, soak them (still in their shells) in a bowl of warm tap water for 5 minutes. To quickly warm the sour cream, scoop your measured amount into a microwave-safe bowl and zap it for 8-10 seconds at 50% power, then stir.
Sugar, Vanilla, Lemon juice, Salt
Sugar sweetened the cream cheese, so your dessert isn’t savory. But it also lightens the texture. I typically use granulated sugar (the white standard kind). Caster sugar (superfine) dissolves slightly faster but isn’t necessary. Don’t use brown sugar or powdered sugar in the filling unless your recipe specifically calls for it. Brown sugar’s molasses changes the color and adds more moisture, and powdered sugar’s cornstarch can change the texture of the cheesecake.
A little lemon juice (about 1 teaspoon per 24-oz cream cheese) brightens the filling and cuts the richness. You won’t taste it as overtly lemon, but it has a “more cheesecake-y” flavor instead of being flat. A pinch of salt does the same thing. Vanilla extract (good quality or homemade if you have it) adds roundness to the flavor as well. You can really flavor cheesecake anyway with other extracts, but vanilla is classic!
The Egg To Cream Cheese Ratio Is Critical
This is the most important principle of cheesecake that most people don’t have to think about because they aren’t developing the recipe. The ratio for classic American baked cheesecake is one large egg per 8-ounce block of cream cheese. Most standard 9-inch cheesecakes use 24 ounces of cream cheese (three blocks) and three large eggs.
With a higher ratio of eggs, the filling puffs up in the oven from the egg proteins coagulating. It then collapses and cracks as it cools (this is the same physics as a soufflé deflating). Too few eggs and the filling is heavy and doesn’t have enough structure, ending up dense, gummy, or wet, and feels like a solid block of cream cheese.
This ratio reflects something important about cheesecake’s identity: it’s a cheesy custard set with eggs, not a cake leavened by them. The eggs are structural proteins in most cheesecake recipes, not necessarily intended to lift it for an airy texture.
Other cheesecake types may use a different ratio for a different result (like Basque cheesecake, which is intended to puff up and fall). Other styles like Italian ricotta often use slightly more eggs to compensate for ricotta’s lower binding power. German Käsekuchen uses a similar ratio to New York-style with quark, and Japanese cotton cheesecake separates the eggs entirely to encourage lift by whipping the egg whites. If a recipe deviates significantly from 1:1 cream cheese to eggs, look at the cheesecake type—that’s usually why, and it will significantly impact the bake and texture.
Fundamental 2: The Crust
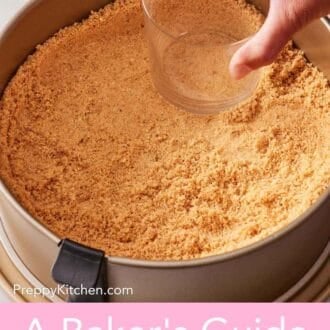
The crust on cheesecake isn’t just for flavor or contrast to the filling—it can be structural to hold the filling up. The standard ratio for a graham cracker crust in a 9-inch springform: 1½ cups graham cracker crumbs + 6 tablespoons melted butter + 2 tablespoons granulated sugar. The crumbs should look like wet sand when mixed and clump together when pinched but not feel overtly greasy.
A pre-baked, properly compressed crust also forms a moisture barrier that keeps the filling from making the bottom soggy as it bakes and chills. Prebaking the crust does three things:
- It dries out the crumbs slightly so they don’t turn soggy when they absorb some moisture from the filling.
- It melts the sugar to give a firmer set so the crust is less likely to crumble apart when you add the filling and after baking.
- It lightly toasts the crumbs for better flavor.
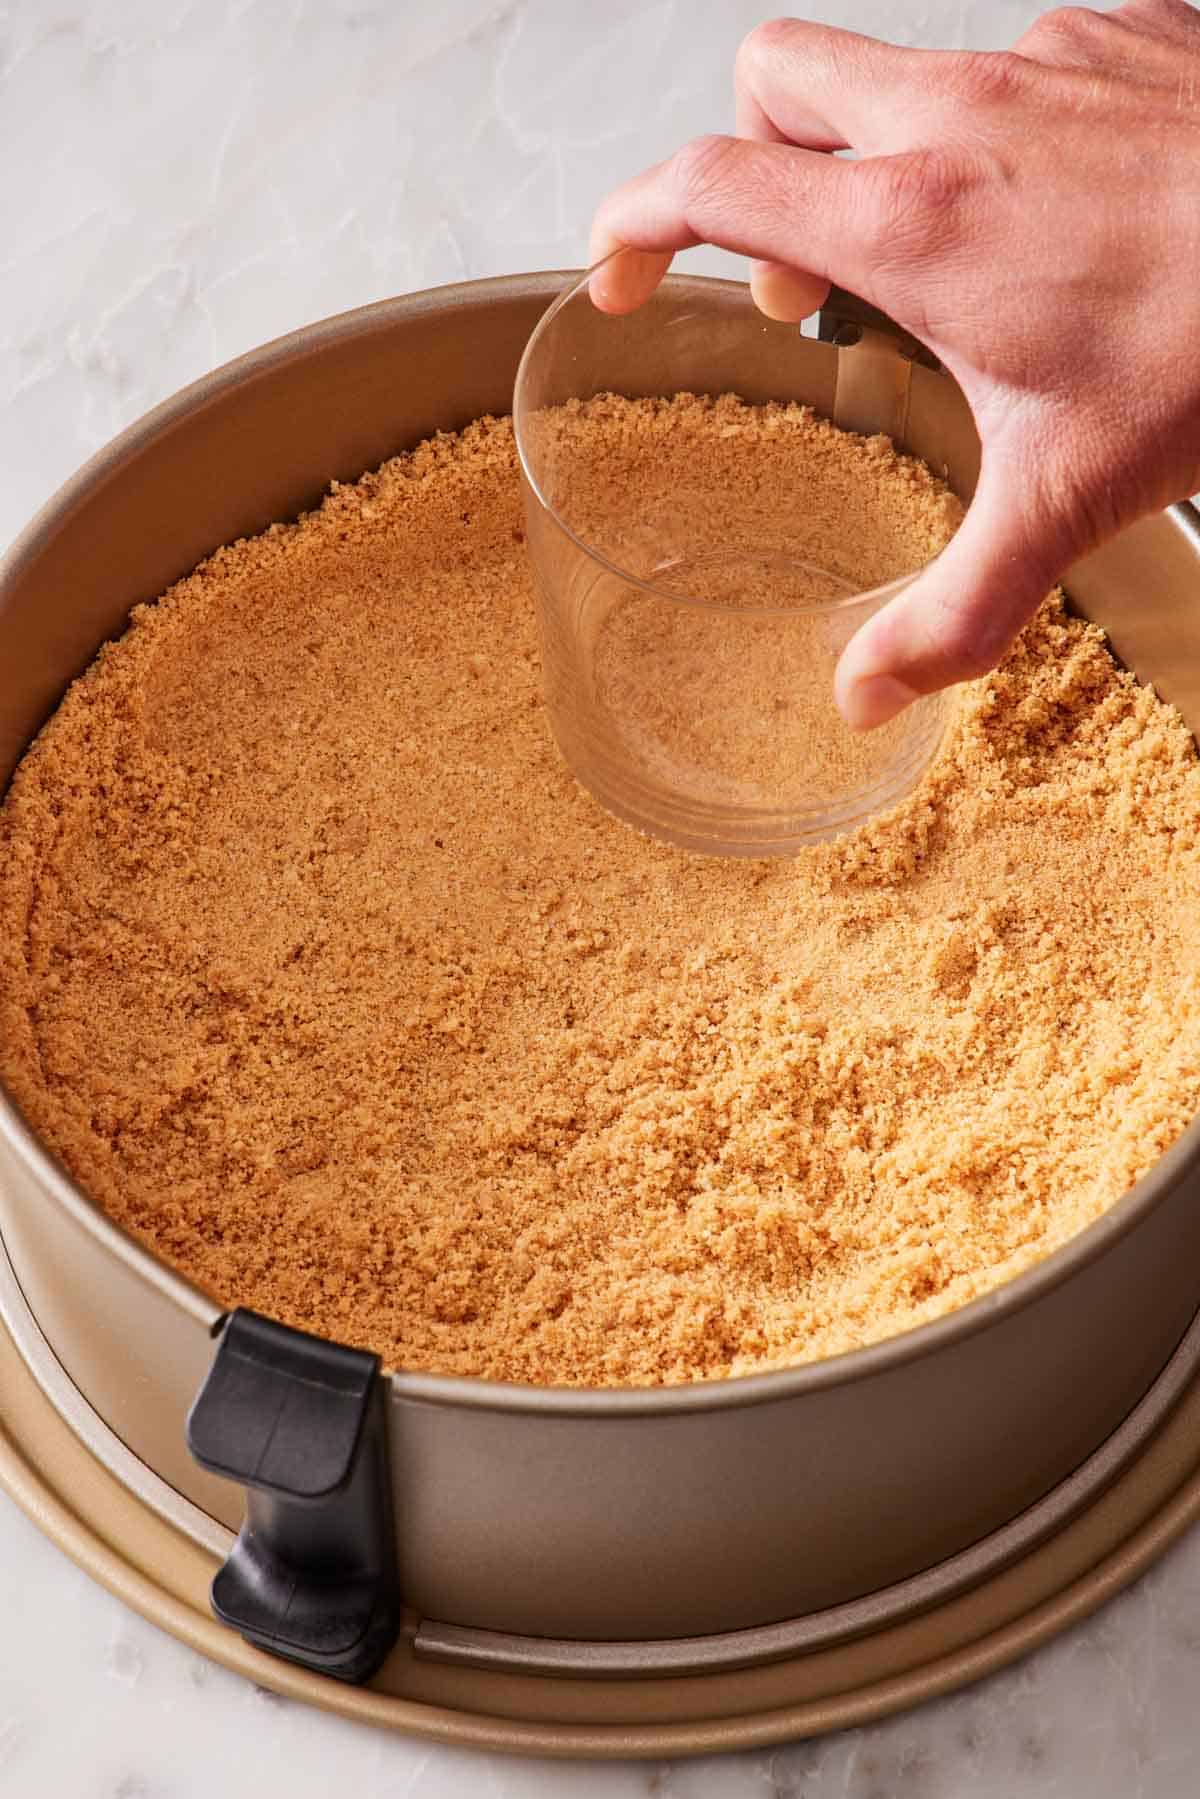
Skipping this step is the top cause of soggy crusts on cheesecake. Press the crust into the pan firmly. I use the bottom of a flat-bottomed measuring cup or a glass to compress it. Use uniform pressure across the bottom. If your cheesecake has crumbs up the side of the pan, use the side of the glass or a small silicone spatula to press them against the pan. Loose, fluffy crusts will crumble when sliced, but tightly packed crusts hold their shape well.
Crust Variations and Ratios
A crumb crust is very easy to adapt using other kinds of cookies or crackers. Different cookies have different fat and sugar contents, though, which means they will soak up more or less butter, changing the butter ratio:
- Graham crackers — the standard ratio is 1 tablespoon butter per ¼ cup crumbs. However, boxed, prepackaged crumbs are typically drier than processing full sheets of graham crackers. will absorb more butter. You may need an additional tablespoon or two depending on how many crumbs you are using. My graham cracker crust recipe explains this in detail!
- Oreos — use whole Oreos including the cream filling (the cream replaces some of the butter). Reduce the melted butter to 4 tablespoons for 1½ cups Oreo crumbs (about 24 cookies). My chocolate cheesecake and Oreo cheesecake both use this approach. Avoid Double Stuf. Too much filling makes the crust greasy.
- Biscoff (speculoos) — these are sweeter and have more fat than graham crackers. Use the same crumb amount, drop butter to 4 tablespoons, and skip the added sugar entirely.
- Vanilla wafers — use 5 tablespoons butter and the standard 2 tablespoons sugar for 1½ cups of crumbs. They have a slightly more delicate flavor and pair well with chocolate or cream fillings.
- Shortbread (like Lorna Doones) — these are already buttery, so drop the melted butter to 3 tablespoons. Add more a teaspoon at a time if needed until the crust holds together.
- Gingersnaps — use 4 tablespoons of melted butter and 2 tablespoons of sugar. Adds a warm spice note that pairs well with pumpkin or apple-flavored cheesecakes.
- Almond flour (gluten-free) — 1½ cups almond flour, 4 tablespoons melted butter, 2 tablespoons sugar. Lower-carb option that works for keto adaptations, too.
No crust at all: Several cheesecake styles skip the crust entirely. Basque cheesecake is made in a parchment-lined springform with no crust. Japanese cotton cheesecake is sometimes baked in a single-layer cake pan with no crust. Other ricotta cheesecakes can be baked with or without crust depending on the recipe or the region it’s from.
Fundamental 3: Mixing
If a cheesecake cracks, one cause can be from how it was mixed, not necessarily the baking process. When you beat cream cheese, sugar, and eggs together, you can easily incorporate air into the batter. A small amount of air is normal and natural to the mixing process, but a lot of air creates a foamy structure. In the oven, that air expands as it heats, puffing the cheesecake—the more air, the more dramatically it puffs. Then as the filling cools, the air contracts, the egg proteins (now coagulated and rigid) can’t accommodate the shrinkage, and the surface tears open into cracks.
The fix is simple: never beat above medium-low speed. I use a stand mixer with the paddle or whisk attachment on speed 2 or 3 (out of 10). Hand mixers should stay below medium. The goal is to combine the ingredients well but not to whip them.
The Basic Mixing Method Order
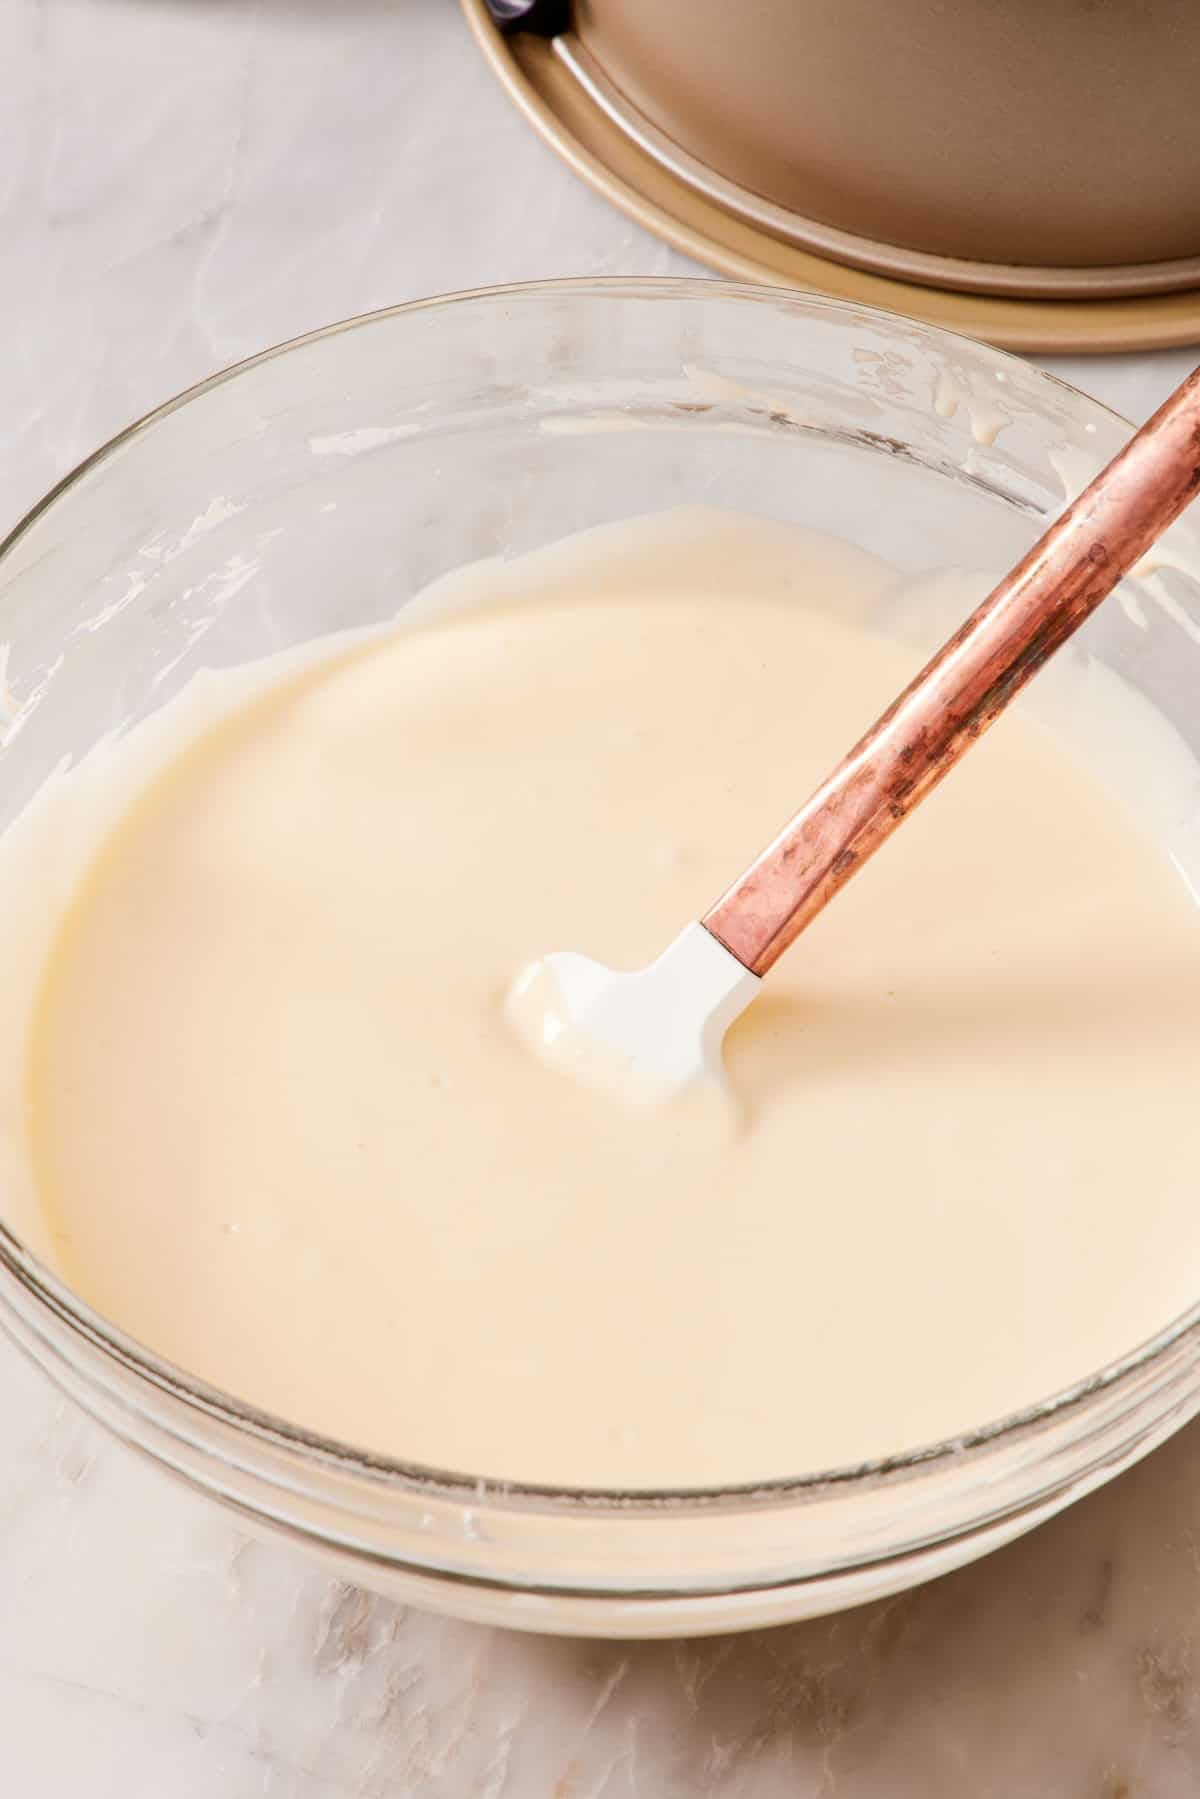
1. Always beat the room-temperature cream cheese alone first. It just needs about 60 seconds on medium-low until completely smooth. Stop. Scrape the bowl. Any lumps you see now will probably still be there later, so try to get rid of them at this stage.
2. Add the sugar next. This will help loosen the cream cheese before you add the more liquidy eggs to the mix. If you have any flavorings like lemon, vanilla, or chocolate, they typically go in at this stage too.
3. Add the eggs near the end, one at a time. Adding them one at a time helps the egg’s water content disperse evenly through the fat-rich cream cheese. Adding them all at once has you mixing longer to achieve uniformity, and that extra mixing is where over-aeration happens. Same goes for adding the eggs before the sugar—you risk overmixing! Eggs easily whip up to hold air, so mix them as little as possible.
4. If you have a stabilizer (cornstarch or flour), mix it in last. It will be less likely to clump once the batter is runnier, and you only need a quick stir with the mixer, or you can mix it by hand to incorporate it into the batter.
Whisk Vs. Paddle Attachment
I switched from a paddle to a whisk attachment a few years ago in my classic cheesecake recipe because I found that it incorporated the cream cheese with the other ingredients better. The paddle, despite seeming gentler, actually had a harder time dispersing clumps of cream cheese, especially once the eggs were added—I’d consistently find tiny lumps even when using room temperature ingredients.
The whisk distributes everything more evenly because the wires cut through the cream cheese rather than stirring it. The trade-off is that a whisk can incorporate air a lot faster than a paddle, so you really need to mind your mixing speed. But if you’re sticking to no higher than medium-low already, you’ll be fine! You can certainly use a paddle attachment, and many of my older recipes still do. But don’t be afraid to use your whisk if you’re concerned about lumps.
Tap The Pan
After you pour the filling into the crust-lined pan, tap the pan firmly on the counter 4 to 5 times. Hold the pan a couple of inches above the counter, and then gently slam it on the surface. This pops the small air bubbles trapped in the batter that would otherwise become tunnels in the baked cheesecake. You’ll see bubbles rise to the surface and pop. Don’t skip this—it’s a 10-second step that can easily prevent holes that cause cheesecake cracks.
Fundamental 4: Baking And The Water Bath Debate
This is the most argued-about question in cheesecake baking, and I’ve tested hundreds of cheesecakes to come to my own conclusion: a properly designed recipe doesn’t need a water bath. My classic cheesecake, chocolate cheesecake, blueberry cheesecake, strawberry cheesecake, and cheesecake bars are all designed to bake crack-free without one. The recipes do this by getting the egg ratio right, baking at lower temperatures, and using the residual-heat cooling method below.
That said, there are situations where a water bath helps. Here’s what a water bath actually does, and when to use it.
What A Water Bath Actually Does
A water bath (bain-marie) is a pan of hot water that goes in the oven, traditionally with the cheesecake pan sitting in the water. It does two things:
- Adds humidity. The water evaporates during baking, raising the moisture in the oven. The humid heat is gentler on egg proteins so they coagulate more slowly and uniformly, with less surface tension as they set. This dramatically reduces cracks.
- Buffers the temperature. Water can’t go above 212°F (100°C) at sea level. So even if your oven runs hot or cycles unevenly, the water-bathed cheesecake stays in a milder thermal environment.
The Two Ways To Do A Water Bath
The traditional method: wrap the springform pan tightly in extra-wide heavy-duty foil and place the pan inside a larger pan filled with about an inch of hot water. (Double the foil if you don’t have a wide roll or heavy-duty foil.) The water surrounds the cheesecake pan, and the foil prevents leakage. This works, but the foil wrap is annoying, and water seepage is quite common—even with foil, some pans leak and you end up with a soggy crust.
The “fake water bath” method: place a separate pan of hot water on the bottom oven rack, with the cheesecake on the rack above. The cheesecake is never in contact with water at all, so there’s no leak risk, but you still get the humidity benefit. You get all the crack-prevention benefits with 0% of the soggy-crust risk. This is my preferred method when I do use a water bath. It’s also what I recommend if your oven is unreliable or runs hot.
When to skip the water bath entirely:
- When you’re using a recipe specifically designed for no-bath baking (many of mine have the right egg ratio and baking method to avoid a water bath).
- When you want maximum crust crispness—bath humidity does soften the bottom crust slightly.
- For Basque-style cheesecakes or other rustic cheesecakes which are meant to crack and burn on top. (See my Basque cheesecake for this rustic style where cracks are the goal!)
The Two-Temperature Bake
This is the second factor of the no-water-bath method, and it’s crucial. Start the cheesecake at a higher temperature (325-350°F for the first 10–15 minutes) to set the structure of the edges and crust, then drop the oven temperature to about 300°F for the remaining 30- 45 minutes to gently cook the center.
The high-then-low-temperature method does two things: it ensures the edges set (so they don’t pull away from the pan as the center bakes), and it cooks the center gently enough that egg proteins coagulate slowly and uniformly to prevent cracks. This is why my classic cheesecake bakes 15 minutes at 350°F and 30-35 minutes at 300°F.
If you only want to bake at one temperature, choose a lower one (325°F is a good median temperature).
What about Basque temperatures?
Basque cheesecake is the exception to both of these rules. It bakes at 450-475°F (a temperature you’d never want for a New York-style cake) because the goal is the deeply caramelized “burnt” top. The interior stays creamy because the high heat sets only the surface and edges before the center has time to fully coagulate. This is also why Basque cheesecakes are pulled while the center is still dramatically wobbly. They’re meant to be slightly underbaked at the core for a very soft, custardy texture.
What If Your Springform Leaks?
Some springform pans leak butter or moisture around the seal between the bottom and the side ring (without a water bath) while baking. This most commonly happens with an Oreo crust. The easiest solution is to place the springform pan on a rimmed baking sheet to catch any potential leaks. This also makes it easier to move the springform pan in and out of the oven.
Fundamental 5: Doneness
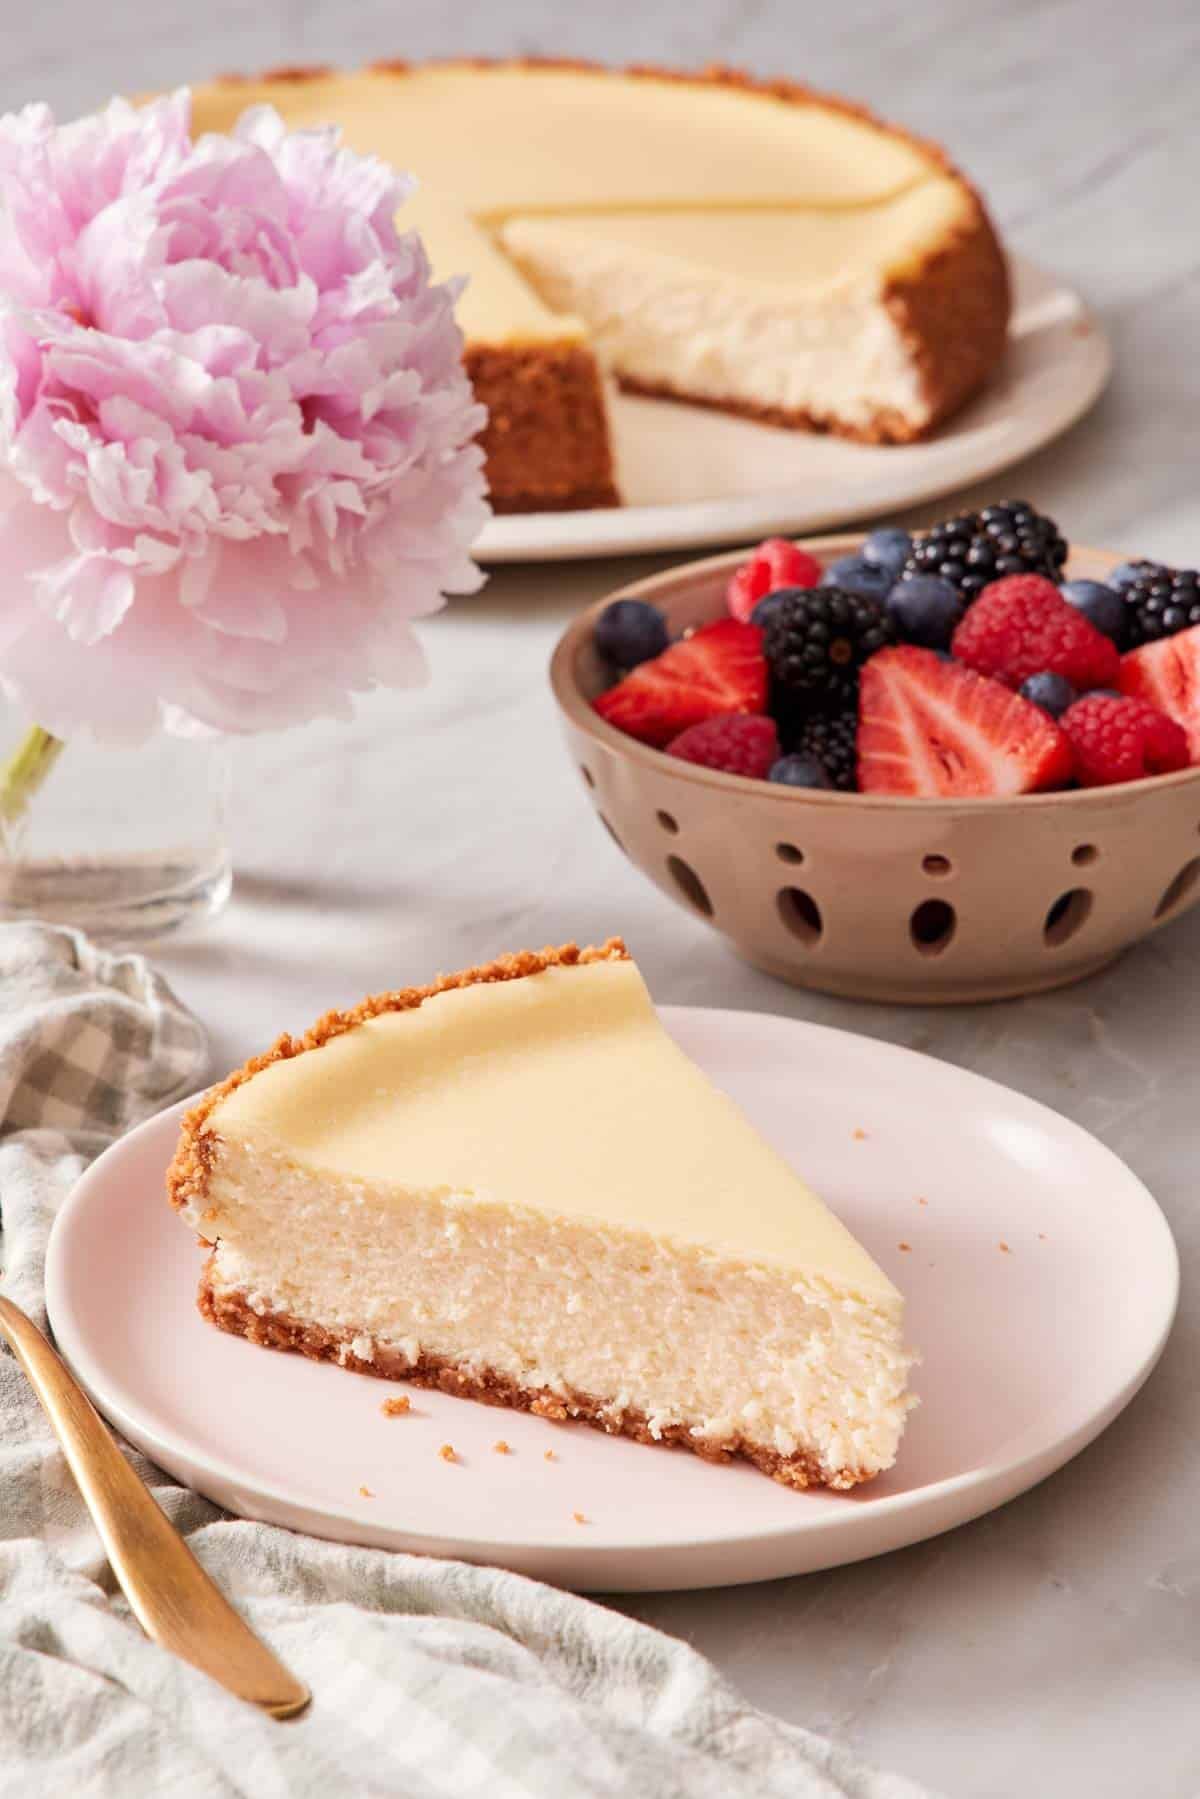
It’s very common for home bakers to overbake their cheesecakes by close to 15 minutes. The reason: a cheesecake doesn’t look done when it actually is done. It often still looks shiny or wobbly in the center, like it hasn’t set. That’s because it sets considerably as it cools, especially since most recipes call for the cheesecake to stay in the oven, turned off, and slowly cool down over time. The cheesecake texture changes dramatically from the point when the oven goes off to when you serve it after chilling.
The jiggle test:
The jiggle test is the gold standard for testing cheesecake doneness. To perform the test, open the oven, gently shake the rack or the pan by moving it back and forth, and watch the surface of the filling. Here’s what you want to see:
- The outer 2 inches of the surface look set and matte. There should be no glossy raw-batter sheen or movement.
- The center 4-5 inches still wobbles like Jell-O. You want a soft, uniform jiggle, not sloshing liquid.
When you see both of those visual indicators, turn the oven off or pull it out (whichever the recipe says). The center will continue cooking from residual heat for at least 10-15 minutes, and then it will set while cooling for the next several hours, until it’s perfectly creamy and firm in the fridge.
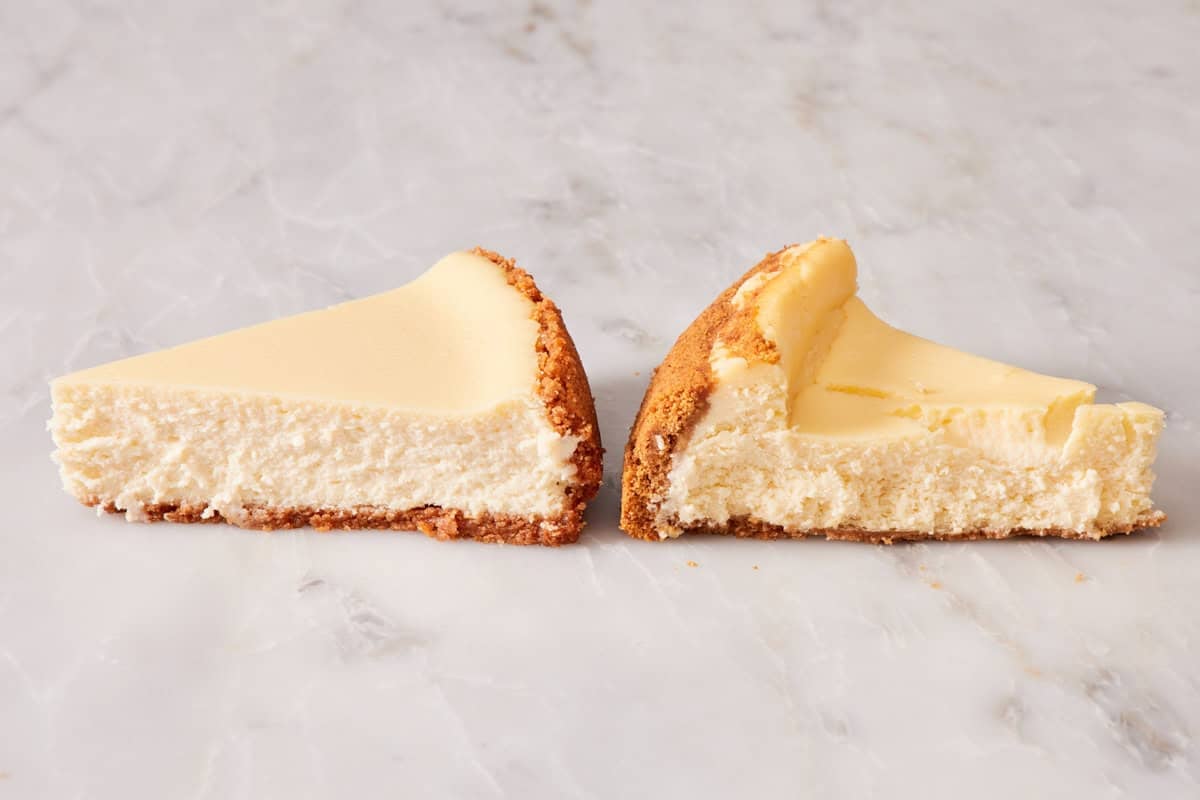
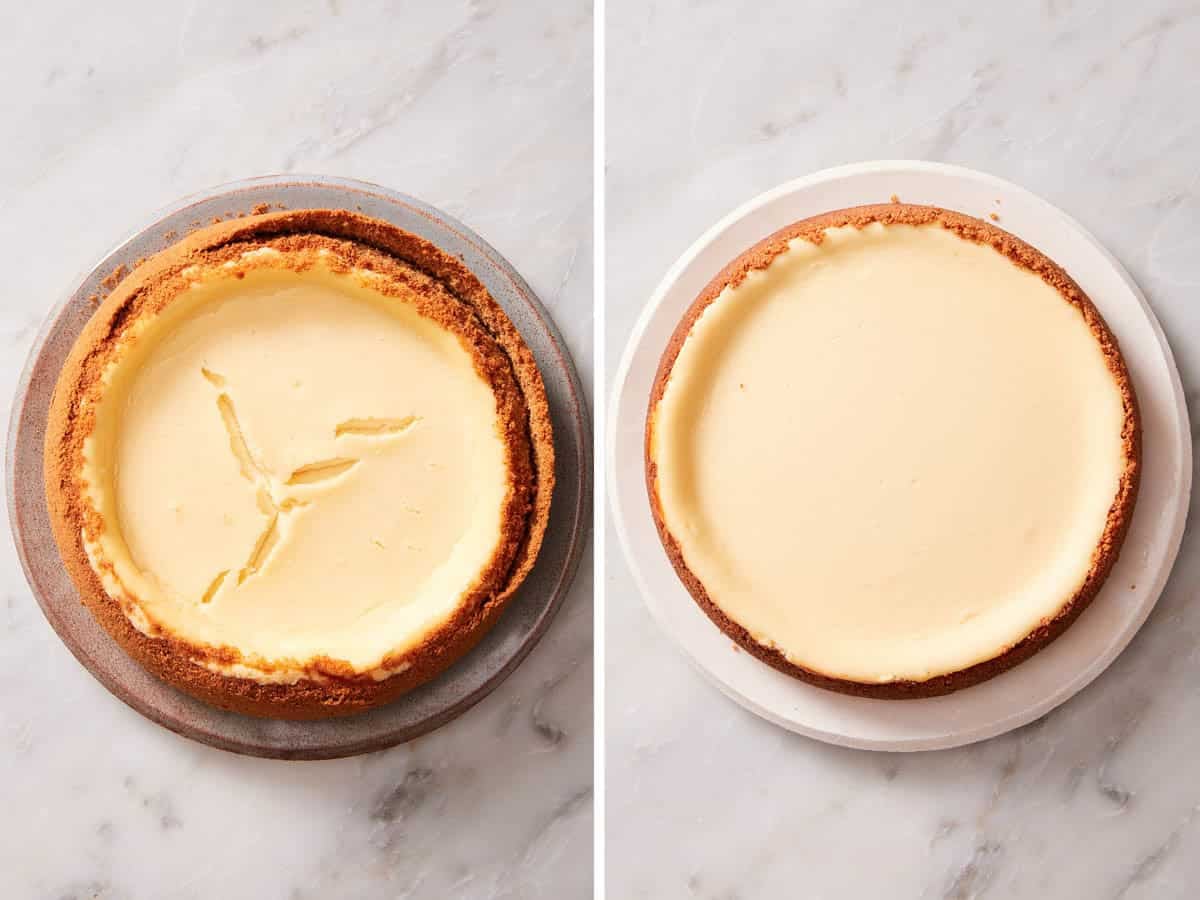
If the entire surface is firm and the center doesn’t jiggle at all, you’ve likely overbaked it. The cheesecake will still taste good, but it will be slightly drier and more prone to cracks as it cools. I tested my classic cheesecake recipe twice, baking one cheesecake for 20 minutes longer than necessary compared to a perfectly baked cheesecake. You can see in the image below that the cheesecake on the left has just the right consistency with a dense but creamy texture. The slice on the right is cracked and more crumbly from getting too dry.
The thermometer alternative:
If you find the jiggle test unreliable, an instant-read thermometer in the center is more precise. Insert the probe vertically through the center, going about 1 inch deep, not all the way to the crust, which retains heat differently. The reading you want is the temperature of the custard portion.
Stop baking at 150°F (65°C) for ultra-creamy and slightly soft. Pull at 155-160°F (68°C) for the traditional firm yet creamy texture. Above 165°F is overbaked. The thermometer takes guesswork out of it, especially for new bakers.
While it is technically more precise than the jiggle test, it does also come with added risk. Use caution with this test! Cheesecakes can often crack if you poke a hole in it because you form a break in the surface. As the filling cools and settles, it can pull at the hole and form a crack. (See my chocolate cheesecake recipe for details on my thermometer probe test and the crack results.)
What If It Cracks Anyway?
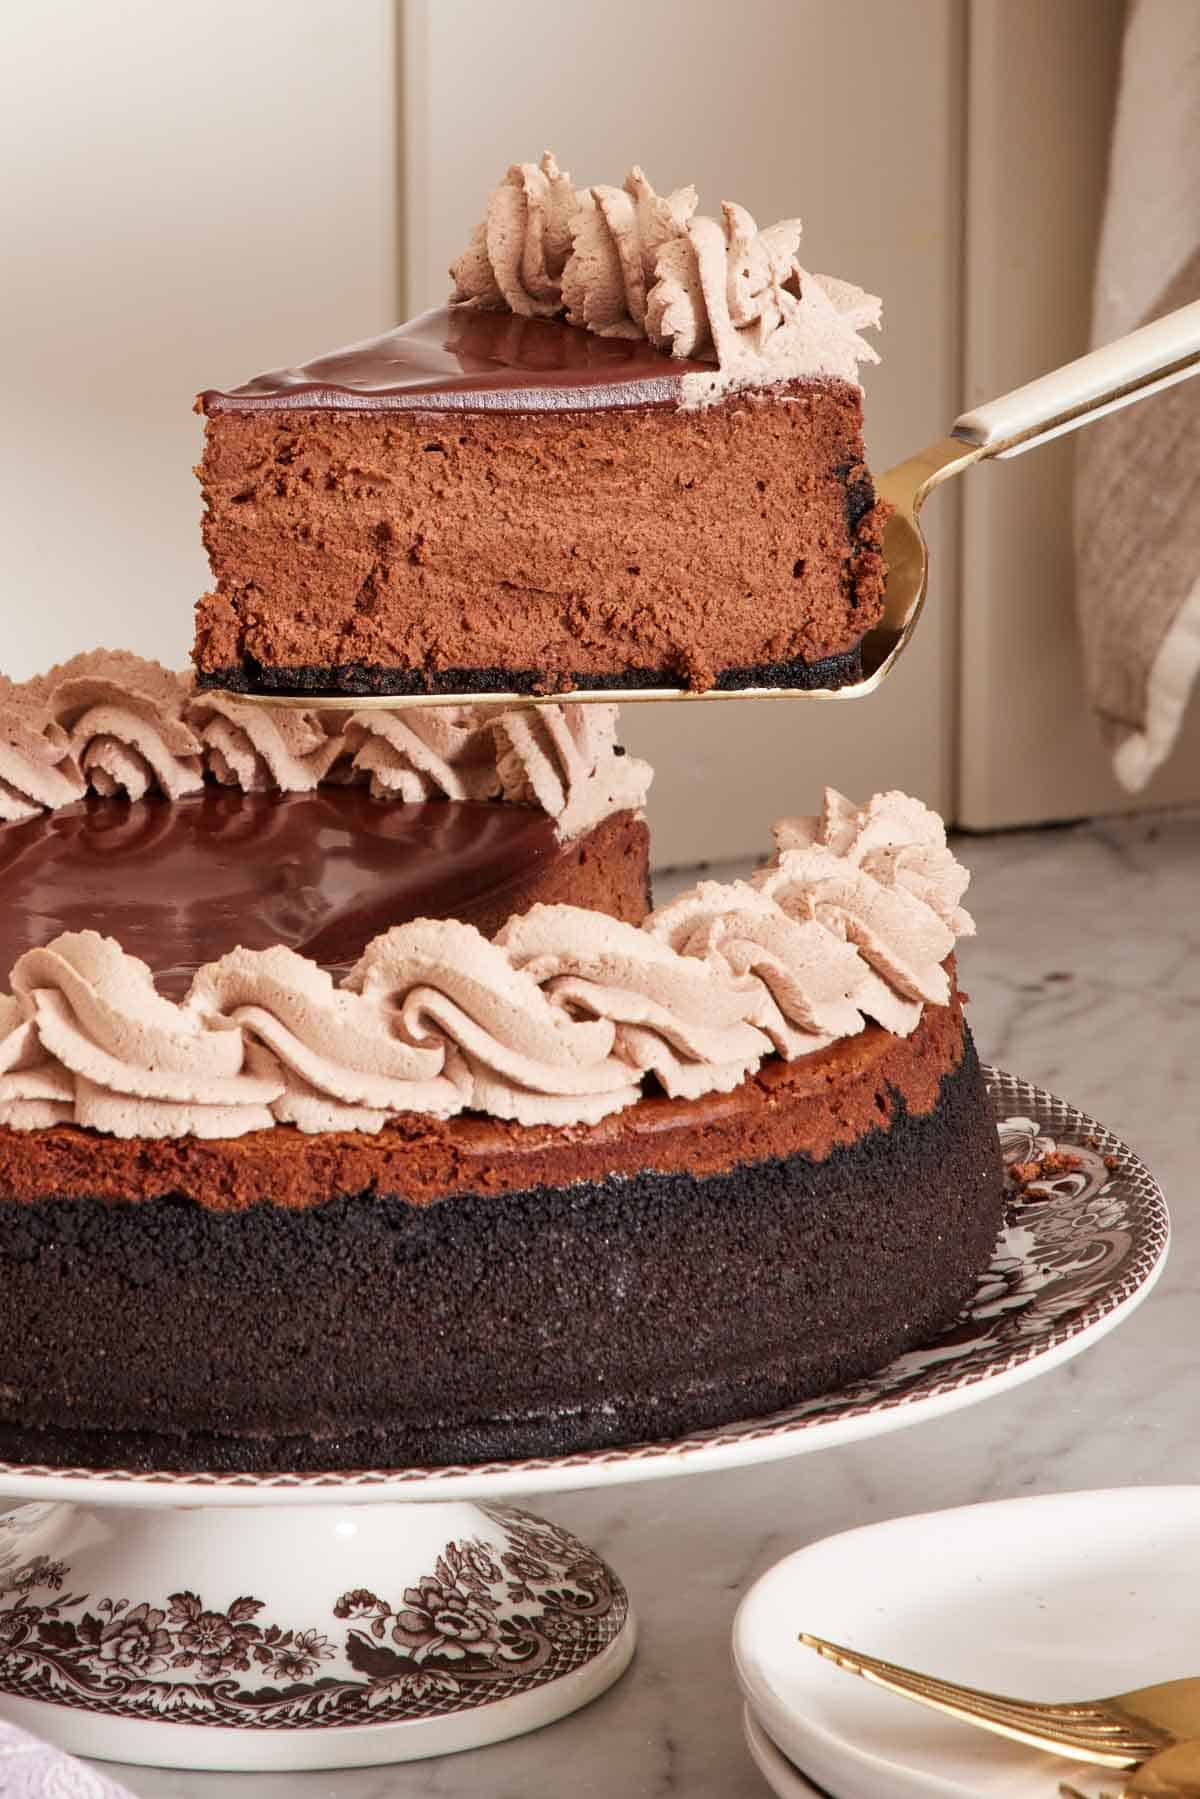
Cracks are aesthetic, not flavor, problems. If it cracks: top with whipped cream, fruit sauce, ganache, lemon curd, or a sour cream topping. Nobody will know! My strawberry cheesecake and blueberry cheesecake both top with a fresh fruit sauce that hides any imperfection beautifully.
A sour cream topping is a traditional topping for New York cheesecake and adds a tangy contrast layer that some bakers prefer to the un-topped version anyway.
Fundamental 6: Cooling And Slicing
This is the step where cheesecake most often goes wrong—not because it’s hard, but because it requires patience. Cheesecake takes a minimum of 8 hours from oven to serving, so be sure you plan for it. (This is why it’s an excellent make-ahead dessert!)
The Three-Stage Cool
Stage 1: Oven off, door closed, about 1 hour. When the cheesecake comes out of the oven, the surface is still molten, and the egg structure is fragile. The biggest crack risk is a sudden temperature drop. Turn the oven off, leave the cheesecake inside with the door closed. The oven cools gradually from 300°F to room temperature over the pan of about 1 hour, giving the cheesecake a slow temperature decline.
Some recipes call for partially cracking the oven door open with a wooden spoon during this stage, which cools the oven and cheesecake slightly faster. I’ve tested both and find them roughly equivalent. It mostly depends on how sensitive the filling is to temperature differences, so always follow your recipe’s recommendation.
Stage 2: Counter, room temperature, 1-2 hours. Pull the cheesecake out of the oven and let it sit on the counter for another hour, still in the springform pan. The temperature drops further but slowly. Don’t transfer to the fridge yet. If you put it in there immediately, condensation would develop on the surface of the cheesecake, damaging the texture and appearance.
Stage 3: Fridge, at least 6 hours, ideally overnight. Cover the pan loosely (a paper towel under a sheet of foil secured to the rim of the pan prevents condensation drips on the surface). Chill for 6 hours minimum, with 12-24 hours being even better. The cheesecake develops its final dense-creamy texture during chilling—the casein proteins in the cream cheese form their final network, the fats fully solidify, and the flavors mature. A cheesecake served after 4 hours of chilling is technically edible but is noticeably softer and less complex than one chilled overnight.
Why you cannot speed up this process
I have tried. The freezer doesn’t work well because the surface freezes before the center is even cool, and you get an ice-crystal-textured cheesecake (not to mention the dramatic temperature difference that can cause a crack). A blast chiller might do the job (commercial bakeries use them), but that is not an option in a home kitchen, so gradual cooling is the only option. Remember to keep the timing in mind: it takes a minimum of 10 hours to bake, cool, and chill a cheesecake.
Removing From The Springform Pan
Once your cheesecake has chilled, it’s time to remove it from the pan. Run a paring knife or offset spatula around the inner edge of the springform pan sides between it and the cheesecake (this separates any stuck parts so it doesn’t break the cheesecake). Unclasp the sides slowly, then remove.
To get the cheesecake off the pan base, run a long thin spatula underneath the crust to release it, then slide it onto a serving plate. If you’re nervous, leaving it on the springform base is fine! Most people don’t even notice.
Slicing A Cold Cheesecake Cleanly
Cheesecake slices the cleanest when it is cold, but using a hot knife helps get the smoothest cut. Run a thin, sharp knife (an 8-inch chef’s knife or a long-bladed slicing knife) under hot tap water for 5 seconds, then dry it completely on a kitchen towel. Slice through the cheesecake in one downward motion—don’t saw back and forth. Wipe the blade clean, then make the next cut. Clean the blade after every cut and rewarm it as needed (usually after 1-2 slices are cut). This may feel tedious for a 12-slice cheesecake, but it produces clean, restaurant-quality slices.
If you don’t wipe between cuts, the residual filling on the blade smears across the next slice’s face, dragging into a messy edge. The warm dry knife cleanly melts through the fat structure of the chilled cheesecake.
The 8 Most Common Cheesecake Failures
When something goes wrong, it’s almost always one of these eight things. Here’s how to tell what went wrong and how to fix it or prevent it in the future:
| Failure | Cause | Fix |
| The surface cracked across the middle. | Cause: usually too much air whipped in during mixing, sometimes too high a baking temperature; occasionally too sudden a temperature drop after baking; inserting a probe thermometer. | Fix: re-read Fundamental 3 and beat only on medium-low. If you’ve already mixed at high speed, tap the pan firmly to remove some of the bubbles. Make sure you cool it gradually (use the 3-step method). Or, avoid inserting a thermometer next time. |
| Cracks around the edge that radiate inward. | Cause: edges set faster than the center, then the center’s shrinkage pulls the rigid edges apart. Usually means the oven is running too hot or the cheesecake baked too long. | Fix: drop the oven temperature 25°F next time, and pull when the center jiggles and still looks shiny. |
| The cheesecake sank in the middle. | Cause: overwhipping, causing the center to puff too much, then it sinks while cooking; underbaking and the center never set, so it sank as it cooled. Sometimes too few eggs for the cream cheese amount can also lead to an insufficient structure. | Fix: Don’t beat over medium-low speed. Use the thermometer test if you’re new to baking cheesecake, and bake to 150-155°F. Verify your egg-to-cream-cheese ratio. |
| The texture is grainy or curdled. | Cause: cream cheese was added cold, or was cream cheese overheated when trying to quickly soften it and broke during mixing. Once cream cheese liquefies and re-sets, the fat solidifies in larger particles and the texture is permanently grainy. | Fix: bring cream cheese to room temp, and try to do it slowly at room temperature. If speeding up the process, only microwave it in short bursts. |
| The bottom is soggy. | Cause: water bath leaked into the pan, or the crust wasn’t pre-baked. | Fix: skip the water bath if possible (use the fake-bath method instead) or wrap it with extra-wide foil. Prebake the crust at 350°F for 10 minutes. |
| The filling is dense and heavy, not creamy. | Cause: usually too few eggs, sometimes overmixing causing the proteins to develop too much. Could also be using low-fat cream cheese. | Fix: check the egg ratio and don’t beat it for too long. Use full-fat brick cream cheese. |
| The surface has small craters or tunnels. | Cause: trapped air bubbles in the batter that didn’t pop during baking. | Fix: tap the pan firmly on the counter after pouring in the filling. For really large bubbles, use an offset spatula to draw spirals through the batter to release deep bubbles, then tap. |
| The slice has a weeping or wet appearance. | Cause: residual moisture from the cooling step, usually from condensation forming by putting a still-warm cheesecake in the fridge. | Fix: cool completely on the counter before refrigerating, and lay a paper towel under any covering during fridge time to absorb humidity. |
Tools And Equipment
You don’t need much, but a few specific tools genuinely help make it easier to bake cheesecake.
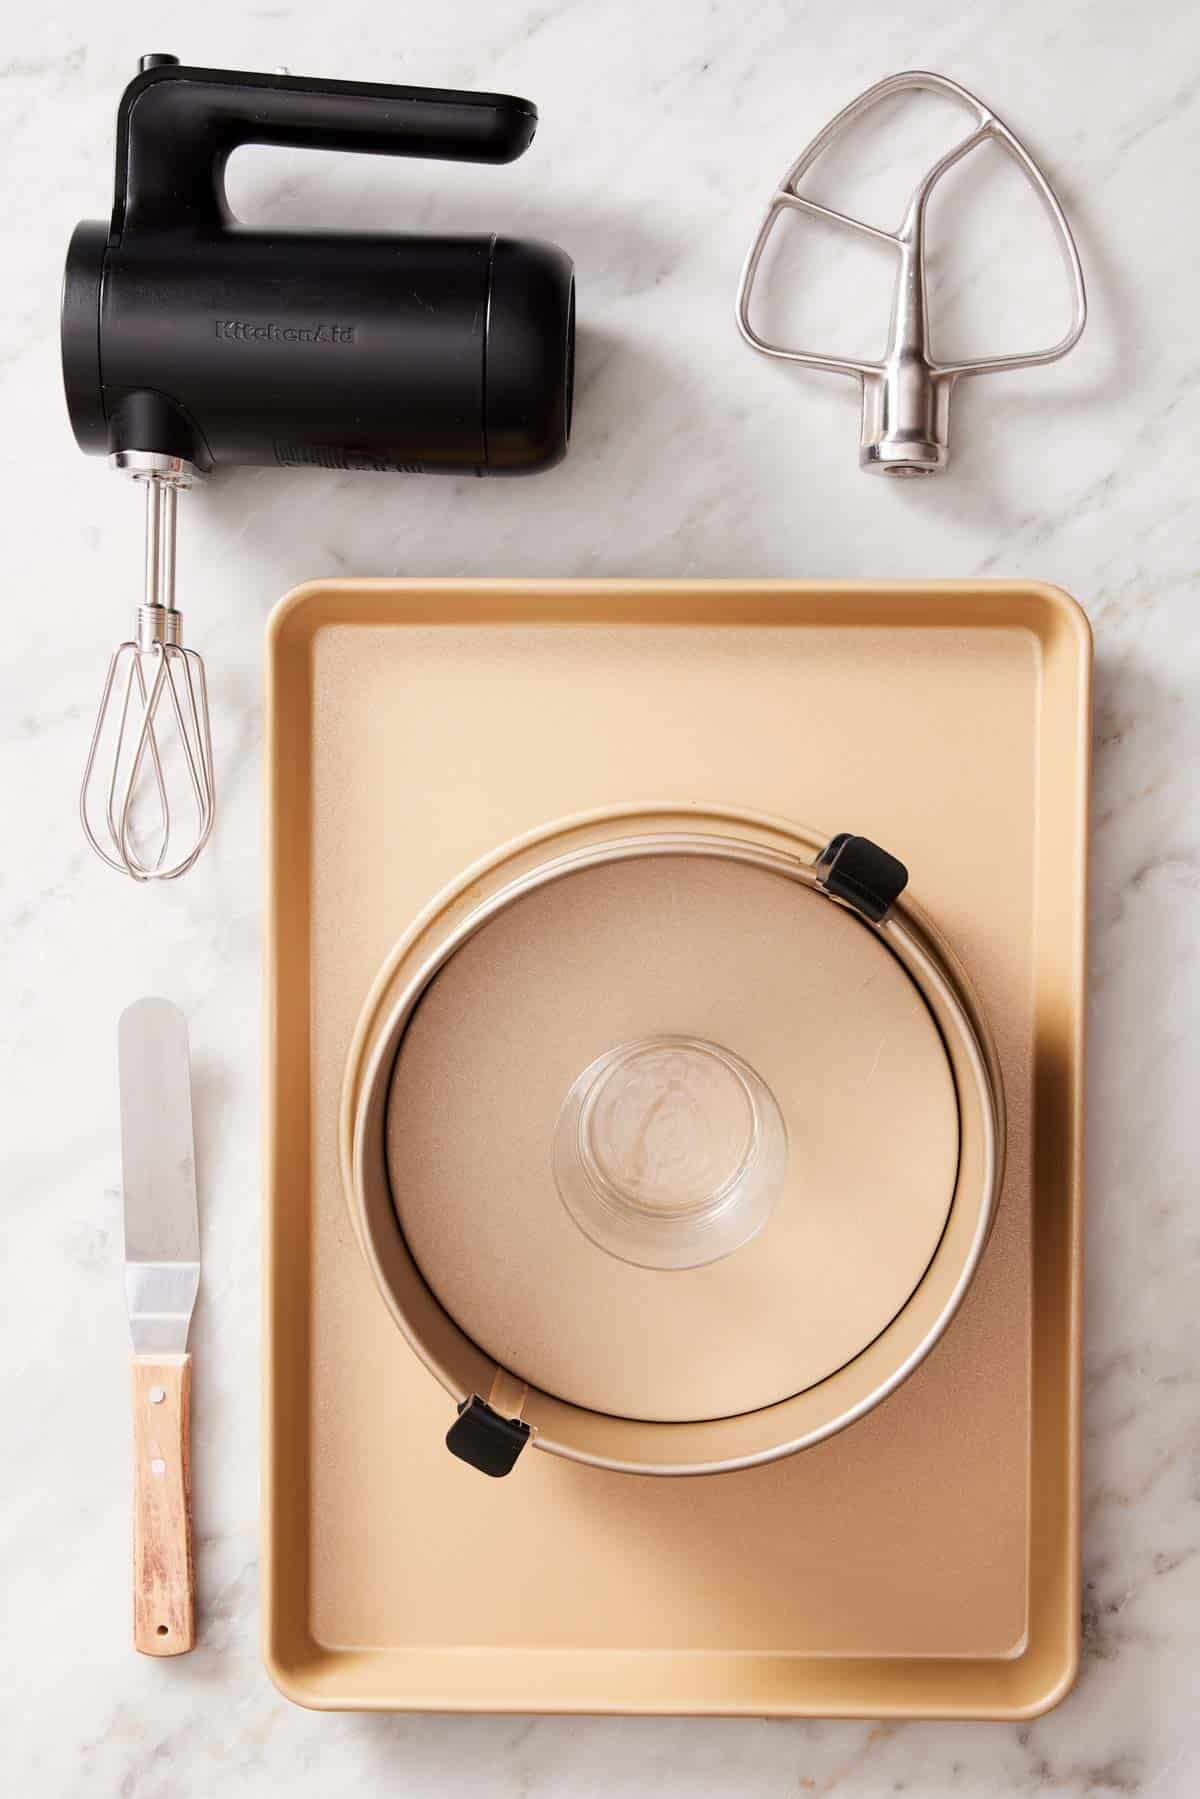
9-inch springform pan — this is honestly a non-negotiable for most cheesecakes. You shouldn’t invert a cheesecake out of a regular cake pan because you can damage the cheesecake. The springform’s removable side ring prevents the need to invert it, which is why it’s the standard cheesecake vessel. Look for a heavy-bottomed pan with a tight seal between base and ring. A leaky pan is the #1 cause of butter leakage and water bath disasters. A 7-inch springform is the right size for Instant Pot or air fryer cheesecakes; an 8-inch is sometimes used for thicker, taller cakes.
Stand mixer or hand mixer — a paddle works for a stand mixer too, but a whisk works better, as discussed in Fundamental 3. If using a hand mixer, use the wire whisk attachments; just stay below medium speed.
Instant-read digital thermometer — optional but eliminates doneness guesswork. The 150-155°F internal temperature target is precise. Remember, this can cause cracking, though, so use with caution!
Offset spatula — for smoothing the top of the batter before baking, and for releasing the cheesecake from the springform base.
A flat-bottom glass — if your cheesecake has a crumb crust, this is the most helpful tool for pressing it smoothly into the bottom and up the sides, if needed.
Heavy-duty aluminum foil — for a water-bath wrap (if you’re doing one) and for covering the chilled cheesecake.
Rimmed baking sheet — always place the springform on a rimmed sheet. This catches butter leaks, and makes oven transfer easier.
Storage, Freezing, And Make-Ahead
Cheesecake is one of the best make-ahead desserts! It’s even better the next day than the day it’s baked, and it’s freezable up to 3 months.
Refrigerator (4-5 days): If you are storing before serving, leave it in the pan until you are ready to serve. Lay a sheet of paper towels on the top rim of the pan (the towel absorbs condensation that would otherwise drip onto the surface), then cover it with foil, pressing the foil to the sides of the pan to seal. If the cheesecake is already on a serving plate, loosely cover with foil.
Freezer (up to 3 months): There are two freezing methods:
- Whole cheesecake: leave it in the springform with the side ring on, wrap the whole pan in two layers of plastic wrap and one layer of heavy foil. Thaw overnight in the fridge before serving.
- Individual slices: slice the chilled cheesecake, wrap each slice in plastic wrap, then place wrapped slices in a freezer-safe container or zip-top bag. Thaw individual slices in the fridge for 2-4 hours before eating. This is my favorite way to keep leftover cheesecake! That way I can pull a slice anytime I want one.
Freezing changes the texture slightly. Frozen and thawed cheesecake is roughly 95% as good as fresh—there’s a barely perceptible structural change from ice crystal formation, but you may notice it is slightly grainer than when enjoyed fresh. For special occasions when you have the time, fresh wins, but for weeknight dessert or holiday prep, freezing is genuinely fine.
Make-ahead timing: Here are the best ways to store the cheesecake based on how far in advance you want to make it.
- Day before: bake, chill overnight, top before serving. Best plan for most occasions.
- Three days ahead: bake, chill, cover well in the fridge.
- Up to 3 months ahead: bake, chill, freeze whole or in slices.
Frequently Asked Questions
99% of cracks come from mixing the batter on too high a speed (whipping in air that expands and tears as it cools) or baking the cheesecake too hot. Use medium-low only, never beat above that, and bake at 300-325°F for the bulk of the time. If your cracks are at the edges and radiate inward, the oven is too hot. If the crack runs across the center, the issue is usually air in the batter or cooling it too fast.
No, if your recipe is designed without one, like many of mine. If your oven runs hot, your recipe was developed for one, or you want the absolute insurance against cracks, then you should use a water bath. The fake water bath (pan of water on the bottom rack, cheesecake on the rack above it) is a good option and gives you the same benefits but without the risk of a soggy crust.
“Regular cheesecake” usually means American-style cheesecake baked in a graham cracker crust. New York-style is a specific subset: extra dense, extra rich, often taller, with the addition of sour cream or lemon juice for a slight tang. Most American baked cheesecakes today are some version of New York-style.
Yes, and I recommend it. Cheesecake actually tastes better after 24 hours of chilling than it does after 6 hours. The flavors deepen, the texture becomes denser and creamier, and slicing is cleaner. Bake the day before you need to serve it, refrigerate overnight, then finish with any topping close to serving.
Cheesecake Recipes To Try
These are some of my most popular cheesecake recipes:
- Raspberry Cheesecake — a classic New York-style cheesecake swirled with raspberry jam.
- Lemon Cheesecake — rich, creamy, and tangy. Packed with fresh lemon zest and topped with lemon curd.
- Peanut Butter Cheesecake — an excellent recipe if you’re newer to cheesecake baking; the shiny ganache layer on top can hide any cracks!
- Pumpkin Cheesecake — a cheesecake recipe that I do use a water bath for because of the added pumpkin. It’s easy to make and perfect for Thanksgiving!
- Pecan Pie Cheesecake — my classic cheesecake topped with a gooey pecan pie filling.






