
This post may contain affiliate links. Please read our disclosure policy.
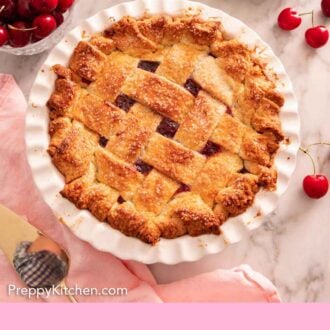


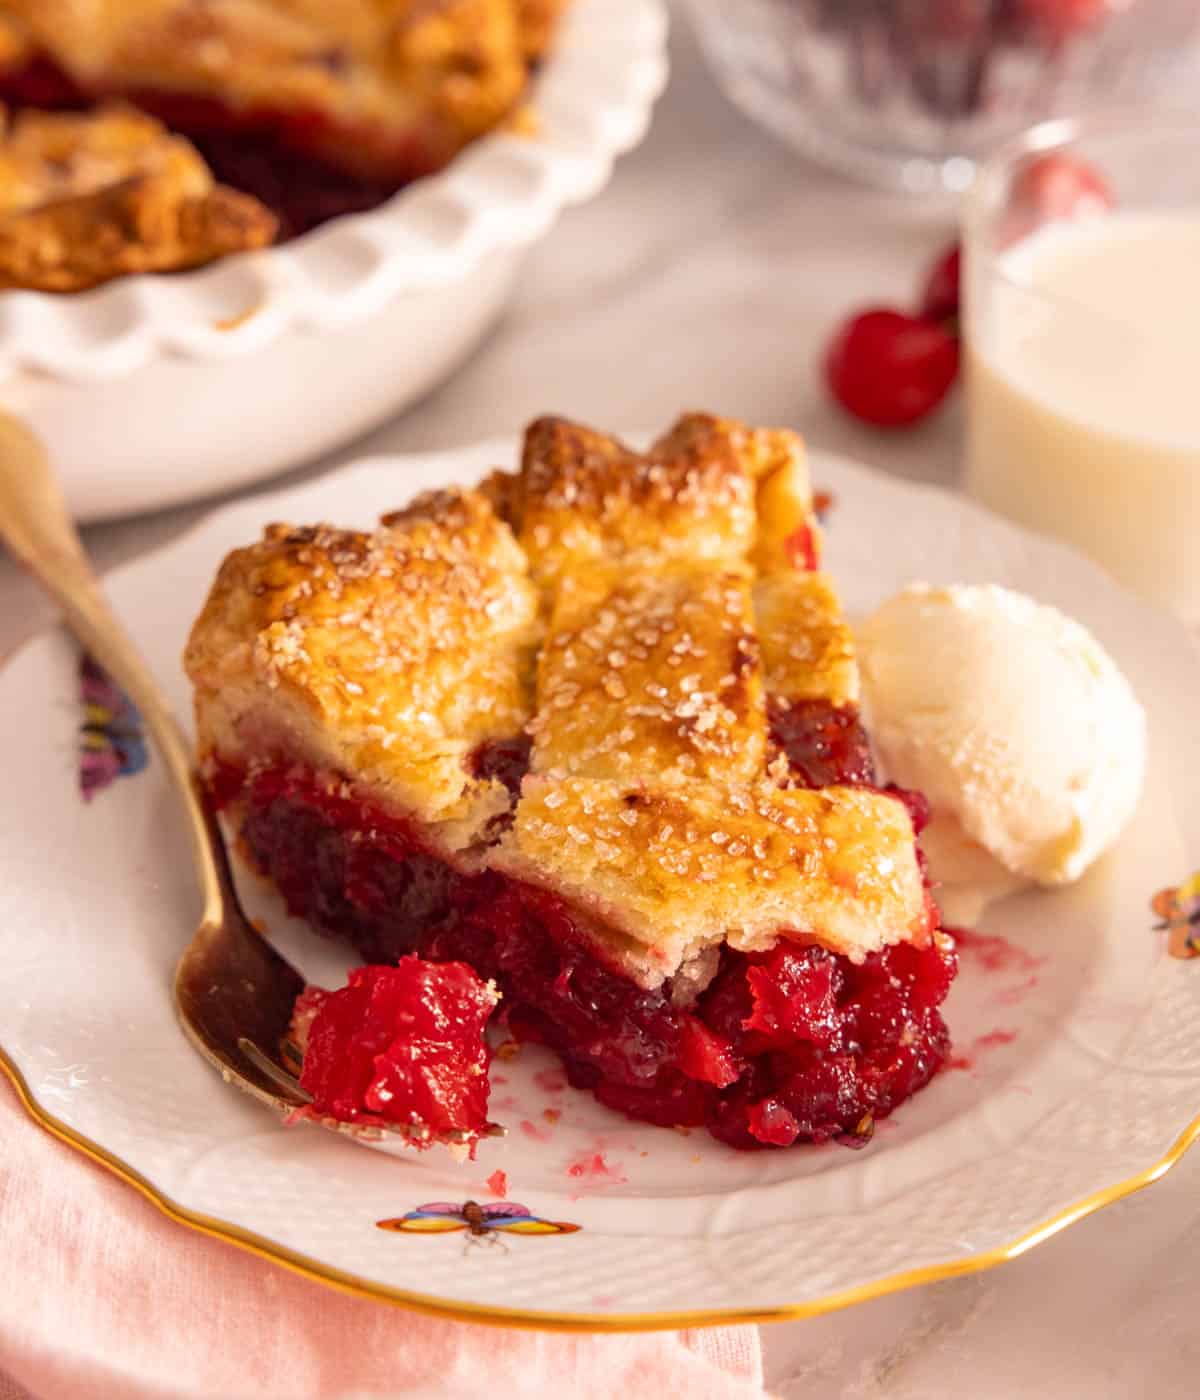
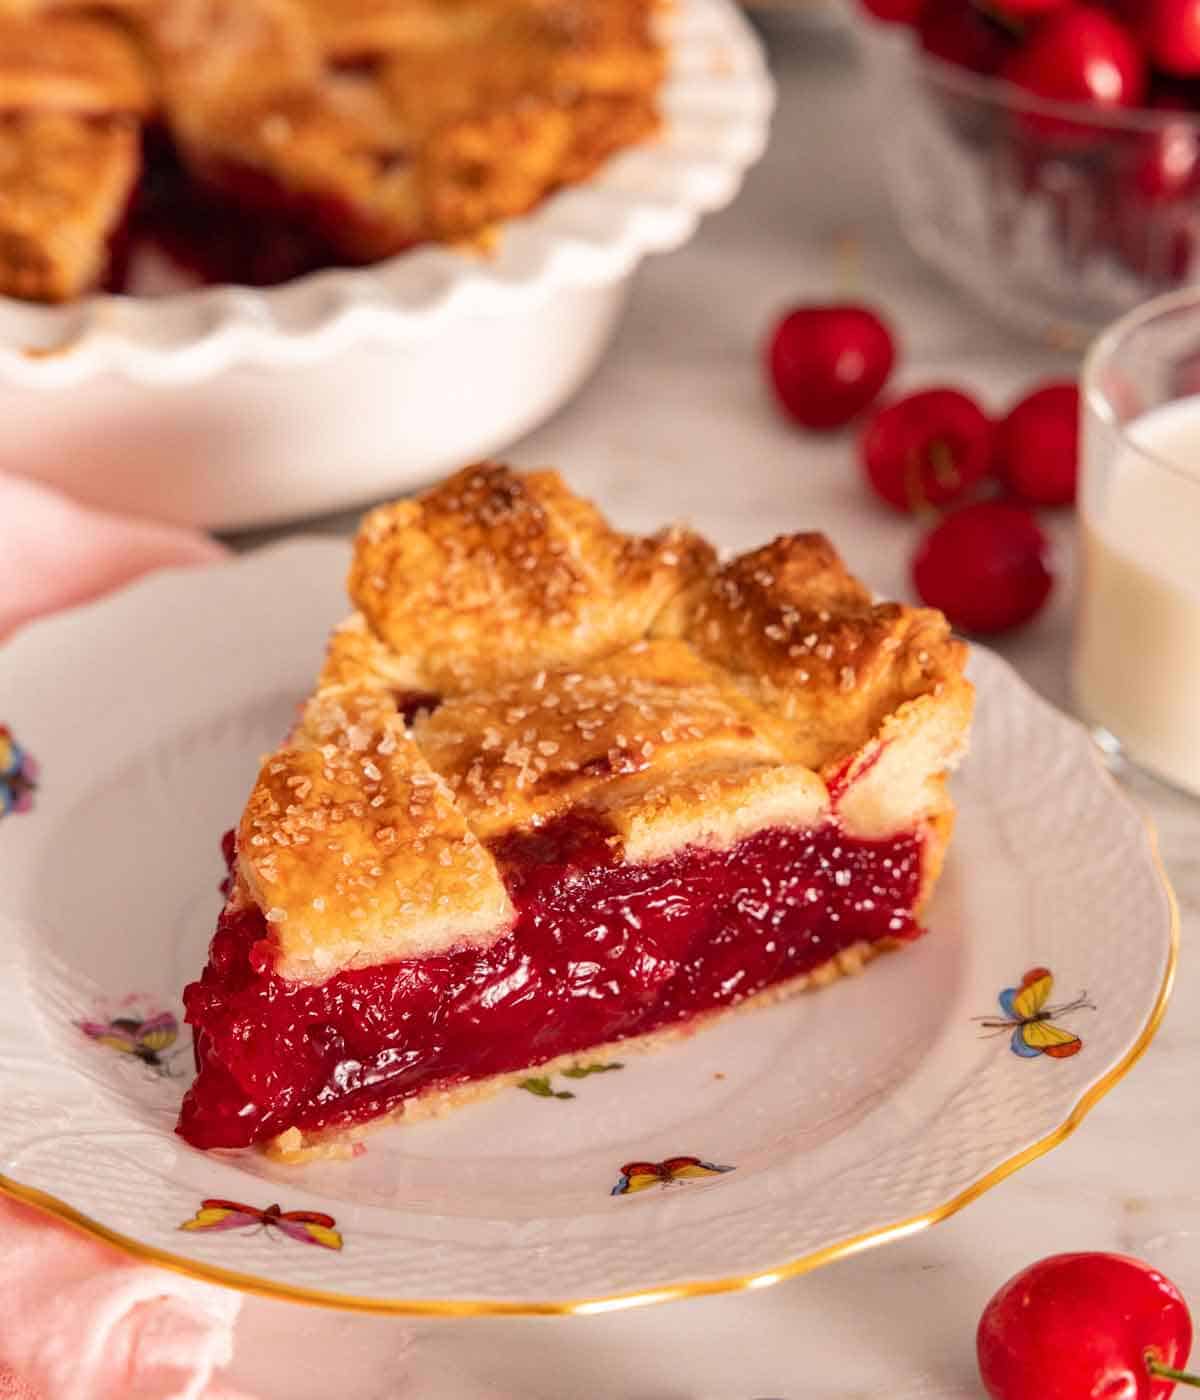
Each slice of this Homemade Cherry Pie embodies summer flavor. Made with a flaky golden crust and vibrant sweet-tart cherry filling, this classic dessert evokes the joys of warm, sunny days and fun family gatherings. This homemade pie is easy to make using less than ten simple ingredients, and I take you step-by-step through the process.
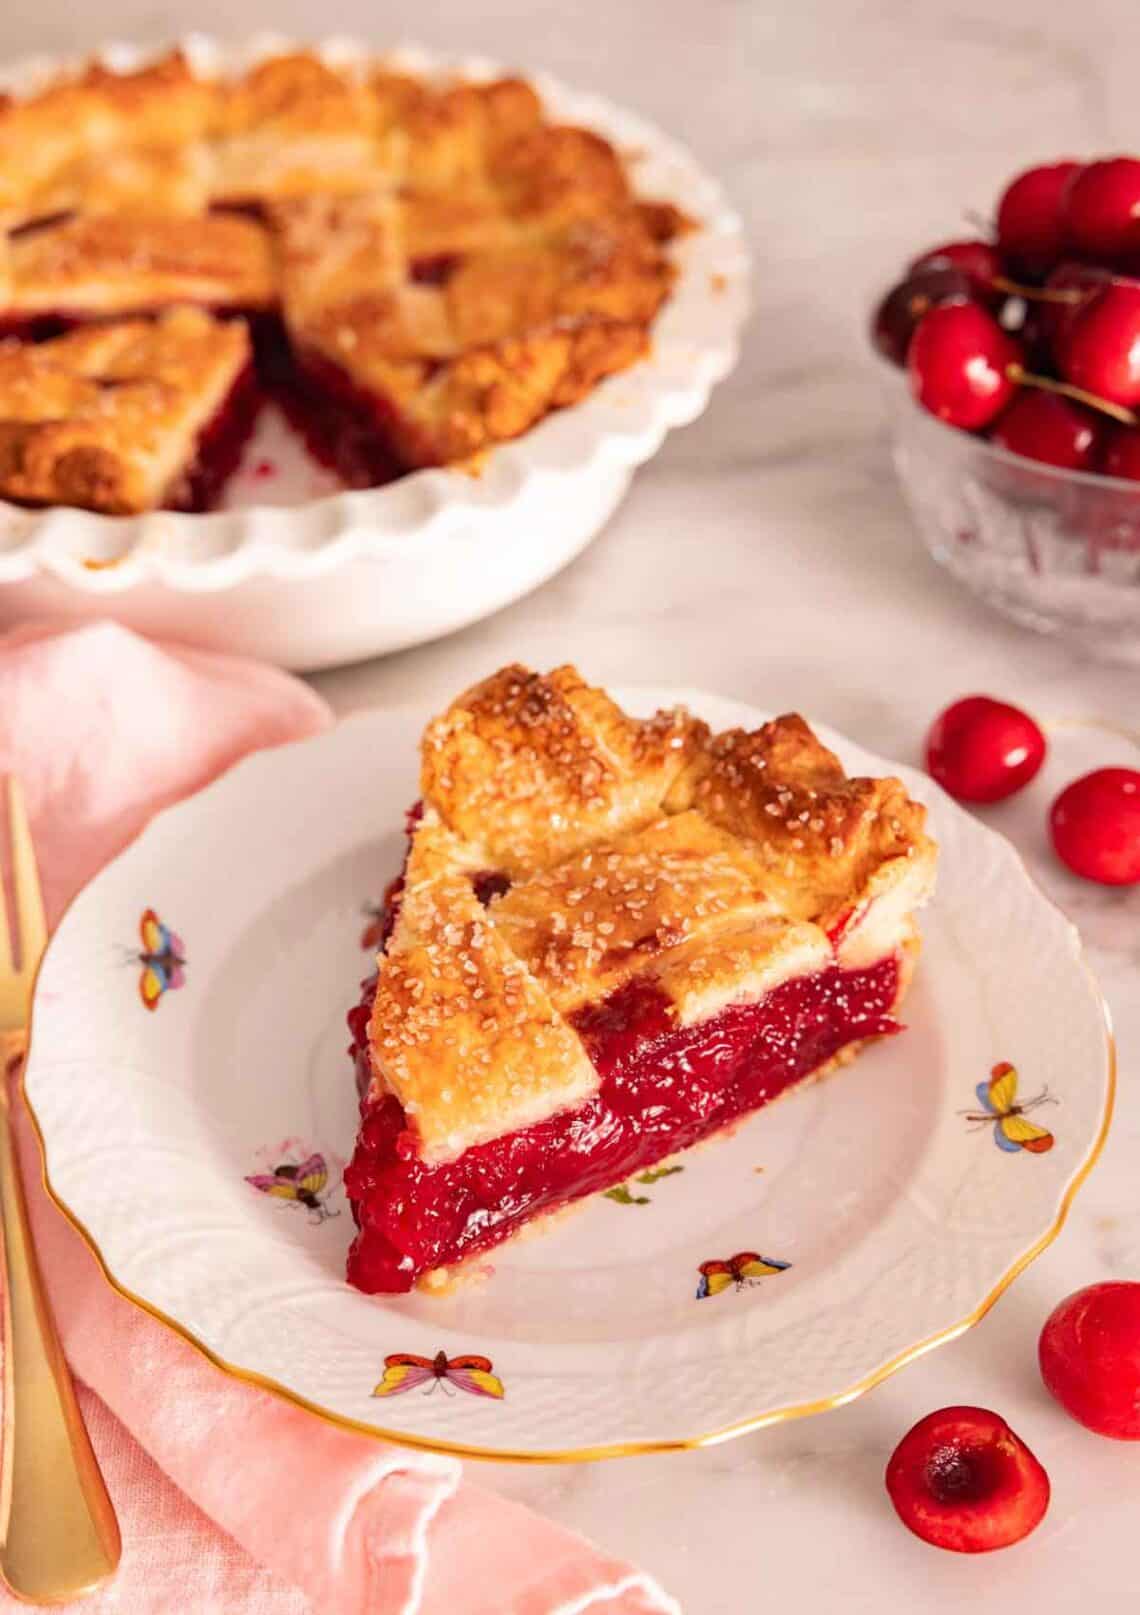
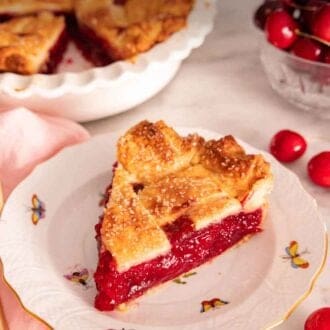
Nothing says “summer” like a freshly baked cherry pie. The bright, juicy sweetness and slight tartness of fresh cherries meld with the flavors of zesty lemon, rich butter, a hint of almond extract, and sugar for a delicious homemade cherry pie filling. Complimenting the fruitiness is a buttery, flaky pie crust with a tender texture and rich, comforting taste. Each bite is the perfect blend of melt-in-your-mouth pastry and juicy fruit filling.
Indulge in this easy-to-make treat freshly cooled from the oven or chilled with a scoop of vanilla ice cream for the ultimate summer dessert. The lattice pie crust top, sparkly sugar topping, and bright red filling make this a fantastic treat to celebrate summer holidays or add cheer to a normal day! For more pie recipes, try my strawberry pie, blueberry pie, or apple pie next.
Ingredients for Cherry Pie
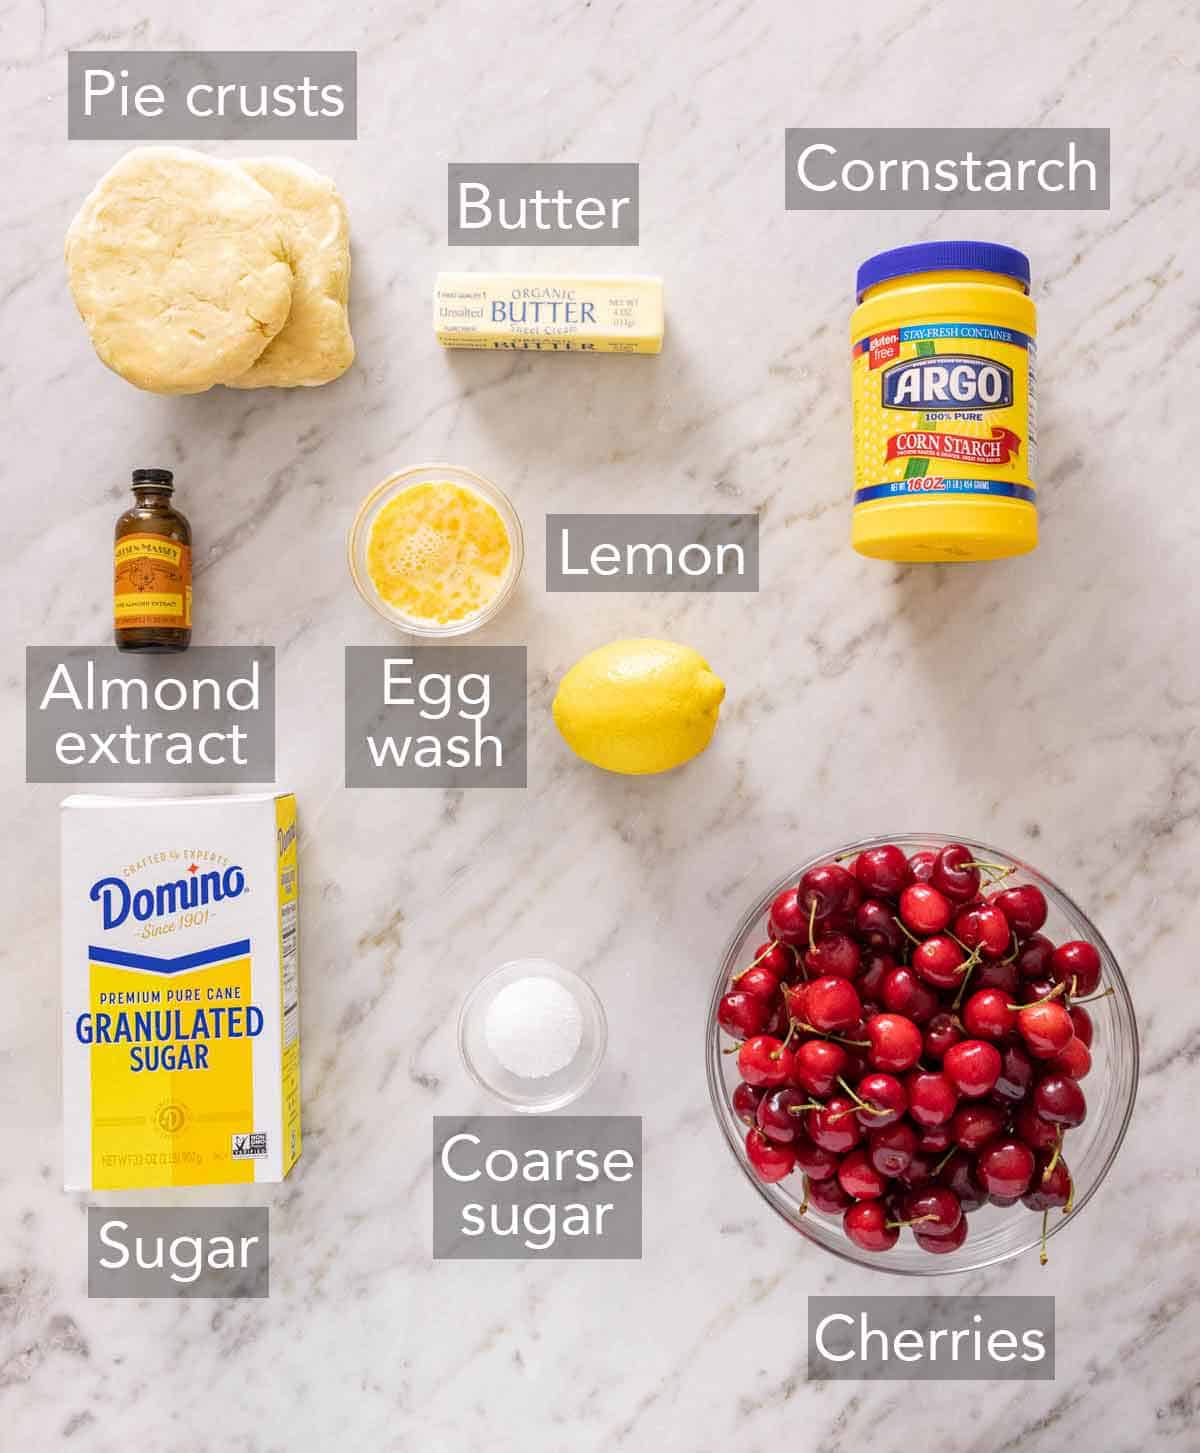
Cherries — for the best cherry pie filling, choose fresh, ripe cherries with firm flesh and vibrant red color. If fresh cherries are unavailable, frozen or canned cherries will work as a substitute.
Sugar — granulated sugar is used to sweeten the filling and balance the tartness. For a richer filling flavor, use a mix of granulated sugar and light brown sugar.
Lemon Juice — freshly squeezed lemon juice adds a bright, tangy contrast to the sweet cherries. One medium or large lemon yields the needed juice.
Cornstarch — used as a thickening agent for the pie filling to help achieve the perfect texture. Fully dissolve it in the cherry mixture to avoid a starchy taste in the finished pie. Alternatively, substitute it for an equal amount of tapioca flour if desired.
Butter — adds richness and a silky texture to the cherry filling. Choose unsalted butter to control the seasoning.
Almond Extract — enhances the cherry flavor with a subtle nutty note. You can substitute with up to 2 teaspoons of vanilla extract depending on your taste preference.
Pie Crusts — you will need two pie crusts for this recipe – one as the base and one to create the lattice top crust pattern. I recommend using my easy homemade pie crust recipe for the best taste and texture, but storebought works in a pinch.
Egg Wash — this egg-milk combination is brushed on top of the pie crust before baking to help achieve a golden, shiny topping.
Coarse Sugar — sprinkling coarse sparkling or turbinado sugar over the egg wash before baking adds a delightful crunch, a touch of sweetness, and a sparkling quality to the crust. Alternatively, use sanding sugar or regular granulated sugar in a pinch.
How To Make Cherry Pie
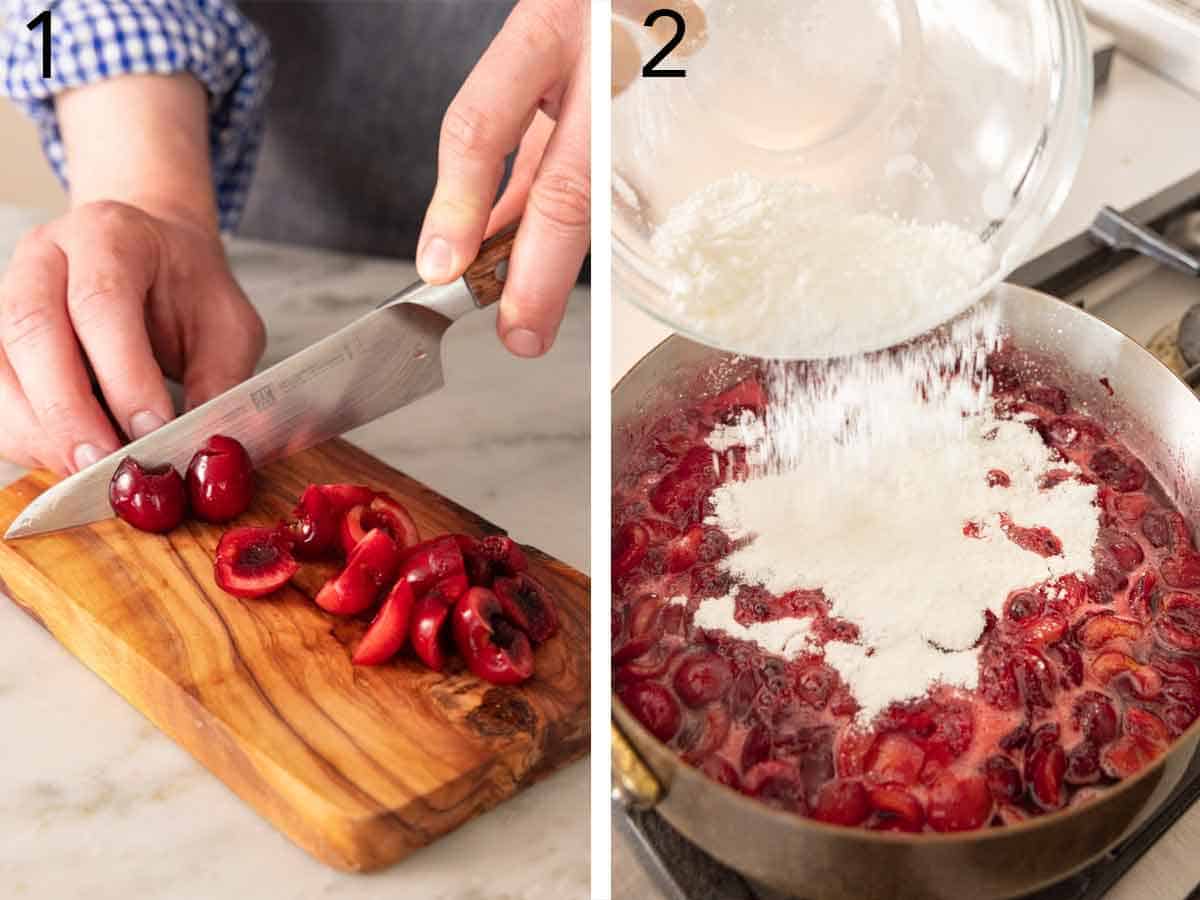
1. Pit the cherries and cut them in half.
2. Place the pitted cherries in a medium pot with ½ cup sugar and lemon juice. Cook over medium heat, stirring frequently, until the mixture is very juicy and simmering, for about 10 minutes.
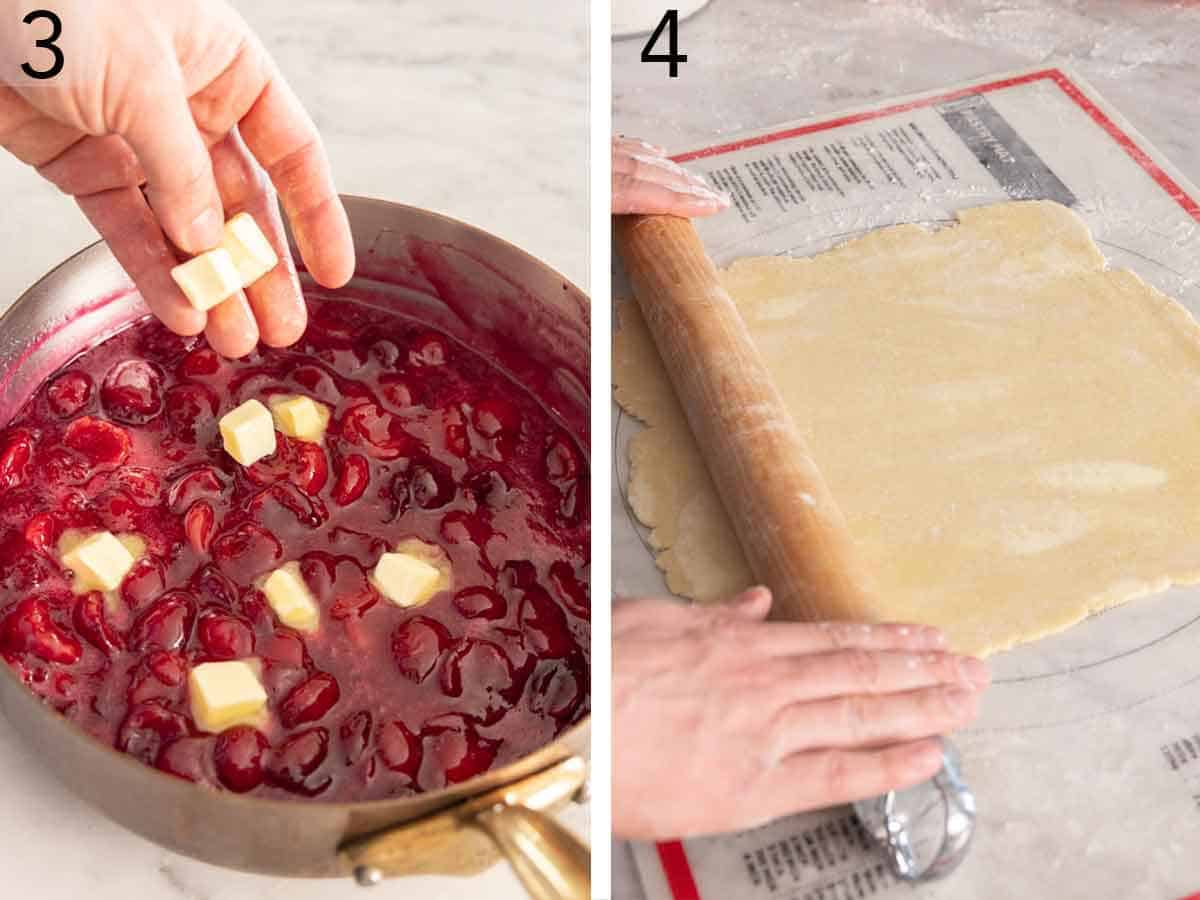
3. Whisk the remaining ½ cup of sugar and cornstarch in a small bowl. Sprinkle over the cherry mixture and cook, stirring constantly, until bubbling and thickened, about 3 minutes. Remove the pot from the heat. Dot the top cherry mixture with butter and add the almond extract. Stir together until the butter is melted. Cool for at least 30 minutes.
4. Preheat the oven to 425º F. On a lightly floured surface, roll out the dough of one pie crust into a 13-inch circle. Transfer the dough to a 9-inch pie pan, letting the excess hang over the edge of the pan. Pour the cherry filling into the pie crust.
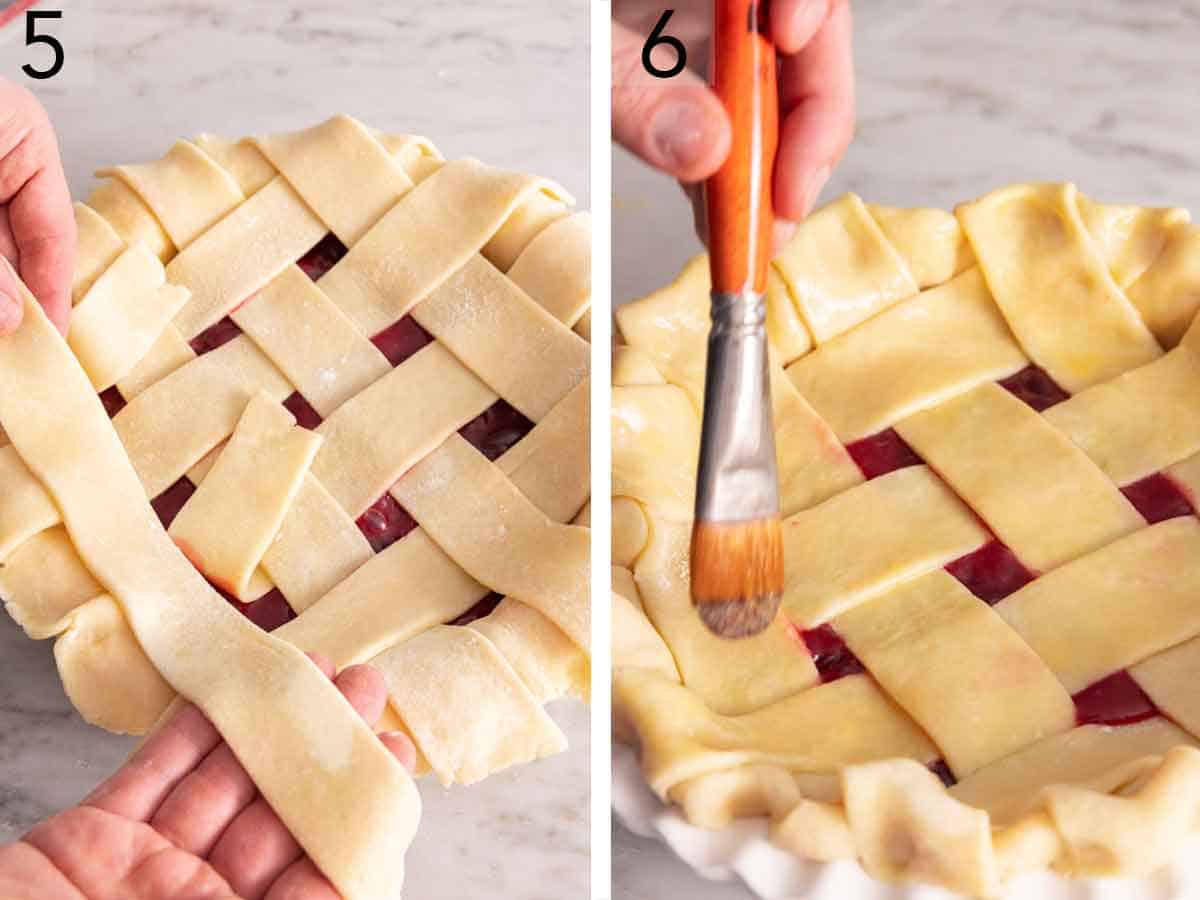
5. Roll the second pie crust dough into a 12-inch circle and cut it into 1-inch-wide strips. Arrange the strips in a lattice pattern and place them over the top of the filling. Trim the edges of the pie dough, leaving about 1 inch of overhang. Tuck the excess dough under and crimp the edge as desired.
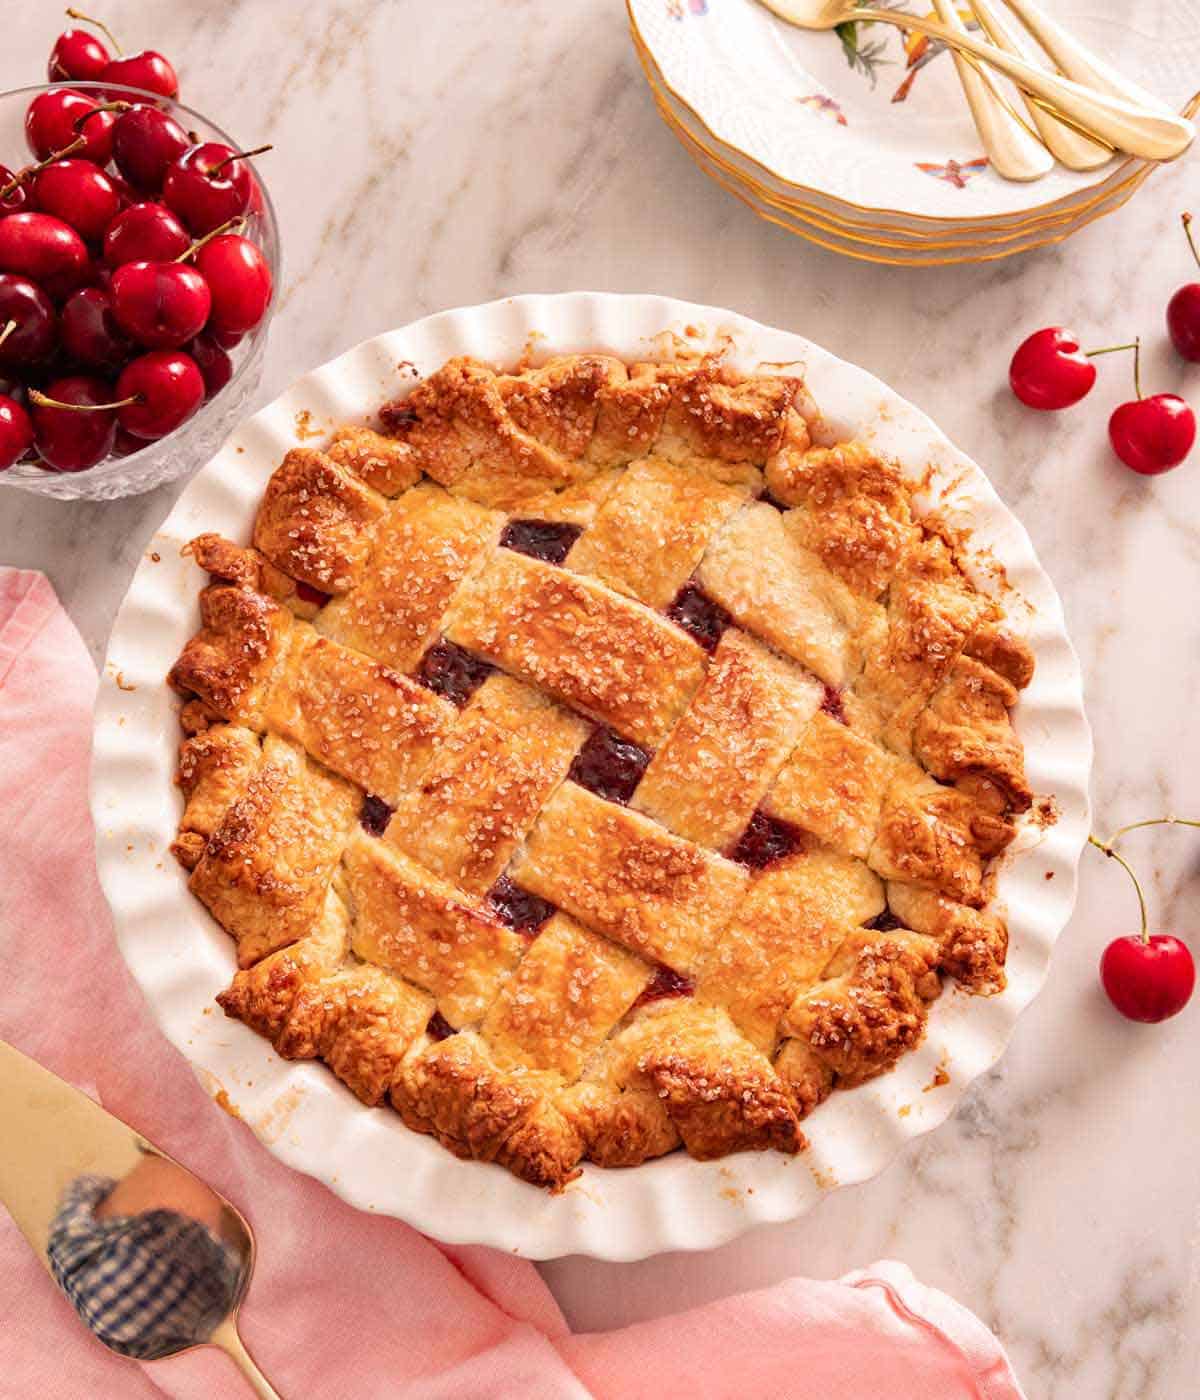
6. Brush the dough topping lightly with egg wash and sprinkle with coarse sugar. Place the pie on a rimmed baking sheet. Bake for 20 minutes. Then reduce the oven temperature to 375º F and continue baking for 30-40 minutes until the crust is golden brown and the filling bubbles. Place the pie on a wire rack and let cool for a few hours before slicing.
Pitting Cherries
There are three great techniques for pitting cherries. Using a cherry pitter is the easiest and my favorite option, but you can definitely pit cherries without one! Check out my cherry cobbler recipe for a visual demonstration of each method!
- Cherry pitter: Remove the stems from each cherry and place one cherry at a time in the pitter’s cradle with the stem end up. Squeeze the handles of the pitter together so the rod pushes through the cherry and forces the pit out the other side. Remove the pitted cherry and repeat with the remaining cherries. Cherries tend to splatter a bit when the pit gets pushed out, so I like to squeeze the pitting into a tall container or bowl to catch the pits and stop the cherry juices from spraying everywhere.
- Skewer or chopstick: Remove the cherry stems. Hold one cherry with the cherry stem end facing out. Place the tip of the skewer or chopstick in the divet where the stem was, then push the skewer or chopstick straight through the cherry against the pit until it comes out the opposite end, removing the pit with it. (Make sure your hand is clear of the end of the cherry!)
- Piping tip: Hold and pit the cherry the same way as you would with the skewer, but use the point of an open round piping tip to push the pit out of the cherry.
What Are the Best Cherry Varieties for Pie?
Ultimately, the best cherry variety for your pie depends on your flavor preference and availability. Overall, cherries with a balance of sweetness and tartness and a firm yet juicy texture work well in this recipe. Sweet cherries like Bing and Rainer are delicious, adding a deep cherry flavor to the classic dessert. Tart cherries like Sour, Montmorency, and Morello can also be used for pie, as their tartness and acidity help balance the sweetness. If you find your cherries are very tart, you can increase the sugar in the filling to suit your taste. Add an extra teaspoon of cornstarch for every ¼ cup of added sugar.
Can I Use Canned Cherries?
If fresh or frozen cherries are unavailable, you can make this pie recipe using canned cherries. Opt for canned tart cherries packed in water or their own juices instead of syrup to better control the pie’s sweetness. Drain the liquid, saving ¼ cup of the juices to add to the pot with the cherries before cooking.
Do I Need to Prebake the Bottom Crust for Cherry Pie?
Prebaking the bottom crust, or blind baking, is unnecessary for this cherry pie recipe since we will bake the crust with the filling. The only times you need to blind-bake the bottom crust is when you make a pie where the filling is not baked or is baked for a short period of time.
The Key to Perfectly Golden Crust (No Soggy Bottom!)
To achieve the perfect golden crust with no soggy bottom, start baking the pie at a high temperature for 15-20 minutes, then reduce the temperature for the remaining cooking time. This helps to properly set the crust and start to brown it, which creates a seal (almost like searing meat!). If your oven runs cooler, you set a rack in the bottom third of the oven and bake your pie close to the bottom. More heat will touch the bottom of the pie this way and ensure a golden bottom crust.
Also, don’t pull the pie too soon! An underbaked pie will certainly result in a soggy bottom, either from underbaked dough or a runny filling. Make sure the crust is a deep golden brown, and if you have an instant-read thermometer, you can insert it into the center of the filling to check the temperature. It should reach between 195-200°F before removing it from the oven to ensure it is properly cooked and set.
Storing Homemade Cherry Pie
Allow leftover pie to cool completely to room temperature, then cover it with plastic wrap or aluminum foil or store it in an airtight container in the refrigerator for up to 3-4 days. Enjoy cold or at room temperature.
Pro Tips For Cherry Pie
- Fresh is best. If in season, opt for fresh cherries with dark color and a firmer feel for the best overall taste and texture.
- Use sour cherries. For a flavor twist, swap the tart or sweet cherries out for sour ones. Increase the sugar to balance the tartness yet maintain a slightly sour flavor based on your taste. Add another teaspoon of cornstarch per ¼ cup of added sugar to make sure the filling sets properly.
- Extra flaky crust. Place the whole pie in the refrigerator for up to 60 minutes or in the freezer for 30 minutes before applying the egg wash and baking for a next-level flaky crust.
- Bright red filling. For an extra vibrant red filling, add several drops of red food coloring to it before simmering.
- Protect the crust edges. If the edge of the pie crust appears to be getting too brown during baking, shield it with foil at any time. This will help the crust and filling cook at the same rate.
- Cool completely before serving. Allow the pie to cool completely to room temperature on a wire rack before slicing. This allows the filing to set and ensures clean slices.
- Make the filling ahead of time. If desired, you can make the filling up to 1 day in advance. Cool and refrigerate it before refrigerating and bring it to room temperature before baking.
Frequently Asked Questions
If your pie filling is runny, it may be because you did not use enough cornstarch or the pie is underbaked. Ensure you use the correct amount as specified in the recipe. Thoroughly mix it so it is completely dissolved and evenly distributed in the cherry mixture to prevent clumping. The pie may also not have cooked long enough to activate the thickening agent. Cook the pie until the filling is bubbling in the center (or is 195-200°F), which indicates the cornstarch has been properly activated.
Yes, you can swap the cornstarch 1:1 with tapioca starch as the thickening agent. Tapioca will give the pie a smoother, gel-like consistency with a glossy finish. You can use storebought tapioca flour or grind instant tapioca pearls into a fine powder.
I highly recommend preparing the easy cherry filling as outlined in the recipe for the best cherry pie experience. However, you can use canned cherry pie filling in a pinch. Taste it to adjust the sweetness to taste, and add a thickening agent if it is runny.
Yes, you can freeze leftover pie by wrapping it tightly in plastic wrap and then placing it in a freezer-safe container. Store for up to 2-3 months. Thaw in the refrigerator overnight, then reheat in the oven at 300ºF until warmed through to maintain its texture.
If you’ve tried this Homemade Cherry Pie recipe, then don’t forget to rate it and let me know how you got on in the comments below. I love hearing from you!
Cherry Pie Recipe
Equipment
- Small pot
- Small mixing bowl
- 9″ pie pan
- Rimmed baking sheet
Ingredients
- 4 cups fresh cherries (650g)
- 1⅓ cup granulated sugar (266g)
- 2 tablespoons fresh lemon juice (about 1 lemon)
- 5 tablespoons cornstarch (50g)
- 2 tablespoons butter cubed
- ½ teaspoon almond extract
- 2 homemade pie crusts
- egg wash (1 large egg beaten with 1 tablespoon milk)
- coarse sugar
Instructions
- Pit and halve the cherries. Place in a medium pot with ½ cup sugar and lemon juice. Cook over medium heat stirring frequently, until very juicy and simmering, about 10 minutes
- Whisk the remaining ½ cup of sugar and cornstarch together in a small bowl. Sprinkle over the cherry mixture and cook, stirring constantly, until bubbling and thickened, about 3 minutes. Remove from the heat. Dot the top with butter and add the almond extract. Stir together until the butter is melted. Cool for at least 30 minutes. (Filling can also be refrigerated for up to 1 day. Bring to room temperature before baking.)
- Preheat the oven to 425F.
- On a lightly floured surface, roll one pie crust into a 13-inch circle. Transfer to a 9-inch pie pan, letting the excess hang over the edge of the pan. Pour the cherry filling into the pie crust.
- Roll the second pie crust into a 12-inch circle and cut into 1-inch wide strips. Arrange the strips in a lattice pattern and place over the top of the filling. Trim the edges of the pie dough leaving about 1-inch of overhang. Tuck the pie the excess dough under and crimp the edge as desired. Brush the dough lightly with egg wash and sprinkle with coarse sugar. Place the pie on a rimmed baking sheet.
- Bake for 20 minutes. Reduce the oven temperature to 375F and continue baking for 30 to 40 minutes, or until the crust is golden brown and the filling is bubbling all over. (Shield the edge of the pie with foil at any time if it appears to be getting too browned.) Place the pie on a wire rack and let cool for a few hours before slicing.
Notes
- Fresh is best. If in season, opt for fresh cherries with dark color and a firmer feel for the best overall taste and texture.
- Use sour cherries. For a flavor twist, swap the tart or sweet cherries out for sour ones. Increase the sugar to balance the tartness yet maintain a slightly sour flavor based on your taste. Add another teaspoon of cornstarch per ¼ cup of added sugar to make sure the filling sets properly.
- Extra flaky crust. Place the whole pie in the refrigerator for up to 60 minutes or in the freezer for 30 minutes before applying the egg wash and baking for a next-level flaky crust.
- Bright red filling. For an extra vibrant red filling, add several drops of red food coloring to it before simmering.
- Protect the crust edges. If the edge of the pie crust appears to be getting too brown during baking, shield it with foil at any time. This will help the crust and filling cook at the same rate.
- Cool completely before serving. Allow the pie to cool completely to room temperature on a wire rack before slicing. This allows the filing to set and ensures clean slices.
- Make the filling ahead of time. If desired, you can make the filling up to 1 day in advance. Cool and refrigerate it before refrigerating and bring it to room temperature before baking.
Nutrition
Have you tried this recipe? Tag me today!
Mention @preppykitchen and tag #preppykitchen!


