

This post may contain affiliate links. Please read our disclosure policy.








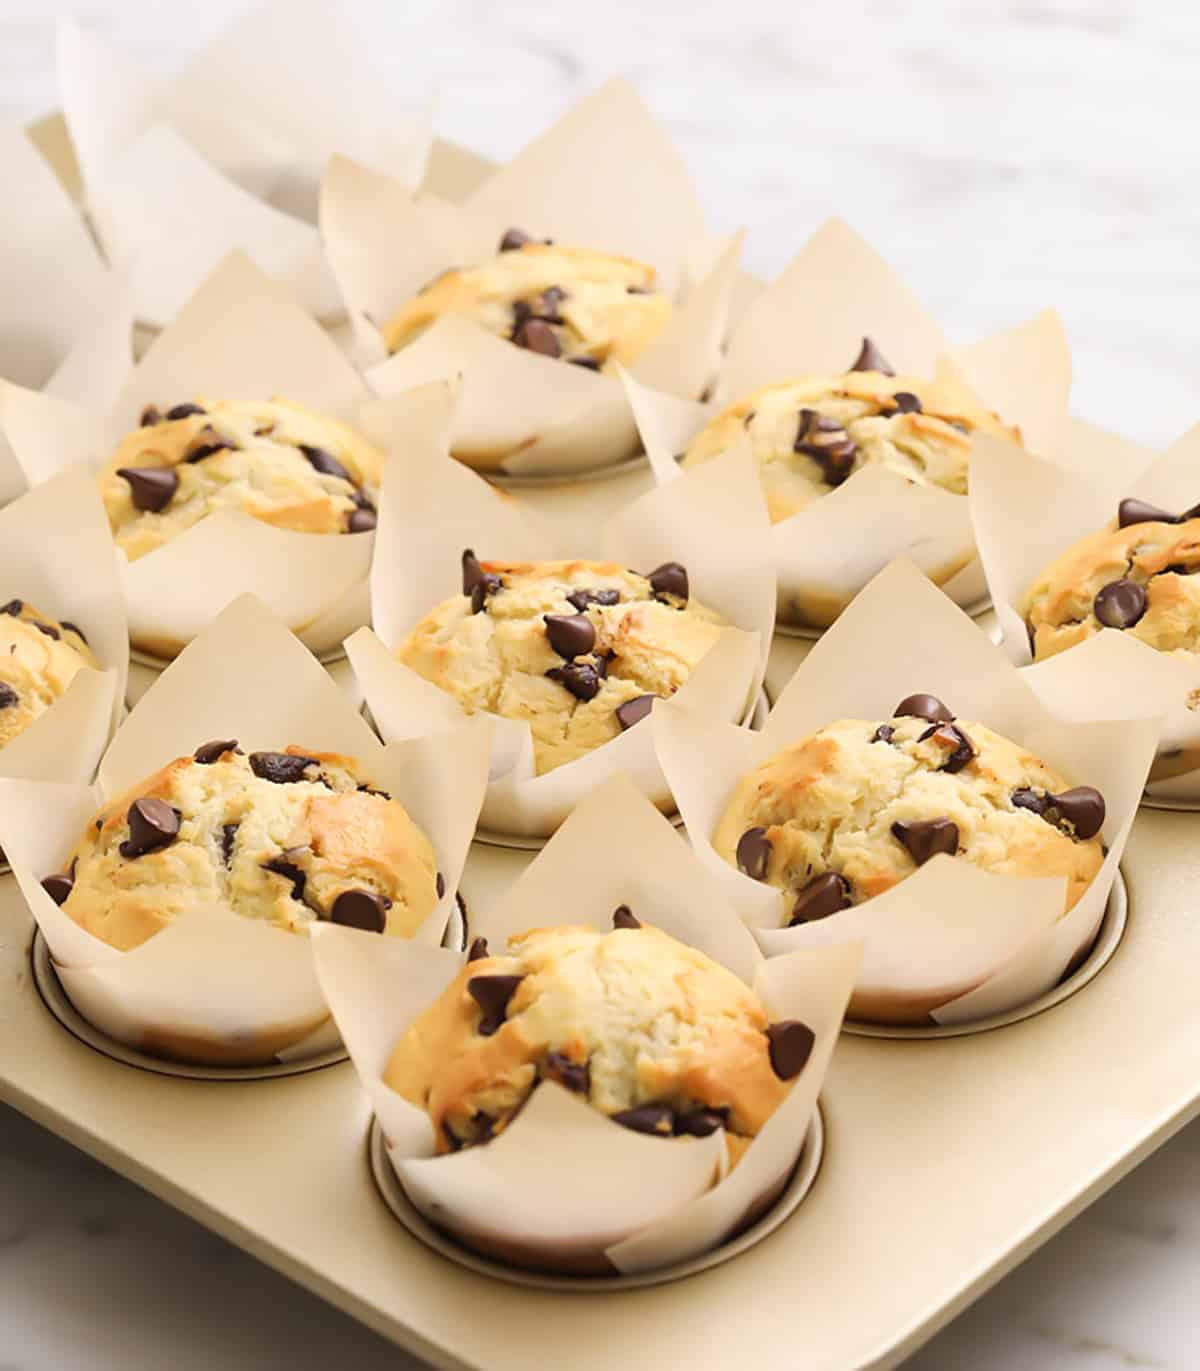
My chocolate chip muffins are soft, fluffy, loaded with chocolate, and finished with the tall golden domes that make them look like they came from a bakery! This dome comes from a two-temperature bake that doesn’t take any extra time—the muffins bake in just 25 minutes.
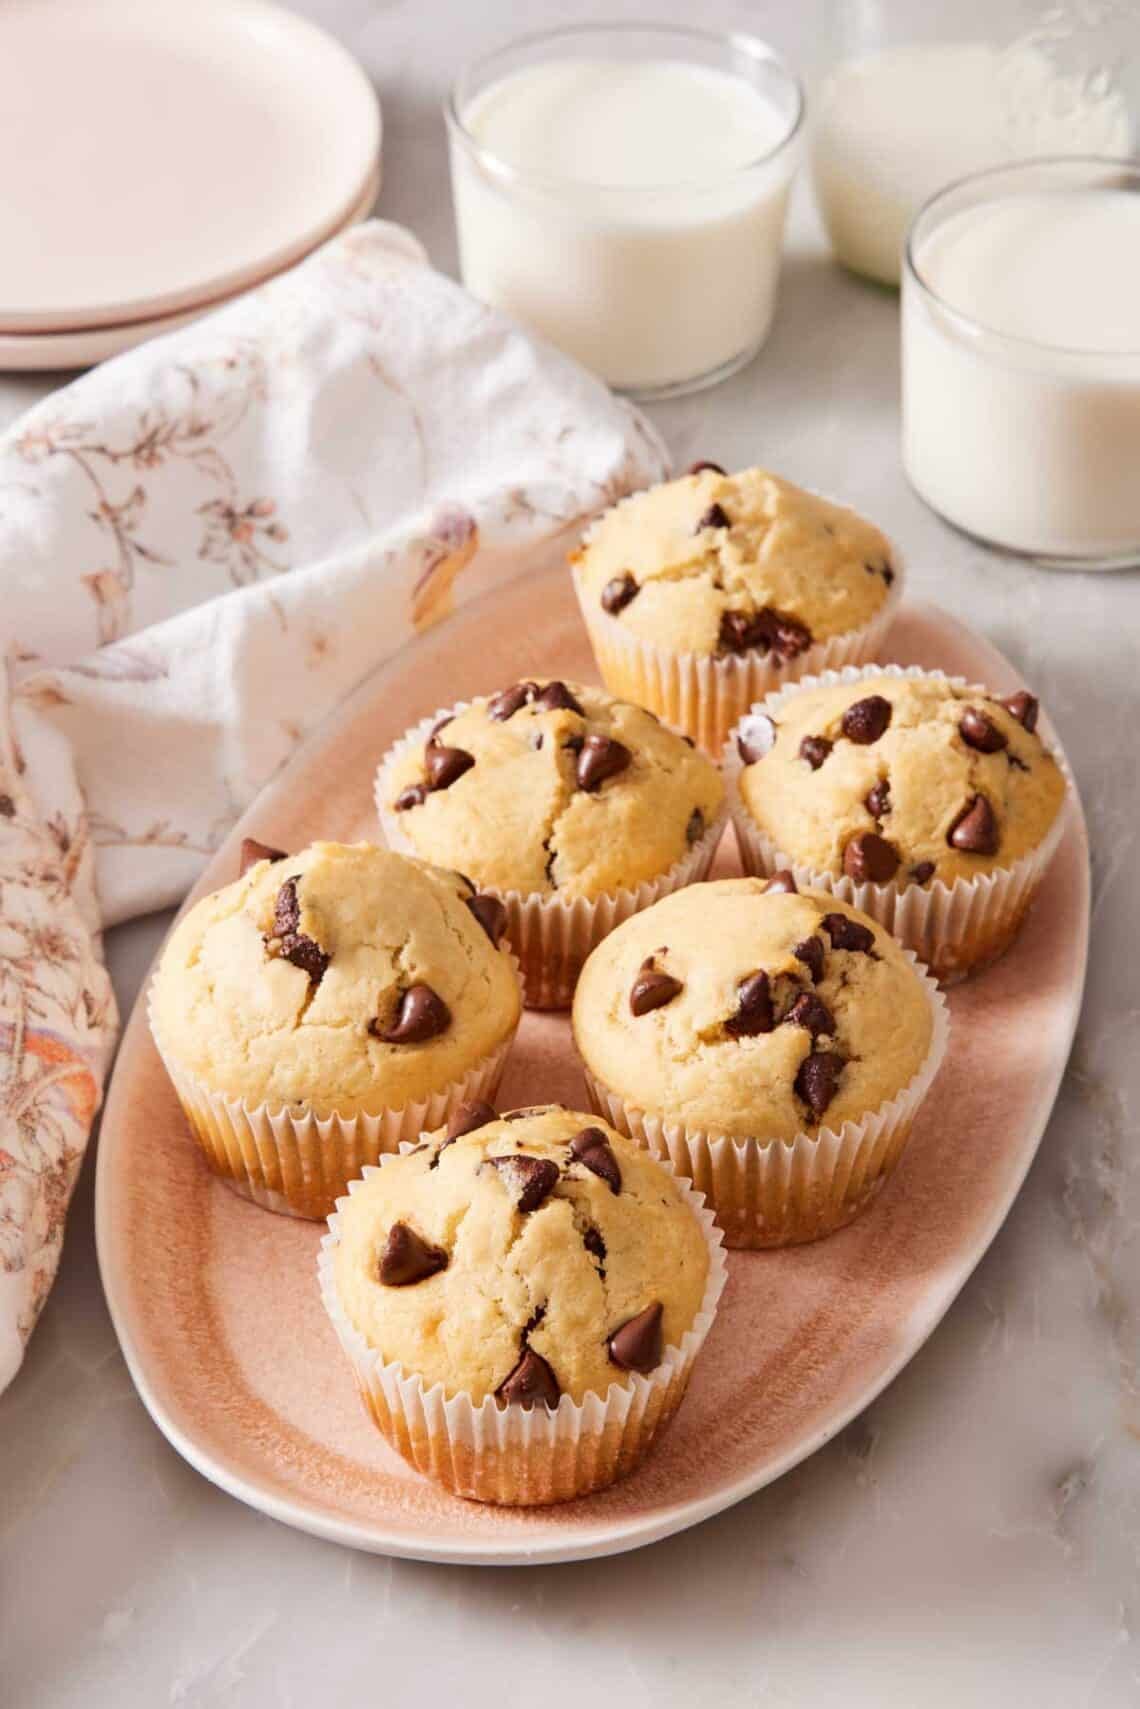
The difference between a homemade chocolate chip muffin that is sad and flat and one that looks like it came from a bakery is the dome. Bakery muffins rise into tall, slightly cracked, golden tops that mushroom slightly over the edge of the paper liner. Most home muffin recipes produce flat or slightly rounded tops that sit at or just above the rim of the tin. The difference isn’t necessarily the recipe—it’s the bake. Specifically, a five-minute blast at 425°F followed by twenty minutes at 350°F, which sets the edge of the muffin fast and forces the still-loose batter in the middle to rise up before the structure locks in.
I’ve been using this recipe since 2020, and it has a 5-star rating across hundreds of reader votes, but the post itself was overdue for a refresh. The recipe stayed exactly as it was. What’s new is the explanation of why each step matters, particularly the two-temperature bake, which is the single step that makes these muffins look like they came from a coffee shop instead of a kitchen counter.
“Watched the YouTube video for this recipe and followed it exactly. Recently bought a scale for measuring ingredients, and have been trying to step up my baking game by paying attention to the more finicky directions, like making sure eggs are at room temp, and “folding in” as opposed to mixing. Here to say, all these little details really do make a big difference in the final result. This is the PERFECT chocolate chip muffin recipe and I will absolutely be making these again!”
Shelby
The Two-Temperature Bake: Secret To The Dome
Here’s the trick to the perfect domed muffin tops. You preheat the oven to 425°F. You bake for exactly 5 minutes at that high heat. Then—without taking the muffins out—you reduce the oven temperature to 350°F and bake for another 20 minutes until the tops are deep golden and a toothpick comes out clean.
Here’s why it works: At 425°F, the outside of each muffin sets within the first 2-3 minutes. The top of the batter forms a thin shell. Meanwhile, the fluid batter in the middle is being heated rapidly, the baking powder is reacting, and the trapped gases are pushing up against that newly set shell. Because the muffin can’t spread sideways (set edge) and can’t push down (because of the pan shape), the only direction left is up. The middle rises into a tall dome before the surface tension breaks, which gives you the cracked top and domed shape.
If you bake the entire time at 350°F, the surface never sets fast enough to constrain the rise. The batter pushes up gently as the leavening reacts, but it also spreads out at the top, and you end up with flatter, more rounded muffins instead of tall domes. The 5-minute window matters. Less than that and the surface doesn’t set; more than that and the outside can brown too fast before it finishes cooking.
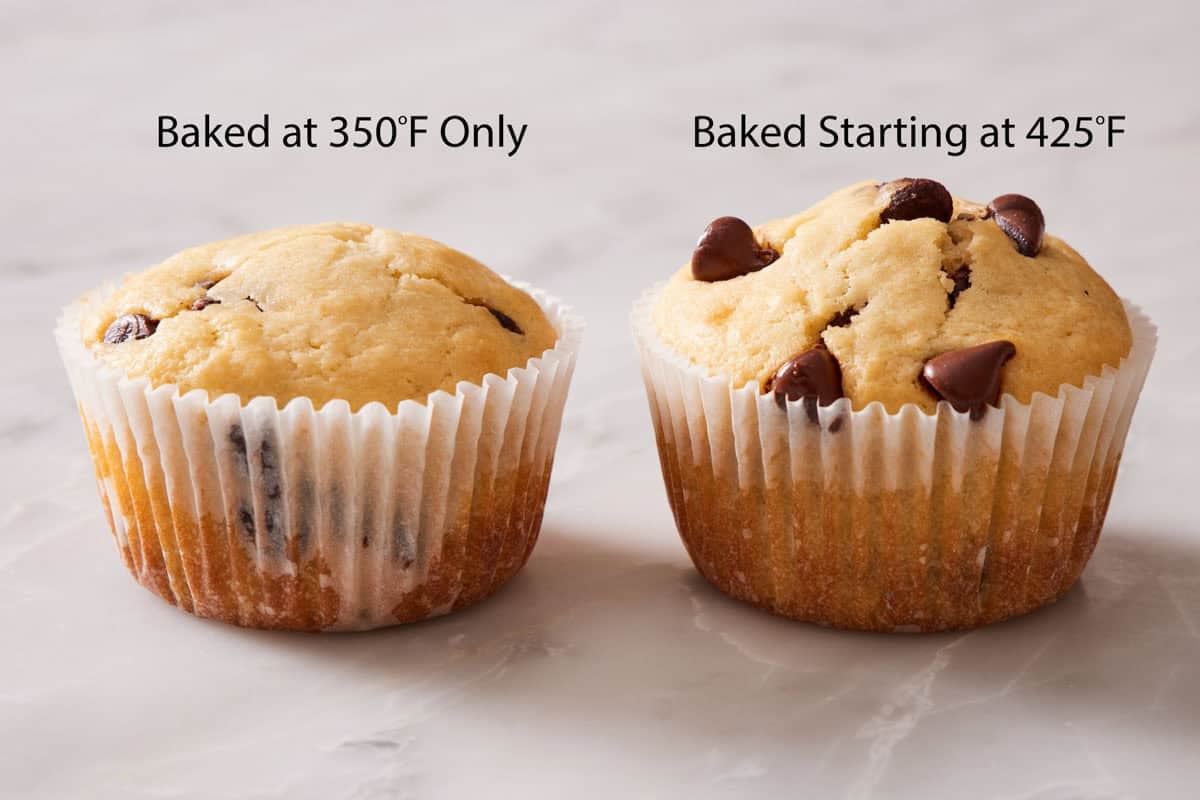
I tested this at 425°F for 5 minutes before dropping to 350°F, and baked a batch at 350°F for the entire time. The 5-minute batch produced a taller top with a slightly more golden crust. The 350-batch had a more “muffin top” spread over the sides (which can stick to your pan) and a flatter top.
Key Ingredients & Why Each One Matters
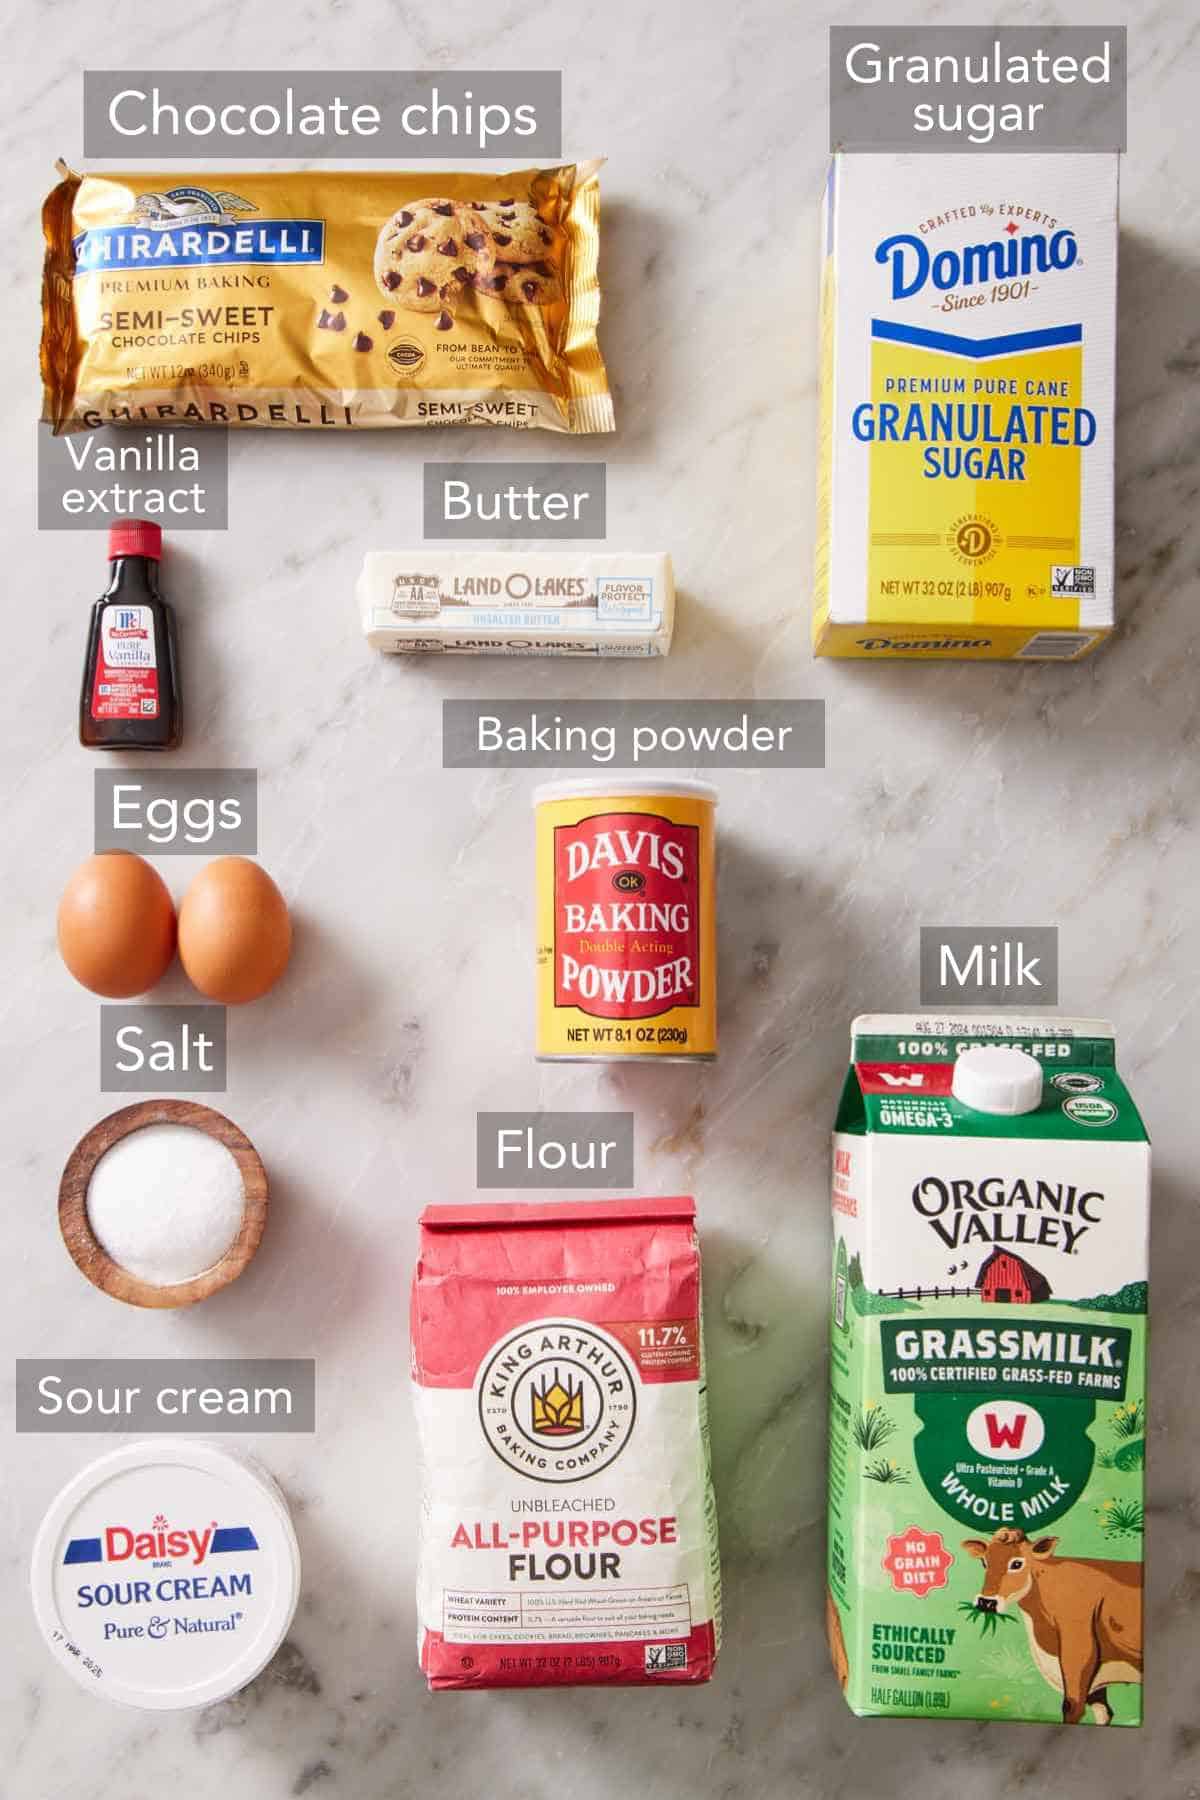
These are the main ingredients you need to make these easy chocolate chip muffins. You can find the full list of ingredients and measurements in the recipe card below.
All-purpose flour — standard AP at 10-11% protein gives you the tender crumb you want in a muffin. Bread flour would make these chewier and feel denser; cake flour would make them more delicate but less able to hold up the dome. AP is the right call. Weigh the flour if you have a scale. Using a dry scoop and scooping straight into the flour can pack 30-40% more flour into the cup than the recipe calls for, making dense, dry muffins.
Baking powder — a full tablespoon sounds like a lot, but it’s doing two jobs: it’s the only leavening agent in the recipe (no baking soda), and it has to push the dome up against the partially-set surface during that 425°F window. Less than this, and the dome doesn’t develop fully. Make sure your baking powder is fresh. Old baking powder can cause the muffins not to rise well.
Kosher salt — salt does the same work in muffins as it does in everything else: it amplifies the sweetness without making the muffin taste salty, and it sharpens the chocolate flavor. Kosher salt has larger flakes than table salt, so the measurement isn’t interchangeable—if all you have is table salt or fine sea salt, use ¾ teaspoon.
Whole milk — whole milk has the right balance of fat and water for a tender, moist crumb. Skim or low-fat milk works but produces a slightly drier muffin. The room-temperature part matters: cold milk hitting melted butter will cause the butter to seize up into little solid chunks, which is why I tell you to microwave the wet bowl briefly if you see that happen.
Granulated sugar — I went with the staple choice for easy mixing. Could you use brown sugar? Yes, but it will brown the muffins a touch more and add a caramel flavor note—delicious but just different from the original recipe.
Unsalted butter — melted butter is what makes this a quick bread-style muffin rather than a cake-style one (beating butter and softened sugar). Melted butter gives you a tender, slightly denser crumb with real butter flavor. Cool it for 5 minutes after melting before you whisk it with the milk and eggs—pouring very hot butter into the wet mixture can partially cook the eggs and curdle the mixture.
Sour cream — the most important ingredient for moisture in this recipe. Sour cream’s fat and lactic acid keep the muffins tender for days after baking and give a faint, almost imperceptible tang that rounds out the sweetness. Whole-milk plain Greek yogurt works as a substitute with the same quantity for a very similar effect. I do this swap regularly when I’m out of sour cream and can’t tell the difference in the finished muffin.
Vanilla extract — a generous pour for muffins this size, but it takes the flavor from good to excellent. It doesn’t make these muffins taste heavily of vanilla, but it builds the background flavor that lets the chocolate come forward.
Eggs — two large eggs add structure, color, and binding. Bringing them to room temperature is important, as cold eggs hitting the melted butter will solidify pockets of fat in the batter and give you an uneven texture when baked. If you forgot to set them out, soak them in a bowl of warm tap water for 5 minutes.
Semisweet chocolate chips — this is the generous amount for a heavily chocolate-loaded muffin. A reader (Ebby) recently told me the chocolate chip quantity ran a bit high for her taste at 1½ cups (270g). The chips are generous on purpose, but you can scale back to a cup (180g) if you want a more muffin-forward, less chocolate-heavy result. The base recipe holds up either way! Semisweet is my default; bittersweet works for a darker, less sweet result; milk chocolate works for a sweeter, more candy-bar profile. Save a small handful to sprinkle on top of the scooped batter before baking. The visible chocolate on top helps with the bakery muffin look.

How To Make Chocolate Chip Muffins
The muffin method is the simplest mixing method in baking—add wet ingredients into dry, fold gently, stop when it looks unified, and no streaks of flour remain. The biggest mistake home bakers make with muffins is over-mixing.
Once the wet hits the dry and you start stirring, gluten begins developing in the flour. A few seconds of folding is fine, but a minute of vigorous stirring is too much. Over-mixed muffins come out tough, dense, and tunneled (vertical holes through the crumb from trapped gas that couldn’t escape). Below, I’ve highlighted the step-by-step process for mixing these muffins. You can find the full set of instructions in the recipe card below.
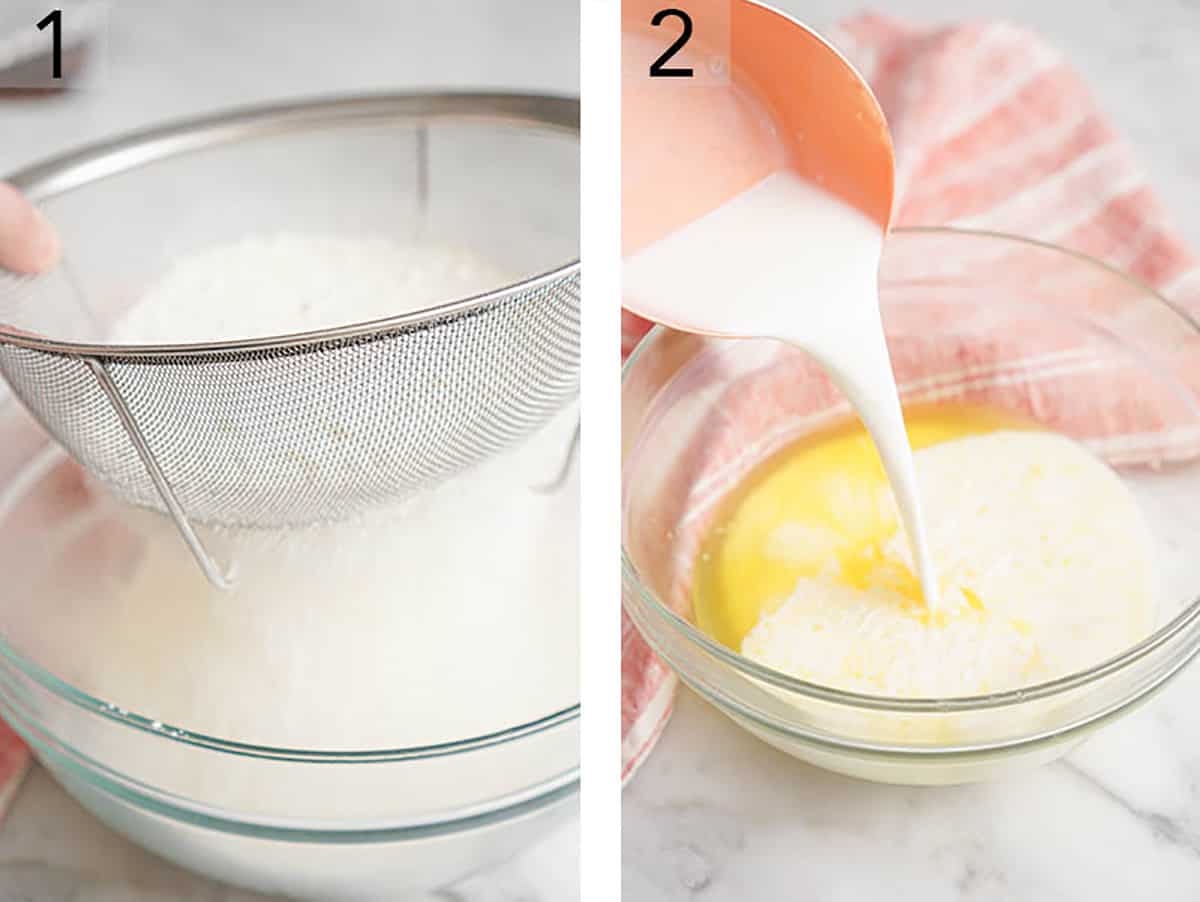
1. Prep your pans by lining two muffin pans with 18 paper liners (regular or tulips both work). In the second pan with empty wells, add some water to the wells without liners to help the muffins bake more evenly. Sift the dry ingredients into a large mixing bowl (flour, salt, and baking powder), then whisk to make sure everything is evenly combined.
2. In a medium bowl, combine the milk, sugar, melted butter, eggs, sour cream, and vanilla.
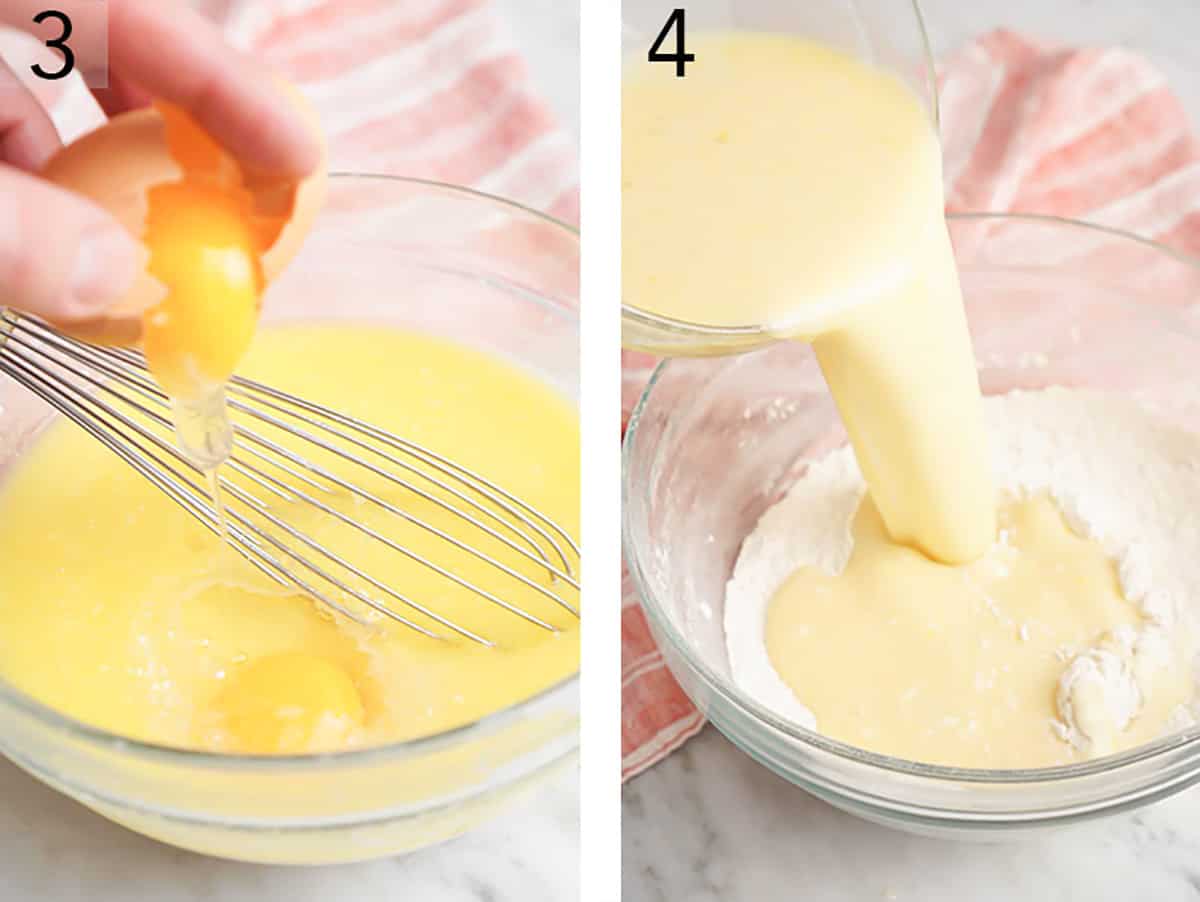
3. Whisk the wet ingredients together until they are smooth and well combined.
4. Make a well in your dry mix and add the wet mixture. Then, gently fold them together. Remember, you don’t want to overwork the batter here, or you’ll have dense muffins.
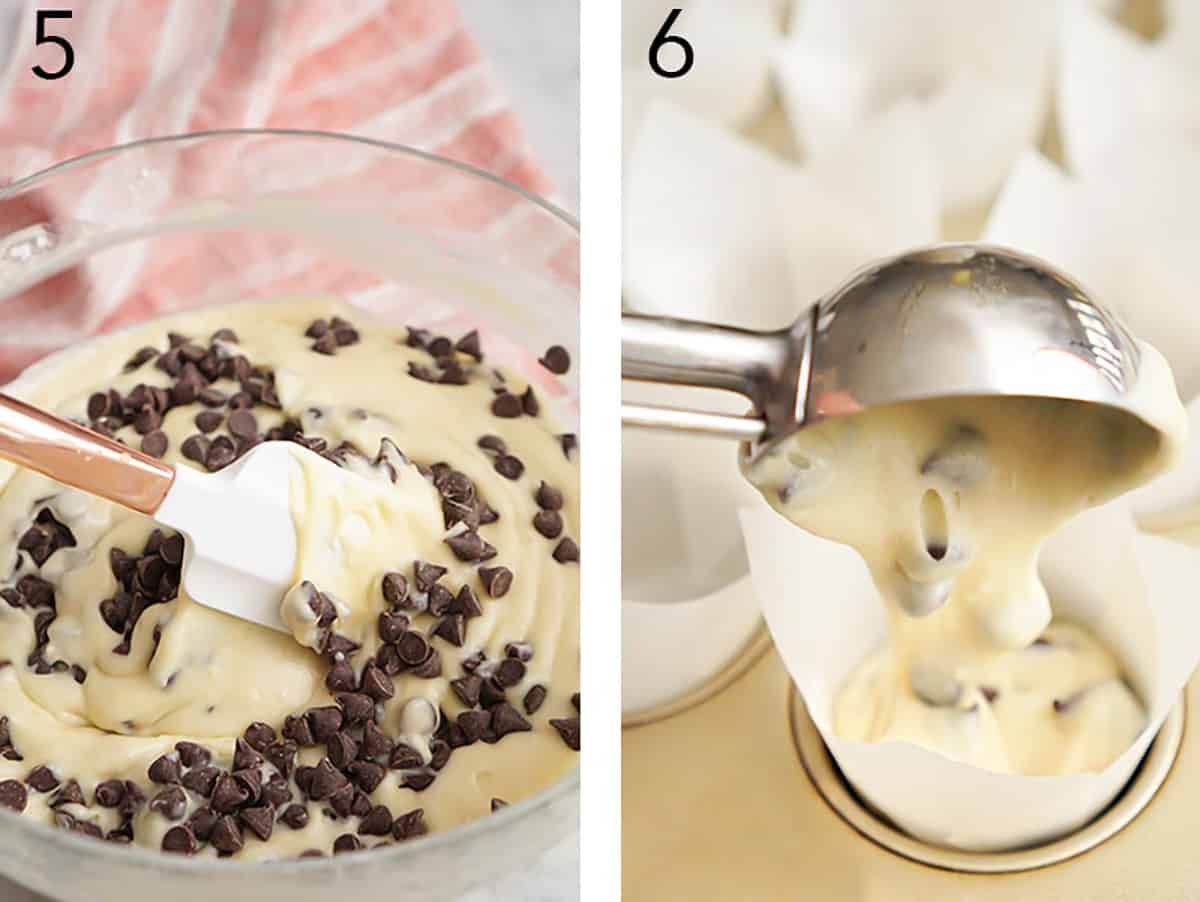
5. Once there are only a few flour streaks remaining in the bowl, add the chocolate chips and fold them in.
6. Divide the batter between each muffin liner. Regular liners will be full to the top. Tulip liners will only be about half full, since they are taller. Sprinkle with more chocolate chips if you wish! Bake at 425°F for 5 minutes to set the top of the muffins. Then drop the oven temp to 350°F and bake until the muffins are golden brown, about 20 minutes. Cool for a few minutes in the pan, then move them to a cooling rack.
Filling the Tin (Liners vs Direct)
Two ways to fill the muffin pan, and they produce slightly different muffins:
With paper liners — easier cleanup, easier removal, and slightly softer edges. Pop a paper liner into each well of a 12-cup pan and use an ice cream scoop or a large spoon to fill each one to the top of the liner. Yes, all the way to the top. Filling to ⅔ or ¾ full is the standard “muffin” advice, and good for some recipes or if you aren’t sure how your recipe will work. But I developed this one and tested it with the liners completely full. Filling to the rim and using the two-temperature bake is what gets you tall domes.
Directly into a buttered tin — crispier edges, slightly more rustic look, a small percentage of readers strongly prefer this style. Butter and flour each well of the tin (or use baking spray), then scoop the batter directly in. The metal-on-batter contact gives you a thin, crisp edge around each muffin that you don’t get with paper liners. The cleanup is harder, though, as crumbs almost inevitably stick to the wells, even when greasing well and using a non-stick pan.
Knowing When They’re Done
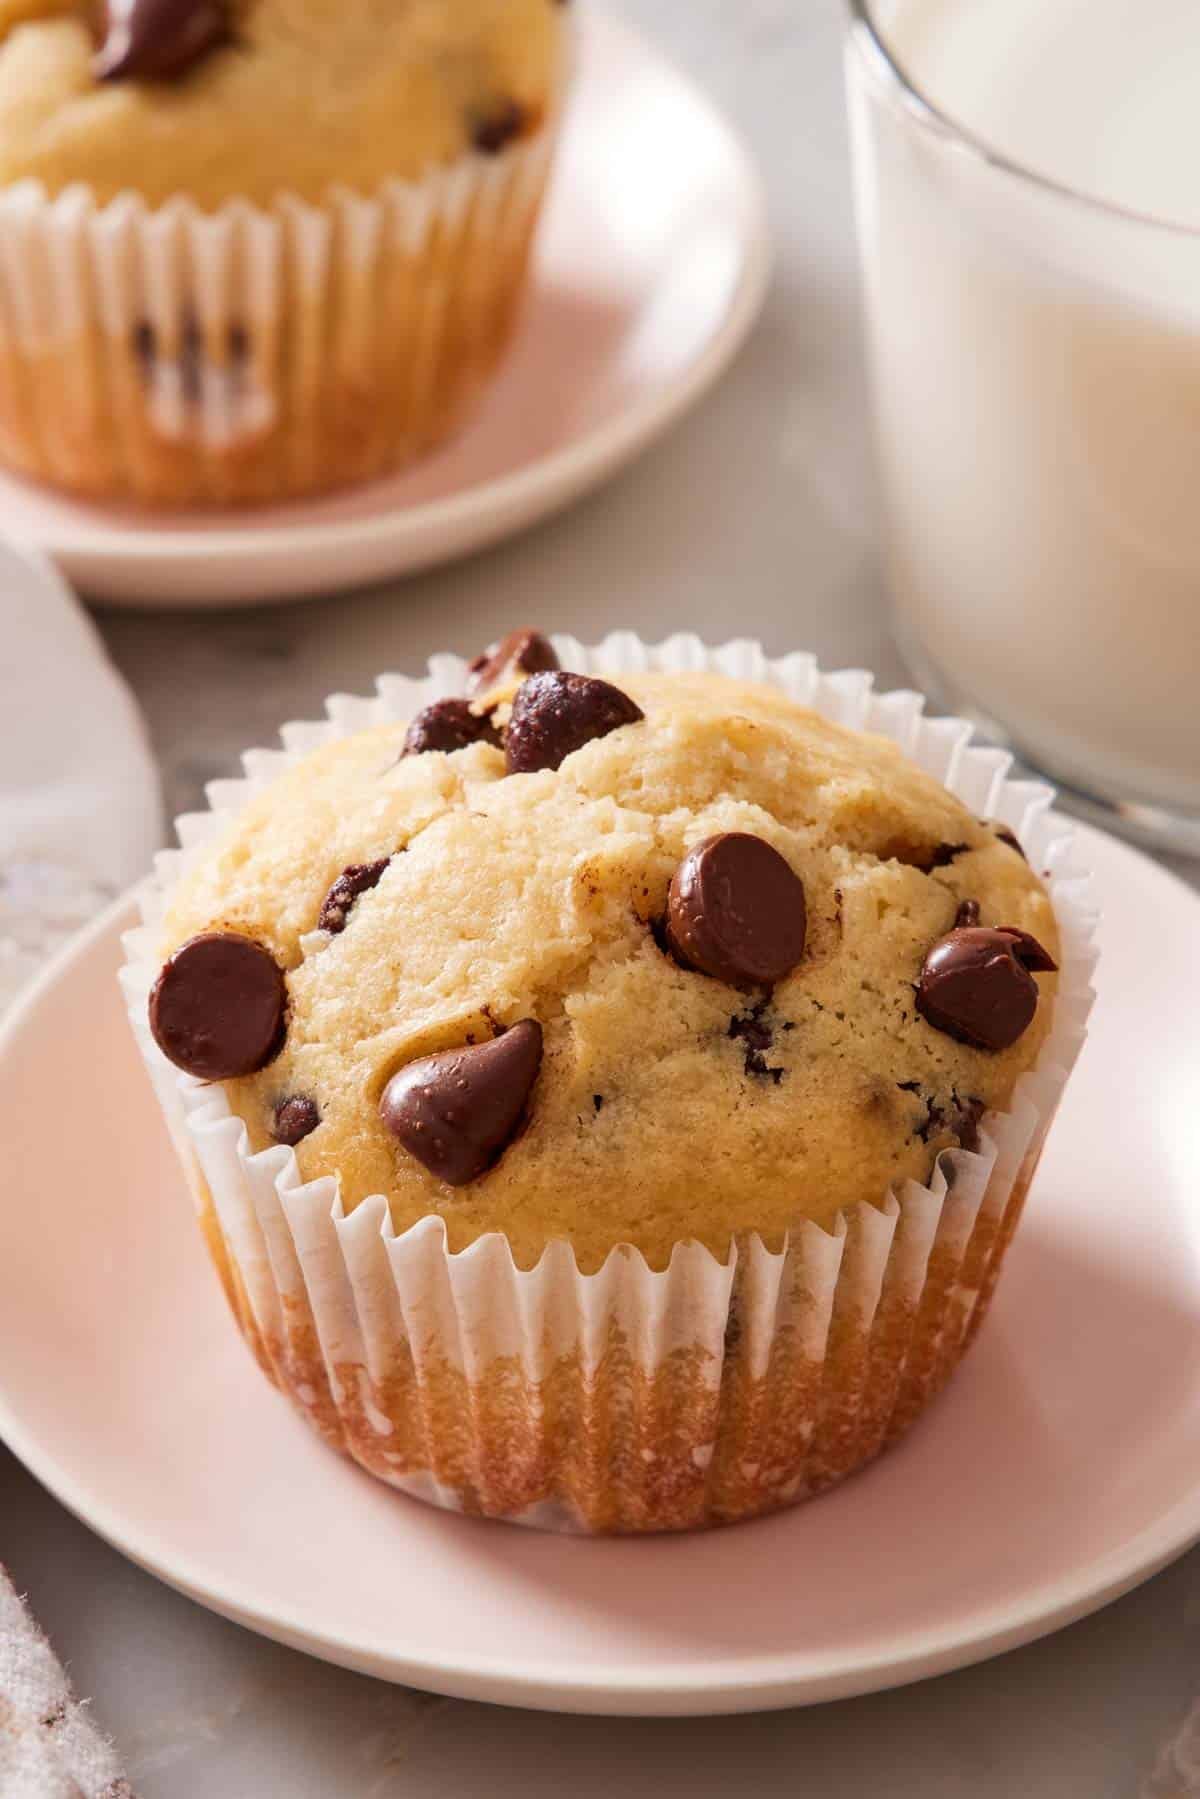
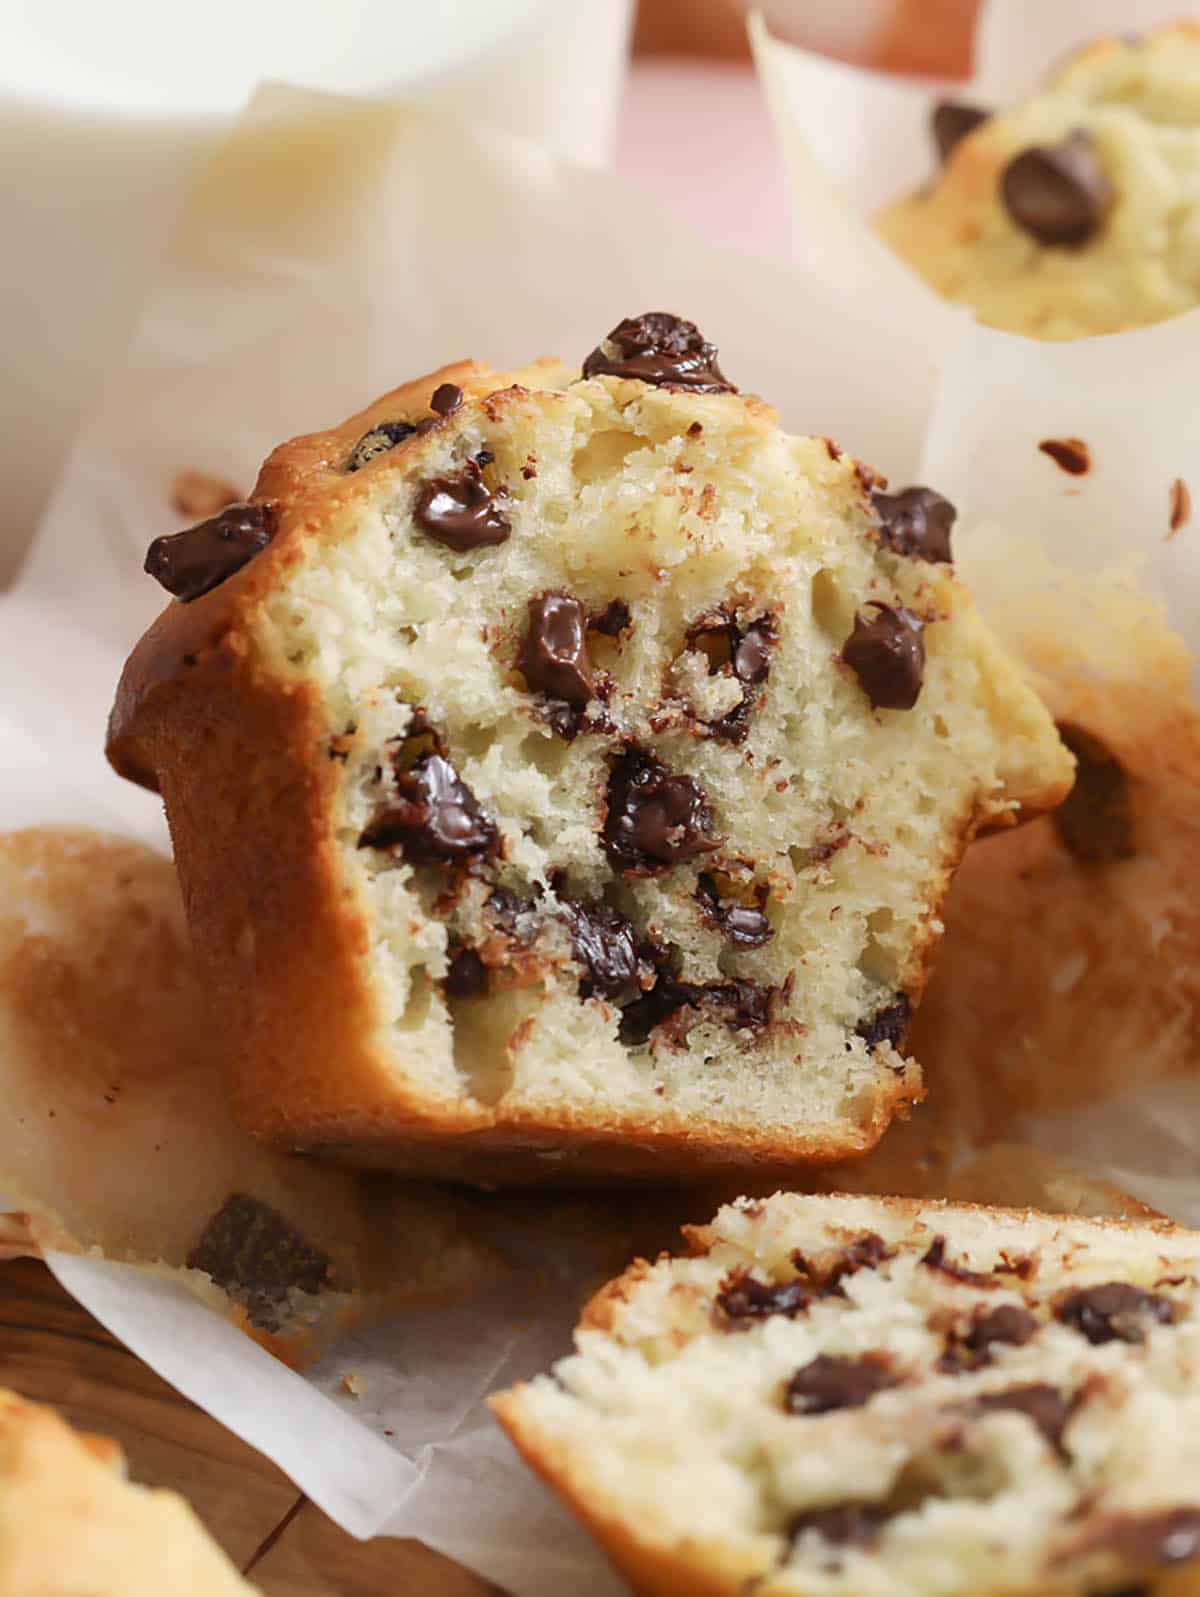
Done means the tops are a deep golden brown (not pale, not light amber), they’ve domed up well above the rim of the tin, and a toothpick inserted into the center of a muffin comes out clean. You may have a streak of melted chocolate, but there shouldn’t be any wet batter, maybe a melted chocolate streak. If the toothpick comes back with raw batter, give them another 2 minutes and test again.
Pro-Tips For The Best Muffins
Weigh your flour. Measuring by scooping directly into the flour is the #1 cause of dense muffins. It can result in an extra 30-40g per cup of flour by overpacking the scoop. Use a scale if you have one, or fluff the flour with a spoon, sprinkle it into the measuring cup, and then level it off.
Fill the empty muffin wells with water. Since you have two pans (24 wells) and are baking 18 muffins, 6 of the wells will be empty on one pan. When a muffin pan isn’t full, it conducts more heat, and the muffins will brown faster. The water helps absorb some of the heat, as muffin batter would, so it disperses more gently and evenly to the batter-filled wells. You only need 2-3 tablespoons per well, filling them about halfway.
Reserve a small handful of chocolate chips to press onto the tops of the scooped batter before baking, if you’d like. Visible chocolate on top is a bakery look detail that I love!
Chocolate Chip Muffins Recipe

Ingredients
- 2¾ cups all-purpose flour (330g)
- 1 tablespoon baking powder
- 1 teaspoon kosher salt
- 1¼ cups whole milk room temperature (300ml)
- 1 cup granulated sugar (200g)
- ½ cup unsalted butter melted and cooled (113g)
- 2 large eggs room temperature
- ¼ cup sour cream room temperature (60g)
- 1 tablespoon vanilla extract
- 1½ cups semisweet chocolate chips (270g)
Instructions
- Preheat to 425°F. Line two 12-cup muffin pans with 18 paper liners. (You can use regular or tulip liners.) Fill the empty wells in one pan with 2 tablespoons of water. (This helps the muffins bake more evenly when the pan isn’t full.)
- Sift the flour, baking powder and salt into a large bowl, then whisk together and set aside.
- In another bowl, add the milk, sugar, melted butter, eggs, sour cream, and vanilla. Whisk until well combined.
- Add the wet mixture to the dry and fold together with a spatula just until a few streaks of flour remain. Add the chocolate chips and fold them in until they are well dispersed through the batter and the flour is fully mixed in. (If you want, reserve a handful of the chocolate chips to add on top.)
- Using an ice cream scooper, divide the batter among the paper liners (about ⅓ cup each). Regular liners will be full to the top of the liner. Tulip liners will be about half full. Sprinkle the batter with extra chocolate chips if you saved any.
- Bake one pan at a time for 5 minutes at 425°F.
- Lower the oven temperature to 350°F and bake for 20 minutes or until the tops are golden and a tooth pick inserted into the comes out clean. Let the muffins cool for a few minutes in the pan, then remove them and finish cooling on a wire rack.
Notes
- Choose your paper liner. I love the bakery look of tulip liners, but you will likely need to special order them. This recipe works great with regular paper liners, too! The yield and bake time are the same for both.
- You can make 12 large muffins using the tulip liners. Divide the batter evenly between the tulip liners in one 12-cup pan, and bake for 20-23 minutes once you drop the temperature to 350°F.
- Don’t open the oven door when you drop the temperature. Just change the temperature setting and leave the muffins inside undisturbed. Opening it will dramatically drop the temperature and can cause the muffins to sink.
- Since this recipe uses baking powder only, it’s okay for one pan of batter to sit while the other pan bakes. Baking powder reacts in the heat of the oven (as opposed to baking soda, which reacts when mixed into the batter), so it won’t lose leavening power while it waits.
Nutrition
Have you tried this recipe? Tag me today!
Mention @preppykitchen and tag #preppykitchen!
Storage and Freezing
Cooled muffins keep at room temperature in an airtight container for 2 days. After that, they start drying out—still fine, but losing the just-baked moist crumb. To extend that: store with a slice of plain white bread or a few large marshmallows in the container, which releases moisture that the muffins absorb.
Refrigerated, they keep for 4 days, but should be microwaved for 10-15 seconds before eating. Refrigeration firms up the butter and dulls the texture, and a brief reheat brings them back.
Frozen, they keep for 3 months. Cool completely, wrap each muffin individually in plastic wrap, and store in a freezer-safe zip bag. This is the same method I use for freezing cupcakes. Thaw at room temperature for an hour or microwave an unwrapped muffin for 20-30 seconds. The texture comes back perfectly! Frozen muffins are honestly almost indistinguishable from fresh ones once they’re warmed.
Variations Worth Trying
A few new directions you can take this base recipe to mix things up:
- Mini muffins. Use a 24-cup mini muffin tin instead of a standard 12-cup. Fill to the top (about 1 tablespoon). Bake at 425°F for 5 minutes, then 350°F for 5-8 minutes (instead of 20). Yields about 36-40 mini muffins from one batch. Read more tips about baking in various muffin pan sizes by reading my Academy lesson on Different Cupcake Pans.
- Jumbo muffins. Use a 6-cup jumbo muffin tin instead of the standard 12-cup. Fill to the top. Bake at 425°F for 7 minutes, then 350°F for 25-30 minutes. Yields 6 enormous bakery-style chocolate chip muffins. They need slightly longer at 425 degrees since each well has more batter than a standard muffin pan.
- Coarse sugar topping. Sprinkle the scooped muffins with turbinado or sparkling sugar before baking. This adds a crackle-top finish and a slight crunch.
- Drizzle of ganache. Once cooled, drizzle a thin chocolate ganache (1:1 cream and chocolate, melted) over the tops. This decadent addition pushed them firmly into dessert territory.
- Banana chocolate chip variation. I already have a separate recipe for this (see banana chocolate chip muffins), which is built differently—banana adds moisture and replaces some of the sugar’s structural work.
Frequently Asked Questions
You can, but you’ll lose the bakery-style dome. The 5-minute blast at 425°F sets the surface of the muffin fast and forces the still-fluid middle to rise up against that set shell instead of spreading out. Once the dome is established, dropping to 350°F lets the inside bake through without burning the top. If you don’t want to drop the temp, I actually recommend you bake them at 375°F. The 25°F bump gives you a more golden top and a slightly better dome than baking at 350°F. They won’t be as impressively domed as the 425°F start, but if you don’t care about that, 375°F-only is a good simplification.
There are three main causes: (1) too much flour from measuring incorrectly—weigh it next time at 120g per cup; (2) old baking powder—fresh baking powder is critical because it’s the only leavener in this recipe. If your container has been open more than 6 months, replace it; (3) over-mixed batter—stop folding the moment the flour and chocolate chips are distributed. Dense muffins are almost always a result of one of these three things, or often a combination of them.
Two days at room temperature in an airtight container; four days refrigerated (microwave for 10-15 seconds before eating to soften); three months frozen. To freeze, cool completely, wrap individually in plastic wrap, and store in a freezer-safe bag. Thaw at room temperature for an hour or microwave a wrapped muffin for 20-30 seconds—the texture comes back almost like just-baked.
More Muffin Recipes To Try
These are 5 more of my highest-rated muffin recipes:
- Banana Muffins — the batter stirs together fast and goes from bowl to baked in under 30 minutes!
- Double Chocolate Muffins — intensely chocolate from cocoa powder and chocolate chips
- Blueberry Muffins — easy to make anytime of year with fresh or frozen blueberries
- Zucchini Muffins — so fluffy and moist from shredded zucchini
- Pumpkin Muffins — these muffins stay moist for days thanks to being packed with pumpkin puree
If you’ve tried this chocolate muffin recipe, then don’t forget to rate it and let me know how you got on in the comments below. I love hearing from you!





