This is the best chocolate covered strawberries recipe for a sweet treat that shows your loved ones how much you care. It takes just three simple ingredients to make a rich and decadent dessert of juicy strawberries with a crisp chocolate coating. Quickly melt good quality chocolate chocolate, dip fresh strawberries, and let them set — that’s it!
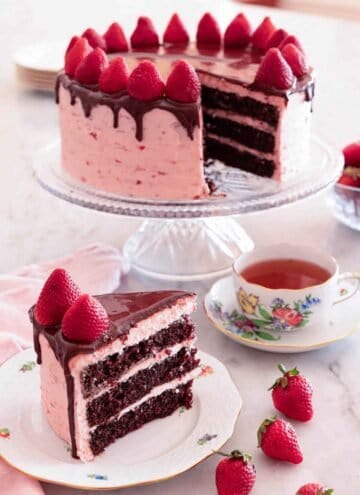
This easy chocolate covered strawberries recipe is also incredibly versatile! I outline the steps to coat the strawberries in dark chocolate and then decorate them with white chocolate stripes (or vice versa!). You can get creative with how you decorate the strawberries and what chocolate you use, and you can even add fun toppings! If you’re looking for more strawberry dessert recipes, try my strawberry tart recipe, strawberry cupcakes, or chocolate strawberry cake.
Ingredients
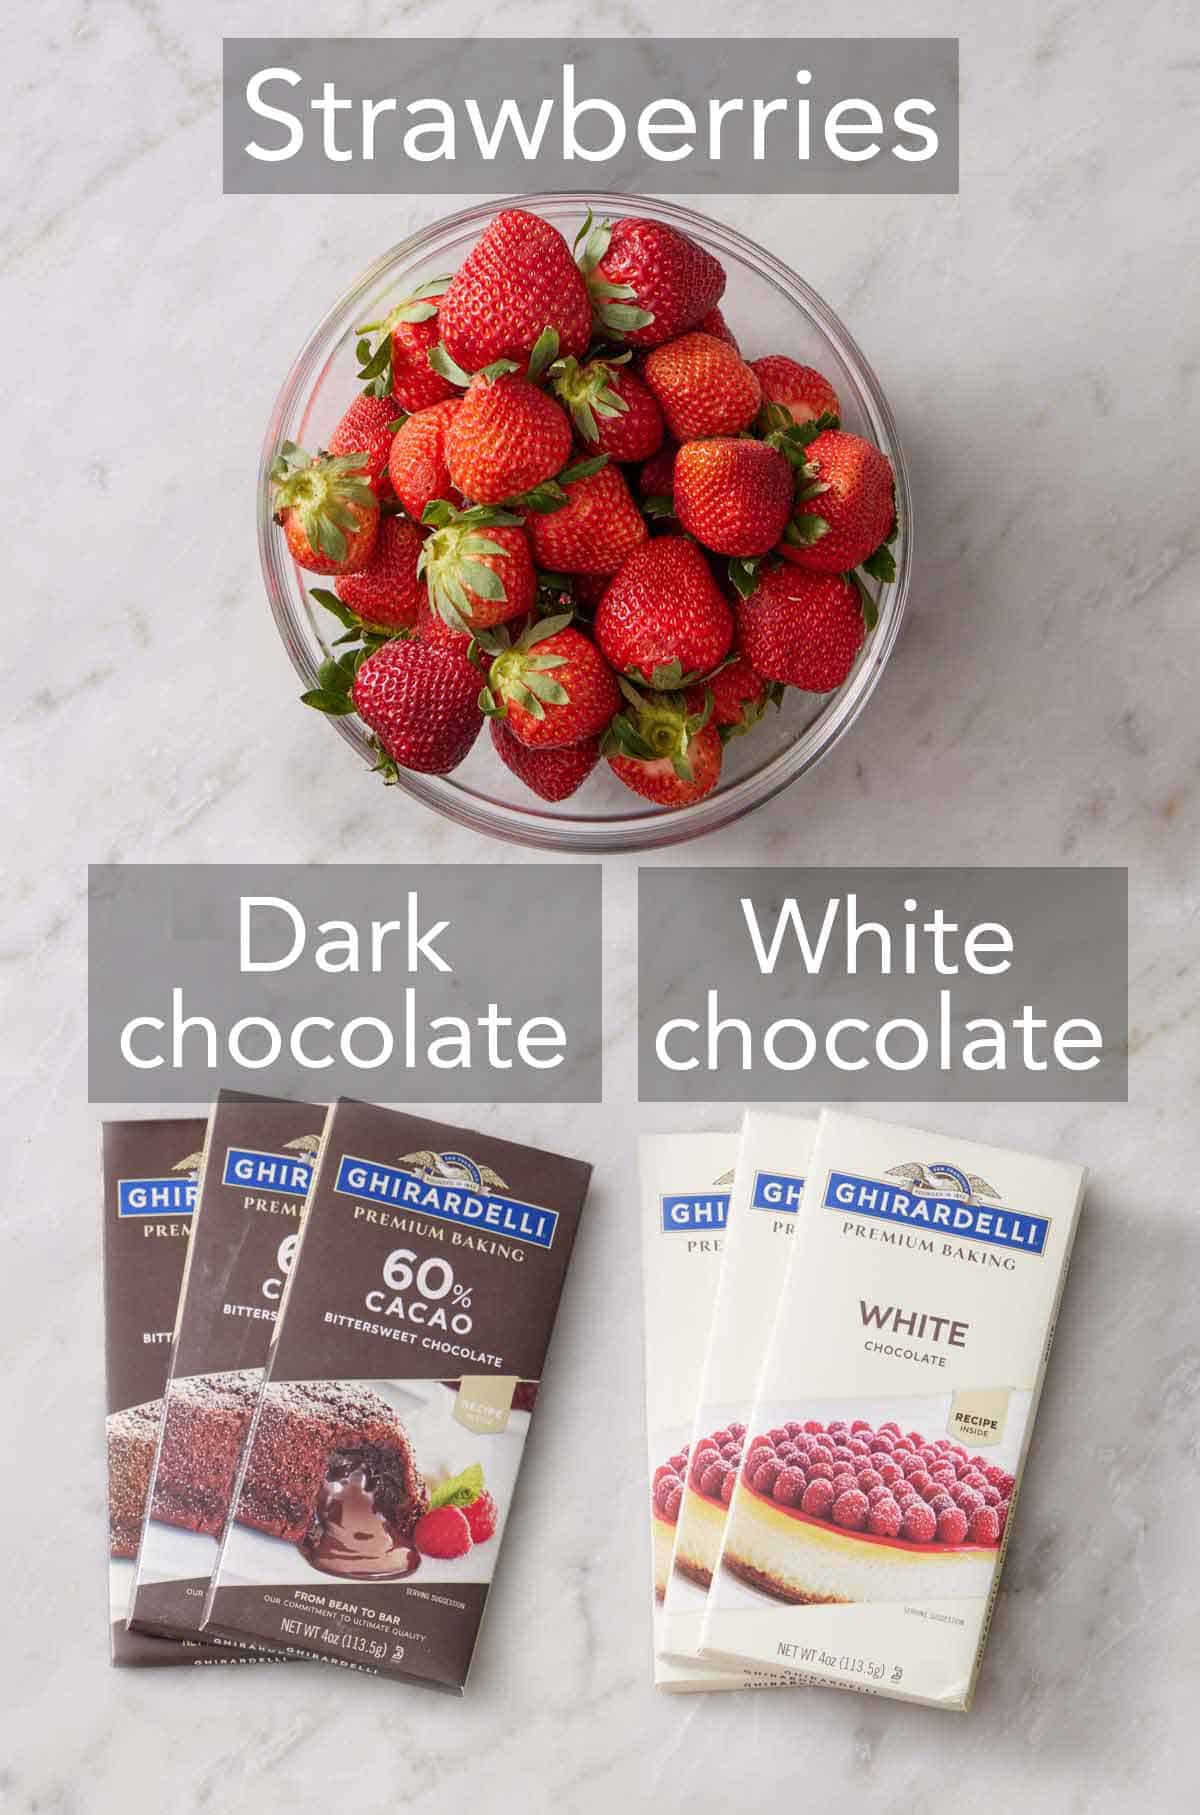
Strawberries — use bruise-free fresh strawberries with the stem and leaves still attached.
Dark chocolate — this is my preferred dipping chocolate, but you can also use bittersweet chocolate, milk chocolate, or semi-sweet chocolate, depending on the type of chocolate you prefer.
White chocolate — a white chocolate bar or white candy melts are perfect for melting and drizzling onto the dark chocolate for contrast and decoration.
The Best Chocolate To Use For Dipping
Use high-quality baking chocolate bars. Bars melt smoothly and set nicely for a crisp outer shell. Since this recipe only has 3 ingredients, the flavor of the chocolate will come through very strongly, so the quality really matters. I prefer dark chocolate, but any variety you like the taste of works great.
If you use chocolate chips, melt 2 teaspoons of solid coconut oil or vegetable shortening with the chocolate chips for a more dippable, silky smooth consistency and shine and to help the chocolate firm up when it cools.
How Do I Know What Chocolate Is Considered High Quality?
The best way to select chocolate is to look at the ingredients. High-quality chocolate is typically made from only cocoa beans, cocoa butter, sugar, and sometimes milk or extracts for flavoring (like vanilla or orange). A higher cocoa percentage is also a good sign of quality. The delicious chocolate bars you use should have a smooth and shiny appearance and snap when broken.
Low-quality chocolate will often include the same ingredients mentioned above with the addition of fillers or stabilizers (which make melting difficult) and may use vegetable oils instead of cocoa butter. These bars may be dull in appearance or softer and bend slightly or not have a firm snap when broken.
How To Make Chocolate Covered Strawberries
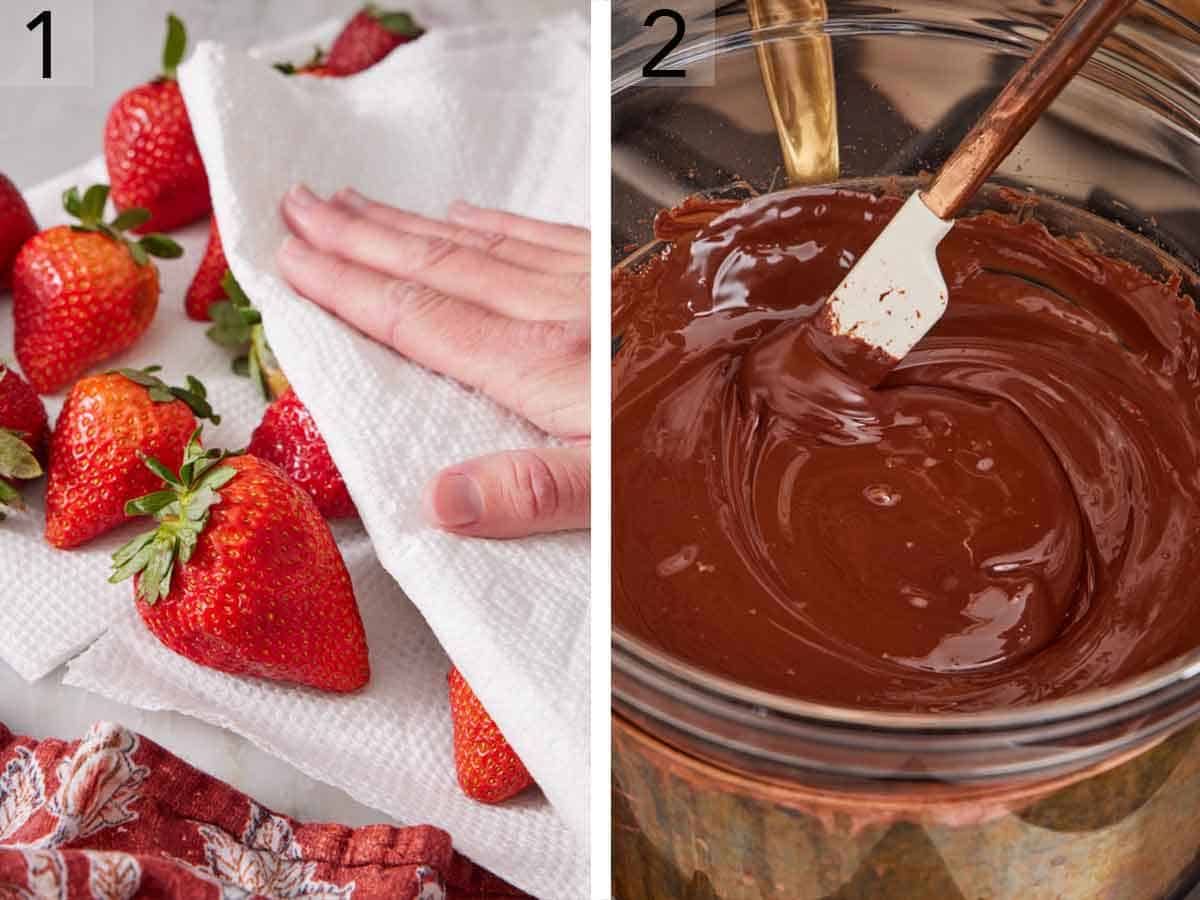
1. Wash and carefully pat the strawberries dry. Try to remove as much moisture as possible so the chocolate sticks to the strawberries.
2. Melt the two types of chocolate separately in a double boiler. You can also use a microwave to melt the chocolate (see instructions in the section just below).
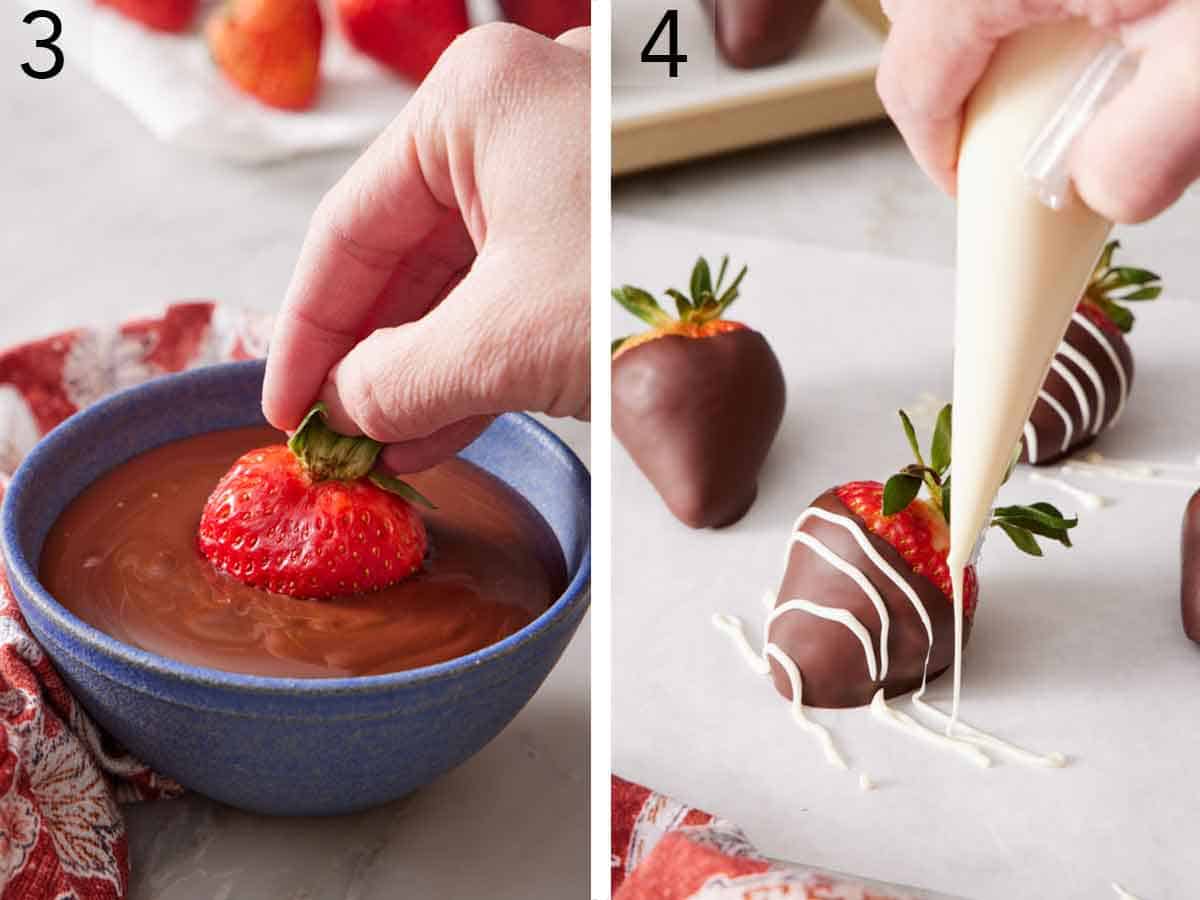
3. Dip each strawberry in chocolate by holding the berry by the stem. Lift the strawberry out of the chocolate and let any excess chocolate drip off for a few seconds. Then, place each strawberry on parchment paper or wax paper to set.
4. Add the other type of melted chocolate you chose to a piping bag, snip off the tip, and pipe over the dipped part of the strawberry to create pretty stripes. Set the chocolate-covered strawberries aside to let the chocolate harden.
The Best Way To Melt Chocolate
The best way to melt chocolate is by using a double boiler. This method melts the chocolate gently, which reduces the risk of the chocolate splitting.
If you don’t have an actual double boiler, you can easily create your own! Fill a medium saucepan a fourth of the way with water and bring the water to a gentle boil. Reduce to a simmer on the lowest heat and set a heatproof bowl on top of the saucepan. (Make sure the bowl sits snugly on the rim of the saucepan so there is no space around the edges, and the bottom of the bowl doesn’t touch the water.) Add the chocolate to the bowl and continuously stir until it is melted. Remove the bowl from the heat and dip in the strawberries!
You can also use a microwave at half-power. Place the chocolate in a microwave-safe bowl and microwave in 30-second increments, stirring each time, until the chocolate has melted.
Do I Need To Temper The Chocolate For Dipping?
If you use good baking chocolate bars, then you do not need to dip the berries in tempered chocolate. Tempering the chocolate can prevent it from looking dull after it sets, but that should not happen with a good-quality chocolate bar.
If you use chocolate chips, it still isn’t really necessary to temper the chocolate. But if you want to err on the side of caution, it’s easy to do by reserving a small handful of chocolate chips. Fully melt the rest of the chocolate, then add the reserved chocolate chips and stir until melted.

Topping Ideas
You can add a personal twist to homemade chocolate strawberries by adding additional toppings! After you dip the strawberries in melted chocolate, sprinkle with or dip them in toppings of your choice before the chocolate sets. Here are some ideas:
- Shredded coconut or toasted coconut
- Chopped nuts like pistachios, almonds, candied walnuts, or candied pecans
- Colorful sprinkles
- Mini chocolate chips
- Crushed cookie crumbs
How To Store
Chocolate-dipped strawberries are best the day you make them, but they will last up to 48 hours. Store leftovers in the refrigerator in an airtight container with a paper towel at the bottom to absorb excess moisture. Place the strawberries in a single layer so there is space between each one.
Pro Tips For Making This Recipe
- Keep the stem and leaves intact. Leaving them on gives you a better grip to dip the strawberries into the chocolate and also makes a pretty presentation. Removing the tops of the strawberries can also cause the strawberries to lose tasty juices and shorten their freshness.
- Clean and dry strawberries well. Chocolate and water don’t mix well! Make sure the strawberries are as dry as possible after you wash them before starting the chocolate-dipping process so the chocolate sticks.
- Use the right vessel for dipping. I like to pour the melted chocolate into an 8-ounce cup for dipping the strawberries. You can also use a small bowl, but make sure it has sufficient depth. You want to be able to easily dunk the strawberries straight into the chocolate so they are submerged just up to the stem for a neat, even coating.
- Use a toothpick to help with dipping. If the strawberry leaves are small or brittle, insert a toothpick in the top of the strawberry to use as a handle for dipping.
- Strategically place strawberries on the baking sheet. Leave a little room between each strawberry so they don’t stick together as the chocolate sets, and any toppings you use to decorate the strawberries stay on the intended berries.
- Refrigerate the chocolate-covered strawberries to help set the chocolate. Depending on the temperature of your kitchen, it may take the chocolate a while to set at room temperature. To speed up the process, place the baking sheet of chocolate covered strawberries in the refrigerator for 10 to 15 minutes.
- Make the perfect gift box! Package up chocolate dipped strawberries by placing each one on a pretty paper cupcake liner and setting them in a tin or box. They go perfectly with cake pops and chocolate truffles if you want to make a treat assortment!

Frequently Asked Questions
The melted chocolate will bind best to room temperature strawberries rather than cold strawberries. Cold berries will develop a layer of condensation between the chocolate shell and the berry. This, in turn, will cause the chocolate to either fall off or not set properly.
Wash and dry the strawberries, and leave them on your counter for about an hour before you start melting the chocolate.
For the best results, enjoy chocolate covered strawberries the day you make them. But they will keep for up to 48 hours in the refrigerator.
If you can, avoid freezing them. But you can freeze them in a freezer-safe container for a month or two if desired. Eat when they’re partially defrosted, not fully thawed out. If you let them thaw completely, the strawberries will be mushy.
If you’ve tried this chocolate covered strawberries recipe, then don’t forget to rate it and let me know how you got on in the comments below. I love hearing from you!

Chocolate Covered Strawberries Recipe
Video
Equipment
- Glass bowl or double boiler
- Parchment paper
Ingredients
- 2 pounds strawberries fresh, stem attached (900g)
- 12 ounces dark chocolate (or bittersweet, semi-sweet, milk chocolate) (340g)
- 10 ounces white chocolate or white candy melts (284g)
Instructions
- Wash and carefully pat dry your strawberries.
- Melt your batches of chocolate in a double boiler by placing each chocolate in a heat-proof bowl and setting it over a small pot with an inch or two of simmering water. You can also use a microwave to melt the chocolate. Heat it at 50% power in 30-second intervals, stirring in between, until fully melted.
- Dip each strawberry in chocolate. Place each strawberry on parchment paper to set. If you want to add any toppings, sprinkle them while the chocolate is still wet.
- For added decoration, add a contrasting color of chocolate to a piping bag, snip off the tip, and pipe over the dipped part of the strawberry to create stripes.
- Set aside to let the chocolate harden, or place them in the refrigerator for 15 minutes to firm up quickly.
Notes
- Keep the stem and leaves intact. Leaving them on gives you a better grip to dip the strawberries into the chocolate and also makes a pretty presentation. Removing the tops of the strawberries can also cause the strawberries to lose tasty juices and shorten their freshness.
- Clean and dry strawberries well. Chocolate and water don’t mix well! Make sure the strawberries are as dry as possible after you wash them before starting the chocolate-dipping process so the chocolate sticks.
- Use the right vessel for dipping. I like to pour the melted chocolate into an 8-ounce cup for dipping the strawberries. You can also use a small bowl, but make sure it has sufficient depth. You want to be able to easily dunk the strawberries straight into the chocolate so they are submerged just up to the stem for a neat, even coating.
- Use a toothpick to help with dipping. If the strawberry leaves are small or brittle, insert a toothpick in the top of the strawberry to use as a handle for dipping.
- Strategically place strawberries on the baking sheet. Leave a little room between each strawberry so they don’t stick together as the chocolate sets, and any toppings you use to decorate the strawberries stay on the intended berries.
- Refrigerate the chocolate-covered strawberries to help set the chocolate. Depending on the temperature of your kitchen, it may take the chocolate a while to set at room temperature. To speed up the process, place the baking sheet of chocolate covered strawberries in the refrigerator for 10 to 15 minutes.
- Make the perfect gift box! Package up chocolate dipped strawberries by placing each one on a pretty paper cupcake liner and setting them in a tin or box. They go perfectly with cake pops and chocolate truffles if you want to make a treat assortment!







Love your tutorials. I always forward on to my college aged daughter who also enjoys. John, you’re so fun to watch! I look forward to all your new videos?
How do you keep your strawberries from seeping? The strawberry juice started seeping out. Was my chocolate to warm?
They should not be cut. If your whole berry seeped then the chocolate may have been too hot.
One more time, you are shinning like a start. Thank you for your amazing tutorials.
You are TOOOOO kind!!