This post may contain affiliate links. Please read our disclosure policy.


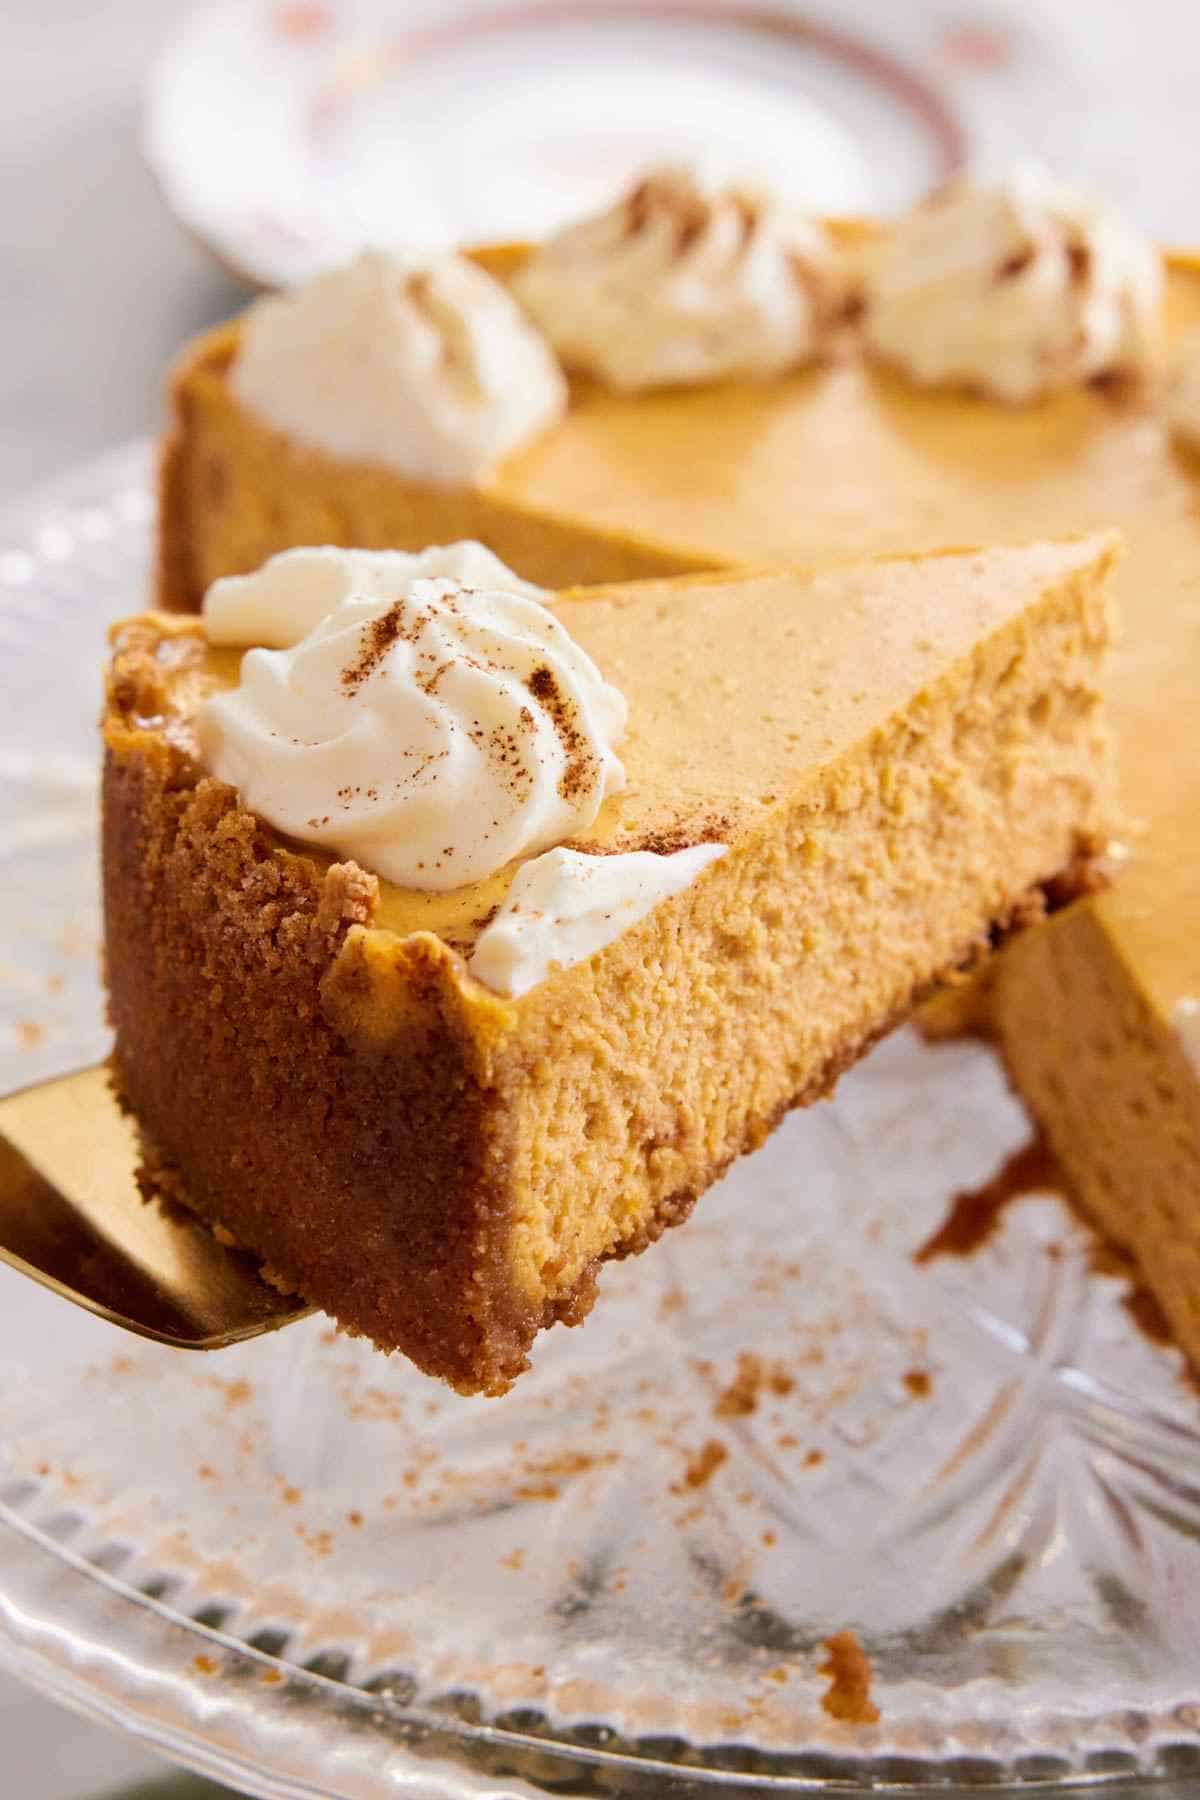
Creamy and gently spiced, this pumpkin cheesecake has plenty of real pumpkin flavor inside a crisp graham cracker crust. You can make it ahead for Thanksgiving or any fall gathering!

I’ve tested countless ways to bake cheesecake, and when I developed this pumpkin version, I found that a water bath was key to preventing cracks. I’ll explain why it matters and how to keep water out of the pan so the crust stays crisp. The trick is using foil that’s wide enough to cover the pan in one sheet!
“This is, by far, the most incredible cheesecake of all time. Instructions were foolproof and exactly what I needed to make a PERFECT pumpkin cheesecake for my family’s Thanksgiving. Will be saving this recipe to re-make repeatedly.”
Jillian
Key Ingredients & Substitutions

These are the main ingredients you need to make this easy pumpkin cheesecake recipe. You can find the full list of ingredients and measurements in the recipe card below.
Cream cheese — use blocks of full-fat cream cheese, not the kind that comes in tubs. The tub cream cheese has a different texture and formulation (it has more moisture), so it can affect how the cheesecake bakes and sets. Set the blocks out at least two hours before you start so they soften properly. If the cream cheese is still cold or firm, it will break into tiny lumps that won’t smoothly incorporate into the filling.
Pumpkin puree — use 100% pure pumpkin, not pumpkin pie filling, which has added sugar and spices that will affect the taste of the cheesecake. I recommend sticking with canned pumpkin for this recipe. Not only is it much easier, but fresh puree can vary in moisture content, which can cause the cheesecake filling to crack or not set properly. If you would like to use homemade pumpkin puree, blot it to remove excess moisture for the best results. You can follow the blotting steps in my pumpkin chocolate chip cookie recipe.
Crust — you’ll need Graham crackers, unsalted butter, granulated sugar, and ground cinnamon for the simple crust. You can use 1½ cups (180g) of boxed graham cracker crumbs in place of processing full sheets to save some time, but you may need another tablespoon or two of melted butter. You can also use gingersnap cookies or speculoos (Biscoff) cookies. You may need less or more butter, so start with 3 tablespoons of butter, stir, and squeeze a bit in your hand. If it falls apart, stir in another tablespoon and test again. For more tips on forming the best crust, check out my graham cracker crust recipe.
Sugar — you’ll need both granulated sugar and light brown sugar for the filling. Cheesecakes typically use granulated sugar only, but I decided to use part brown sugar to add a light caramel flavor to enhance the flavor of the pumpkin puree.
Eggs — ensure the large eggs are room temperature so they mix into the other ingredients easily.
Sour cream — adds a hint of tang and helps soften the overall texture of cream cheese filling for a delightfully velvety texture.
Vanilla extract — use a good-quality vanilla extract, not vanilla essence, which is artificially flavored.
Pumpkin pie spice — use your favorite blend, or you can make your own! I like to make my own pumpkin spice mix by mixing together ½ teaspoon ground cinnamon, plus ¼ teaspoon each of grated nutmeg, ground ginger, ground allspice, and ground cardamom. Or, you can mix up a big batch of my pumpkin pie spice to keep in your cabinet for fall baking season!
Why I Use A Water Bath For This Recipe
I know that a water bath can be intimidating, but it is the best way to ensure a flawless pumpkin cheesecake with no cracks. A water bath (or bain marie) is generally used for custardy recipes like flan or crème brûlée to promote a creamy texture by evening out and gently dispersing the heat. The added moisture also creates a humid environment, which helps prevent the surface from drying out so it’s less prone to cracking, which is why cheesecakes are often baked in them.
During recipe testing for this pumpkin cheesecake, I found that with the added pumpkin, the filling was a bit more susceptible to cracking than a plain cheesecake.
Pumpkin is often used as an egg replacer and can cause batters to puff up a bit more during baking. In my test without a water bath, the filling puffed too much, and then once it fell and settled back down as it cooled and cracked. The more even, gentle heating and the added humidity from the water bath helped counteract that effect.
How To Avoid A Soggy Cheesecake In A Water Bath
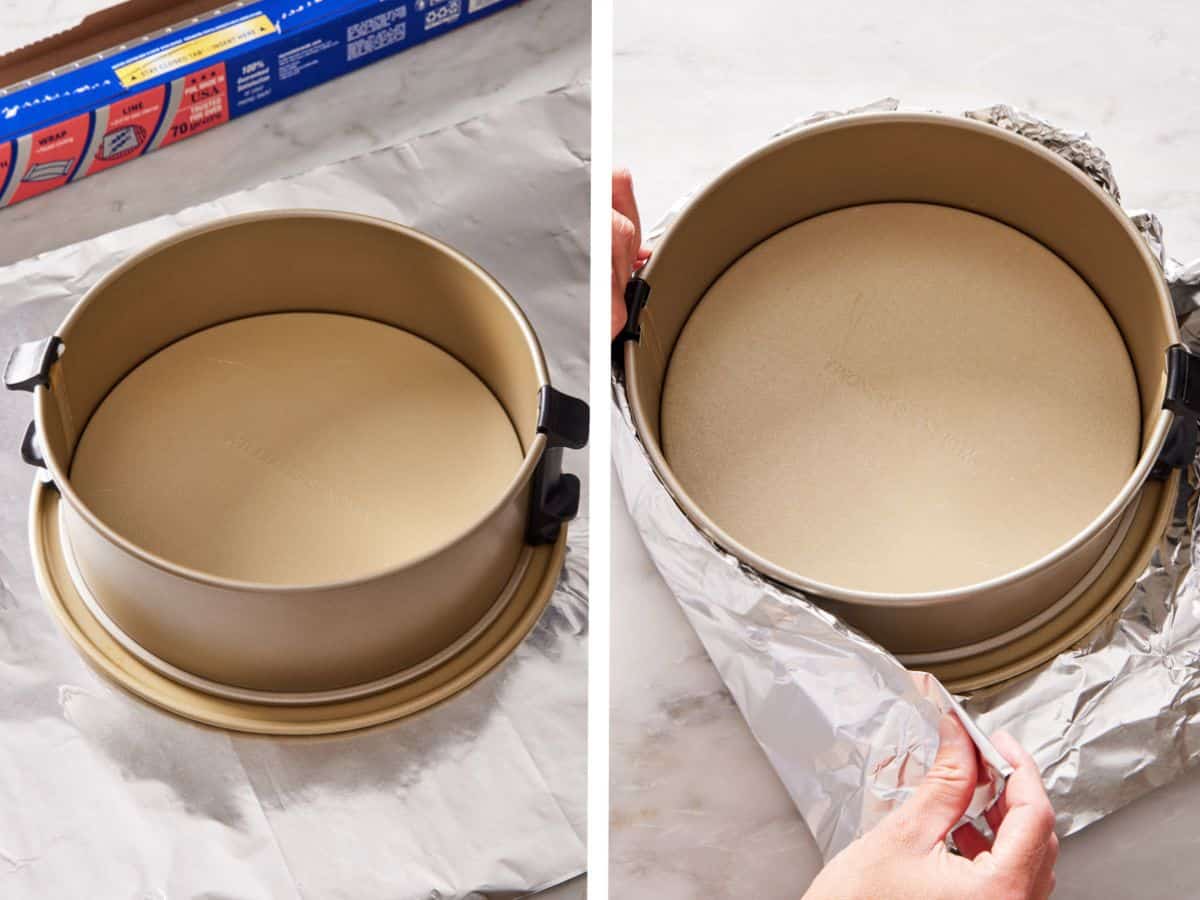
The main reason I try to avoid a water bath when possible is that the water can easily leak into the seams of a springform pan and cause the crust to be soggy. To prevent this, use heavy-duty extra-wide foil!
Standard-width foil forces you to join two sheets, and the seam sits below the waterline where it will leak. I have tested with standard foil, and no matter how well I think I seal it, there is always at least a small ring around the bottom edge of the crust that is soggy from water seeping in.
Extra-wide foil wraps the whole base and comes up the sides in one piece with no join at all. Press it tightly against the pan and avoid creating folds below the halfway mark, since the water only comes about an inch up the side. This way, you get a tight seal, and no water will leak into the creases or gaps.
Can I skip the water bath?
I don’t recommend it for this pumpkin cheesecake for the reasons just mentioned: it can crack more easily. I don’t use a water bath for several other cheesecake recipes, like my classic cheesecake, because the ratios of egg to cream cheese are different: 1 egg per block of cream cheese. This recipe contains 4 eggs and 3 blocks of cream cheese to balance the added pumpkin.
If you don’t want to submerge the pan in a water bath, you can use a steam pan with similar results. Put a shallow dish of boiling water on the rack below the cheesecake rather than placing the cheesecake in it. You get most of the humidity without any risk of a leak. I use this approach on my classic cheesecake for anyone whose oven runs hot, and it works here too.
What you give up is the even, gentle heat transfer of the pan sitting in water, and with this filling that matters more than it does with my plain cheesecake. You are more likely to get puffed edges in from the pumpkin, and risk a small crack. But if you do, whipped cream covers it, and nobody will know!
Pro Tips To Prevent Cracks
In addition to the aid of a water bath, how you mix the cheesecake and cool it can reduce the risk of cracking. These are my best tips to bake a pumpkin cheesecake without any cracks:
- Don’t over-whip the filling: The more air you incorporate into the cheesecake batter, the more it will puff in the oven, which will cause the filling to crack. Don’t beat the cream cheese above medium speed, and then once you add the eggs, beat on low speed to avoid whipping in more air.
- Gently tap the pan if you see large air bubbles: Once you pour the batter into the pan, if you see any air bubbles rising to the top, gently tap the pan on the counter or pop the bubbles with a toothpick. If they bake into the filling, it can cause large holes, which can make the filling sink or crack.
- Keep the oven door closed during baking: It can be tempting to peek, but opening the door can make the cheesecake crack from a fast temperature drop. Open it only near the end to check for doneness, when the filling is most likely set.
- Cool it slowly. Once baked, turn the oven off and don’t open the door. A drastic change in temperature can cause the filling to contract too quickly and crack. The cheesecake will cool in the oven for 1 hour and slowly drop in temperature during that time. This also finishes setting the center of the cheesecake without overbaking it.
Get all of my tested tips in my Baker’s Guide to Cheesecake!
How To Make Pumpkin Cheesecake
Portions of the recipe are highlighted in step-by-step process images below. You can find the full set of instructions in the recipe card.

1. To make the crust, pulse the Graham crackers into fine crumbs in a food processor. (If you are using boxed crumbs, place them in a bowl.) Add the sugar, cinnamon, and melted butter, and mix until combined. The mixture should feel like wet sand.
2. Wrap the bottom of a 9-inch springform pan with a layer of wide heavy-duty foil. Transfer the crust mixture to the prepared pan. Using the flat bottom of a measuring cup or glass, press the crumbs into a flat layer on the bottom and about 2 inches up the sides of the pan. Bake the crust at 350°F for 10 to 15 minutes, or until fragrant and a dark golden color around the edges. Set the crust out to cool while you work on the filling. Then, reduce the oven temperature to 300°F.

3. To a large bowl with a hand mixer or the bowl of a stand mixer, add the cream cheese and beat at medium speed until smooth, about 1 minute. Add the granulated sugar, brown sugar, and salt, and mix on medium until creamy, which will take about 1 more minute. Scrape down the bowl.
4. Add the eggs, one at a time, allowing each to incorporate before adding the next. Stop and scrape down the bowl as needed. (Do not beat above low speed or you will incorporate too much air and risk the cheesecake puffing up and cracking.)

5. To the cream cheese mixture, add the pumpkin puree, sour cream, pumpkin pie spice, and vanilla extract.
6. Sprinkle the flour on top and mix on low until just incorporated. Scrape down the bowl and mix one last time.

7. Pour the pumpkin cheesecake filling into the cooled crust. Place the springform pan into a large, deep roasting pan and place it in the oven. Carefully fill the pan with enough boiling water to come about 1 inch up the side of the springform pan. (Pour carefully so you don’t splash any water into the batter!)
8. Bake at 300°F for about 1 hour or until the edges are set, but the center wobbles slightly when gently shaken. Then, turn off the oven and cool it for 1 hour in the oven while the door is closed. Remove the cheesecake from the water bath, unwrap the foil, and allow it to cool to room temperature on a wire rack, about 1 hour more. Lay a kitchen towel or paper towels on the top edge of the pan (to absorb any condensation), cover tightly with foil, and chill overnight or for a minimum of 6 hours. Run a knife around the edge of the chilled cheesecake before releasing the spring and removing the sides of the pan. Pipe whipped cream around the edge or add other toppings before serving if you’d like.
How To Serve
I like a simple decoration of homemade whipped cream piped onto the cheesecake. It adds visual interest and an extra layer of decadence to this fall dessert without being too time-consuming. You could also drizzle some caramel sauce on top, sprinkle chopped toasted pecans, or simply enjoy it plain. Trust me, this cheesecake has plenty of flavor to stand on its own!
Want to go all out? Make the topping for my pecan pie cheesecake and spoon it on top before serving!
Pumpkin Cheesecake Recipe
Equipment
- 9″ Springform pan
- Mixing Bowls
- Electric hand or stand mixer
- Roasting pan
- Wide aluminum foil
Ingredients
Crust:
- 10 full sheets of graham crackers (170g)
- ¼ cup unsalted butter melted (56g)
- ¼ cup granulated sugar (50g)
- ½ teaspoon ground cinnamon
Filling:
- 3 (8-ounce/226g) blocks cream cheese room temperature
- ¾ cup granulated sugar (150g)
- ½ cup packed light brown sugar (110g)
- ½ teaspoon salt
- 4 large eggs room temperature
- 1 cup pumpkin purée (244g)
- ½ cup sour cream room temperature (120g)
- 2 teaspoons vanilla extract
- 1½ teaspoons pumpkin pie spice
- 2 tablespoons all-purpose flour
- Whipped cream for serving (optional)
Instructions
Make the Crust:
- Preheat the oven to 350°F. Wrap the bottom of a 9-inch springform pan in a layer of heavy-duty wide foil, and bring the foil up the sides of the pan to just under the top edge. Press firmly to create a tight fit.
- Add the graham crackers to a food processor and pulse until broken down into fine crumbs. Add the sugar and cinnamon and pulse until combined. While pulsing, pour in the melted butter, and mix until well combined and the mixture feels like wet sand.
- Transfer the mixture to your springform pan and press the crumbs into a flat layer on the bottom and about 2 inches up the sides of the pan using the bottom of a measuring cup or glass.
- Bake for 10 to 15 minutes, or until fragrant and turning a dark golden color on the edges. Set aside to cool while making the filling.
Make the Filling:
- Reduce the oven temperature to 300°F.
- In a large mixing bowl or the bowl of a stand mixer fitted with a whisk attachment, beat the cream cheese at medium speed until smooth, about 1 minute. Add the sugars and salt and mix on medium until creamy, about 1 minute. Scrape down the bowl..
- Add the eggs, one at a time, mixing between each addition and allowing each to incorporate before adding the next. Stop and scrape the bowl down as needed.
- Once the eggs are incorporated, add the pumpkin puree, sour cream, spices, and vanilla. Sprinkle the flour on top. Mix on low speed just until incorporated. Scrape down the bowl and mix one last time. Pour the batter into the baked crust.
Bake the Cheesecake:
- Place the pan into a large roasting pan and place it in the oven. Carefully fill the pan with enough boiling water to come about 1 inch up the side of the springform pan.
- Bake for about 1 hour or until edges are set but the center wobbles slightly when gently shaken. Turn the oven off and leave the door closed. Allow the cake to cool for 1 hour in the oven without opening the door. Remove the roasting pan from the oven. Remove the cheesecake from the water bath and cool to room temperature on a wire rack. Cover with a towel or paper towel, wrap with foil or plastic wrap, and chill overnight or for at least 6 hours.
- Run a knife around the edge of the chilled cake before releasing the spring and removing the sides of the pan. You can garnish the cake with dollops of whipped cream or enjoy plain.
Notes
- Storing the pumpkin cheesecake with a paper towel over the top of the pan prevents any condensation from dripping onto the cheesecake and marring its surface. The foil or plastic wrap helps the cheesecake not dry out and also prevents it from absorbing odors from your refrigerator.
Nutrition
Have you tried this recipe? Tag me today!
Mention @preppykitchen and tag #preppykitchen!
Storing, Freezing And Making It Ahead
This is a make-ahead dessert by design, since it has to chill six hours minimum anyway. Bake it up to two days before you serve it. Leave it in the pan, lay a paper towel across the rim so condensation cannot drip onto the surface, then cover.
Leftovers keep 5 days refrigerated. To freeze, wrap the whole cake or individual slices in plastic and then foil and freeze for 2-3 months. Thaw overnight in the fridge.
If you know you will have leftovers, add whipped cream to slices as you serve rather than piping the whole cake, since it weeps after a day.
More Recipes To Try
For more pumpkin baking, try one of these dessert recipes next:
- No-Bake Pumpkin Cheesecake: it’s set with whipped cream in the fridge with no oven needed at all.
- Pumpkin Pie: the traditional holiday pie with a smooth pumpkin custard baked in a buttery pastry crust.
- Mini Pumpkin Pies: excellent to make ahead of time, and can easily be made in a muffin pan for the perfect individual servings.
- Pecan Pie Cheesecake: the perfect blend of a classic pie and creamy plain cheesecake.
- Pumpkin Bars: soft and chewy bars topped with cream cheese frosting.
If you’ve tried this pumpkin cheesecake recipe, then don’t forget to rate it and let me know how you got on in the comments below. I love hearing from you!