
This post may contain affiliate links. Please read our disclosure policy.
Sometimes you don’t have to choose between chocolate and vanilla, you can have both! I took my favorite chocolate and vanilla cake recipes and combined them to make this stripy wonder.
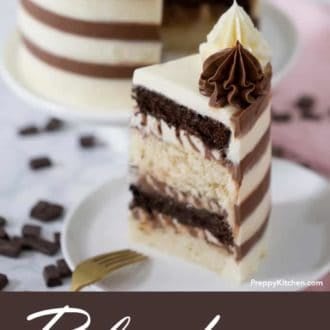
This classic cake is really the best of both worlds. Rich chocolate cake and buttercream paired with light and flavorful vanilla. Really delicious and so pretty!
About the Decoration
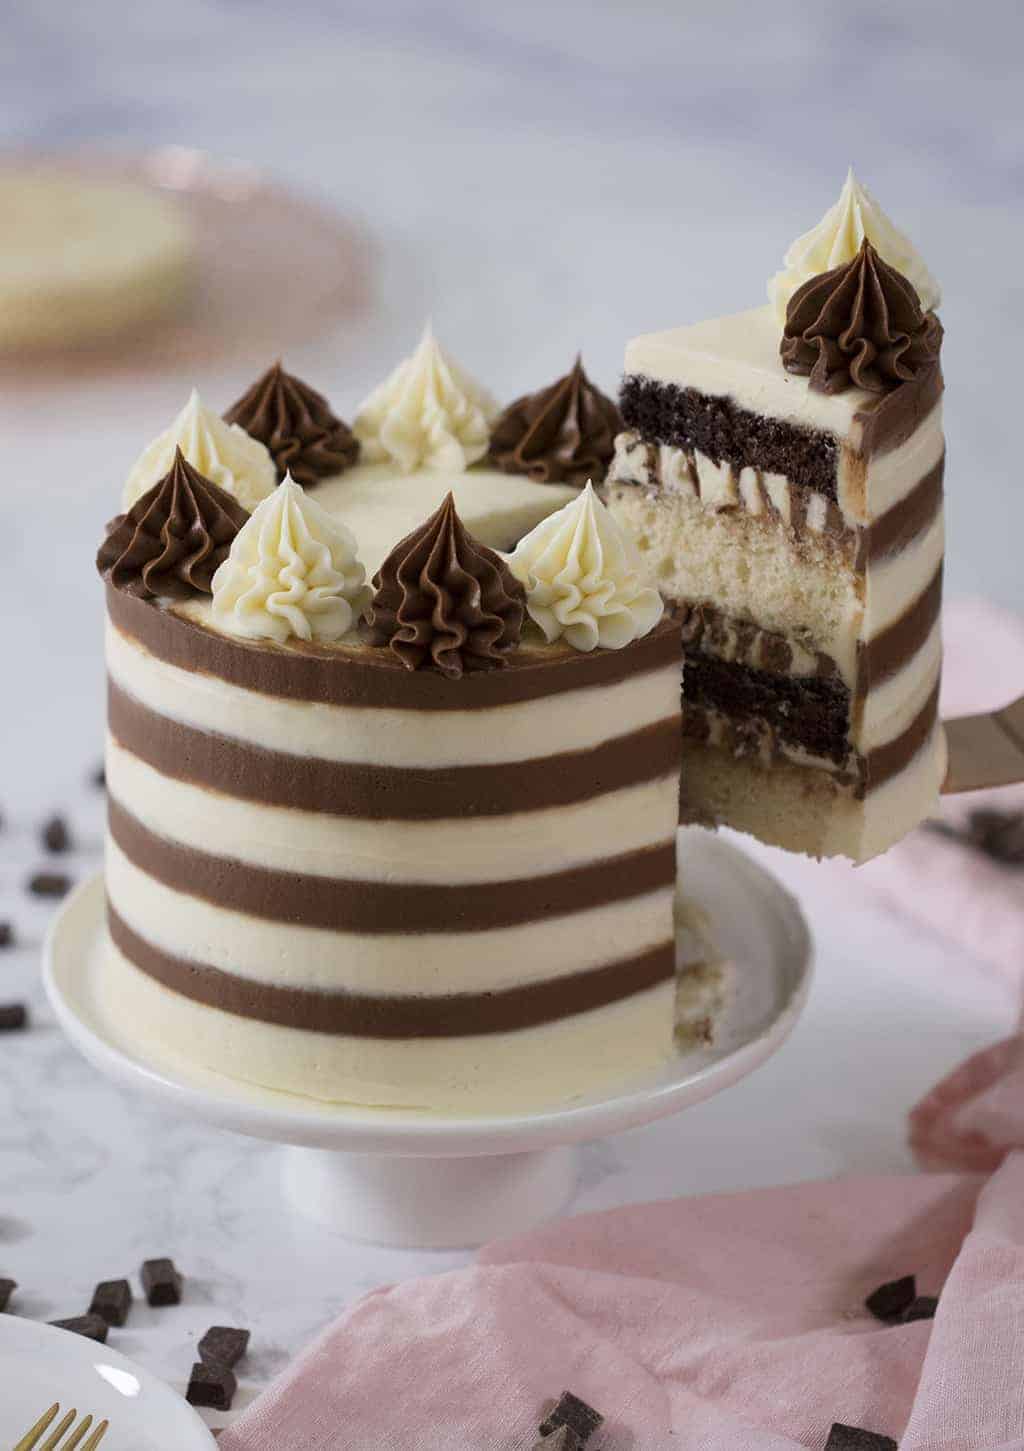
- For the decoration scheme I wanted to go as preppy as possible so two tone stripes with simple dollops of alternating flavors on top. I loved the look of this cake and always think it’s nice to give guests a bit of a choice when it comes to dessert!
- Pipe your alternating bands then fill in any gaps with a piping bag that you’ve snipped a smaller opening on. Use a bench scraper to smooth, and here’s the key bit; wipe the scraper off completely after each swipe and don’t go crazy trying to get a perfectly smooth finish. You’ll only end up blurring the lines and potentially removing too much buttercream!
- You can also use a large toothed cake comb if you have one to get the stripes.
Some Tips and Pointers
- If you’re not using 6-inch pans, double the recipe for 8-inch pans or triple the recipe for 9-inch pans.
- If you see little clumps of butter after you mix the wet ingredients don’t panic, it all works out by the time you mix in the dry ingredients. You can even use melted butter and warm the milk and sour cream up a bit if you like.
- You can substitute whole milk yogurt for the sour cream if desired, I do it all the time and can’t really tell the difference.
- To get FLAT layers that are moist inside and out try using cake strips! You can buy a set on the shop page or make your own from foil and paper towels at home. I made a whole blog post on it so check it out if you’re interested!
- To pipe the two-tone frosting you fill one bag (1/2 way full) with white frosting, one bag with blue frosting and then put both bags in a third piping bag. No need for a tip, just snip about an inch off each bag.
- If you want to go crazy, use my ultimate chocolate cake recipe! Fill 2 six-inch pans with the chocolate batter and use the rest to make some cupcakes! You can freeze for these for later! Use the vanilla recipe here to fill 2 six-inch pans, and also use the rest for cupcakes!
How to Make Black and White Cake
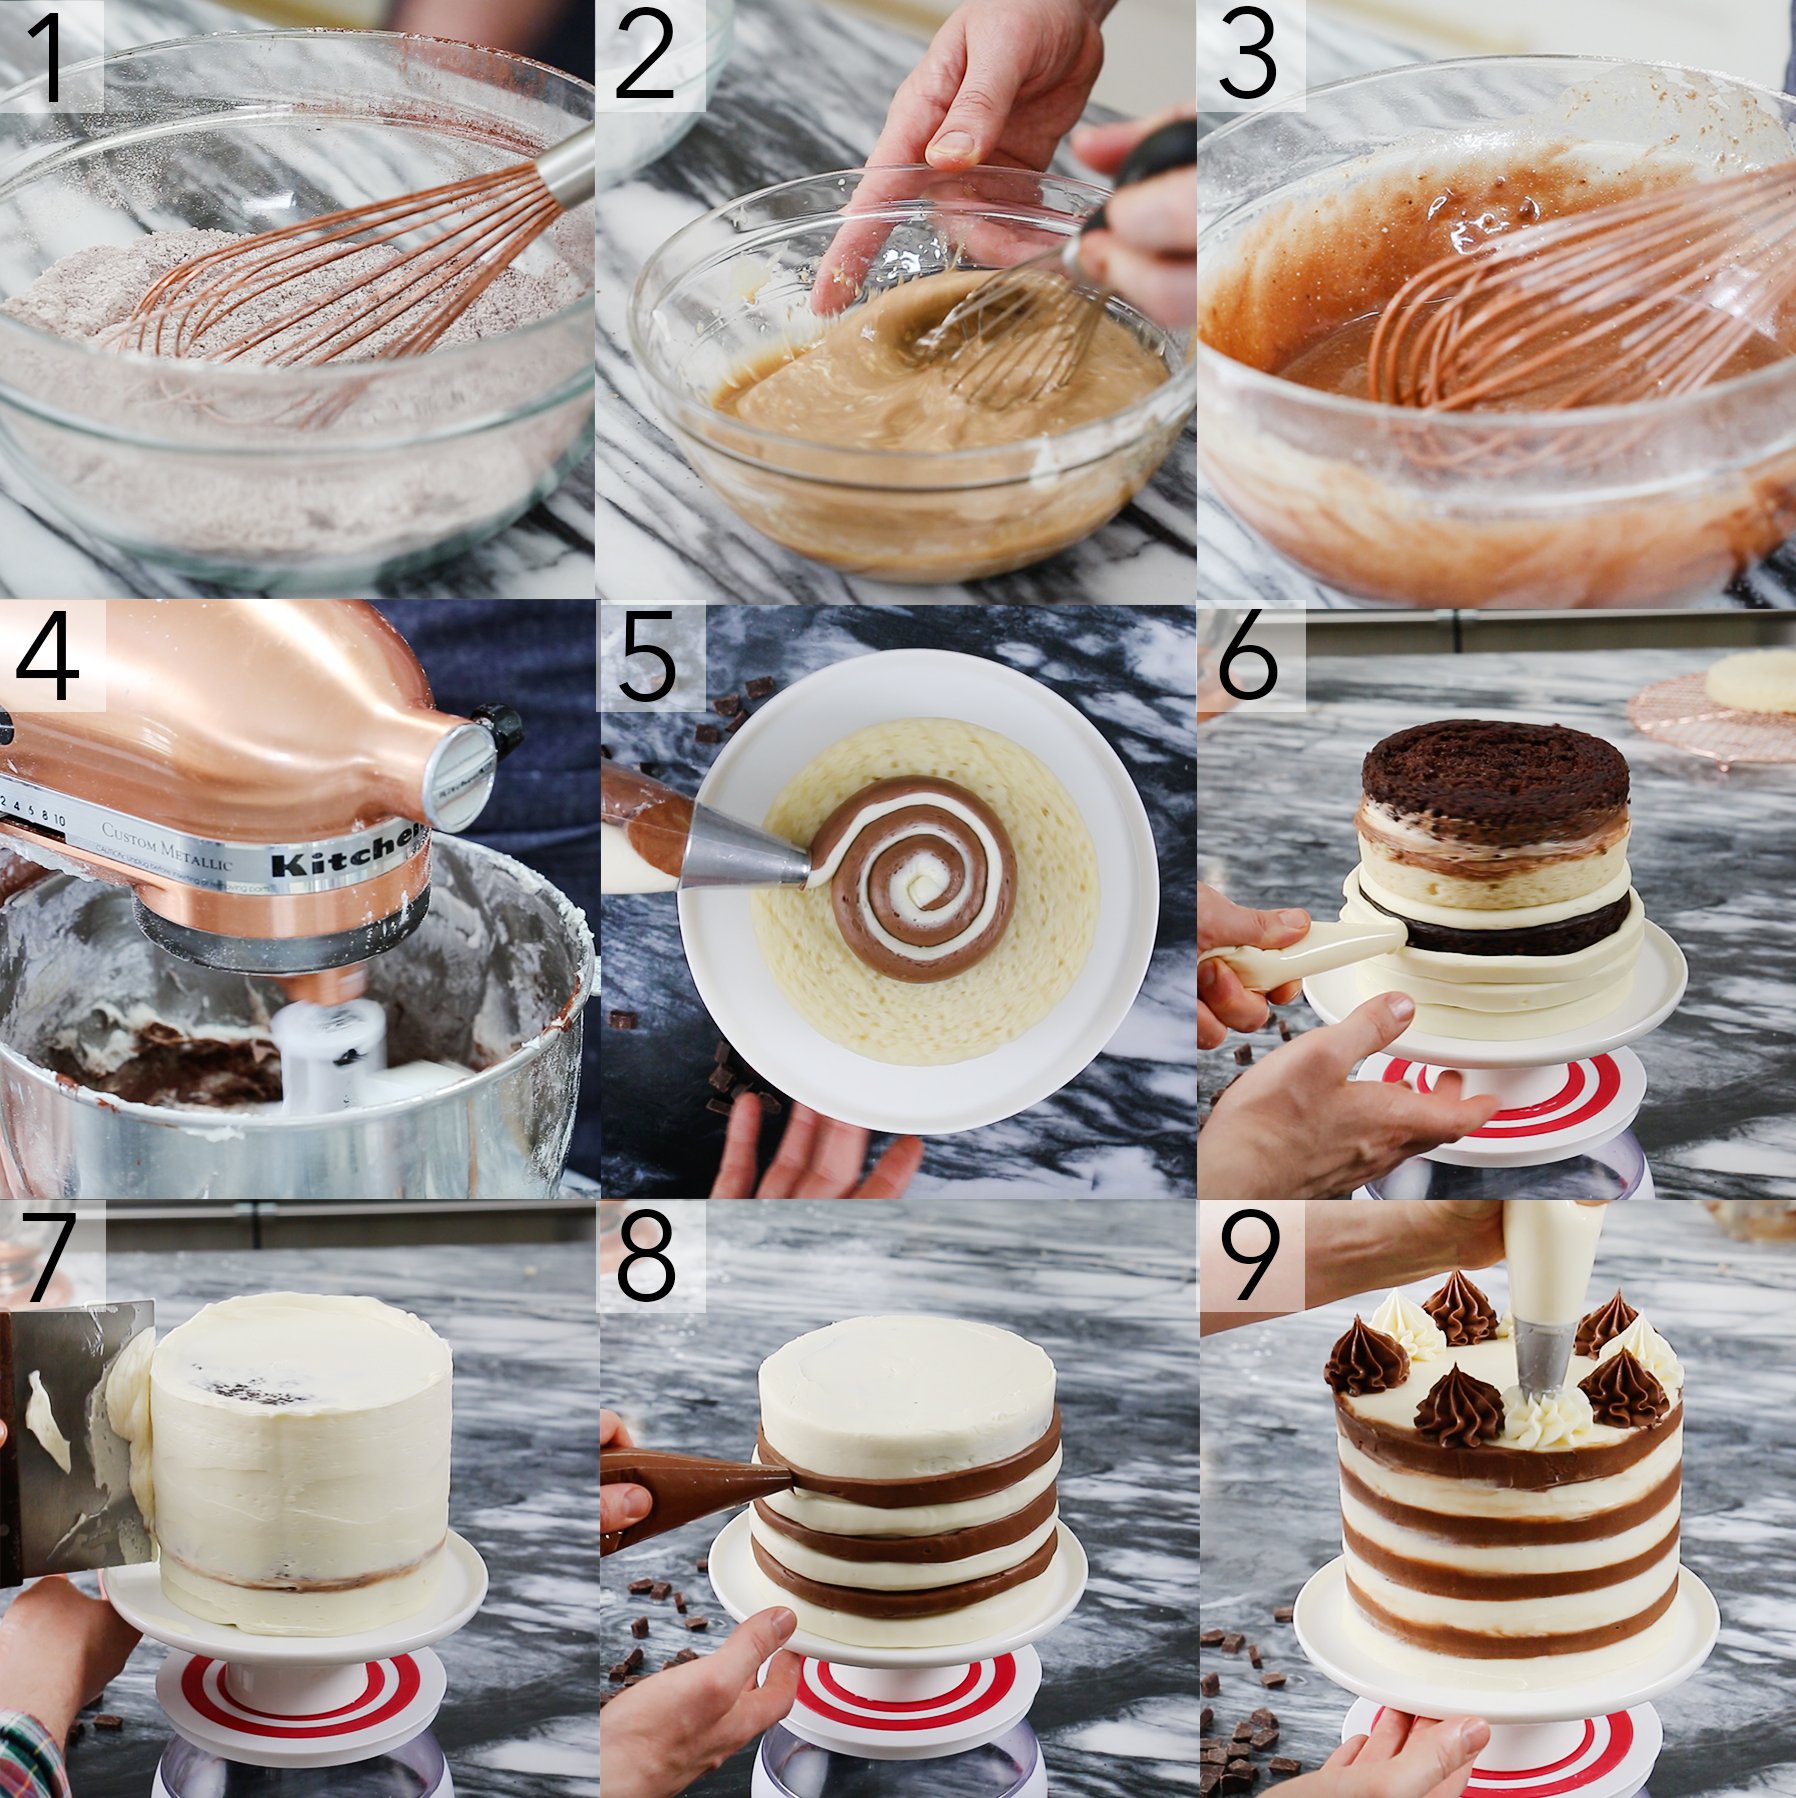
- Preheat to 350 degrees F. Butter and flour 4 six inch cake pans. I always use cake strips on my pans for an even bake but they’re optional. Sift the dry ingredients (not the cocoa powder), including the sugar, together in a large bowl.
- Mix the wet ingredients together in a medium bowl. There will be little butter lumps but don’t worry about it!
- Add the wet to the dry and mix until just combined. Divide the mixture into 2 bowls. 1/2 for the vanilla and 1/2 for the chocolate. Add the cocoa powder to smaller batch and mix. Transfer the two batters into four 6″ cake pans, which have been buttered and floured. Bake for about 30 minutes or until the centers are springy to the touch. Test centers with a toothpick.
- In a standing mixer, beat the butter on low for a few minutes using a paddle attachment. Beat in the confectioner’s sugar slowly. Add the vanilla and drizzle in the cream slowly until you have a desirable consistency. Transfer to 2 piping bags and snip off the tips. Melt semi sweet chocolate and add 1 tablespoon of cream. Set aside to cool. In a standing mixer, beat the butter on low for a few minutes using a paddle attachment. Beat in the confectioner’s sugar slowly. Add the melted chocolate and cocoa to the mixture. Mix and drizzle in the cream a tablespoon at a time until a desirable consistency is reached. Beat until you have an even, fluffy consistency. Transfer to 2 piping bags and snip off the tips. Add a cocoa and vanilla to a piping bag fitted with a large round tip or snip off the end.
- Start the first layer with vanilla cake. Pipe cocoa-vanilla combination bag between each layer.
- Alternate layering vanilla and chocolate cake rounds.
- Pipe with a vanilla piping bag and smooth out the outside of the cake with an uneven spatula.
- Alternate by piping vanilla and chocolate rings.
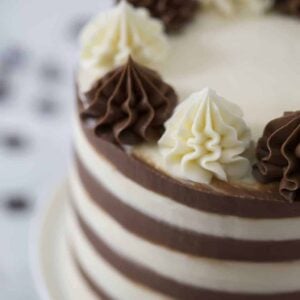
- Carefully smooth out. Transfer remaining vanilla and chocolate buttercreams to piping bags fitted with an 868 star tip. Alternate by piping chocolate and vanilla dollops.
If you’ve tried this cake then don’t forget to rate the recipe and let me know how you got on in the comments below, I love hearing from you!
Black and White Cake
A delicious chocolate and vanilla cake.
Ingredients
INGREDIENTS:
For the Cake:
- 1 2/3 cups all purpose flour
- 1 cup granulated sugar
- 1/4 teaspoon baking soda heaping
- 1 teaspoon baking powder heaping
- 3/4 cup butter unsalted, room temperature
- 3 tablespoons vanilla extract
- 3 egg whites room temperature
- 1/2 cup sour cream room temperature
- 1/2 cup milk room temperature
- 3 tablespoons cocoa powder
For the Vanilla Buttercream:
- 1 cup butter unsalted
- 5 cups confectioners sugar
- 2 tablespoons vanilla extract
- 1/4 cup heavy whipping cream You'll probably use less
For the Chocolate Buttercream
- 1 cup butter unsalted, room temperature
- 5 cups confectioners sugar
- 1/4 cup heavy whipping cream You'll probably use less
- 4 oz semi sweet chocolate melted
- ⅓ cup cocoa powder
Instructions
INSTRUCTIONS:
For the Cake:
- Preheat to 350 degrees F. Butter and flour 4 six inch cake pans. I always use cake strips on my pans for an even bake but they're optional.
- Sift the dry ingredients (not the cocoa powder), including the sugar, together in a large bowl.
- Mix the wet ingredients together in a medium bowl. There will be little butter lumps but don't worry about it!
- Add the wet to the dry and mix until just combined.
- Divide the mixture into 2 bowls. 1/2 for the vanilla and 1/2 for the chocolate.
- Add the cocoa powder to smaller batch and mix.
- Transfer the two batters into four 6″ cake pans, which have been buttered and floured.
- Bake for about 30 minutes or until the centers are springy to the touch. Test centers with a toothpick.
For the Vanilla Buttercream:
- In a standing mixer, beat the butter on low for a few minutes using a paddle attachment.
- Beat in the confectioner’s sugar slowly.
- Add the vanilla and drizzle in the cream slowly until you have a desirable consistency.
- Transfer to 2 piping bags and snip off the tips.
For the Chocolate Buttercream:
- Melt semi sweet chocolate and add 1 tablespoon of cream. Set aside to cool.
- In a standing mixer, beat the butter on low for a few minutes using a paddle attachment.
- Beat in the confectioner’s sugar slowly.
- Add the melted chocolate and cocoa to the mixture. Mix and drizzle in the cream a tablespoon at a time until a desirable consistency is reached.
- Beat until you have an even, fluffy consistency.
- Transfer to 2 piping bags and snip off the tips.
- Add a cocoa and vanilla to a piping bag fitted with a large round tip or snip off the end.
For the Assembly:
- Start with the first layer with vanilla cake.
- Pipe cocoa-vanilla combination bag between each layer.
- Alternate layering vanilla and chocolate cake rounds.
- Pipe with a vanilla piping bag and smooth out the outside of the cake with an uneven spatula.
- Alternate by piping vanilla and chocolate rings.
- Carefully smooth out.
- Transfer remaining vanilla and chocolate buttercreams to piping bags fitted with an 868 star tip.
- Alternate by piping chocolate and vanilla dollops.
Notes
- This design is buttercream heavy. So if you like your cakes with less frosting, skip the decoration scheme!
- f you’re not using 6-inch pans, double the recipe for 8-inch pans or triple the recipe for 9-inch pans.
- If you see little clumps of butter after you mix the wet ingredients don’t panic, it all works out by the time you mix in the dry ingredients. You can even use melted butter and warm the milk and sour cream up a bit if you like.
- You can substitute whole milk yogurt for the sour cream if desired, I do it all the time and can’t really tell the difference.
- To get FLAT layers that are moist inside and out try using cake strips! I made a whole blog post on it so check it out if you’re interested!
- To pipe the two-tone frosting you fill one bag (1/2 way full) with white frosting, one bag with blue frosting and then put both bags in a third piping bag. No need for a tip, just snip about an inch off each bag.
Nutrition
Serving: 1piece Calories: 240kcal Carbohydrates: 39g Protein: 3g Fat: 17g Saturated Fat: 5g Cholesterol: 40mg Sodium: 240mg Potassium: 120mg Fiber: 2g Sugar: 32g Vitamin A: 150IU Vitamin C: 0.8mg Calcium: 40mg Iron: 1.1mg
Have you tried this recipe? Tag me today!
Mention @preppykitchen and tag #preppykitchen!


