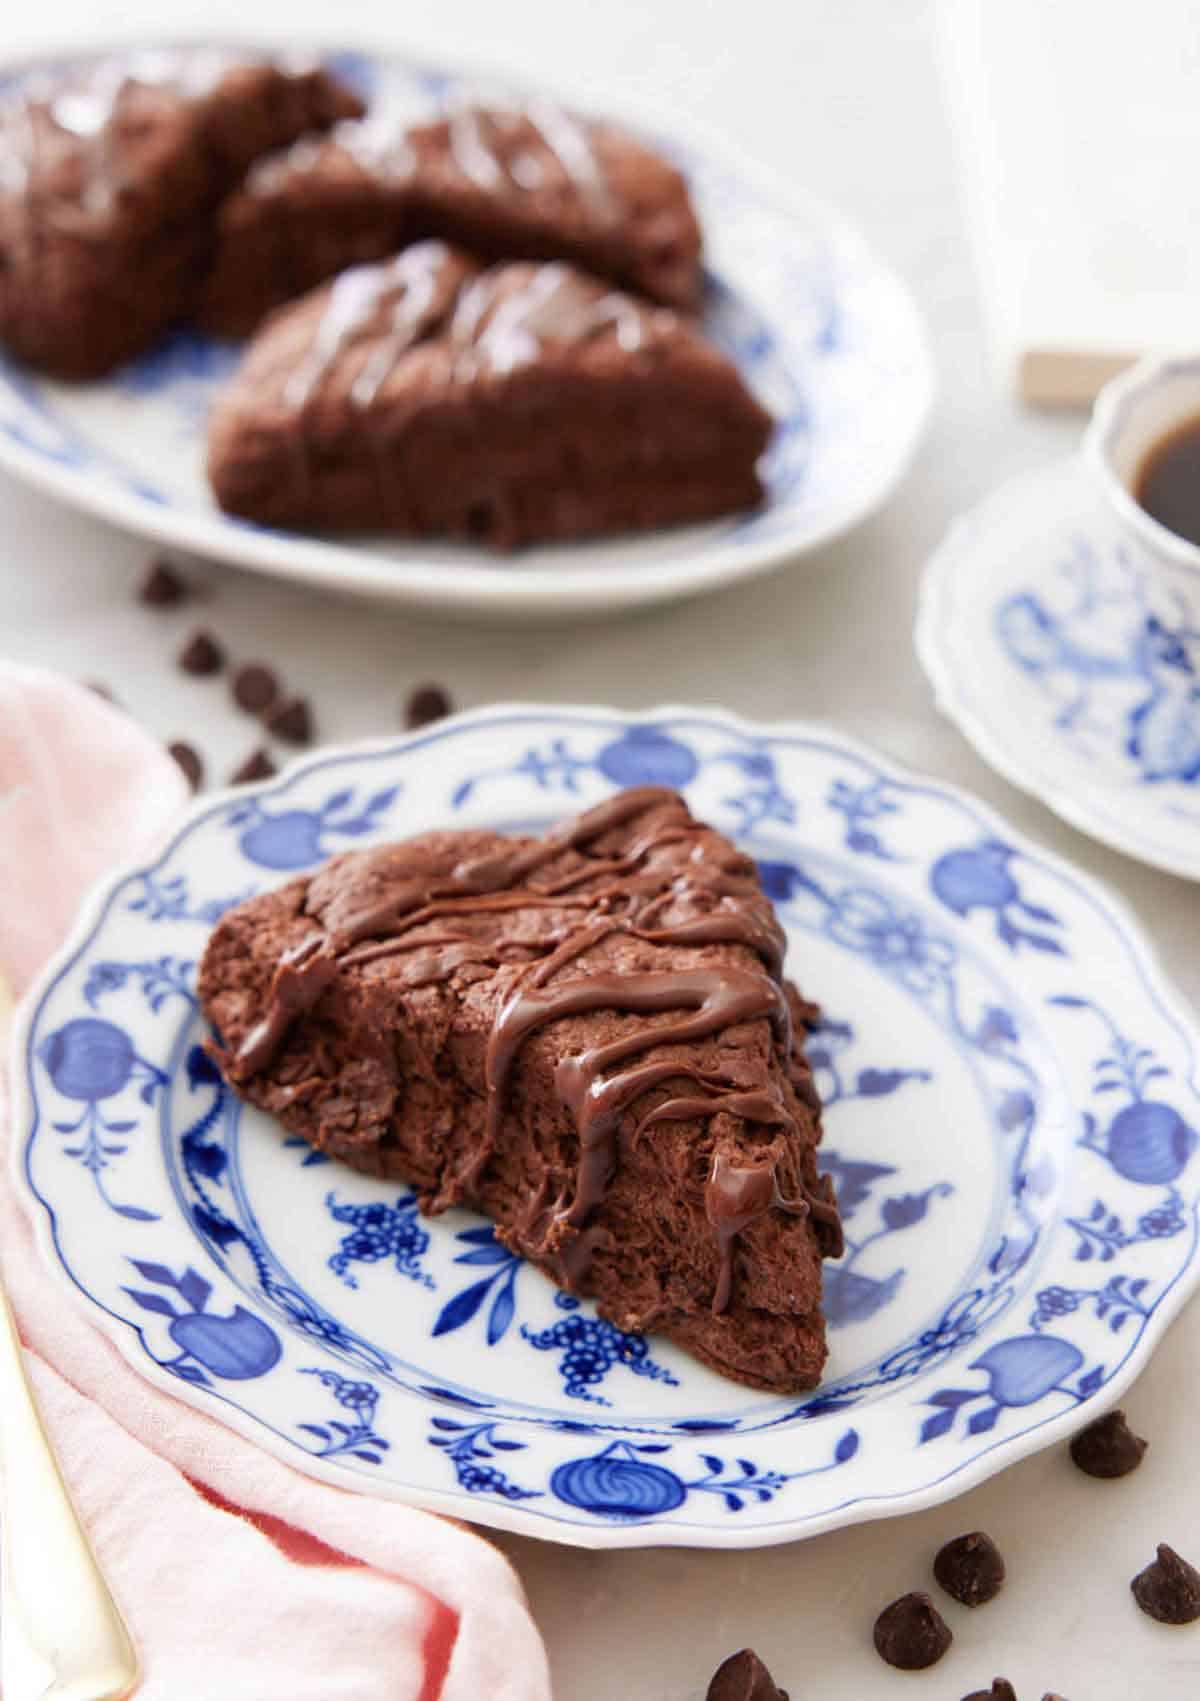
If you want to start off your day with some chocolate, then you need to make these chocolate scones. Not only are the scones chocolate flavored, but they’re also full of chocolate chips and finished with a chocolate glaze. They’re perfect for the chocolate lover in your life or for when you’re craving an indulgent treat.
These chocolate scones are one of my go-to breakfast and brunch recipes, as everyone loves them. They’re not only soft and moist but flaky and tender. They’re also extremely easy to make! The most difficult part of this recipe is laminating the dough before refrigerating it. Even then, it’s straightforward and easy to get the perfect flaky layers. If you want another scone recipe for brunch, then try my blueberry scone recipe, cranberry orange scone recipe, or chocolate chip scone recipe.
What You Need to Make This Recipe
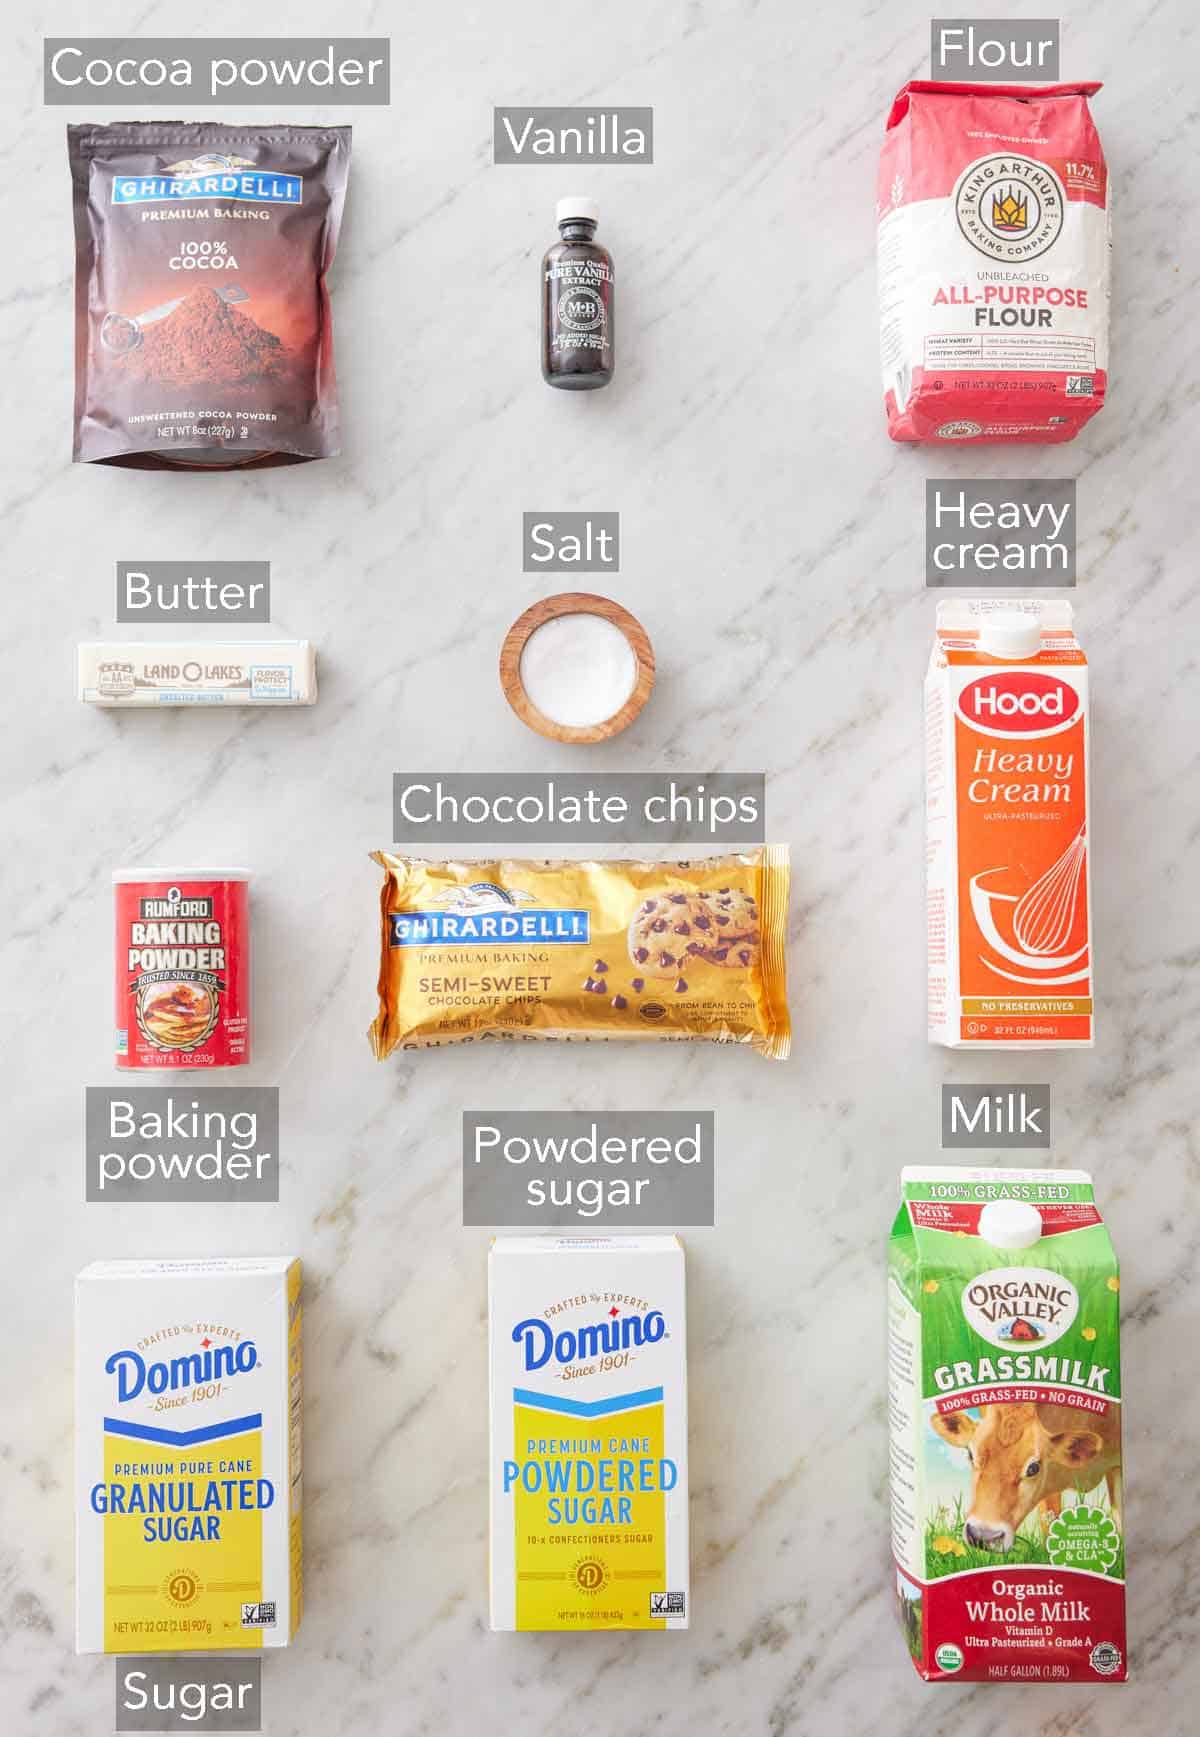
Flour — due to the amount of protein in different types of flour, I do not recommend changing the all-purpose flour to a different one.
Cocoa powder — make sure to use unsweetened cocoa powder. Personally, I like using Ghirardelli but use what you have.
Baking powder — make sure your baking powder is fresh and not expired! Baking powder is how you get your chocolate scones to rise and be fluffy.
Butter — make sure your butter is super cold, as you don’t want the butter to melt into the dough before you bake the scones. The reason you need cold butter and not room temperature is so it’ll melt when you bake them, creating pockets and leaving you with flaky layers.
Chocolate chips — use good quality chocolate chips when possible. I like using semi-sweet chocolate chips to make the chocolate scones taste even more chocolatey, but you can also use any chips in this recipe, such as dark chocolate chips, white, milk chocolate chips, or even peanut butter chips or caramel chips.
Heavy cream — instead of milk, this scone recipe uses heavy cream as it adds richness to the dough, so the scones stay tender and will not dry out as quickly.
Powdered sugar — you’ll need this to make the glaze for the scones. See my post on how to make you own powdered sugar if you don’t have any on hand.
How to Make Chocolate Scones
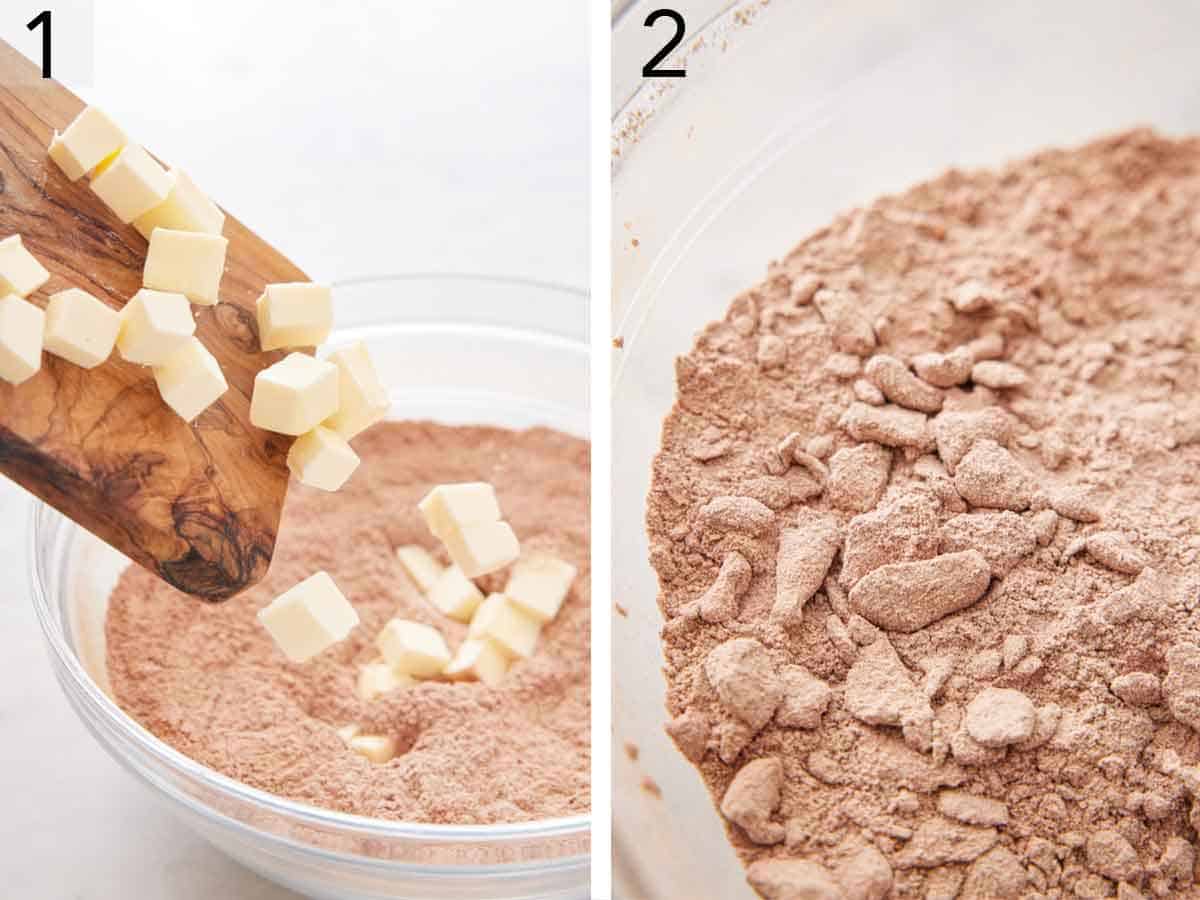
1. In a large mixing bowl, whisk together the flour, cocoa powder, granulated sugar, baking powder, and salt. Add the butter.
2. Toss to coat the butter in the flour mixture. Then, use a pastry cutter or, by pressing the pieces between your fingers, work in the cold butter until the pieces are pea-sized.
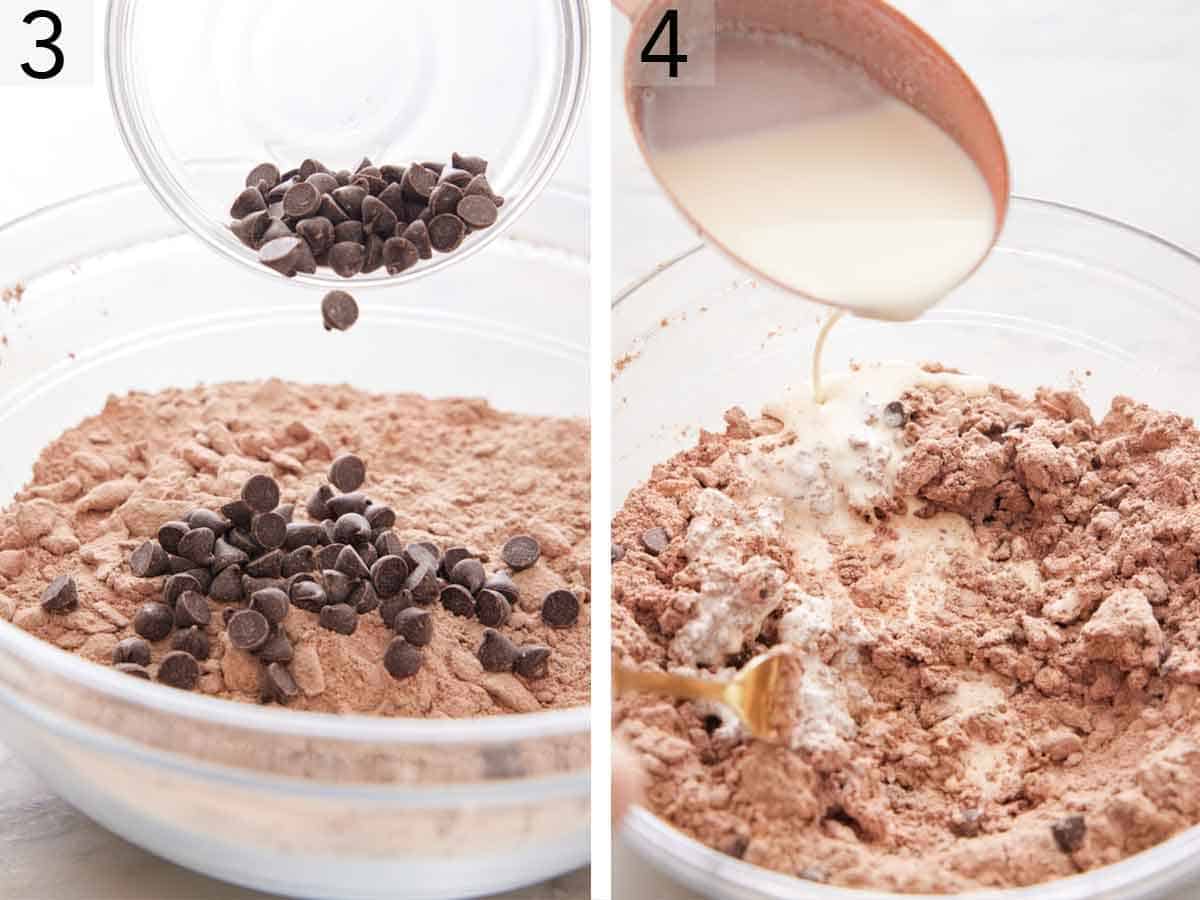
3. Toss in the chocolate chips.
4. Slowly stir the heavy whipping cream into the flour mixture using a fork until a shaggy dough forms.
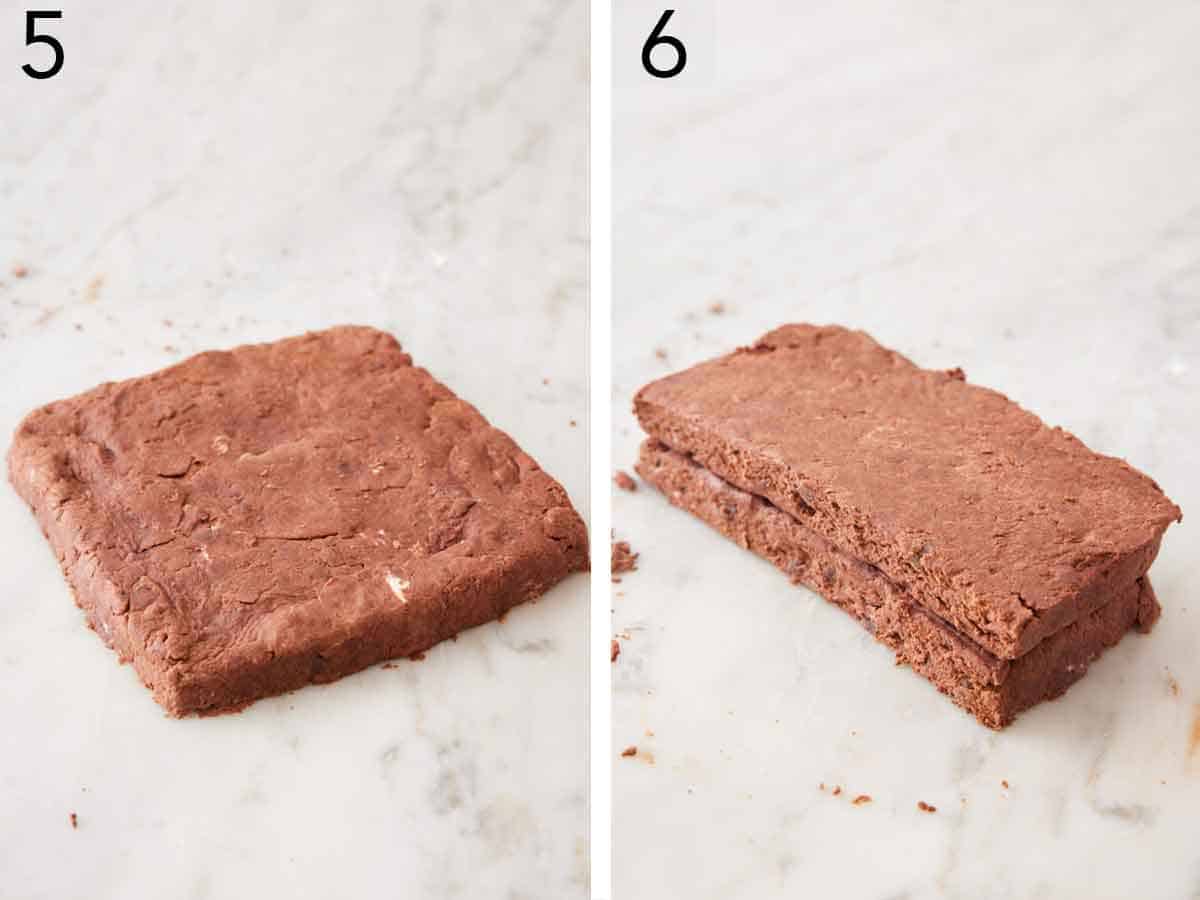
5. Turn out the dough onto a lightly floured surface and press into a ¾-inch thick square.
6. Cut the dough in half. Stack each half and press down.
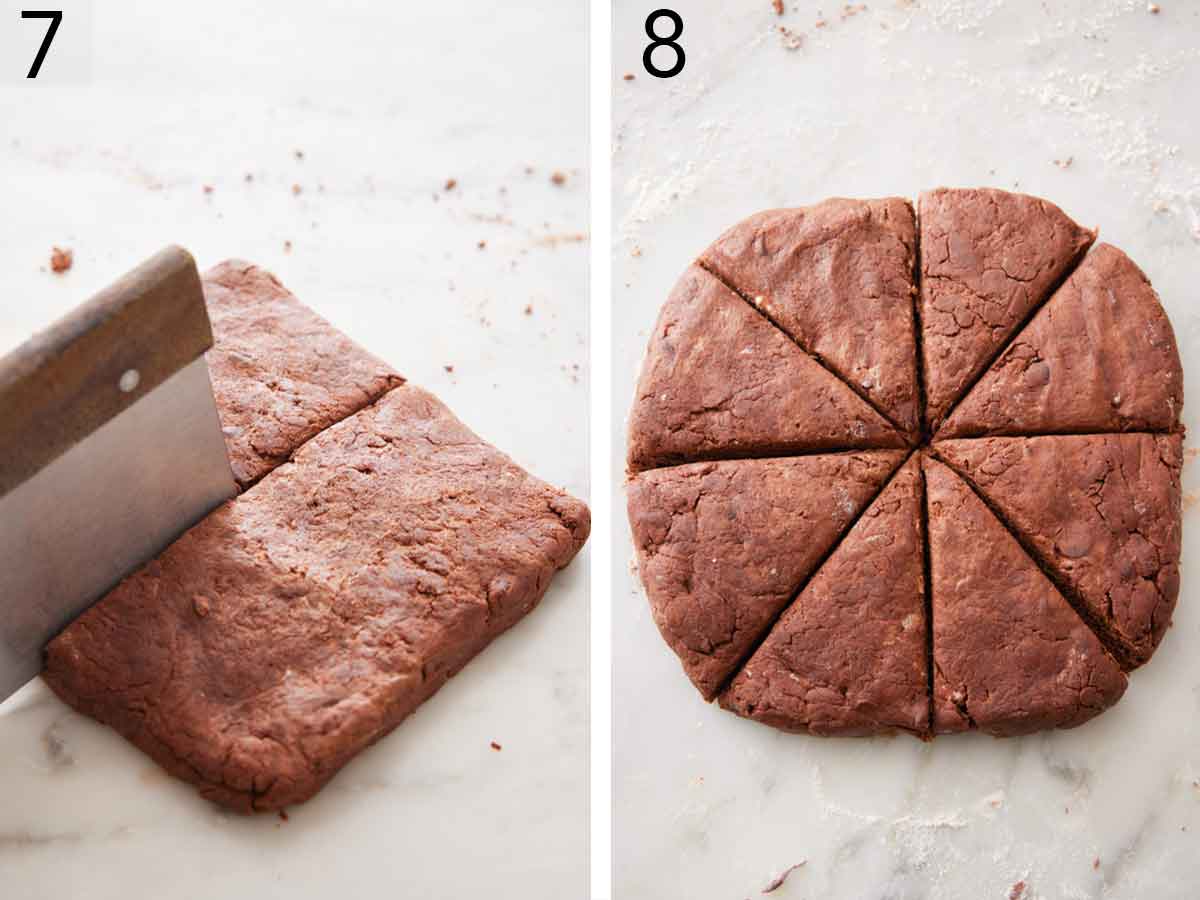
7. Repeat the cutting and stacking again, then shape the dough into a 7-inch disc.
8. Cut the disc into 8 equal triangles and place scones on the prepared baking sheet about 2 inches apart. Refrigerate for 15 minutes. Bake for 10 to 12 minutes on a parchment paper lined sheet pan, rotating the baking sheet halfway through baking. Let cool completely on a wire rack.
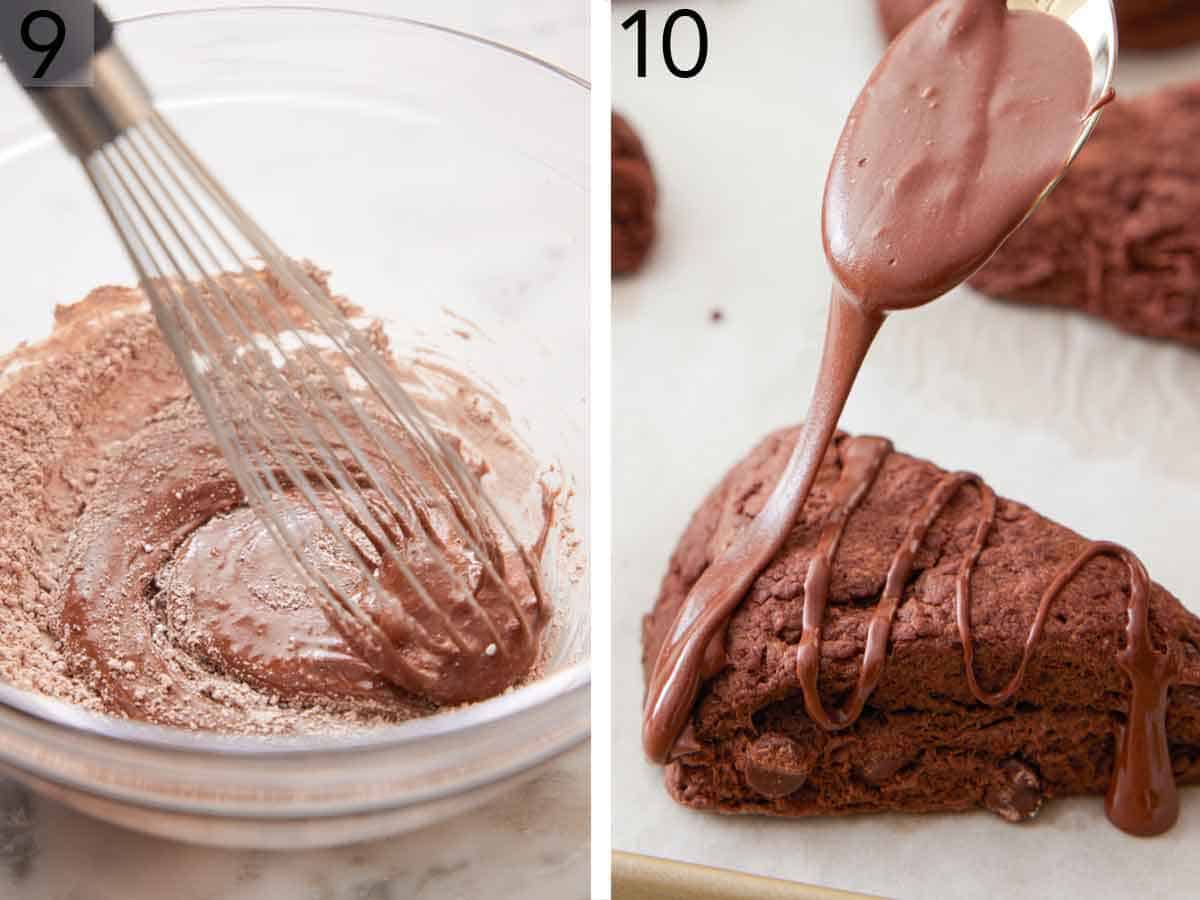
9. In a medium bowl, whisk together the confectioners’ sugar, cocoa powder, milk, and vanilla extract until smooth.
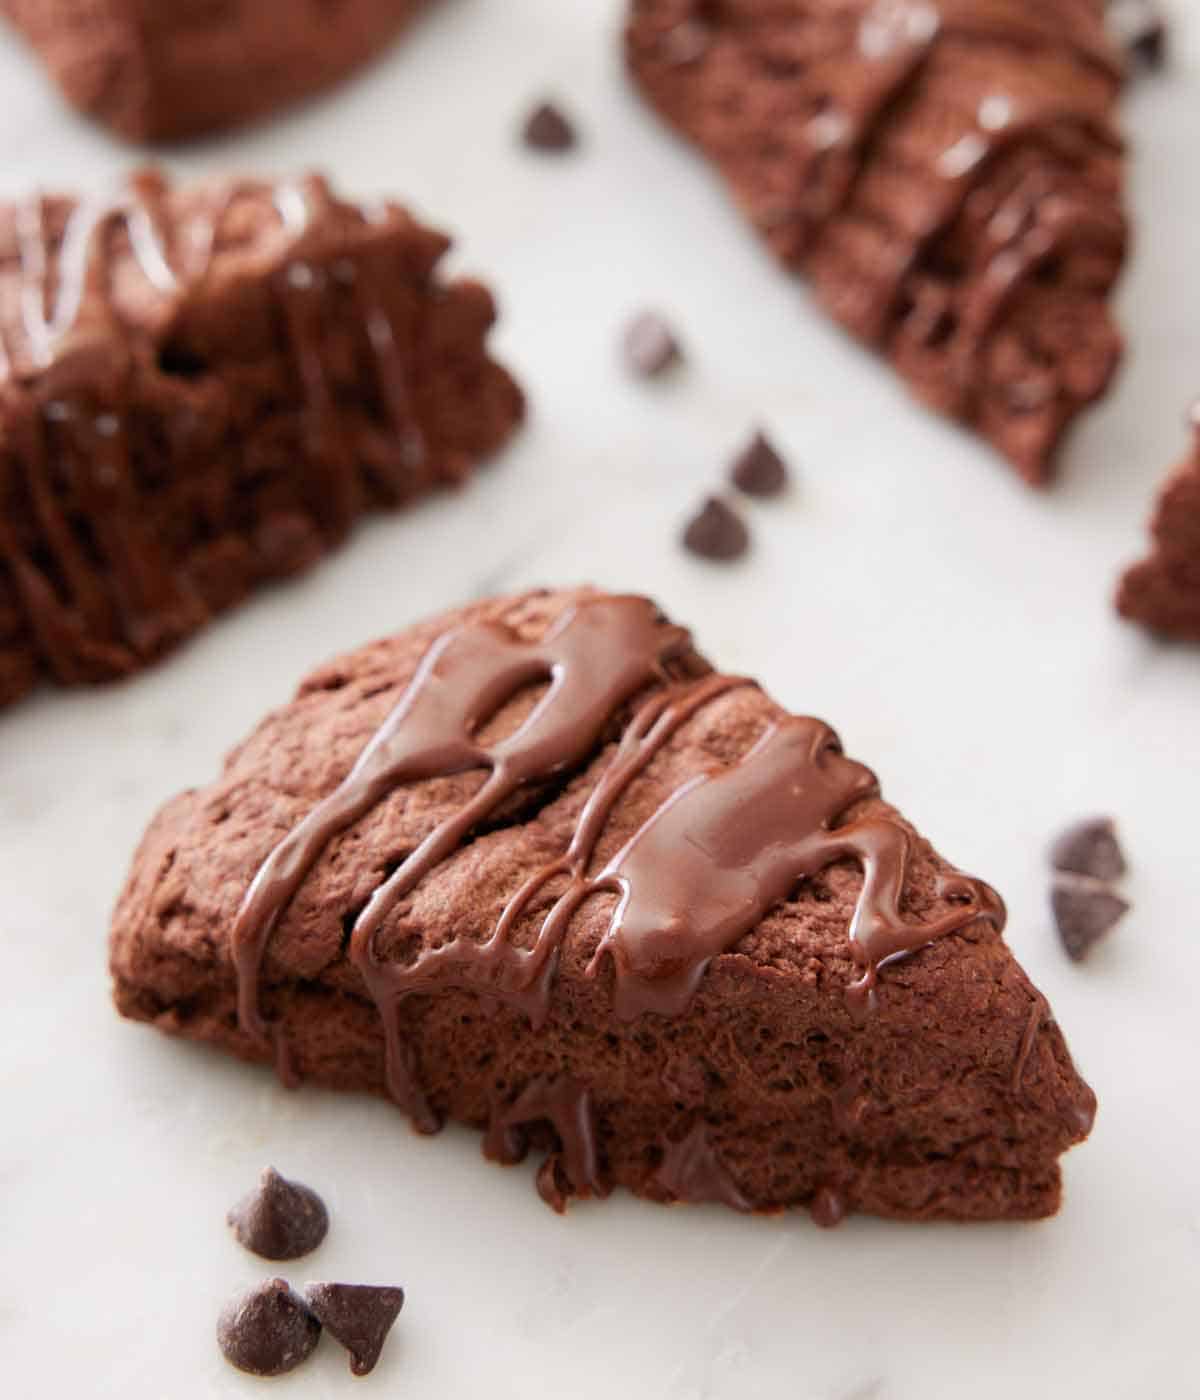
10. Drizzle the cooled scones with the chocolate glaze. Let the glaze set up for about 20 minutes for serving.
Pro Tips for Making This Recipe
- Make sure to measure the flour correctly. If you add too much flour, the dough will become dry, and the scones will be crumbly. The best way to measure flour is with a kitchen scale. If you don’t have one, then fluff your flour with a spoon, sprinkle it into your measuring cup, and use a knife to level it off.
- Press straight down when you cut the scone dough, being careful not to twist or saw the dough. Doing so seals the edge and prevents the scones from rising properly. If you use one then make sure its a sharp knife.
- Careful not to overwork the dough, as you don’t want gluten to form! The more you knead the dough, the more gluten will form, leading to chewy scones.
- If your kitchen is warm and you’re worried about the butter melting as you work it into the flour mixture, you can freeze and grate it. This helps the butter stay solid until the chocolate scones go into the oven for the best flaky interior.
- While refrigerating for 15 minutes seems like a small step, do not skip it! Placing the dough in the fridge gives the gluten in the dough a chance to relax and the butter to firm up. Cold dough will also help keep the scones from over-spreading as they bake.
Frequently Asked Questions
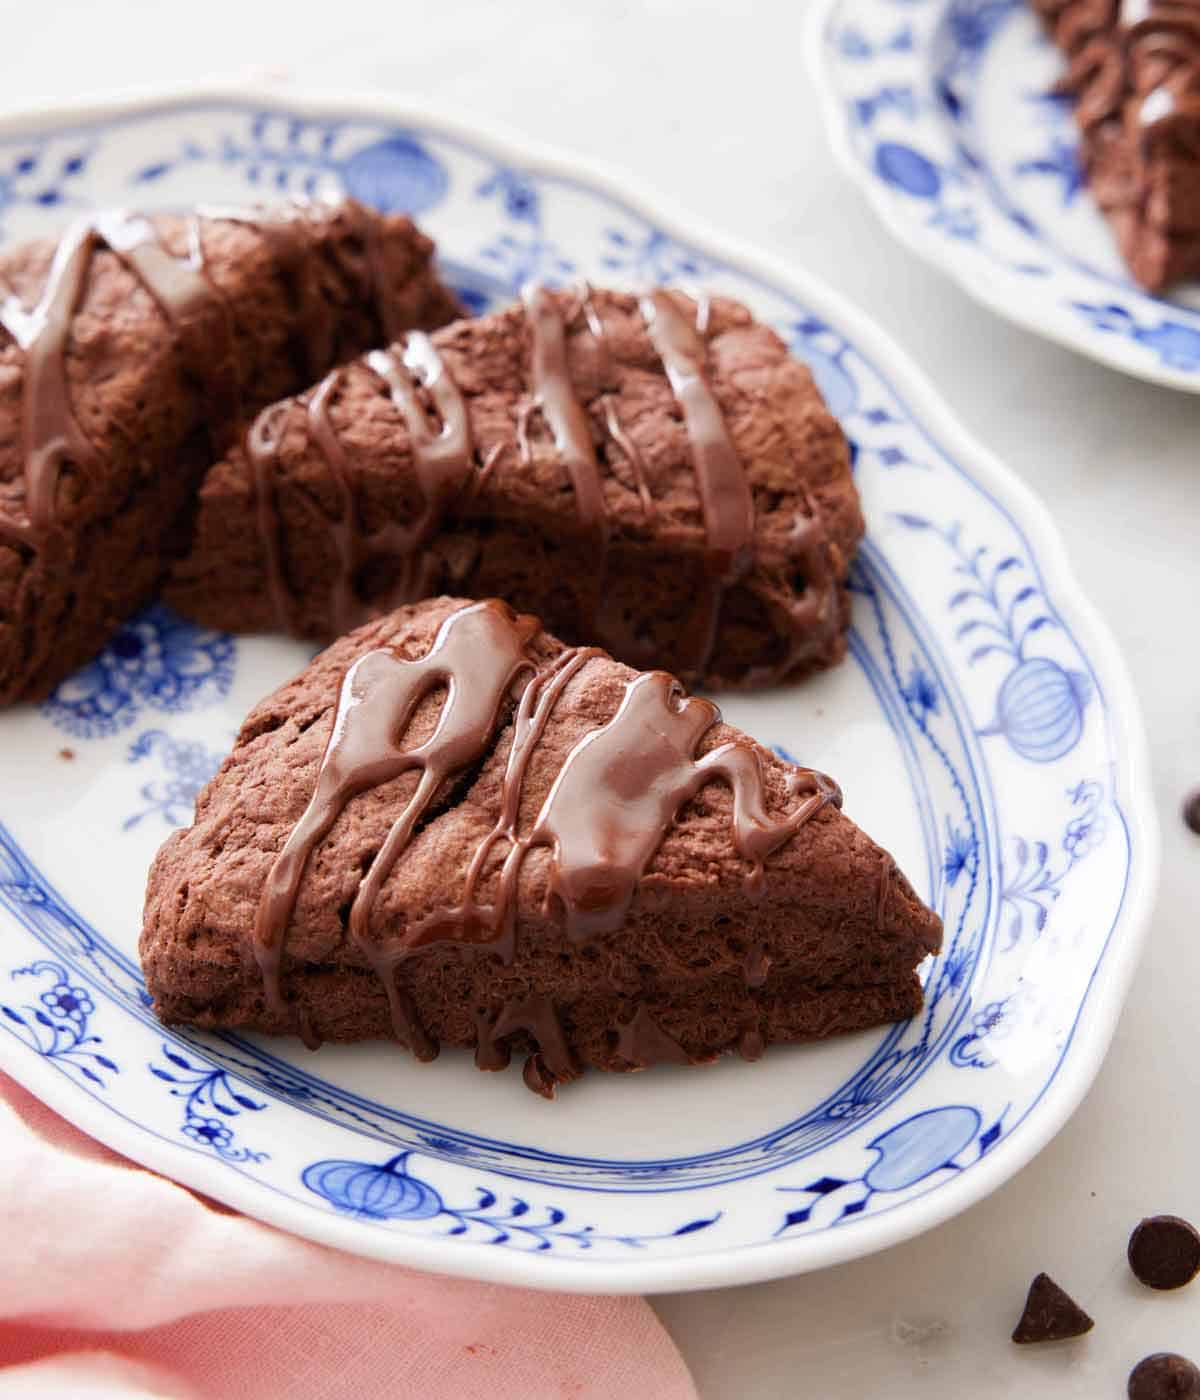
You can store leftover chocolate scones in an airtight container for up to 4 days.
You can prepare the dough for the scones, then cover and refrigerate overnight. Cut and bake the scones in the morning. Alternatively, you can flash freeze cut scone dough on a sheet pan before transferring them to a freezer bag or container. You can bake them from frozen with a couple of extra minutes added to the baking time.
If the dough is too dry, the scones won’t rise and will be crumbly, so make sure to measure the dry ingredients correctly. If the scones are too wet, then they won’t rise either, as they’ll be weighed down. Also, if you do not fully heat the oven to 400F before adding the wedges to the oven, that will also affect the scone’s rise.
If you’ve tried this Chocolate Scone recipe, then don’t forget to rate the recipe and let me know how you got on in the comments below, I love hearing from you!

Chocolate Scones
Equipment
- Baking Sheet
- Parchment paper
- Large mixing bowl
- Small mixing bowl
Ingredients
- 2¼ cups all-purpose flour (270g)
- ½ cup unsweetened cocoa powder (50g)
- ¼ cup granulated sugar (50g)
- 2½ teaspoons baking powder
- ¼ teaspoon salt
- ½ cup cold unsalted butter cubed (113g)
- ⅓ cup semi-sweet chocolate chips (60g)
- 1 cup heavy whipping cream divided (240ml)
For the Chocolate Glaze:
- 1 cup powdered sugar (120g)
- 2 tablespoons unsweetened cocoa powder
- 2 tablespoons whole milk
- ½ teaspoon vanilla extract
Instructions
- Preheat the oven to 400F. Line a baking sheet with parchment paper.
- In a large mixing bowl, whisk together the flour, cocoa powder, granulated sugar, baking powder, and salt. Add the butter and toss to coat in flour. Using a pastry cutter or by pressing the pieces between your fingers, work in the cold butter until the pieces are pea-sized. Toss in the chocolate chips.
- Slowly stir the heavy whipping cream into the flour mixture using a fork until a shaggy dough forms. Turn out the dough onto a lightly floured surface and press into a ¾-inch thick square. Cut the dough in half. Stack each half and press down. Repeat the cutting and stacking again, then shape the dough into a 7-inch disc. Cut the disc into 8 equal triangles and place on the prepared baking sheet about 2 inches apart. Refrigerate for 15 minutes.
- Bake for 10 to 12 minutes or until puffed and tops appear dry, rotating the baking sheet halfway through baking. Let cool completely.
For the Glaze:
- In a medium bowl, whisk together the confectioners’ sugar, cocoa powder, milk, and vanilla until smooth. Drizzle the cooled scones with the chocolate glaze. Let the glaze set up for about 20 minutes for serving. Scones can be stored in an airtight container for up to 4 days.
Notes
- Make sure to measure the flour correctly. If you add too much flour, the dough will become dry, and the scones will be crumbly. The best way to measure flour is with a scale. If you don’t have one, then fluff your flour with a spoon, sprinkle it into your measuring cup, and use a knife to level it off.
- Press straight down when you cut the scone dough, being careful not to twist or saw the dough. Doing so seals the edge and prevents the scones from rising properly.
- Careful not to overwork the dough, as you don’t want gluten to form! The more you knead the dough, the more gluten will form, leading to chewy scones.
- If your kitchen is warm and you’re worried about the butter melting as you work it into the flour mixture, you can freeze and grate it. This helps the butter stay solid until the scones go into the oven for the best flaky interior.
- While refrigerating for 15 minutes seems like a small step, do not skip it! Placing the dough in the fridge gives the gluten in the dough a chance to relax and the butter to firm up. Cold dough will also help keep the scones from over-spreading as they bake.

















Leave a Reply