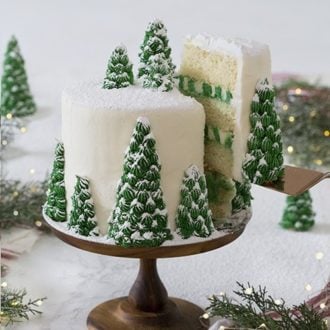
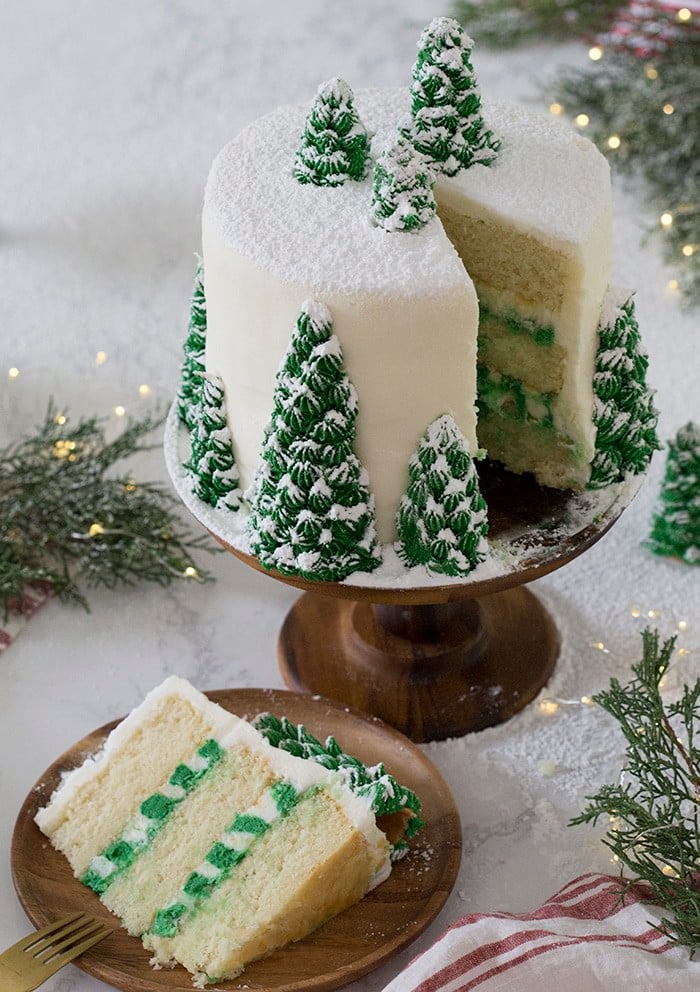
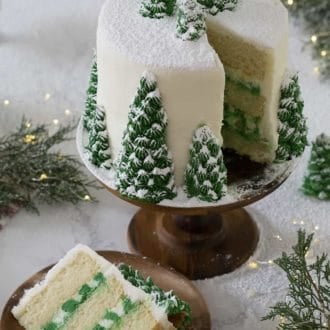
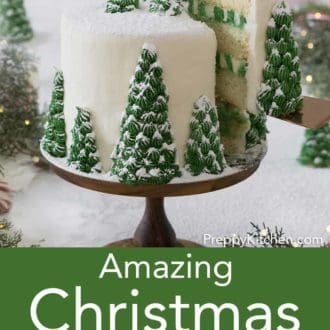
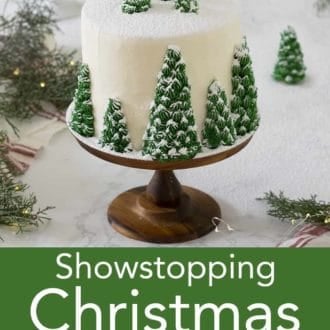
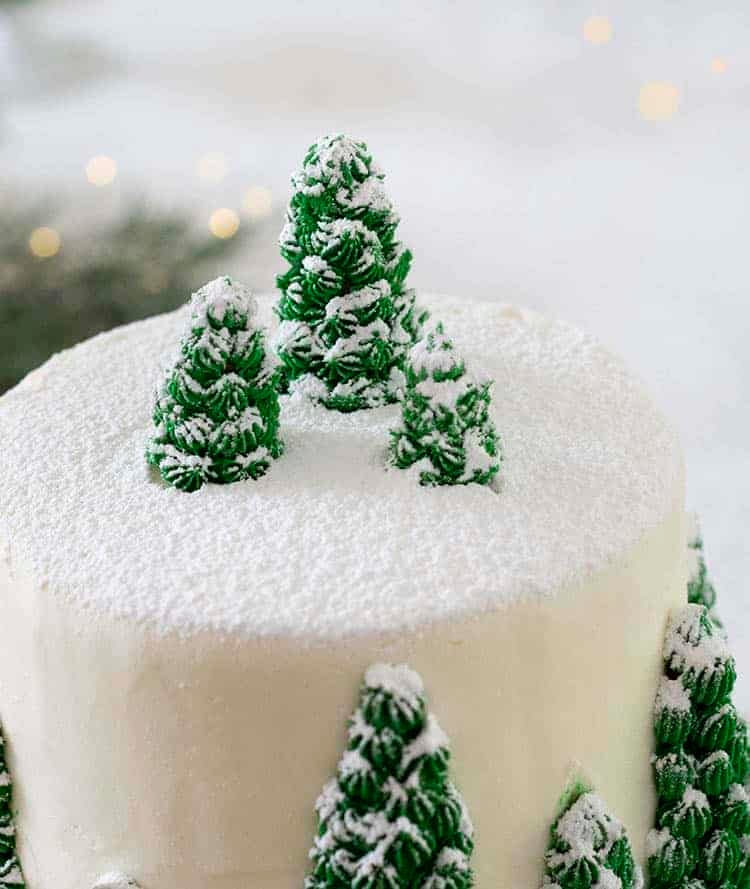
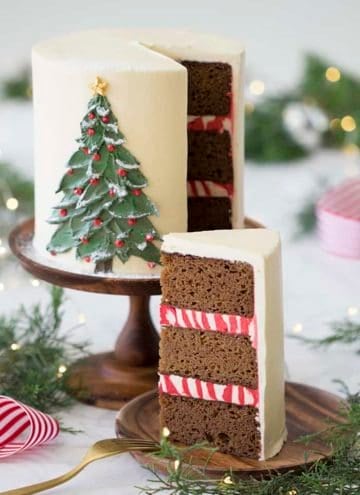
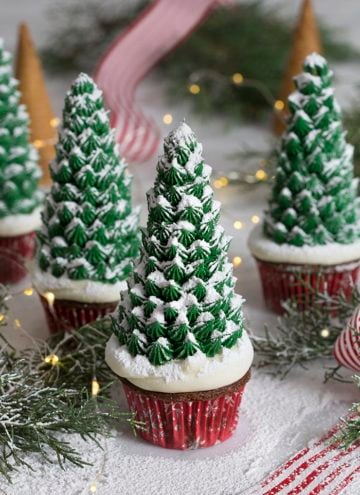
If you saw my Christmas Tree Cupcakes you know where I got the inspiration for this cake. I cut up a few ice cream cones and used them as the base for various sized pine trees on the side and top of my cake. Little dollops of green buttercream and a dusting of powdered sugar complete the snowy winter scene.
The real star of this dessert is the cake itself! So pillowy soft and delicious. I made mine with “plain” vanilla but you could add in some peppermint extract, orange blossom water, lemon zest or whatever else you love to make this cake your own!
Pro Tips for an Amazing Christmas Tree Cake
- If you’re not using 6-inch pans, double the recipe for 8-inch pans or triple the recipe for 9-inch pans.
- You can substitute whole milk yogurt for the sour cream if desired, I do it all the time and can’t really tell the difference.
- To get FLAT layers that are moist inside and out try using cake strips! You can buy a set on the shop page or make your own from foil and paper towels at home. I made a whole blog post on it so check it out if you’re interested!
- To pipe the two-tone frosting you fill one bag (1/2 way full) with white frosting, one bag with green frosting and then put both bags in a third piping bag. No need for a tip, just snip about an inch off each bag.
- I like to give a really good dusting of powdered sugar “snow” to the trees for some added realism and depth.
- If you don’t have a #30 tip then try any small to medium star or leaf tip to pipe the tree.
- The trees can also look cute with little sugar or fondant ornaments and presents, too! I actually applied white ornaments to one tree with tweezers. It looked good but they kind of got lost in the snow. SO not worth the effort, for me at least. Hope you enjoy!!
Cake decorating to be a bit intimidating then check out my How to Decorate a Cake post, it has lots of helpful tips and a full how to video.
How to Make a Christmas Tree Cake
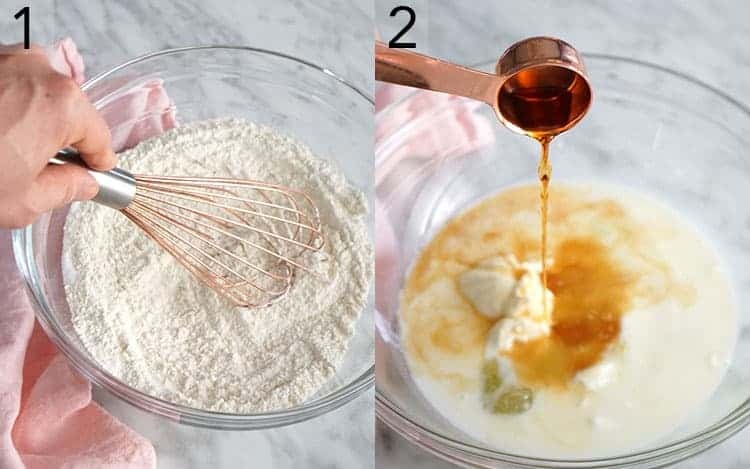
1. Preheat oven to 350 degrees F. Butter and flour 3 six inch cake pans. In a large bowl add the flour, leavening agents, salt and sugar. Whisk and set aside.
2. In a medium bowl add the egg whites, sour cream, milk, vanilla and butter. Mix until combined but don’t worry if you see little clumps.
3. Add the wet mixture to the dry. Whisk batter together until smooth. Don’t over beat it though, you’re really just mixing until combined.
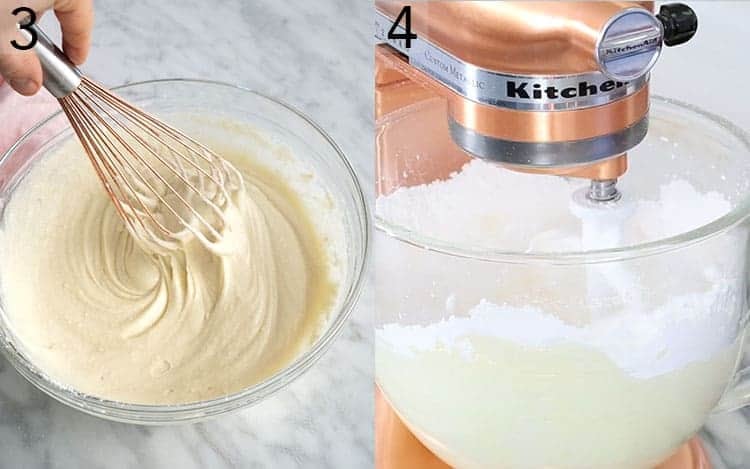
4. To make the buttercream beat the room temperature butter until light and fluffy. Add the confectioners sugar, vanilla, and cream. Mix and add the food coloring.For the frosting; Cream the butter, add the sugar, then mix on high. Add the milk a tablespoon at a time until desired consistency is reached. Divide the frosting into a two batches. Add green food coloring to one batch, mix until combined then transfer to a piping bag. add some white buttercream to another piping bag then place both in a third fitted with a large round tip. Once you have your two-tone piping bag filled you’re ready, pipe and stack your layers.
5. Pipe the two-toned buttercream onto the first layer, add the second layer and repeat then cover the cake in white buttercream.
6. Smooth out the buttercream on your cake using a bench scraper. Grab an angled cake spatula to smooth out the top and edges.
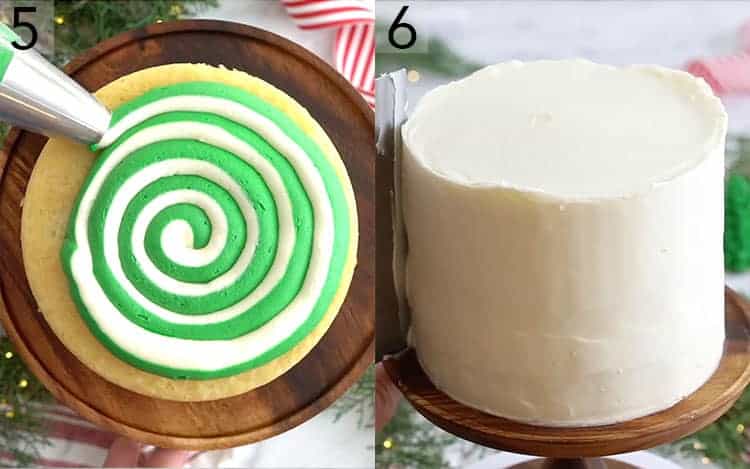
7. Use a sharp serrated knife to cut the ice cream cones, you’ll want some shorter ones for the top and a bunch of halved cones of various heights for the side. It’s fine to have a rough edge but it can be easier to cut them if briefly you dip the cones in water.
8. Press the halved cones onto the side of the cake, staggering the tall and short ones for some visual interest.
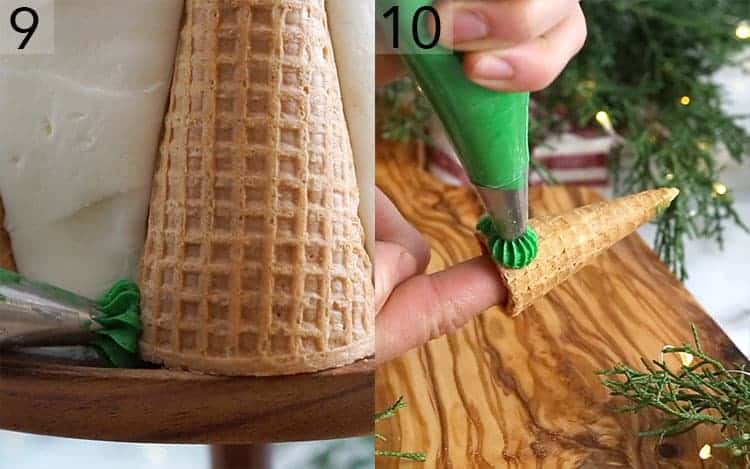
9. Use a number 30 tip to pipe star-shaped dollops onto the surface of the cone beginning at the bottom and working to the top.
10. For the cones on top of your cake; go ahead and pipe those dollops on before placing them on your cake. You can save the “tippy top dollop” for after they are placed on the top of the cake.
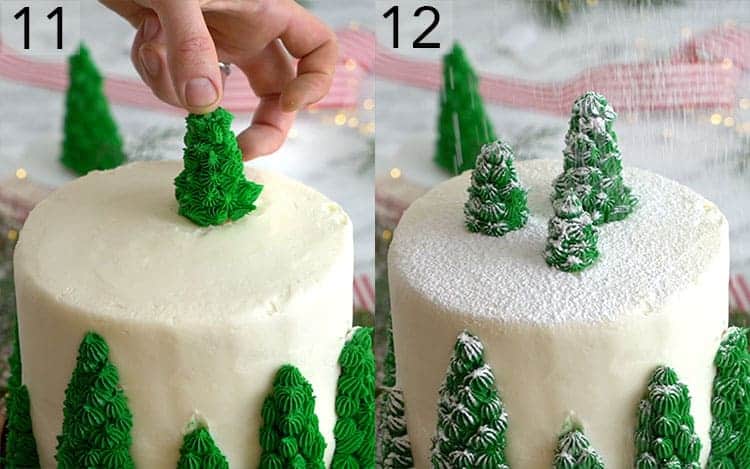
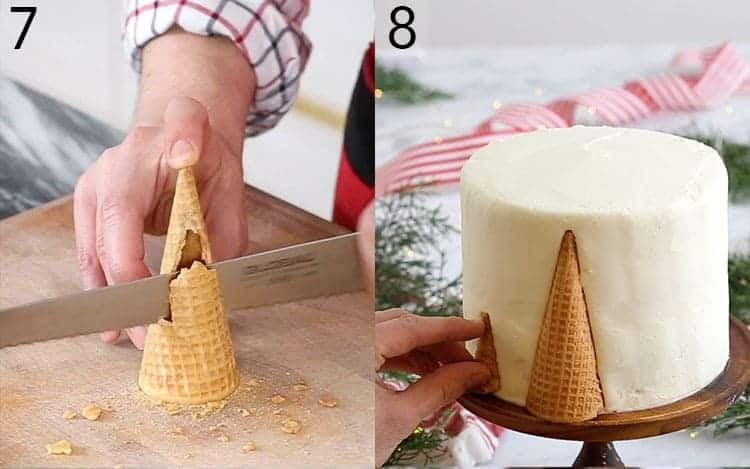
11. When the trees are frosted, arrange them on the top of the cake, then go ahead and pipe that last dollop at the top of the cone.
12. Last, but not least, sift confectioners’ sugar onto the top of the cake and all on those trees and it’s ready to serve!
If you’ve tried this Christmas cake recipe then don’t forget leave a rating and let me know how you got on in the comments below, I love hearing from you!
Christmas Tree Cake
Video
Ingredients
For the Cake
- 1 2/3 cups all purpose flour 213g
- 1 cup granulated sugar 200g
- 1/4 tsp baking soda 1g
- 1 tsp baking powder 3g
- 1/4 tsp salt 1g, heaping, optional
- 3/4 cup unsalted butter 176g, room temperature
- 3 egg whites
- 1/2 cup sour cream 120g
- 1 tbsp vanilla 15mL
- 1/2 cup whole milk 120mL
- 1/2 tsp peppermint extract, optional 2.5mL
For the Buttercream
- 1.5 lb confectioners sugar 680g
- 1 lb unsalted butter 454g
- 1-2 tbsp heavy whipping cream If needed for consistency
- 1 tsp vanilla extract 5mL
- 5 drops green food coloring for the trees
For the Assembly
- 12 ice cream cones
Instructions
For the cake
- Butter and flour three 6-inch pans. I use damp cake strips on my pans for more even baking as well. Preheat oven to 340F.
- Sift the dry ingredients together in a large bowl. In a separate bowl, beat the wet ingredients together.
- Add the wet to the dry and mix until combined. Divide the mixture evenly into the cake pans. I like to use a kitchen scale to measure for even layers.
- Bake for 30 -35 minutes or until the centers are set and springy.
- Let the layers cool in the pans for about 4 minutes, then dump each layer out onto a cooling rack.
For the Frosting
- Cream the butter. Add the sugar and mix on high. Add the vanilla and salt. You can also add milk a tablespoon at a time to get a smoother consistency if needed.
- Divide the buttercream into two batches. For the colored batch, add the green food coloring, mix until combined.
For the Assembly
- For the Christmas trees on the side of your cake, use a serrated knife to cut the ice cream cones into different sizes. Once you have a variety of desired sizes, carefully cut them in half.
- Use a number 30 tip to pipe star-shaped dollops onto the surface of the cone beginning at the bottom and working to the top. Place the cones that have been cut in half on around the side of your cake before piping.
- When all of your trees have been piped and placed, sift confectioners' sugar onto the top of the cake and it's ready to serve!
Notes
- If you’re not using 6-inch pans, double the recipe for 8-inch pans or triple the recipe for 9-inch pans.
- You can substitute whole milk yogurt for the sour cream if desired, I do it all the time and can’t really tell the difference.
- To get FLAT layers that are moist inside and out try using cake strips! You can buy a set online or make your own from foil and paper towels at home. I made a whole blog post on it so check it out if you’re interested!
- To pipe the two-tone frosting you fill one bag (1/2 way full) with white frosting, one bag with green frosting and then put both bags in a third piping bag. No need for a tip, just snip about an inch off each bag.
- I like to give a really good dusting of powdered sugar "snow" to the trees for some added realism and depth.
- If you don't have a #30 tip then try any small to medium star or leaf tip to pipe the tree.



I made this for a Christmas Party and it was amazing!!
Bonsoir, j’ai réalisé votre recette ! Pas tout a fait comme le vôtre , pas les mêmes moules . Pour moi , un 20×10. Et j’ai fait un Molly cake . Mais avec au moins 4heures de travail . Suis pas pâtissière , juste amateur ! Suis pas trop mécontente de mon résultat . Sais pas comment vous envoyer une photo . Merci pour vos recettes . Joyeux Noël et bonne année 2020 !
rave reviews on this cake! Just a few things….Video says 350 degrees which makes more sense than 340 degrees. The recipe says both baking soda and baking powder, Video says just the baking powder. The recipe doesn’t mention that you can melt the butter, so I didn’t melt the butter. Honestly, I was semi freaking out by the batter! I bake it and crossed my fingers, the cake was delicious. thank you for the recipe, perhaps update it so it coincides with the video?
🙂 HAPPY NEW YEAR!!
I made this cake, and it was a hit at my family’s function by adults and kids! Your videos are so informative and I always enjoy learning from you. Many thanks and happy holidays!