

This post may contain affiliate links. Please read our disclosure policy.



Learn how to decorate cookies like a pro! Pick the right icing, master two essential techniques for outlining and flooding, and you can decorate cookies that look like they came out of a bakery, even if it’s your first batch.

Decorating cookies is so rewarding, but it is one of the most intimidating baking techniques to start. The good news: the difference between cookies looking like a rough beginner’s first try and beautifully finished professional ones comes down to two things at the start: picking the right icing for the look you want, and learning the outline-and-flood technique. Once you understand those, the rest is just practice and a variation on those two fundamentals.
I’ve been decorating cookies for years, for tutorials and recipes for all of you, and for my own cookie parties at home. The question I get most often from readers is some version of: “Mine never look like the photos—what am I doing wrong?” Almost every time, it’s not a skill level issue; it’s that they’re using the wrong icing for the look they want, or they’re trying to skip a key step. This guide walks you through the choices, the tools, and the techniques in the order they matter, so by the time you finish reading, you’ll know exactly what to do for your next batch.
“I used your tips for the cookie decorating party and we had a blast! Prepping everything ahead of time and laying it out on baking trays helped contain the mess, so it was stress-free. We also looked at this post for ideas and inspiration while we decorated, and all of the cookies looked so professional!
Mary

The Two Icings That Decorate Most Cookies
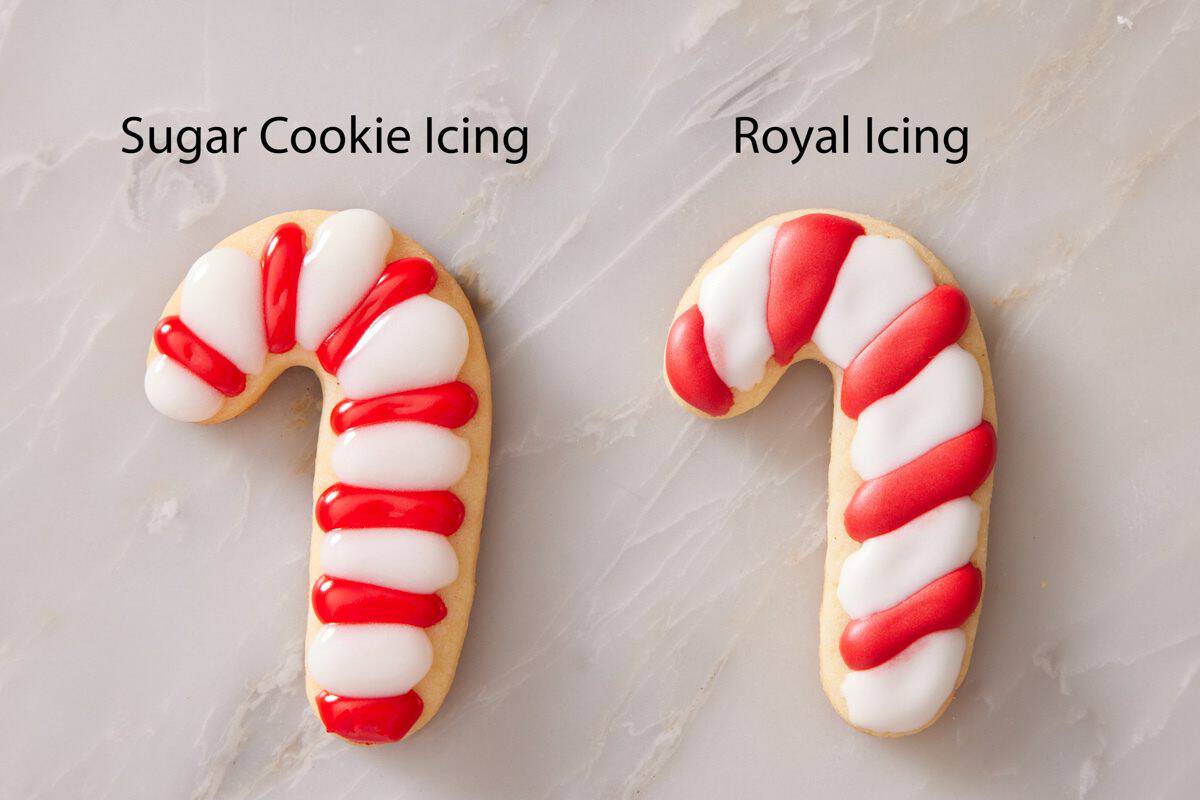
Before you touch a piping bag, you have to make one decision: which icing are you using? There are two main types—royal icing and sugar cookie icing— and the choice depends on what you’re making and how comfortable you are with piping.
| Royal Icing | Sugar Cookie Icing | |
| Ingredients | Egg whites + powdered sugar | Powdered sugar + corn syrup + milk |
| Final texture | Hard, crisp, smooth | Soft, glossy, slightly chewy |
| Best for | Detailed designs, stackable cookies, gifts | Quick decoration, kids, beginner bakers |
| Difficulty | Intermediate (consistency control matters) | Beginner-friendly |
| Drying time | 6-8 hours to fully harden | Up to 24 hours to fully set; still stays slightly soft |
| Stackable when dry? | Yes | Gently, not in multiple layers or for shipping |
| Best icing recipe | Royal Icing | Sugar Cookie Icing |
When To Choose Royal Icing
Royal icing is what professional cookie decorators use, and it’s what you want any time you’re going for detail—outlining, intricate piping, marbled or patterned designs, raised textures, or anything you plan to package or give as a gift. It dries to a hard, smooth, candy-like finish that’s stackable, packable, and shippable.
The trade-off: it’s slightly fussier to make, and you have to manage two consistencies (a thicker outlining version and a thinner flooding version) to use it correctly. My royal icing recipe uses egg whites (the most accessible version), but you can also make it with meringue powder if you prefer.
When To Choose Sugar Cookie Icing
This is the icing I reach for when I’m decorating with kids, or when I want festive cookies done fast. It’s essentially a thick powdered sugar glaze with corn syrup for shine, and it comes together in five minutes with no mixer required.
The trade-off: It dries to a glossy, slightly soft finish. It’s great for casual holiday cookies, but less ideal if you want sharp piped lines. It’s also a more forgiving icing if you’ve never decorated cookies before. My sugar cookie icing recipe is the simplest place to start to go from “no decorating experience” to “a tray of pretty cookies.”
For most beginners, I recommend starting with sugar cookie icing on a small batch, then graduating to royal icing once you’re comfortable with how the icing flows out of the bag.

Tools You’ll Need
You don’t need a professional cookie decorator’s kit to get started. Here’s what’s actually essential vs. nice to have:
Essential:
- Cookies, fully cooled. This sounds obvious, but it’s a big beginner mistake. Warm cookies (even slightly warm) will melt the icing, so it either runs off or changes texture and doesn’t set right. Bake your cookies, then let them cool completely on a rack. You can even chill them briefly if your kitchen is warm. I cut out cookies for decorating with my sugar cookie recipe or gingerbread men recipe, depending on the season or purpose!
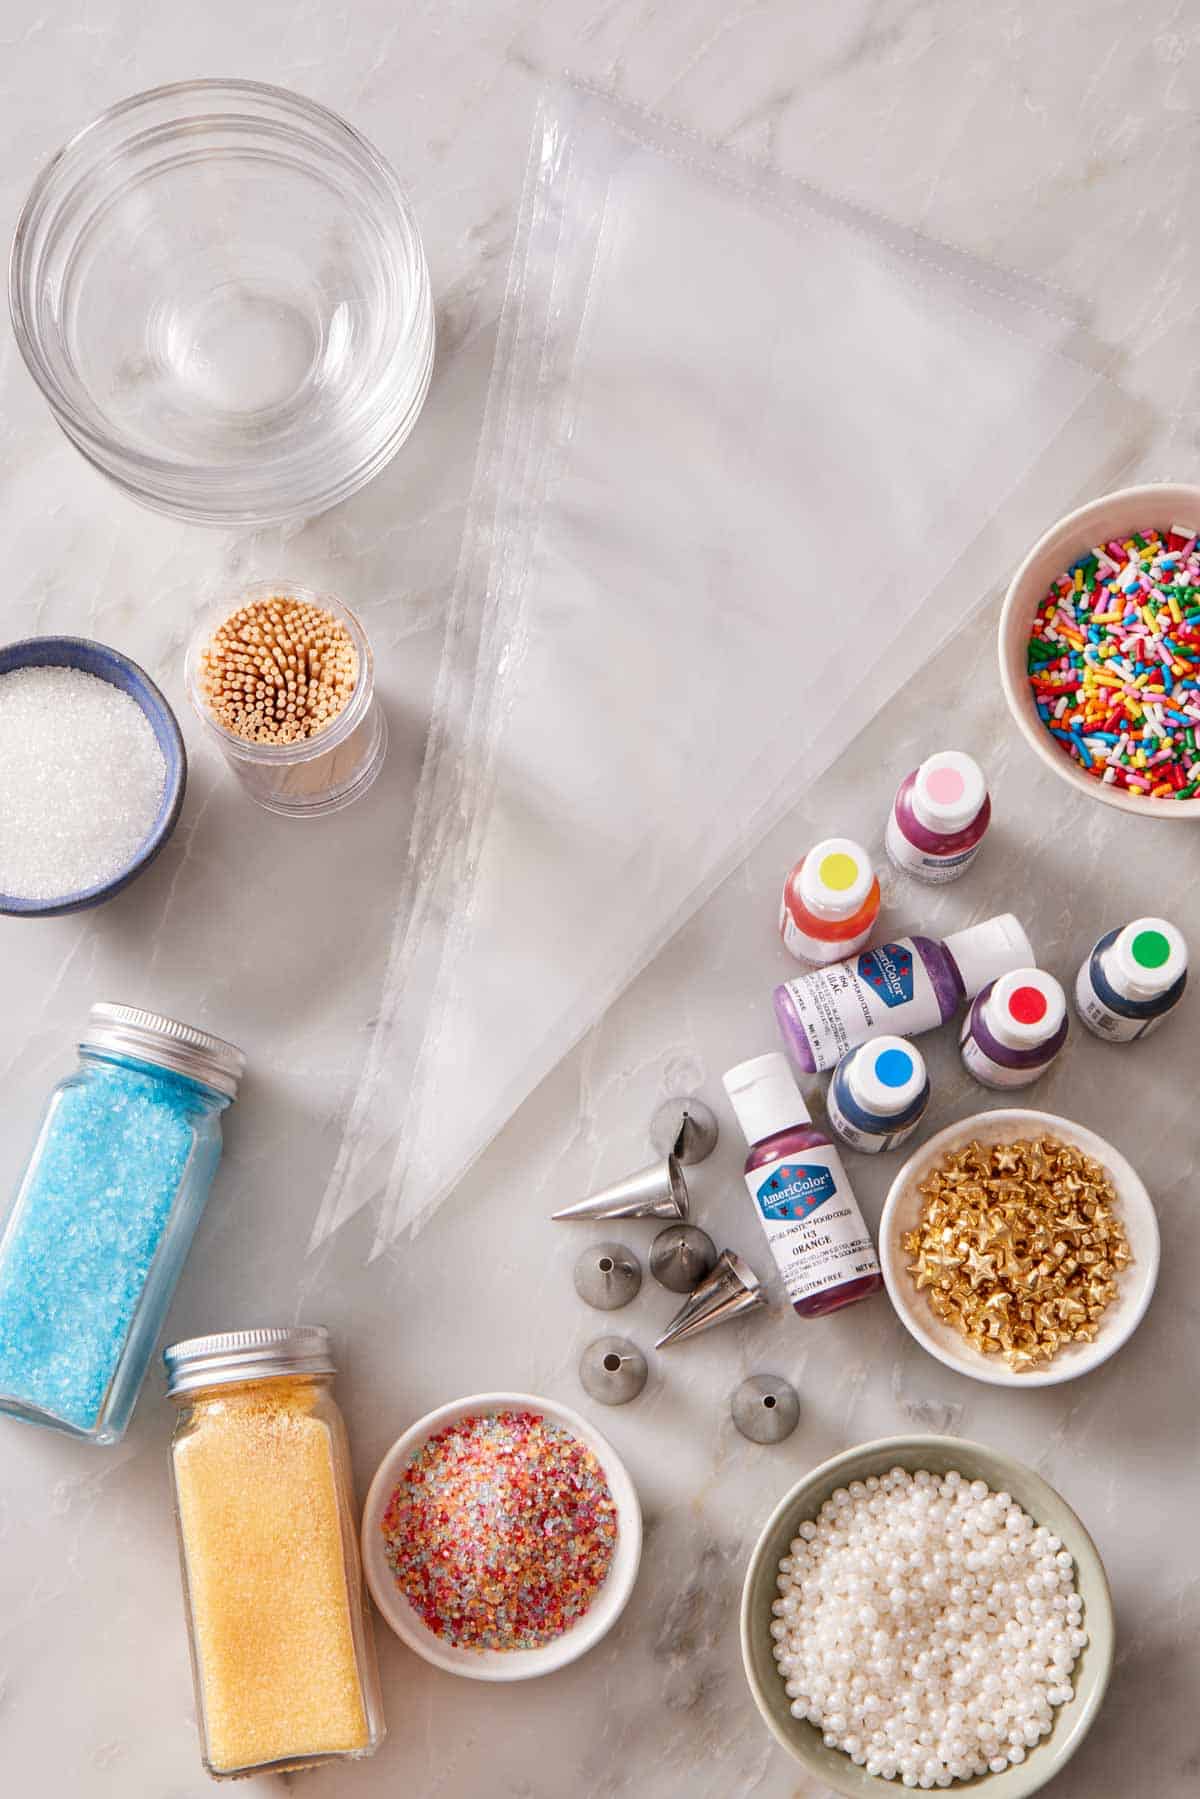
- Piping bags or squeeze bottles. Disposable piping bags are cheap, give you precision for details, and clean up easily. Squeeze bottles are more forgiving for beginners since they are less pressure sensitive and harder to over-squeeze. That does require buying special equipment, though, and you could honestly use a ziptop bag with the tip cutout if you wanted a very simple solution.
- Small round piping tips. A #2 tip for outlining and a #3, #4, or #5 tip for flooding covers most of what you need for all cookie decorating designs. If you only buy one tip, get a #2! It has a 0.06 inch (about 1/16”) opening with #3, #4, or #5 tips being just a hair larger for more icing flow to cover a larger area.
- Gel food coloring. Liquid food coloring will thin out your icing and mess up your consistency. Gel adds color without changing texture, and it is highly concentrated, so you don’t need to use much for rich colors.
- Small bowls. This is how you will divide the icing to change the consistency for flooding and outlining, or color it.
- Toothpicks. For mixing in food coloring, fixing piping mistakes, popping air bubbles, and creating patterns like marbling.
Nice-to-have:
- A turntable or lazy Susan for rotating cookies as you decorate.
- A scribe tool for popping air bubbles in flooded icing before it dries. This works like a toothpick but is reusable. You really only need this if you plan on decorating cookies often.
- Sprinkles, sanding sugars, edible glitter. Apply while the icing is still wet so they stick.
What you don’t need: a stand mixer specifically for the icing (a hand mixer or even a whisk works), specialty cookie decorating courses, or specialty piping tips. Save those for after you’ve decided you love this and want to level up.
The Outline-and-Flood Technique (Master This First)
This is the most widely used technique and the foundation of cookie decorating. Once you have it down, almost every other design becomes a variation. The idea is simple: you pipe a border around the cookie with stiffer icing, then fill in the inside with a thinner icing that levels itself out into a smooth surface. The border holds everything in place. Without it, your icing runs off the edges, leaving sad puddles.
Here’s how it works step by step:
1. Make two icing consistencies, if needed. If you are using royal icing, divide it into two bowls. Leave one thicker for the “outline consistency”—thick enough that a ribbon of icing sits on top of itself for 8-10 seconds before melting back in. This is the icing for your border. (You will need less of this consistency. I typically do about a quarter of the batch in this thickness.) To the second bowl, add water, one drop at a time, stirring gently, until you reach “flood consistency”—thin enough that a ribbon of icing disappears back into the surface in 3-4 seconds. This is the icing that fills (or “floods”) the inside of the outline. If you are using sugar cookie icing, you don’t need to make a secondary consistency, unless you prefer a sharper outline. In that case, do the same but use milk to thin it out instead of water. If you need to thicken the outline consistency, whisk in more powdered sugar.
2. Outline the cookie. Place the thicker, outline icing in a piping bag with a #2 tip. Hold the tip just above the surface of the cookie (not touching) and pipe a continuous line around the perimeter, just inside the edge of the cookie, or in the shape of the area you want to flood. Aim for a clean, unbroken outline. Gaps will let your flooding icing escape later, so fill them in if the line breaks. Don’t let the outlines dry too much before you flood, or the icings won’t melt together for a uniform, smooth surface.
3. Flood the inside. Place your thinner icing in another piping bag with a slightly larger tip, or in a squeeze bottle. Fill in the area inside your outline, working from the edge toward the center. Don’t worry about being neat—the flood icing self-levels. (If you don’t have two sugar cookie icing consistencies, still outline and then flood, using the same icing.)
4. Pop air bubbles. As soon as you finish flooding, run a toothpick gently across the surface to pop any visible bubbles or pull the icing to fill any small gaps. They’ll set into permanent dimples if you skip this step.
5. Let it set before adding details. If you’re going to pipe details on top, the flood layer needs to be dry on top first—about 2 hours for royal icing. Waiting for the first layer of icing to dry will give you crisp details and sharper lines that sit on top of the first layer of icing. Adding piping icing onto the wet areas (while the flood is still wet) gives you blended, marbled effects, which I’ll cover in the next section. Sugar cookie icing doesn’t do well with more icing piped on top, so stick to single-depth or wet-on-wet designs.
The piping pressure rule. How hard to squeeze the piping bag is the thing that takes the most practice, and you need to learn by feel. Too much pressure, and you’ll blow out a thick worm of icing; too little, and the line breaks. Practice on a paper plate or parchment before you touch your cookies. Squeeze with steady, even pressure and let the icing fall onto the cookie surface. Don’t drag the tip on the cookie itself—this is why you hold the tip just above the cookie’s surface.

Decorating Techniques From Beginner To Intermediate
Once you have the outlining and flooding technique down, here are a few other decorating techniques that can elevate your designs:
Wet-on-wet (marbling and dots). While your flood icing is still wet, drop dots of a different color directly into it. The dots sit flush with the surface and dry into the same plane. Drag a toothpick through dots to make hearts, swirls, or marbled patterns. This works well with both icing types, but is sharper with royal icing because it has more body than sugar cookie icing.
Wet-on-dry (clean piped lines and details). This is the technique for adding any raised designs or details to your cookies. Wait for your flood icing to fully harden on the surface at least (if it can fully set, 6 hours or overnight, that’s even better!). Then pipe details on top with the thicker outline icing. This is how you get sharp eyes or features on animals, a name in script on top of a fully iced cookie, or any other precise designs.
Sprinkles and sanding sugar. Add sprinkles or sanding sugar while the icing is still wet, so they adhere. For full coverage (like a sparkly snowflake), pour sanding sugar over the whole flooded cookie and shake off the excess. You can also combine techniques like doing wet-on-dry designs and then sugaring just the newly piped area. Make sure the areas you don’t want sugar or sprinkles to stick are fully dry first, before you pipe and coat.
Color flow and ombré. Pipe two colors of flood icing side by side and gently swirl them together with a toothpick at the seam for a smooth gradient.
Buttercream piped designs. For a different look entirely, you can decorate sugar cookies with vanilla buttercream using piping tips. The cookies won’t be stackable (buttercream stays soft), but you get a beautiful piped flower or rosette that’s perfect for a tea party tray. My russian piping tips guide covers specialty tips that you can use with this technique for these fast and impressive cookies.

Decorating Christmas Cookies
Christmas cookies are where most people learn to decorate, so they deserve their own section. The classic shapes—gingerbread men, snowflakes, Christmas trees, candy canes, stars, ornaments—all work well with both royal icing and sugar cookie icing, and the same techniques apply. A few seasonal-specific notes from my years of making holiday cookie trays:
- Stick to a tight color palette. A few colors (like red, white, and green) plus sanding sugar will give you a more polished tray than ten colors. Pros pick a palette and commit. This also means you need fewer bags and tips!
- Mix shapes for visual interest. A platter of all gingerbread men is nice, but a platter with gingerbread men, snowflakes, and round ornaments is a beautifully decorated Christmas spread that feels more special and impressive (even though you did the same work for each one).
- Sugar cookies hold detail beautifully. The dough is sturdier than most gingerbread cookie doughs, so it’s especially good for intricate decoration. My gingerbread men recipe is built specifically to handle detailed icing without getting soggy, so it’s a great recipe to use if you’re looking to decorate them, too!
- Use sanding sugar generously. A flooded snowman covered in sparkling sugar feels like it’s really made of snow. A flooded white top of a stocking with white sanding sugar reads as a fuzzy band. A green tree flooded then dotted with colorful sprinkles feels like a lighted Christmas tree. This is an easy technique that doesn’t require any piping skills.
Here’s the cookie tray plan I use myself: I bake sugar cookies or gingerbread cookies of different shapes the day before, then decorate the next day. I choose royal icing or sugar cookie icing based on my needs. If it’s a cookie swap, I do royal icing so the cookies pack up easily without getting damaged. If it’s a holiday party, I save time and do sugar cookie icing and simpler designs so I can focus on other parts of the menu.

Make-Ahead And Cookie Party Tips
If you’re planning a cookie decorating party for kids, friends, or a holiday gathering, the prep makes or breaks the experience. Here’s how I plan and prep:
- Three days ahead: Make the dough and chill the discs for a day. Or, go ahead and cut out the cookies and freeze them before baking (you can actually freeze the dough or cutouts a month in advance if you want to really get a jumpstart).
- Two days ahead: Bake the cookies and store them in an airtight container at room temperature.
- One day ahead: Make your icing and store the main batch in an airtight container or tightly covered bowl at room temperature. Don’t fill the piping bags yet—powdered sugar icings can form a skin or release a bit of liquid as they sit, and it’s easier to give them a quick stir in the container or bowl than to deal with it once they’re bagged. You can go ahead and divide and color or adjust consistency, or do that day-of.
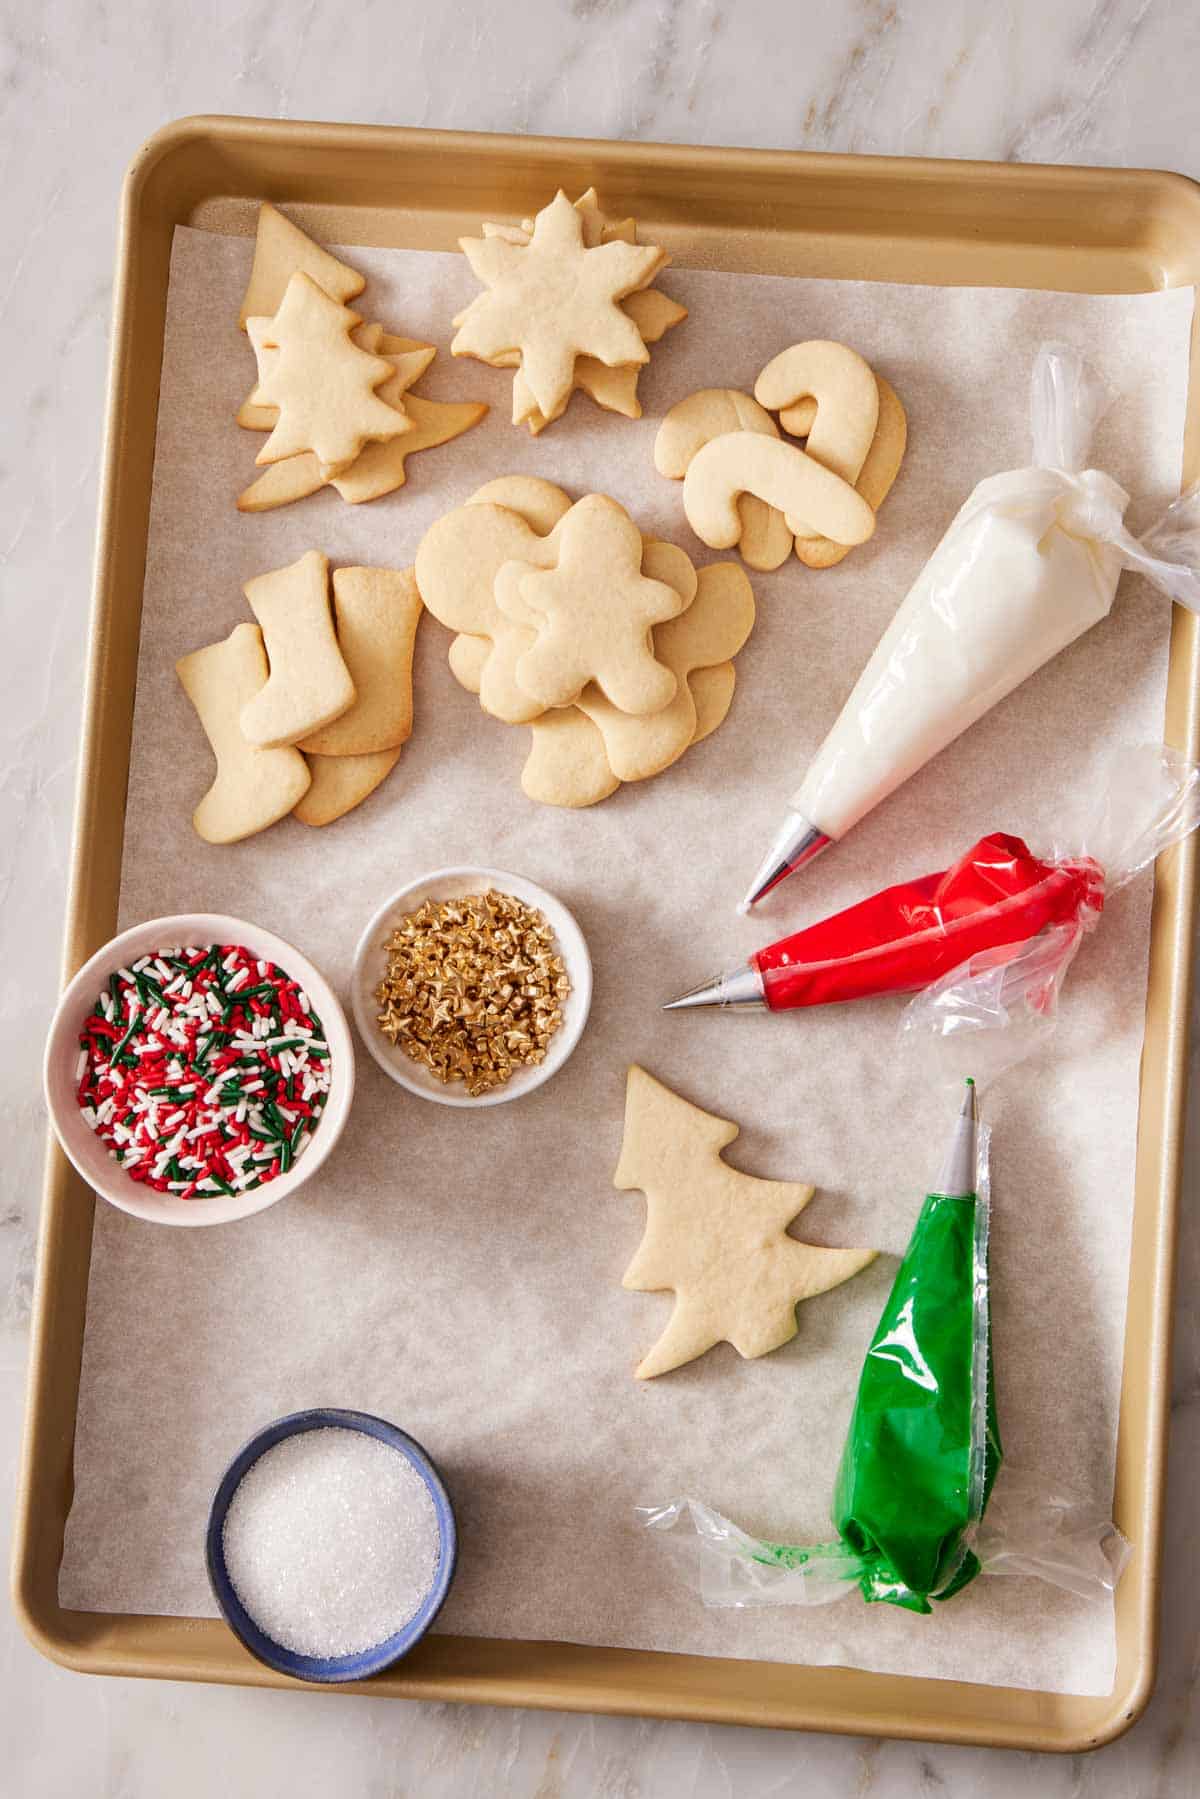
- Day of: Stir the icings briefly to recombine, color or adjust consistency if needed, then fill your piping bags. Set up a decorating station with bowls of sprinkles, sanding sugars, and other candies. Have parchment-lined trays for each person to decorate to contain any loose sprinkles or messy icing drips. Set out racks or more trays for finished cookies to dry on.
For storing decorated cookies: Once the icing is fully dry (6-8 hours for royal icing, up to 24 hours for sugar cookie icing), you can stack royal icing cookies in an airtight container with parchment between layers. Keep sugar cookie icing in a single layer if possible. Decorated cookies keep for about a week at room temperature, or you can freeze them for up to 3 months. Flash-freeze in a single layer first, then stack in a freezer container with parchment between layers.
Frequently Asked Questions
Royal icing is made with egg whites (or meringue powder) plus powdered sugar, and it dries hard and candy-like, perfect for detailed piping, stackable cookies, and gifts. Sugar cookie icing is a simpler glaze made from powdered sugar, corn syrup, and milk, and it dries glossy but slightly soft; it’s perfect for casual decorating, kids, and beginners. Both work for the outline-and-flood technique, but royal icing allows for more decorating options and techniques. The choice depends on the look you want and how comfortable you are with consistency control.
Two likely culprits: your icing is too thin, or you skipped the outline step. Flood-consistency royal icing will run off the cookie unless you have a thicker outline holding it in place. Pipe an outline first with thicker icing, then flood inside it with the thinner frosting. If your outline icing or sugar cookie icing is running, the icing is too thin overall—add powdered sugar a tablespoon at a time to thicken it up.
Royal icing takes 6-8 hours to harden completely at room temperature. Sugar cookie icing can take up to 24 hours to fully set. If your kitchen is humid, drying takes longer. A box fan blowing gently across the cookies speeds it up significantly and also gives royal icing a shinier finish. Don’t stack decorated cookies until the icing is hard to the touch. Even then, it’s best to place parchment between layers so the bottom of the cookies doesn’t leave crumbs or marks on the icing.
Yes, meringue powder is the most common substitute and is what many professional cookie decorators use. It’s a pasteurized dried egg white product that you reconstitute with water. The texture and behavior are nearly identical to fresh egg whites when making royal icing. Check the label on the package for specific substitution instructions. You can also make royal icing with pasteurized liquid egg whites from a carton if you’re concerned about raw eggs. My royal icing recipe walks through the egg white version in detail.
You want a cookie that holds its shape during baking, has a flat top, and is sturdy enough to support a layer of icing without breaking. The two most popular choices are cut-out sugar cookies and gingerbread cookies—both have flat surfaces, hold detailed shapes, and stand up to flooding. My snowflake cookies are also a great choice for the winter holidays. Avoid cookies that puff up or spread (like chocolate chip cookies) since the uneven surface makes piping difficult.
More Tutorials To Try
Learn more techniques from one of my other Baking Academy lessons:
- Academy: How to Freeze Cookies — freeze your cutouts to prep ahead for a cookie decorating party
- Academy: How Long To Chill Cookie Dough — a guide for baking cookies with the best texture, flavor, and spread
- Academy: Knowing You Oven — learn how to identify hotspots to bake the perfect cookies for decorating
- Academy: Essential Kitchen Tools & Utensils — everything you need (and what you don’t) to stock your kitchen for easy cooking and baking
- Academy: How To Decorate A Cake — frosting and decorating fundamentals for layer cakes
If you’ve used this Academy lesson on How To Decorate Cookies, then don’t forget to rate it and let me know how you got on in the comments below. I love hearing from you!






