
This post may contain affiliate links. Please read our disclosure policy.





Learn how to freeze every type of cookie dough: drop, slice-and-bake, cutout, and shaped cookies. Plus, exactly how to bake from frozen, how long it really keeps, and which doughs you should never freeze.
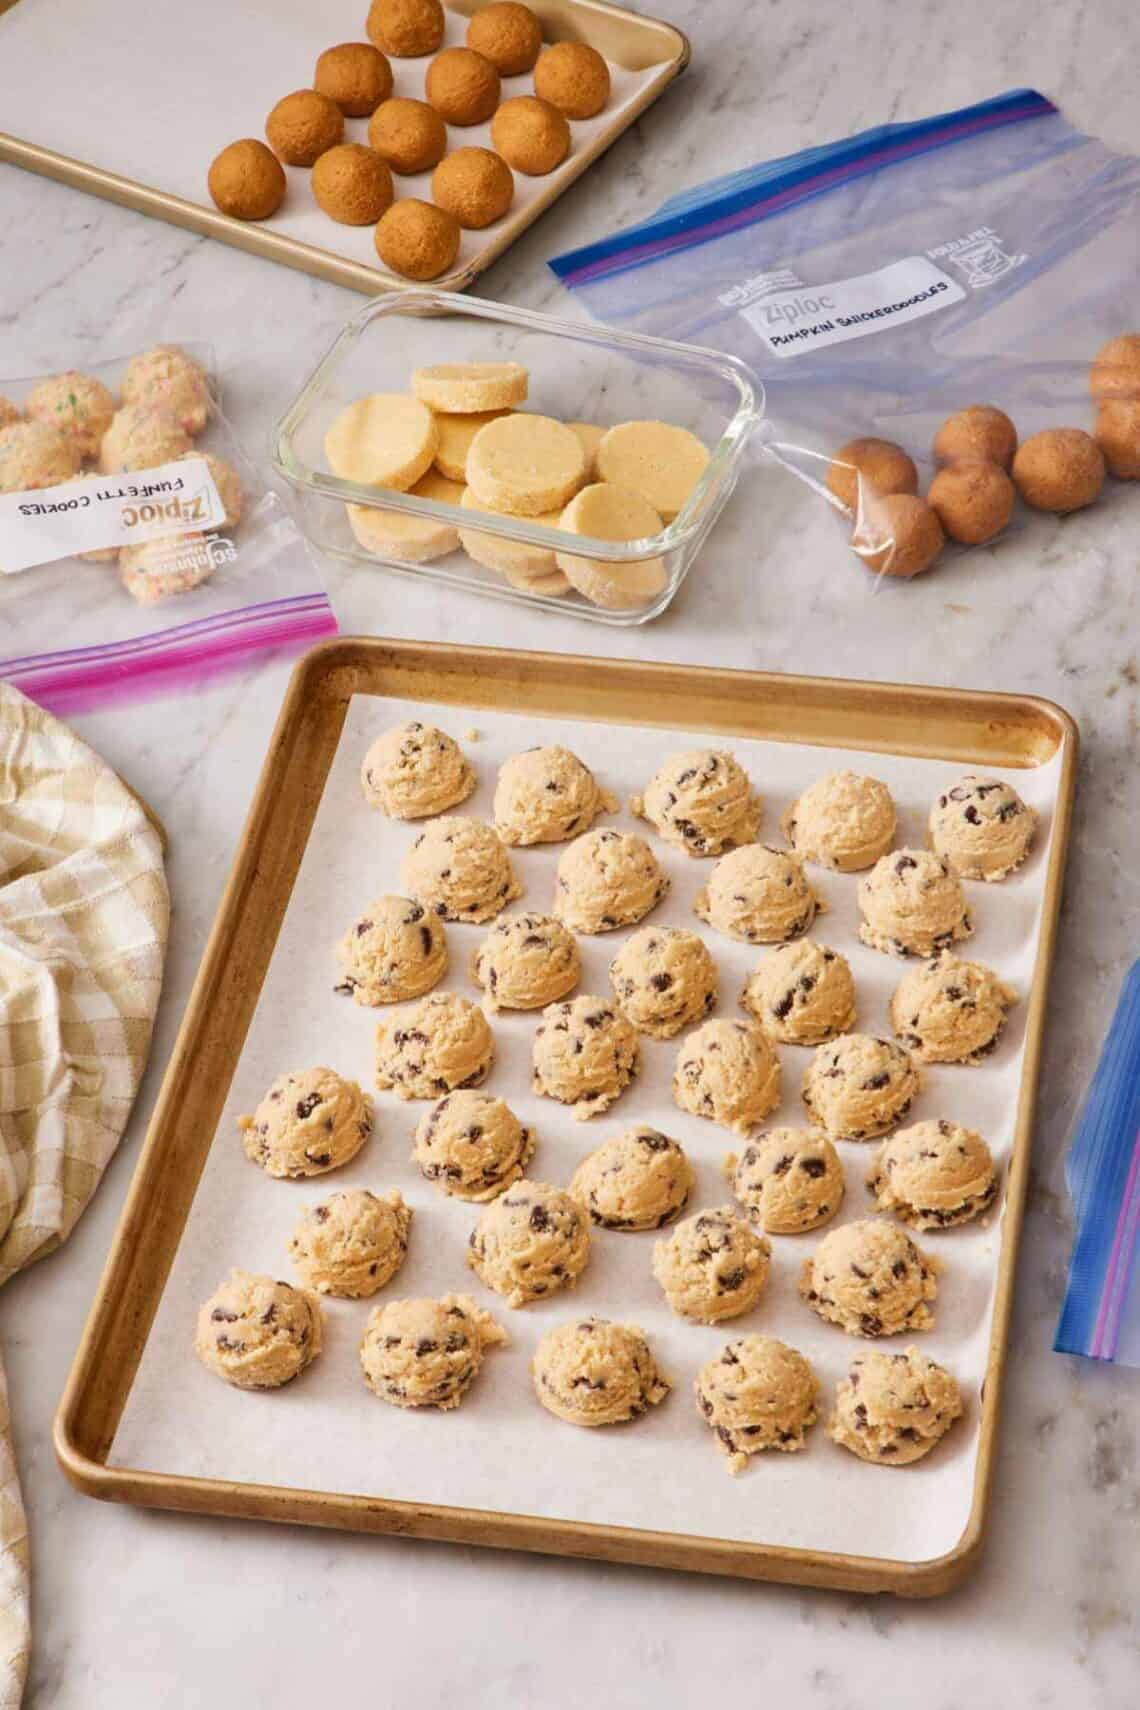
I keep cookie dough in my freezer—a few dough balls in a labeled bag means warm cookies for a kid’s last-minute sleepover, for a friend dropping by, or when I just want one with coffee. The actual baking takes longer than popping the frozen dough on a sheet pan. And once you’ve done it a few times, freezing dough goes from a kitchen project to a habit.
This guide is the long version of every cookie freezing question I’ve gotten over the years: what dough to freeze (and what not to), how to portion and store it, how to bake straight from frozen without ending up with thick rocks that won’t spread, how long it actually keeps, and the chemistry of why some doughs handle the freezer beautifully and others fall apart. Whether you’re stockpiling sugar cookies for the holidays or just trying to outsmart a Tuesday-night cookie craving, the technique works the same.
“This post was so helpful! Every time I make cookies, I want to save some dough to bake later, but I don’t know how to freeze it without the dough balls sticking together or developing ice crystals. Now I do, and I freeze all kinds of cookie dough!”
Mindy
What Types Of Cookie Dough Can You Freeze?
The short answer: almost any cookie dough built around butter, flour, sugar, and eggs. The longer answer is that how you freeze depends on the cookie’s structure, and getting that wrong is what gives people frozen-cookie horror stories. I sort the doughs I freeze into four types:
| Cookie Dough Type | Why It Works |
| Drop Cookies | The dough you scoop straight from the bowl onto a baking sheet. Classic chocolate chip cookies, oatmeal chocolate chip cookies, double chocolate chip cookies, s’mores cookies, white chocolate macadamia cookies, and chocolate crinkle cookies all sit here. These are the easiest to freeze and the most rewarding, and you can bake one at a time straight from the freezer. |
| Slice-and-bake cookies | Dough that’s shaped into a log, chilled, then sliced into rounds. Butter cookies, pinwheel cookies, cinnamon roll cookies, and most shortbread cookies work this way. The freezer is actually a friend to slice-and-bake doughs because a fully frozen log can slice cleaner than a chilled one. |
| Cutout cookies | Rolled and cut from a disc. Lofthouse cookies, classic sugar cookies, gingerbread men, and snowflake cookies belong here. You have two options: freeze the dough as a disc and roll-and-cut later, or pre-cut the shapes and freeze them on a tray to bake straight from frozen. |
| Shaped cookies | Formed by hand before baking. Thumbprint cookies, peanut butter cookies with the fork crosshatch, Mexican wedding cookies before the powdered-sugar coating, shaped candy cane cookies. These freeze well as long as the shape is locked in before they go in the freezer. |
The Cookie Doughs You Should Never Freeze
Almost every cookie guide tells you which cookies freeze well, but what about the ones that don’t? There’s a real list, and it matters because freezing the wrong dough wastes your ingredients and time.
| Cookie Dough Type | Why It Doesn’t Work |
| Macarons | Freezing a tray of piped French macaron shells (unbaked) may feel like an excellent way to get ahead on a time-consuming recipe—but it doesn’t work. The meringue structure depends on a delicate egg white foam stabilized by sugar, and freezing destabilizes that foam. The shells come out flat, hollow, and sad when baked. The same problem applies to any meringue-based cookie batter, including meringue cookies or kisses. Bake them, then freeze the finished cookies if you need to make ahead. |
| Madeleines and other cake-batter cookies | These are made from a thin batter that depends on the leavening reaction happening immediately when the cold batter hits the hot pan. Because they would need to thaw after freezing, the batter loses the leavening’s punch and affects the texture of the batter, giving you flat, dense madeleines. (Madeleine batter can rest in the fridge overnight, just not the freezer.) |
| Florentines and lace cookies | Made from a butter-sugar-cream mixture that’s barely a dough at all—more of a syrup that hardens into thin, crisp lace. The mixture separates when frozen and doesn’t recombine cleanly when thawed. Bake fresh. |
| Pizzelles, krumkake, and other iron-pressed cookies | The batter is too thin and too eggy to handle freezing. Same logic as madeleines. (Freeze already baked.) |
The pattern: Doughs that are very wet, use whipped eggs, or are batter-like rather than dough-like don’t survive the freezer. The ones that freeze well are higher in fat and sugar and lower in moisture—chunky, scoopable, hold-their-shape doughs. If you can roll it into a ball without it flowing through your fingers, it’ll probably freeze fine.
How To Freeze Drop Cookies (The Flash Freeze Method)
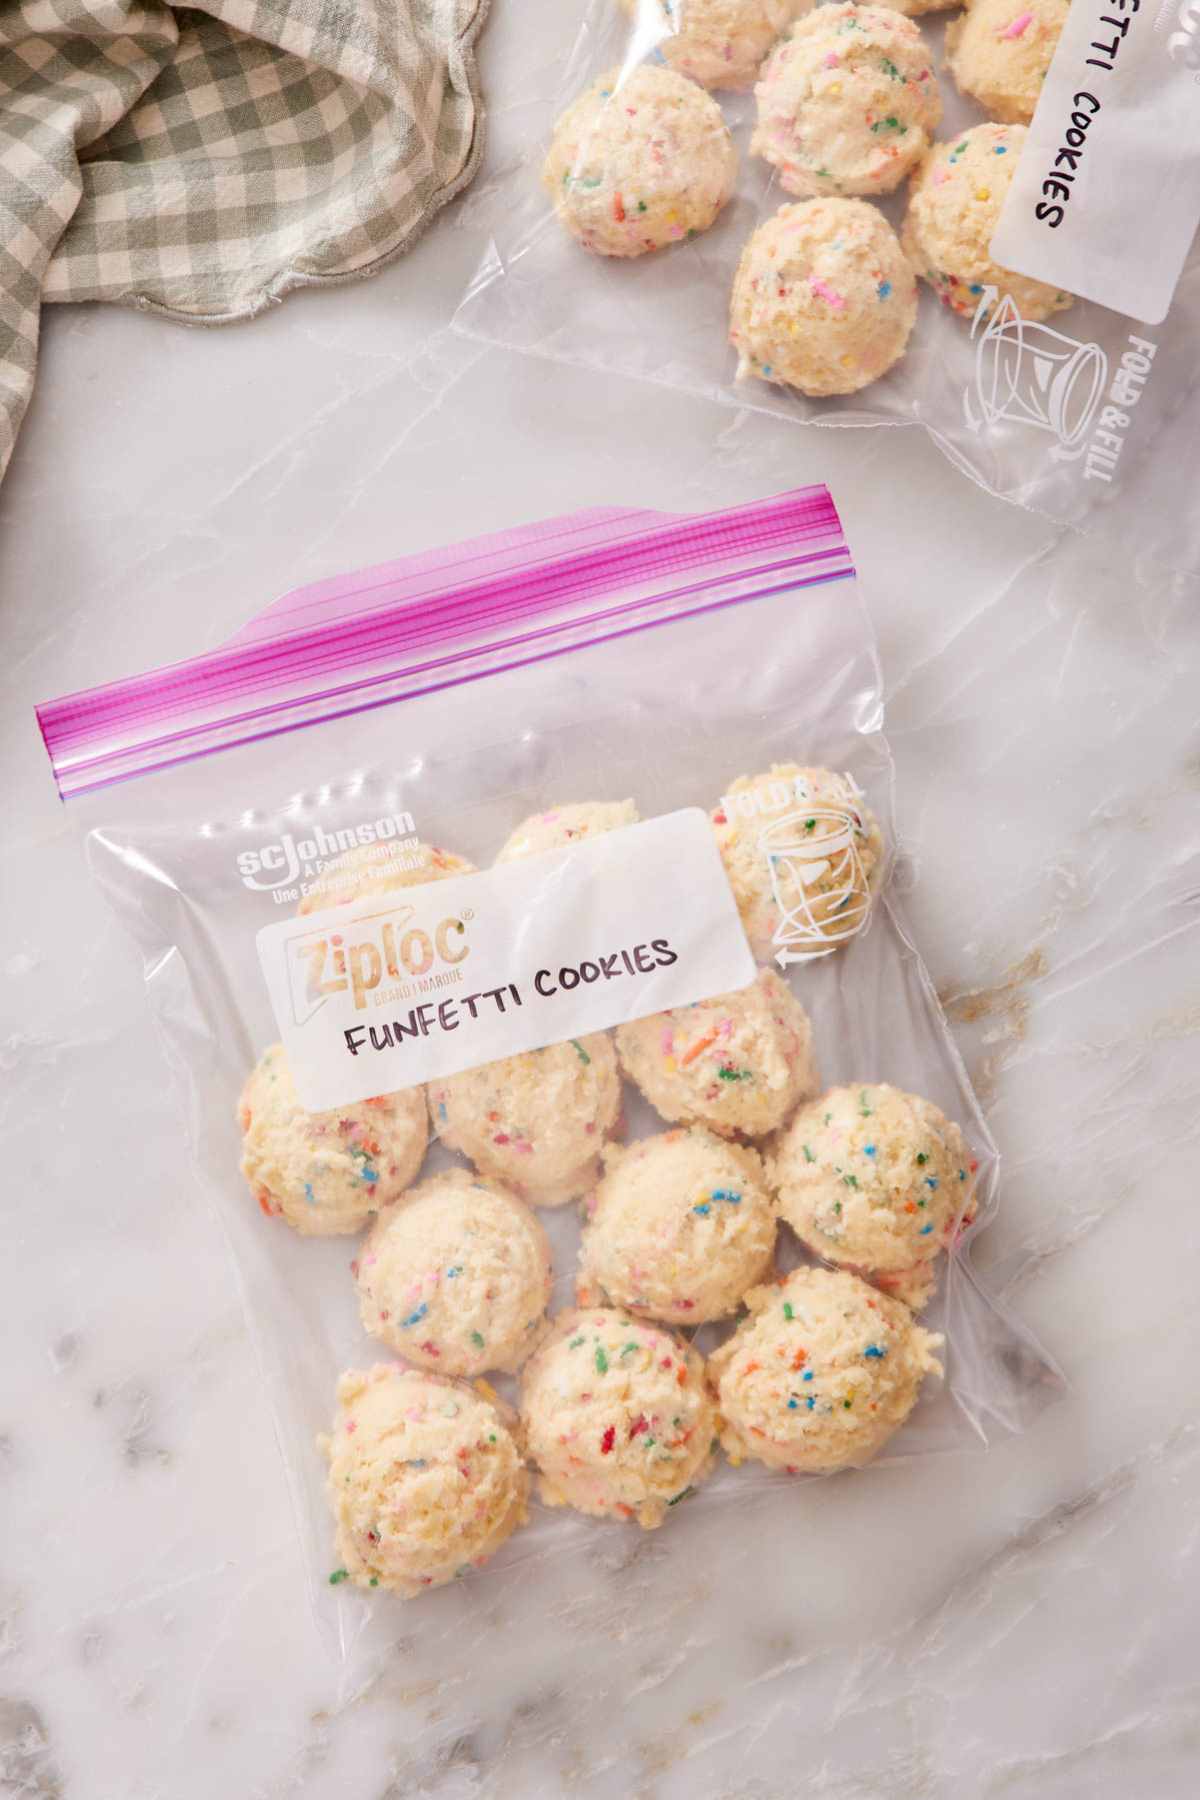
This is the method I use 90% of the time. Drop cookies make up most of my baking, and the flash-freeze process means I can pull out exactly the number of cookies I want to bake later (three, six, twelve, whatever) without thawing anything.
1. Make and chill the dough first (if needed). If your recipe calls for chilling the dough before scooping, don’t skip that step before freezing. Chilling does two things: it lets the flour fully hydrate, which improves flavor, and it firms up the butter so the dough holds its shape when scooped.
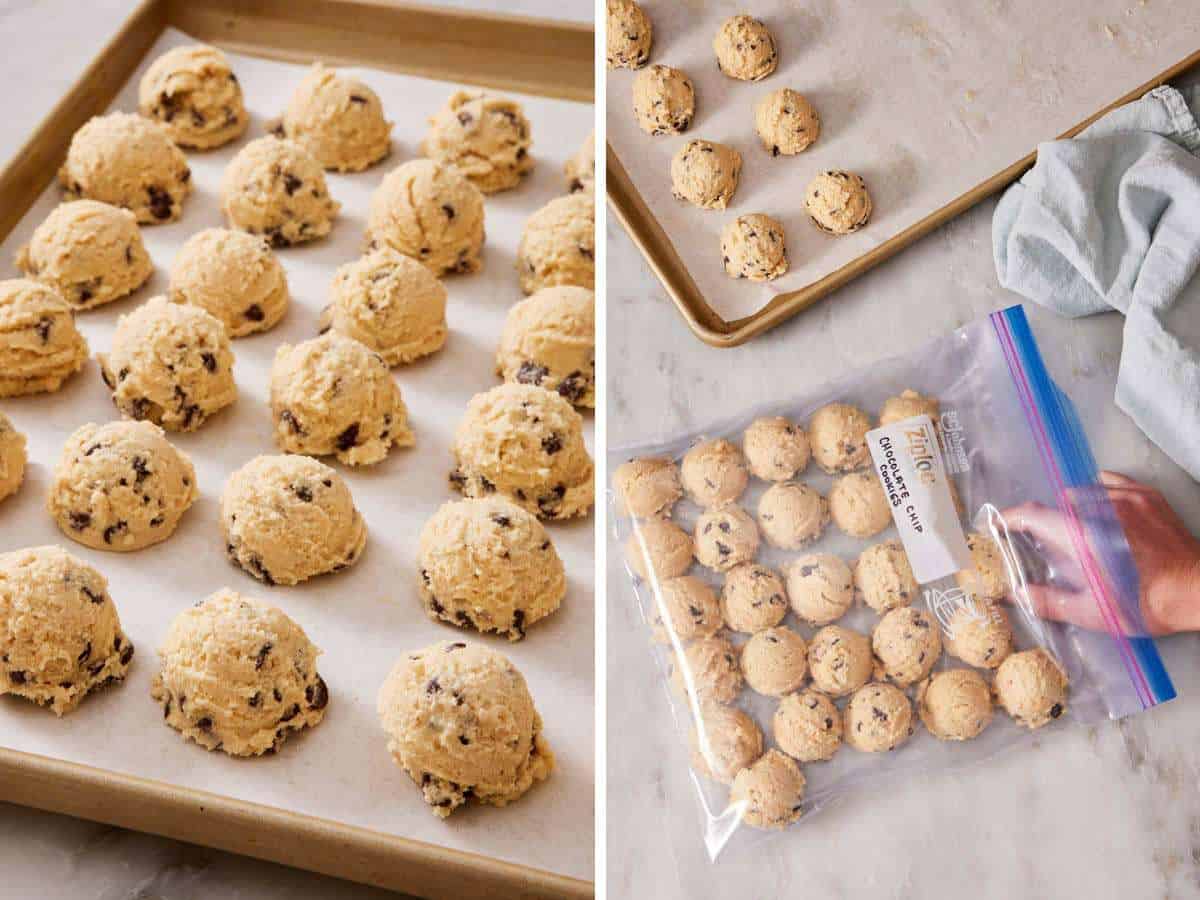
2. Scoop into balls. Use a cookie scoop for consistent size. A #40 scoop (about 1.5 tablespoons) is my workhorse for most drop cookies. Roll lightly with your hands after scooping if the dough needs to be in a smooth, uniform ball. Place the dough balls on a parchment-lined baking sheet, close together but not touching. They don’t need spacing on the freezing tray as they do for baking—they just need to not touch each other so they don’t stick together.
3. Flash-freeze on the tray. Put the tray flat in the freezer for 1 to 2 hours, until the dough balls are solid all the way through. This is the critical step. If you skip flash-freezing and dump scooped dough straight into a bag, you’ll come back the next day to one dough boulder you have to chip apart. The flash-freeze locks each ball into a solid shape that can be placed into a bag freely.
4. Transfer to a bag, press out air, label. Move the frozen dough balls into a freezer-safe zip-top bag. Press out as much air as you can—air carries the moisture that becomes ice crystals on the surface, which is the actual mechanism behind freezer burn. (More on that below.) Label with the recipe name, the freeze date, and the bake temperature and time. Future-you will be glad you wrote down the baking details!
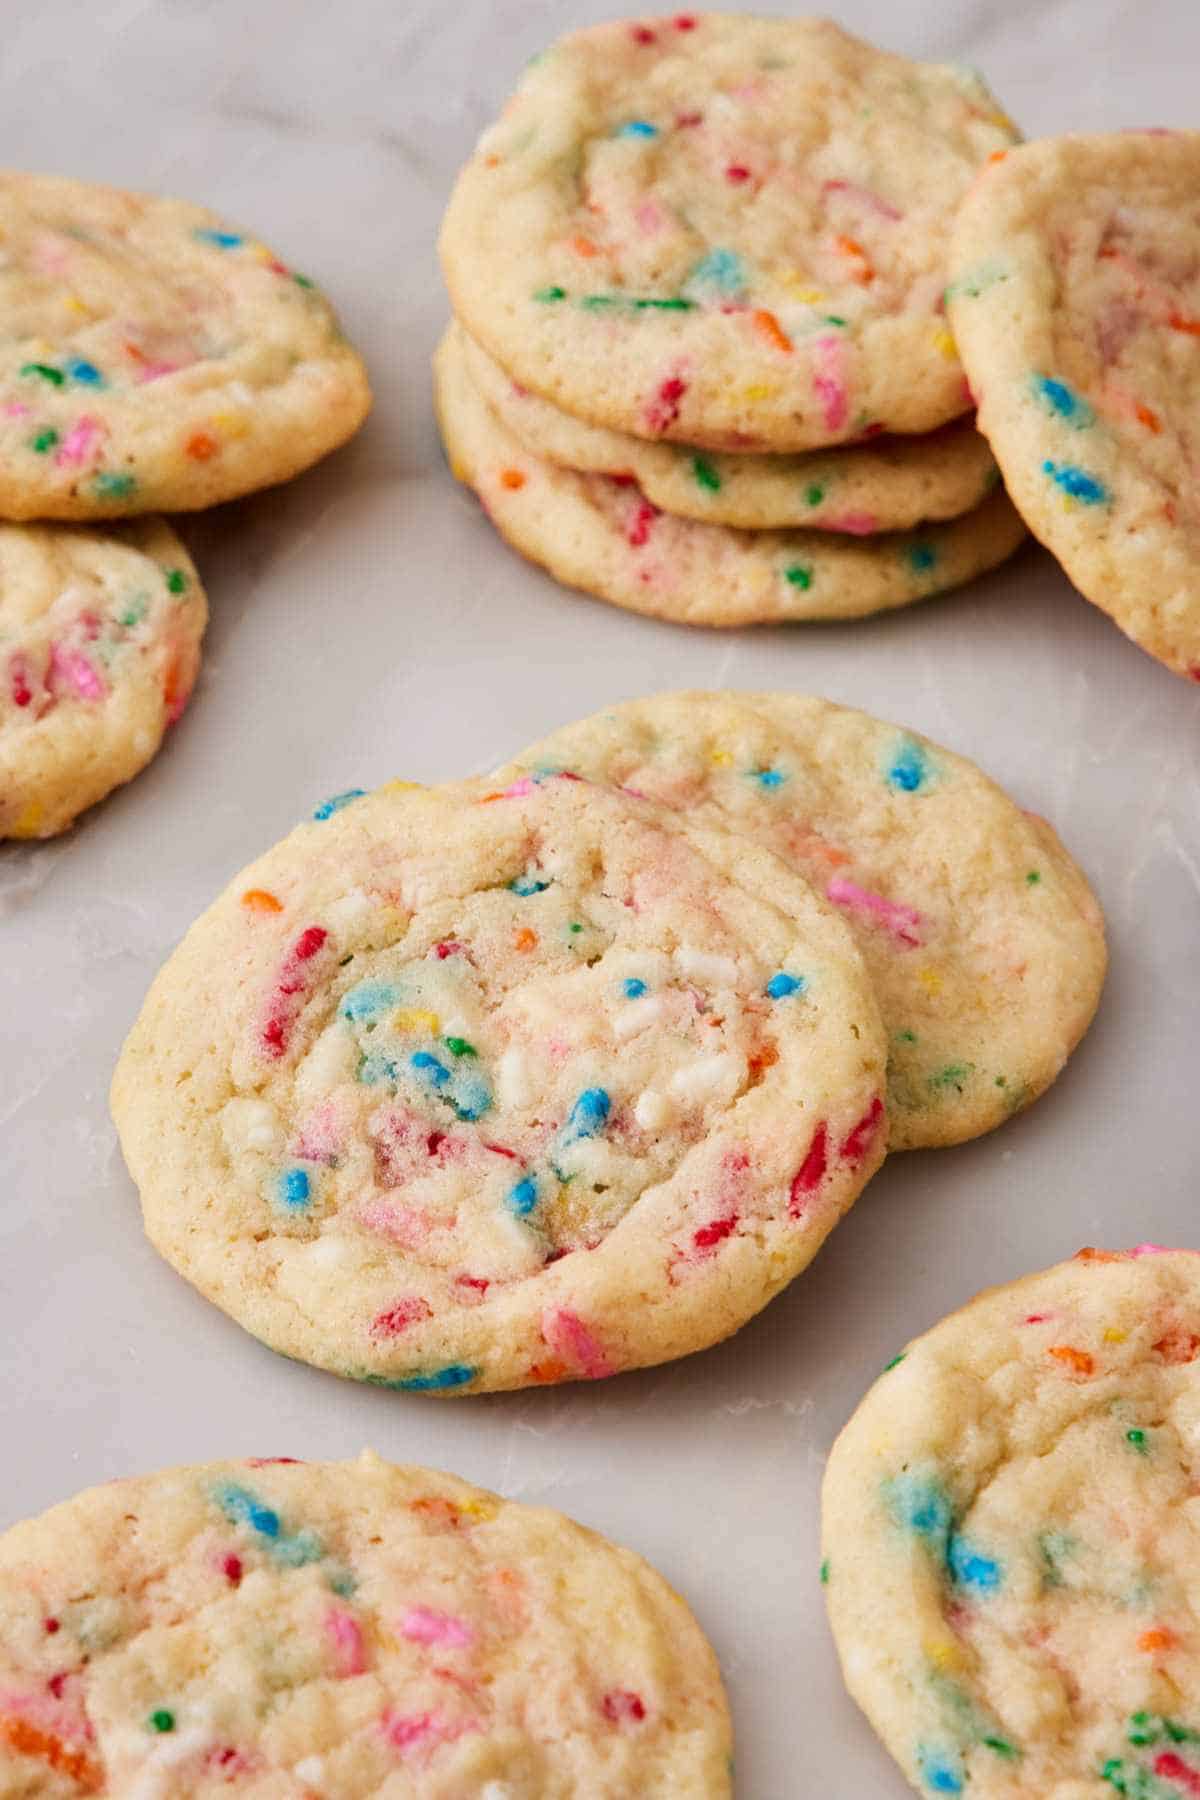
This method works for funfetti cookies, molasses cookies, snickerdoodle cookies, lemon cookies, and basically every drop cookie I make. The few exceptions—cookies that get coated in sugar or spice before baking have a small modification, which I’ll cover in the coating rule below.
How To Freeze Slice-And-Bake Dough (The Log Method)
Slice-and-bake doughs were practically invented for the freezer. The whole point of a slice-and-bake cookie is that the dough rests cold so the butter sets, then slices into clean rounds. In many cases, a fully frozen log slices even cleaner than a chilled one, so you get sharper edges and more uniform thickness.
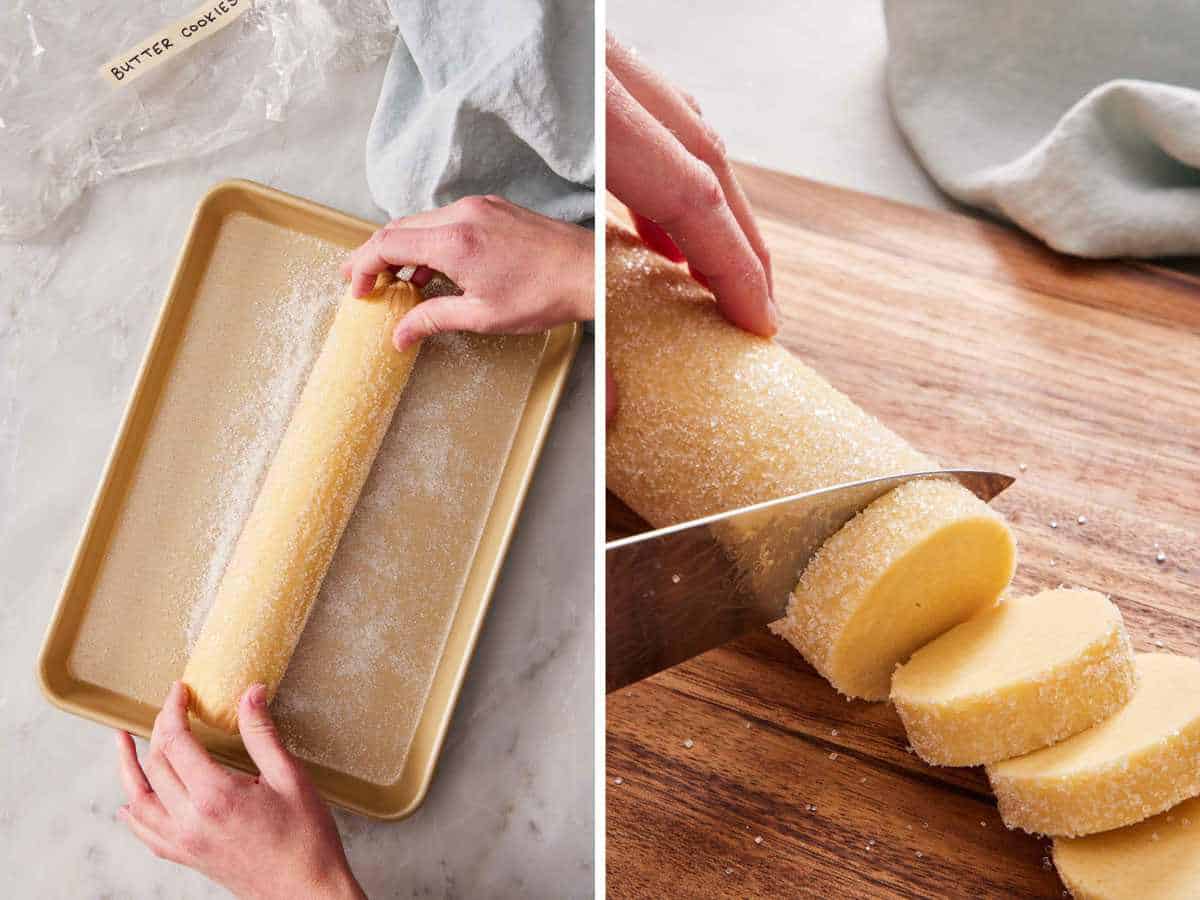
1. Shape into a log. Roll the dough on a sheet of parchment or plastic wrap into a tight cylinder, usually about 1.5 to 2 inches in diameter. The tighter you roll, the cleaner your slices will be later (air pockets in the log become uneven cookies after slicing). Once rolled, tighten the log by twisting both ends of the wrapping like a Tootsie roll.
2. Store and label. Slide the loaf into a freezer-safe bag or wrap again in foil so the cookie dough is protected from freezer burn. Label the log with the cookie dough type and any instructions for slicing and baking.
3. Freeze flat at first. If the log is soft, freeze it flat on a tray for the first hour or two before standing it up. Letting a soft log freeze on its side gives you a perfectly round, straight log; freezing it standing up while still soft can cause it to bend or slump.
4. Slice from frozen, bake from frozen—or thaw briefly first. When you’re ready to bake, you have two options. You can take the log straight from the freezer, slice with a sharp serrated knife (a smooth chef’s knife works, but it can crack the cold dough). If needed, let it rest for 10-15 minutes on the counter to make it easier to slice. Then, bake from frozen, adding 1-3 minutes to the bake time. Or you can thaw it in the fridge overnight and then slice, which is sometimes easier on the knife and the wrist. (Most recipes will tell you if the dough can be sliced from frozen.)
Save the coating for the end, if you have time. If your slice-and-bake recipe gets coated in sparkling sugar, sprinkles, or chopped nuts before baking (like a sparkly sugar-rim shortbread), thaw the log in the fridge first. The coating won’t stick to a frozen surface even with an egg wash (the wash freezes the moment it hits the cold dough), so do this step last. You can technically coat the logs before freezing, but the freezer can damage some coatings like sprinkles or make raw nuts take on a freezer taste with long-term freezing, so just keep that in mind.

How To Freeze Cutout Cookie Dough (Disc Or Pre-Cut)
Cutout cookies, like sugar cookies, gingerbread men, and hearts, have two options for freezing. I’ve used both at different times for different reasons.
Option 1: The disc method. Shape the dough into a flattened disc about 1 inch thick, then wrap tightly in plastic wrap, slide into a freezer bag, and freeze. To use, thaw the dough in the refrigerator overnight (about 12 hours) before rolling and cutting. This is the method I use when I’m not sure yet what shape I want to cut, or when freezer space is tight—discs stack flatter than a tray of cutouts.
Option 2: The pre-cut method. Roll out the dough, cut your shapes, and lay them on a parchment-lined sheet (you can stack layers separated by parchment). Then, tightly wrap the whole tray in a few layers of plastic wrap and freeze. This method is the way to go if you know you want gingerbread men or stars or hearts, and you want to bake them straight from frozen. Frozen cutouts hold their shape much better in the oven than thawed cutouts. The butter stays solid for the first few minutes of baking, which is exactly what you want for a defined gingerbread man with crisp, identifiable arms and legs.
Both of these options are very helpful if you’re prepping for the holidays or a cookie decorating party. Option 2 will save you more time day-of baking. It’s especially nice when I want to decorate Christmas cookies with the kids but want to focus on spending time with them doing the most fun part, and not rolling and cutting.

How To Freeze Shaped Cookies
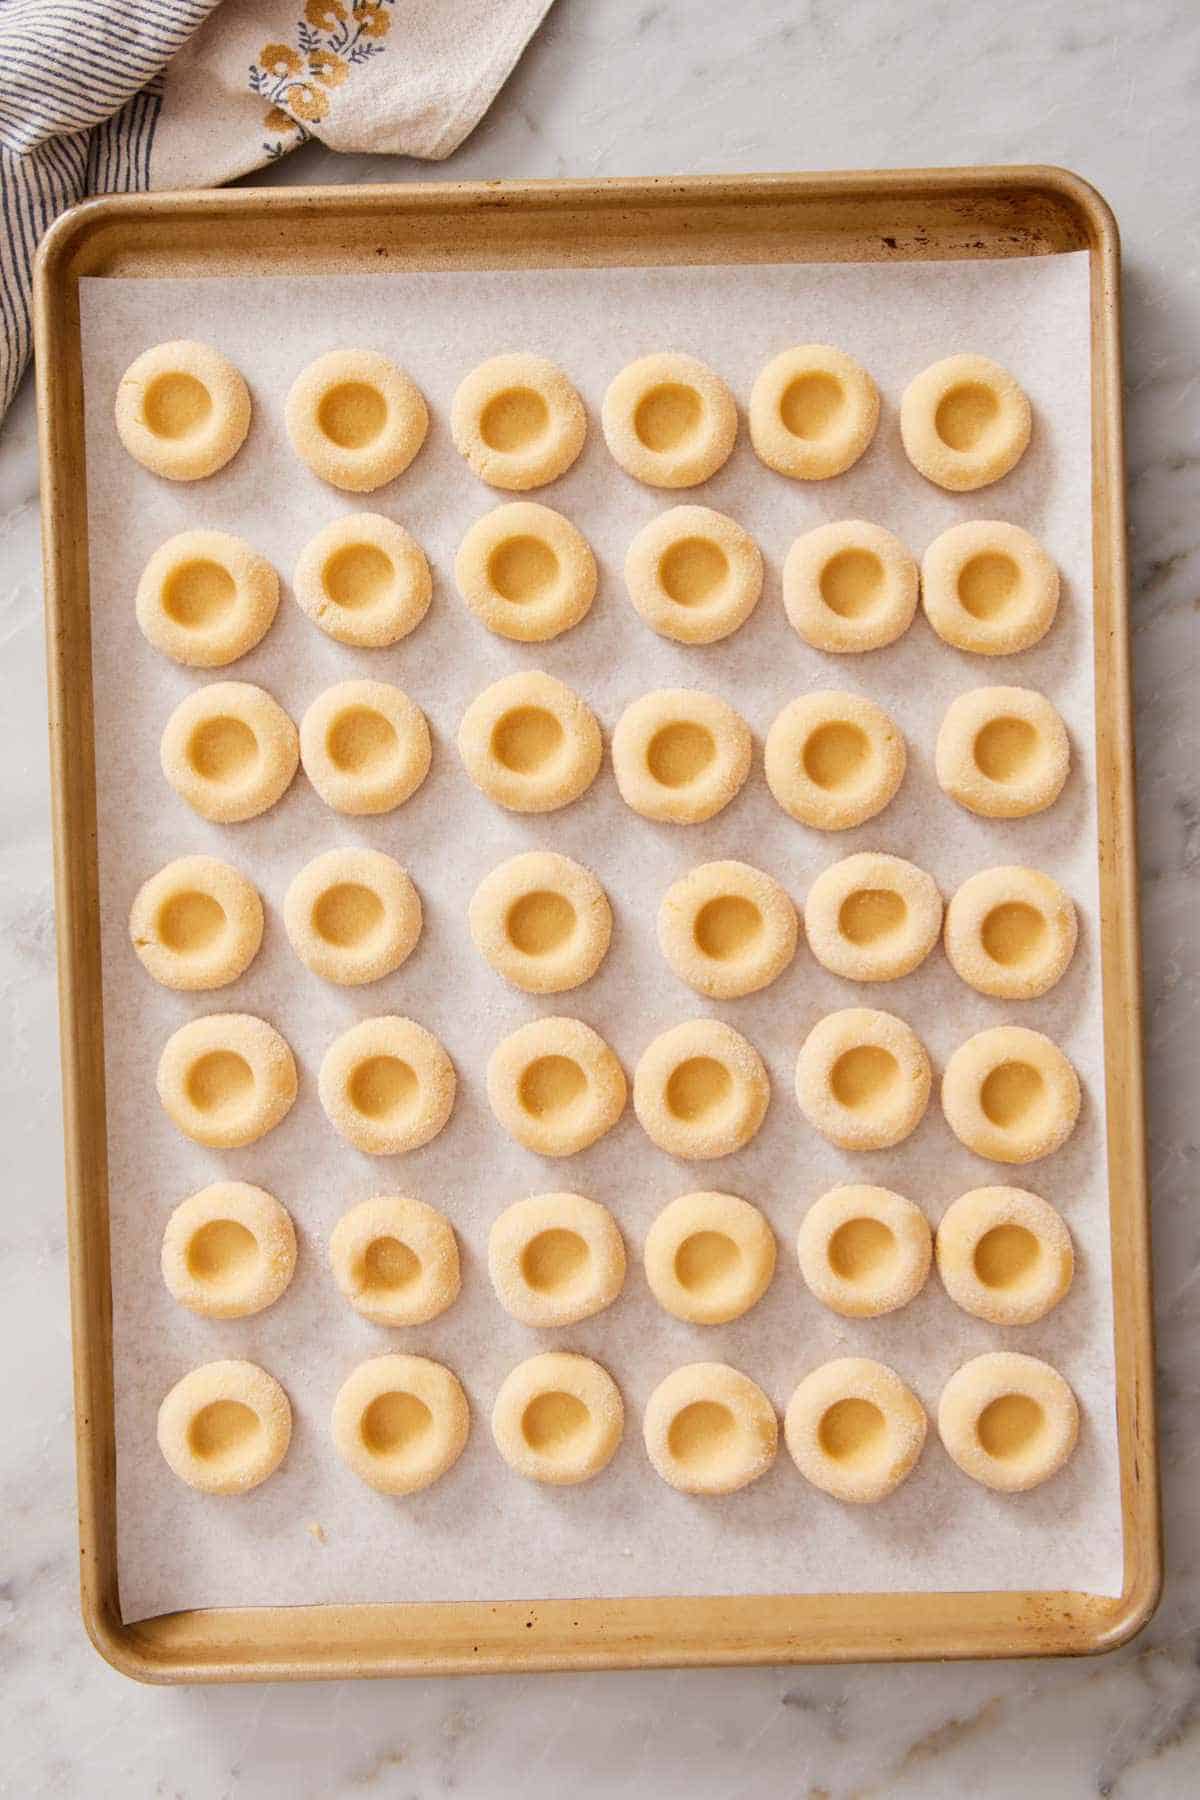
Shaped cookies are anything you press, pinch, or imprint before baking—thumbprint cookies with the well already pressed, peanut butter cookies with the fork crosshatch, or candy cane cookies twisted into their shape. The technique mirrors drop cookies with one extra step:
1. Shape the cookies completely. Make the well in the thumbprint, do the fork press on the peanut butter cookie, and twist the candy canes. The shape needs to be locked in before freezing, because once frozen, you can’t reform the dough without thawing and cracking.
2. Freeze on the tray uncovered first. Same flash-freeze logic as drop cookies—shapes need to lock solid before going in a bag. 1-2 hours in the freezer will firm them up enough to be ready to store.
3. Transfer to a bag or container. Once frozen, shaped cookies are surprisingly resilient. The peanut butter fork pattern stays sharp for the entire freeze. Pop them in a freezer bag or a freezer-safe container and label it.
4. Bake from frozen. Add 1-3 minutes to the recipe’s bake time. The frozen state is actually a feature here—the freezer-firmed butter holds the shape better.
For thumbprints that get a filling, don’t add it for freezing. The jam, caramel, or ganache goes in either after the cookies come out of the oven or right before baking, depending on your recipe.
The Coating Rule (And When To Break It)
Certain sugar coatings, spice coatings, and powdered-sugar dustings don’t always survive the freezer well. The frozen surface forms tiny ice crystals as it thaws, and those crystals dissolve the coating into a wet, splotchy mess that bakes weird. The general rule: Coat after freezing, just before baking. The types that are most likely to fail are:
- Cinnamon-sugar coatings on snickerdoodles → coat fresh, just before baking
- Powdered sugar coatings on crinkle cookies → coat right before baking (this is true for the fresh cookie dough balls, as well)
- Colored sparkling sugar coating on thumbprints or sugar cookies → thaw and coat just before baking. The color can bleed with long-term freezer storage.
The exceptions are coatings that aren’t moisture-sensitive: Granulated or sparkling sugar pressed lightly into the surface of a shaped cookie before freezing usually holds up fine, because the sugar crystals are robust enough to ride out the freeze-thaw cycle. Chopped nuts and sprinkles are also generally okay. But keep in mind that they can change color or absorb freezer flavors with longer storage.
Here’s the workaround that makes life easier when you want to bake straight from frozen (no thawing) and still get a coating: Warm the frozen dough in your hands for 30 seconds before rolling. The surface gets just tacky enough for the sugar to adhere without the dough fully thawing. This is my move for spiced-sugar coatings on holiday cookies—it keeps the dough cold enough to behave in the oven and gets the coating on cleanly.
Storing Frozen Cookie Dough Without Freezer Burn
Freezer burn is a moisture migration problem, not a “your freezer is too cold” problem. Here’s what’s actually happening: moisture from the dough sublimates, meaning it turns into a vapor and moves into the air trapped within your container. That vapor then redeposits as new ice crystals on the dough’s surface. Over weeks or months of this continuing, the dough surface dehydrates and develops the dry, leathery patches we call freezer burn. The USDA’s Food Safety and Inspection Service confirms freezer burn is a quality issue, not a safety one—freezer-burnt dough is still safe to bake; it just won’t taste as good.
There are two ways to slow it down: reduce the air around the food and reduce the temperature swings the food experiences. Chilling the cookie dough in the fridge first reduces the gap in temperature between the dough and the freezer.
Here are the best containers and methods for freezing cookie dough:
| Container | Method |
| Freezer bags (zip-top) | My everyday solution. Press out as much air as you possibly can before sealing. The straw trick—seal the top of the bag with a straw end poked inside, suck the air out through a straw, then seal. This works surprisingly well and is what I use for short-term storage of a couple of weeks. (This works similarly to a vacuum sealer, but with the need for an appliance!) Stack flat for efficient freezer use. |
| Plastic wrap, then foil (or bag) | Best for logs and discs of slice-and-bake or cutout dough. The plastic wrap forms an airtight skin against the dough; the foil layer protects against punctures and adds a second moisture barrier. |
| Lidded freezer containers | Useful for organizing multiple types of cookies in the same container. The downside is you can’t press the air out, so I press a piece of plastic wrap directly onto the dough surface inside the container before putting the lid on. The plastic wrap takes the place of pressed-out air. |
| Vacuum sealer | The gold standard for long-term storage. My executive editor, Sarah, vacuum-seals cookie dough balls and has pulled them out a year later, and they still bake perfectly. If you bake in volume or hit big sales on butter and want to make cookies for the holidays in July, a vacuum sealer is the upgrade that pays back fastest. |
The pattern: More air around the dough = faster freezer burn. The single biggest improvement most home freezers can make is just pressing the air out of the bag (bonus, if you use the straw trick or a vacuum sealer).

How Long Does Cookie Dough Really Keep In The Freezer?
The honest answer surprises people. Frozen cookie dough is safe almost indefinitely at 0°F. The 3-month number you see everywhere—including my own pages—is a quality recommendation, not a safety one. The USDA’s Food Safety and Inspection Service is explicit on this: Freezer storage time limits exist because of texture and flavor degradation, not because of microbial risk. Bacteria don’t multiply at 0°F. Cookie dough doesn’t go bad in the freezer in the food-safety sense, as long as it stays frozen.
What it does is degrade. After about 3 months, stored dough starts to lose moisture, the butter can develop slight off-notes, and the texture firms up in a way that affects spread when baked. After 6 months, dough usually shows a bigger texture shift unless your freezer runs especially cold and steady. After a year, the dough will be quite dry and most certainly has ice crystals all over it (unless you vacuum seal).
My practical recommendations:
- 3 months for dough in zip-top bags or airtight containers without pressing the air out. Default expectation.
- 4-6 months for dough double-wrapped dough discs and logs (plastic + foil), or zip-top bags with pressed-out air.
- Up to a year for vacuum-sealed dough in a chest freezer that doesn’t see daily door openings.
Label everything. The single most useful number on the label isn’t the recipe name; it’s the freeze date. Don’t get trapped into baking less-than-delicious cookies by finding that unlabeled bag behind the frozen peas in a year.

How To Bake Cookies From Frozen
Most frozen cookie dough bakes essentially the same way fresh dough does, with one adjustment. (See below about dough spreading to suit your preference, though.) The dough takes a few extra minutes to come up to baking temperature in the oven, so most recipes need 1 to 3 extra minutes added to the bake time.
The technique:
1. Preheat the oven to whatever the recipe calls for, no adjustment.
2. Place the frozen dough balls (or slices, or cutouts) on a parchment-lined baking sheet, spaced as the recipe directs. They don’t need to thaw.
3. Bake for the original recipe time plus 1-3 minutes. Start checking at the original time and add a minute at a time until the cookies look right—golden edges, set tops, slight glisten in the center for chewy styles.
4. Pull from the oven and cool on the sheet for the recipe-specified rest time.
That’s it for most cookies. The exceptions are slice-and-bake dough that benefits from a 10-15 minute counter rest before slicing (so the knife has an easier time), dough discs that need to thaw overnight before rolling, and dough that’s destined to be coated in sugar (which gets that coating just before the oven, after a brief warming in your palms or thaw).
The Spread Test: Why Frozen Dough Spreads Less
Here’s the bake-from-frozen quirk almost no other freezer-cookie guide tells you about. Cookies baked from frozen dough spread less than cookies baked from fresh dough. Sometimes that’s a feature; sometimes it’s a problem.
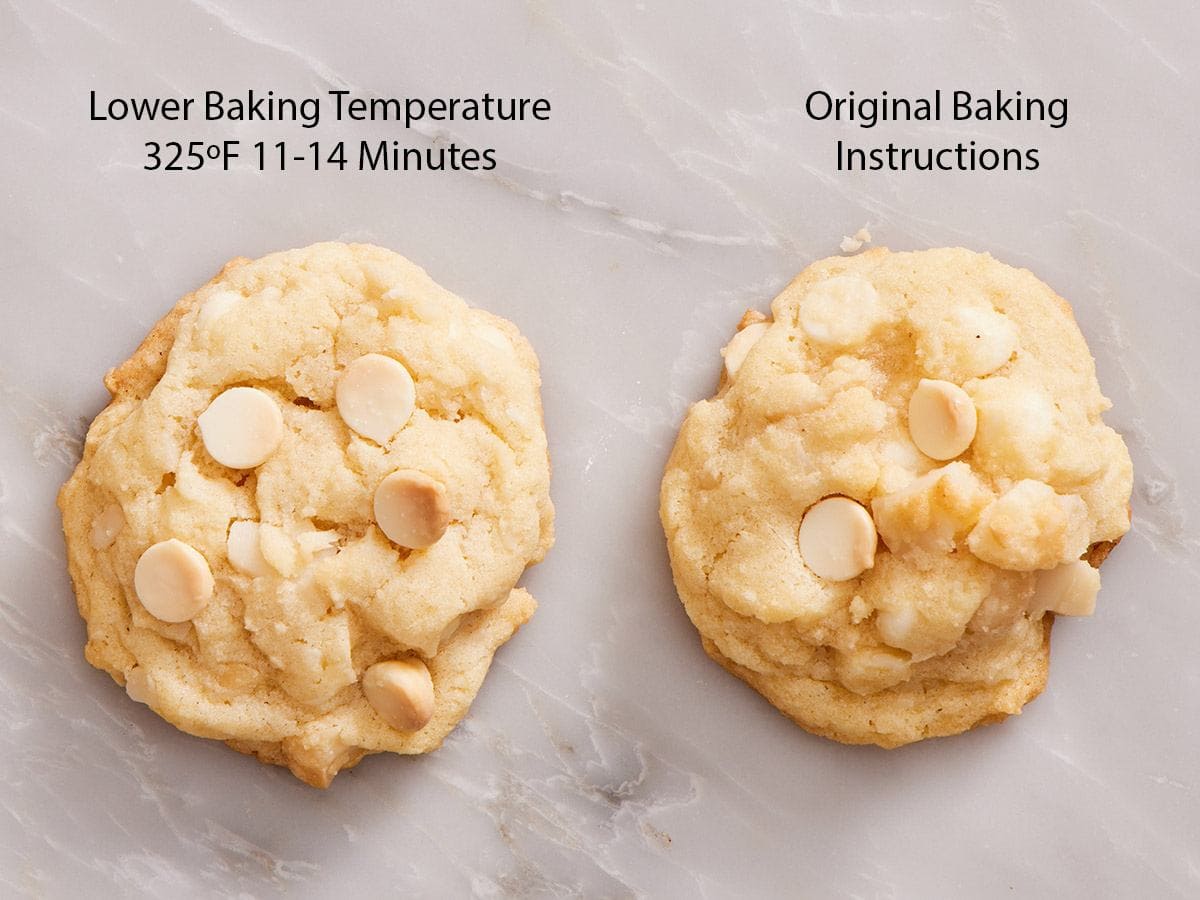
The chemistry is simple. Cookie spread happens when butter melts faster than the flour structure sets up around it—molten butter flows outward, the dough flows with it, and the cookie spreads. Frozen butter takes longer to melt than room-temperature or chilled butter, which gives the egg proteins, sugar, and the developed gluten structure more time to set up before the spread fully starts. The edges start to firm up and set before the center has finished warming up. The result: a thicker, taller, less-spreadable cookie.
For cutout cookies and shaped cookies, this is exactly what you want. A frozen-baked gingerbread man keeps his arms; a frozen-baked thumbprint keeps its well. Bake at the recipe temperature, add 1-3 minutes.
For drop cookies where you want spread—chocolate chip, oatmeal, funfetti— baking from frozen gives you a noticeably thicker cookie, which some people love and some people find too cakey. To restore the original spread when baking from frozen:
Reduce the oven temperature by 25°F from the original recipe. If your recipe calls for 350°F for 11 minutes, bake at 325°F for 12-15 minutes. The lower temperature gives the butter more time to melt and the dough more time to flow before the structure sets, which closes most of the spread gap. This will take a few more minutes, so add the additional 1-3 minutes still. The cookies come out maybe 5% thicker than the fresh version, which is essentially the same cookie.
There’s no wrong answer. Bake from frozen the first time, see what you get, and adjust on the second batch. If you like thicker cookies, don’t adjust the oven temperature!
Frequently Asked Questions
Not necessarily. The ice crystals can be from condensation that formed during a temperature swing in your freezer (or because the bag wasn’t fully sealed). Brush off any visible ice from the dough surface before baking. It could be from freezer burn, so look for any white or dry patches on the dough that indicate burning.
Both. Let baked cookies cool completely to room temperature, then layer them in a freezer-safe container with parchment between layers. Keep them for up to 3 months for the best quality. To serve, thaw at room temperature for 30 minutes (most cookies) or warm briefly in a 300°F oven for 4-5 minutes if you want them to taste freshly baked or have gooey chocolate chips.
Up to about 3 days is ideal for most doughs. After that, the eggs in the dough start to limit how long it’s temperature safe, even chilled, and the dough can dry out. If you know within a day that you won’t be baking soon, freeze by day 3. Check out my lesson on How Long To Chill Cookie Dough for more details about the time advantage of chilling cookie dough.
Drop cookie dough that was thawed and not yet baked: yes, you can refreeze, but the texture will be slightly degraded. Slice-and-bake or cutout dough that was thawed: no, don’t refreeze. The freeze-thaw-freeze cycle gives you grainy, spotted cookies. Better to bake the whole batch and freeze the baked cookies.
Three likely causes: (1) Frozen butter takes longer to melt than chilled butter, so cookies always spread less from frozen. Try reducing the oven temperature by 25°F as described in the spread test section above. (2) Too much flour in the original dough, which is the most common spread-failure cause regardless of whether it is frozen or fresh. (3) The dough sat too long in the freezer and lost moisture, which firmed it up further. If your dough is fresh and the recipe is right, the reduce oven temperature trick fixes it.
More Baking Tutorials To Try
I have several helpful baking tutorials on the blog to make baking a breeze!
- How Long To Chill Cookie Dough — this tutorial answers all your questions about why you should chill cookie dough for texture and flavor, how long, and what not to chill.
- How to Decorate Cookies — take the stress out of cookie decorating with my simple tutorial with decorating styles and ideas.
- How to Soften Butter — seven methods to soften butter in a matter of minutes.
- How To Make Your Own Powdered Sugar — you can easily make powdered sugar just using granulated sugar and cornstarch.
- How to Soften Brown Sugar — turn rock-hard brown sugar into soft, fluffy sugar again!
If you’ve tried this “how to freeze cookie dough” recipe, then don’t forget to rate it and let me know how you got on in the comments below. I love hearing from you!






