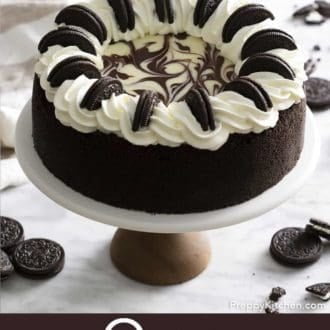
Dessert will never be the same once you taste this blissfully rich Oreo cheesecake. This masterpiece is made with a buttery Oreo crust, a tangy-sweet cream cheese filling, and a stunning white and dark chocolate ganache marble swirl and whipped cream garnish. It is sure to wow!
Each bite is loaded with the iconic cookie’s flavor, with layers of chopped Oreos throughout the creamy cheesecake filling. The homemade ganache duo, piped whipped cream, and cookie adornment takes this cake to the next level. I outline exactly how to create this bakery-style look at home! The perfectly balanced flavors and idyllic presentation make this baked cheesecake a true show-stopper. For more cheesecake recipes, try my chocolate cheesecake, lemon cheesecake, or blueberry cheesecake.
What You Need To Make Oreo Cheesecake
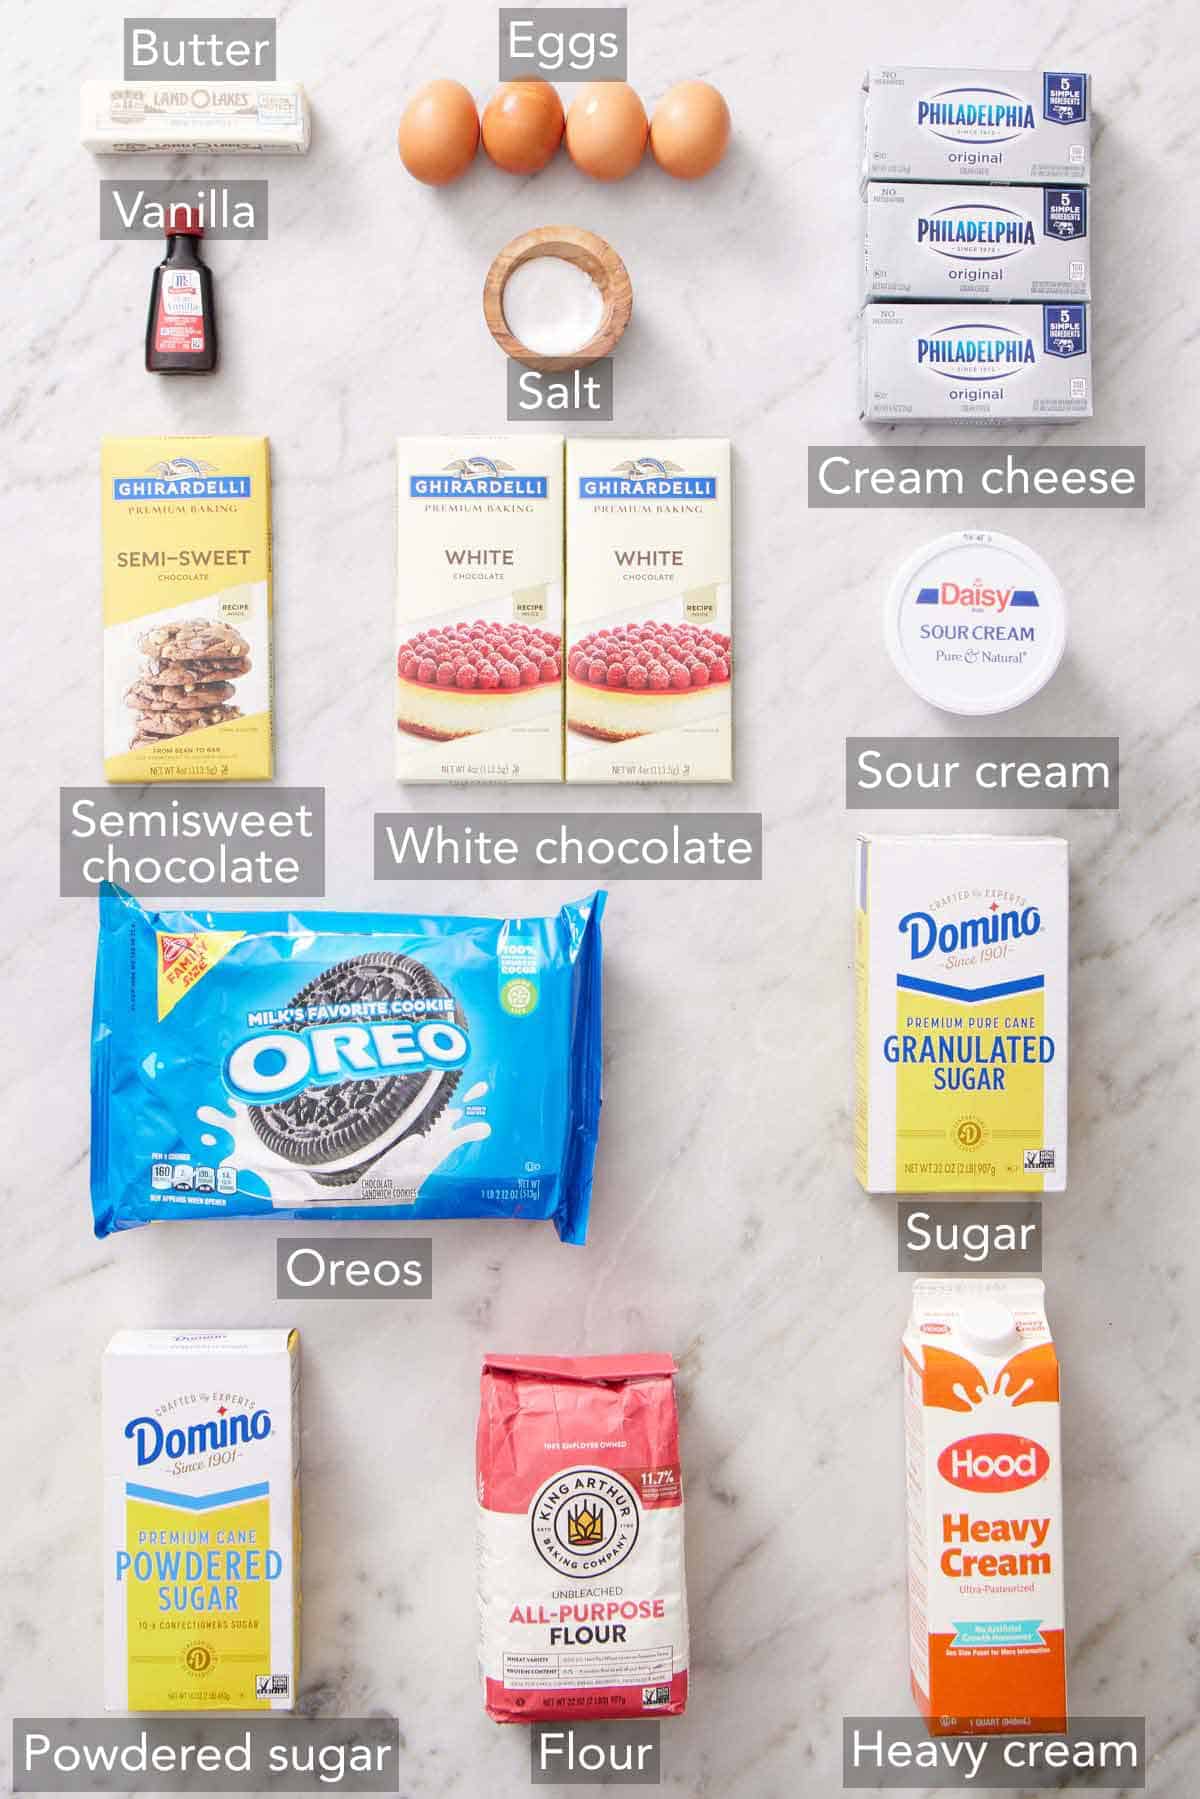
Oreos — these classic chocolate sandwich cookies with a cream filling are the star ingredient in this dessert recipe. You can opt for original Oreos or for a flavor twist, choose a different Oreo flavor. I do not recommend using Double Stuf Oreos, though. The extra filling adds too much sugar to the crust and filling.
Butter — unsalted melted butter binds the cookie crumbs together to create a crisp crust that prevents the filling from leaking out.
Cream Cheese — use full-fat cream cheese for the richest, smoothest filling. Avoid low-fat or whipped versions for the best results, and bring the cream cheese to room temperature before adding it to the recipe.
Sugar — granulated sugar is used to sweeten the cream cheese mixture. I like the break up any clumps before adding the sugar to the cream cheese to make sure the filling turns out smooth.
Sour Cream — full-fat sour cream adds an essential tang and richness to the cheesecake filling. Bring it to room temperature before adding it for easier mixing. Alternatively, swap 1:1 with plain whole-milk Greek yogurt.
Vanilla Extract — use pure vanilla extract for the richest flavor. Look for brands that use real vanilla beans. You can also use vanilla bean paste or scrape the seeds from a vanilla bean pod!
Eggs — for the filling, you will need whole eggs and an egg yolk. Eggs help create the perfect creamy yet light texture of a great cheesecake. Use large, room-temperature eggs, so they incorporate smoothly into the filling.
Chocolate — the ganache requires both white and semi-sweet chocolate. Choose high-quality bars or chips of both types.
Heavy Cream — cold heavy cream, commonly also referred to as heavy whipping cream, is a key ingredient for preparing the ganache and whipped cream. Pull the cream out of the fridge just as you are ready to make your whipped cream. Cold cream whips up beautifully, whereas warm cream doesn’t hold air well and is soft and runny, or can split easily.
Powdered Sugar — helps to sweeten and stabilize the whipped cream while keeping it nice and light. Sift the powdered sugar to remove any clumps for a smooth whipped cream.
How To Make Oreo Cheesecake
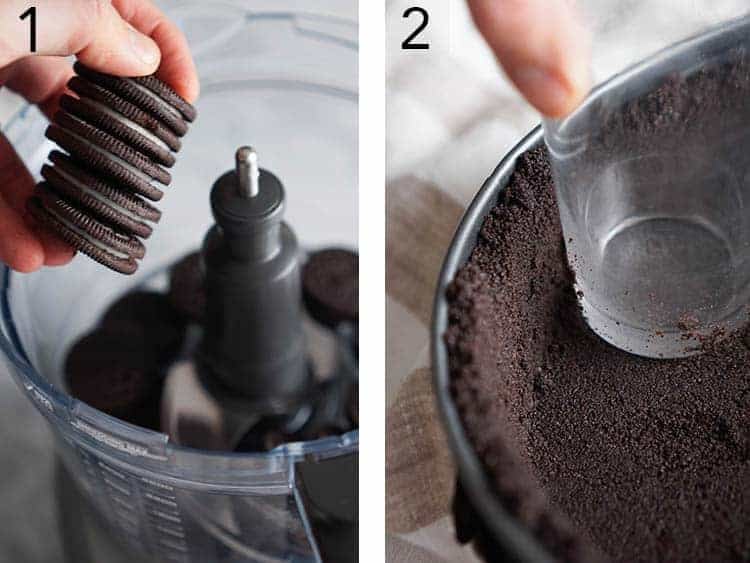
1. Set oven to 350º F. Add the Oreos to a food processor and pulse until you have mostly fine crumbs. Drizzle in the melted butter while pulsing, then remove the blade and use a spatula to mix in any butter settled at the bottom. If you’re doing this by hand, place the Oreos in a sealed plastic bag and crush them using a rolling pin. Then, mix with melted butter in a bowl.
2. Transfer the Oreo mixture to a springform pan and distribute evenly with a spatula. Use a large glass or measuring cup to press the mixture into the bottom of the pan and create a firm crust. Chill the crust for a few minutes in the freezer while the oven reaches 350ºF, then bake for about 10 minutes. Remove and set aside.
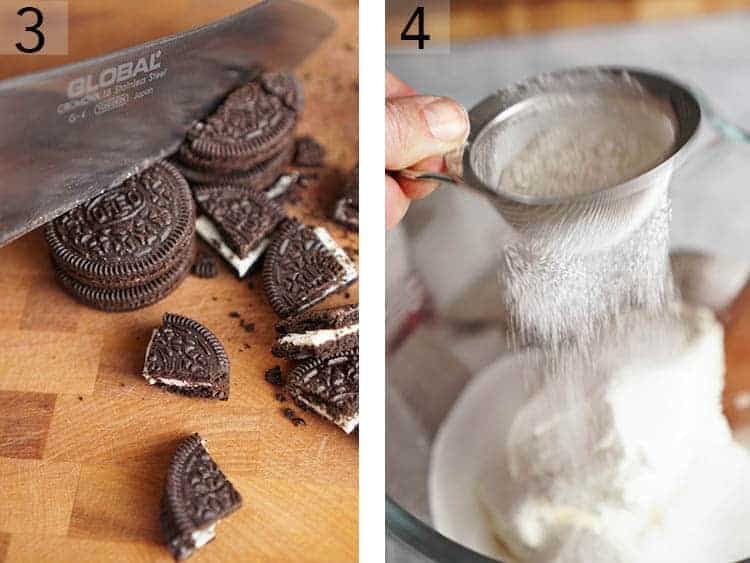
3. Chop about 12 Oreos into quarters, or just give them a rough chop. Crush another 12-16 Oreos in your food processor or a large bag and set aside.
4. Add the room-temperature cream cheese and sugar to the bowl of your stand mixer fitter with a whisk, then sift in the three tablespoons of flour. Beat until smooth. You can make the batter with a hand electric mixer instead; just make sure to use a large bowl so things don’t become precarious.
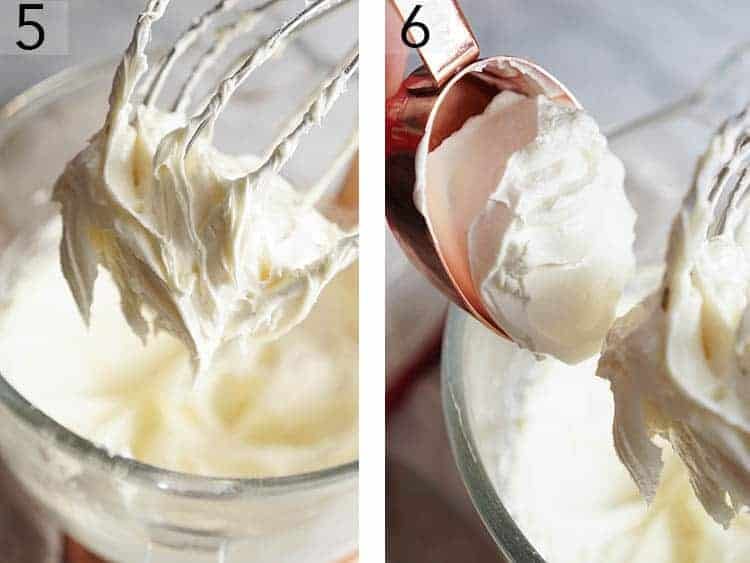
5. Once the batter is smooth and without lumps like you see in the photo above it’s time to scrape the bowl down! This is an important step because a uniform consistency will help your cheesecake bake properly.
6. Beat in the sour cream and scrape the bowl down again, then beat once more until smooth.
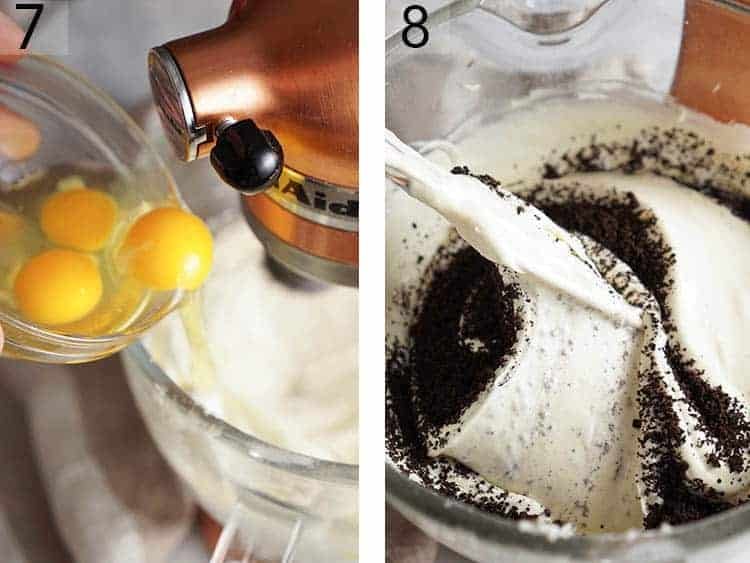
7. Add the eggs and yolk one at a time while the mixer is running on a medium speed then pour in the vanilla extract. Beat until smooth. Vanilla is optional here, if you love the flavor add it in but you can totally skip is as the Oreos have a big note of chocolate, which may mask the vanilla.
8. Pour in the Oreo crumbs and fold into the batter scraping that bowl down as you go.
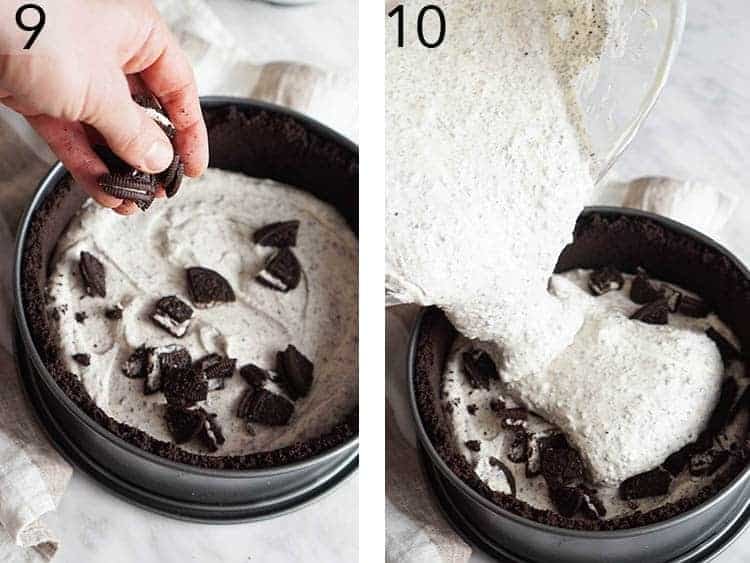
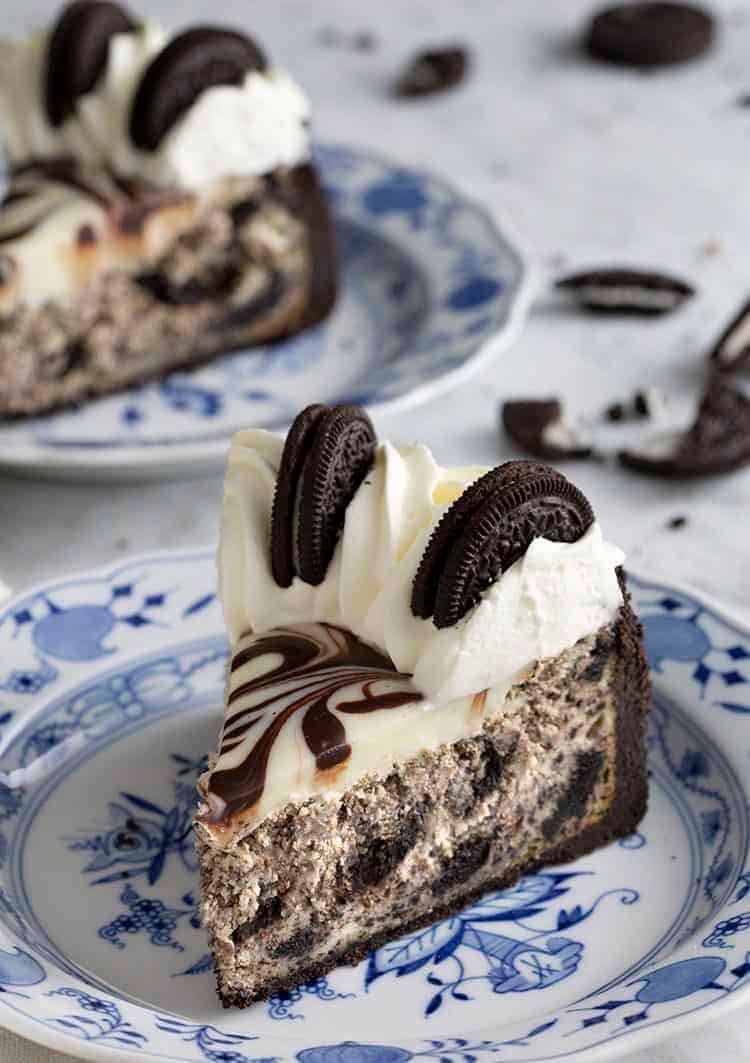
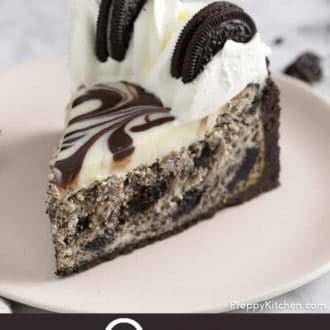
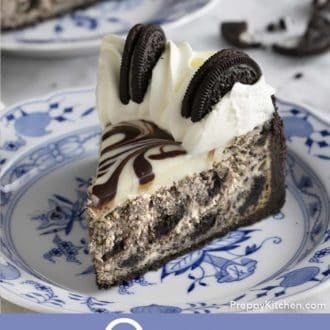
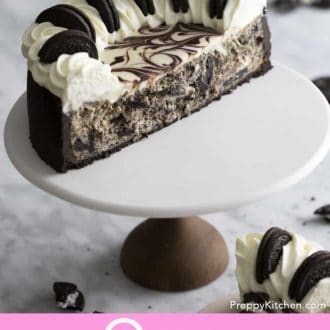
9. For maximum Oreo flavor, we add chunks of the cookies in layers. Pour about a third of the batter into your crust then smooth it to the edge and sprinkle in some of the quartered Oreos.
10. Pour in another third of the batter, then more cookies, and finally, top off with the remaining batter. Smooth it out a bit, then place on a baking sheet and pop into the preheated oven at 350º F for 10 minutes. Reduce the oven temperature to 300º F and bake for another 60 minutes. The center will still jiggle, but the edge will be set. Turn the oven off and leave the cheesecake inside for 30 minutes. Then, remove the cheesecake and allow it to cool completely to room temperature before chilling.
For best results, I suggest chilling the cheesecake overnight for the best results, but you can get away with three hours if you’re in a hurry. Once chilled, remove the cheesecake from the springform pan and place it on a cake stand.
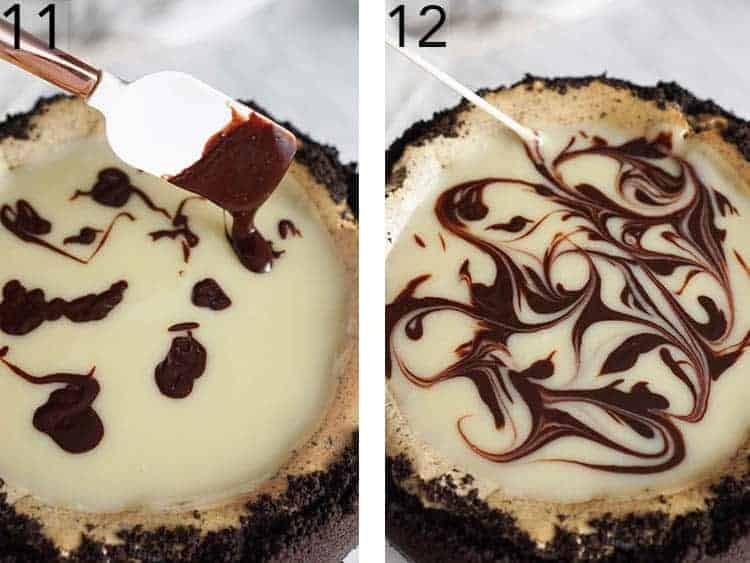
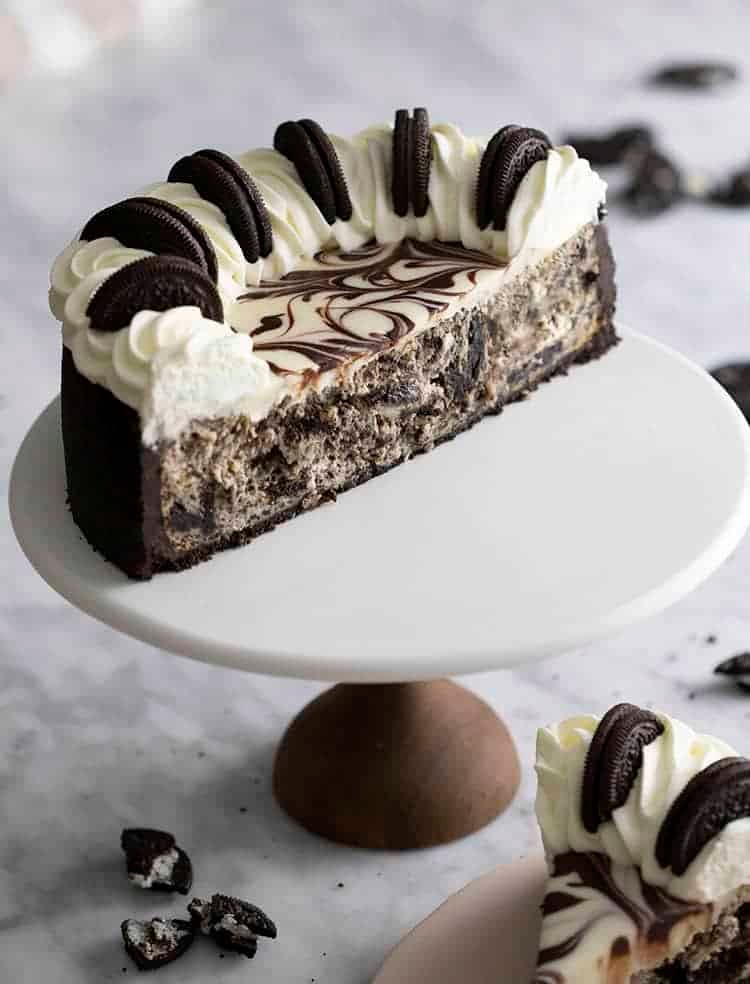
11. Make two batches of ganache: one white and one dark chocolate. The dark chocolate batch is quite small, so it’s easiest to microwave the chocolate in short bursts at 50% power, then pour in the warm cream and mix until smooth. You can make the white chocolate the same way or in a double boiler. Pour the white chocolate ganache onto the chilled cake, then add spoonfuls of the dark chocolate.
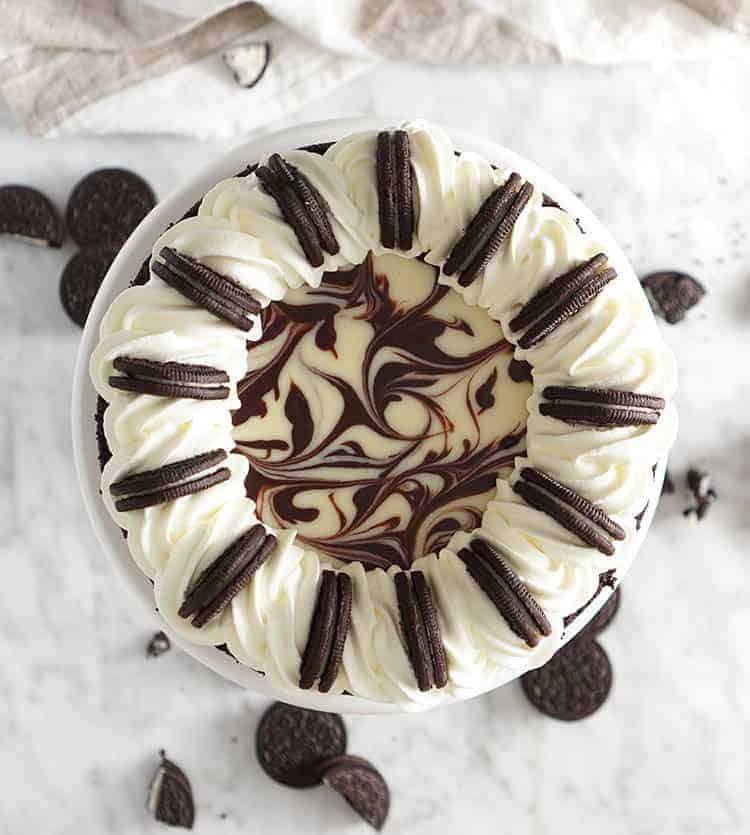
12. Use a skewer or small knife to swirl the chocolate and create a pleasing pattern. Try not to over-mix, as it will start to look “muddy”. Place the cheesecake in the fridge to chill while you make the whipped cream.
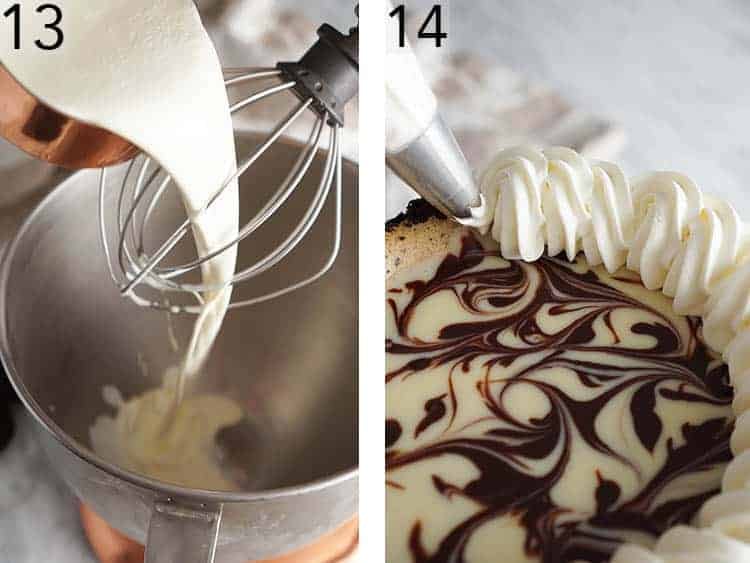
13. The best way to make whipped cream is to freeze the bowl and whisk before whipping, this speeds everything up and gives a nice smooth consistency. Add the cream, powdered sugar, and vanilla to your chilled bowl and beat on high until soft peaks form.
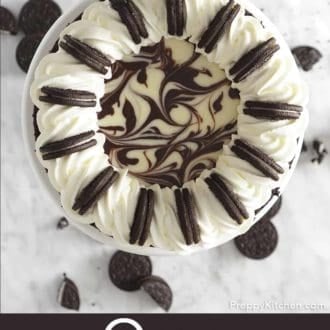
14. Transfer the whipped cream to a large piping bag fitted with a large closed star tip (I used an 846), then pipe the edge in a tight corkscrew pattern. Place Oreo halves in the whipped cream and serve!
Do I Need To Use A Water Bath?
A water bath can help prevent the cheesecake from cracking, but it is not necessary. This recipe uses a two-temperature process to avoid cracking: first, it is cooked at a higher temperature for a short duration, followed by a lower temperature for the rest of the cooking time.
If you’d like to do an easier version of a water bath as a little added insurance, you can place a pan of boiling water on the bottom oven rack and the cheesecake on the center rack above. This will add humidity to the oven environment, but you don’t risk water leaking into the pan.
How Do I Prevent Cheesecake From Cracking?
Cracks in cheesecake can be disappointing but don’t get discouraged. It won’t affect the flavor, and this one is covered with a ganache, so it won’t even be visible! Here are the best tips to help prevent cracks altogether:
- Don’t overmix the batter. Beating it too much can incorporate more air than desired, which will expand in the oven and cause the filling to crack when it contracts and cools.
- Don’t peek! Only open the oven near the end of baking to check the cheesecake for doneness. If you consistently open the oven, you are letting the hot air escape and creating temperature fluctuations that can cause cracking.
- Cool it properly. Once the cheesecake is done, don’t open the door after you have turned the oven off until the cooling time is up. This gradual cooling process not only finishes setting the filling but prevents a drastic temperature decrease that can cause the filling to cool and contract quickly.
- Release any stuck-on filling from the pan. When you remove it from the oven after the first cooling stage, run a knife around the outside of the cheesecake to release it from the sides of the pan if any of the filling touched and stuck during baking. Since cheesecake slightly shrinks as it cools, stuck areas can create tension and form cracks in the center.
For The Crust, Do I Remove The Filling In The Cookie?
No, you do not need to remove the filling from the cookies to make the crust. It is essential to help bind the crumbs together for the crust and add flavor to the cheesecake overall. Pulse whole Oreos in the food processor to create the fine crumbs for the crust, and chop whole Oreos with a knife for the filling.
Pro Tips For Making This Recipe
- Don’t overbeat the batter. When mixing the cheesecake, blend the ingredients until just combined. Overmixing can incorporate too much air, leading to cracks on the surface of the cheesecake. Mix on medium speed and scrape down the bowl often to ensure even mixing.
- Allow to cool properly. This is crucial to achieving the best texture and preventing cracks. After baking, turn off the oven and leave the cheesecake inside with the door closed for about 30 minutes. Then cool at room temperature on a wire rack, refrigerating for at least four hours before slicing.
- Easy release. Quickly run a knife around the sides of the cheesecake pan when it comes out of the oven (after sitting for 30 minutes) to release any stuck batter. This prevents cracks from the cheesecake shrinking and pulling at the sides when removed from the pan.
- Use other cookies for the crust. While classic Oreos are a popular choice, you can get creative with other Oreo flavors, or use Graham crackers, chocolate chip cookies, or even gingersnaps for a tasty variation.
- Slice with precision. For clean cheesecake slices, use a sharp knife dipped in hot water and wiped dry before each cut. This prevents the cheesecake and crushed Oreos from sticking to the knife for a neat, professional-looking presentation.
Frequently Asked Questions
Cheesecake can last up to 4-5 days in the refrigerator when properly stored. Cover the cooled cheesecake with plastic wrap or aluminum foil or transfer it to an airtight container.
Yes! Tightly wrap individual slices or the whole cheesecake in plastic wrap or aluminum foil and place in a freezer-safe container for up to 2-3 months. Thaw in the refrigerator overnight before serving.
Cheesecake can form cracks for several reasons. Overmixing the batter can incorporate too much air, causing the filling to puff up and crack when it contracts and cools. Overbaking can dry out the filling, causing cracks to form. Not cooling it as directed in the recipe can cause temperature shock, which can also cause cracks. However, if a crack does form, just cover it with ganache or a pile of whipped cream, and no one will know! It will taste delicious either way!
Simply follow the recipe as outlined to make the crust and batter, then use the instructions in my mini cheesecake recipe to assemble and bake them.
If you’ve tried this Oreo Cheesecake Recipe, then don’t forget to rate it and let me know how you got on in the comments below. I love hearing from you!
Oreo Cheesecake
Video
Equipment
- 8" springform pan
Ingredients
For the Crust:
- 26 Oreos
- ¼ cup unsalted butter melted (plus more if needed) (56g)
For the Cheesecake:
- 3 (8-ounce/226g) blocks cream cheese room temperature
- 1 cup granulated sugar (200g)
- ½ teaspoon salt
- ½ cup sour cream room temperature
- 1 tablespoon vanilla extract
- 3 large eggs room temperature
- 1 large egg yolk room temperature
- 3 tablespoons all-purpose flour
- 12 Oreos crushed
- 12 Oreos roughly chopped
For the White Chocolate Ganache:
- 1 cup finely chopped white chocolate (175g)
- ⅓ cup heavy cream (80mL)
For the Dark Chocolate Ganache:
- 2 tablespoons finely chopped semisweet chocolate (20g)
- 1 tablespoon heavy cream
For the Whipped Cream:
- 1 cup heavy whipping cream cold (240mL)
- ¼ cup powdered sugar (30g)
- 1 teaspoon vanilla extract
For the Assembly:
- 7 Oreos
Instructions
For the Crust:
- Preheat oven to 350F.
- Add the Oreos to your food processor and pulse until broken into small pieces. Pour in melted butter while pulsing processor. Remove blades and use a spatula to mix butter in completely. If the crumbs do not hold together when squeezed, mix in an additional tablespoon of melted butter at a time until they do. (See Pro Tips for instructions on making this without a processor or stand mixer.)
- Transfer mixture to your springform pan and spread our with a spatula so the crumbs are evenly distributed on the bottom and toward the side as well. Press into a flat layer using a tall glass and really try to compact the side to it keeps it’s shape after cutting. Bake for about 10 minutes at 350, or until fragrant. Remove from oven, set aside.
For the Filling:
- Crush about 12 Oreos either by hand or in your food processor then set aside. Chop 12 more Oreos, you can quarter them or just give a very rough chop. set aside as well.
- Add ROOM TEMPERATURE cream cheese, sugar and salt to a stand mixer fitted with a whisk attachment then sift in the three tablespoons of flour and mix at medium speed to cream. Scrape bowl down and mix until completely homogenous.
- Add sour cream and vanilla extract, mix well then add the eggs and yolks one at a time, allowing each to incorporate before adding the next. Scrape the bowl down and mix until completely smooth.
- Fold in the crushed Oreos and make sure to scrape the bowl down as you go!
- Pour a third of the batter into the springform pan. Smooth out to the edge then sprinkle some of the chopped Oreos in. Add another third of the batter smooth and sprinkle in more of the chopped cookies then add the final layer of batter and smooth.
- Place springform pan into a large roasting pan or on a baking sheet (this makes sure there are no leaks and it’s easier to remove from the oven.
- Bake at 350F for 10 minutes then reduce temperature to 300F and bake another 50 minutes or until cake’s edge is set but center is still wobbly. Turn oven off but leave door closed and allow cake to rest for an additional half hour in the oven. Remove from oven and cool to room temperature then cover with a towel or paper towel and chill overnight. You can enjoy the cheesecake after about 3-4 hours of chilling but it’s MUCH easier to cut if you’ve chilled it overnight.
For the Ganaches:
- You’ll be making two batches of ganache, one white and one dark. They can be made in a double boiler or you can use your microwave. If you’re using the microwave add the chocolates to separate bowls then zap in the microwave at half power in a few 20-30 second bursts. Pour hot cream over and mix then set aside. If there are some stubborn lumps then mix a little more cream and apply a little more heat until smooth.
- Pour the white chocolate ganache onto the cake and smooth close to the edge. Add small spoonfuls of the dark chocolate ganache and then use a skewer or small knife to swirl them together. Transfer to the refrigerator to chill while you make the whipped cream.
For the Whipped Cream:
- Add the cold cream, powdered sugar, vanilla to the bowl of your stand mixer fitted with a whisk attachment and beat on high until soft peaks form. It’s best to use a cold bowl and whisk straight out of the freezer but room temperature works too.
- Transfer whipped cream to a piping bag fitted with a large closed star tip and pipe the edge of the cake in a tight corkscrew pattern. Cut 7 Oreos in half and place in the whipped cream straight side down.
Notes
- Don’t overbeat the batter. When mixing the cheesecake, blend the ingredients until just combined. Overmixing can incorporate too much air, leading to cracks on the surface of the cheesecake. Mix on medium speed and scrape down the bowl often to ensure even mixing.
- Allow to cool properly. This is crucial to achieving the best texture and preventing cracks. After baking, turn off the oven and leave the cheesecake inside with the door closed for about 30 minutes. Then cool at room temperature on a wire rack, refrigerating for at least four hours before slicing.
- Easy release. Quickly run a knife around the sides of the cheesecake pan when it comes out of the oven (after sitting for 30 minutes) to release any stuck batter. This prevents cracks from the cheesecake shrinking and pulling at the sides when removed from the pan.
- Use other cookies for the crust. While classic Oreos are a popular choice, you can get creative with other Oreo flavors, or use Graham crackers, chocolate chip cookies, or even gingersnaps for a tasty variation.
- Slice with precision. For clean cheesecake slices, use a sharp knife dipped in hot water and wiped dry before each cut. This prevents the cheesecake and crushed Oreos from sticking to the knife for a neat, professional-looking presentation.





Anam says
Hello! I wanted to make this recipe with a 9” springform pan. Im fine with it being a bit thinner and not changing the quantities. How does the baking time compare?
Sarah Ward (Executive Editor, Preppy Kitchen) says
I would start checking at 35 minutes once baking at 300F.
Kirstyn says
Love this recipe! Just can’t seem to master my ganache. It always seems to run off the sides.
Joel says
This cheesecake is INSANE- easily 10/10! It’s a showstopping presentation and the flavor is perfection. I was so upset because I did not turn the temp down from 350 to 300 for the 50 minutes and it was STILL perfection. Thank you John!
Samantha says
This cheesecake is so yummy. My daughter requests this specific cheesecake for her birthday. It’s divine!
Tammy Bozza says
I posted this on the YouTube video, but wanted to add it here too. When I made the crust with a whole stick of butter as directed, it leaked out of the pan AND the crust slipped down the sides of the pan. I remade it with 4 TBSP of butter and it was perfect! This was my daughter’s birthday cake and she’s not a fan of white chocolate, so for the top, I crushed up Oreos instead of using the ganache. My cheesecake had a pretty significant crack in the middle, so I thought the ganache would just sink into the crack and not give me a smooth top, and I was worried that the white chocolate would make the cheesecake overly sweet. The crushed up Oreos were the perfect topping in our opinion!
Erika says
Absolutely delicious and a biiiig hit with my little nephews as all things Oreo are.