
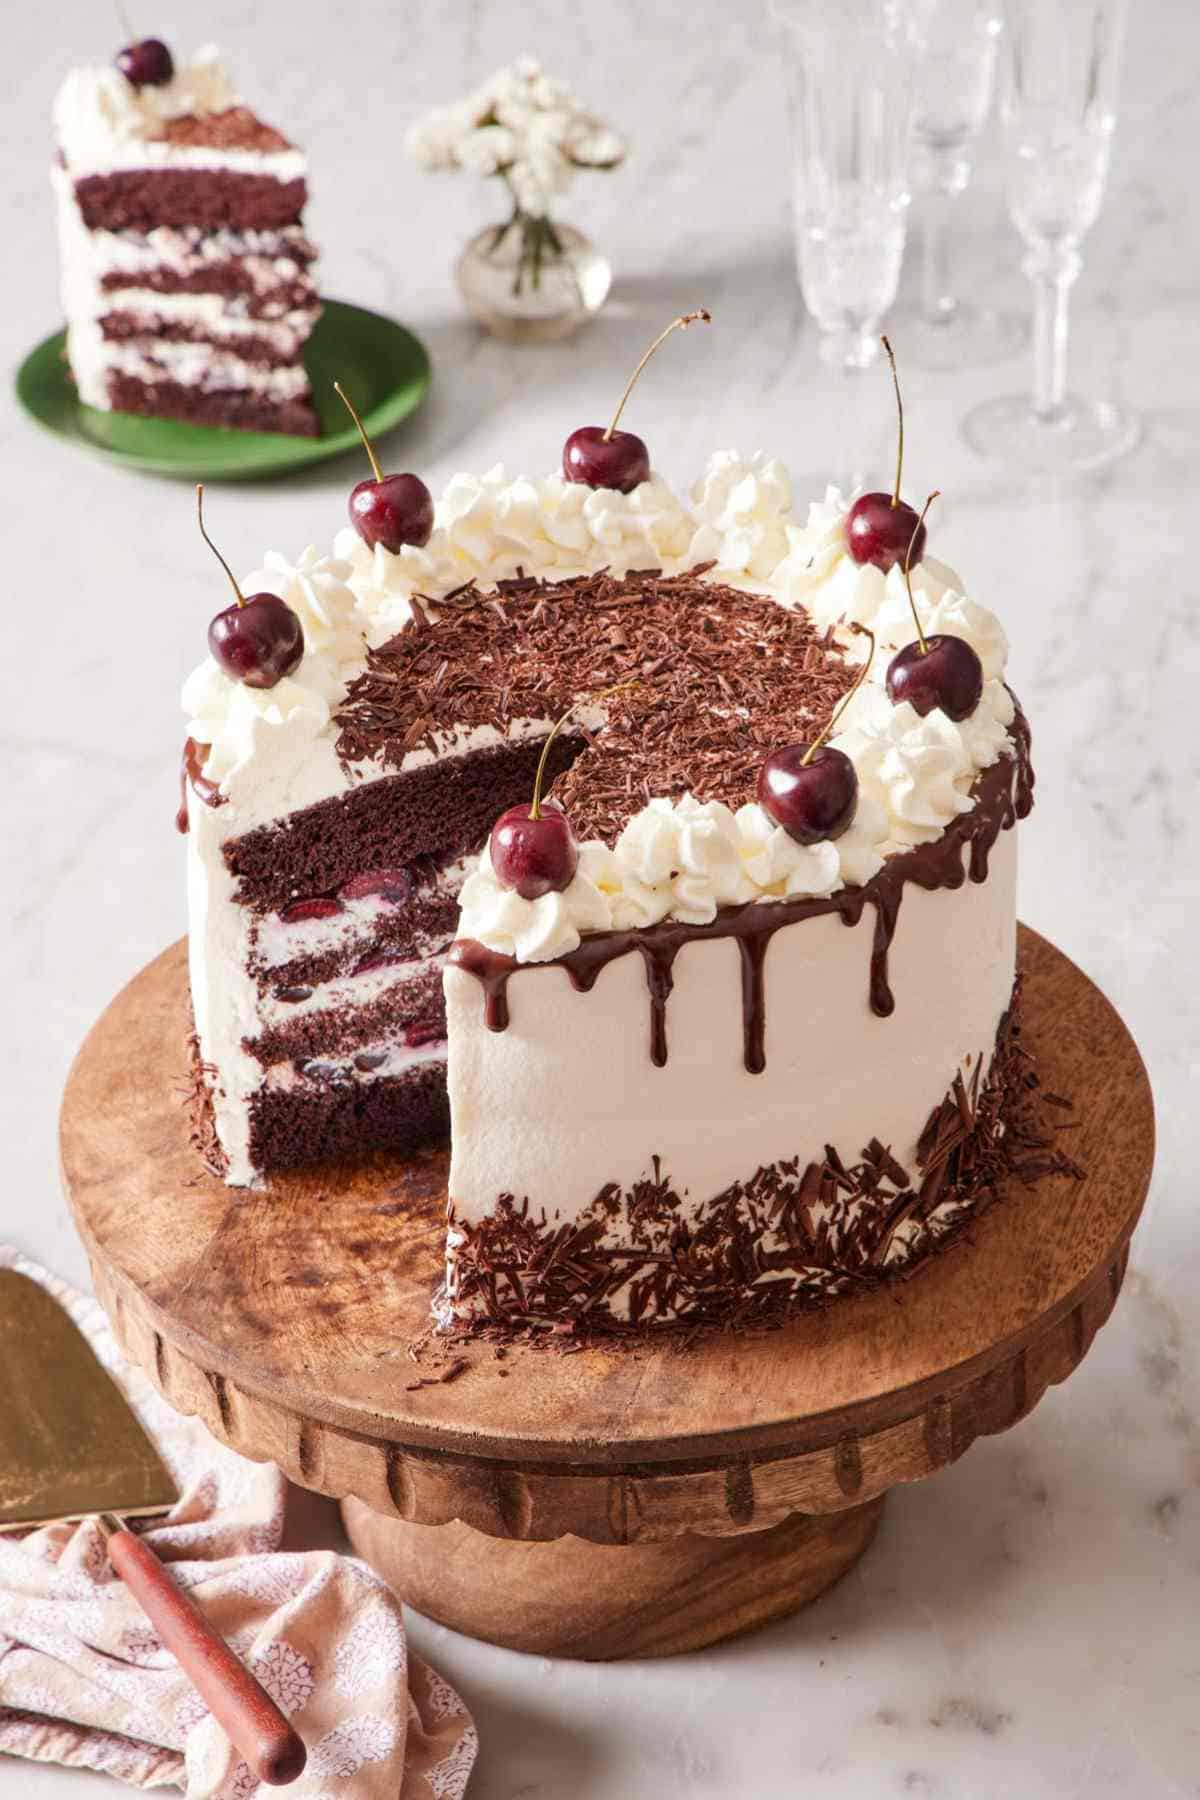

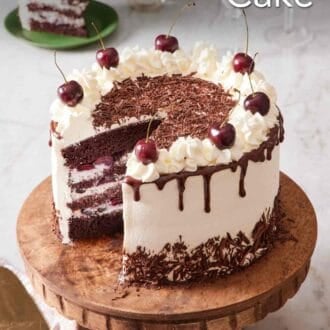
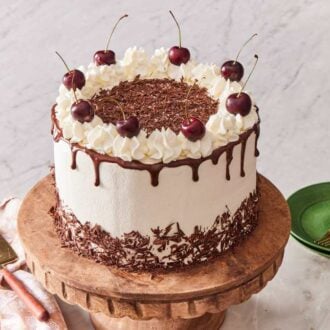
Black Forest Cake, or Schwarzwälder Kirschtorte, takes its name from the Black Forest region of Germany, where kirsch—its signature cherry brandy—originated. Despite its dramatic appearance, this cake is surprisingly easy to make at home. My foolproof, carefully tested recipe prioritizes balanced flavors and straightforward assembly so you can make this showstopper with confidence.
The frosting is nothing more than fluffy, cloudlike, sweetened whipped cream, stabilized just enough to support the layers while keeping the cake refreshingly light. Feel free to leave the decoration minimal, or add bakery-style flourishes like chocolate shavings, ganache drips, or piped rosettes for an effortlessly elegant presentation.
A reader, Elbangel, says: “John, you are so amazing, explaining and guiding us while preparing such delicious desserts and cakes. I did this cake, and it was just perfect. It was a hit among my family.” ★★★★★
Table of Contents
Why You’ll Love My Black Forest Cake
I originally published this Black Forest Cake recipe in 2020 as a three-tier 6-inch cake. Since then, many of you have told me you loved the flavor but wanted a larger cake. So, I’ve updated this recipe to make an 8-inch cake, but with the same elements that made you fall in love with the recipe to start.
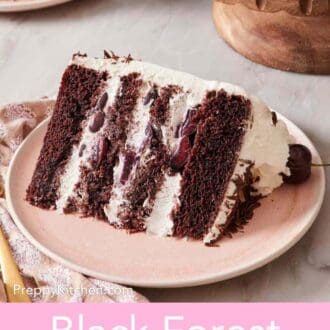
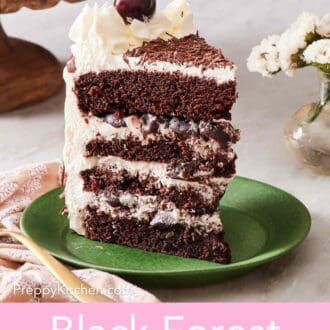
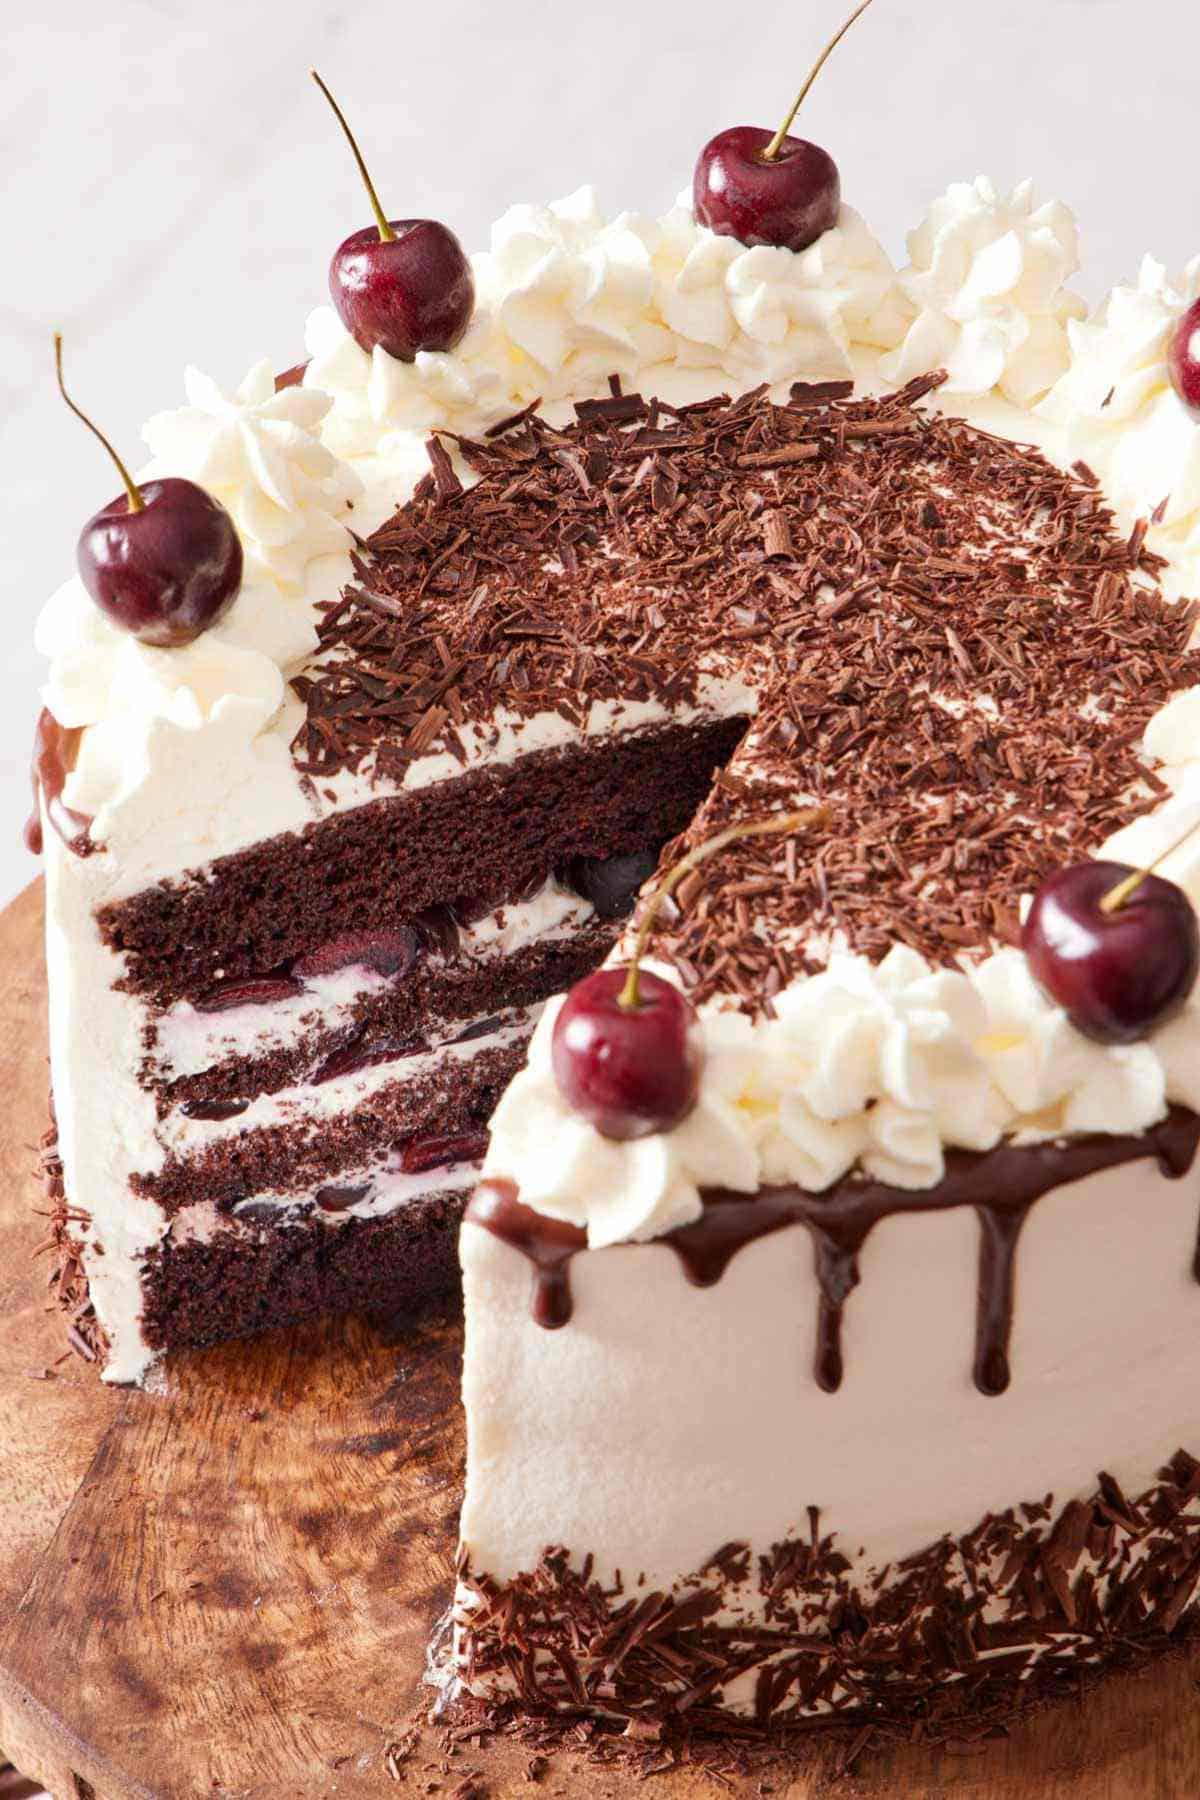
- Decadent but airy chocolate cake layers. Blooming the cocoa in hot water intensifies its deep, dark chocolatey flavor, while the batter stays wonderfully light. You’ll only bake two layers, then split them in half for four even, elegant tiers.
- Sweet fresh cherries soaked in cherry liqueur add flavor and moisture. The cherries release their juices to create a vibrant kirsch-cherry syrup that’s so much more flavorful and complex than the liquid from jarred maraschino cherries. We’ll use the syrup to brush onto each cake layer, ensuring every bite stays moist and flavorful for days.
- Whipped cream frosting is so much easier than buttercream. No waiting for butter to soften or fussing with temperature. This frosting uses just three ingredients and whips up in half the time!
Key Ingredients & Substitutions
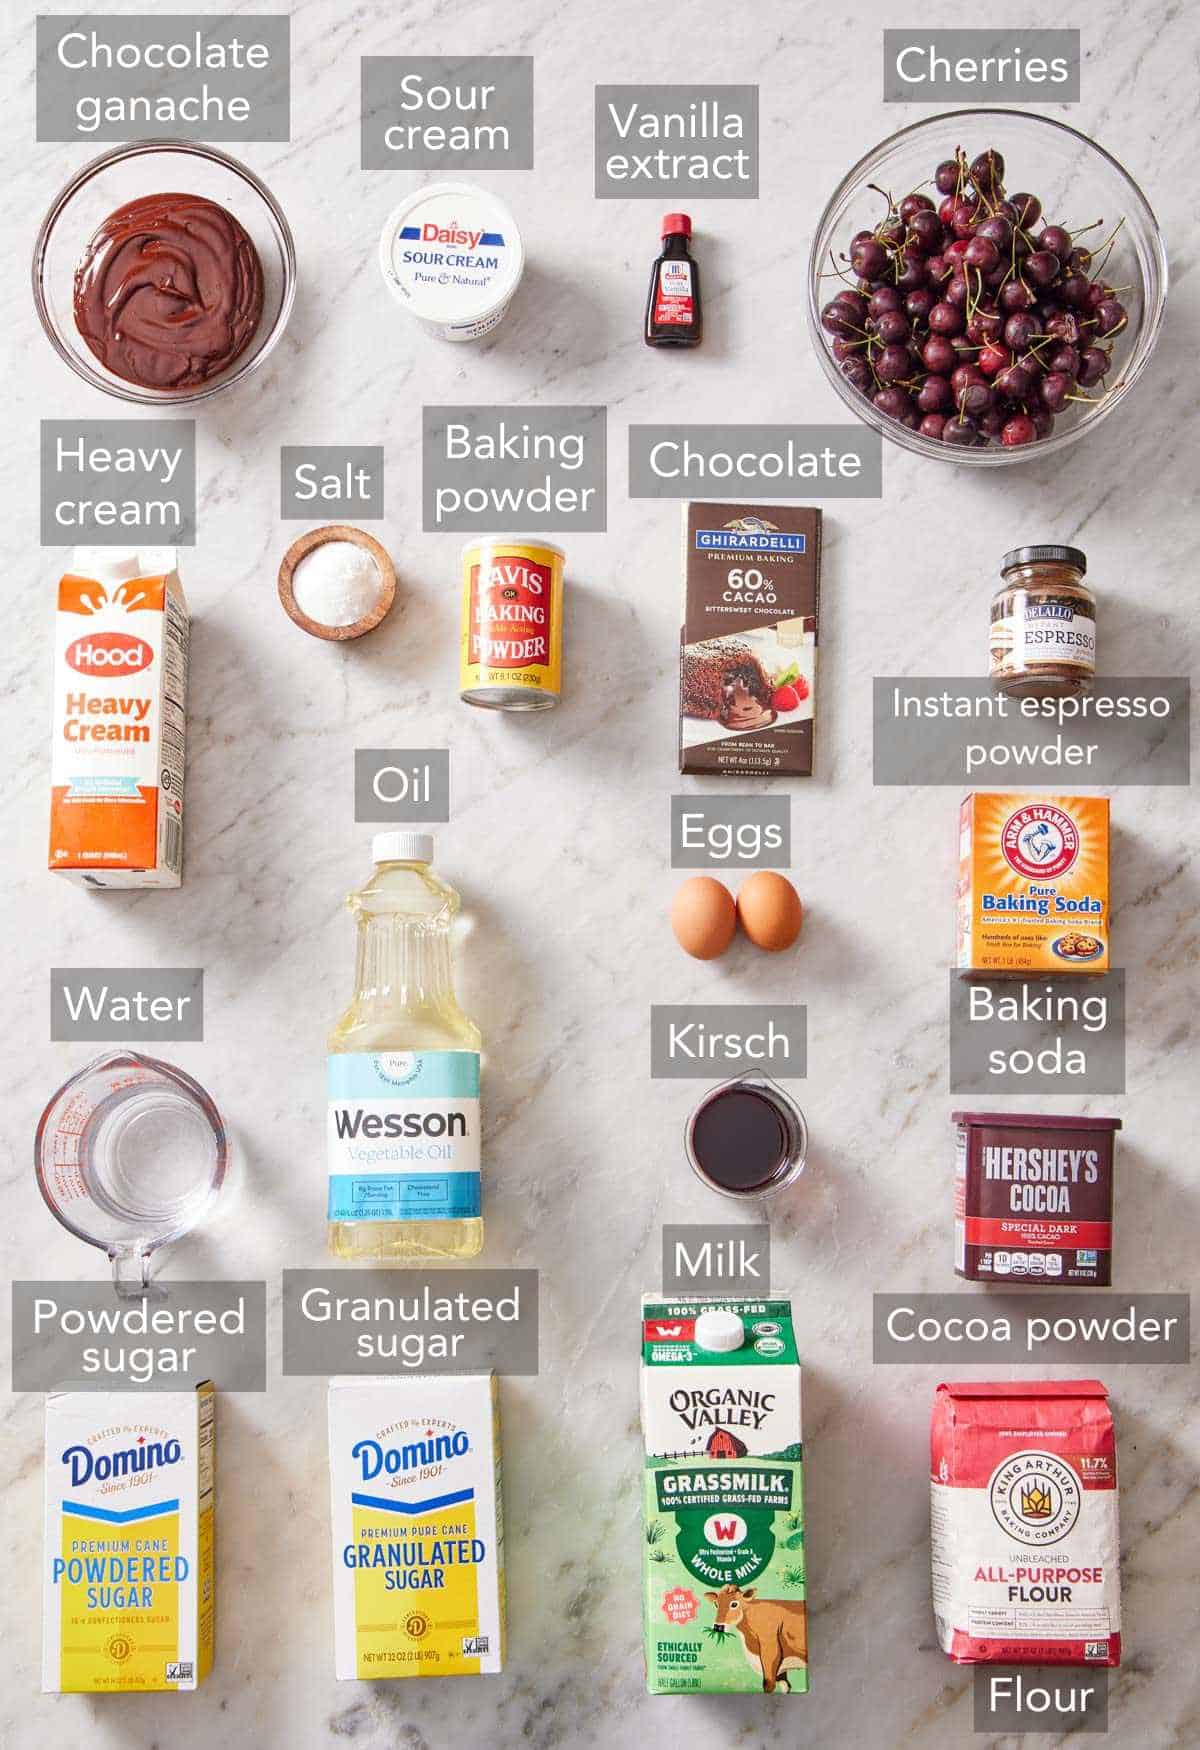
These are the main ingredients you need to make Black Forest cake. You can find the full list of ingredients and measurements in the recipe card below.
Unsweetened Dutch-process cocoa powder — “Dutch-process” means the cocoa has been alkalized, which makes it taste extra smooth and chocolatey. The process also reduces its acidity, and thereby affects how the leaveners work. I balance this with the addition of sour cream (acidic) and using both baking soda (acid-reactive) and baking powder (self-reactive). This way, you get a rich, deeply cocoa-flavored cake with the right texture.
Instant espresso powder — adding a hint of espresso to the cake batter deepens the chocolate flavor. If needed, you can omit it, but it’s a very small amount for the whole cake, so it won’t add much caffeine to it.
Boiling water — this may seem like an odd ingredient to add to cake batter, but it does two important things: It blooms the cocoa powder, as I mentioned above, bringing out more flavor compounds for a more intense chocolate flavor. It also hydrates the flour faster, before the batter hits the oven, so the cake is moister. I use this hot liquid trick for both my rich chocolate cake and Devil’s food cake, and have supremely moist results!
Whole milk and sour cream — a double dose of dairy ensures a spectacularly springy and moist sponge cake texture. The acid in the sour cream also helps balance the less acidic cocoa powder and makes the cake more tender as it inhibits gluten formation from the all-purpose flour. Plus, the added fat helps keep the cake moist for several days in the fridge.
Vegetable oil — I use liquid oil in the batter for two reasons. It makes the batter really easy to just whisk together (no beating softened butter, therefore no electric mixer required). Second, this cake needs to stay refrigerated and be served cold. A fat that stays liquid at a colder temperature will make sure the layers stay soft even when cold. Any neutral oil will work (e.g., canola, grapeseed, or avocado).
Baking powder and baking soda — we’ll need both types of leaveners to ensure our cake layers reach their full, fluffy potential. Baking soda will react with the acid in the other ingredients (eggs, sour cream, etc.), and baking powder will react on its own. Using both leaveners also helps the cake layers bake up more evenly. Using baking powder only can create a domed cake, so baking soda helps the batter’s rise spread a bit more evenly throughout the pan.
Whole cherries — when available, you can’t beat fresh cherries for this cake. That said, frozen cherries come pre-pitted and get extra juicy when macerating in the liqueur, and are a perfectly acceptable substitution. Just note that they’re not great for decorating the top of the cake since they do weep a lot and are very soft. Also, make sure to buy sweet varieties, as sour cherries can throw off the balance.
Kirsch or cherry juice — If you can’t find kirsch but want to use a liqueur, swap in regular brandy or use another fruity-flavored liqueur like pomegranate or berry. If you want to go alcohol free, use cherry juice instead!
Whipped cream frosting — the higher fat content in heavy whipping cream (versus regular whipping cream) will produce a more stable frosting. Some added powdered sugar sweetens the frosting while also helping to stabilize it. And a splash of vanilla extract lends a delicious hint of flavor.
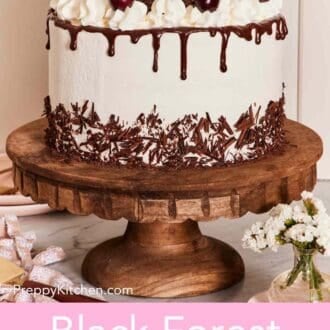
Decorations — you have some options here! You can keep it simple with just piping of the whipped cream and some fresh cherries. Or, you can make chocolate shavings or add chocolate sprinkles to the outside. For the ultimate bakery touch, you can add a chocolate ganache drip on top. Have fun with it!

Pro Tips For Making & Assembling The Cake
Wrap the cake pans with cake strips before baking for flat, even layers. The water-soaked cake strips help insulate the sides of the batter so it bakes more evenly. This prevents domed tops and ensures flat, uniform layers that stack beautifully. This is one of my favorite tricks, and I wrote a whole guide for how to bake perfectly flat cake layers!
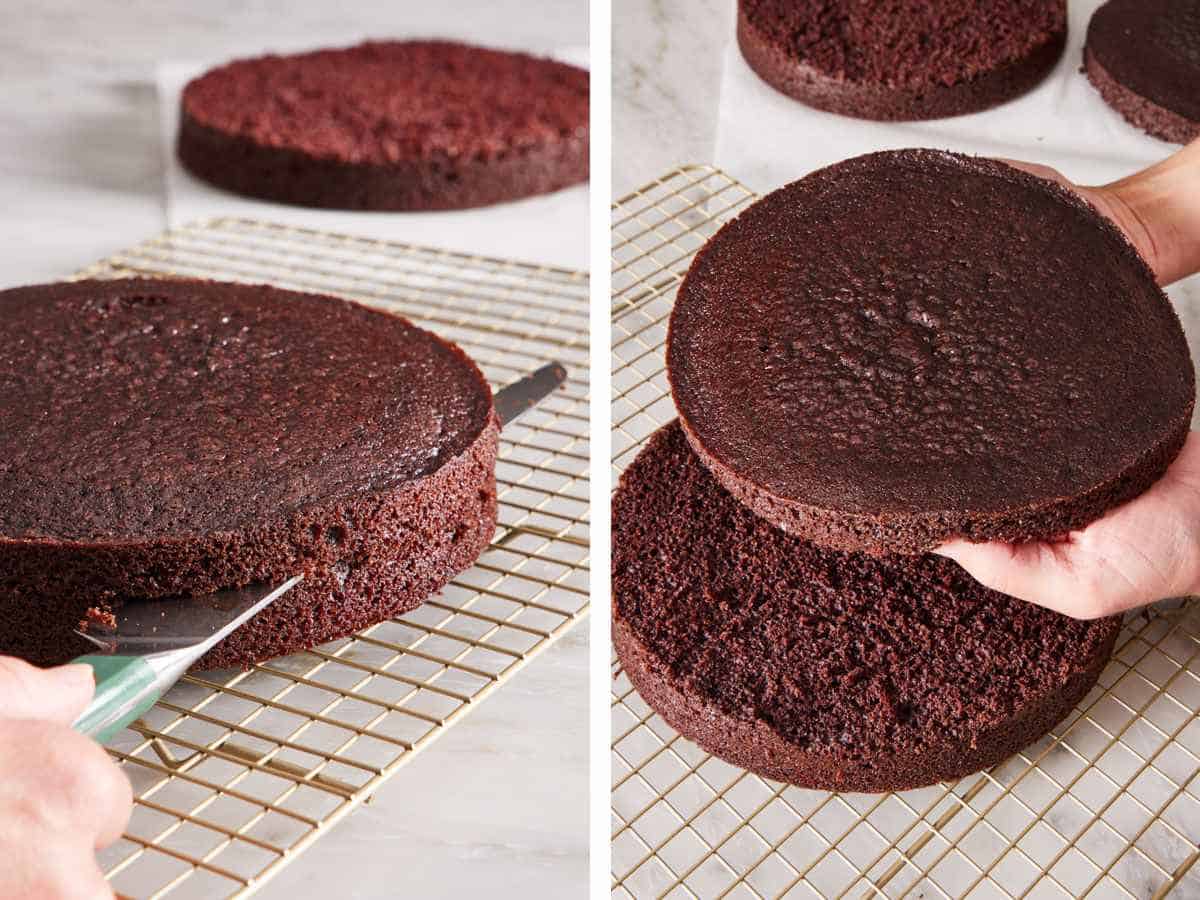
Cutting The Cake Layers
If your cake layers feel very delicate, you can freeze them for 20 to 30 minutes before slicing them in half. This helps to firm up the outside and makes them a bit easier to handle once they are cut.
The best tool for cutting cake layers in half crosswise (like a hamburger bun!) is a large serrated bread knife. Make sure the knife is longer than 8” so you can see both ends through the layer to know exactly where you are cutting. I find that it helps to score the layers before I cut them, or mark a few points with toothpicks. This way, I have a guideline to follow as I cut.
Assembling The Cake Layers
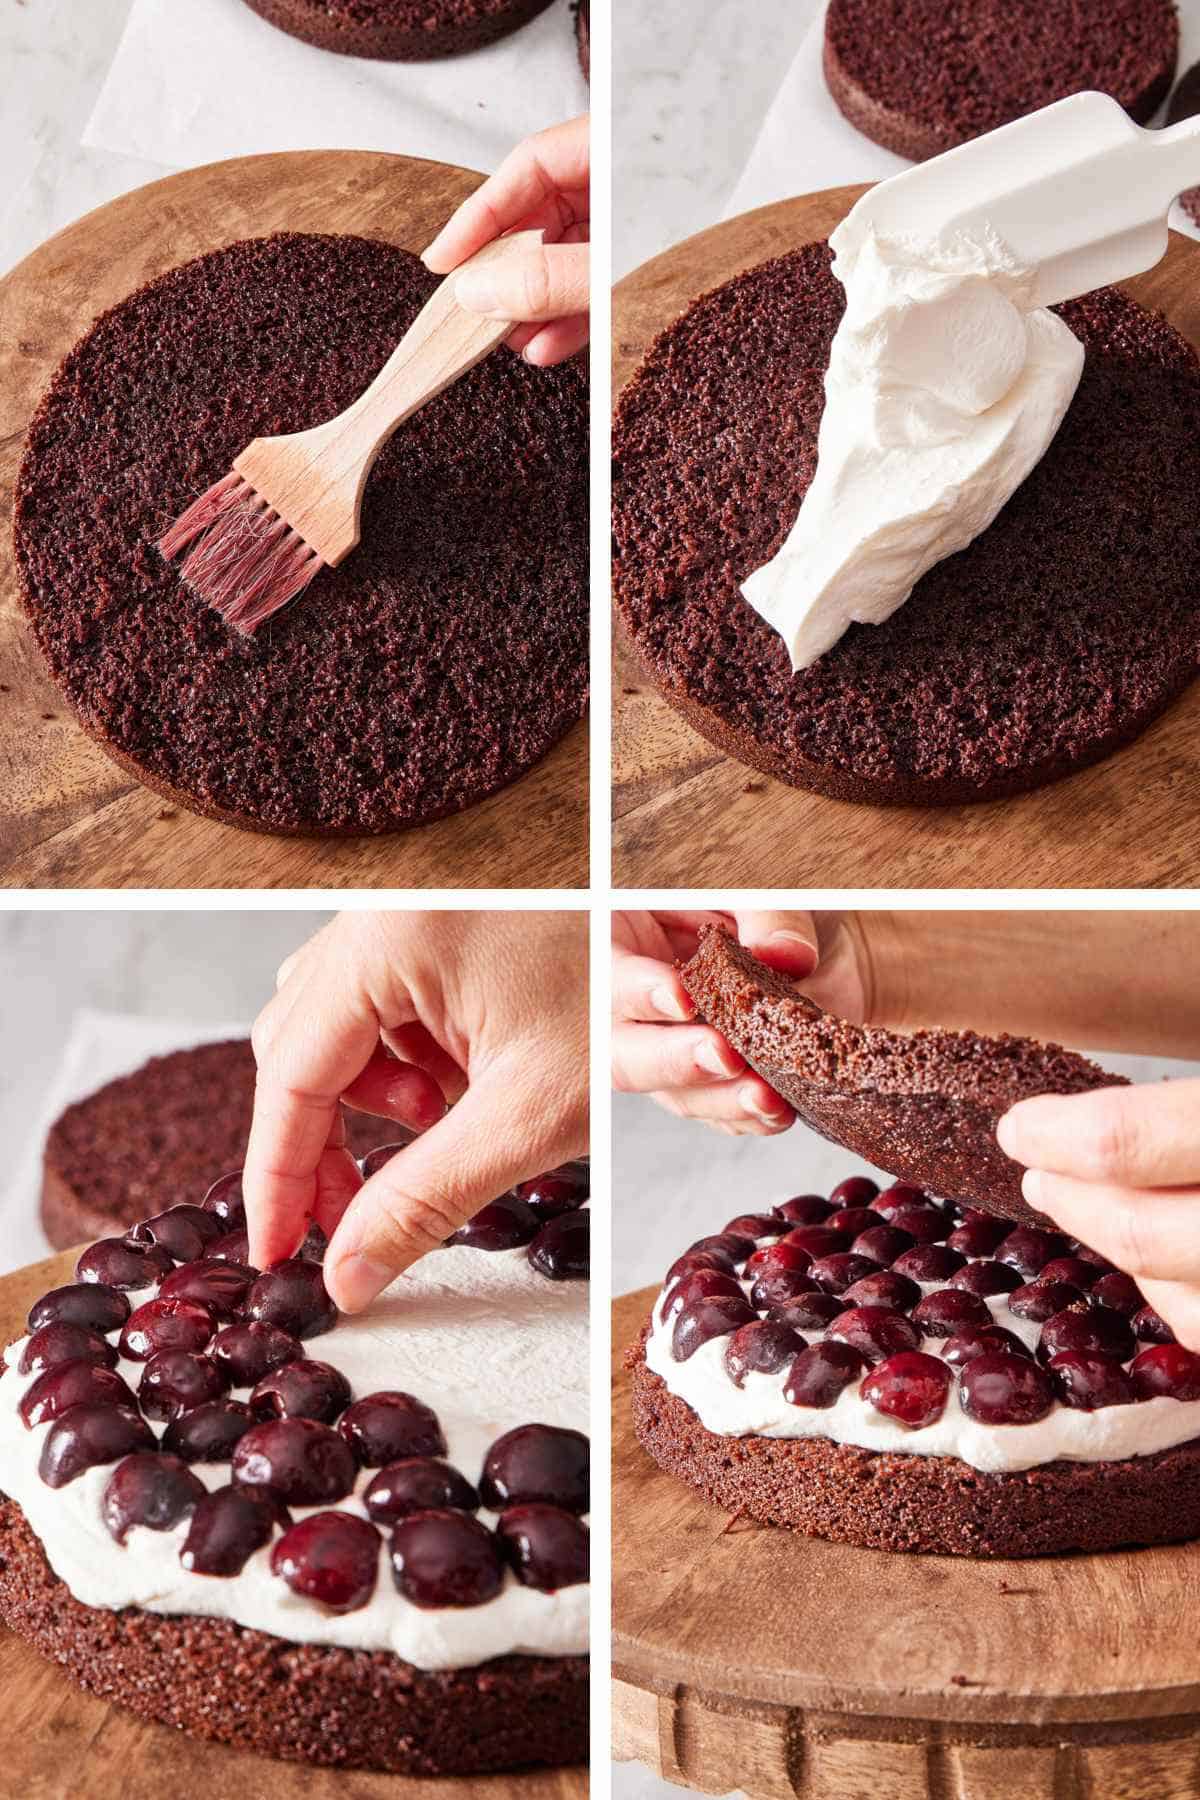
When you are ready to assemble, add the layers in this order— syrup soak, whipped cream, cherries. Start each tier by brushing on the cherry syrup so it can absorb into the cake layer below, keeping the cake moist and flavorful. Next, add a generous layer of whipped cream, then spoon the cherries on top. This allows the cherry filling to settle into the cream rather than sliding around, creating a more stable, even cake.
Do a crumb coat on the outside of the cake to hold everything together. After stacking the layers, spread a thin layer of whipped cream over the entire cake to trap crumbs and seal in the filling. Chill briefly, then add your final decorative coat for a smooth, clean finish.
Chill the cake at any time if it feels unstable at room temperature. If your layers start to slide or the whipped cream feels too soft, pop the assembled cake (or even just the layer you’re working on) into the refrigerator or freezer for 10-15 minutes. The brief chill firms the whipped cream and makes stacking and smoothing much easier.
Decorating The Cake: Choose Your Garnishes
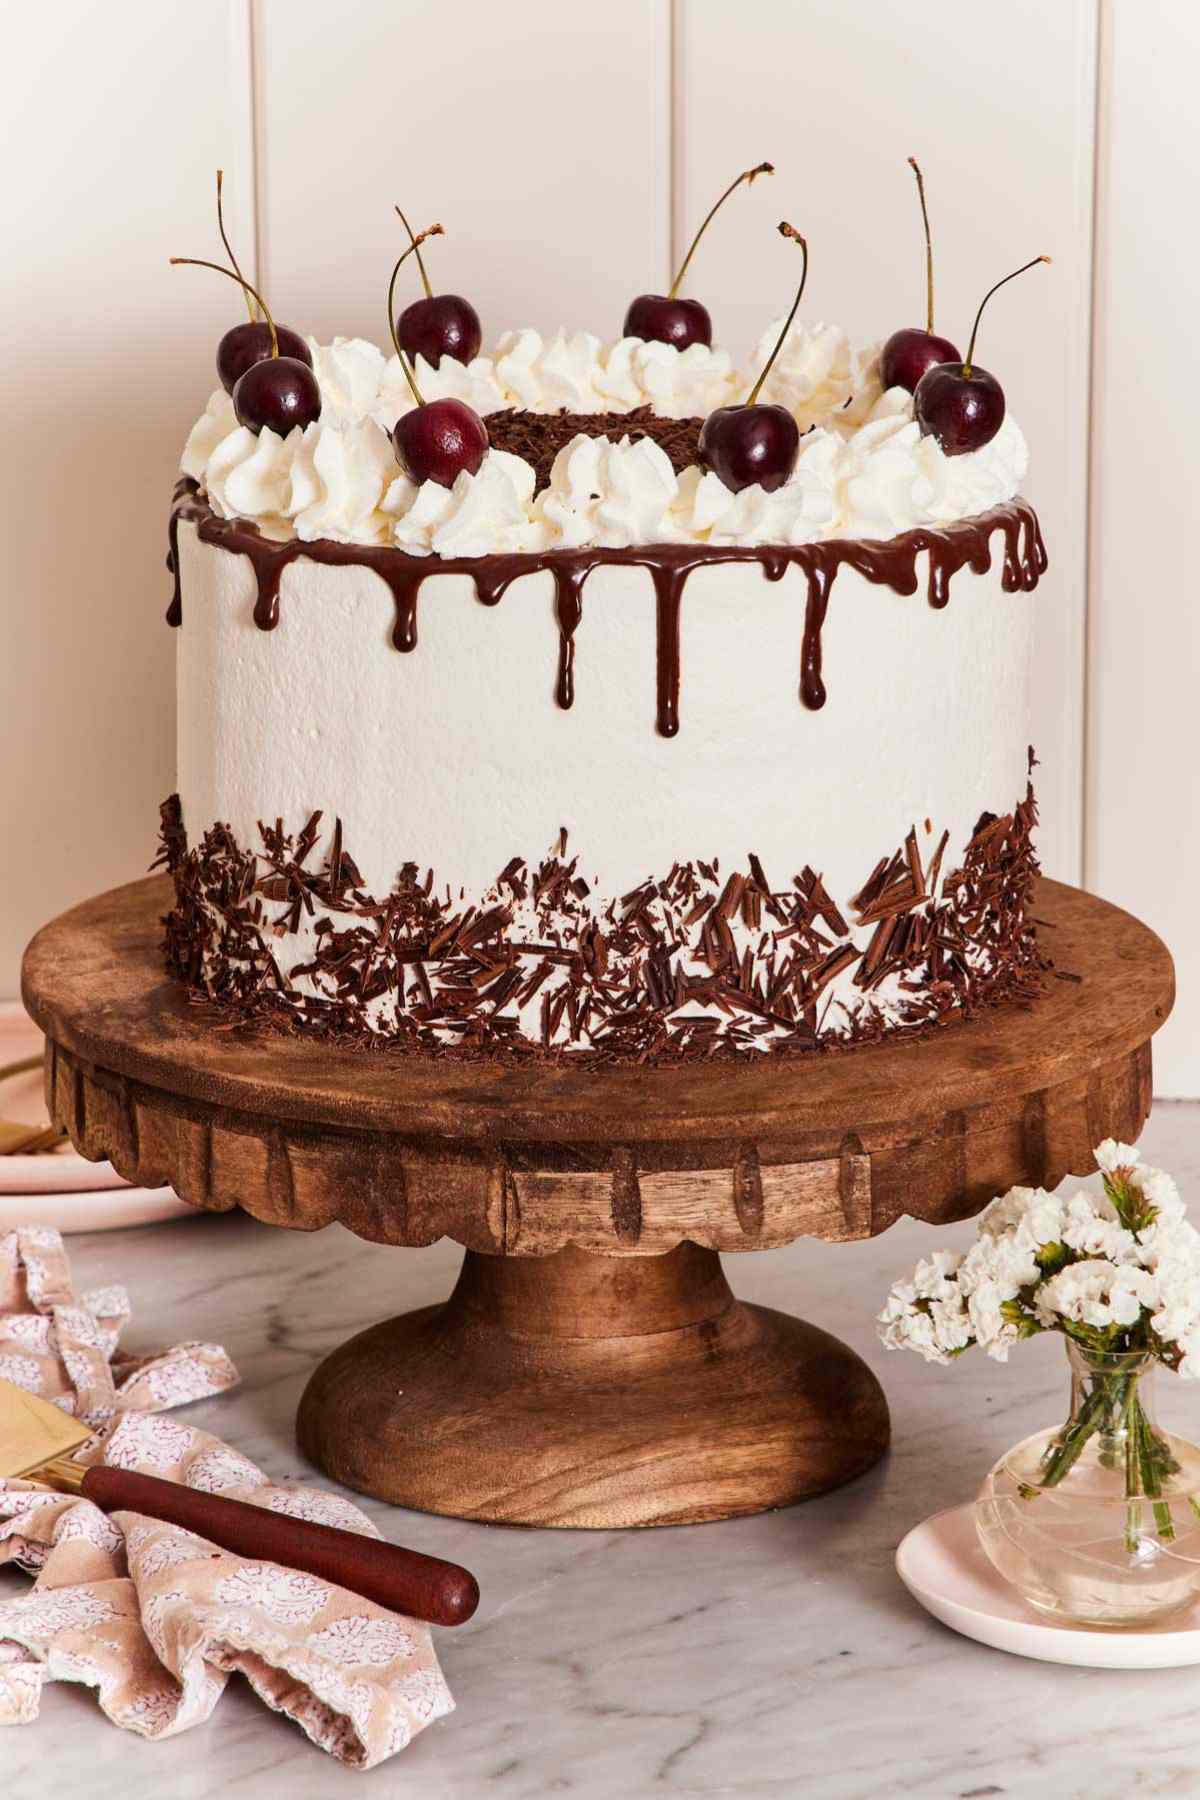
You can keep this cake classic, elegant, and true to tradition with a simple, smooth coat of whipped cream and a crown of fresh cherries on top. If you’d like a more dramatic presentation, add a glossy ganache drip and a few chocolate curls or shavings for a bakery-style finish.
For step-by-step guidance on creating the perfect drip, chocolate curls, and more professional techniques, be sure to check out my post on How to Decorate a Cake. It walks you through everything you need for a polished, show-stopping result.
An Easy Way To Make Chocolate Curls
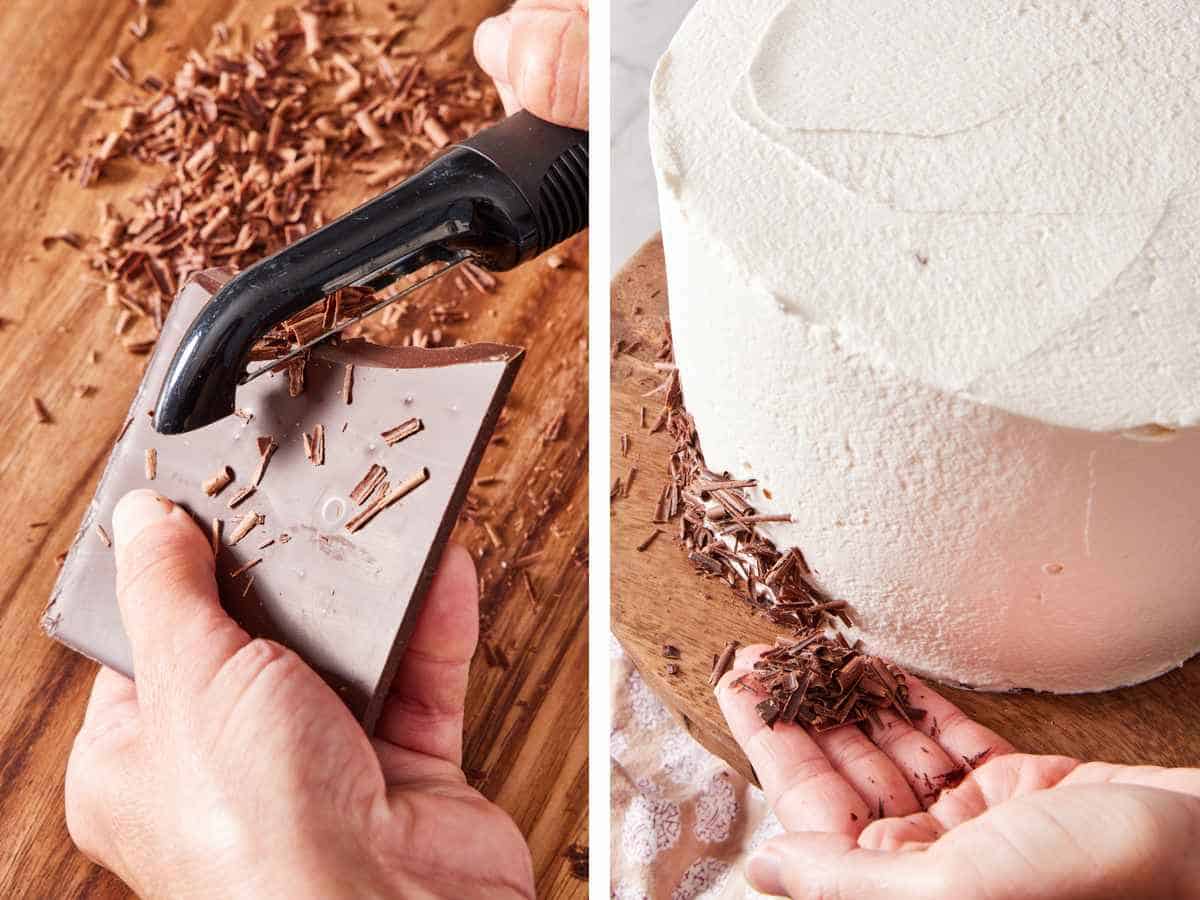
With nothing more than a chocolate bar and a basic vegetable peeler, you can make gorgeous chocolate shavings that look straight out of a patisserie.
How to Make Chocolate Shavings: Unwrap and hold a chocolate bar in one hand, then run a vegetable peeler down one side. The shavings will start out small and get a bit bigger, and you work your way into the bar. Shave the chocolate into a bowl or onto parchment paper to easily collect it for decorating. It helps if your chocolate bar is at room temperature or slightly warm. You can pop it in the microwave for 5 seconds before you start. Also, a thicker bar or block of chocolate will produce fatter shavings, if you wish!
Make-Ahead and Storage
Make-ahead: The cake can be made a day in advance—this will actually enhance the stability and flavor of the cake! You should loosely cover it if you chill it for more than a few hours, so if you don’t have a cake cover, wait to add the final decoration until shortly before you plan to serve it. That way, you don’t damage your piping or ganache.
Storage: loosely cover leftovers and chill for up to 5 days. You can freeze the whole cake or slices for up to 3 months. Thaw in the fridge before serving.
How To Make Black Forest Cake
Below, I’ve highlighted portions of the recipe in step-by-step process images along with instructions for making the best black forest cake. You can find the full set of instructions in the recipe card below.

1. Add the cocoa powder and espresso powder to a large bowl. Slowly pour in the boiling water while whisking; the heat will dissolve the cocoa and deepen its flavor.
2. Whisk in the milk, sour cream, and oil until smooth. Add the eggs and vanilla and whisk again. In a separate bowl, whisk together the flour, sugar, baking soda, baking powder, and salt.

3. Pour the cocoa mixture into the dry ingredients and whisk until the batter is smooth and everything is incorporated. (It will be quite runny. That’s exactly right!)
4. Divide the batter evenly between your prepared pans.
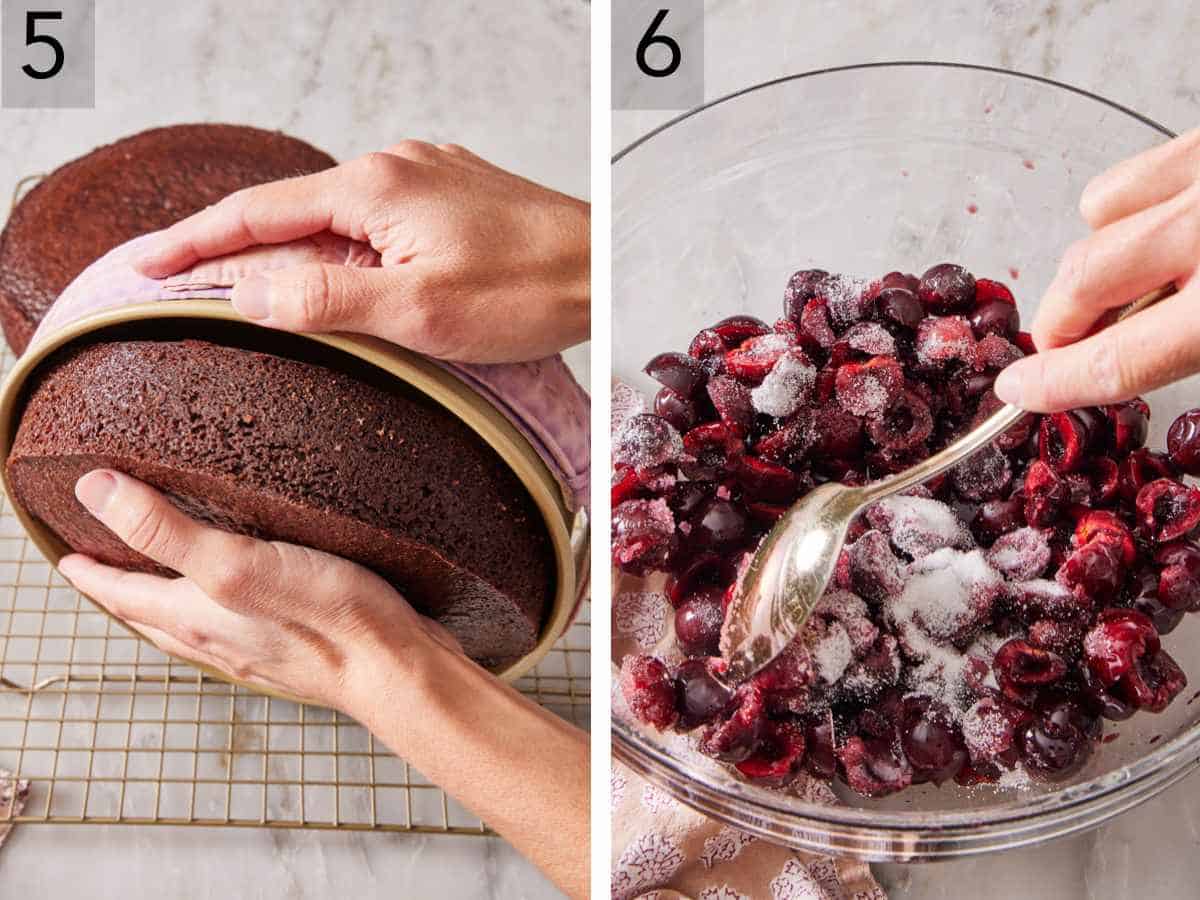
5. Bake for 30-35 minutes, or until the tops spring back when lightly pressed and the edges begin pulling away from the pans. Cool the cakes in their pans on a wire rack for 20 minutes, then carefully invert them onto the rack—parchment-side down—to cool completely.
6. While the cakes cool, stir the cherries, sugar, and kirsch together in a medium bowl. Cover and let them macerate for 30-60 minutes, giving them a stir now and then. Drain off the syrup that collects at the bottom. If needed, top it off with cold water or a bit more kirsch until you have ⅔ cup (160 ml). Set both syrup and cherries aside.
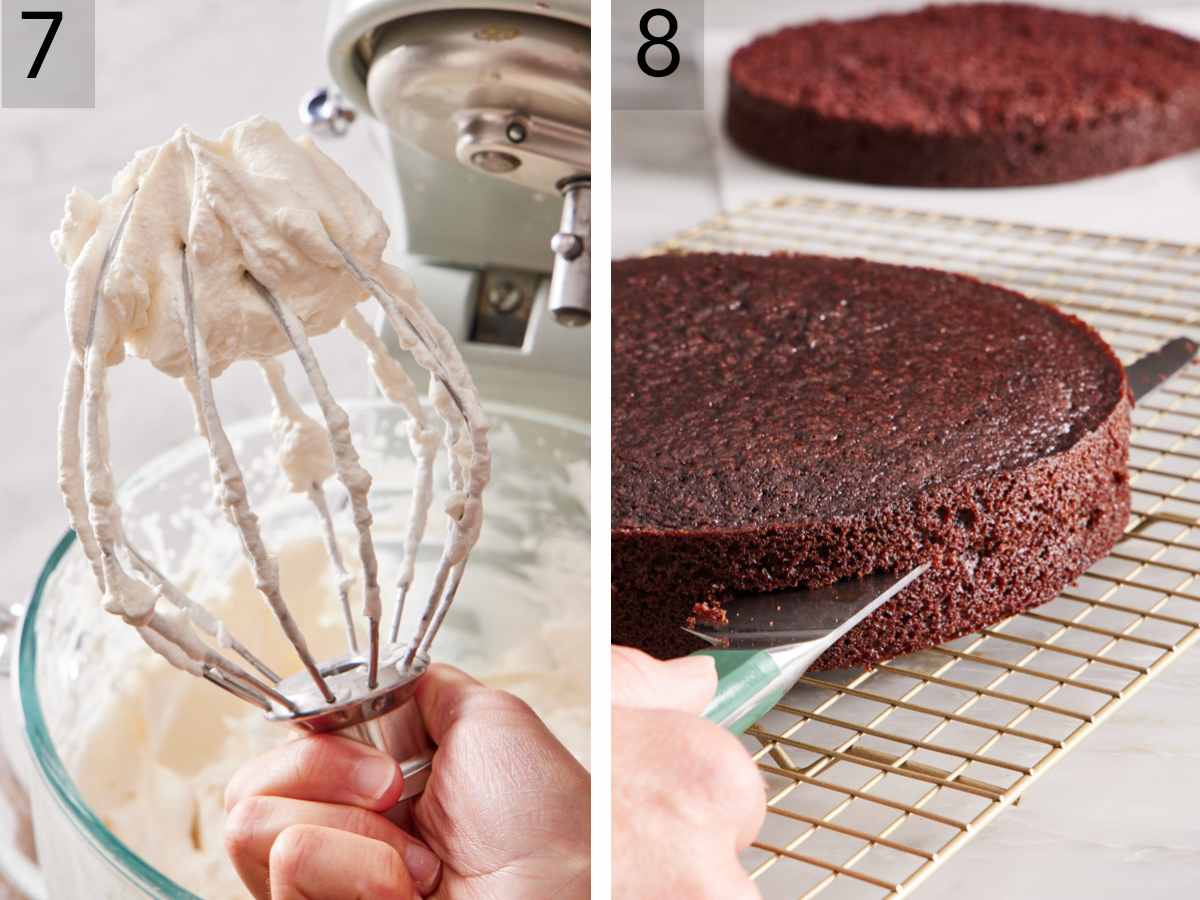
7. In the bowl of a stand mixer fitted with the whisk attachment (or using a hand mixer), beat the cold cream and powdered sugar on medium until it starts to thicken, about a minute. Increase to medium-high and whip to soft peaks, then drizzle in the kirsch and continue whipping just until stiff peaks form. Scoop about 1 cup of whipped cream into a piping bag fitted with a closed star tip and refrigerate it for decorating later.
8. Remove the parchment from the cooled cakes. Using a serrated knife, slice each layer horizontally to create four thin layers total. Set aside one bottom piece to use as your last cake layer to give it an extra-smooth, flat finish.
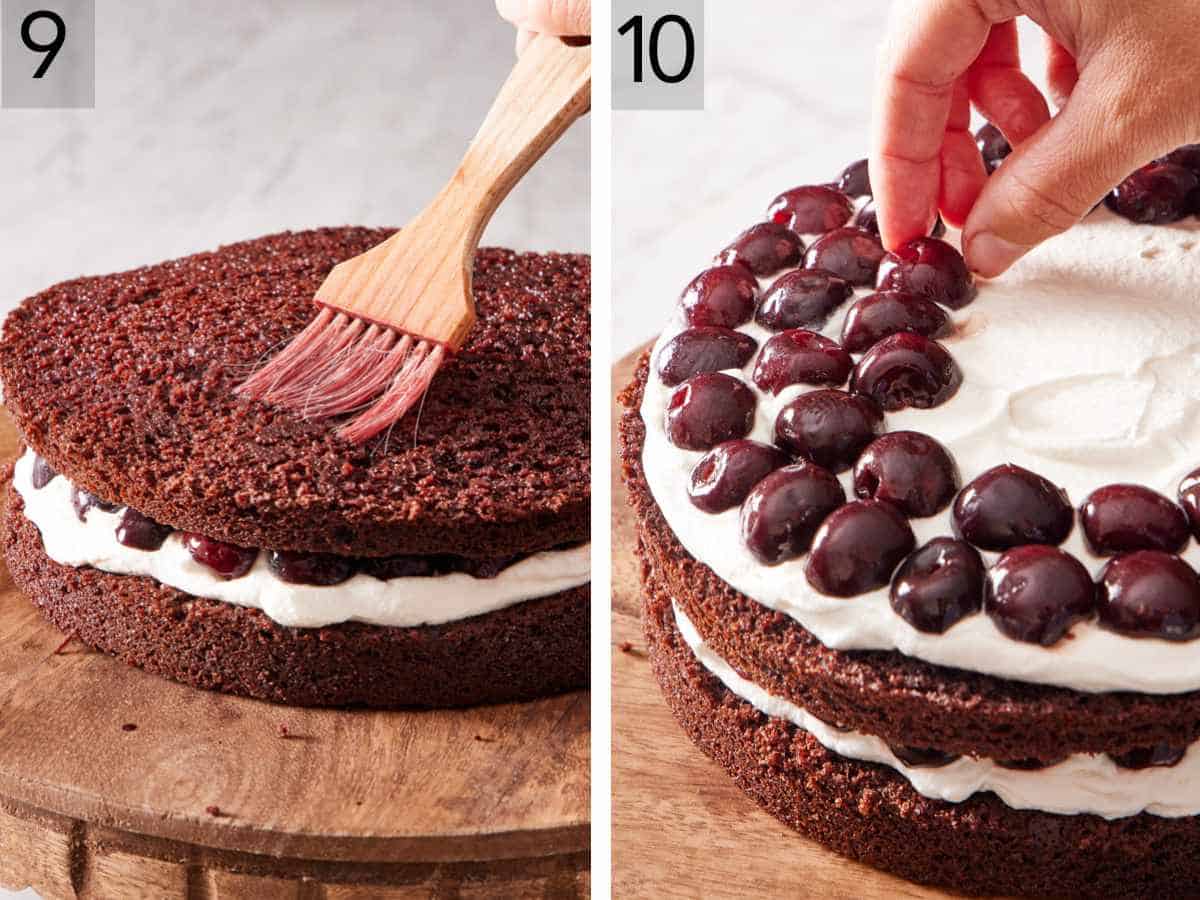
9. Place the first bottom layer, cut-side up, on your serving plate. Brush 3-4 tablespoons of cherry syrup over the surface. Add about ¾ cup whipped cream and spread it evenly to the edges, then spoon a third of the cherries over the cream.
10. Repeat with the next two layers: cake → syrup → whipped cream → cherries. (Placing the cherries cut-side down helps avoid gaps.)
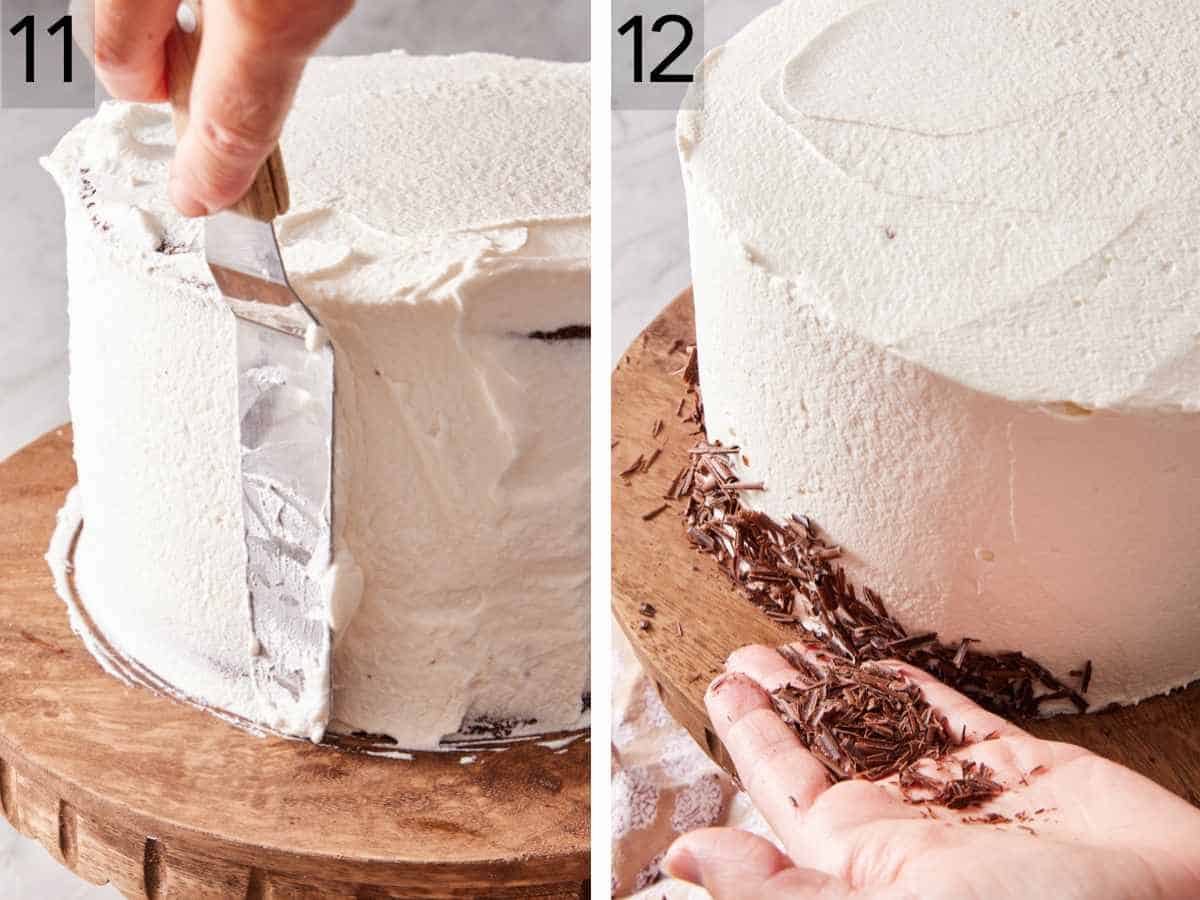
11. Spread the remaining whipped cream over the top and sides of the cake in a smooth, even coat.
12. Press chocolate curls onto the sides and sprinkle more on top if you like. For a ganache drip, chill the cake for about 30 minutes to firm the frosting. Then pipe runny ganache around the top edge, letting it gently drip down the sides. Finally, pipe rosettes of the reserved whipped cream on top of the cake and garnish with fresh cherries. Keep the cake refrigerated until serving.
Black Forest Cake Recipe
Video
Equipment
- 8” round baking pans
- Mixing Bowls
- Electric mixer
- Wire cooling rack
Ingredients
Chocolate Cake:
- 2¼ cups all-purpose flour (270g)
- 2 cups granulated sugar (400g)
- 1½ teaspoons baking powder
- 1 teaspoon baking soda
- ½ teaspoon salt
- ½ cup unsweetened Dutch-process cocoa powder (50g)
- 2 teaspoons instant espresso powder
- ⅔ cup boiling water (160ml)
- ½ cup whole milk (120mL)
- ½ cup sour cream (120g)
- ½ cup vegetable oil (120mL)
- 2 large eggs
- 1 tablespoon vanilla extract
Cherry Syrup and Filling:
- 1½ pounds whole cherries pitted and halved (about 2½ cups of halved cherries)
- ¼ cup granulated sugar
- ⅓ cup kirsch or cherry juice
Whipped Cream Frosting:
- 4 cups cold heavy whipping cream (960ml)
- ½ cup powdered sugar (60g)
- 2 tablespoons kirsch (optional; replace with 2 teaspoons vanilla extract)
Assembly:
- ½ cup chocolate ganache (120ml) (optional)
- Chocolate shavings or sprinkles for garnish (optional)
- Fresh whole cherries (optional)
Instructions
For the Cake:
- Preheat the oven to 350°F. Lightly grease two (8-inch) round cake pans with butter or baking spray and line the bottom of each pan with parchment paper. (I highly recommend using soaked cake strips for baking flat cake layers.)
- In a large mixing bowl, whisk together the flour, sugar, baking soda, baking powder, and salt. Set aside.
- Place the cocoa powder and espresso powder in a medium bowl. While whisking, slowly pour in the boiling water, and whisk until the cocoa powder is fully dissolved. Whisk in the milk, sour cream, and oil until combined, then add the eggs and vanilla, and whisk well combined.
- Pour the cocoa mixture into the flour and whisk together until all of the dry ingredients have been incorporated and the batter is smooth. (The batter will be runny.) Divide the batter between the prepared cake pans.
- Bake for 30 to 35 minutes or until the springs back when gently pressed and the sides of the cake start to pull away from the pan. Let the cakes cool in the pans on a wire rack for 20 minutes. Carefully invert the cake layers onto the wire rack, place parchment paper-side down, and let cool completely.
For the Cherry Syrup and Filling:
- While the cakes are cooling, place the cherries, sugar, and kirsch in a medium bowl and stir to combine. Cover and let cherries macerate for 30 minutes to 1 hour, stirring occasionally. Drain off the syrup that has collected in the bottom of the bowl. Add enough cold water or more kirsch to the syrup to make ⅔ cup (160ml), if needed. Set aside.
For the Whipped Cream Frosting:
- Place the cold cream and powdered sugar in the bowl of a stand mixer with the whisk attachment (or a large mixing bowl if using an electric hand mixer), and beat on medium speed until the cream starts to thicken, about 1 minute. Then increase the speed to medium-high, and continue beating until soft peaks form, about 2 minutes. Drizzle in the kirsch and beat just until the cream forms stiff peaks, 30 seconds to 1 minute. Reserve 1 cup of the whipped cream in a piping bag fitted with a closed start tip and place it in the fridge.
For the Assembly:
- Remove the parchment paper from the cooled cake layers. Cut each cake layer in half horizontally, so you have 4 thinner layers. (Each will have a top half and bottom half.) Reserve one bottom half to use as the final, top layer of the cake so you have a smooth, even top. Place the other bottom layer cut-side up on a serving plate. Brush 3 to 4 tablespoons of the reserved cherry syrup onto the top of the cake. Spread about ¾ cup of whipped cream on top, smoothing it out to the edges, then arrange about a third of the macerate cherries on top of the whipped cream in an even layer. (I like to put them cut side down into the cream to avoid big gaps between the layers.)
- Place another cake layer on top, cut-side up, and gently press it down, just enough until it’s even. Repeat by brushing with more syrup and adding whipped cream and cherries. Add another cake layer and top with syrup, whipped cream and cherries as before. Place the reserved bottom layer cut-side down so the smooth side is on top, and press down gently until the top is even.
- Spread the remaining whipped cream all over the top and sides of the cake in a smooth, even layer. Press chocolate curls onto the sides and sprinkle them on top of the cake, if desired. If you want to add a ganache drip, chill the cake for 30 minutes. Then, pipe the runny ganache around the top edge of the cake, letting it drip down the sides.
- Pipe the reserved whipped cream on top and garnish with additional fresh cherries. Keep the cake refrigerated until you are ready to serve.
Notes
- Measure the flour correctly. Adding too much flour to the batter can result in cakes that are dry, dense, and too thin to cut in half easily. I always recommend a scale for accuracy, but if you don’t have one, use the fluff and spoon method. Fluff up the flour, gently spoon it into a dry measuring cup, then level off the top with a knife.
- If you can’t find kirsch, you can use a regular brandy or a different fruity-flavored liqueur. Or, swap it out for fruit juice like cherry or pomegranate for a non-alcoholic option.
- If you don’t have instant espresso, you can replace it and the boiling water with ⅔ cup hot brewed coffee or heated cold brew.
Nutrition
More Cake Recipes To Try
Try one of my most popular layer cakes next!
Classic red velvet cake is known for its velvety crumb, subtle cocoa flavor, and vibrant red hue. Paired with tangy cream cheese frosting, it’s an elegant option for any celebration.
Light, tender, and beautifully fragrant, vanilla cake is a timeless favorite. Its soft crumb and clean flavor make it the perfect canvas for any frosting or filling.
German chocolate cake is layered with a decadent coconut-pecan filling that’s buttery, nutty, and caramelly. It’s a nostalgic, show-stopping dessert with incredible texture in every bite!
Deeply chocolaty and wonderfully moist, my mocha cake delivers a rich flavor without being heavy. It’s a versatile, crowd-pleasing staple that pairs beautifully with everything from a dollop of whipped cream to a scoop of ice cream.
Soft, fluffy, and studded with colorful sprinkles, funfetti cake is pure joy in dessert form. It’s nostalgic, birthday-cake flavor makes it irresistible for celebrations of any kind.
If you’ve tried this Black Forest Cake recipe, then don’t forget to rate it and let me know how you got on in the comments below. I love hearing from you!
Christie Osborne says
This sounds amazing! My daughter and I love your recipes! You have taught us so much about baking and flavor and texture. When she asked for a black forest cake for her 8th bday she knew we had to come to your site! But I am not sure about making it with the kirsch since we are making it for 8 year olds. Any suggestions for a substitute?
Marcel Lamoureux says
Hi John,
I’ve made this incredible cake twice to wonderful results and thank you for this recipe. Now I would like to make it as a Yul Log. Do you think it would work as a Christmas log cake? This recipe for for the regular Black Forest cake is outstanding!!! Please let me know what you think of this idea and thank you. I’m a huge fan of your site. Cheers!
Marcel Lamoureux says
Hi John, Christmas is fast approaching and I would love to make this recipe as a Yul Log. If I use your recipe for your regular Yul Log and then add the Kirch to it then continue with the rest of the Black Forest recipe, do you think this can work? The original recipe of the Black Forest cake is absolutely outstanding. Would love to hear from you. Thank you!
Elbangel says
John , You are so amazing explaining and guiding us doing preparing so delicious desserts and cakes. I did this cake and was just perfect. Was a hit among my family. I would like to send a picture of it. Thank you for sharing your knowledge and for being so charm.
Bhagyashree Nazareth says
Hi John…I made this cake for my hubby’s birthday…it was delicious…Thank you for the recipe…
Diva dancer says
Wonderful! I didn’t have any coffee so I used chocolate extract. I also had to make it non alcoholic so I substituted the Kirsch with pomegranate molasses, which is used in middle eastern cooking (available at any middle eastern market) and it is the nectar of the Gods…its a must have in the pantry!
Abi Nguyen says
Okay this was DELICIOUS!!
It was so much fun to make and I just need to add that my mom (who doesn’t like cake) LOVED this!!! I was surprised and she was surprised lol but everyone in in my family loved it! Thanks for the recipe!! <33