
This post may contain affiliate links. Please read our disclosure policy.
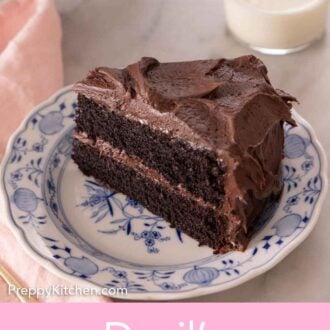
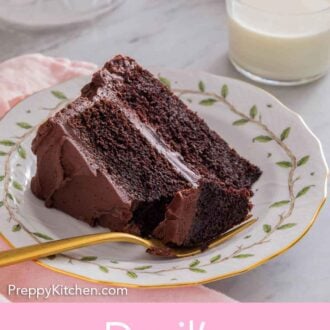
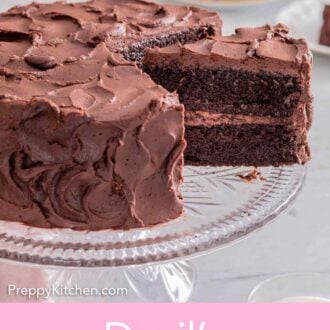
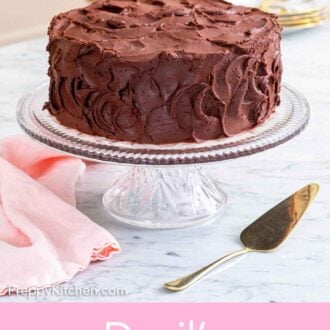
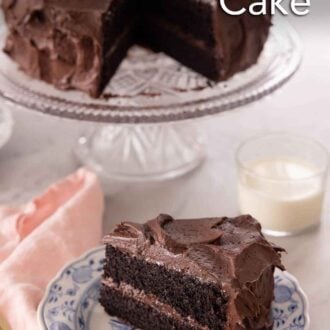
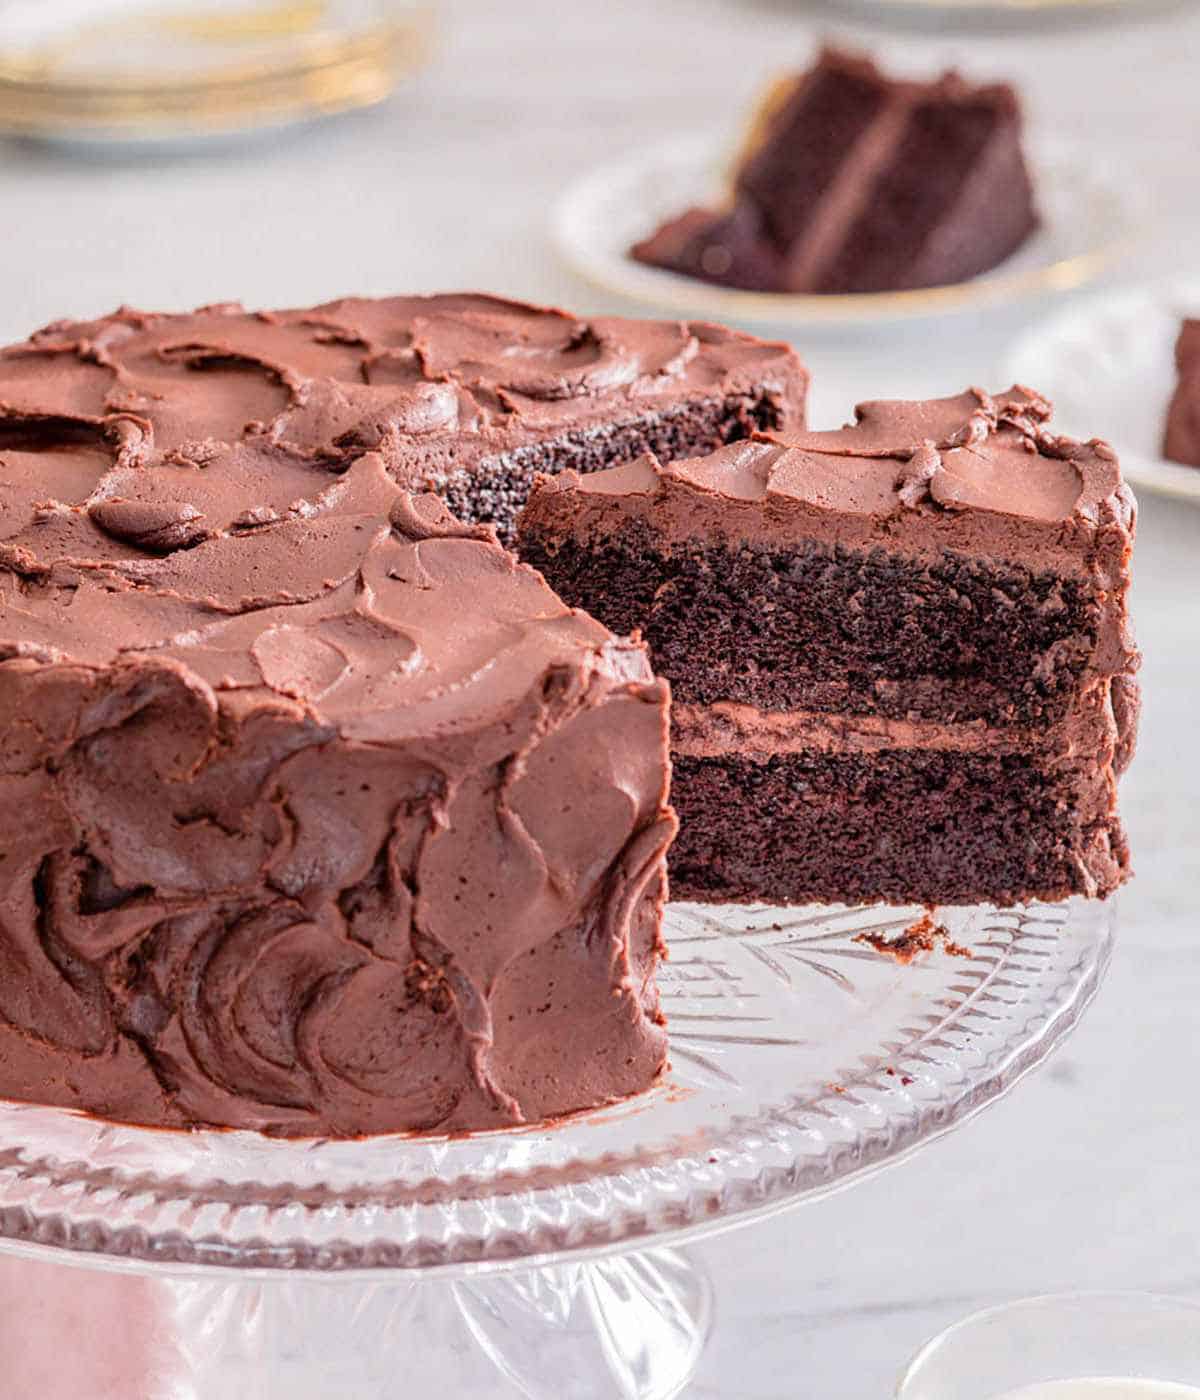
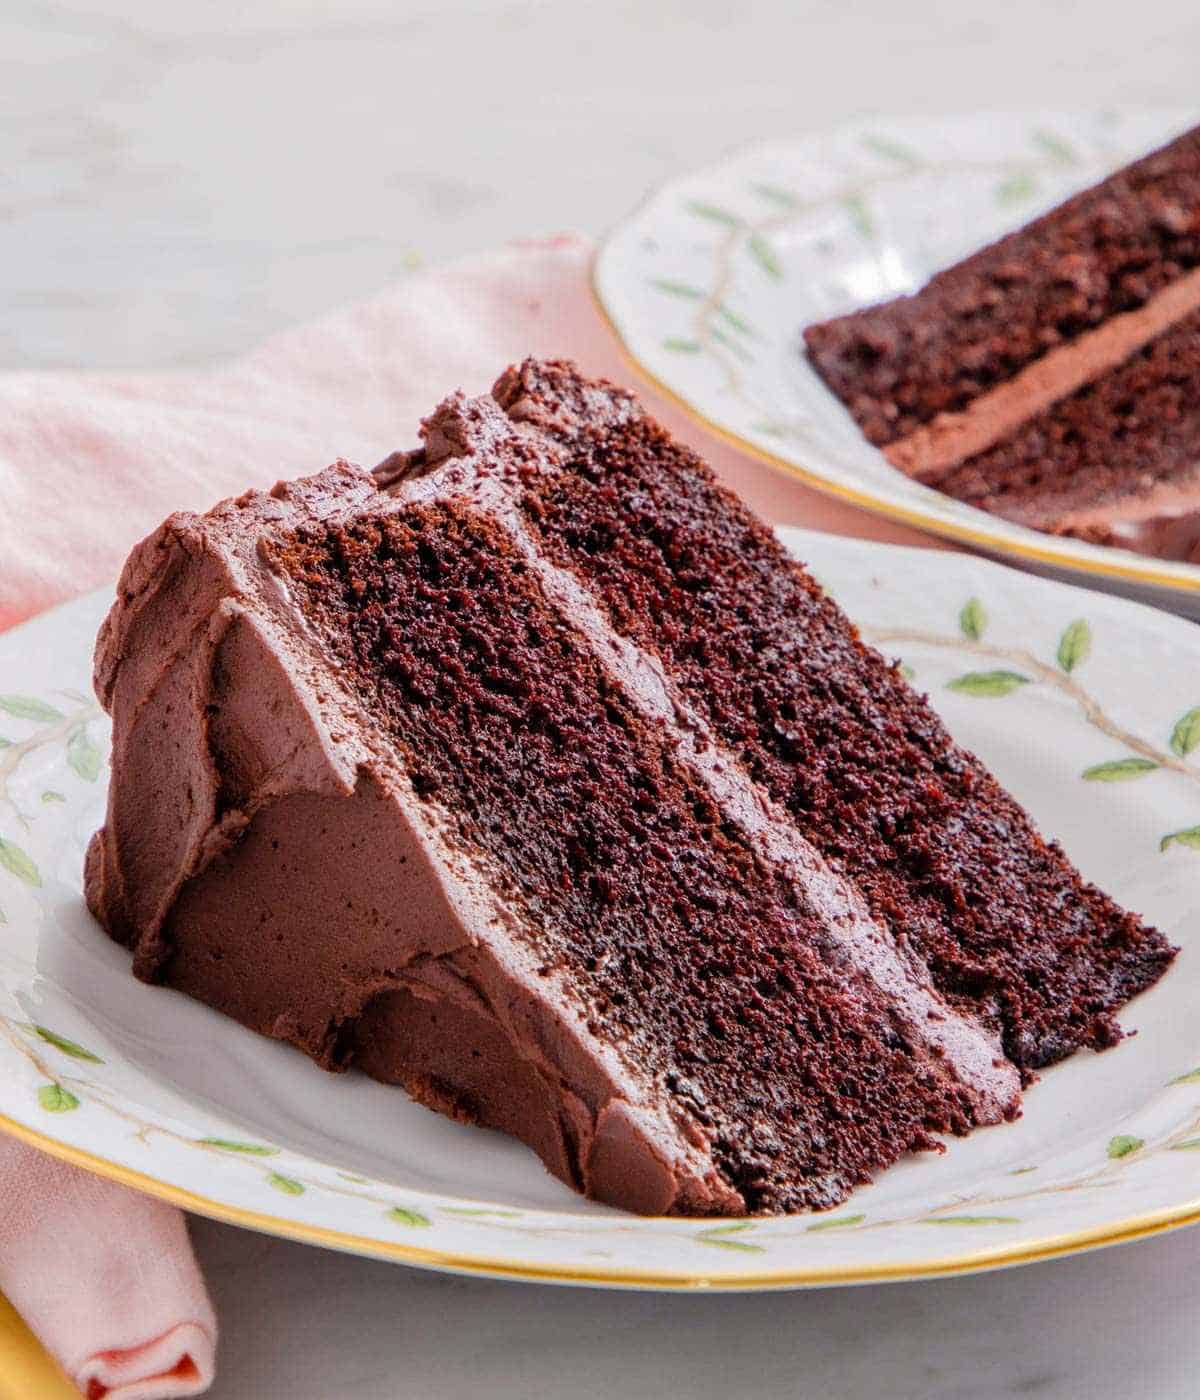
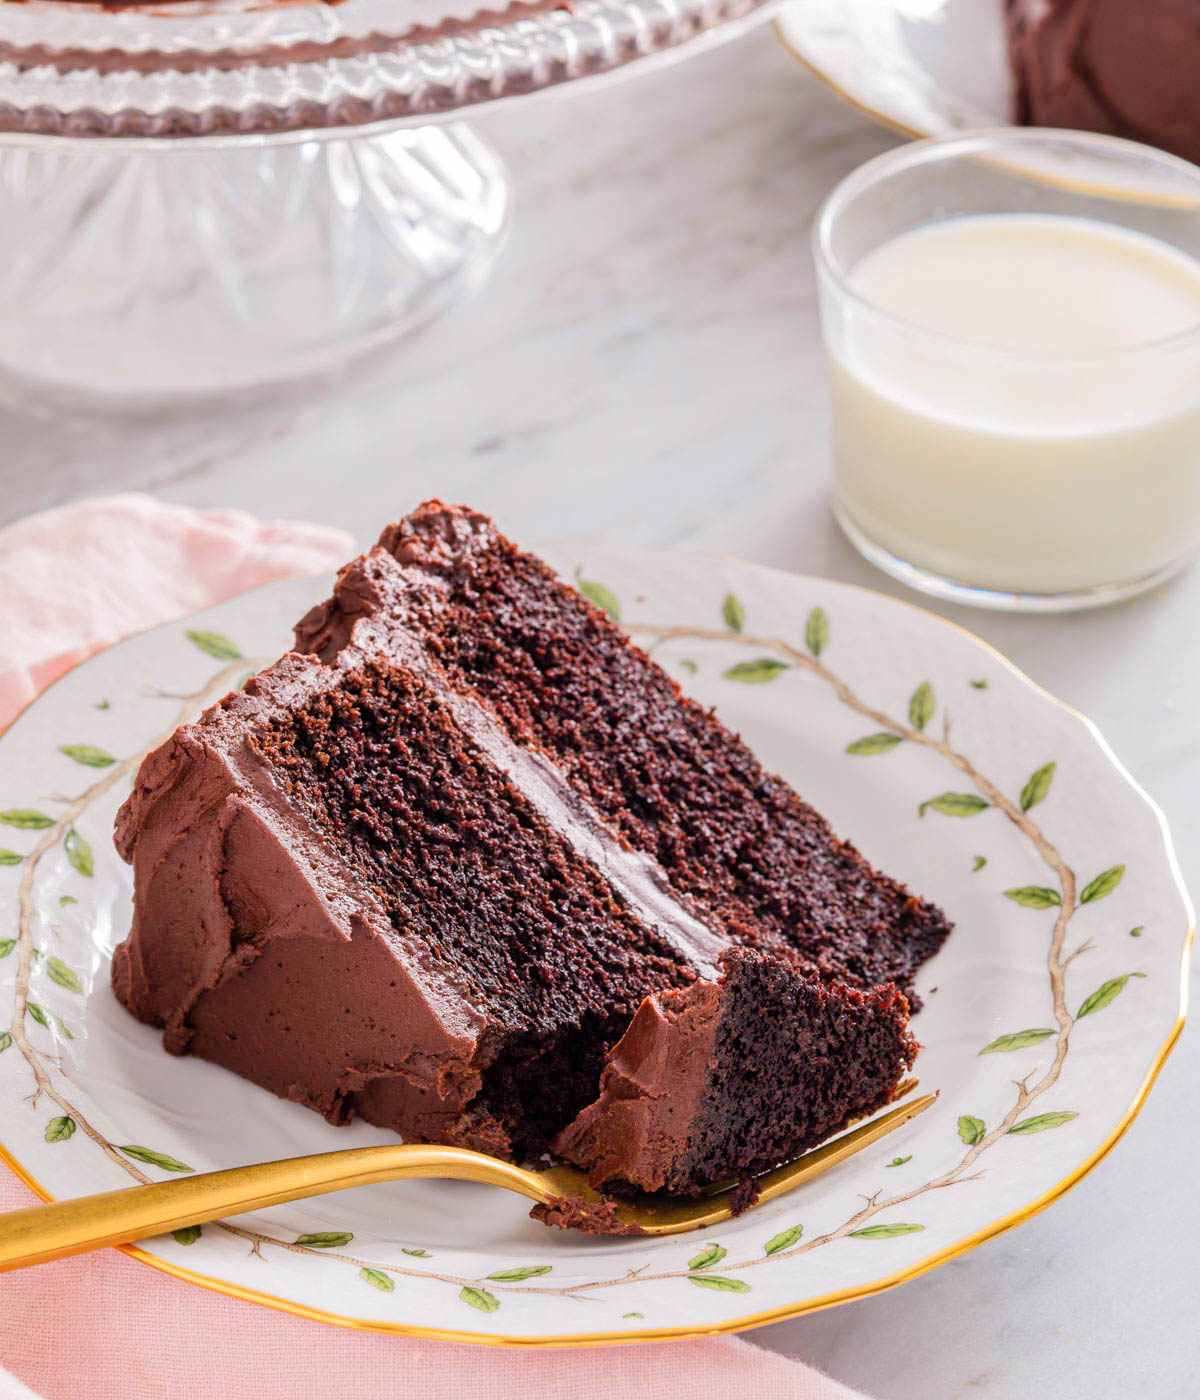
Chocolate lovers will go crazy for this sinfully indulgent Devil’s Food Cake. It is such a rich, moist, and fudgy cake with a deep and intense chocolate flavor. A coating of fluffy chocolate buttercream is a decadent finishing touch.
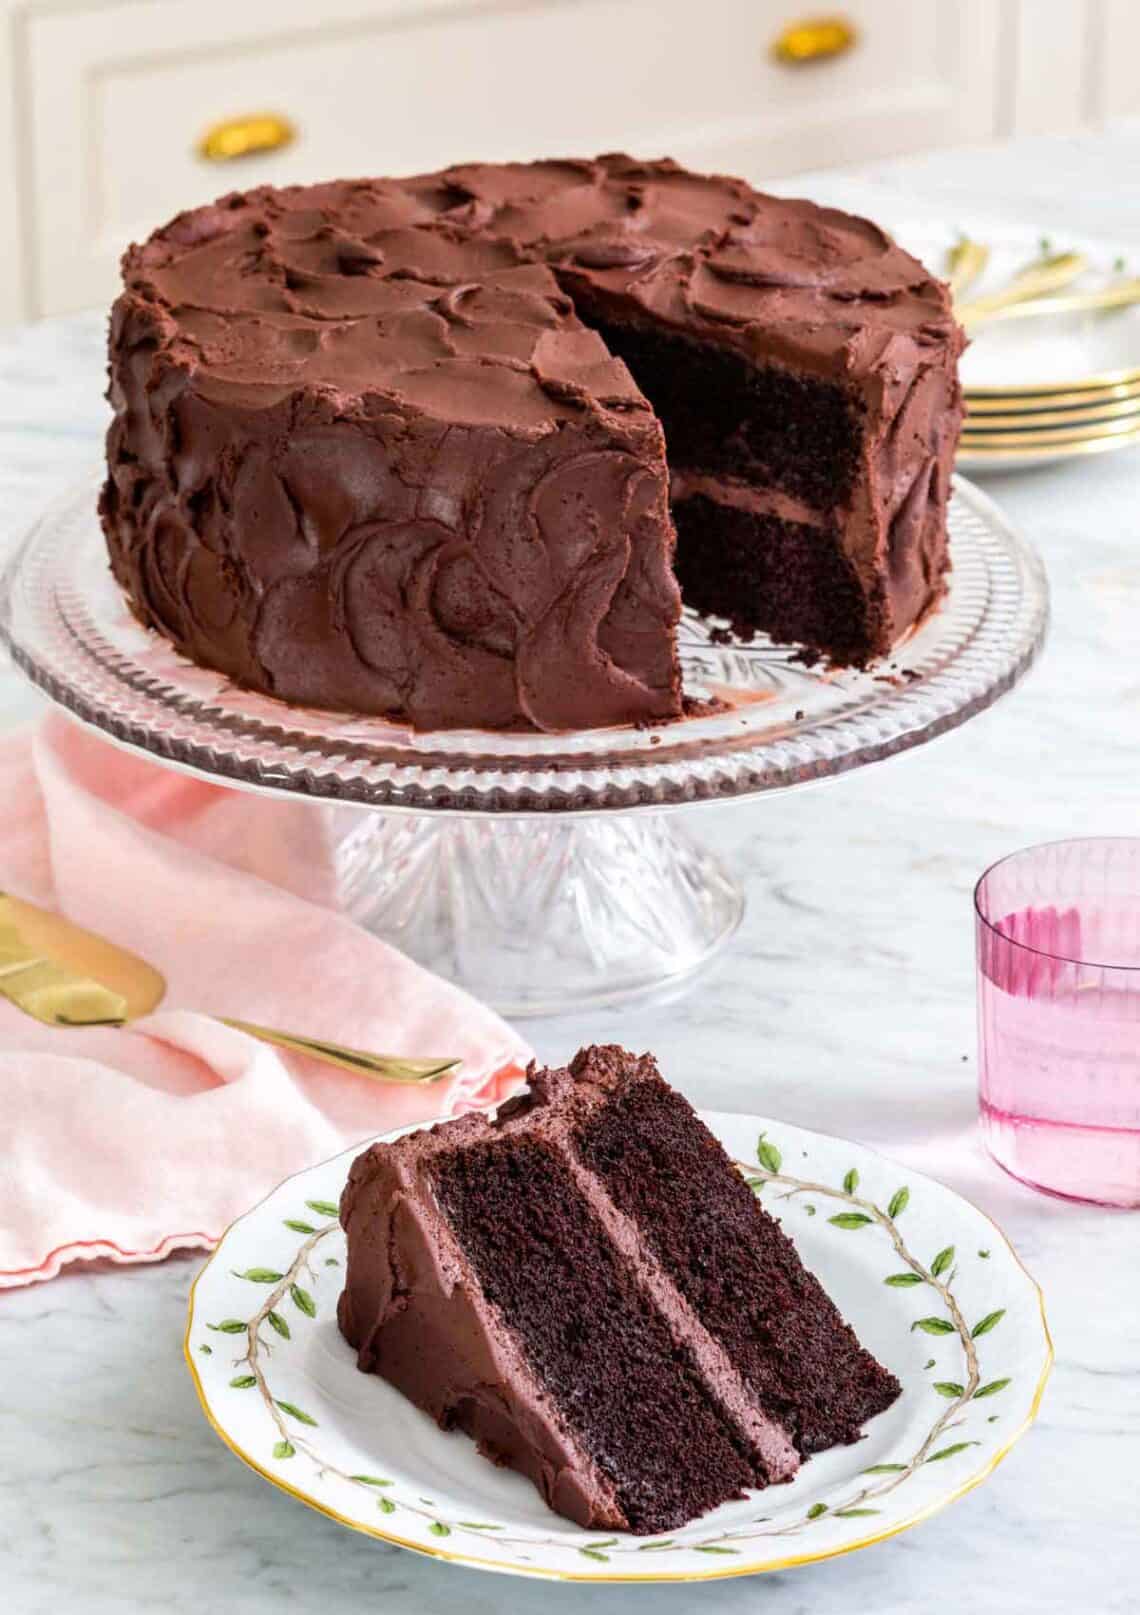
My easy Devil’s food cake is a classic cake recipe that’s always a crowd-pleaser. I tested this recipe with the goal of making a cake that stays moist for days—vegetable oil and sour cream are the secret! The layers are also super tender and fluffy thanks to the combination of baking powder, baking soda, and creaming the butter and sugar together to incorporate air.
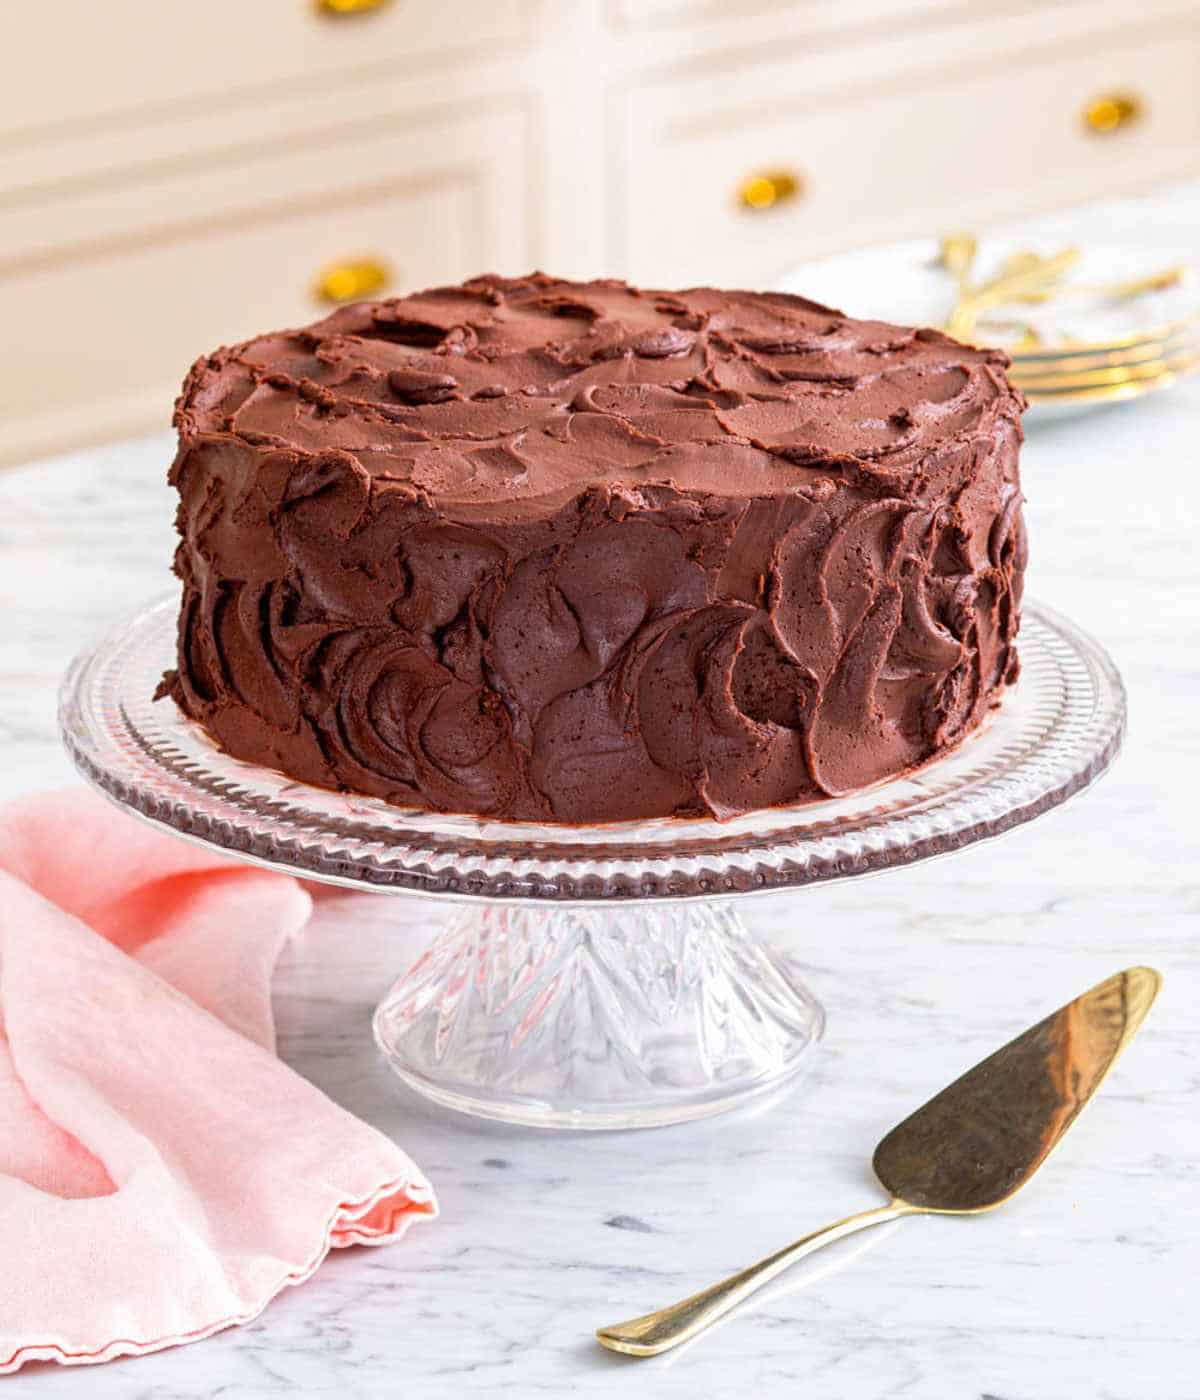
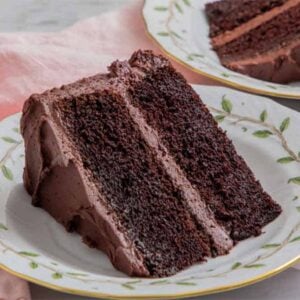
The results? A two-layer cake loaded with rich chocolate flavor that is moist and fudgy while also being tender and fluffy. Finished with swoops of fluffy chocolate buttercream, my Devil’s food cake is just the thing for the chocolate-obsessed person in your life.
“Truly beautiful cake, and the recipe is very easy to follow! Yields an insanely moist cake, and goes well with as much or as little frosting as you want!”
Aria
What Is Devil’s Food Cake?
There isn’t a consensus as to how Devil’s food cake got its name. Some speculate that it was named so because it’s the polar opposite of angel food cake, which is a very light white cake typically served plain or with a simple powdered sugar and berry topping. Devil’s food cake, on the other hand, is rich and dark, with plenty of frosting.
There’s also a theory that it got its moniker from the fact that it is intensely chocolatey, sinfully so! Devil’s food cake differs from regular chocolate cake because it is richer, as it contains more chocolate (1 cup of cocoa powder instead of ½ cup). It also has a slightly tighter crumb structure than regular chocolate cake. Regular chocolate cake has a more open structure that is sponge-like. Devil’s food cake feels denser from the tighter structure, but is still tender and fluffy with an almost bouncy feel from whipping air into the batter.
The Best Cocoa Powder To Use
Natural or Dutch process cocoa powder is fine. Dutch-processed cocoa powder will give the cake a deeper, richer chocolate flavor. It’s what I used for recipe testing and is my preference for making Devil’s food cake. Either way, use unsweetened cocoa powder since this recipe has sugar added.
I don’t recommend black cocoa for this cake recipe because it’s much more alkaline than regular cocoa powder (a bit acidic) and Dutch process cocoa powder (neutral pH), and will turn the cake texture a bit gummy since it reacts with the baking soda differently.
Other Key Ingredients & Substitutions
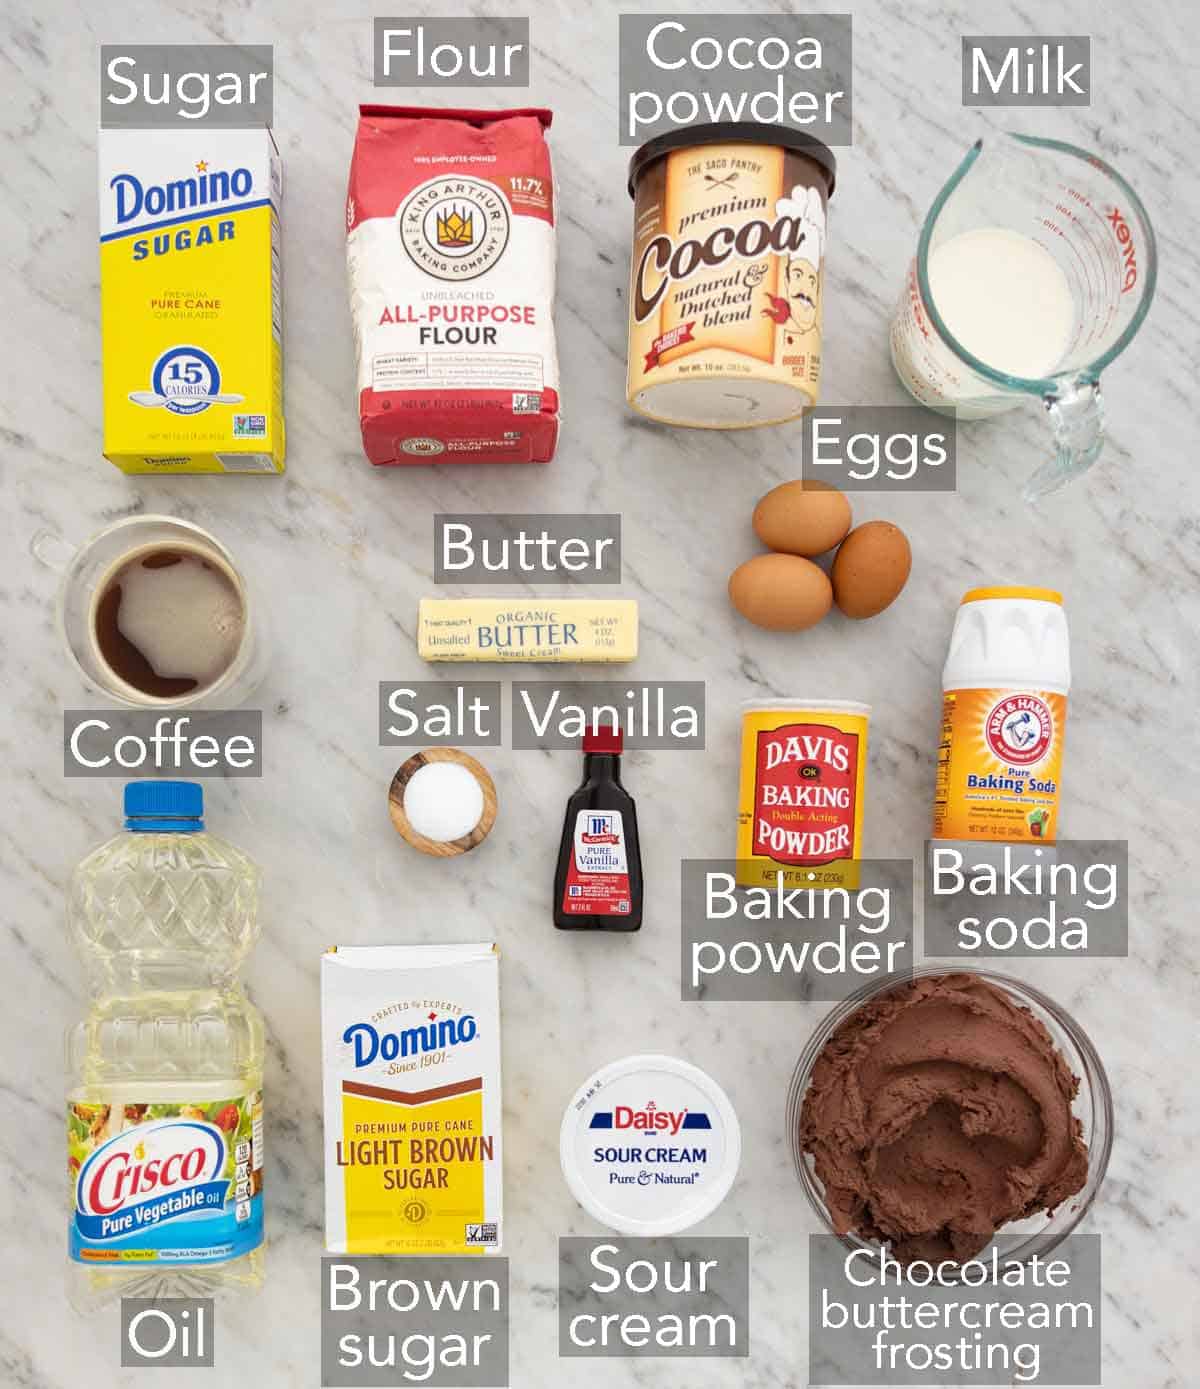
These are the main ingredients you need to make Devil’s Food cake. You can find the full list of ingredients and measurements in the recipe card below.
Cocoa powder — as I mentioned above, I use Dutch-processed cocoa powder for a more intense chocolate flavor, but regular unsweetened cocoa powder works as well. Be sure to sift it so it doesn’t get lumpy when combined with oil.
Oil — oil keeps the cake soft and moist for days. Liquid oils like vegetable oil won’t solidify at room temperature or when refrigerated. Since this cake also contains butter, which solidifies at cooler temperatures, the addition of the liquid oil helps keep the cake soft and moist when it’s cooled. Use a neutral oil like vegetable oil or canola oil so the flavor of the cake is not impacted.
Butter — typically, a cake will use either butter or vegetable oil, but I use both for this recipe! Creaming the butter and sugar together whips air into the batter for a tighter crumb structure. It also lends a rich flavor to the cake!
Sugar — you need granulated sugar and light brown sugar. White sugar adds sweetness and structure to the batter, and brown sugar adds moisture and a little acidity.
Milk and sour cream — milk and sour cream moisten and tenderize the crumb for an incredibly soft devil’s food cake. Sour cream also gives the leavening agents an acid to react with.
Coffee — don’t worry, the cake will not taste like coffee! The coffee works its magic in the background, and all you will be able to taste is a more complex Devil’s food cake. If you’d prefer to not use coffee, replace it with very hot, almost boiling water.
Leavening — baking soda and baking powder work together to give the cake the perfect texture and soft crumb (more details below!).
Why do you add hot coffee to the batter?
Hot coffee quickly hydrates the flour for a very moist cake. The heat opens the starch molecules in the flour, helping the flour hold onto more moisture so less evaporates in the oven during baking. It also blooms the cocoa powder, which enhances the chocolatey flavor. (It’s the same reason I use coffee in my regular chocolate cake recipe!) The flavor isn’t pronounced, but it adds a special something that, while unidentifiable, is noticeable when absent!
The Power of Two Leaveners: Baking Soda & Baking Powder
Devil’s food cake gets its incredibly tender and fluffy texture from a combination of baking soda and baking powder. Baking soda and baking powder produce tiny bubbles of carbon dioxide, which cause the cake batter to rise while baking and give it the airy texture we know and love in a fluffy cake.
The baking soda and baking powder start to react when the batter is mixed together, thanks to acidic ingredients like sour cream and brown sugar. But the reason you use both is that baking powder also reacts with heat. So, you get double-action and an extra lift in the oven once the batter starts baking. The two leaveners together help the cake turn out fluffier and rise more evenly with less doming in the center.
Other Pan Sizes & Conversions
If you want to adapt this recipe to other cake pan sizes, here’s how:
- 8-inch round cake: Divide the batter among three 8-inch round cake pans and reduce the baking time to 30 to 35 minutes. (The batter rises up significantly and almost fills the two 9-inch cake pans as written, so you need three 8-inch pans to fit all of the batter. The layers will be slightly thinner.)
- 9×13-inch sheet cake: Bake in one 9×13-inch cake pan for the same baking time, 40 to 45 minutes.
- Cupcakes: Fill paper cupcake liners in muffin pans about two-thirds full with batter, making about 24 cupcakes. Bake for about 20 minutes or until a toothpick comes out of the center clean. (Reference my chocolate cupcake recipe for more tips on baking cupcakes!). The cupcakes may shrink a bit when cooling, given the light and fluffy nature of this cake recipe.
- Make a four-layer cake: You can cut each 9-inch cake layer in half horizontally with a serrated knife, creating 4 thin rounds. Be very careful when cutting, as the cakes are super delicate. When assembling, place the cake layers cut-side up until the top layer (place it bottom side up for a smooth top) and use ½ cup of frosting between each layer.
Best Frostings For Devil’s Food Cake
There are lots of indulgent options for frosting a devil’s food cake! Here are a few ideas:
- Chocolate buttercream: You can’t go wrong with a classic chocolate buttercream that’s fluffy and creamy!
- Whipped ganache: Ganache is a bit less sweet and more chocolatey than buttercream since chocolate bars are used to make it, instead of cocoa powder. See my chocolate ganache recipe for instructions on how to make whipped ganache.
- Mocha frosting: Coffee lovers will love my mocha frosting, which is very coffee-forward with a hint of chocolate flavor.
- Chocolate cream cheese frosting: Brian’s personal favorite, chocolate cream cheese frosting is nicely tangy, complementing the sweet chocolate cake perfectly. For a less chocolatey option, try the plain cream cheese frosting from my red velvet cake recipe.
- Oreo frosting: For a wonderful cookies-and-cream flavor, make my simple Oreo frosting for this cake.
Pro Tips For Making This Recipe
Don’t use baking strips for this recipe! I know I typically recommend baking strips to bake flat cake layers, but when I was retesting this recipe, I found that the cake layers wanted to shrink more during cooling if baked with them. The layers baked up very evenly on top without the strips, and the edges set a bit more, helping this tender cake hold its form better.
I highly recommend using a scale to measure your flour, as it’s the most accurate method. However, if you don’t have a scale, be sure to fluff your flour with a spoon and then spoon it into your cups before leveling it off with a knife. This method is the best way to measure flour without overpacking the measuring cup.
Bring the eggs to room temperature, so they mix into the batter more effortlessly. The egg yolk and whites break down much more easily when they aren’t cold. If you forgot to bring out your eggs, you could quickly bring them to room temperature by placing them in a large bowl and covering them with warm tap water for 5 to 10 minutes. (Don’t forget to set out the butter, milk, and sour cream in advance as well!)
Let the cakes cool completely before frosting. If the cakes are still warm, the frosting is likely to melt, and the top layer of the cake may slide off!
How To Make Devil’s Food Cake
Below, I’ve highlighted portions of the recipe in step-by-step process images along with instructions for making Devil’s food cake. You can find the full set of instructions in the recipe card below.
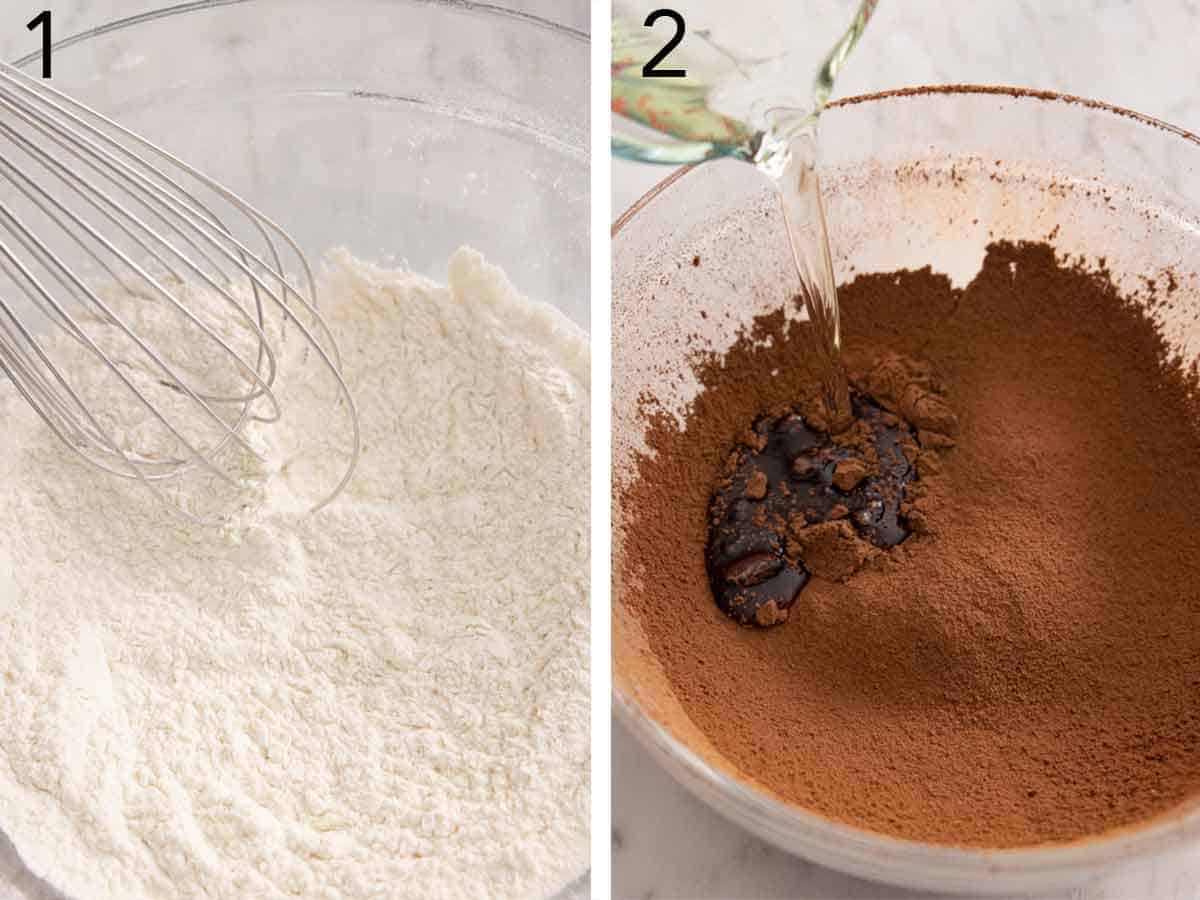
1. Sift together the flour, baking soda, baking powder, and salt in a large mixing bowl and set aside. Place the unsalted butter in the bowl of a stand mixer fitted with the paddle attachment and beat on medium speed until creamy.
2. To a medium bowl, add the cocoa powder and vegetable oil and whisk together. This helps it incorporate more smoothly into the butter mixture, as cocoa powder dissolves well into liquid fat.
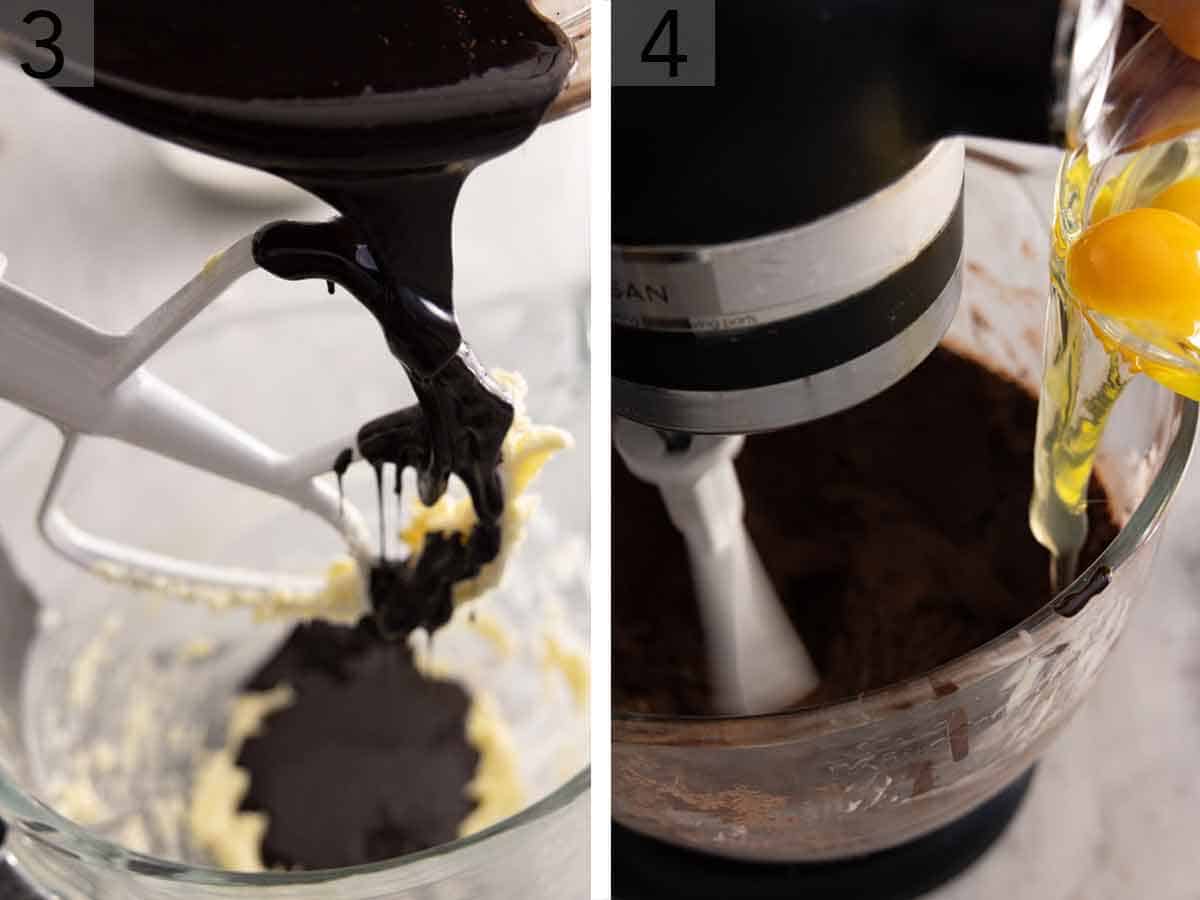
3. Add the cocoa powder mixture to the creamed butter, along with the white sugar and brown sugar. Beat it all on medium speed until very light and fluffy.
4. While the mixer is still running, add the eggs one by one. Make sure to beat well to incorporate each egg before adding the next. Then beat in the vanilla extract.
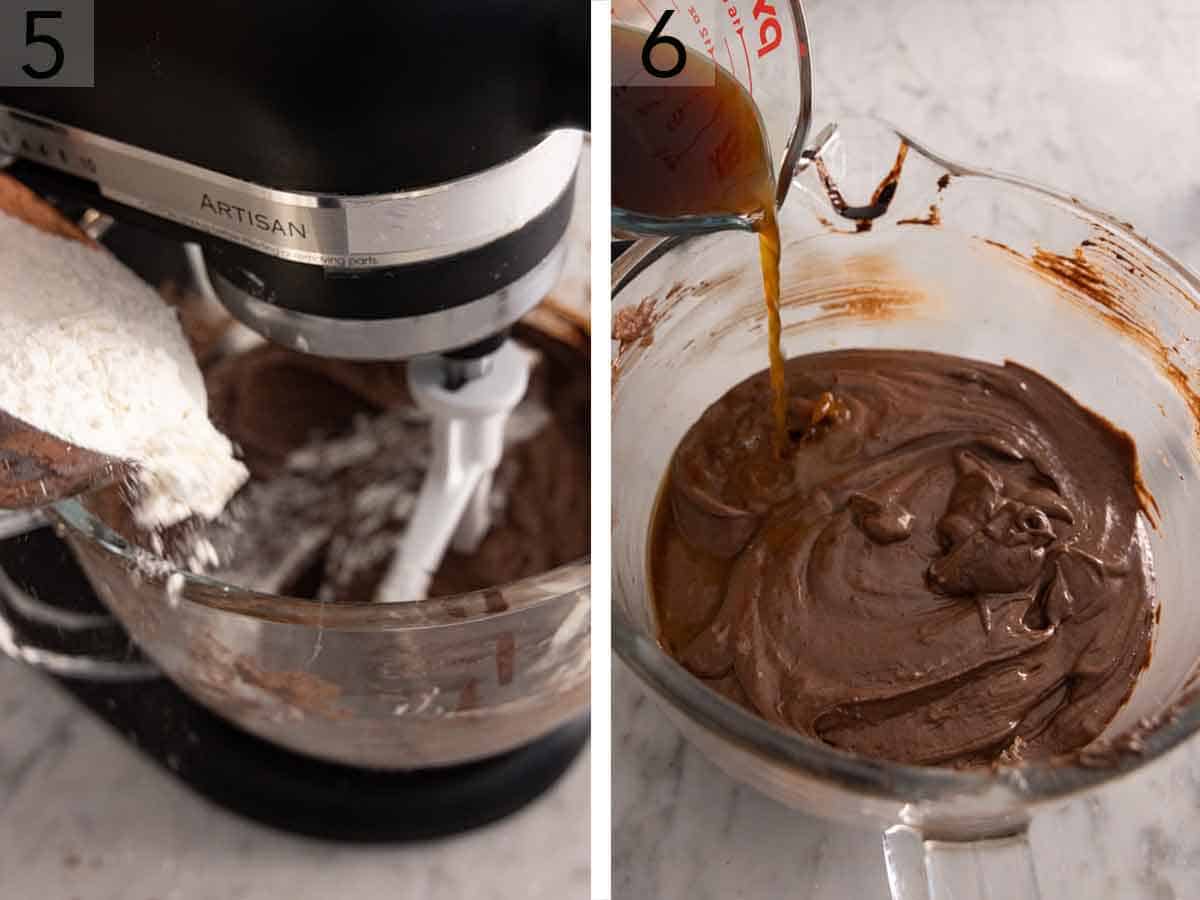
5. Reduce the mixer speed to low and add a third of the dry ingredients mixture to the wet ingredients, followed by half of the milk and half of the sour cream. Alternate with another third of the flour mixture, the rest of the milk and sour cream, and the remaining dry ingredients, and mix to incorporate all the flour.
6. Pour in the hot coffee and whisk to combine.
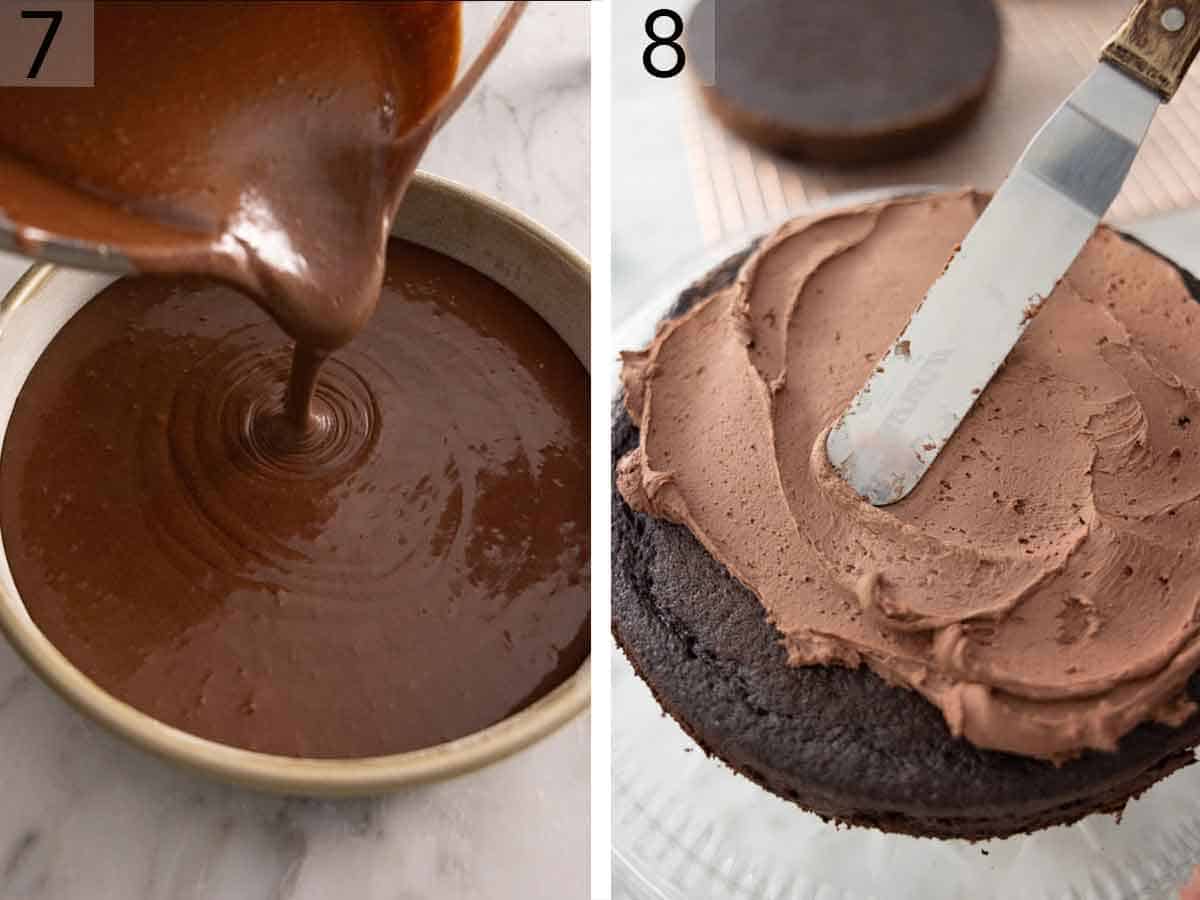
7. Butter and flour two 9-inch round cake pans (or spray them with baking spray) and line the bottoms with parchment paper. Divide the Devil’s food cake batter equally among the two prepared pans. Bake at 350°F for 40 to 45 minutes, then let the cakes cool completely in the pans. Very carefully (the cakes are very delicate!), invert the cakes and remove the parchment paper. You are now ready to assemble your Devil’s food cake!
8. Place one cake layer on a cake stand and spread about ¾ cup of your frosting over the top. (I went with chocolate buttercream.) Carefully place the other cake layer on top and spread the rest of the frosting all over the outside of the cake. Serve and enjoy your delicious chocolate cake!
Devil’s Food Cake Recipe
Equipment
- Electric or stand mixer
- Mixing Bowls
- 9-inch round cake pans
- Parchment paper
Ingredients
- 2 cups all-purpose flour (240g)
- 2 teaspoons baking soda
- ½ teaspoon baking powder
- 1 teaspoon salt
- ½ cup unsalted butter room temperature (113g)
- 1 cup Dutch-processed cocoa powder sifted (100g)
- ½ cup vegetable oil (120ml)
- 1½ cups granulated sugar (300g)
- ½ cup packed light brown sugar (110g)
- 3 large eggs room temperature
- 1 tablespoon vanilla extract
- 1 cup whole milk room temperature (240ml)
- ½ cup sour cream room temperature (120g)
- 1 cup hot coffee (240ml)
- Chocolate Buttercream for frosting the cake
Instructions
Make the Cake:
- Preheat the oven to 350°F. Butter and flour two 9-inch round cake pans, or lightly spray with baking spray, and line the bottoms with parchment paper. (I prefer to bake these cake layers without baking strips wrapped around the pan.)
- In a large bowl, sift together the flour, baking soda, baking powder, and salt.
- Add the butter to the bowl of a stand mixer with the paddle attachment (or a large bowl with a handheld mixer). Beat on medium speed until creamy.
- In a medium bowl, whisk together the cocoa powder and oil. Add it to the butter along with the granulated and brown sugars. Beat on medium speed until very light and fluffy, about 5 minutes, stopping to scrape down the bowl a few times during mixing. With the mixer running, add the eggs, one at a time, beating well after each addition. Stop to scrape down the bowl as needed throughout mixing. Beat in the vanilla.
- With the mixer on low speed, add a third of the flour mixture followed by half of the milk and half of the sour cream. Continue alternating with another third of the flour, the rest of the milk and sour cream, and the remaining flour. Scrape down the bowl and mix once more if needed to incorporate all of the flour. Add the hot coffee and carefully whisk together until well combined. Pour the batter into the prepared cake pans.
- Bake for 40 to 45 minutes or until the cakes are starting to pull away from the sides of the pans and the center springs back when gently pressed. Let the cakes cool completely in the pans. Carefully invert the cakes and remove the parchment paper. (The cakes are very tender and delicate so be gentle.)
For the Assembly:
- Place a cake layer on a cake stand, spread about ¾ cup of frosting over the top. Place with the remaining cake layer on top. Spread the remaining frosting all over the outside of the cake. The assembled cake can be covered and stored at room temperature for up to 5 days.
Notes
- Don’t skip sifting the cocoa powder. Sifting helps prevent lumps in the mixture when combined with the oil.
- Avoid over-mixing the batter. Stop when you see the streaks of flour just disappear. You are going to add the hot coffee last, so any last bits of flour will get mixed in along with the coffee. If you continue mixing it for too long, you risk over-developing the gluten in the batter, leading to a tough, dry, and dense Devil’s food cake.
- The cakes will shrink somewhat as they cool. This is normal! They should evenly settle and produce a flat top as they cool.
- Serving a crowd? Check out my tricks for cutting a round cake to serve more people!
Nutrition
Have you tried this recipe? Tag me today!
Mention @preppykitchen and tag #preppykitchen!
Storing and Freezing Instructions
Storing: Cover the cake and store it at room temperature for up to 5 days. You can also keep the cake in the fridge and bring it to room temperature before serving.
Freezing: For plain cake layers, wrap each cake in plastic wrap and transfer to a freezer-safe bag in the freezer for up to three months. Thaw the frozen cakes at room temperature for a few hours before frosting. If you want to freeze leftover frosted cake, I recommend flash freezing the slices on a lined baking sheet before wrapping them up, so the frosting doesn’t stick to the plastic wrap. Thaw at room temperature for a few hours.
FAQs and Troubleshooting
This usually means the cakes were underbaked, so the cake structure did not set properly in the oven. This can cause it to sink in the center when it cools. Also, poking the cake layer with a toothpick to test it too early can cause the structure to collapse and deflate. This is why, for very light cakes such as this Devil’s food cake, I generally like to press them with my finger instead of poking them with a skewer.
A hotter oven can set the edges of the cake faster, so the center rises more. If that happens, don’t worry! You can cut off the domed area with a serrated knife and enjoy eating the scraps! Just be very careful when cutting, as this is a fragile cake. See my post on how to decorate a cake for a more detailed explanation.
You may have overbaked the cakes. They are ready when the cake edges start to pull away from the cake pans and the center springs back when pressed gently. This usually takes 40 to 45 minutes. Another culprit is using too much flour, which is why I always recommend using a kitchen scale for accuracy. Using too few liquid ingredients can also yield a dry devil’s food cake. Try to measure your ingredients accurately at the start to avoid this.
I haven’t tested a gluten-free devil’s food cake, but you could definitely try it by swapping all-purpose flour with a 1:1 gluten-free baking flour mix! Choose a blend with xanthan gum, which mimics the effect of gluten. The crumb texture might be slightly firmer or denser, but the cake will taste delicious.
More Dessert Recipes To Try
In the mood for more decadent chocolate desserts? Try one of these next!
Easy chocolate Bundt cake is always a show-stopper! It’s soft, moist, and fudgy, and topped with a velvety chocolate ganache.
If you want to wow your loved ones, try my chocolate soufflé recipe. While a little involved, there’s no reason to be intimidated by this recipe. You’ll love how light and silky it turns out!
My 4-ingredient chocolate mousse takes very little hands-on time and is always light as air. Serve it with a dollop of whipped cream and chocolate shavings.
Chocolate lava cake is ready in under 30 minutes and is unbelievably indulgent! The molten chocolate center is guaranteed to impress.
This better than sex cake is perfect for feeding a crowd at potlucks and parties. Chocolate cake, condensed milk, caramel sauce, whipped topping, and chopped candy bars — can you say “indulgent”?
If you’ve tried this Devil’s food cake recipe, then don’t forget to rate it and let me know how you got on in the comments below. I love hearing from you!


