


A delicate crepe is a French classic that you can make at home as easily as quiche Lorraine or pain perdu (a.k.a. French toast). With this easy crepe recipe, recreating the famed Parisian cafe food is well within reach for any curious cook. All you need is a handful of basic ingredients, a blender or whisk, and a skillet!
I’ve made a lot of crepes at home over the years. Through many rounds of recipe testing and cooking up these delicate pancakes for my family, I’ve learned the tips and tricks you need to know to make the process foolproof! Not only is the prep minimal, but these golden brown crepes can be stuffed with any number of fillings to make either sweet crepes or savory crepes, or you can even turn them into a towering crepe cake!
Table of Contents
What Are Crepes?
Crepes are a thin, delicate French pancake. Unlike the classic American-style fluffy pancakes that are thick and cake-like thanks to leaveners like baking powder, crepes are thin and don’t contain any added leavening agents. They’re made by blending a simple batter of flour, eggs, milk, and butter, and cooked in a thin layer until just golden. The result is a delicate, lacy texture that’s tender and flexible.
Crepes are delicate and wonderfully versatile. Think of them as a blank canvas—soft and pliable enough to fold or roll around fillings like whipped cream and fruit or ham and cheese, but still tender enough to enjoy with nothing more than a dusting of powdered sugar.
Key Ingredients
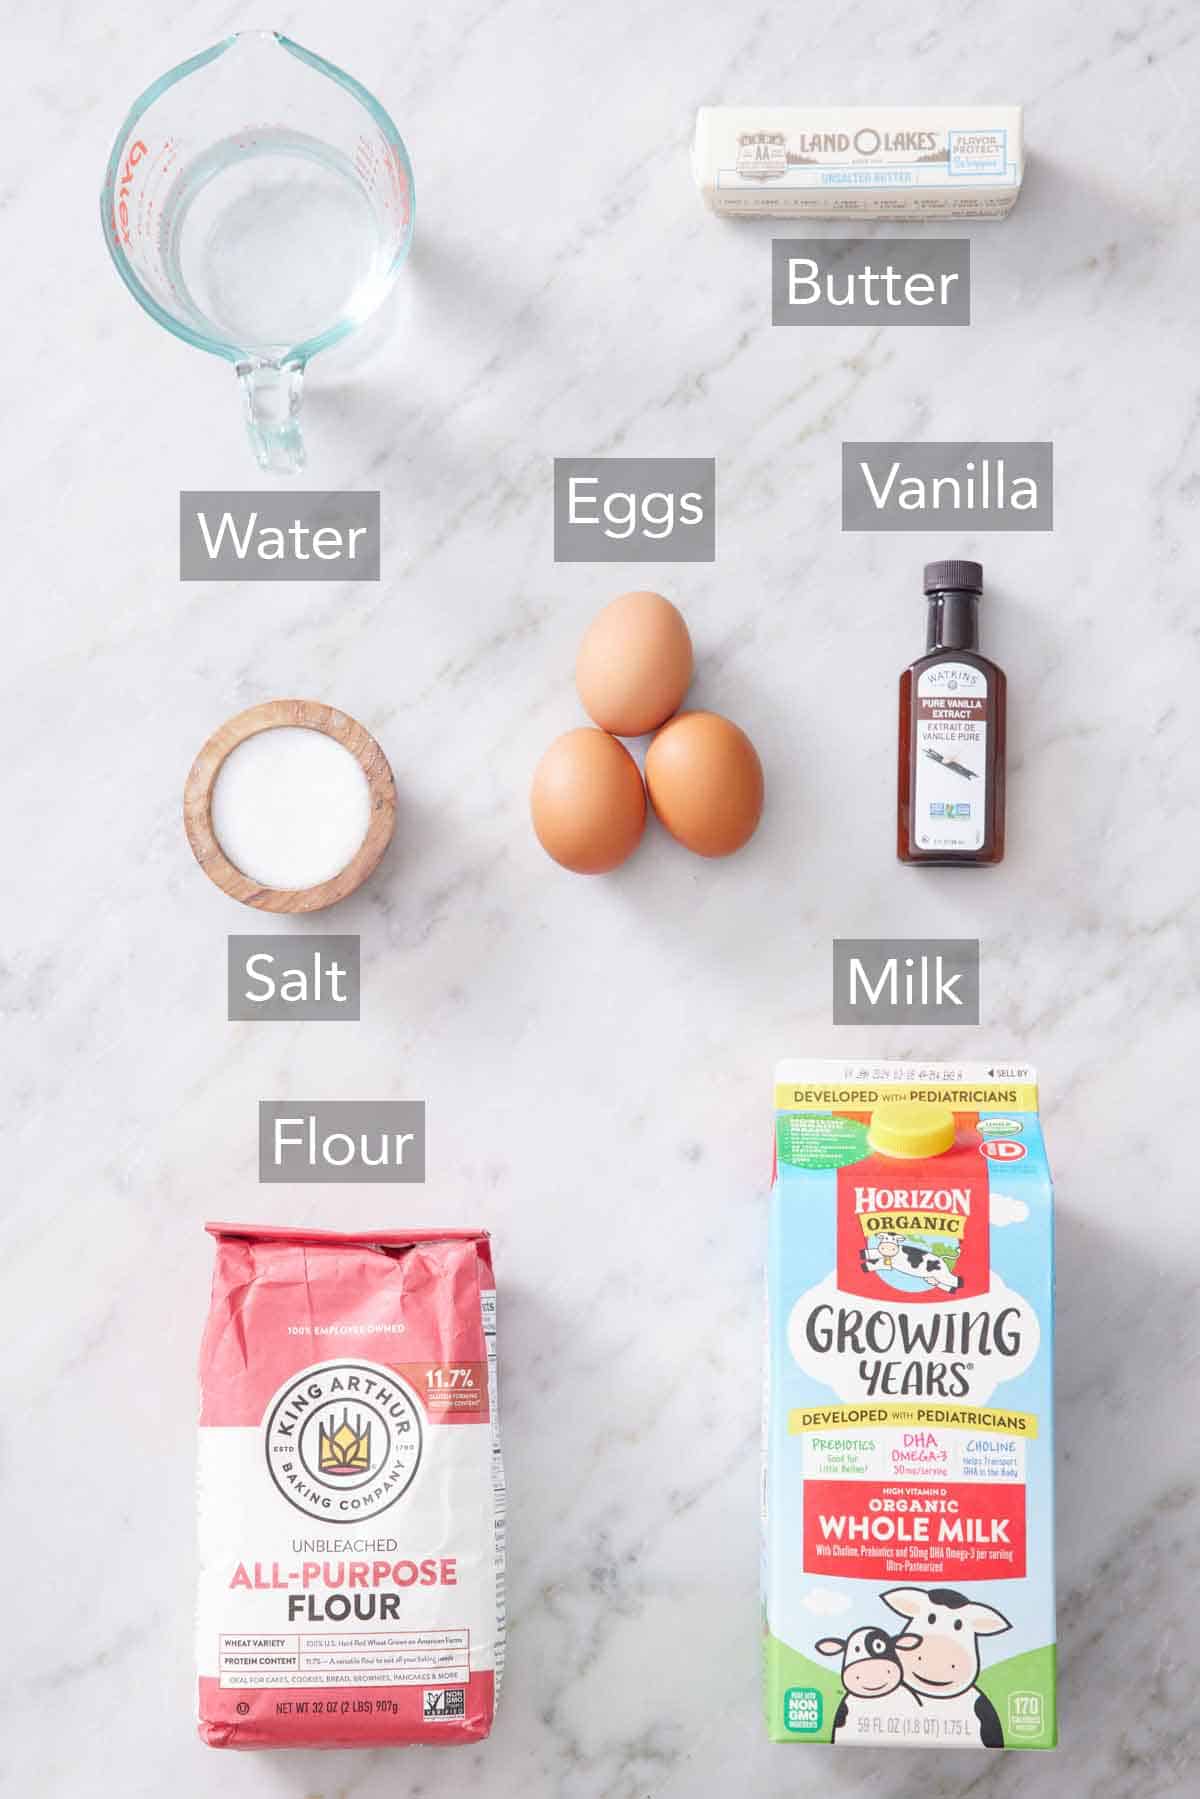
This is a simple recipe, so you only need a few ingredients to make the best crepes! In the recipe card below, you’ll find the full ingredient list along with measurements and instructions.
Large eggs — these act as our binder as well as a flavorful foundation for the custardy crepe batter. Because crepe batter is so simple and isn’t heavily flavored with added spices or flavorings, using a higher-quality egg can be worth it.
All-purpose flour — plain white flour has the perfect amount of protein for structure without overdoing it, ensuring a delicate crepe that won’t fall apart but isn’t rubbery or too chewy.
Whole milk — milk adds richness to the batter and contributes to the tender texture of the crepes.
Butter — a little bit of melted butter is blended into the batter to help the thin crepes turn golden as they cook. More is used on the pan to produce a nonstick surface and create a lacy texture.
Vanilla extract — optional but recommended for making sweet crepes. It adds a touch of richness to the crepes that pairs well with sweet fillings.
Chilling The Batter Is Important
Letting your crepe batter rest in the fridge isn’t just a suggestion. It’s the secret to smooth, tender crepes. Resting gives the flour time to fully absorb the liquid, which helps relax the gluten and results in a thinner, more elastic batter. This makes it easier to spread the batter evenly in the pan and prevents tearing. Skipping it can also result in dry, rubbery crepes—nobody wants that!
Chilling also helps the batter thicken slightly, so your crepes cook up with just the right texture that is delicate but not flimsy. An hour’s rest is the minimum, but you can even let it sit for several hours or overnight. This not only helps you cook up an effortless breakfast, but your guests are certain to tell you that these are the best homemade crepes!

Do You Have To Grease The Pan If You Use Nonstick?
Yes, even if you’re using a nonstick skillet, you’ll still want to grease the pan. Crepes are thin and delicate, which makes them more likely to tear or stick if the surface isn’t lightly coated. A small amount of butter not only helps prevent sticking but also adds rich, golden flavor to each crepe and produces the lacy texture on the outside. If you’re in a pinch, nonstick cooking spray works too, but for the tastiest results, butter is the way to go.
Pro Tips For Making The Best Crepes
If you are using a crepe spreader, make sure you soak it in water first. If you purchased a crêpe pan, chances are it came with a wooden accessory known as a rozell (or a crepe spreader). Soaking it in water helps prevent the batter from sticking to the wood. This also allows the spreader to glide more smoothly across the pan, giving you a perfectly thin, even layer every time. I have ruined many crepes by forgetting this, so here’s my friendly reminder to soak your spreader while you heat up your pan!
Once the batter hits the pan, work quickly. Crepe batter cooks fast, so hesitating can lead to uneven thickness or a lopsided shape. A swift, confident motion is key to perfect crepes. And they don’t have to be perfectly round! Just get the batter evenly spread and don’t worry what shape they take on—they’ll be delicious regardless!
Treat the first crepe as practice. It’s totally normal if it turns out a little too thick, tears, or cooks unevenly. The first one helps you get a feel for the heat of the non-stick pan, how much batter to use, how quickly you need to swirl or spread it, and how long it takes to make the first side perfectly golden. So don’t worry, just keep going!
If you have a larger pan, add additional batter to the pan. The key is to pour just enough batter directly in the center of the pan so you can quickly swirl or spread it into a thin, even circle without leaving gaps or creating thick spots.
How To Make Crepes
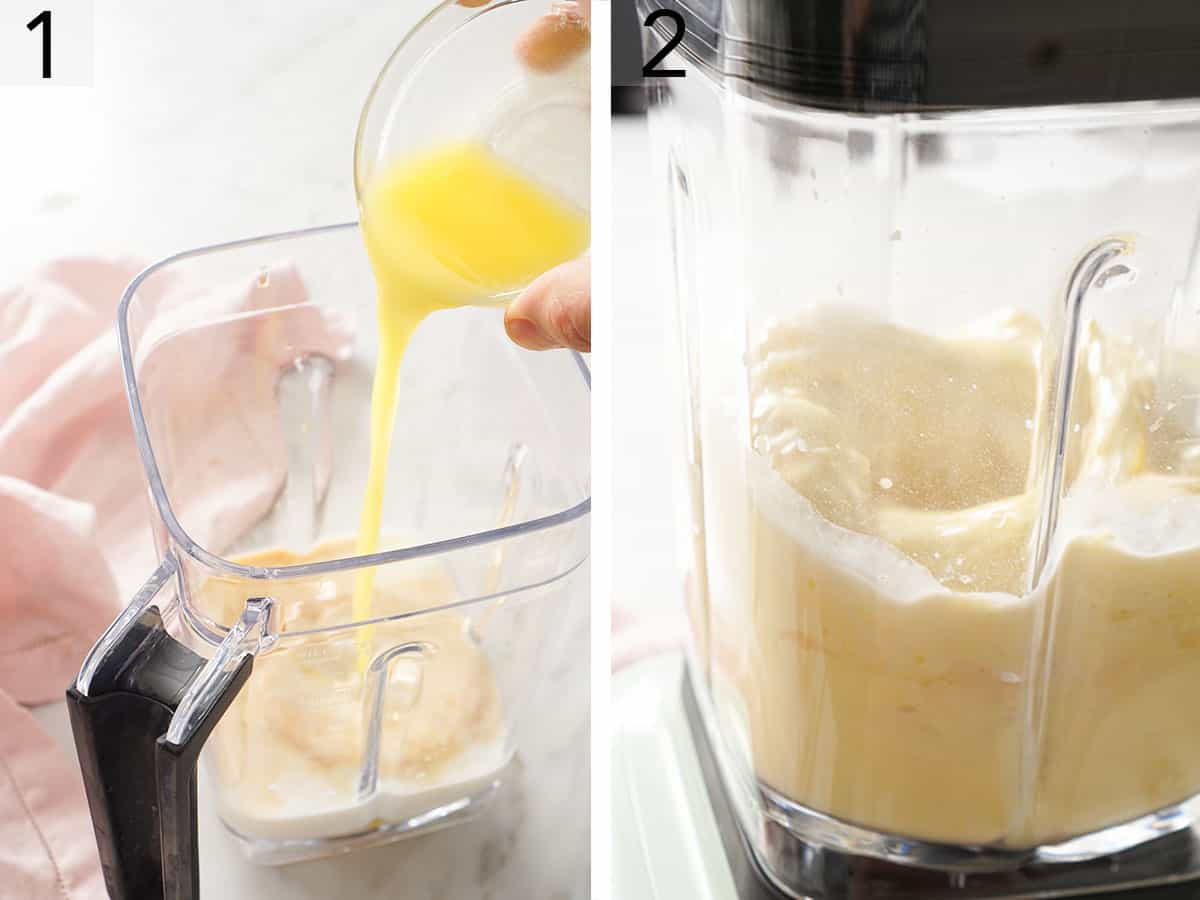
1. In a large mixing bowl or blender, combine the eggs, flour, milk, water, melted butter, vanilla, and a pinch of salt.
2. Whisk it all together until the batter is nice and smooth, or blend it for about 30 seconds if you’re using a blender.

3. Once it’s mixed, cover and chill the batter in the fridge for at least an hour (4 hours or overnight is even better!).
4. When you’re ready to cook, heat an 8-inch nonstick skillet or crepe pan over medium heat. Give it a light brush of melted butter to prevent the crepe from sticking to the bottom of the pan.
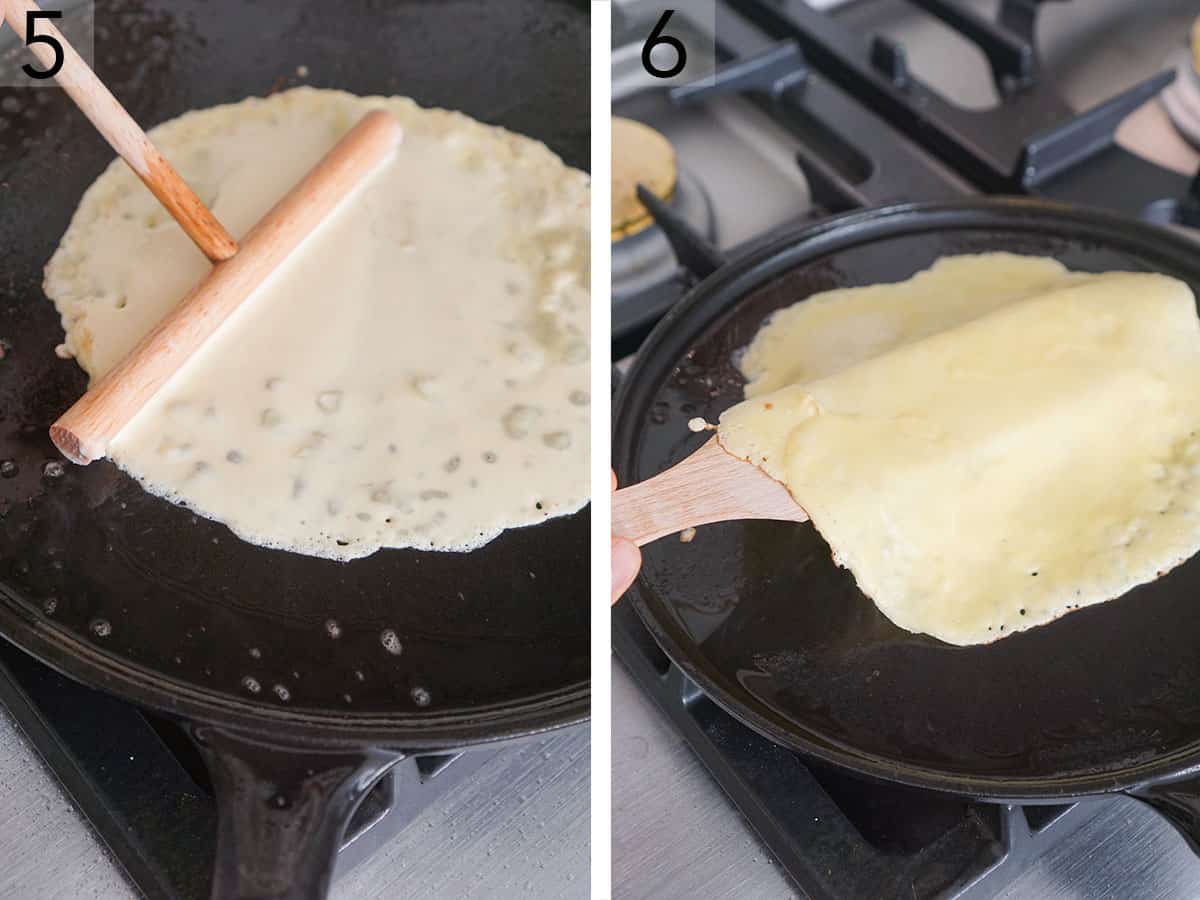
5. Pour about 3 tablespoons of batter into the center of the pan, then quickly tilt and swirl the pan so the batter spreads out into a thin, even layer. Let it cook for 30 to 45 seconds, or until the bottom is lightly golden.
6. Flip the crepe and cook the second side for another 10 to 15 seconds. Once done, slide the cooked crepe onto a plate and cover it with a clean kitchen towel to keep warm. Repeat with the remaining batter, adding a bit more melted butter to the pan between crepes if needed. Serve warm with your favorite toppings or fillings—fresh fruit, Nutella, whipped cream, a dusting of powdered sugar, or whatever makes you happy!

Crepe Recipe
Video
Equipment
- 8” skillet
- Mixing bowl or blender
Ingredients
- 3 large eggs
- 1 cup all-purpose flour (120g)
- ¾ cup whole milk (180mL)
- ½ cup water (120mL)
- 1 tablespoon unsalted butter melted plus more for cooking
- ½ teaspoon vanilla extract optional
- ⅛ teaspoon salt
Instructions
- Combine the eggs, flour, milk, water, melted butter, vanilla extract, and salt in a large mixing bowl or blender. Whisk well, or blend for about 30 seconds, until the batter is smooth. Cover and chill the batter for at least 1 hour or up to 4 hours.
- Heat an 8-inch nonstick skillet or crepe pan over medium. Brush the skillet lightly with butter.
- Pour 3 tablespoons of the batter into the skillet and immediately rotate the pan to coat the bottom evenly. Cook the crepe until lightly browned on the bottom, 30 to 45 seconds.
- Flip the crepe and cook until lightly browned on the second side, 10 to 15 seconds. Transfer the crepe to a large plate and cover it with a clean kitchen towel to keep warm.
- Repeat the process with the remaining batter, greasing the skillet with butter between each crepe, as needed.
- Serve the crepes warm with fresh fruit, Nutella, whipped cream, or powdered sugar.
Notes
- If you have a larger pan, use more batter. For a 10-inch nonstick skillet, about 4 tablespoons (or ¼ cup) of batter works well. If you’re using a 12-inch skillet, bump it up to around 5 tablespoons. Always test the first one and then adjust your batter amount based on how that one cooks.
- Serving a crowd? You can keep your cooked crepes warm while you make more by either covering them on a plate with a lid, tenting them with foil, or placing them on a baking sheet in the oven at 200°F.
Nutrition
Should Crepes Be Rolled Or Folded?
Either one works, so it’s totally up to you! Both look beautiful and taste delicious.
To fold: Spread your filling over half of the crepe, then fold the plain half over the filling. Fold the crepe in half again from a triangle. This is great for sweet crepes filled with chunky fruit or savory crepes filled with heartier ingredients like sautéed mushrooms and arugula.
To roll: For thinner fillings, spread the filling evenly over the whole crepe and roll it up from one end like a jelly roll. For thicker fillings, spread or pipe it just to one side of the center, fold one edge over the filling, and continue rolling it up. This method works well for soft whipped cream, raspberry jam, or savory fillings like shredded cheese and thinly sliced ham.
Crepe Fillings And Serving Suggestions
Crepes are very adaptable in how you serve them. You can keep them plain with a simple dusting of powdered sugar and a sprinkle of fresh berries. Or elevate them into a sweet breakfast or dessert, or turn them into a savory dish, perfect for brunch.
Sweet fillings and toppings: Experiment with any kind of fruit preserves, chocolate ganache or Nutella, fresh fruit like berries or banana slices, cooked fruit like fried apples, or even pastry cream and chocolate pudding. They can also be stuffed with vanilla ice cream or pistachio ice cream for a fun twist on ice cream sandwiches.
Savory fillings and toppings: The options here are just as vast and varied as the sweet ones! Try making a riff on Eggs Benedict by stuffing the middle with honey-baked ham or blanched asparagus and topping it off with a perfectly runny poached egg and hollandaise sauce. Prosciutto or deli turkey, a handful of peppery arugula, a slice of cheese, and a swipe of Dijon mustard is also a delicious combo. Or stuff it with Boursin and roasted veggies or cherry tomatoes!

Make Ahead and Storage Tips
Crepes are perfect for prepping in advance! Plus, they store well, so you can make a bigger batch and save some for a breakfast that is easy to reheat and serve.
Make-ahead: You can make the batter up to 1 day ahead and keep it covered in the fridge. Just give it a quick whisk before using, as it may settle or separate slightly. You can also cook the crepes ahead of time. Allow them to cool to room temperature, stack them with a small piece of parchment paper or wax paper between each one before storing.
Refrigerating: Stack cooked crepes as described above, and store them in an airtight container or tightly wrapped plastic wrap or foil and refrigerate for up to 3 days.
Freezing: For longer storage, freeze a stack of crepes in a freezer-safe bag for up to 2 months. Thaw in the fridge overnight before reheating.
Reheating: To warm them up, place the stack in a 300°F oven for 10 minutes, or gently reheat in a nonstick skillet over low heat for 15–30 seconds per side. You can also microwave them stacked between damp paper towels for about 20–30 seconds.
Frequently Asked Questions
Yes, you can absolutely flavor crepe batter! For sweet crepes, try adding a teaspoon of cinnamon, a few grates of nutmeg, some fresh citrus zest, your preferred flavor extract, or even a splash of liqueur like Grand Marnier or amaretto to the batter. (You can find inspiration from my crepes suzette recipe!) For savory crepes, skip the vanilla and add chopped fresh or dried herbs, cracked black pepper, or a pinch of garlic powder.
If you’ve tried this Crepe recipe, then don’t forget to rate it and let me know how you got on in the comments below. I love hearing from you!
Rumy says
The best crepe recipe eveeeer
Idania says
I’ve just tried this recipe. Very good. We all enjoyed at home.
Jackeline says
I liked the recipe, simple and easy to follow. Will make it tomorrow.
Lina Warren says
You are an amazing chef I have tried many of your recipes and they are all full of flavour.
John Kanell says
Thank you Lina!
Wendy says
Siempre busqué una buena receta para hacer crepas… Está es genial! Gracias…