
This post may contain affiliate links. Please read our disclosure policy.
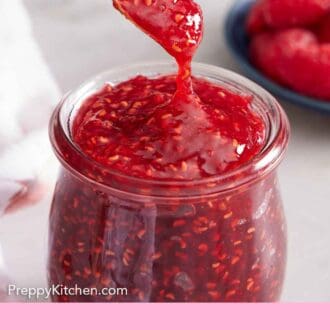


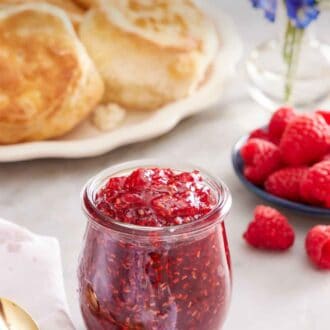
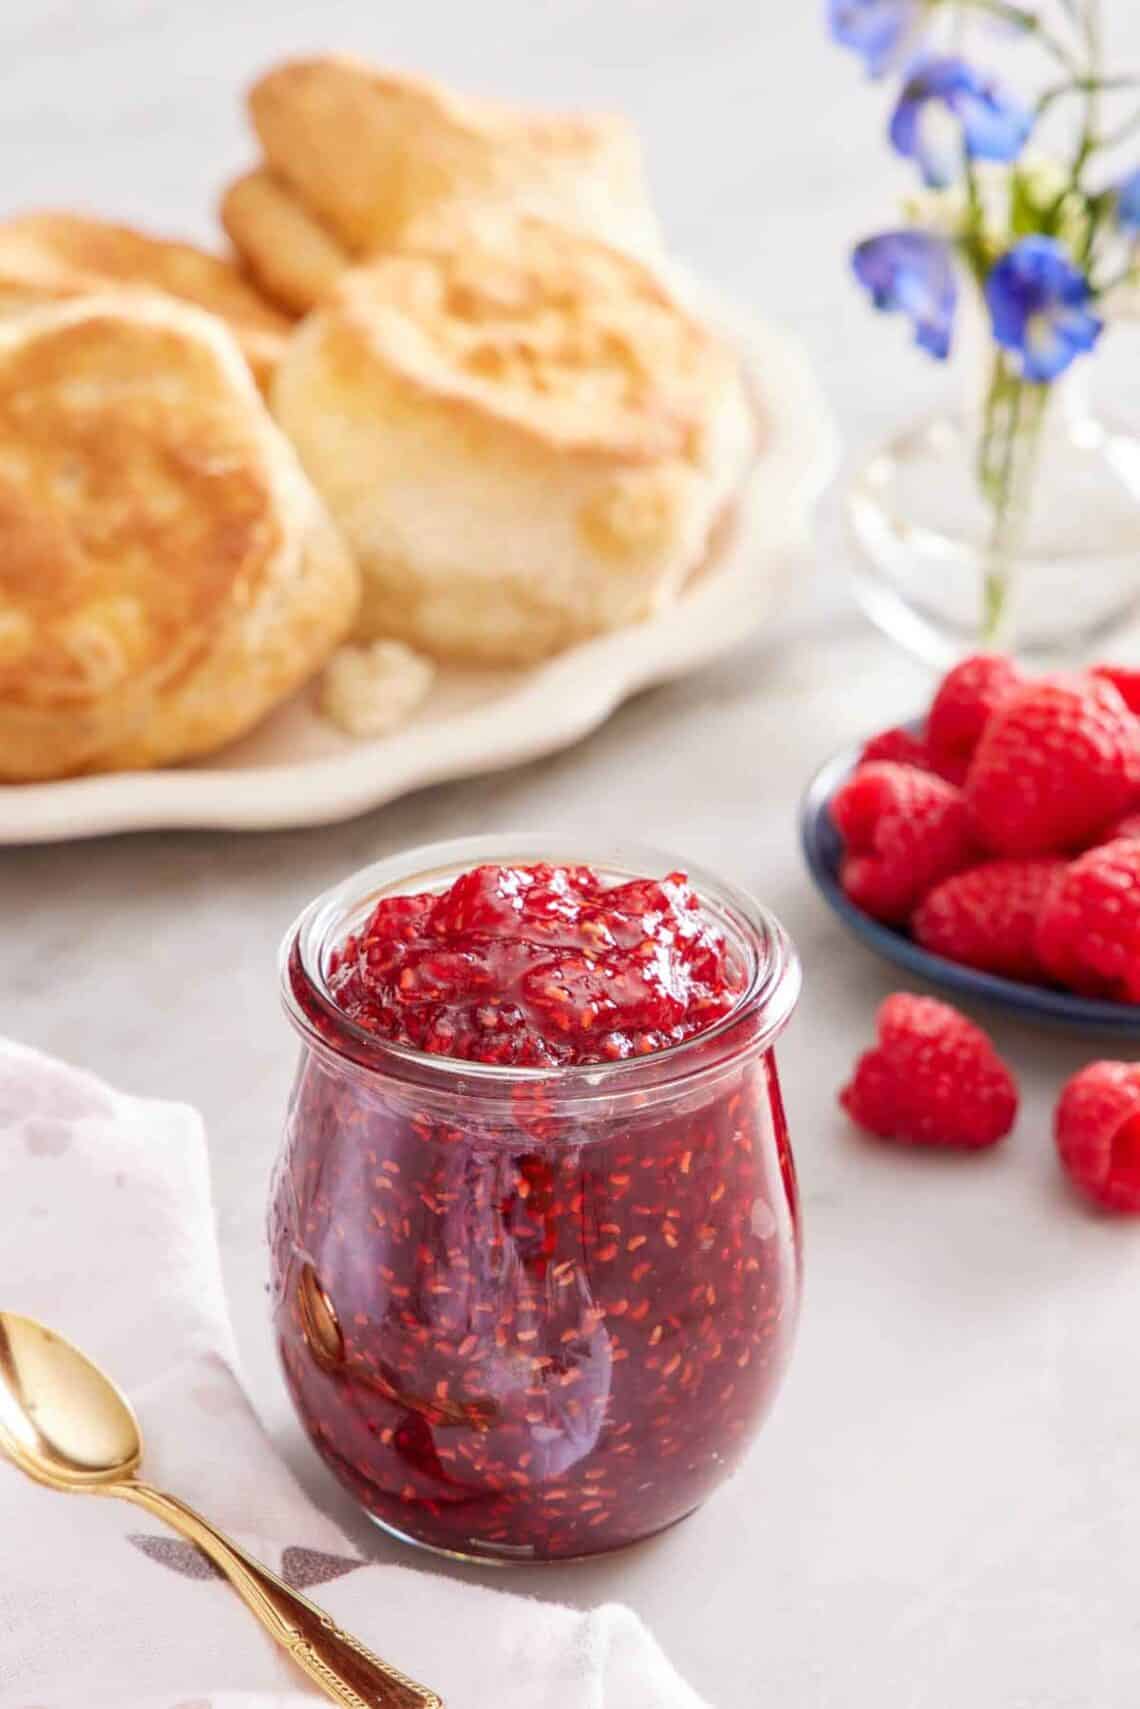
My three-ingredient homemade Raspberry Jam recipe is so easy to make without adding pectin! You’ll love the perfectly balanced sweet-tart flavor and syrupy consistency, ideal to generously spread on slices of soft white bread or a buttery biscuit.
Brimming with sweet, tart, and ever so slightly tangy flavor, this easy raspberry jam recipe comes together quickly with three ingredients. Whether you want to make this small batch raspberry jam to enjoy in a short period, or you want to safely can it for longer storage, I’ve got all the tips!
You can use fresh or frozen raspberries to make jam. But if they’re in season, I recommend using fresh berries that are ripe and sweet. They will yield the best jam that you can slather on bread, scones, pancakes, and more! Or use homemade raspberry jam for raspberry bars, raspberry cheesecake, and as a filling for Linzer cookies.
Ingredients
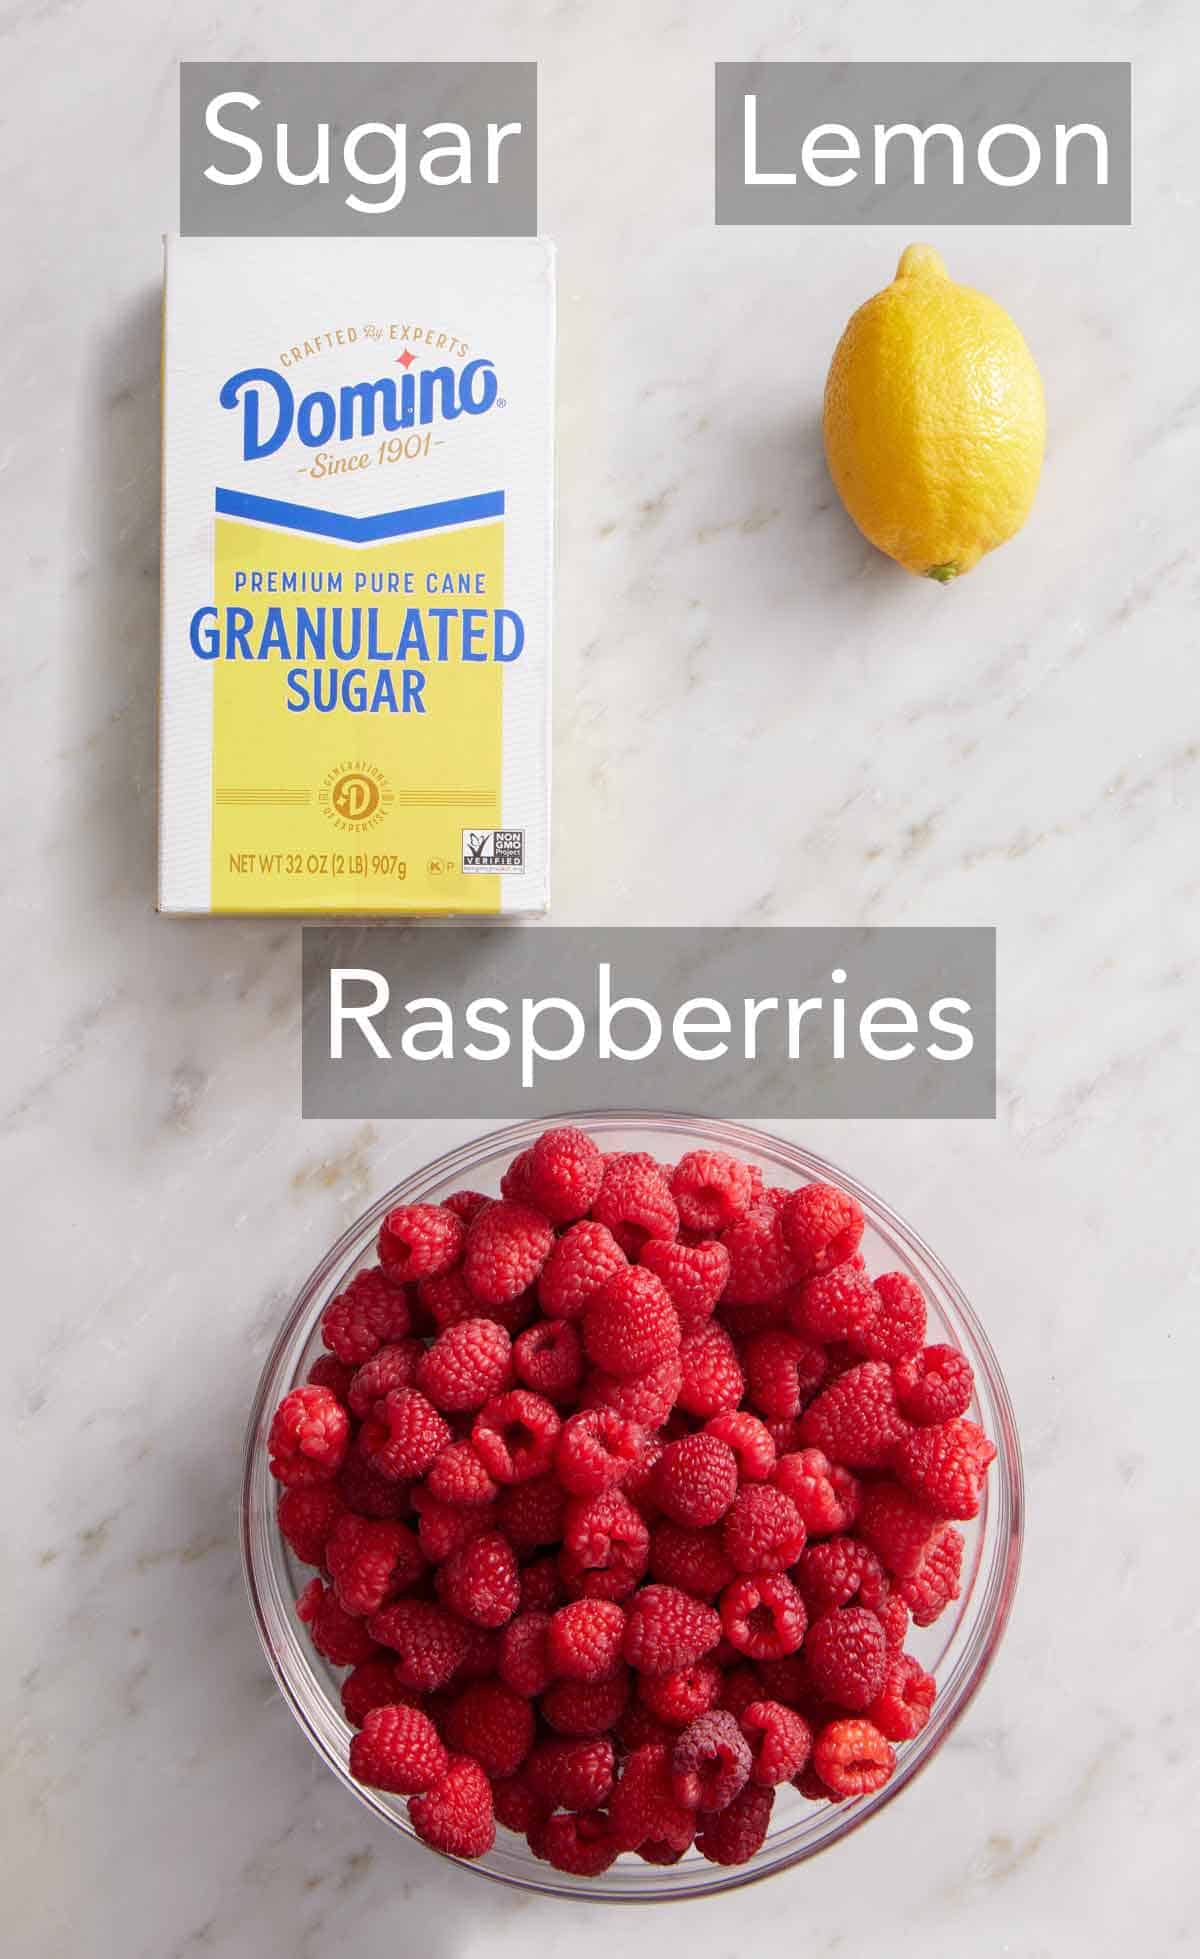
Fresh raspberries — choose vibrantly colored ripe berries. Making jam is a great way to use fresh fruit that might be softer or riper than you’d prefer to eat fresh; just be sure there isn’t any mold growing on the berries.
Sugar — granulated sugar (white sugar) sweetens the jam and acts as a preservative and thickener.
Lemon juice — adds brightness and is also vital to help the jam set with no added pectin.
How To Make Raspberry Jam
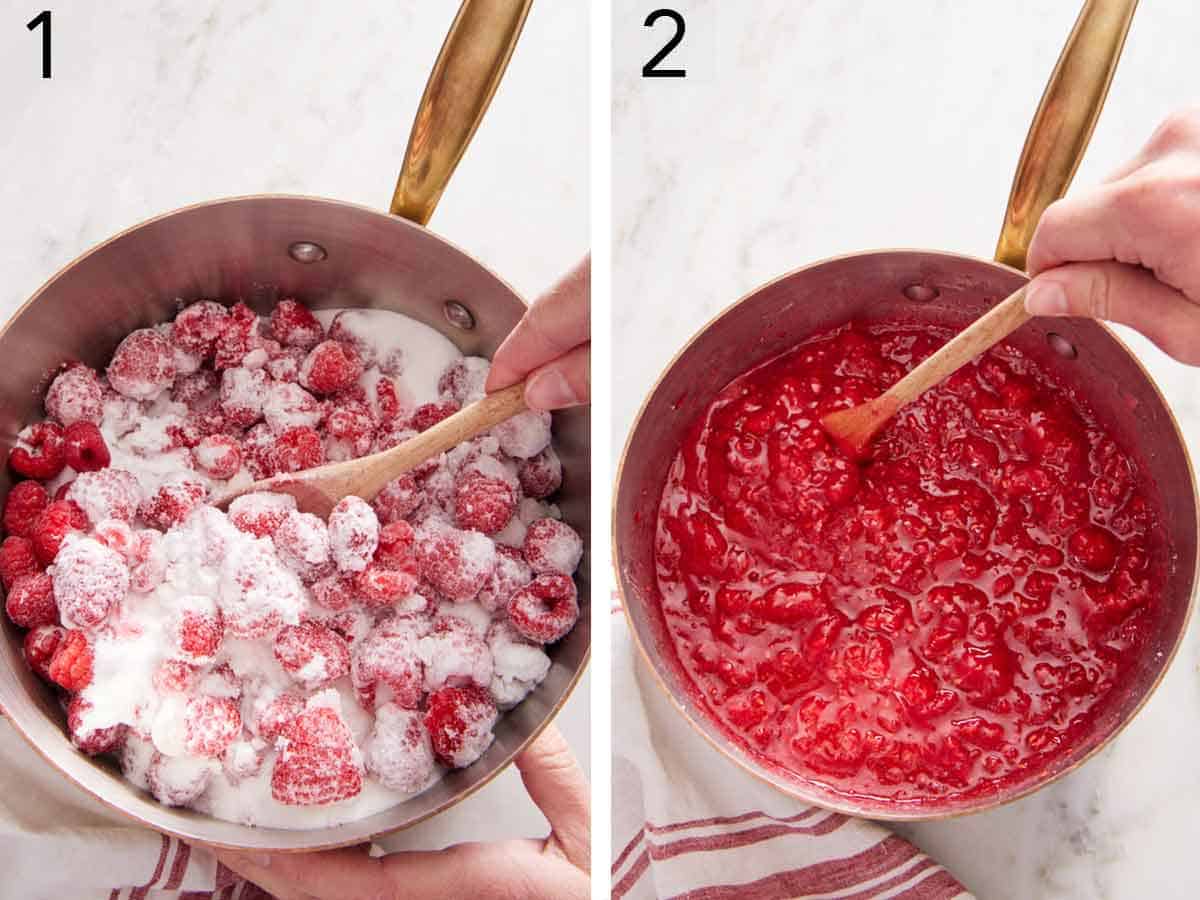
1. Wash and dry the raspberries. Place a small plate in the freezer. In a large pot, combine the raspberries, sugar, and lemon juice. Stir well to combine.
2. Macerate the berries by letting them sit for about 30 minutes, stirring and mashing occasionally with a wooden spoon or potato masher.
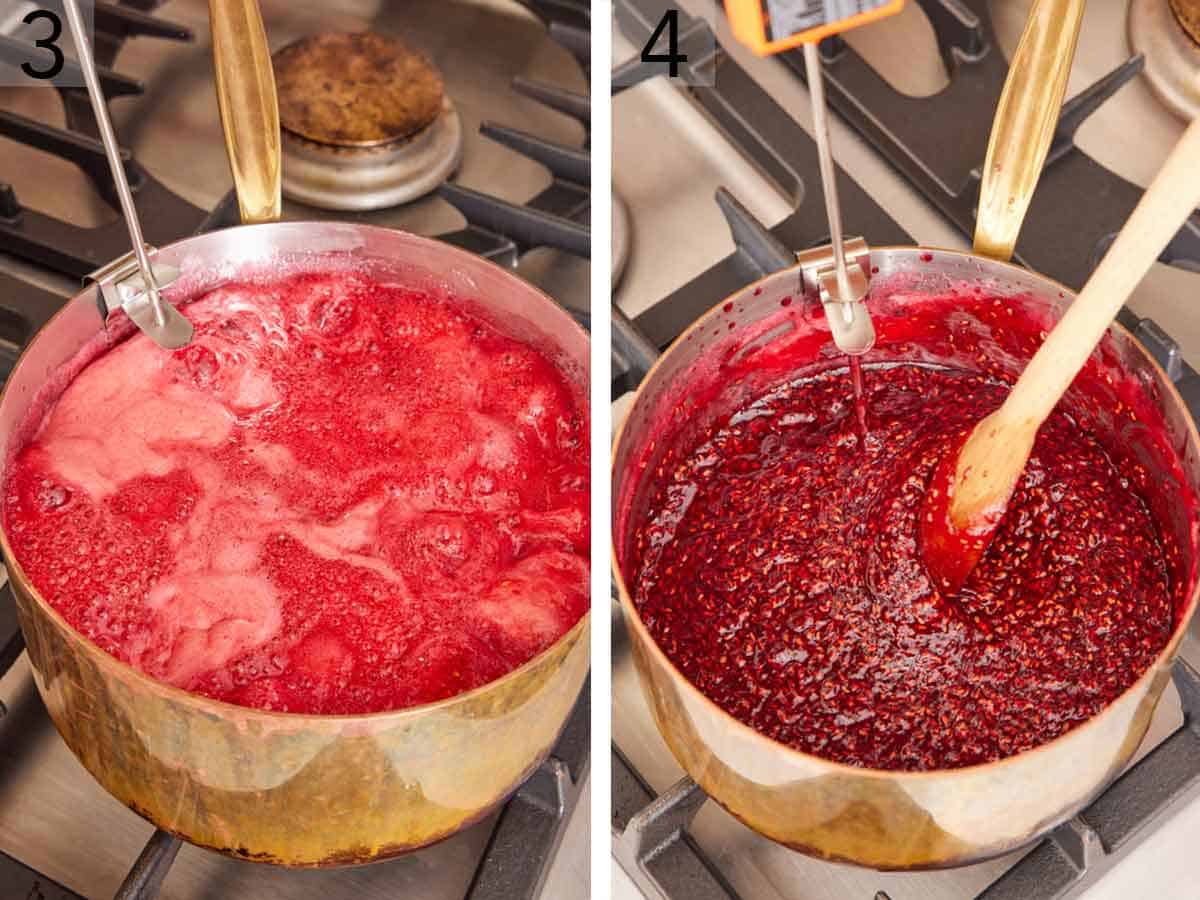
3. Place the pot over medium-high heat. Attach a candy thermometer to the side of the pot. Bring the raspberry mixture to a full rolling boil, stirring frequently. Reduce the heat to medium to keep the berries at a simmer.
4. Let the jam simmer for about 35 to 40 minutes, stirring frequently, until the jam is thick and syrupy and the temperature reaches 218°F to 220°F.
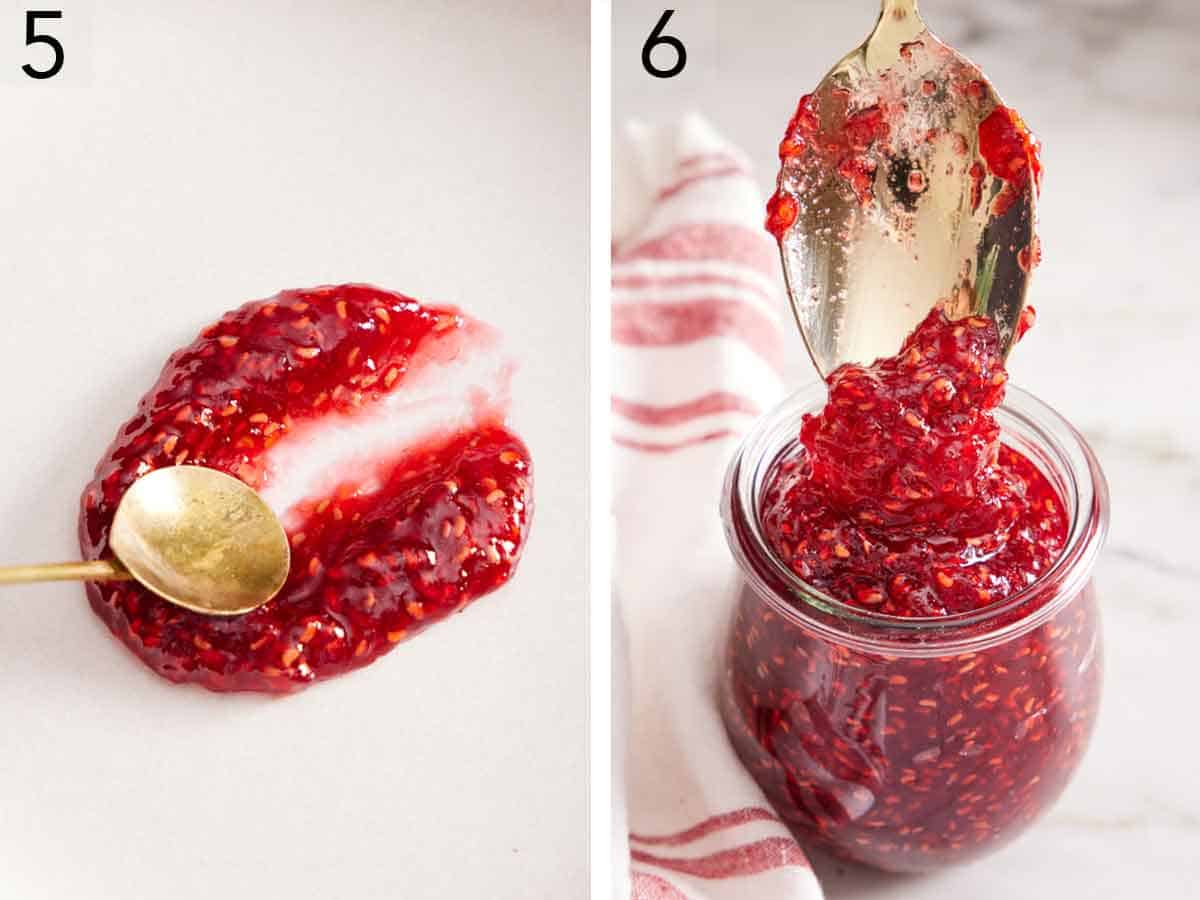
5. Check to see if the raspberry jam is ready by adding a small amount to the frozen plate. Return it to the freezer for 2 minutes, then check the consistency by pulling the back of a spoon through the dollop of jam. Remove the hot jam from the heat if it’s thickened to your liking, or continue simmering until the desired consistency is reached.
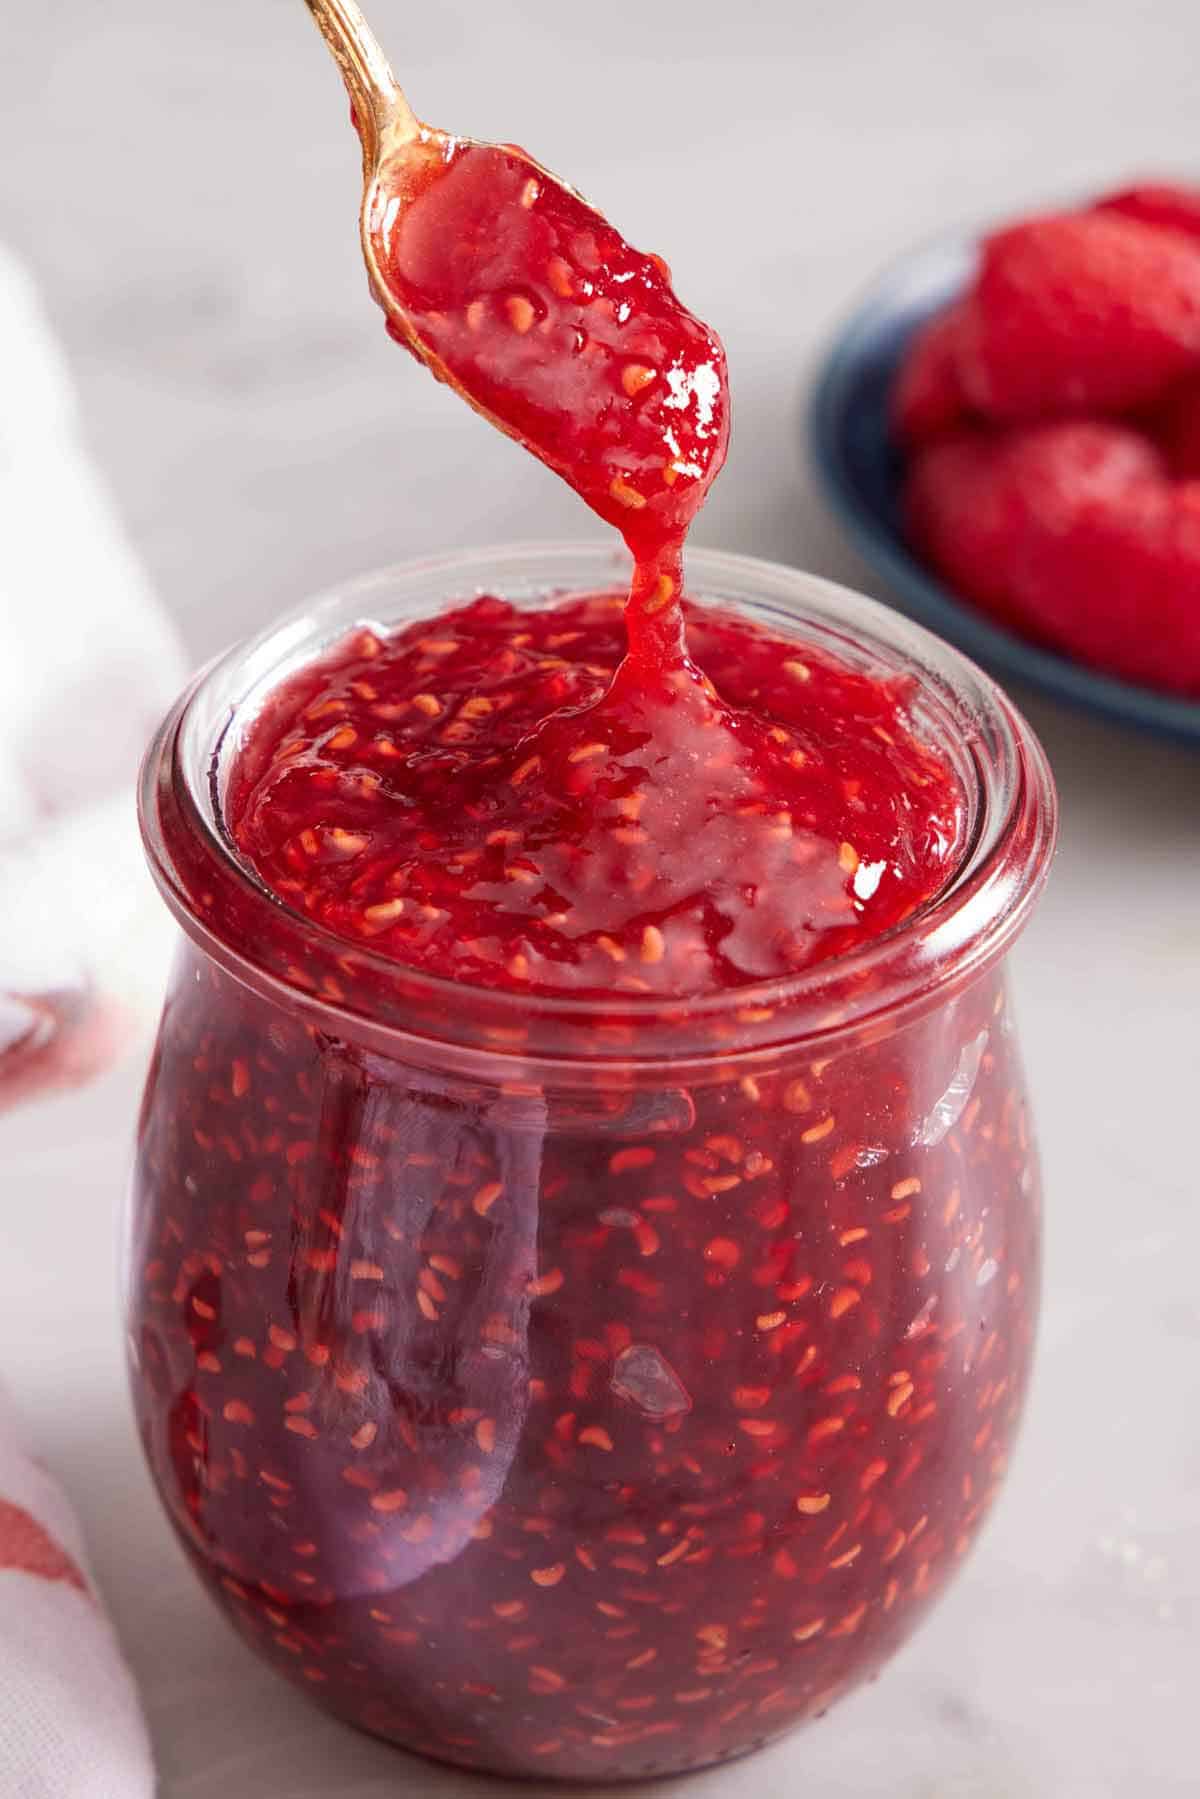
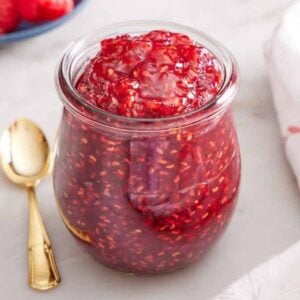
6. When the homemade jam is done, pour it into sterilized mason jars and chill overnight. Store in the refrigerator or freezer, or follow the directions provided by the canning jar manufacturer for how to process and seal your jam jars safely for longer storage.
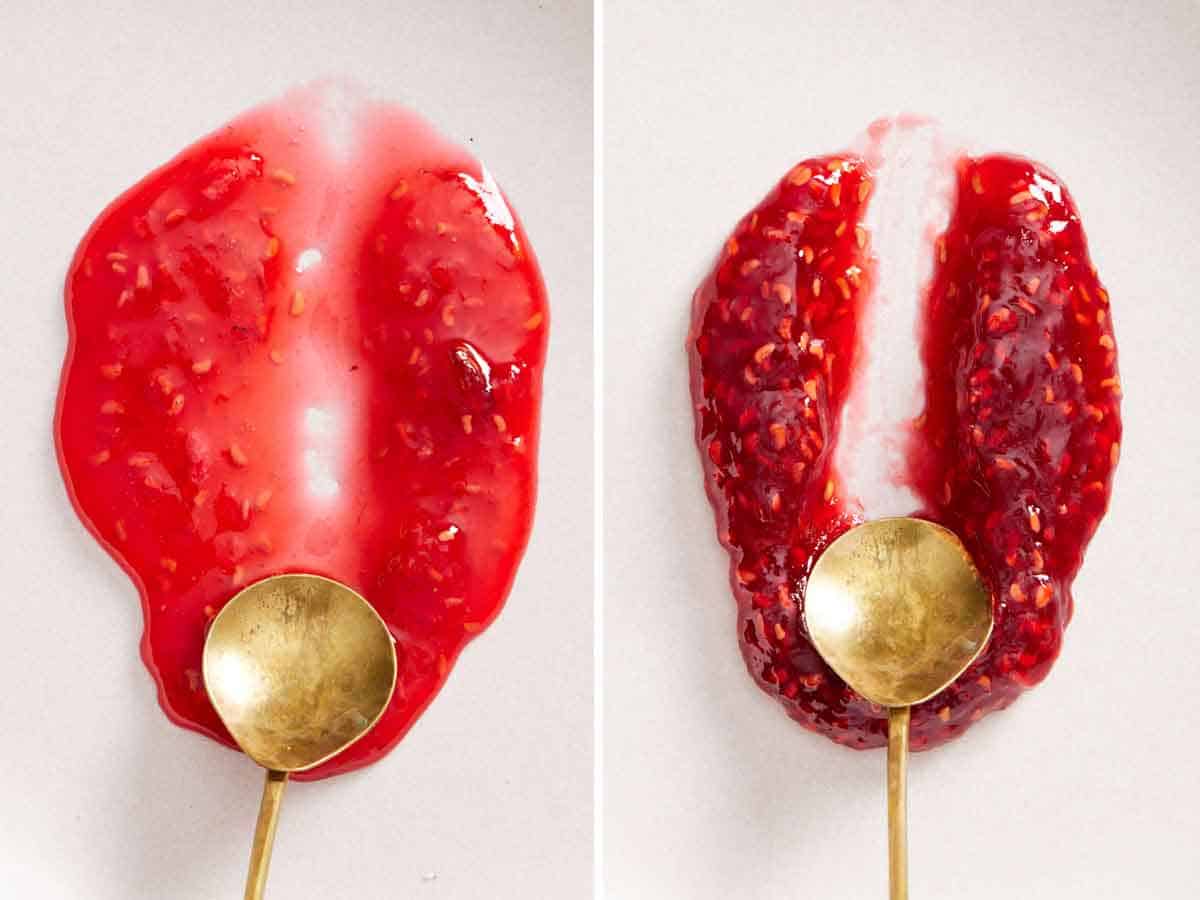
How To Test The Thickness Of The Jam
A simple way to test the thickness of raspberry jam is by using the freezer test. Pop a small plate in the freezer when you start working on the jam (or for at least 30 minutes). When ready to test, add a dollop of the jam to the frozen plate and return it to the freezer for 2 minutes. Remove the plate from the freezer and drag a spoon or your finger through the jam.
For a thick jam, the gap should stay clear. If it fills in, the jam is still runny, and you need to keep cooking it. Continue simmering and check the thickness again in a few minutes.
Can I Strain Out The Seeds?
Yes. For seedless raspberry jam, press it through a fine mesh sieve while hot and discard the seeds.
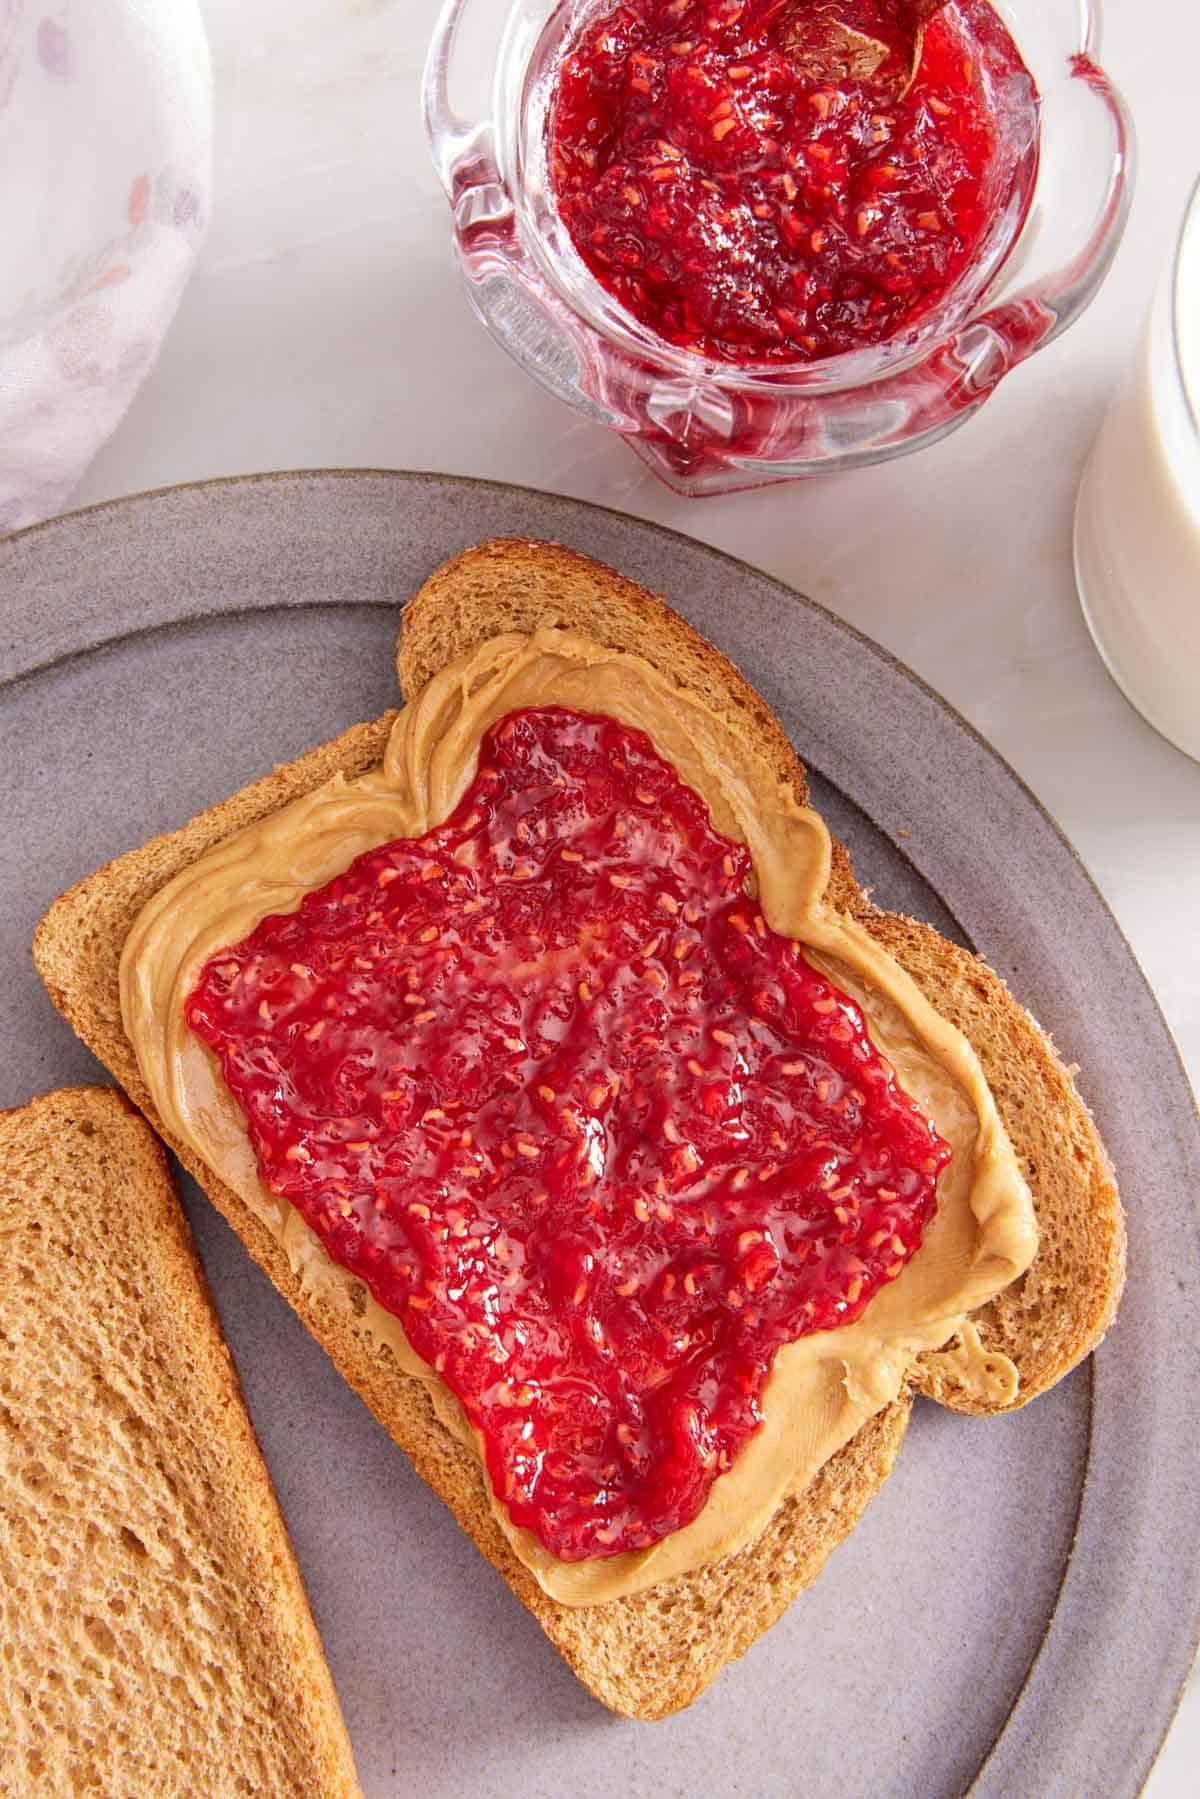
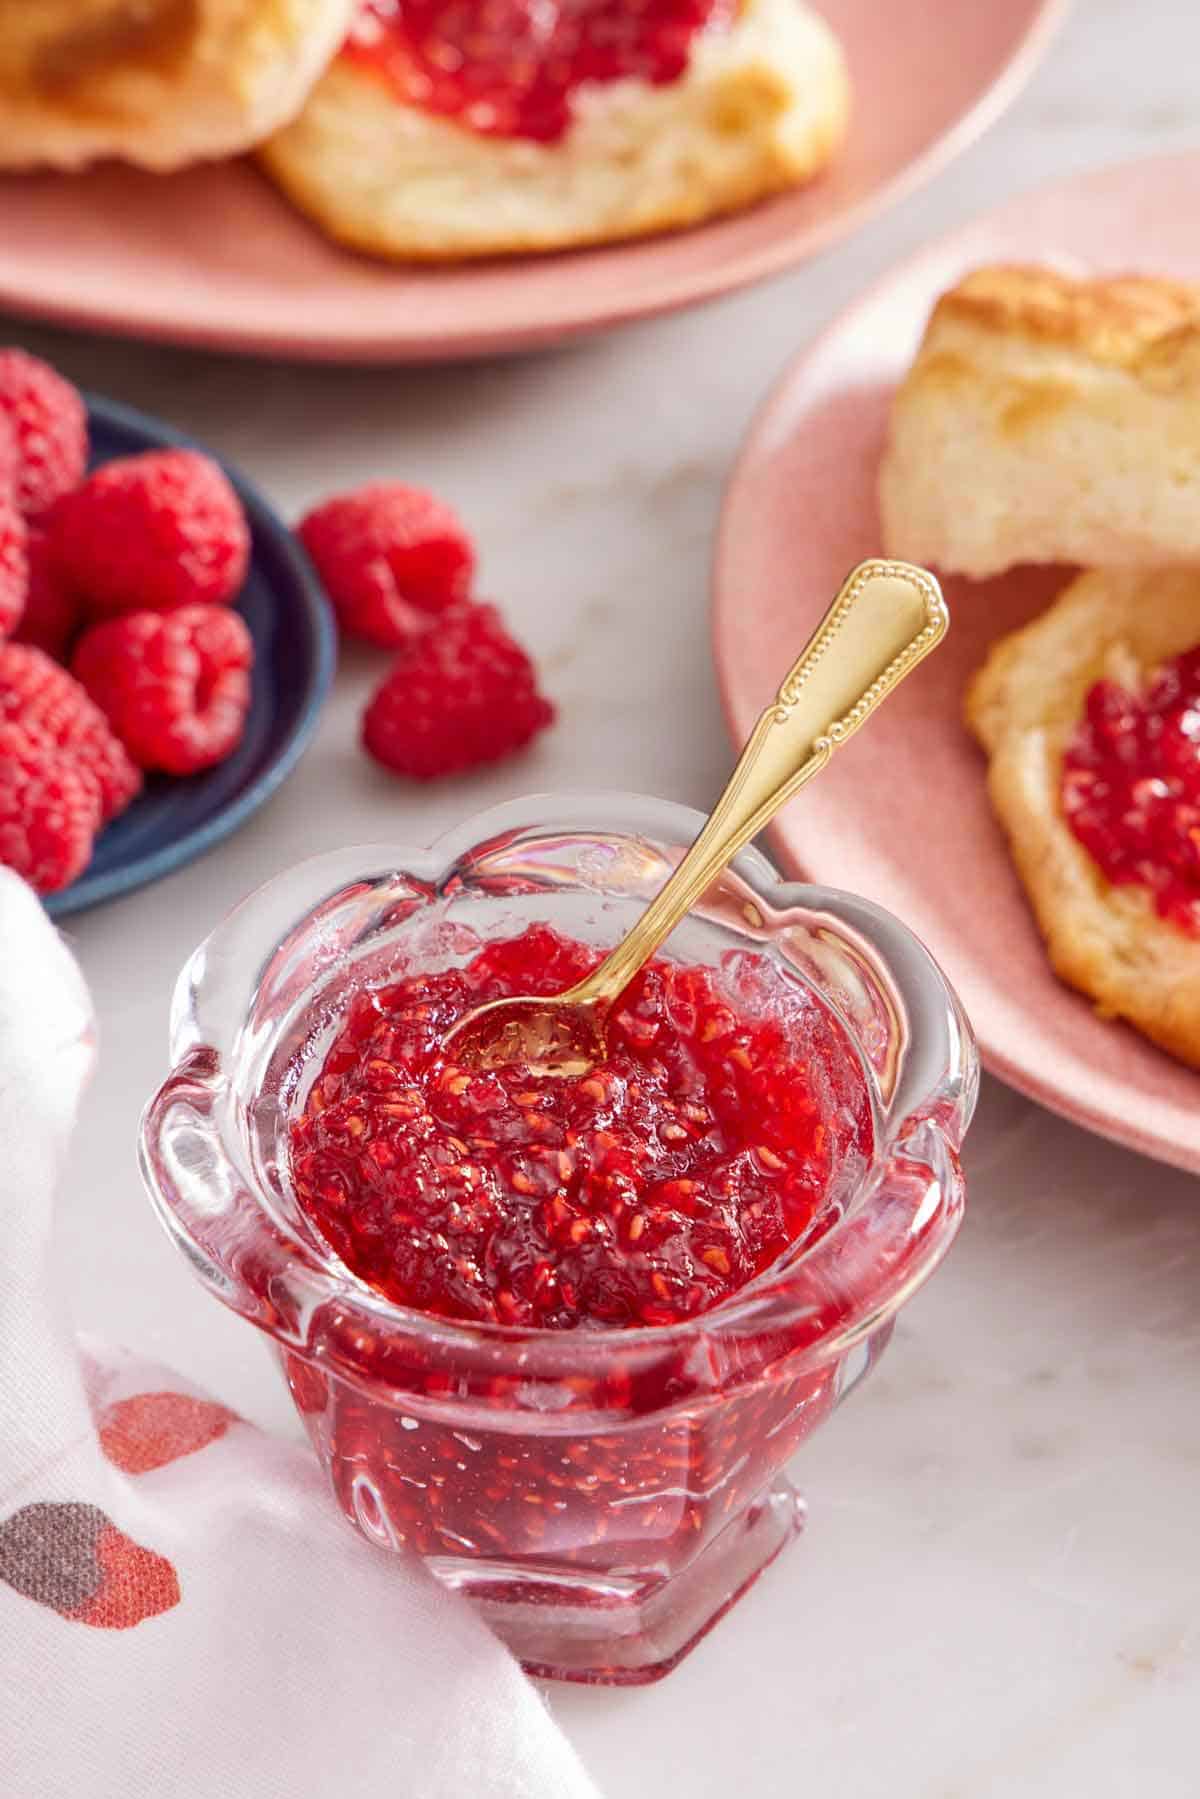
How To Use Raspberry Jam
Like my homemade strawberry jam, there are so many delicious ways to use this raspberry jam! Here are some ideas:
- On white bread for a classic PB&J sandwich or in a Monte Cristo
- On bagels, English muffins, buttermilk biscuits, or scones
- As a cake filling for a Victoria sponge cake
- To flavor raspberry frosting
- Over pancakes, waffles, or French toast
- In thumbprint cookies
- In a yogurt parfait
- Over vanilla ice cream
How To Store
Fridge: You can refrigerate this jam in a glass jar for up to 1 month.
Freezer: Store jars of homemade raspberry jam in the freezer for up to 6 months. If freezing, leave room (½-inch for half pint jars) at the top of the jar for the jam to expand.
Canned (shelf stable): If you want to store jam for longer, sterilize mason jars of jam by following the water bath canning method in my jalapeno jelly recipe. You can store properly canned raspberry jam in a cool, dark place for up to 1 year.
Pro Tips For Making This Recipe
- To sterilize the jars, place them in boiling water (the lids as well) and cook at a low boil for about 15 minutes. Remove them from the water with clean tongs and let dry and cool at room temperature on a clean kitchen towel. I like doing this regardless of whether I will be processing them in a water bath for long-term shelf storage or storing them in the refrigerator or freezer. Alternatively, you can wash the jars in your dishwasher using the sterilize setting.
- Don’t rush the simmering. It’s important for the jam to simmer for at least 30 minutes to reach the proper temperature for the correct consistency. Natural pectin begins to activate at 218-220°F. Your jam will stay runny if it doesn’t reach that temperature.
- Stir more frequently during the last 10 minutes of cooking. As the jam thickens towards the end of the cooking time, it is more likely to scorch, so stir it frequently to prevent that.
Frequently Asked Questions
Yes! Just thaw them for at least an hour first. Otherwise, the sugar can burn in the pot before the raspberries heat up and release their juices.
Not for this recipe. Jam needs the right amount of sugar for flavor, preservation, and to thicken properly. If you do want to use less sugar, you will need to add low-sugar pectin to thicken the jam. Follow the package directions for the amount needed and how to add it.
Yes, lemon juice helps set and thicken the jam without needing to add additional fruit pectin. Lemon juice also ensures it has the proper acidity for a longer storage period. Lastly, lemon juice balances the sweetness of the sugar in the jam for the best flavor.
If you’ve tried this raspberry jam recipe, then don’t forget to rate it and let me know how you got on in the comments below. I love hearing from you!
Raspberry Jam Recipe
Equipment
- 4 8 ounce canning jars
- Large pot (at least 5-quarts in size)
- Candy thermometer
Ingredients
- 2 pounds fresh raspberries (900g)
- 3 cups sugar (600g)
- 2 tablespoons freshly squeezed lemon juice
Instructions
- Wash the raspberries and dry them well. Place a small plate in the freezer.
- In a large pot (at least 5 quarts), combine the raspberries, sugar, and lemon juice. Stir well to combine. Let sit for about 30 minutes, stirring and mashing occasionally, until the raspberries break down and the sugar is partially dissolved.
- Place the pot over medium-high heat. Attach a candy thermometer to the side of the pot. Bring the raspberries to a boil, stirring frequently. Reduce the heat to medium to keep the berries at a simmer.
- Let the jam simmer for about 35 to 40 minutes, stirring frequently, until the jam is thick and syrupy and the temperature reaches 218 to 220°F. (Stir more frequently during the last 10 minutes of cooking. As the jam thickens, it is more likely to scorch on the bottom or sides of the pot.)
- Check to see if it’s ready by adding a tablespoon-sized dollop to the frozen plate. Return it to the freezer for 2 minutes, then check the consistency by pulling the back of a spoon through the dollop. Remove the jam from the heat if it’s thickened to your liking or continue simmering until desired consistency.
- When it’s done, pour the jam into sterilized mason jars and chill overnight.
- Store in the refrigerator or freezer, or follow the directions provided by the canning jar manufacturer for how to process and seal your jam jars safely.
Notes
- To sterilize the jars, place them in boiling water (the lids as well) and cook at a low boil for about 15 minutes. Remove them from the water with clean tongs and let dry and cool at room temperature on a clean kitchen towel. I like doing this regardless of whether I will be processing them in a water bath for long-term shelf storage or storing them in the refrigerator or freezer. Alternatively, you can wash the jars in your dishwasher using the sterilize setting.
- Don’t rush the simmering. It’s important for the jam to simmer for at least 30 minutes to reach the proper temperature for the correct consistency. Natural pectin begins to activate at 218-220°F. Your jam will stay runny if it doesn’t reach that temperature.
- Stir more frequently during the last 10 minutes of cooking. As the jam thickens towards the end of the cooking time, it is more likely to scorch, so stir it frequently to prevent that.
Nutrition
Have you tried this recipe? Tag me today!
Mention @preppykitchen and tag #preppykitchen!


