
This post may contain affiliate links. Please read our disclosure policy.
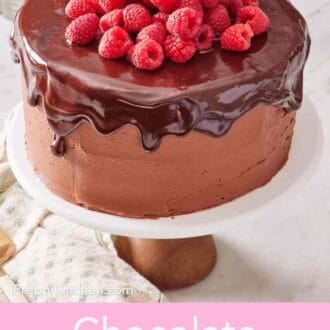
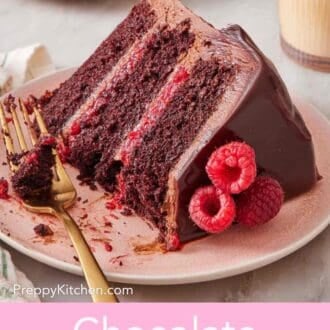
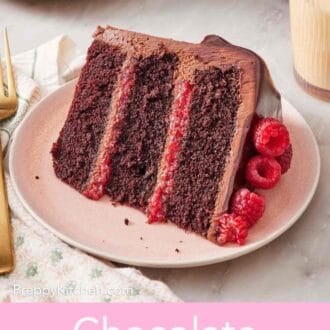
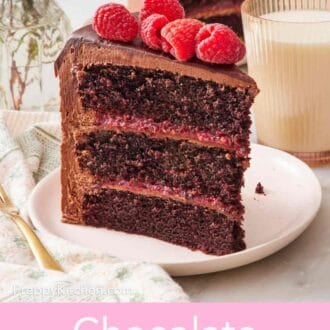
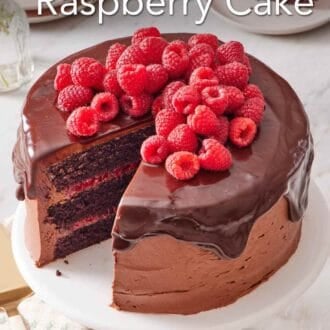
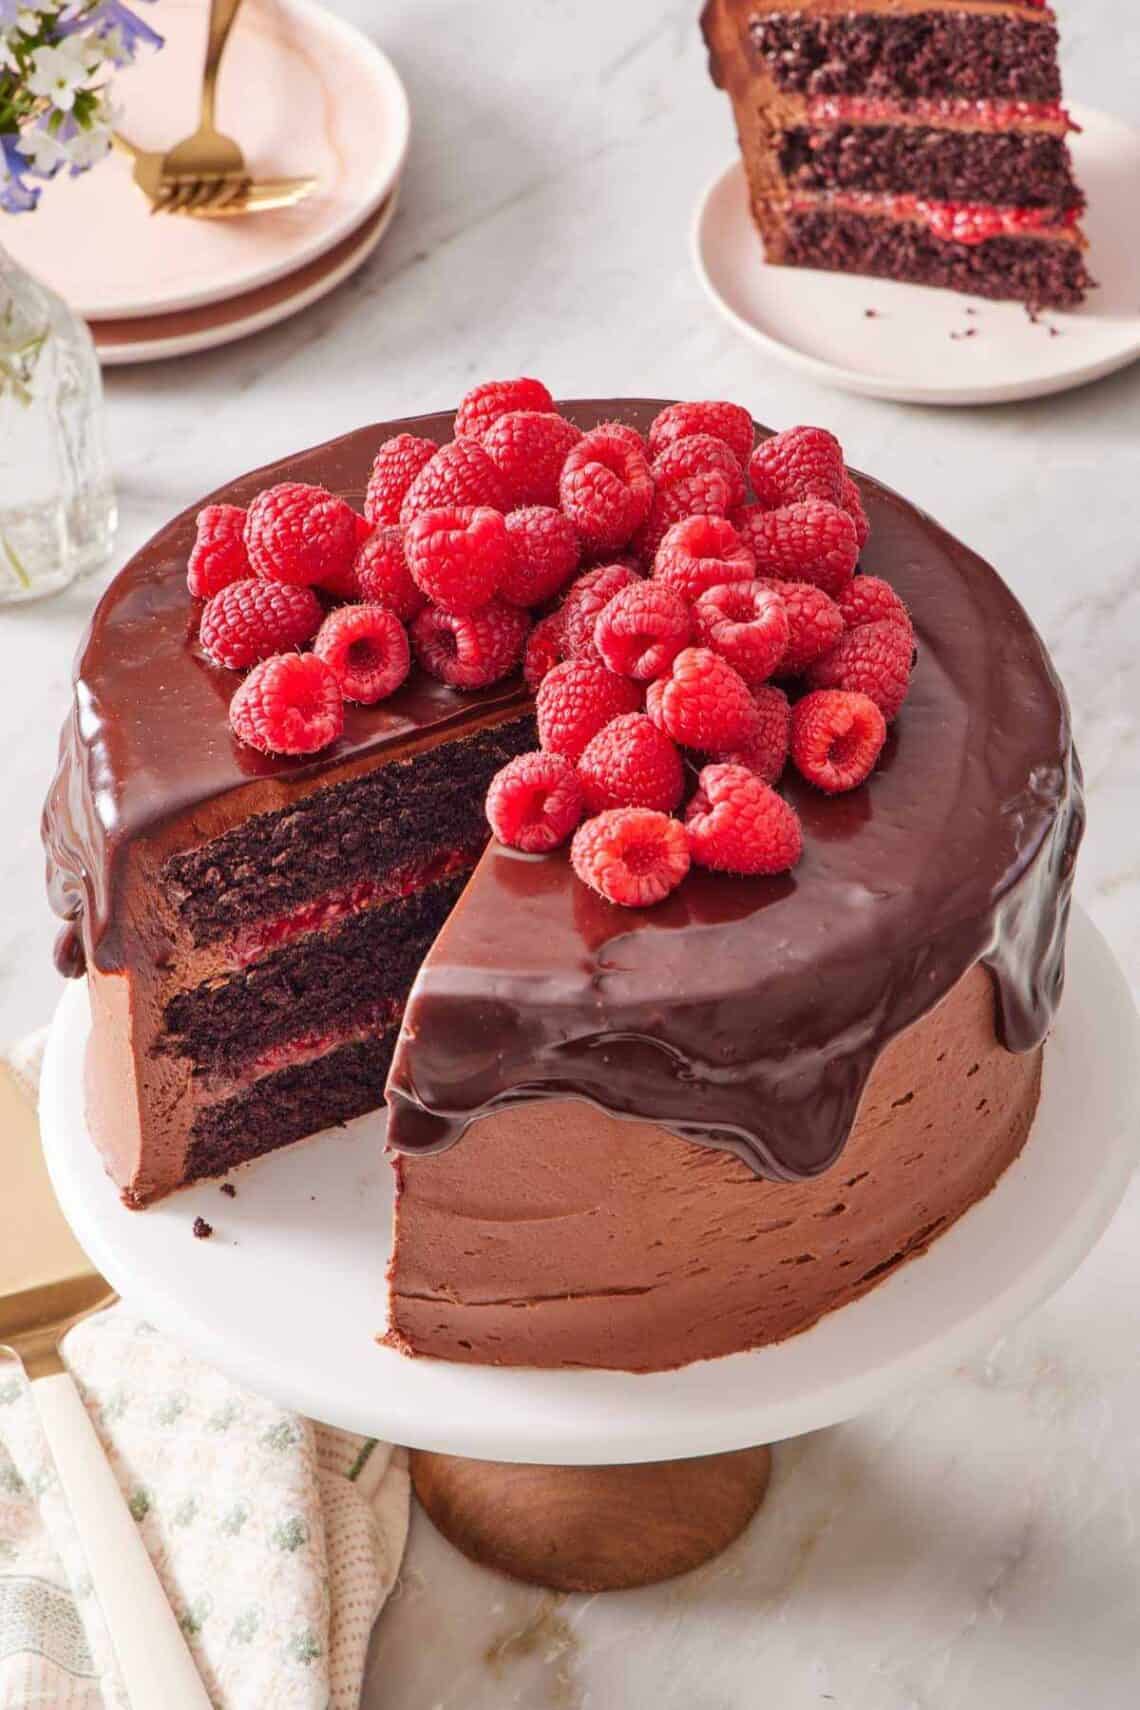
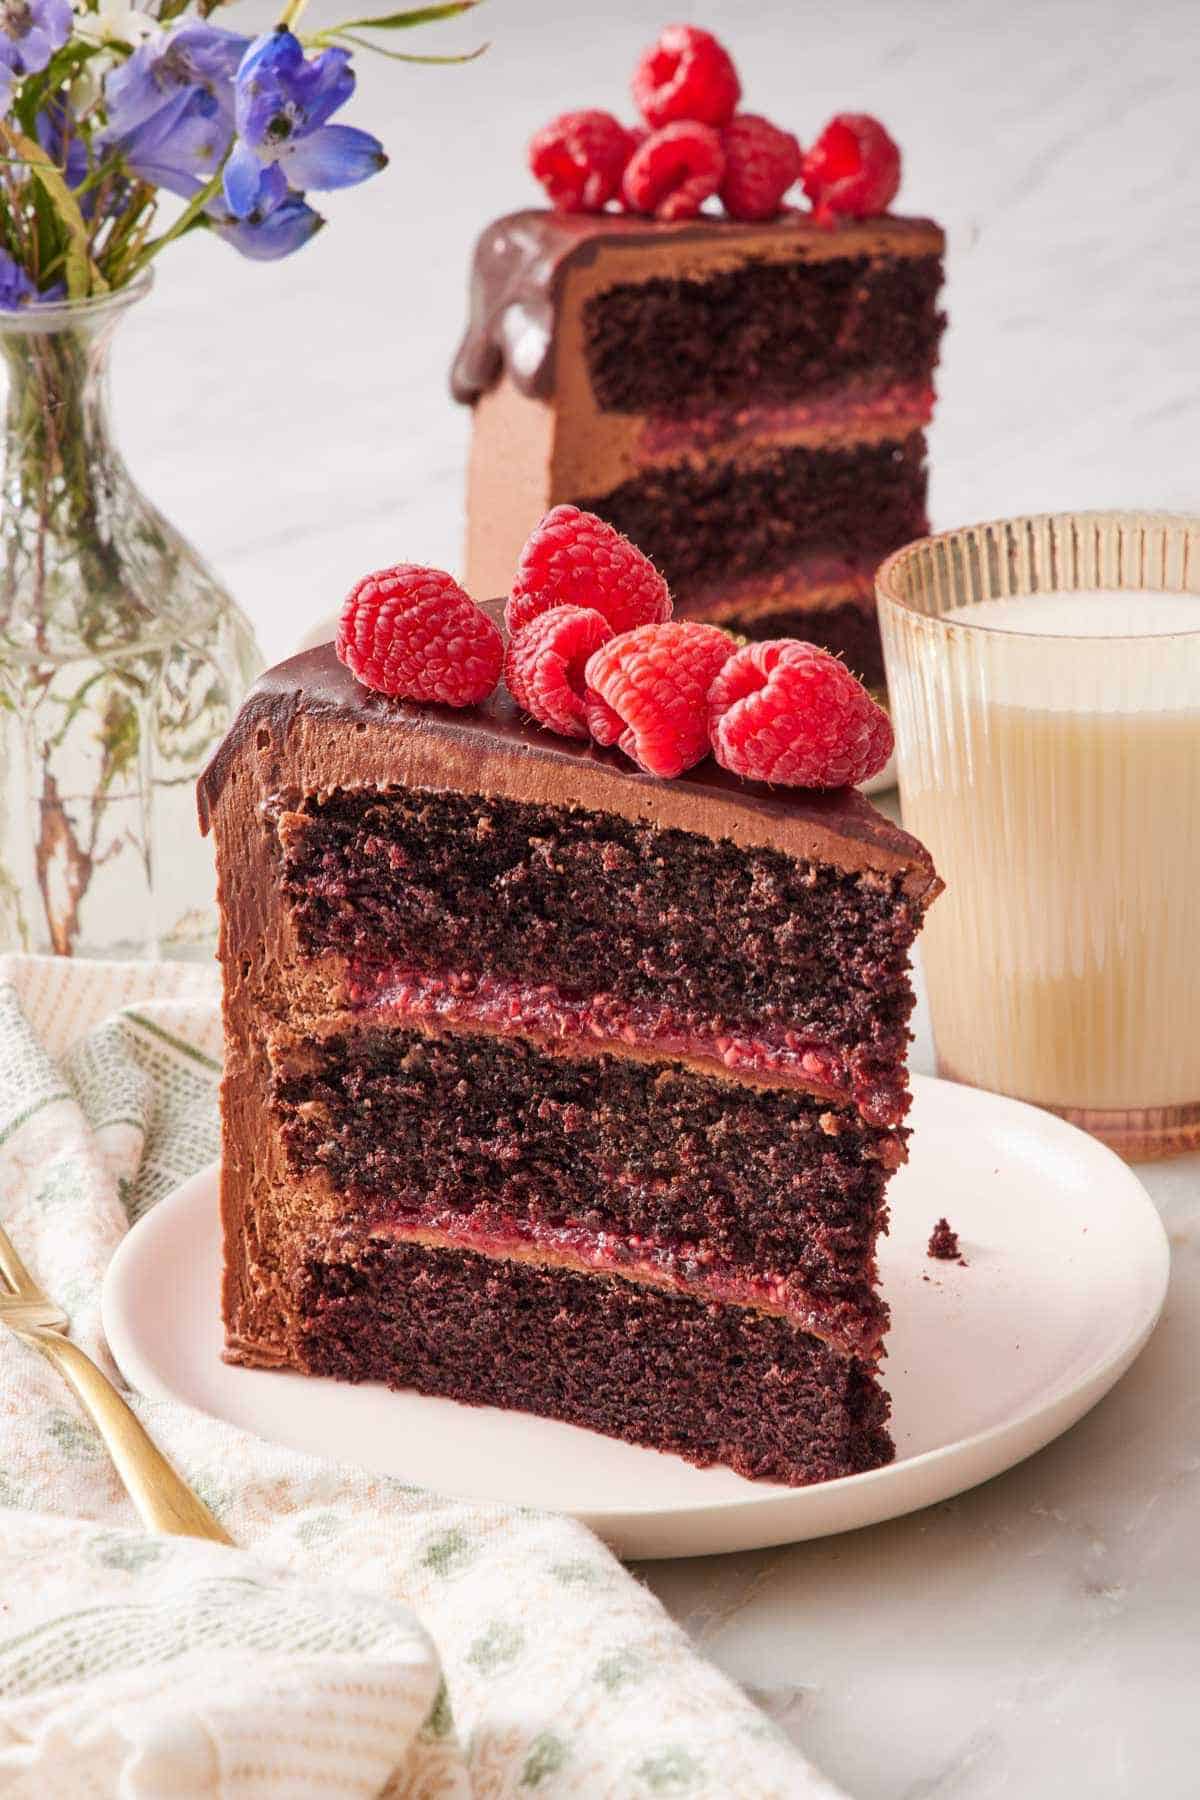
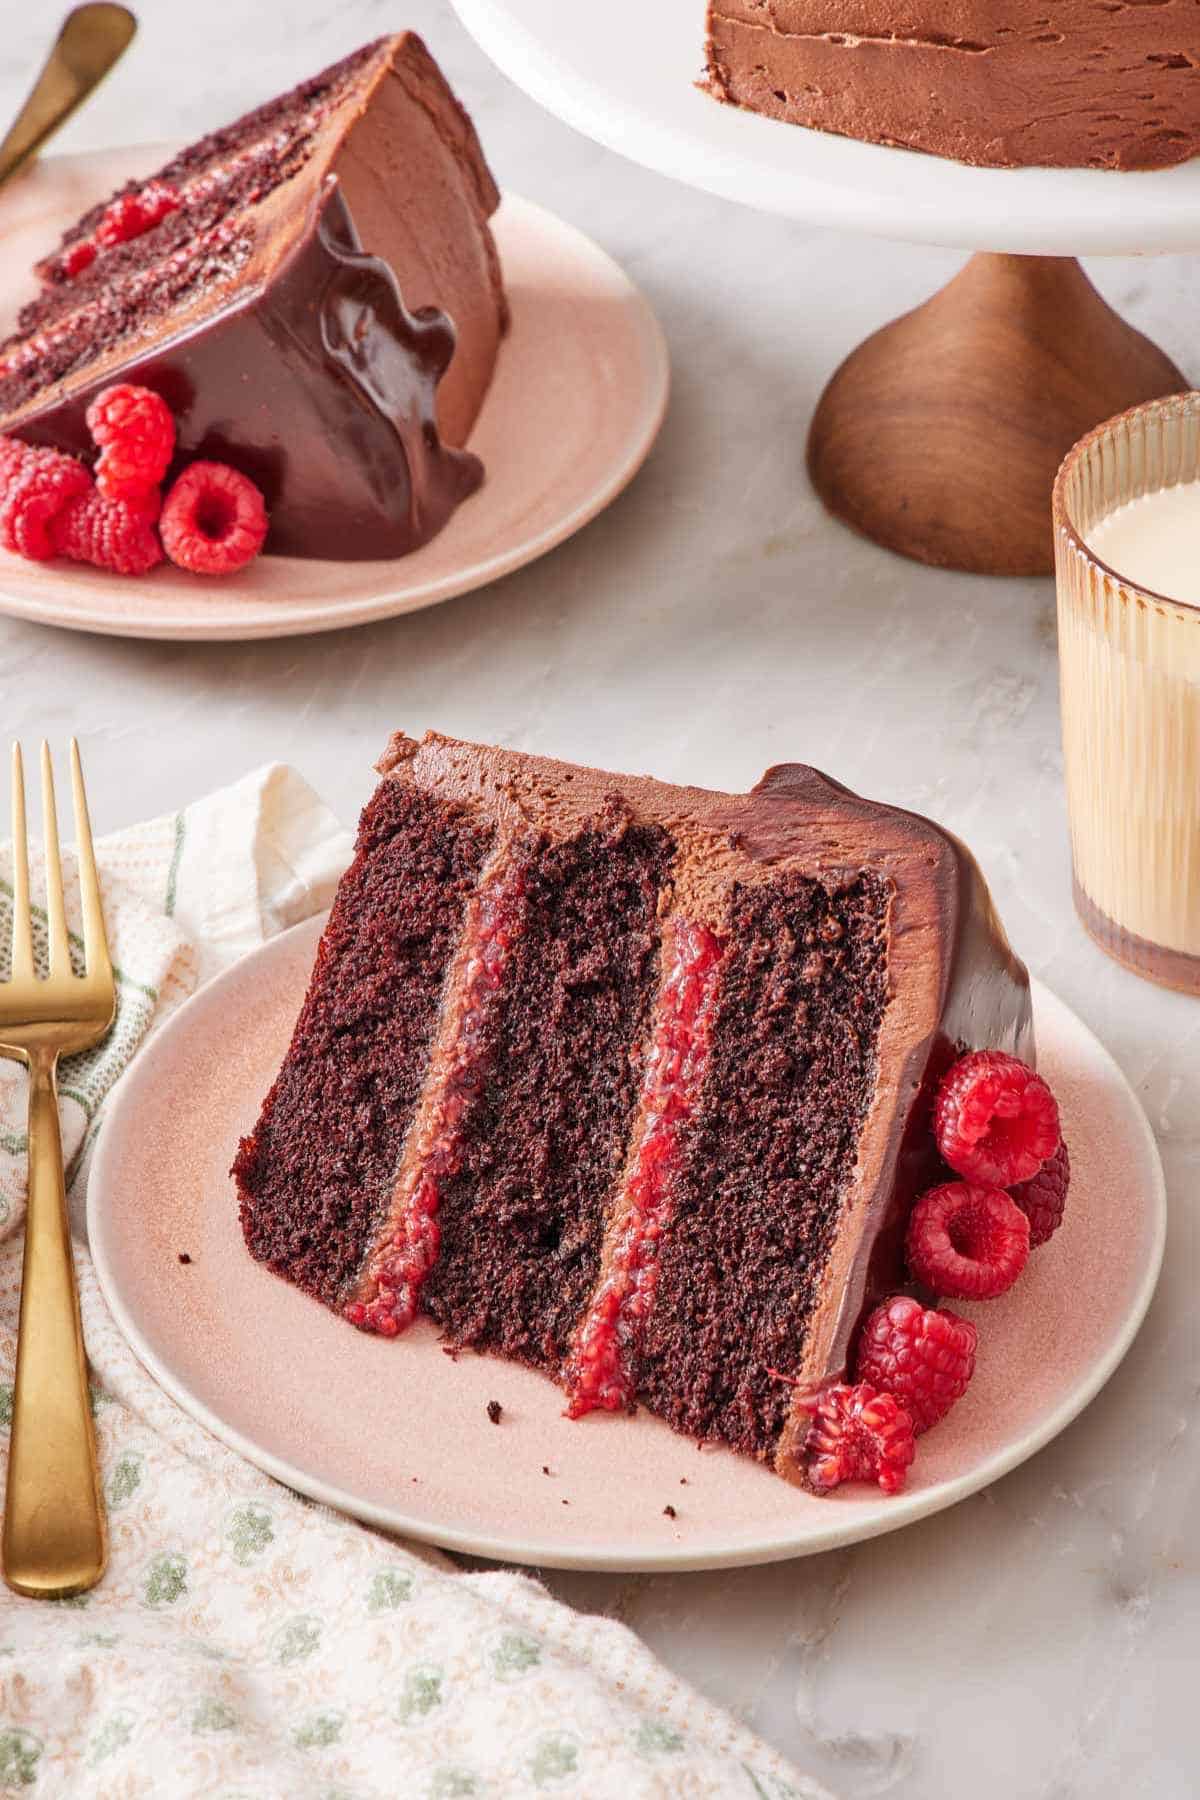
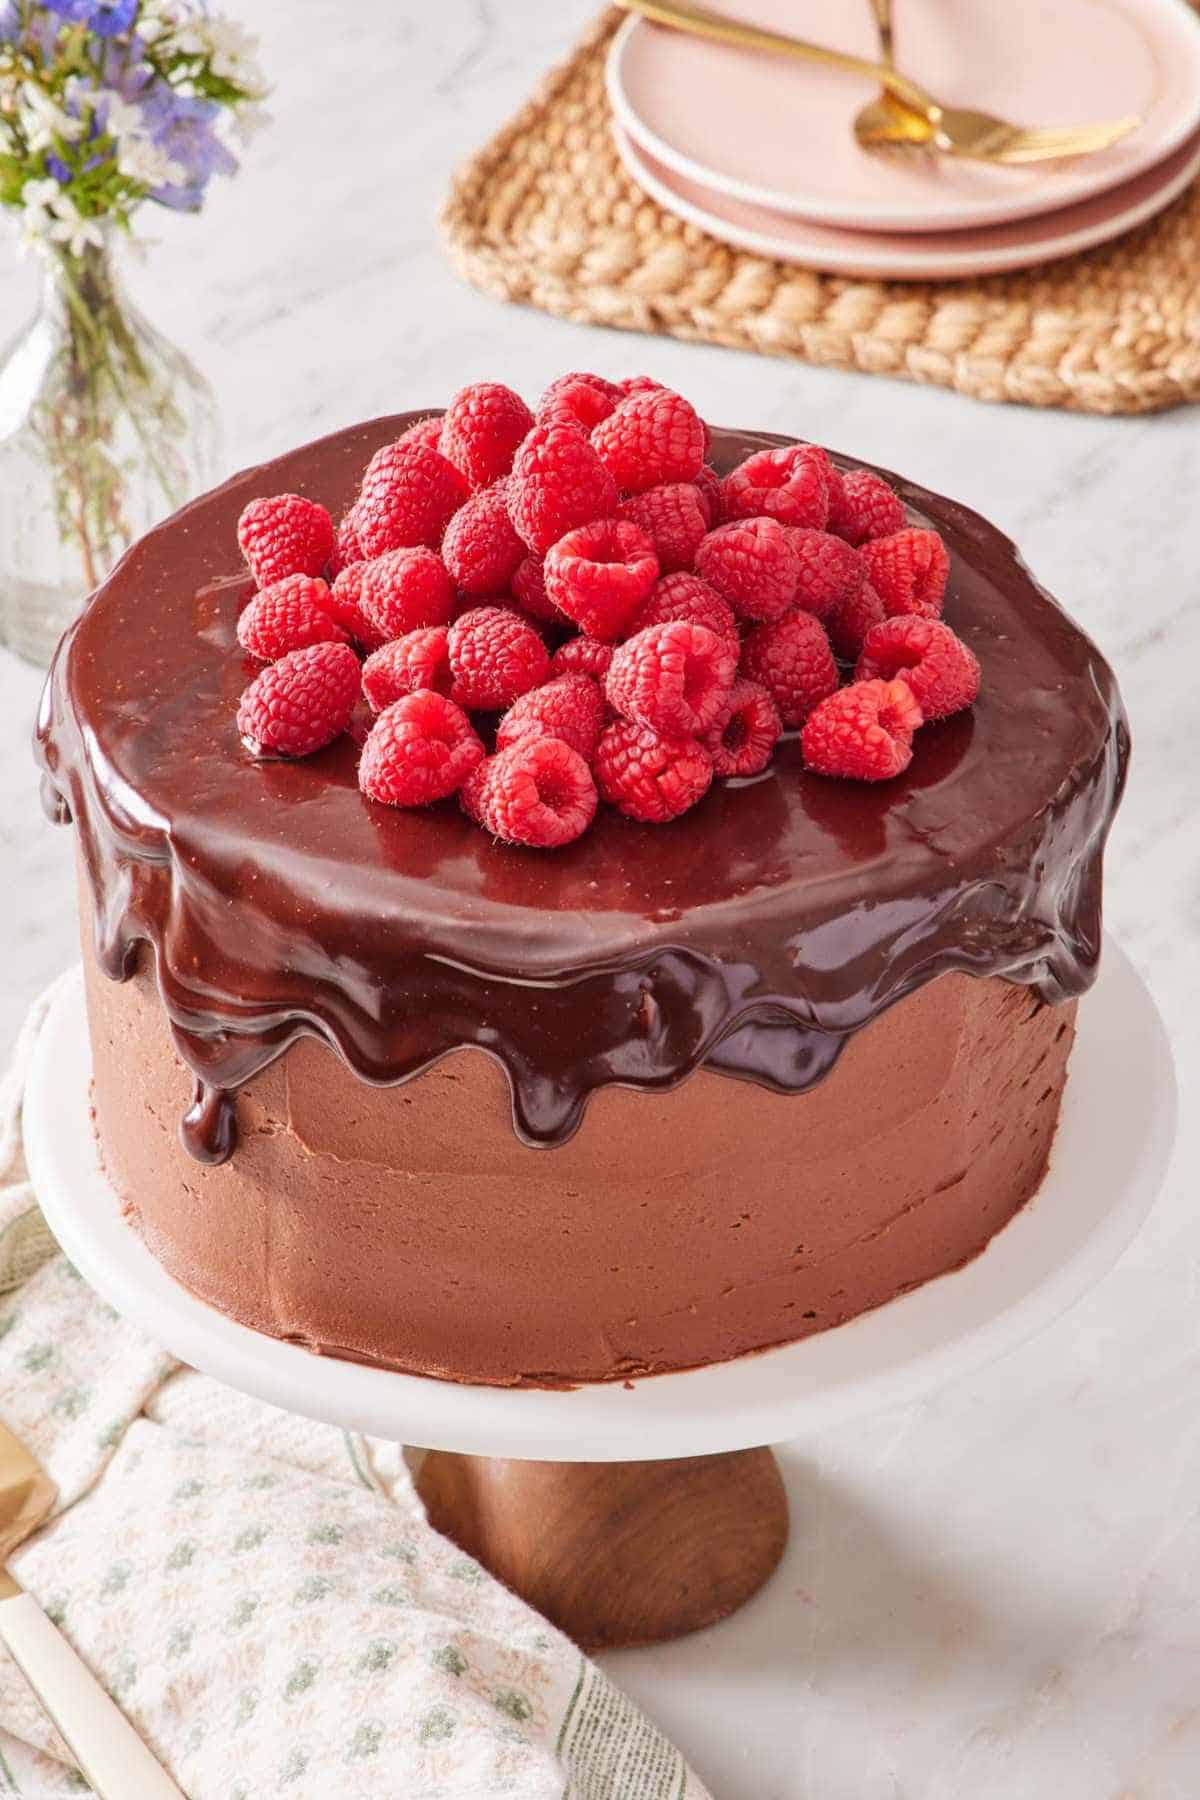
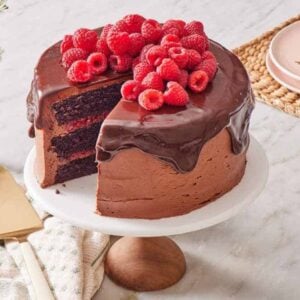
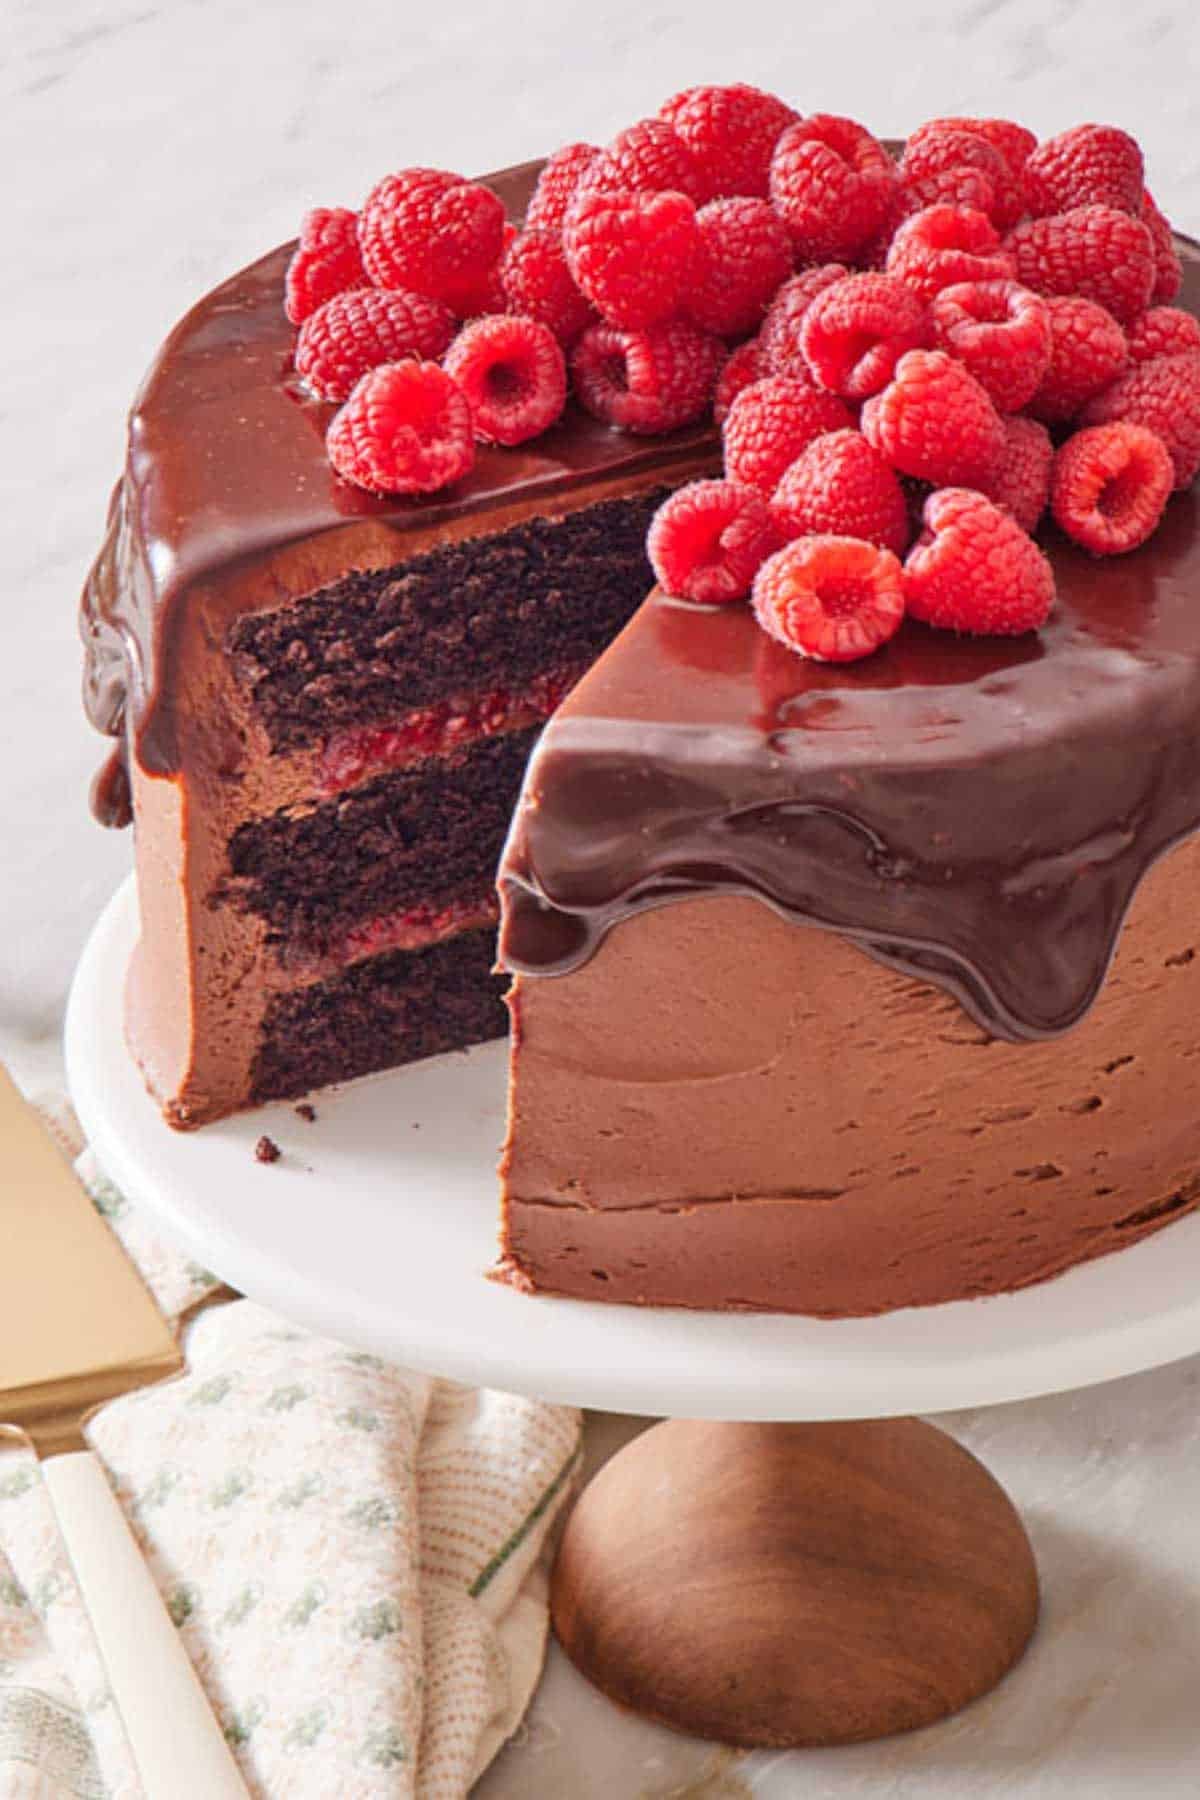
My decadent Chocolate Raspberry Cake has three layers of moist, dark chocolate cake, a jammy raspberry filling that holds its shape between the layers, and is coated with a fudgy chocolate buttercream and a glossy ganache drip. This cake is perfect for any celebration and looks professional, but is achievable to make at home!
I first posted a chocolate raspberry cake on this site in 2016, with fresh raspberries scattered between layers of chocolate cake and buttercream. It was a good cake, but after ten years of making it, and hearing from readers about what worked and what didn’t, I’ve tweaked the recipe slightly for a cake I think is even better!
After retesting this recipe, I kept the three cake layers but switched to making them with Dutch-processed cocoa for a fudgier, richer flavor. I swapped the fresh berries for a jammy compote that is more deeply flavored and holds for days in the fridge. And the decoration on the cake is roughly the same, but I simplified it, removing the apricot glaze on the fruit. You can still do this if you want, but the cake is so pretty with the fresh berries on top that I felt the extra step wasn’t necessary. This cake is a labor of love and perfect for birthdays, anniversaries, dinner parties, or anywhere you want the dessert to be the star!
“Made this for the family and they adored it. Thanks for making me look like I know what I am doing. Beautiful, airy, and decadent at the same time. A true crowd pleaser.”
James
Why This Recipe Works & What Changed
A few things separate this version of the cake from the original, in addition to making it one of the best chocolate cakes on my site:
- Cooked raspberry filling, not fresh berries. This is the biggest change. The fresh raspberries between each cake layer looked beautiful and tasted nice, but they didn’t stay fresh for very long. A cooked raspberry filling has a more concentrated flavor than the fresh berries and a longer shelf life. I kept the fresh berries on top for bright pops of flavor.
- The mixing method here is a simple all-in-one approach. Dry ingredients whisked together, wet ingredients whisked together, combined, then baked. No creaming, folding, or stand mixer required. Even a relatively inexperienced baker can pull it off easily!
- A simpler decoration. The ganache is a simple and elegant cake decoration, and it doesn’t need much beyond that. A lovely pile of fresh raspberries on top of the ganache is the perfect finishing touch.
Key Ingredients
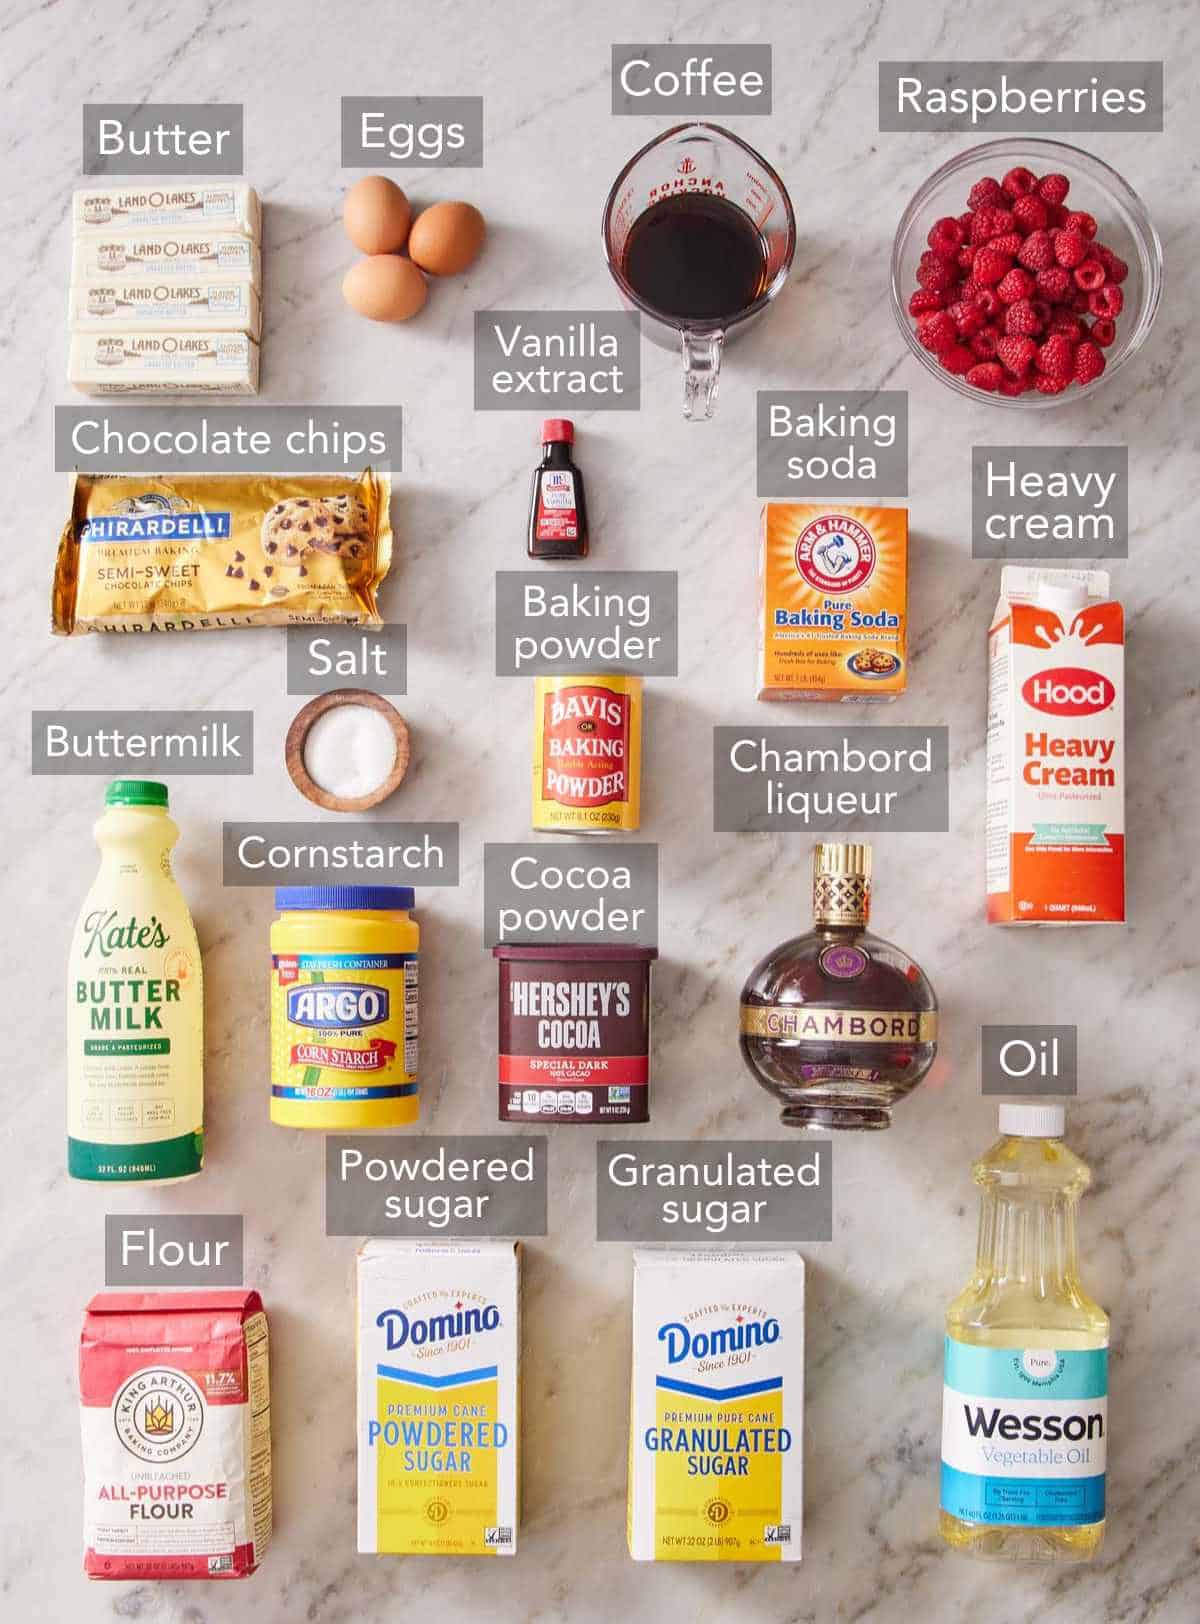
These are the main ingredients you need to make this recipe. You can find the full list of ingredients and measurements in the recipe card below.
Dutch-process cocoa — this is what makes the cake layers taste deeply chocolatey. Natural cocoa powder is lighter in flavor and changes the leavening chemistry (it’s acidic; Dutch is alkalized, so it’s more neutral), which means substituting natural cocoa powder means your cakes risk rising too much and sinking in the center. You don’t need to find a fancy brand of Dutch cocoa either. Hershey’s Special Dark is technically Dutch-process and works great. I also love Ghirardelli, which is available in most grocery stores.
Buttermilk — buttermilk’s acidity tenderizes the gluten for a softer texture and reacts with the baking soda for a better rise. Don’t try to substitute regular milk 1:1. The recipe relies on the acid and base reaction between buttermilk and baking soda; substituting plain milk gives you a denser, less risen cake.
Hot coffee or boiling water — the hot liquid goes in last, after everything else is mixed, for two reasons. The heat blooms the cocoa powder, releasing its volatile flavor compounds and making the chocolate taste deeper and more developed. And the higher temperature quickly hydrates the flour and opens the starch molecules so they absorb more moisture, retaining more of it as the cake bakes for a super moist crumb. Coffee specifically (vs. boiling water) doesn’t make the cake taste like coffee, but it amplifies the chocolate flavor the way salt amplifies sweetness. You can use decaf or heat cold-brewed coffee.
Vegetable oil — a liquid fat like vegetable oil keeps this cake soft even when it is chilled. A fat like butter solidifies when it is cold, which would firm up the texture of the cake. Since vegetable oil stays liquid at cooler temperatures, the cake texture doesn’t change as drastically. This also makes the cake feel more moist, as well, since the texture doesn’t get too firm or crumbly.
Raspberries — you will use the fresh berries to make the compote for the filling and for garnishing the top. If you only have frozen raspberries, you can use them for the filling. You don’t need to thaw them first; add 5-10 extra minutes to the simmer time to release the extra moisture and account for the longer time to come to a simmer. Don’t substitute frozen berries for the topping, though—they will turn to mush and be very watery—just leave them off if you don’t have fresh.
Cornstarch — this is essential for thickening the raspberry filling. Make sure you dissolve it in the water or Chambord before you stir it into the hot fruit. Otherwise, the powder can clump, and you will end up with a runny filling that has gummy bits throughout it.
Chocolate frosting — the fudgy chocolate frosting is made with butter, cocoa powder, powdered sugar, and cream with a splash of Chambord and vanilla extract for flavoring. Use the same cocoa as you do for the cake batter to keep your ingredient list simple.
Chocolate ganache — I chose to make the ganache with semisweet chocolate chips since they are easy to find, and you may already have them on hand. I do recommend a good-quality brand like Ghirardelli or Guittard that is specifically labeled as chocolate chips. Chocolate morsels can turn gummy or even break when made into a ganache.
Easy Substitutes
If you don’t want to use alcohol in the cake, or don’t have one of these ingredients on hand, try one of these substitutions:
- Chambord substitute: Plain water works (the recipe gives you the option). For a similar flavor without alcohol, you can use raspberry syrup or a tablespoon of seedless raspberry jam thinned with water. The Chambord adds a slight depth and sweetness; without it, the filling tastes like pure raspberry, which some people prefer.
- Buttermilk substitute: 1 cup whole or low-fat milk + 1 tablespoon white vinegar or lemon juice, stirred and rested for 5 minutes. Genuinely interchangeable.
- Vegetable oil substitute: Canola oil or a light olive oil. Don’t use a robust extra-virgin olive oil, though, as the flavor is too pronounced for chocolate cake. One labeled as “good for baking” or “light and buttery” works great.
The Raspberry Filling: Cooked vs. Fresh
I want to spend an extra minute on the raspberry filling because it’s the biggest change I made to the original recipe. The new filling is essentially a quick compote made by simmering fresh strawberries with sugar and thickening it with cornstarch so that it turns jammy and holds well between the cake layers. Here are a few tips for the filling:
- Why cornstarch: It thickens the fruit without adding flavor. Flour leaves a faint pasty taste; pectin requires specific sugar ratios, and other thickeners like arrow root powder or tapioca are less commonly stashed in your kitchen pantry.
- Temperature matters: Simmer after adding the slurry, but don’t boil. A hard boil starts to break the cornstarch’s thickening structure.
- Cool completely before using. Warm filling melts the buttercream dam. Press plastic wrap directly onto the surface to prevent a skin, and cool on the counter for 30 minutes or in an ice bath for 5.
Why cooked, not fresh: fresh raspberries between cake layers looked beautiful and added a brightness to the cake. But the buttercream and cake layers above would mash the berries, releasing juice that would soak into the buttercream and soften it. After a day, they were mushy, and the cake slices were less sturdy. A cooked filling holds for several days, and as an upgraded bonus, it tastes more concentrated, so you get more raspberry flavor in every bite.
The Ganache: Three Common Failures & Fixes
The ganache is the simplest component in this recipe, but it can be a little bit tricky. You just need to melt chocolate chips with heavy cream, but if you don’t do it correctly, it can cause a few issues with the texture. Here are the main failures and how to easily fix them based on my recipe testing:
- Too thick (won’t drip, sits in stiff blobs): the cream ratio is off, or the chocolate cooled before pouring. Microwave for 5-10 seconds and stir, or add a tablespoon of warm cream to loosen it.
- Too thin (runs all the way down and pools): the cake wasn’t chilled beforehand, or the ganache was too warm. Chill the assembled cake for a full hour first, and cool the ganache to about 90-95°F (just slightly warm to the touch) before pouring. The cold cake will help set the ganache drips fast.
- Broken (grainy, oily, separated): the chocolate overheated. Add 1-2 teaspoons of hot water and whisk vigorously. If it doesn’t re-emulsify at that point, you need to remake it.
Standard chocolate chips work well here, but because they have stabilizers, I’ve found that swapping them for a chopped chocolate bar may need a slight adjustment: start with 2 tablespoons less cream and add more if needed. For a darker ganache, swap the semisweet chips for bittersweet.
How To Make Chocolate Raspberry Cake
Below, I’ve highlighted portions of the recipe in step-by-step process images along with instructions for making the cake, filling, frosting, and ganache. You can find the full set of instructions in the recipe card below.
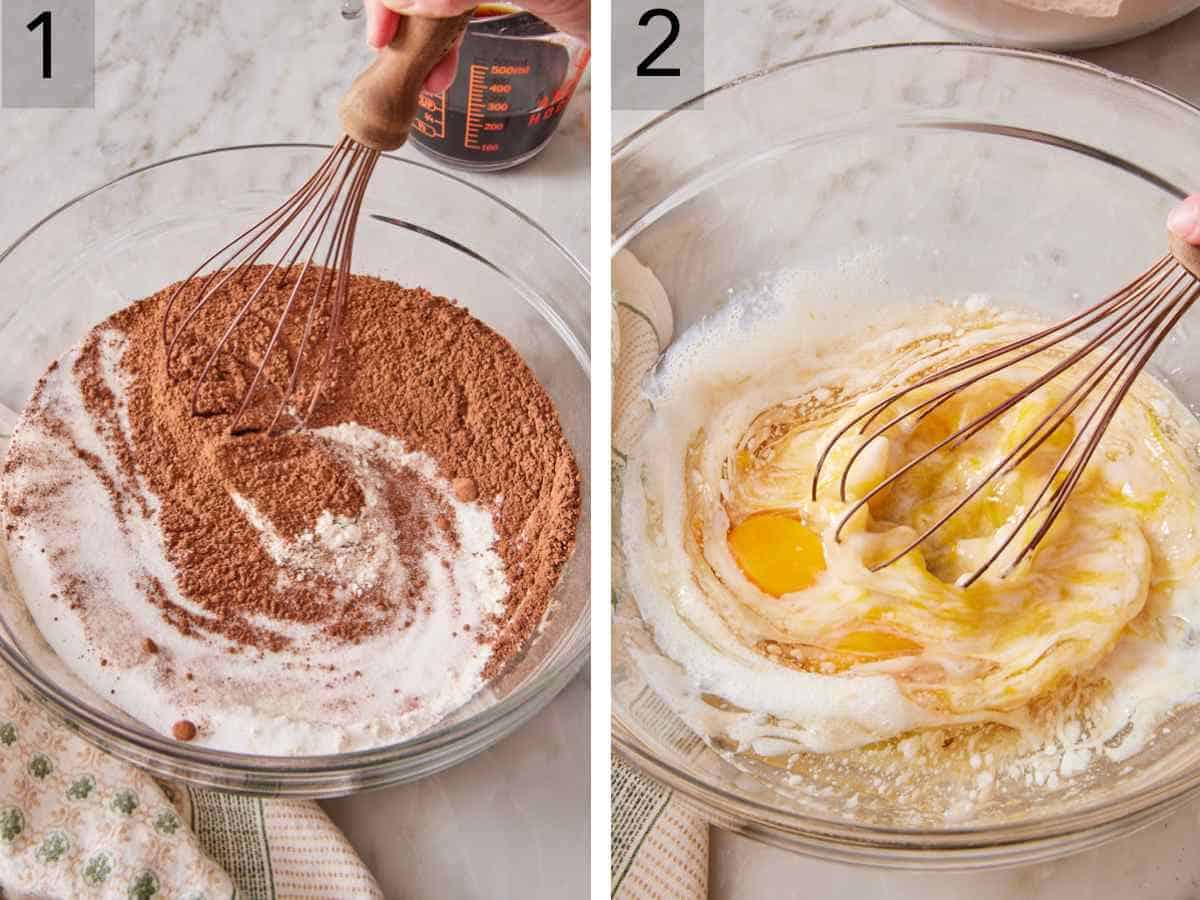
1. Start by setting up your oven. Position two racks toward the center and preheat the oven to 350°F. Grease three 8-inch round pans, line the bottoms with parchment, and if you have cake strips, soak them and wrap them around the pans now. Whisk the dry ingredients together—flour, cocoa powder, sugar, baking soda, baking powder, and salt—in a large bowl and set it aside.
2. Whisk the wet ingredients together and combine the batter. In a medium bowl, mix the buttermilk, oil, eggs, and vanilla together until smooth. Pour that into the dry ingredients and whisk until the flour disappears.
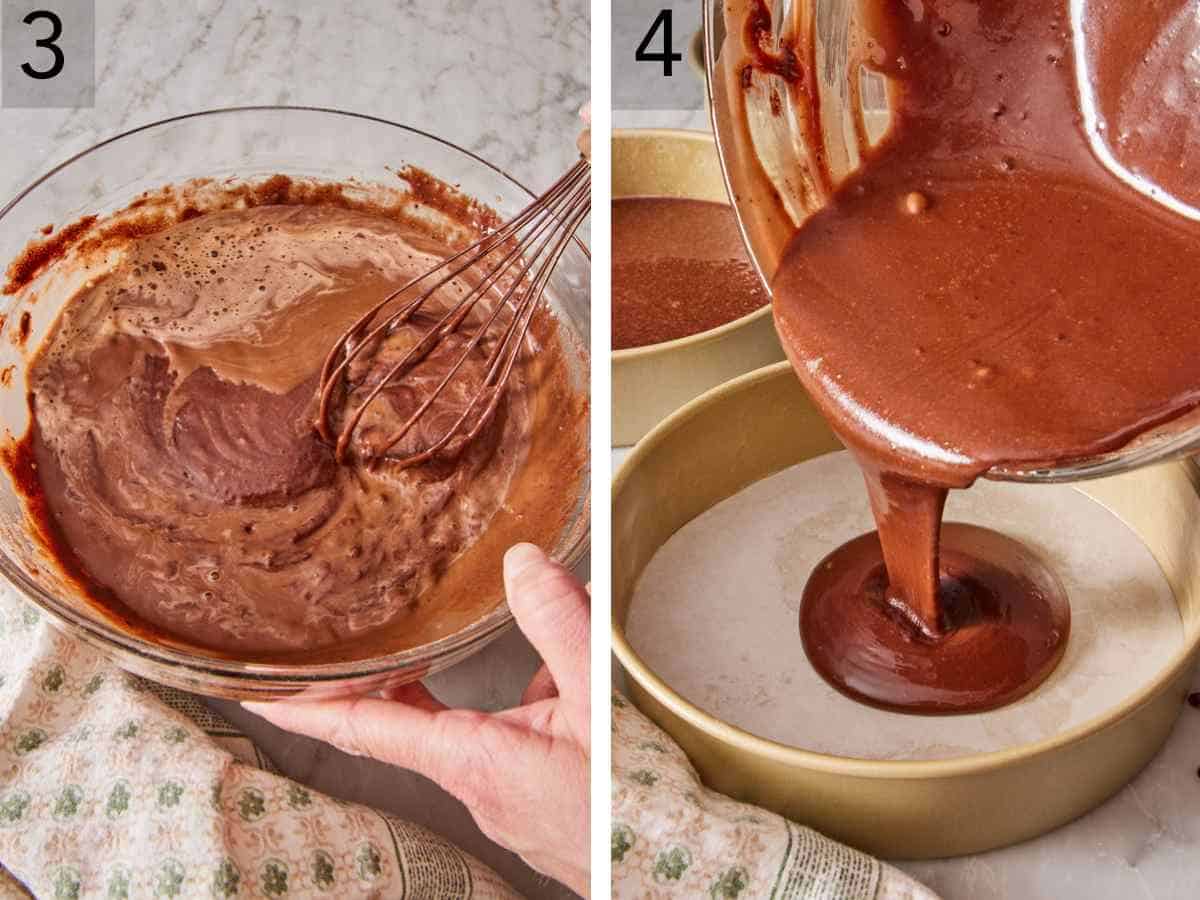
3. Then slowly stream in the hot coffee, whisking as you go. This will feel a bit odd since the batter is thick to start and begins to thin out once the coffee is fully incorporated. But it is correct! Once mixed, the batter will look very thin and almost runny, and that’s exactly what you want.
4. Divide the batter evenly between the three pans and start baking. Start with two pans on one rack and one pan on the other. After 20 minutes, carefully rotate the pans between racks, then bake for another 6 minutes or so. You’re looking for centers that spring back when you press them lightly, and the sides that just start pulling away from the pan. Cool in the pans for 20 minutes, then flip them out onto wire racks to finish cooling.
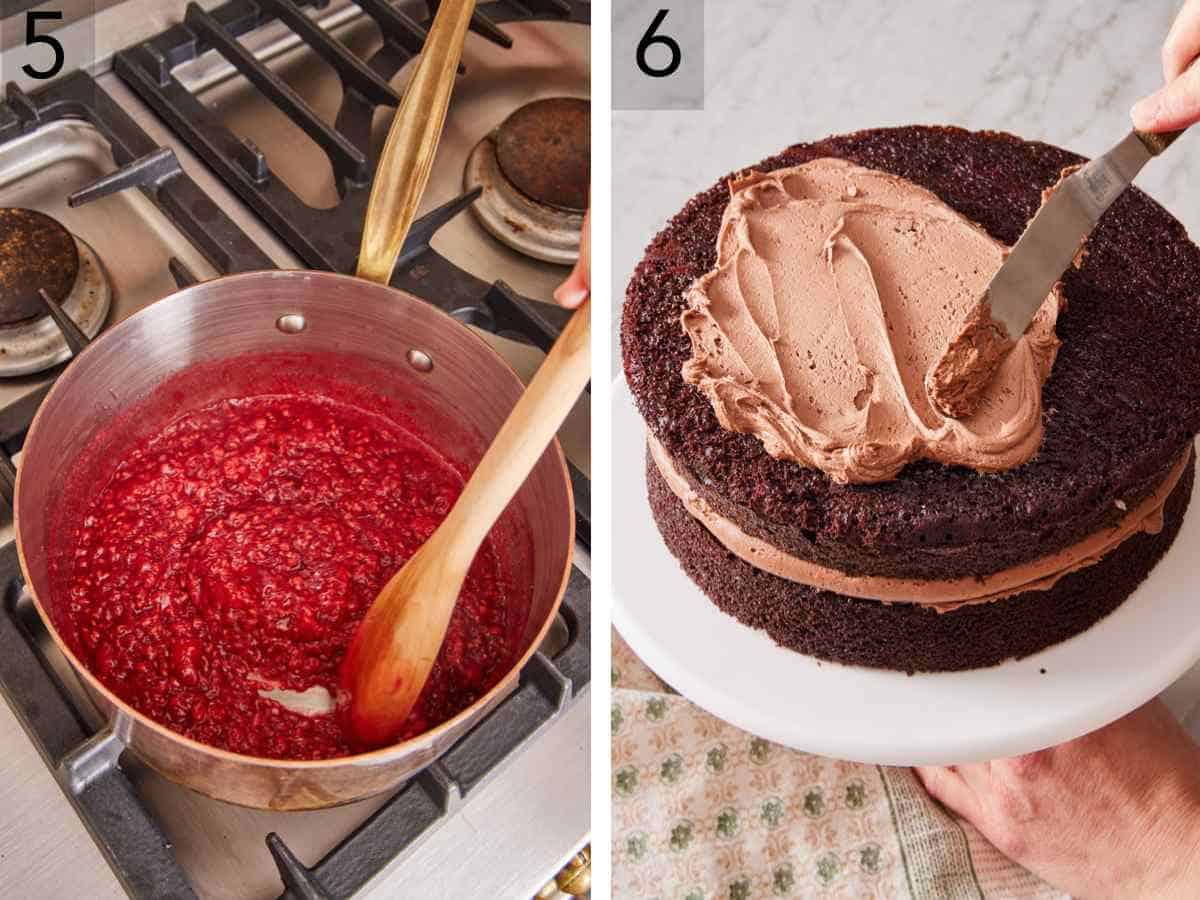
5. Make the raspberry filling. While the cakes are in the oven, add the raspberries, sugar, and a tablespoon of water or Chambord to a small saucepan over medium heat. Stir frequently and give the berries a few gentle mashes as they cook—you want them to break down and get juicy. Once it hits a simmer, let it go for 5 minutes, stirring often. Stir the cornstarch together with the remaining water or Chambord, then pour it into the raspberry mixture. Keep stirring constantly, and within a minute or two, it’ll thicken up and go from cloudy to glossy. That’s when it’s done. Pour it into a bowl, and let it cool completely before using.
6. Now, it’s time to make the frosting and assemble. Beat the butter and salt in a stand mixer with the paddle attachment on medium speed until it looks soft and creamy. Sift in the cocoa powder, mix on low until it comes together, then scrape down the bowl. Keep the mixer on low and add the powdered sugar gradually, alternating with the cream a tablespoon at a time. Once everything is in, add the Chambord and vanilla, scrape the bowl down, and beat on medium-low for about a minute until the frosting is fluffy and smooth. Scoop about 1 cup of frosting into a piping bag and cut about a ½-inch opening at the tip, or use a 1A round tip.
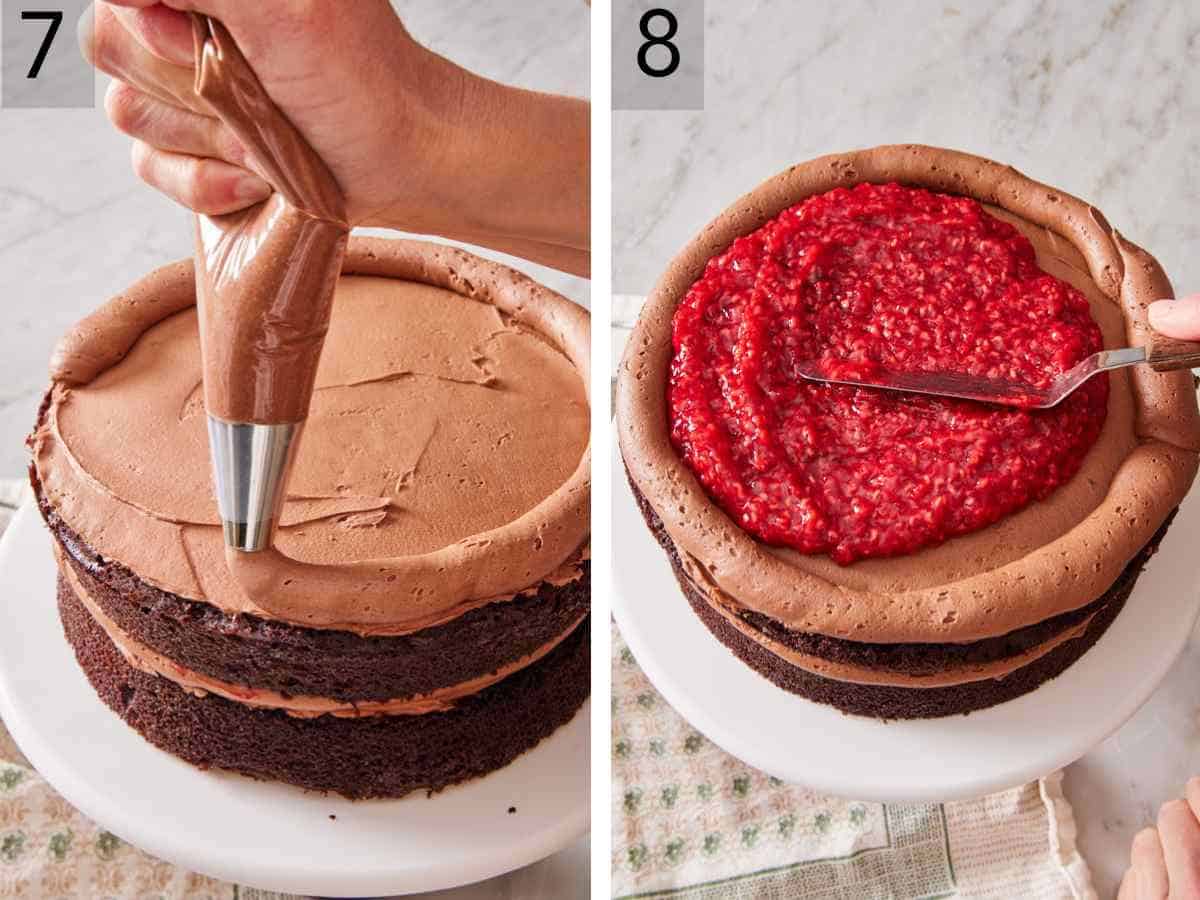
7. To assemble, set a cooled cake layer on your cake stand. Spread about ¼ cup of frosting across the top in a thin layer, then use the piping bag to pipe a border around the edge—this is the dam that keeps the raspberry filling in place.
8. Spoon in half the raspberry filling and spread it evenly inside the border. Set the second layer on top and do the same thing—spread a thin frosting layer, pipe a dam, and spread the rest of the raspberry filling inside. Add the final layer on top, flipping it upside down so the flat bottom faces up and gives you a level surface to work with.
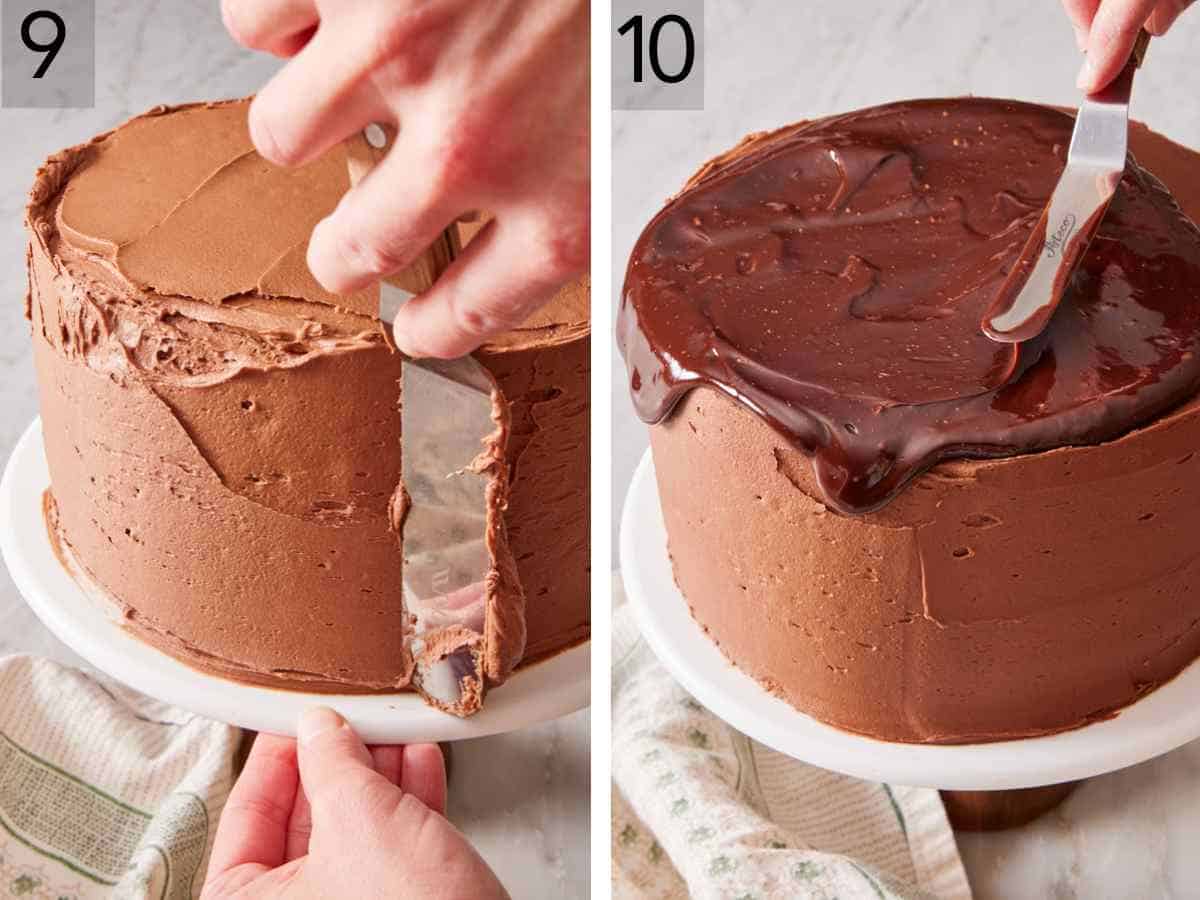
9. Frost the top and sides of the whole cake, then put it in the fridge for a full hour. Toward the end of that chill time, make the ganache. Put the chocolate and cream in a microwave-safe bowl and microwave in 30-second bursts, stirring between each one, until everything is melted and the ganache looks smooth and glossy. Let it sit until it’s just barely warm before using it.
10. Pour the ganache over the top of the cold cake and spread it toward the edges so it drips down the sides on its own. While it’s still a little tacky, pile the fresh raspberries on top so they stick to the ganache. Refrigerate for at least 30 minutes to let everything set, then it’s ready to slice.
Pro Tips For The Best Chocolate Raspberry Cake
Use cake strips for flat layers. If your cake layers dome in the middle, it can make the cake harder to assemble. A raised center means the cooked filling slides off to the sides, and the finished cake looks lopsided. To prevent doming, wrap your pans in soaked fabric cake strips before baking. The water in the fabric keeps the pan edges cool while the center bakes through, and the layers come out flat on top instead of domed. You can buy cake strips or make your own—here’s a full tutorial on how to bake flat cake layers.
Rotate the pans halfway through baking. Since three cake pans don’t typically fit on one oven rack, you will need to divide them between two racks. But that means they won’t heat as evenly since ovens typically have hot spots near the top and bottom. Swapping the pans between racks at the 20-minute mark gives you a more even bake for each layer. Don’t move them sooner, or you risk them collapsing from being jostled in the shuffle.
Pipe a buttercream dam, then add the filling. This border is what holds the raspberry filling in place between layers. Pipe a complete border just inside the cake edge, then fill the inside with raspberry filling and spread to meet the dam. Skipping the dam means filling oozes out the sides during stacking. It’s an extra two minutes that’s worth it!
Add fresh raspberries to the ganache while it’s still warm. The slight stickiness of the warm ganache holds the berries in place. If the ganache has set fully before you add berries, the berries won’t adhere, and they’ll roll off the top when you move the cake.
For tips on assembling your cake, check out my full guide on how to decorate a cake. You can learn about leveling cake layers if they do form a dome, adding a crumb coating before the final frosting layer, and how to make a gorgeous ganache drip.
Chocolate Raspberry Cake Recipe
Equipment
- Electric hand or stand mixer
- Mixing Bowls
- Medium Saucepan
Ingredients
For the Cake:
- 2½ cups all-purpose flour (240g)
- 2 cups granulated sugar (400g)
- 2 teaspoons baking soda
- 1 teaspoon baking powder
- 1 teaspoon salt
- ¾ cup Dutch-process cocoa powder (75g)
- 1 cup whole or low-fat buttermilk (240ml)
- ⅔ cup vegetable oil (180ml)
- 3 large eggs room temperature
- 2 teaspoons vanilla extract
- 1 cup hot coffee or boiling water (240ml)
Raspberry Filling:
- 12 ounces fresh raspberries (340g)
- ¼ cup granulated sugar (50g)
- 3 tablespoons water or chambord liqueur divided
- 1 ½ tablespoons cornstarch
For the Frosting:
- 2 cups unsalted butter room temperature (452g)
- ¾ teaspoon salt
- ¾ cup Dutch-process cocoa powder (75g)
- 6-8 cups powdered sugar (720-960g)
- 6-8 tablespoons heavy cream (90-120ml)
- 1-2 tablespoons chambord liqueur (optional)
- 2 teaspoons vanilla extract
For the Ganache and Assembly:
- ¾ cup semi-sweet chocolate chips (135g)
- ⅓ cup heavy cream (80ml)
- Fresh raspberries for decorating
Instructions
- Position two oven racks towards the center of the oven, and preheat the oven to 350°F. Lightly grease three 8-inch round baking pans with baking spray and line the bottoms with parchment paper. If you have them, wrap water-soaked fabric cake strips around the pans.
- In a large bowl, whisk together the flour, cocoa powder, sugar, baking soda, baking powder, and salt and set aside.
- In a medium bowl, whisk together the buttermilk, oil, eggs, and vanilla. Add the buttermilk mixture to the flour mixture and whisk until no streaks of flour remain. Slowly pour in the hot coffee while whisking until fully combined.
- Divide the batter evenly among the prepared cake pans. Bake for 20 minutes then carefully rotate the pans between oven racks, and continue baking for an additional 6 minutes or until the centers feel springy when gently pressed and the sides of the cakes start to pull away from the pan. Let the cakes cool in the pans for 20 minutes, then carefully invert them onto cooling racks to cool completely.
Make the Filling:
- While the cakes are baking, combine the raspberries, sugar, and 1 tablespoon of water or chambord in a small saucepan. Set over medium heat, and cook, stirring frequently and gently mash the raspberries a few times, until the berries turn juicy and start to simmer. Simmer for 5 minutes, stirring often.
- In a small bowl, stir together the cornstarch and remaining 2 tablespoons of water or chambord. Stir the cornstarch slurry into the raspberries, and cook, stirring constantly until the mixture thickens and no longer looks cloudy, 1 to 2 minutes. Transfer to a bowl and set aside to cool.
Make the Frosting:
- In the bowl of a stand mixer fitted with the paddle attachment, beat the butter and salt on medium speed until soft and creamy, about 2 minutes. Sift in the cocoa powder and mix on low speed until combined. Stop and scrape down the bowl.
- While mixing on low speed, gradually add in the powdered sugar alternating with a tablespoon of cream. If desired, replace 1 or 2 tablespoons of the cream with chambord and add it to the frosting.
- Once all of the sugar is added, beat in the vanilla. Scrape down the bowl and beat on medium-low speed until light, fluffy, and easily spreadable, about 1 minute. Place 1 cup (250g) of frosting in a piping bag and snip off about ½” opening at the end.
Assemble the Cake:
- Place one cooled cake layer on a cake stand and spread ¼ cup (62g) of frosting in a thin layer on top of the cake. Using the reserved 1 cup of frosting, pipe a thin border around the edge of the cake to form a dam to hold in the raspberry filling. Add half of the raspberry filling inside the border and spread it into an even layer.
- Place another cake layer on top and repeat with more frosting and the rest of the filling. Place the final cake layer on top, bottom side up so the cake top is level. Spread the remaining frosting all over the outside of the cake. Chill for 1 hour.
Make the Ganache:
- Towards the end of the cakes chill time, combine the chocolate and cream in a medium microwave safe bowl. Microwave on high in 30-second intervals, stirring between each one, until the chocolate is fully melted and the ganache is smooth.
- Spread the ganache on top of the chilled cake, letting it run off the top and drip down the sides. Immediately arrange fresh raspberries on top of the cake, if desired. Chill the cake for an additional 30 minutes to let the ganache set before slicing.
Notes
- Buttermilk substitute: If you don’t have buttermilk on hand, mix together 1 cup whole milk + 1 tablespoon white vinegar or lemon juice, and let it sit for 5 minutes.
- Frozen raspberries work for the filling only (don’t thaw, add 5-10 minutes to the simmer time). Use fresh ones for the topping or leave them off.
- Chill the cake for the full hour before adding the ganache drip. The recipe specifies this, and it’s not negotiable. A warm cake with warm ganache on top gives you a ganache puddle at the base of the cake stand. A chilled cake at fridge temperature with ganache cooled to ~90°F gives you the controlled drip.
- To get more servings out of this cake, follow my guide on how to cut a round cake. I have an easy way to turn this 8-inch layer cake into 36 smaller servings!
Nutrition
Have you tried this recipe? Tag me today!
Mention @preppykitchen and tag #preppykitchen!
Make-Ahead And Storage
This cake is genuinely better on day two, so it’s a great make-ahead dessert. The filling sets and integrates with the layers, the buttercream firms slightly, and the flavors settle. For a Saturday party, bake it on Friday morning and assemble it Friday afternoon.
Fridge: Keep the cake for 3-4 days loosely covered. The fresh berries on top may start to weep after a day or two, but the cooked filling holds for several days.
Freezer: Unfrosted layers freeze well (wrap tightly in plastic then foil) for up to 2 months. Thaw overnight in the fridge. The assembled cake or individual slices without fresh berries on top freeze well for up to 1 month. Flash freeze until the frosting is firm, then tightly wrap in two layers of plastic wrap. Thaw frozen cake in the fridge (4-6 hours for slices; 12-18 hours for the whole cake). Add the fresh berries after thawing.
Serve at room temperature. Pull the cake from the fridge 30-45 minutes before serving. The cold will make the chocolate cake taste muted. A slightly warmer temperature lets the flavors come forward, and the buttercream softens for a silkier texture.
Frequently Asked Questions
Yes. Replace the Chambord in the filling and frosting with plain water, and skip the Chambord entirely from the frosting. The cake will be slightly less complex but still delicious.
There are two likely causes. First and most common: no cake strips. The pan edge bakes faster than the center because metal conducts heat to the outside first, which is what creates the dome as the center catches up. Second: the oven temperature is too high. Most home ovens run a bit hotter than they say, so an oven thermometer is worth having to verify. If your oven runs 25°F hot, drop it to 325°F and bake for about 5 minutes longer.
Yes. For a 9×13 sheet cake, bake at 350°F for about 30 minutes. For two 9-inch round pans (instead of three 8-inch), use the full recipe and bake at 350°F for about 30-35 minutes. For three 9-inch cake pans, reduce the bake time to 15 minutes before rotating, then another 5 minutes (these layers will be thinner).
To fill a sheet cake, cut it in half lengthwise and spread the frosting and filling on top of the bottom half.
More Recipes To Try
If you love this chocolate raspberry cake, one of my other cake recipes with chocolate is worth trying!
- Chocolate Raspberry Cupcakes — the flavors of this cake in cupcake form
- Chocolate Strawberry Cake — the flavors of chocolate-covered strawberries in a decadent layer cake
- Chocolate Bundt Cake — a super easy chocolate cake batter baked in a bundt pan
- Devil’s Food Cake — my fudgiest chocolate cake recipe
- Ultimate Chocolate Cake — my easy recipe for a super moist classic chocolate cake
- Molten Lava Cakes — so easy to make this restaurant-quality dessert with a gooey chocolate center
If you’ve tried this chocolate raspberry cake recipe, then don’t forget to rate it and let me know how you got on in the comments below. I love hearing from you!


