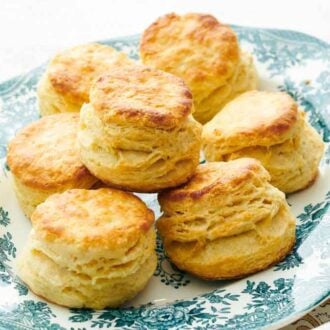
Intro paragraphs: The best biscuits are delectably buttery, tender on the inside, super flaky on the sides, and slightly crisp on the outside. These flaky buttermilk biscuits tick all those boxes and then some! Readers have asked me if buttermilk is essential for making biscuits. While you can make them without it, I tested this recipe both ways and found that buttermilk produced tender biscuits that produced a good rise in the oven. I cover all of the “whys” and a few substitutes below!
A reader, Klecan, says: “My biscuits were very high at least two inches plus and unbelievably flakey. So flakey I had to carefully transfer from sheet to basket. The family was raving…my goal has been to make the best fluffy biscuits and I finally achieved it, thanks to you.” ★★★★★
Key Ingredients
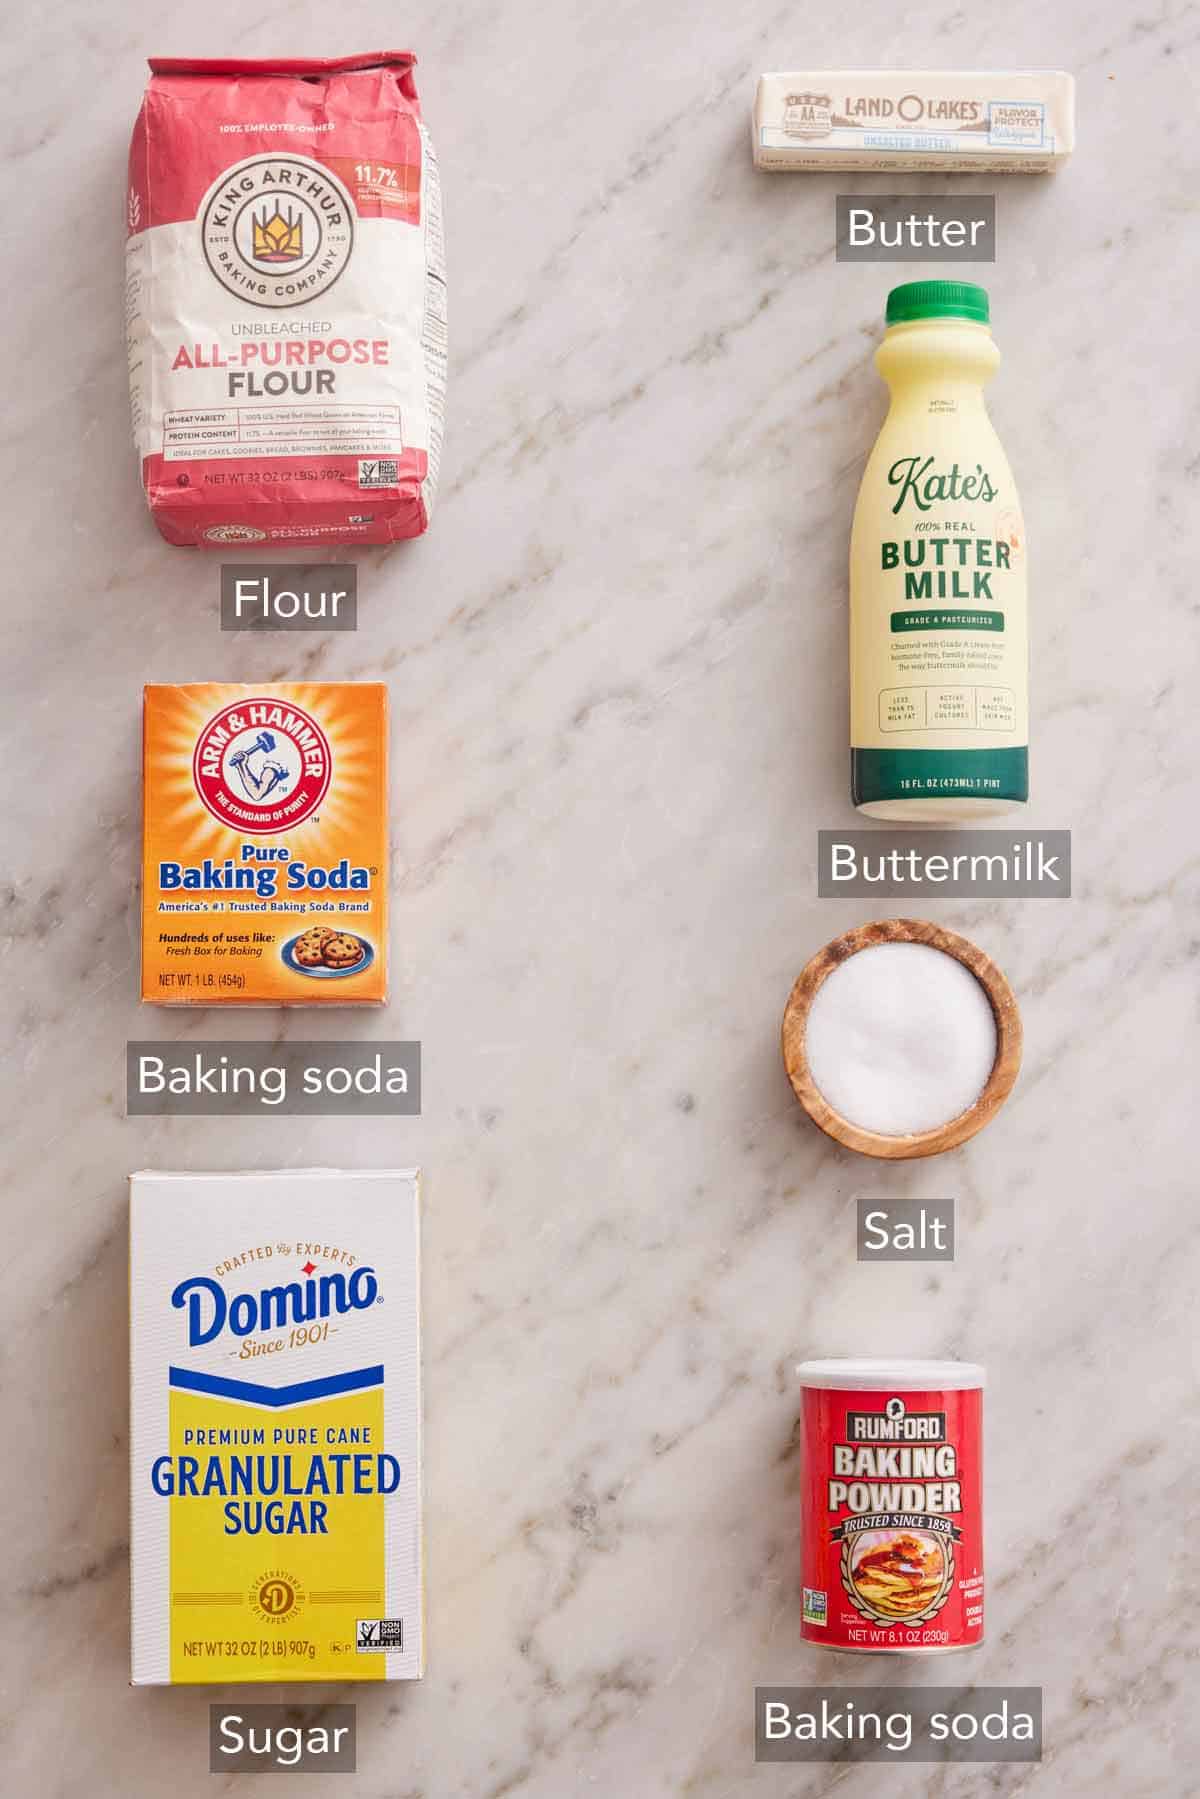
These are the main ingredients you need to make homemade buttermilk biscuits. You can find the full list of ingredients and measurements in the recipe card below.
Buttermilk — buttermilk is the star of this recipe, producing tall, fluffy biscuits with a subtle tang and tender crumb. Use whole or low-fat buttermilk, not fat-free, for the fluffiest, tastiest biscuits. If you don’t have buttermilk, see below for substitute options.
Flour — all-purpose flour works well. It’s a good idea to weigh the flour to ensure you don’t accidentally use too much. Too much flour will result in dry or dense biscuits.
Butter — to avoid overly salty biscuits, opt for unsalted butter. And make sure it is cold. This is vital for flaky buttermilk biscuits! If you only have salted butter, reduce the salt by ¼ teaspoon per stick used. You can use American-style butter sticks (like Land O’Lakes) or splurge for a higher-fat European butter like Kerrygold. Both work well in this recipe.
Leavening — baking powder and baking soda help the biscuits rise. In this recipe, most of the rising power comes from the baking powder. Baking soda, however, reacts with the acid in the buttermilk, giving the biscuits a little bit of extra lift, but it is mainly used here for achieving a beautiful golden crust.
Sugar — granulated sugar adds the faintest sweetness and also helps the biscuits brown in the oven.
Salt — this element is essential to tasty biscuits! Because I use unsalted butter, you can control the salt level. But that means adding salt is necessary for the biscuits to taste delicious. I recommend using sea salt, not iodized salt (table salt), which can taste bitter in baked goods.
How Buttermilk Makes Great Biscuits
Buttermilk produces delicious, fluffy homemade biscuits! As a former science teacher, you know I love to explain “how” something works! In this case, buttermilk is cultured and acidic. The acid from the buttermilk reacts with the leaveners (baking soda and baking powder) to help the dough rise, so you end up with wonderfully tall biscuits. The acid also helps break down the proteins in the flour, which produces tender biscuits. Outside of science, buttermilk adds delicious flavor with a subtle tanginess, along with richness from the fat in the milk.
Buttermilk substitutes
Buttermilk isn’t necessarily an ingredient everyone has on hand all the time. So, if you want to make buttermilk biscuits right now but don’t have it in your refrigerator, I’ve got you covered with a few substitutes!
My tutorial on how to make buttermilk requires only 2 ingredients— milk and an acid (vinegar or lemon juice). Mix 1 cup of milk with 1 tablespoon of vinegar or lemon juice. Set aside for 10 minutes and voila! An excellent, simple buttermilk swap. Alternatively, you can mix ¾ cup plain yogurt with ¼ cup water, or ¾ cup sour cream with ¼ cup water. The acid in the yogurt will work just as well as the buttermilk. If you don’t have any of these items, try my classic biscuit recipe using plain whole milk.
Are Biscuits Better Made With Butter Or Shortening?
I find that it’s hard to beat the flavor of a butter-based biscuit, so that’s how I wrote my recipe. If you use butter, you end up with flaky, tender layers with an irresistible flavor. It is definitely my preferred fat to use in biscuits.
Crisco (also known as shortening) does work in biscuits, but since it has no flavor, they can turn out a bit bland. Shortening biscuits tend to be softer and crumblier than butter biscuits and are slightly cake-like. If this is the texture you prefer, Crisco is a good option! For the best of both worlds, you can use half butter and half Crisco to make buttermilk biscuits.
The Key To Flaky Biscuits
My executive editor, Sarah, has retested these biscuits several times to help find the key to baking up the tallest, flakiest biscuits. Between her tests and mine, here are my tips for making sure your biscuits bake up sky-high:
- Keep things cold: Perhaps the most important step to make tall, fluffy biscuits is using cold ingredients. The butter basically needs to go straight from the fridge into the bowl with the dry ingredients. Why? You want the butter to keep its solid state and not melt into the dough as you continue through the process of shaping the biscuits. These distinct pockets of butter are important. Once the biscuits go in the oven, the cold butter immediately steams when it hits the hot oven air, pushing the dough apart and creating air pockets, which create height and flaky layers.
- Preheat the oven fully: The oven needs to be at 425°F before placing the dough inside. The high temperature helps steam the butter as mentioned above. Plus, it helps them turn nice and golden brown on top!
- Make your biscuits cozy on the baking sheet: Having your biscuits barely touch or no more than ½” apart gives them support as they rise, so they will end up taller than if they are very spaced out on the baking sheet.
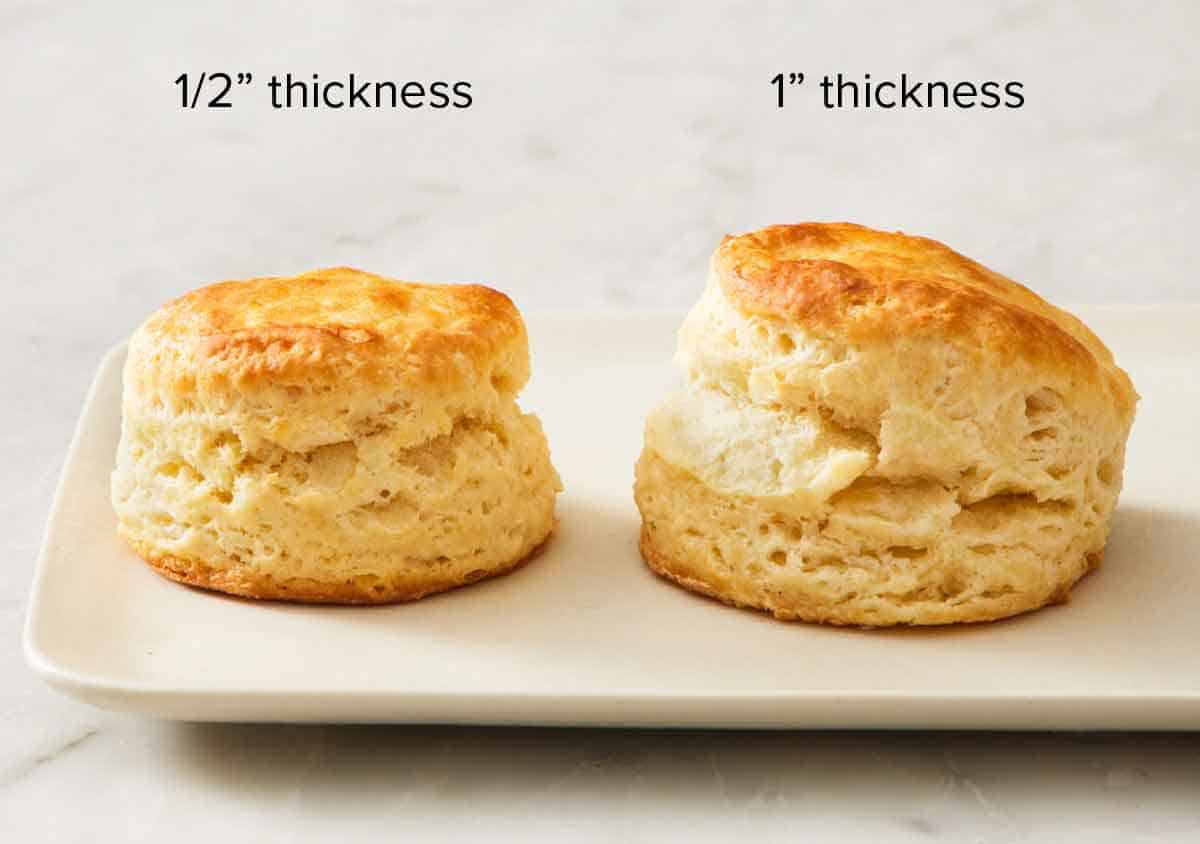
- Double the recipe! Double all of the ingredients and follow the steps for cutting and folding the dough. Instead of rolling it to ½ or ¾ inch thick, roll the dough until it is 1 to 1¼ inches thick before cutting out the biscuits. As you can see in the image below, the biscuit on the right baked up much taller when the dough was rolled thicker. You can keep the same size cutter or go larger (up to 3″ round) for bigger biscuits, perfect for turning into breakfast sandwiches!
Can I Freeze The Biscuits Before Baking?
Yes, the biscuits can be frozen before you bake them. This is a great way to make them ahead of time! After cutting the biscuit dough into rounds, place them on a parchment paper-lined baking sheet and freeze for about 1 hour. Once they’re solid, transfer them to a freezer-safe container and freeze for up to 1 month.
To bake from frozen: Arrange the frozen biscuits on a lined baking sheet and brush the tops with butter. Bake as directed in the recipe, just add about 5 minutes to the baking time.
Pro Tips For Making The Best Buttermilk Biscuits
Measure the flour correctly. Using too much flour will result in dry biscuits. The best way to avoid this is to weigh the flour using a kitchen scale. If you do not have one, fluff up the flour in its canister and spoon it into the measuring cup, then level off the top. Do not scoop directly from the container.
Don’t be tempted to add more liquid. The dough will be shaggy and somewhat crumbly after mixing in the buttermilk, which will seem like it doesn’t have enough liquid to come together. But after the first fold and roll, you will be amazed at how nicely the dough forms. Trust the process!
Don’t over-mix. Over-mixing the buttermilk into the dough will give you hard, flat biscuits. Mixing liquid into flour starts to activate gluten, and if you continue this process for too long, the biscuits will turn chewy and dense instead of light and fluffy.
No twisting! When cutting the biscuits, be sure not to twist the cutter. Twisting seals the layers of butter and pastry that you have created, which will prevent your biscuits from rising as tall and can cause them to fall over in the oven.
How To Make Buttermilk Biscuits
I’ve highlighted portions of the recipe in step-by-step process images, below, along with instructions for making buttermilk biscuits. You can find the full set of instructions in the recipe card below.
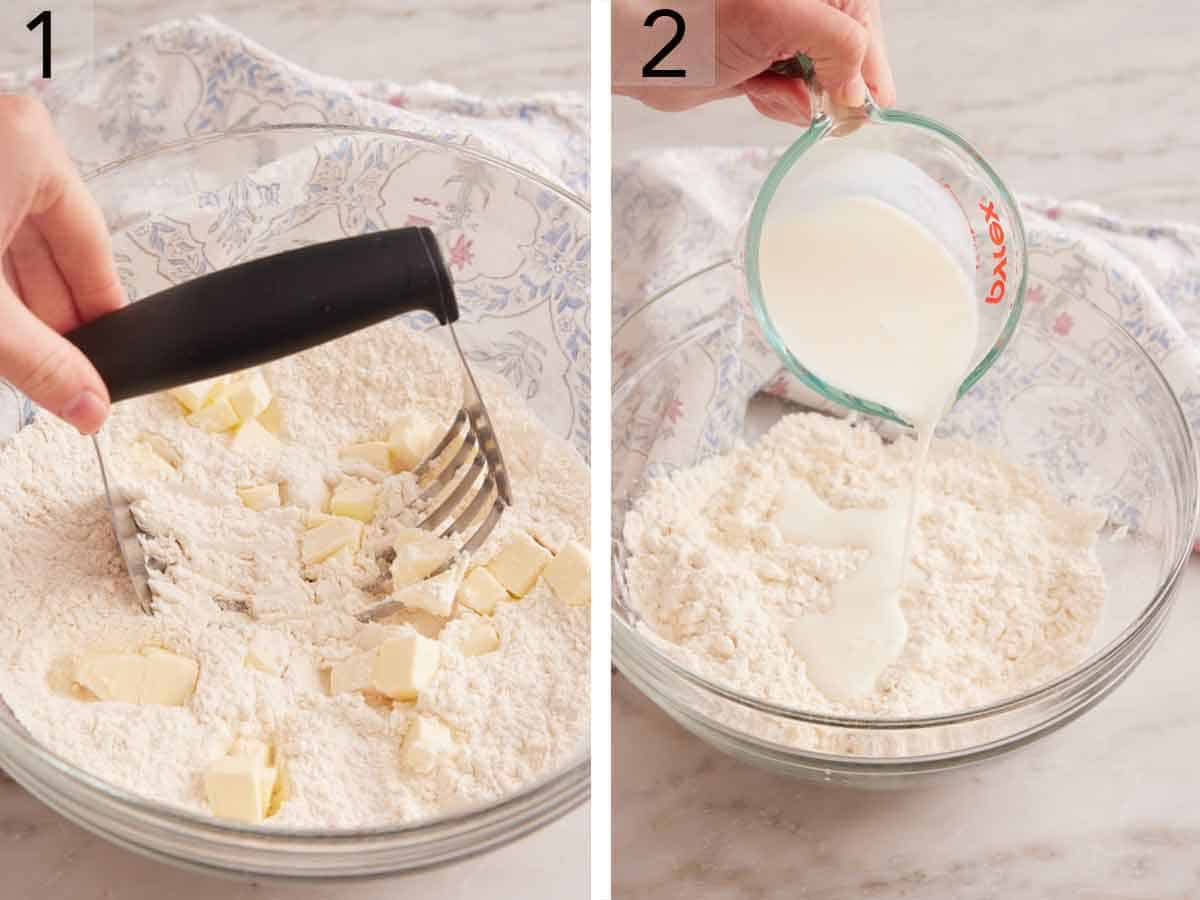
1. Whisk together the flour, baking powder, sugar, salt, and baking soda in a large bowl. Add the butter and toss in the flour to coat. Then, cut the butter into the flour using a pastry cutter until the butter is pea-sized.
2. Gently stir in the cold buttermilk until a shaggy dough forms. (I like to use a silicone spatula for this task!)
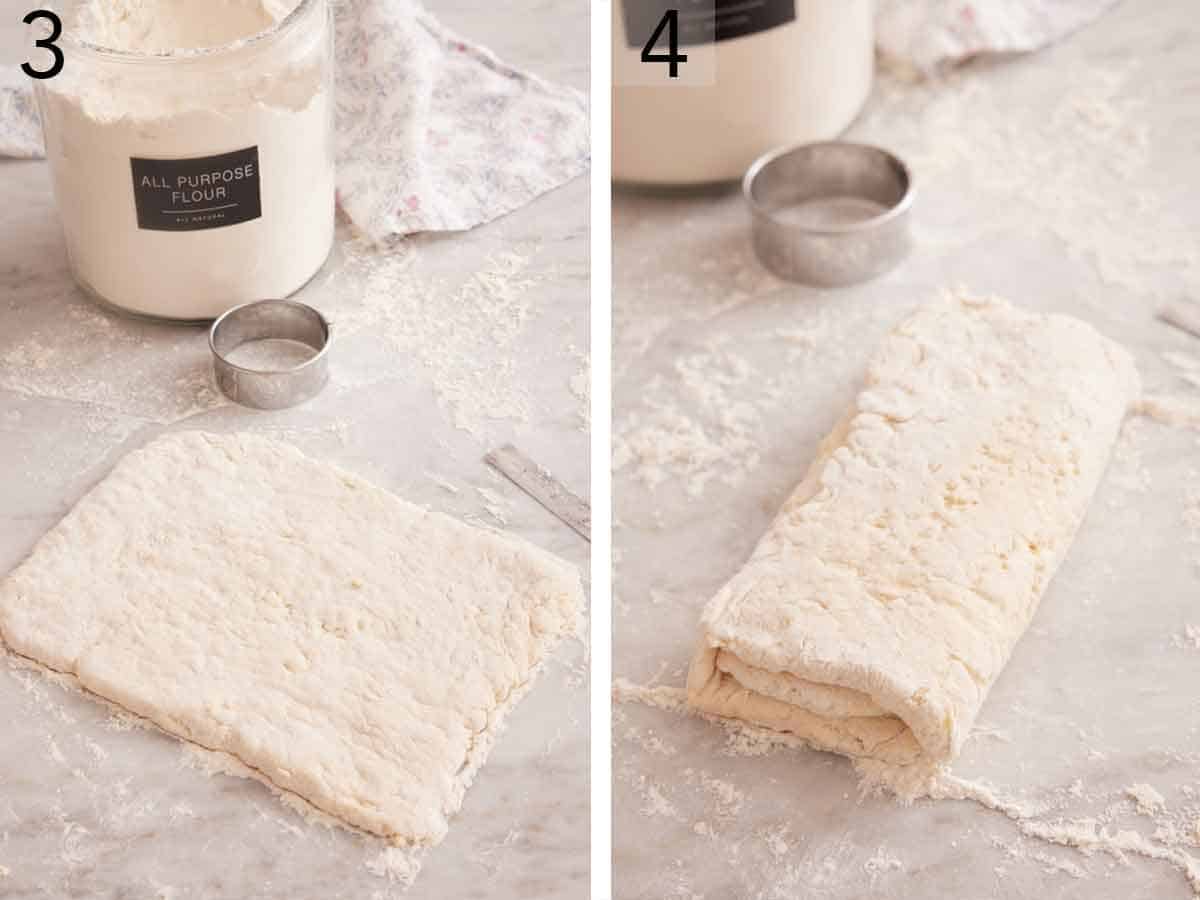
3. Transfer the dough to a lightly floured surface, and pat the dough into a 10-x8-inch rectangle, about ¼-inch thick, with the long edge facing you. (Lightly flour your hands and the top of the dough if needed to keep it from sticking to your hands.)
4. Fold the short sides of the dough over the center, into thirds like a letter, gathering any crumbs that fell away and placing them on top of the dough. Then, turn the dough 90 degrees, and use a rolling pin to roll it into a 10-x8-inch rectangle again, about ¼-inch thick. (When you roll it out, keep the long sides long and the short sides short.)
Repeat the process of folding, turning, and rolling two more times. (This will be a total of 3 folds and turns. This is called lamination, and it is how you get perfectly flaky layers.) On the final roll, shape the dough into a 10×5-inch rectangle, about ½ to ¾-inch thick.
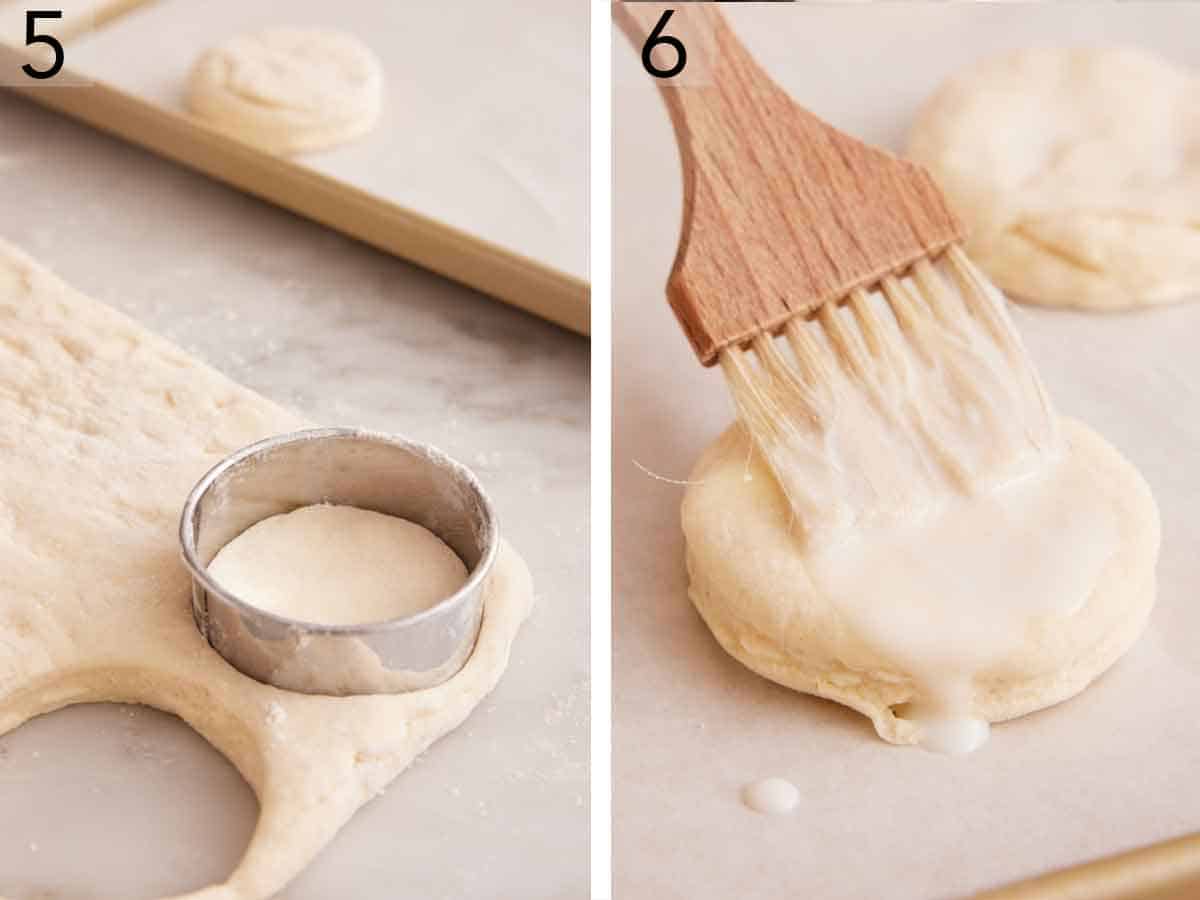
5. Using a floured 2½-inch round biscuit cutter, cut out 8 biscuits, re-rolling scraps if desired to cut 2 more biscuits. Place biscuits in an even layer on a baking sheet lined with parchment paper, with the sides of the biscuits barely touching.
6. Brush the tops with the remaining 2 teaspoons of buttermilk. Bake at 425°F for 12 to 15 minutes until golden brown on top. Let the buttermilk biscuits cool slightly on the baking sheet, about 5 minutes, before serving.
Buttermilk Biscuit Recipe
Video
Equipment
- Mixing Bowls
- Large baking sheet
- Parchment paper
Ingredients
- 2 cups all-purpose flour (240g)
- 1 tablespoon baking powder
- 2 teaspoons granulated sugar
- ¾ teaspoon salt
- ¼ teaspoon baking soda
- 6 tablespoons cold unsalted butter cubed (85g)
- ¾ cup plus 2 teaspoons cold buttermilk divided (180mL)
Instructions
- Preheat the oven to 425°F. Line a large baking sheet with parchment paper or a silicone baking mat.
- In a large bowl, whisk together the flour, baking powder, sugar, salt, and baking soda. Add the butter, and toss in the flour to coat. Using a pastry cutter, cut in until butter is pea-sized. Gently stir in 3/4 cup buttermilk until shaggy dough forms.
- Transfer the dough to a lightly floured surface, and pat it into a 10-x8-inch rectangle, about 1/4-inch thick with the long edge facing you. Fold the dough into thirds like a letter (I fold the left side over the center and then the right side over the left), gathering any crumbs and placing on top of dough. Turn dough 90 degrees, and roll into a 10×8-inch rectangle again, about 1/4-inch thick. Repeat the process of folding, turning, and rolling two more times. On the final roll, shape the dough into a 10×5-inch rectangle, about ½- to ¾-inch thick.
- Using a floured 2½-inch round cutter, cut out 8 biscuits, re-rolling scraps if desired to cut 2 more biscuits. Place biscuits in an even layer on the prepared baking sheet with the sides of the biscuits barely touching. Brush the tops with the remaining 2 teaspoons of buttermilk.
- Bake for 12 to 15 minutes until golden brown on top. Let cool slightly on the baking sheet, about 5 minutes, before serving.
Notes
- Try baking them in a cast-iron skillet! You can swap the baking sheet out and bake 8 buttermilk biscuits in a 10-inch cast-iron skillet or bake 10 biscuits in a 12-inch cast-iron skillet. The skillet doesn’t need to be lined or sprayed before baking. The sides will get a little fluffier and softer since the biscuits will bake closer together, and the sides of the skillet insulate them from direct heat. The bottoms will be crispier baked in a skillet, thanks to how well the skillet conducts heat.
- Don’t skip brushing the biscuit tops! I love the buttermilk brush on top because you get a lovely tang from the beginning that really sells the homemade, tender biscuit. It also helps them brown. If desired, you can brush them with melted butter before baking (instead of buttermilk) and after baking for a buttery finish.
Nutrition
What To Serve With Buttermilk Biscuits
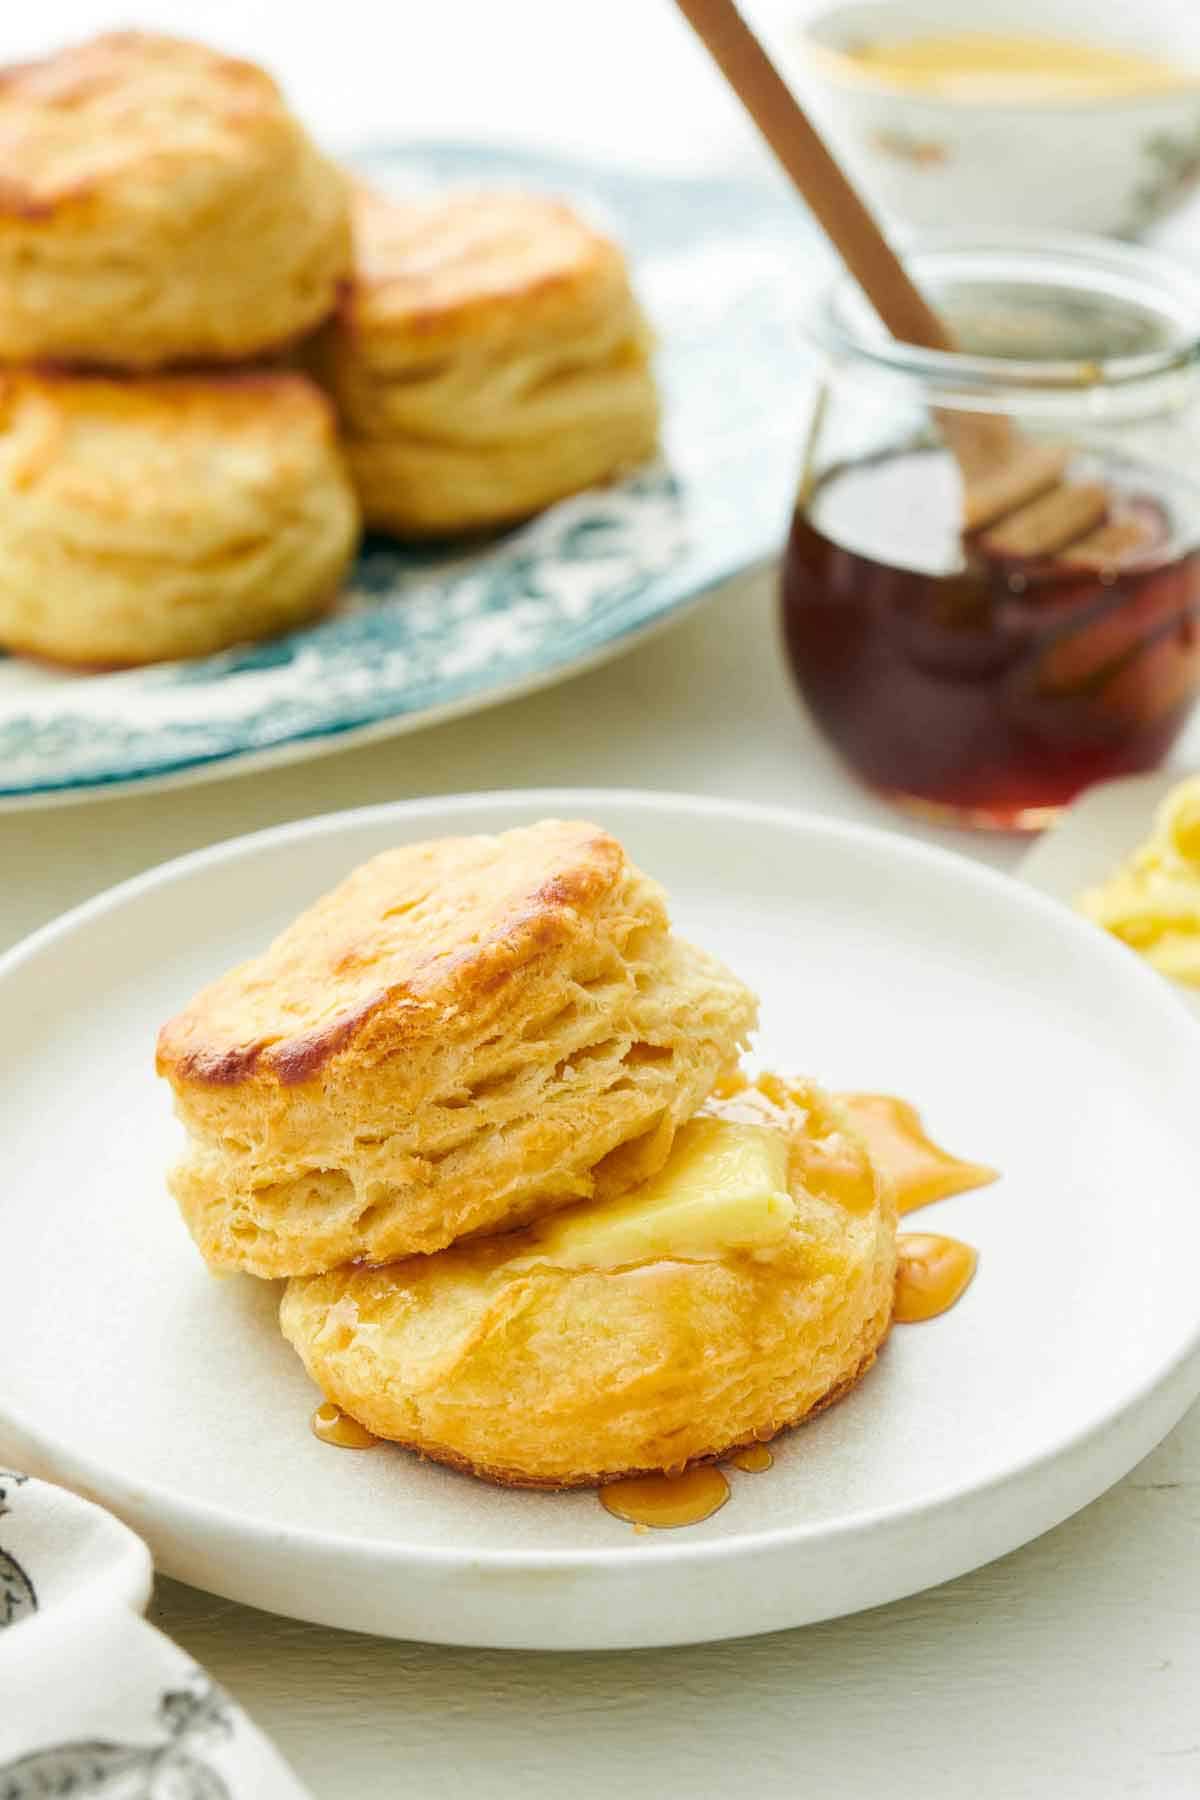
You can’t go wrong with a thick smear of homemade jam and butter on these buttermilk biscuits. You can also spread creamy honey butter on them or drizzle with honey or sorghum syrup. If you prefer savory biscuits, load them up with sausage gravy or make breakfast biscuits with eggs, cheese, and sausage sandwiched between two halves. They are also the perfect side to a homemade breakfast casserole and crispy air fryer bacon.
Variations To Try
You can add different flavorings to the biscuits! Try fresh or dried herbs like chives, thyme, oregano, or rosemary. For cheesy biscuits, fold in shredded cheddar cheese or parmesan cheese. Crumbled bacon and diced jalapeno are also delicious additions. These should all be added after you cut in the butter, but before pouring in the buttermilk. For garlicky biscuits, whisk ½ teaspoon garlic powder along with the other dry ingredients at the very beginning.
Why Aren’t My Buttermilk Biscuits Fluffy?
Two main causes of non-fluffy biscuits are using too much liquid and overworking the dough. At first, the dough will seem very dry, and you may be tempted to add more buttermilk. But this is a recipe where you need to trust the process because it will form a cohesive dough without additional liquid. Over-mixing the dough to try to force it into a smooth dough will also give you dense, flat biscuits. As previously mentioned, the dough looks very shaggy at first, but it will come together as you gently flatten, fold, and roll it.
How To Store Leftovers
Biscuits are best served hot or soon after they’re baked. If you have leftovers, store them in an airtight container in the fridge for up to 5 days. Reheat them in the oven at 350°F for 5 to 10 minutes or in the air fryer at 350°F for 3 to 5 minutes.
More Biscuit Recipes To Try
If you love these buttermilk biscuits, try one of my other homemade biscuit recipes!
My quick and easy drop biscuit recipe doesn’t require any folding or rolling. Just stir the batter together, scoop it onto a baking sheet, and bake until golden brown!
These cheddar biscuits are packed with flavor from shredded sharp cheddar and garlic powder. Similar to drop biscuits, just stir the dough together, scoop, and bake. So easy!
Use up leftover sourdough discard by baking my sourdough biscuits! They are flaky and buttery with a distinct tanginess from the active starter.
Folding mashed sweet potatoes into a biscuit dough produces the most tender, flaky sweet potato biscuits! They’re perfect for breakfast or filling a bread basket for a holiday meal.
If you’ve tried this buttermilk biscuit recipe, then don’t forget to rate it and let me know how you got on in the comments below. I love hearing from you!







Jennifer Jenny says
Fantastic recipe! I wanted made them 1 inch high but did not double the recipe and ended up with 5 biscuits. I was nervous about overworking the dough so I probably underworked it but they are delicious! I finally found the recipe that I will use all the time.
Jennifer says
We love these biscuits! Thanks for the recipe.
Judy says
I’m sharing this recipe page with everyone I know.
Easy to make and delicious!
Jennie says
Great biscuit recipe and thanks for all the laughs from watching the video.!