
This post may contain affiliate links. Please read our disclosure policy.
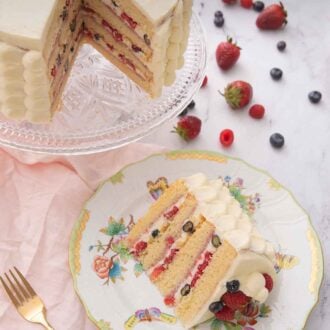
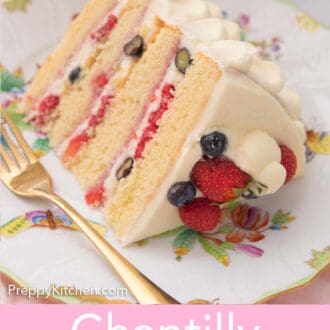

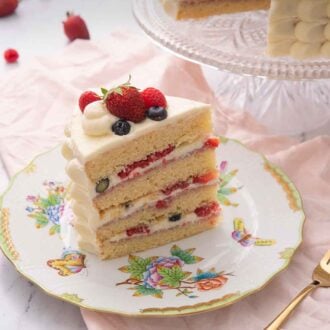
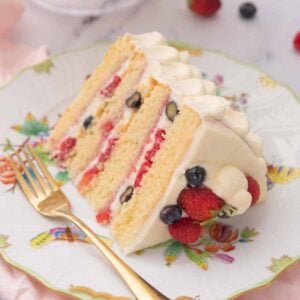
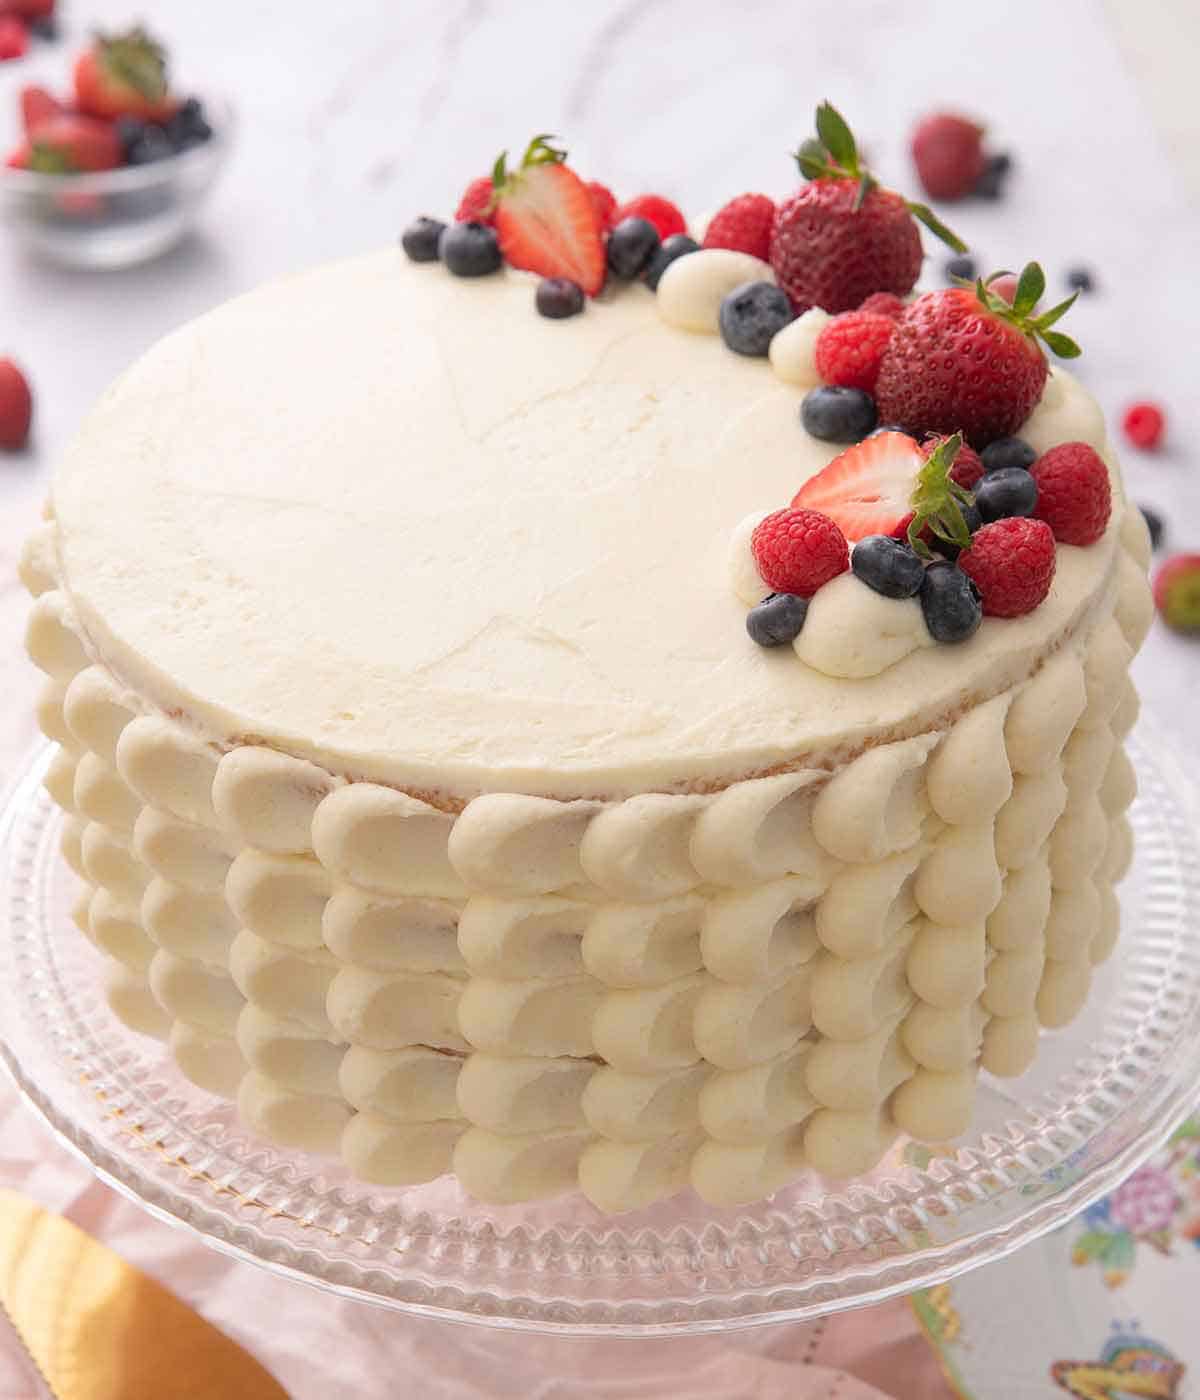
Berry Chantilly Cake with layers of soft vanilla cake, fruit jam, fresh berries, and a dreamy Chantilly cream frosting is bursting with flavor that’s perfect for summer! It’s light, fresh, not too sweet, and looks absolutely gorgeous.
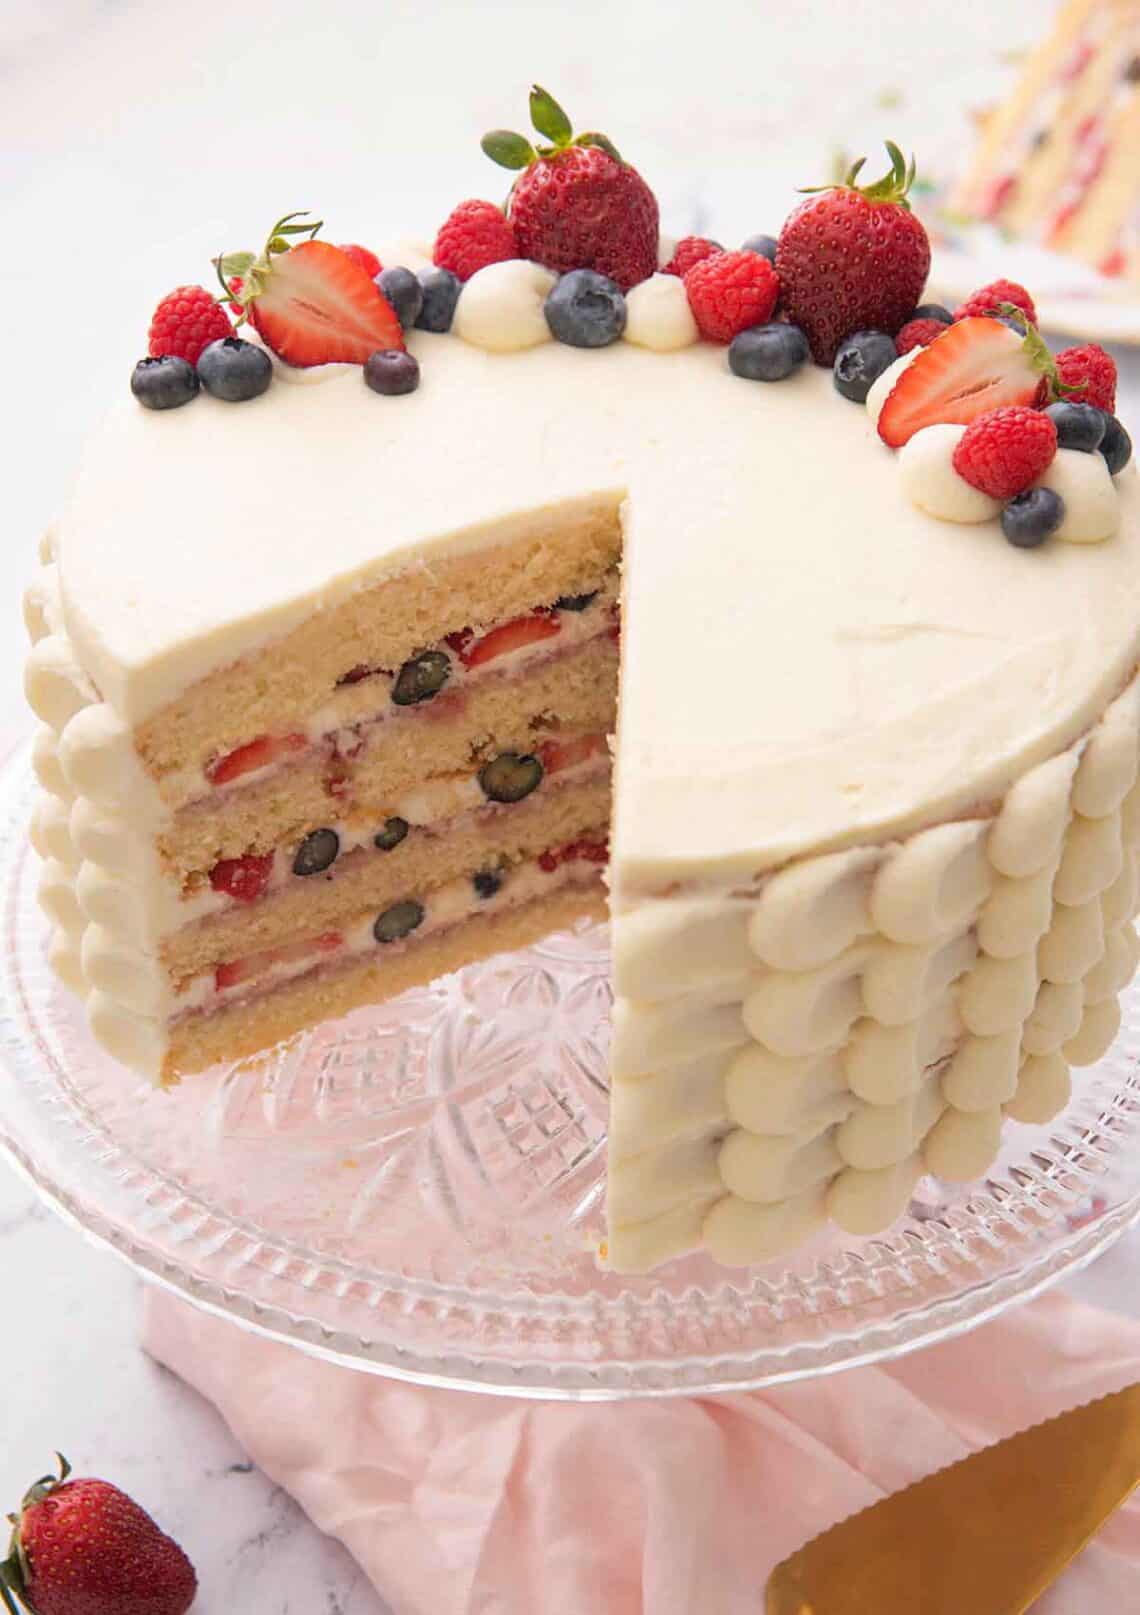
If you love Whole Foods Chantilly cake, my homemade version is a must-try! A light, airy vanilla cake is layered with soft Chantilly cream, sweet berry jam, and a combination of fresh berries tossed with lemon juice. Since it’s served chilled, this cake is so refreshing and ideal for a special occasion on warm summer days.
For this Chantilly cake recipe, the cake needs to be chilled for a bit after assembling. I find this to be a great make-ahead dessert since a longer chill time means the layers will set better. I recommend assembling it in the morning if you plan to serve it at night or even the night before for a daytime gathering. For more cake recipes, try my vanilla cake, strawberry cake, and vanilla Bundt cake.
Ingredients
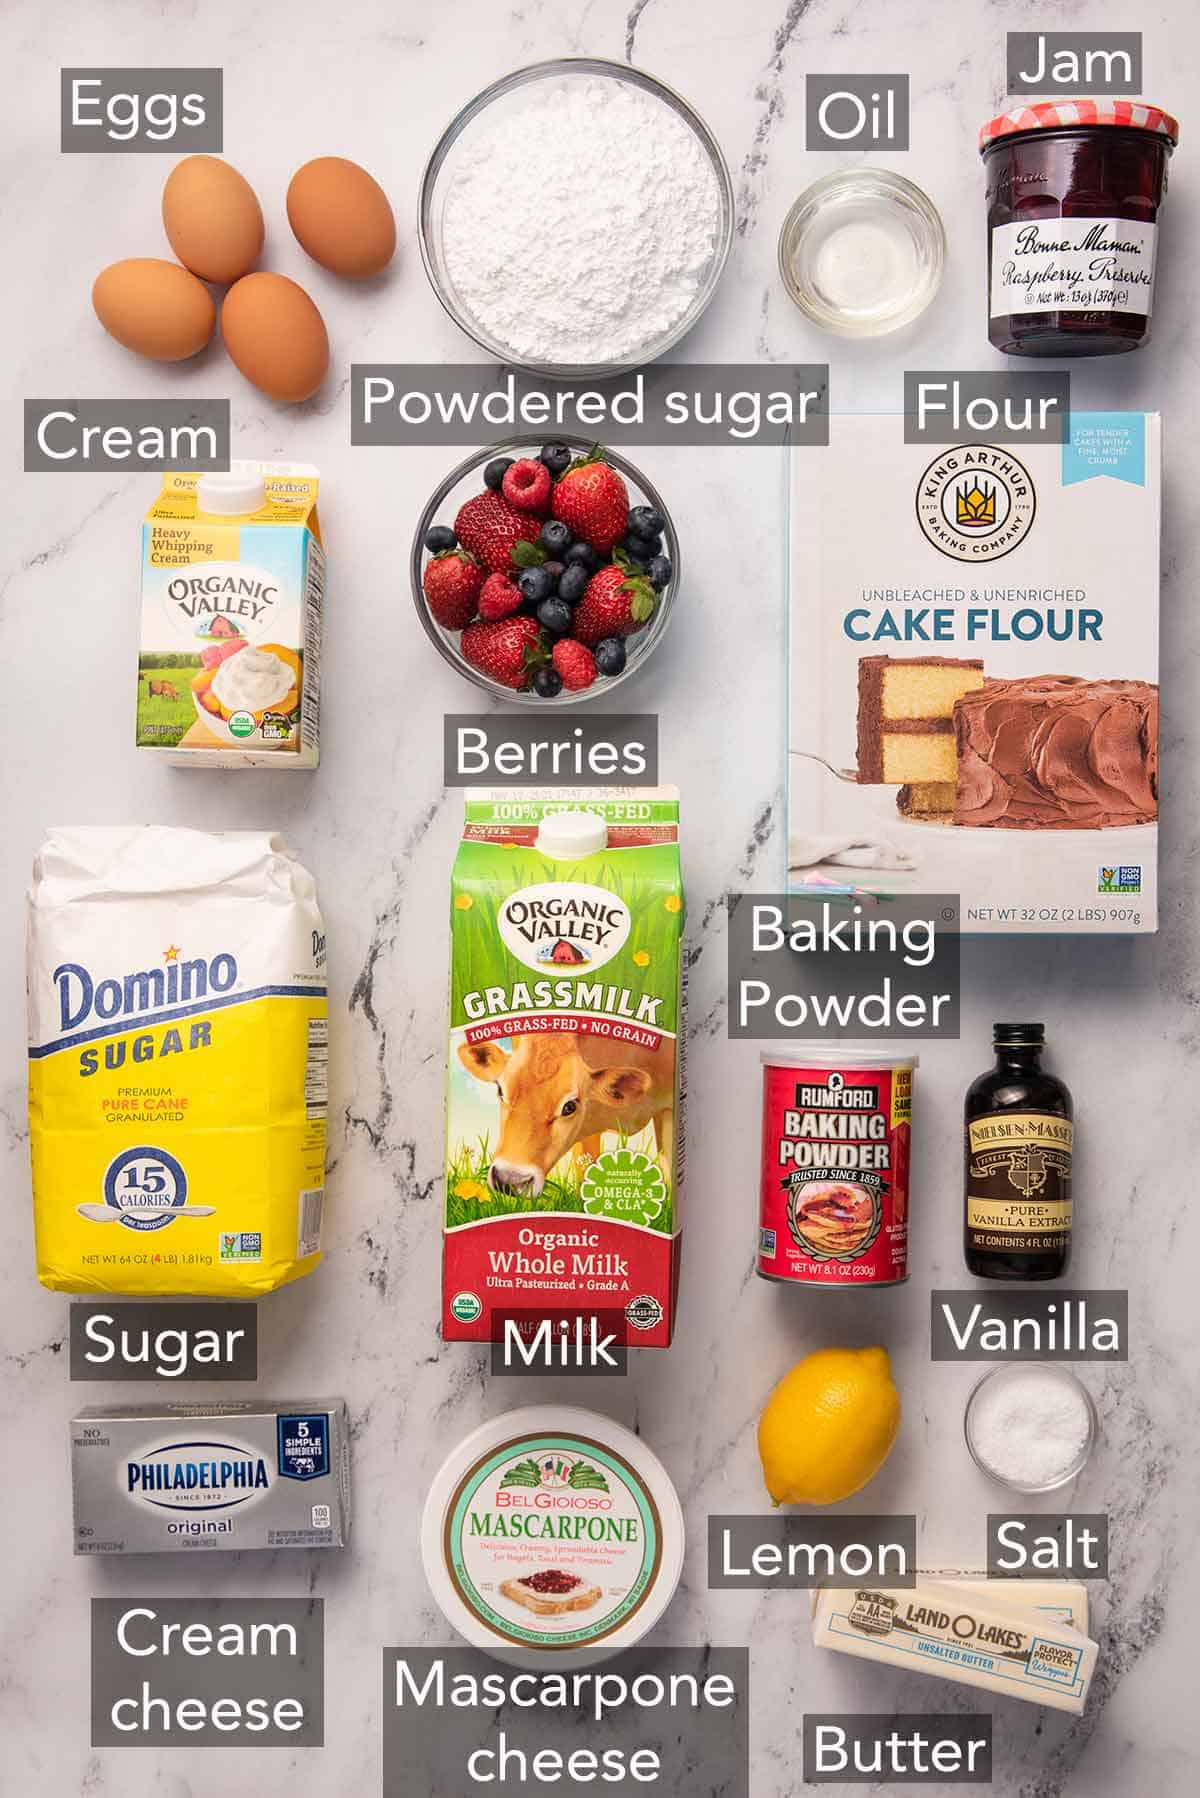
Here are the main ingredients that make this recipe unique and delicious! You can find the full list of ingredients in the Chantilly Cake recipe card.
Cake Flour — fine cake flour gives the cake the most amazing, delicate, and airy crumb. This is because cake flour has a lower protein content and is more finely milled than all-purpose flour. I use King Arthur brand. If you use Swans Down, weigh it or use 3¾ cups (it weighs less than King Arthur brand). If you don’t have cake flour, see my easy tutorial for how to make a cake flour substitute!
Butter and Oil — I use two types of fat for the cake layers. Butter lends flavor, and vegetable oil adds softness. Since this cake is refrigerated and served chilled, the liquid fat (vegetable oil) helps to keep the cake tender when cold.
Berry filling — for the sweet-tart berry filling, you need your favorite seedless berry jam, water, a mix of fresh berries, lemon juice, and zest. You can strain your jam by pressing it through a fine mesh sieve; just be sure to measure it after straining so you have enough.
Chantilly cream frosting — mascarpone cheese, cream cheese, powdered sugar, cold heavy whipping cream, and good vanilla extract make the velvety Chantilly frosting. The mascarpone and cream cheese are important as they act as stabilizers, making the frosting more sturdy than plain whipped cream.
Chantilly Cake Recipe
Equipment
- Mixer
- Parchment paper
- 9-inch round cake pan
Ingredients
For the Vanilla Cake:
- 3½ cups unbleached cake flour (420g)
- 2½ teaspoons baking powder
- ½ teaspoon salt
- 1 cup unsalted butter softened (227g)
- 2 cups granulated sugar (400g)
- 4 large eggs room temperature
- 1 tablespoon vanilla extract
- 3 tablespoons vegetable oil (45mL)
- 1 cup whole milk room temperature (240mL)
For the Berry Filling
- ½ cup seedless berry jam (150g)
- 2 tablespoons water
- 8 ounces fresh strawberries (225g)
- 4 ounces fresh raspberries (113g)
- 4 ounces fresh blueberries (113g)
- Juice and zest of 1 lemon
For the Chantilly Cream:
- 2 (8-ounce/227g) containers mascarpone cheese room temperature
- 1 (8-ounce/227g) block cream cheese room temperature
- 3 cups powdered sugar sifted (360g)
- 2 cups cold heavy whipping cream (480mL)
- 1½ teaspoons vanilla extract
Instructions
For the Cake:
- Preheat the oven to 350F. Lightly grease two (9-inch) round cake pans with baking spray with flour. Line the bottoms with parchment paper and wrap with baking strips.
- In a large bowl, sift together the cake flour and baking powder. Whisk in the salt.
- In a large mixing bowl or the bowl of a stand mixer using the paddle attachment, beat the butter on medium speed until creamy, about 1 minute. Add the sugar and beat until light and fluffy, about 4 minutes. Add the eggs, beating each well before adding the next. Scrape down the sides and bottom of the bowl and beat in the vanilla.
- While mixing on low speed, add one-third of the flour mixture and mix just until combined. Add the oil and half of the milk. Mix just until combined. Repeat with the remaining flour and milk, scraping down the bowl between additions or as needed. Divide the batter between the cake pans, and smooth the top with an offset spatula.
- Bake for 40 to 45 minutes or until the tops are golden brown and the sides start to pull away from the pan. Let cool in the pans for 20 minutes. Remove and cool completely on a wire rack.
For the Berry Filling:
- Place the jam and water in a glass measuring cup and microwave on high for 15 to 30 seconds or until warmed. Stir until combined.
- Hull and thinly slice the strawberries. Place them in a bowl with the raspberries and blueberries. Toss with the lemon zest and juice.
For the Chantilly Cream:
- In a large bowl or the bowl of a stand mixer using the paddle attachment, combine the mascarpone and cream cheese. Beat on medium speed until smooth and creamy, about 30 seconds. Add the powdered sugar a few spoonfuls at a time, beating on low speed until combined. Once fully incorporated, scrape down the bowl and increase speed to medium and beat until fluffy, about 30 seconds.
- In another large mixing bowl, beat the cream and vanilla on medium speed until stiff peaks form. Fold the whipped cream into the mascarpone mixture.
For Assembly:
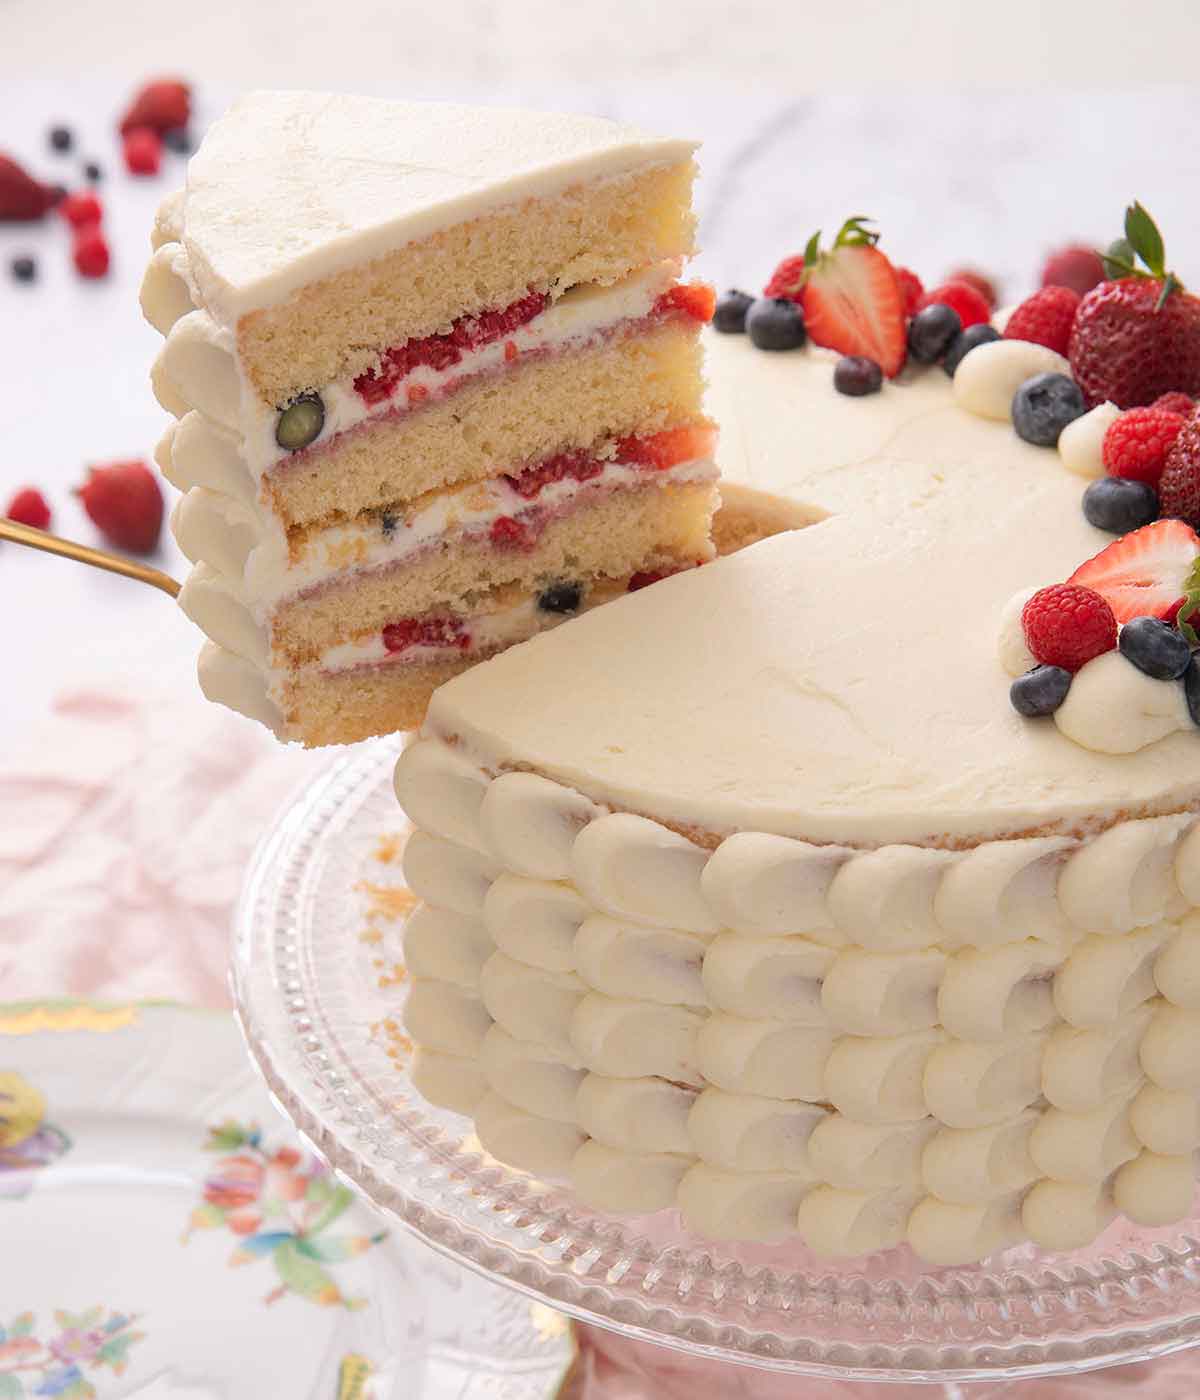
- Carefully cut each cake layer in half, horizontally, creating 4 thin round cake layers.
- Place one layer, cut-side up on a cake plate. Spread one-third of the berry jam mixture on the cake in a very thin layer. Top with about 3/4 cup of Chantilly Cream. Sprinkle one-third of the fresh berries over the cream. Top with another cake layer, and gently press down. Repeat the layers.
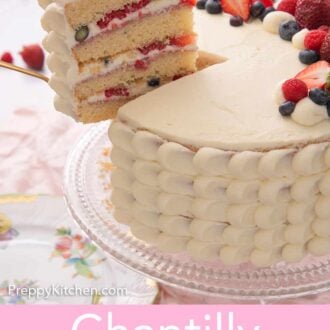
- Thinly spread about 1 cup Chantilly Cream over the top and sides of the cake. Place the remaining cream in a piping bag and decorate as desired. Garnish with more fresh berries. Refrigerate the cake for at least 2 hours before serving.
Notes
- Measure the flour correctly: Adding too much flour to the recipe will make the Chantilly cake dense and dry. The best way to measure flour is by using a scale. If you don’t have a scale, fluff your flour before sprinkling it into your measuring cup, and then use a knife to level it off.
- Don’t try to shorten the time it takes to cream the butter and sugar. The mixture is fully creamed when the color lightens, and the texture is fluffy. If the mixture looks like wet sand, it is not ready. When fully creamed, air is being incorporated and that helps make the cake light and fluffy.
- Add almond extract: You can add up to ½ teaspoon of almond extract to both the cake and Chantilly cream.
Nutrition
Have you tried this recipe? Tag me today!
Mention @preppykitchen and tag #preppykitchen!
How To Make Chantilly Cake
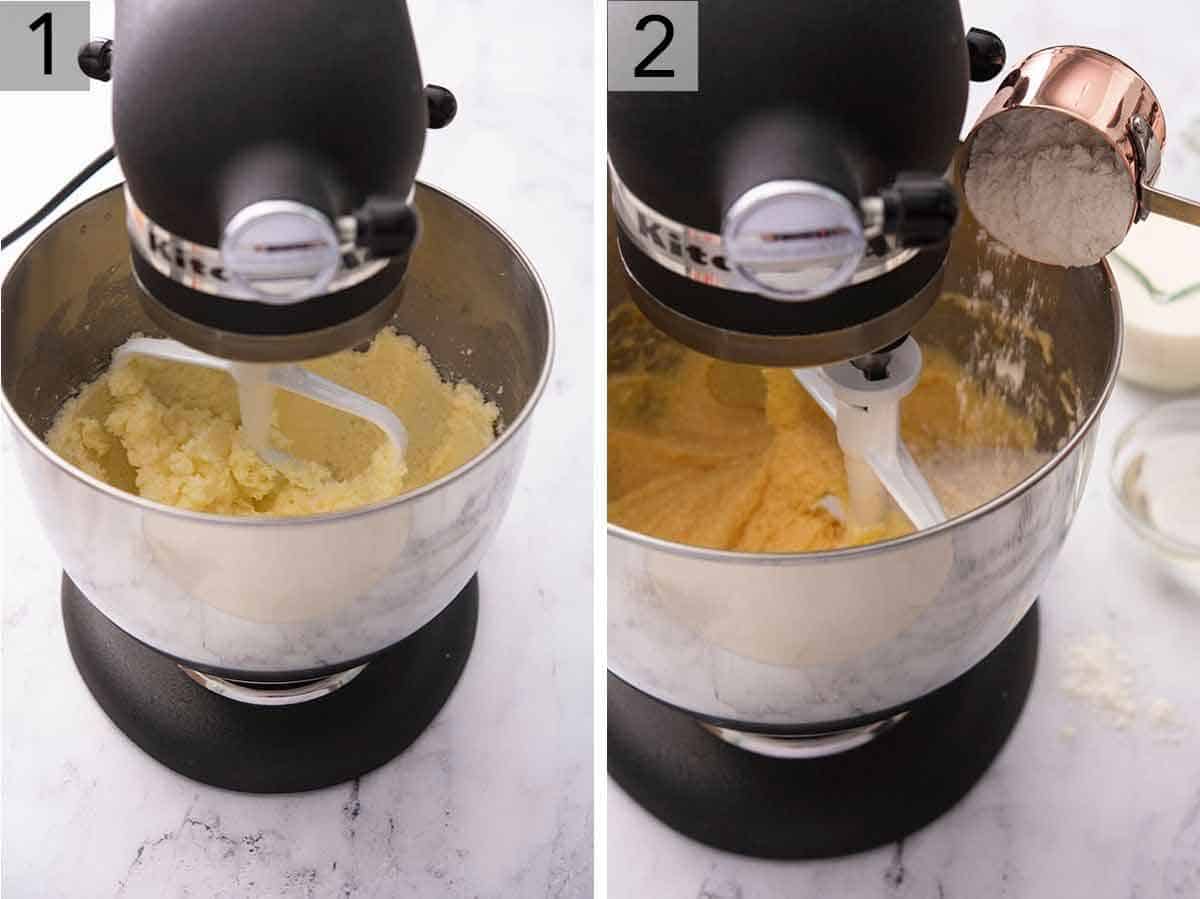
1. Sift together the flour and baking powder, add the salt, and set aside. In the bowl of a stand mixer using the paddle attachment or in a large bowl with a hand mixer, beat the butter on medium speed until creamy. Add the sugar and beat, then add the eggs.
2. Scrape down the sides of the bowl before adding the vanilla.
With the mixer on low speed, alternate adding the flour mixture, the oil, and the milk. Mix just until combined.
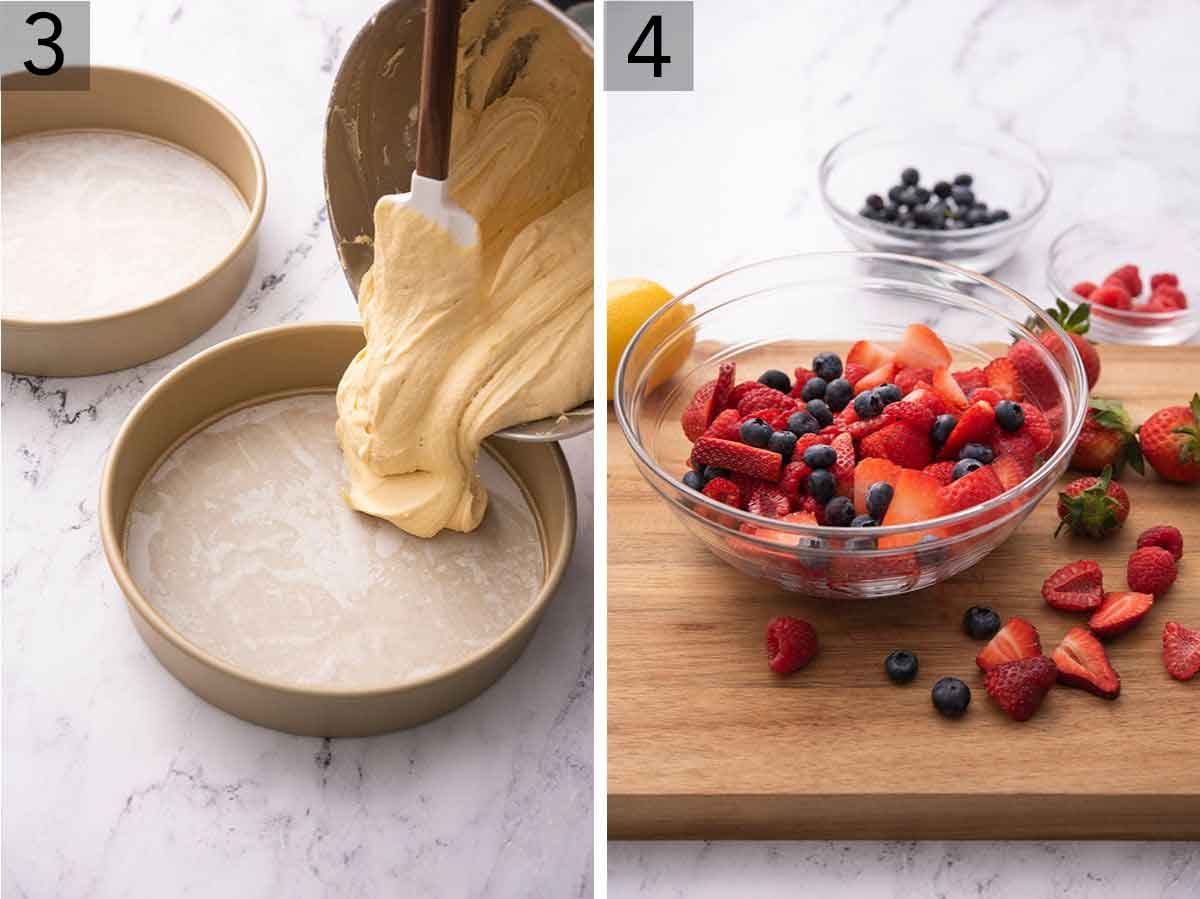
3. Divide the batter between two greased 9-inch cake pans lined with parchment paper. Wrap with baking strips. Bake at 350°F for 40 to 45 minutes, then let cool in the pans for 20 minutes. Remove to cool completely on a wire rack.
4. Microwave the jam and water in a glass measuring cup until warmed. Hull and thinly slice the strawberries before placing them in a bowl with raspberries and blueberries. Add the lemon zest and juice and toss.
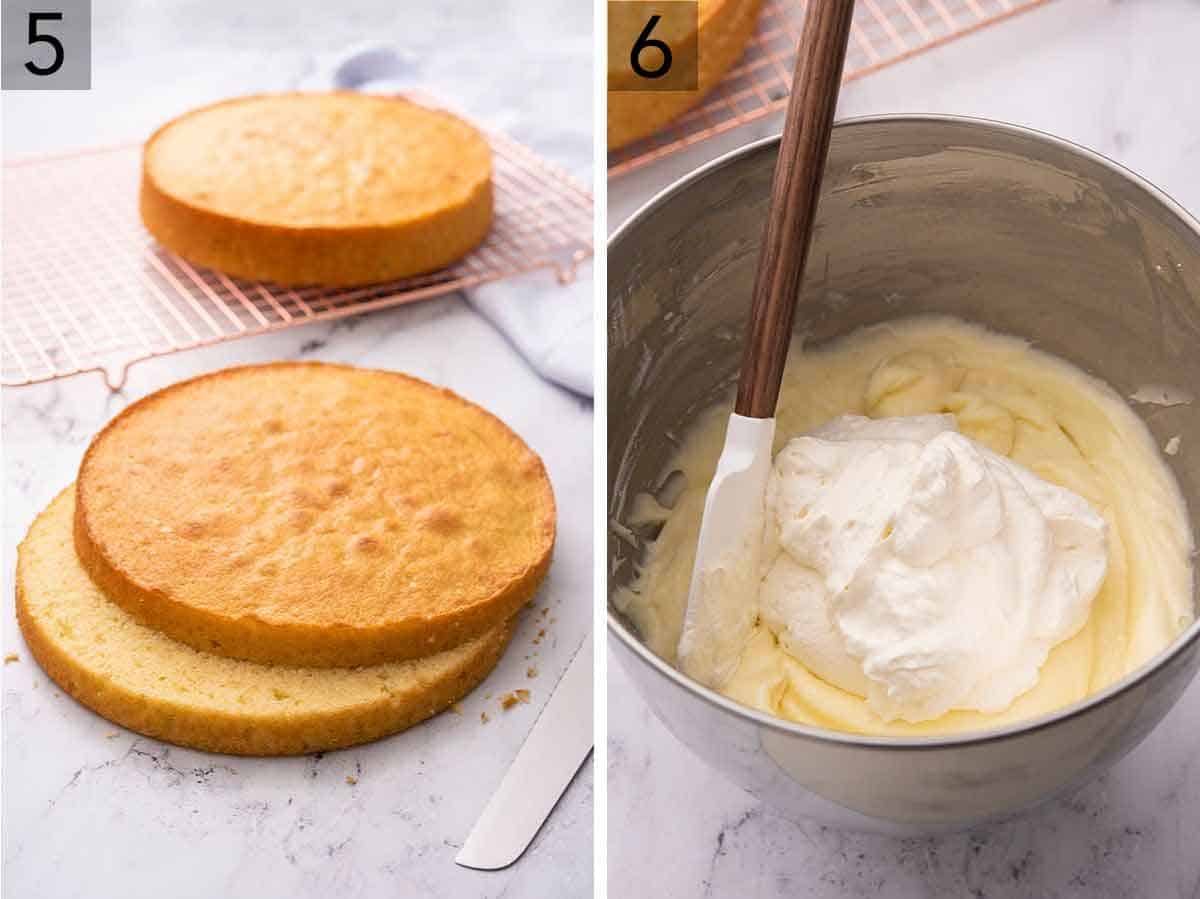
5. Cut each cake layer in half, horizontally, with a long serrated knife.
6. Add the mascarpone and cream cheese to a large bowl or the bowl of a stand mixer. Beat until smooth, then add the powdered sugar in increments and fully incorporate. In a separate large bowl, beat the cold heavy cream and vanilla extract until stiff peaks form. Fold it into the mascarpone mixture.

7. Place one of the vanilla cake layers on a cake plate and spread one-third of the jam mixture on the cake. Top with about ¾ cup of Chantilly cream.
8. Sprinkle a third of the fresh berries on top. Top with another cake layer, and gently press down. Repeat the process.
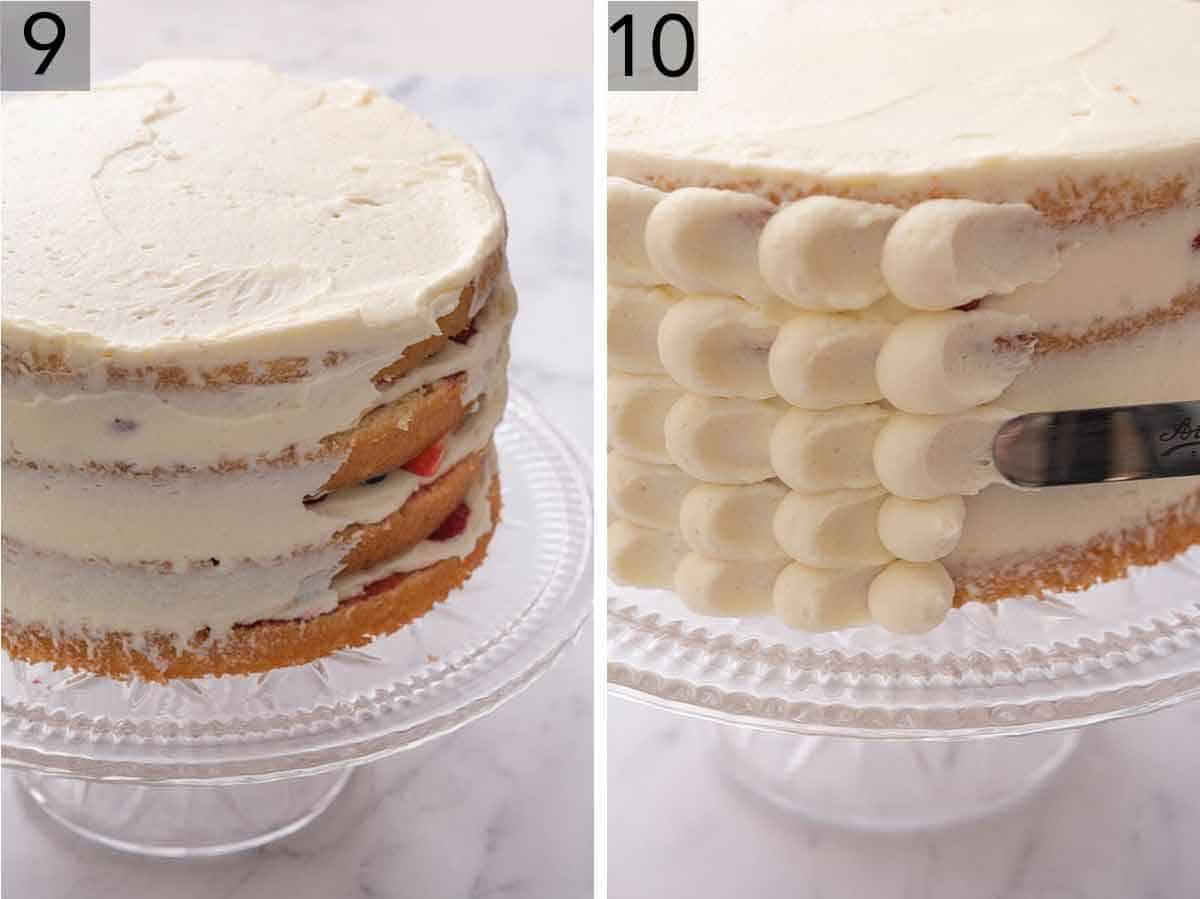
9. Spread 1 cup of frosting over the top and sides of the cake.
10. Place the rest of the cream in a piping bag and decorate the Chantilly cake as desired. Add more berries as a garnish to the top of the cake and chill for a minimum of 2 hours before serving.
What Is Chantilly Cake?
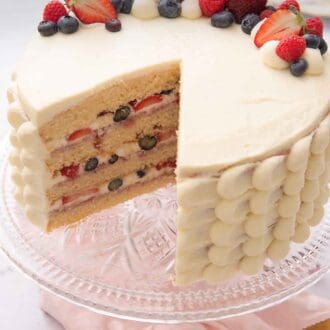
Chantilly cake is a layered vanilla cake with berry jam, a mix of fresh berries, and Chantilly cream frosting in each layer. The stabilized whipped cream roasting keeps this cake from being too sweet and is perfect if you love desserts made of fresh berries with whipped cream! This cake should be served chilled, making it wonderful for the spring and summer holidays like Easter, Mother’s Day, Memorial Day, or the Fourth of July.
Use Baking Strips For Flat And Tall Layers
You can use cake strips to help the moist Chantilly cake layers bake flat and even. Cake strips keep the outside edge of the pan cooler so that the entire cake rises at the same rate, which prevents a dome from forming. If you don’t want to purchase a set of baking strips, check out my post on how to bake flat cake layers to learn how to make your own DIY cake strips!
Are Whipped Cream And Chantilly Cream The Same?
Technically, they are not the same, although it can get confusing as the terms are often used interchangeably. Chantilly cream is often referred to as a sweetened whipped cream, typically made with powdered sugar and vanilla extract. In some traditional forms, the whipped cream is also stabilized with the addition of mascarpone cheese (though cream cheese is frequently used, too). The Chantilly cream for this cake has been stabilized so that it makes a good, sturdy frosting.
Regular whipped cream is simply heavy cream that has been whipped. In its simplest form, it does not contain stabilizers but can be sweetened, flavored, or left plain. It is a great garnish or topping, but it is less suitable as a frosting unless it is stabilized.
Can I Color The Frosting?
Yes, you can add gel food coloring to the Chantilly cream frosting. I recommend dissolving it into the cream before whipping or beating it into the mascarpone mixture.
Troubleshooting A Runny Frosting
A common problem with Chantilly cream is it can turn out runny, often due to the cream not being cold enough. The heavy cream should be cold when you whip it, and it must be whipped to stiff peaks so it holds its structure well.
- If you have a warm kitchen, pop the mixing bowl in the fridge for about 10 minutes before whipping the cream, and keep the whipped cream in the fridge until ready to fold it into the mascarpone mixture.
- If the frosting loses its stiffness once the whipped cream is folded in, cover it with plastic wrap and chill the frosting with the whisk for 15 minutes, then whip it on medium speed until the mixture firms up again.
- Try adding lemon curd or fresh lemon juice! The acid from the lemon will stiffen the cream mixture a bit without causing it to break. Bonus: It’s delicious and complements the fresh lemon in the recipe. Whisk in ¼ to ½ a cup of lemon curd or 3 to 4 tablespoons of lemon juice.
How To Store
This layer cake will keep well loosely covered or in an airtight container in the refrigerator for up to 4 days.
Pro Tips For Making This Recipe
- Chill the cake well before serving. This will give time for the Chantilly frosting to set up and for the cake to absorb some of the juices from the fruit.
- Use room temperature ingredients: All the refrigerated ingredients (with the exception of the heavy cream, which needs to be cold) should be set out in advance to come to room temperature before you start baking.
Frequently Asked Questions
You can use any kind of fresh berry or mixture of berries you like. Just be sure to stick with fresh berries. While you can often swap fresh for frozen berries, they will not work in this recipe. As the frozen berries thaw, they become too soft and release a lot of liquid, which would bleed into the delicate cake. This recipe also works well with other fresh fruit like sliced peaches or plums!
You can use any flavor of berry jam you like! Purchase seedless or use homemade jam and press it through a sieve to remove the seeds. Try my raspberry jam or strawberry jam recipes if you want to go the homemade route.
Cream cheese and Greek yogurt are often used in place of mascarpone cheese. For this recipe, I recommend swapping the mascarpone for more cream cheese but keep in mind that the frosting might be a little tangier than if you used mascarpone.
If you’ve tried this berry Chantilly cake recipe, then don’t forget to rate it and let me know how you got on in the comments below. I love hearing from you!


