
This post may contain affiliate links. Please read our disclosure policy.
Lining a cake pan is the super easy insurance policy that separates a cake that releases cleanly from one that tears in half on its way to the cooling rack. Here’s how to do it for round, square, rectangular, and loaf pans, plus how to cut a parchment circle in 30 seconds without a template.
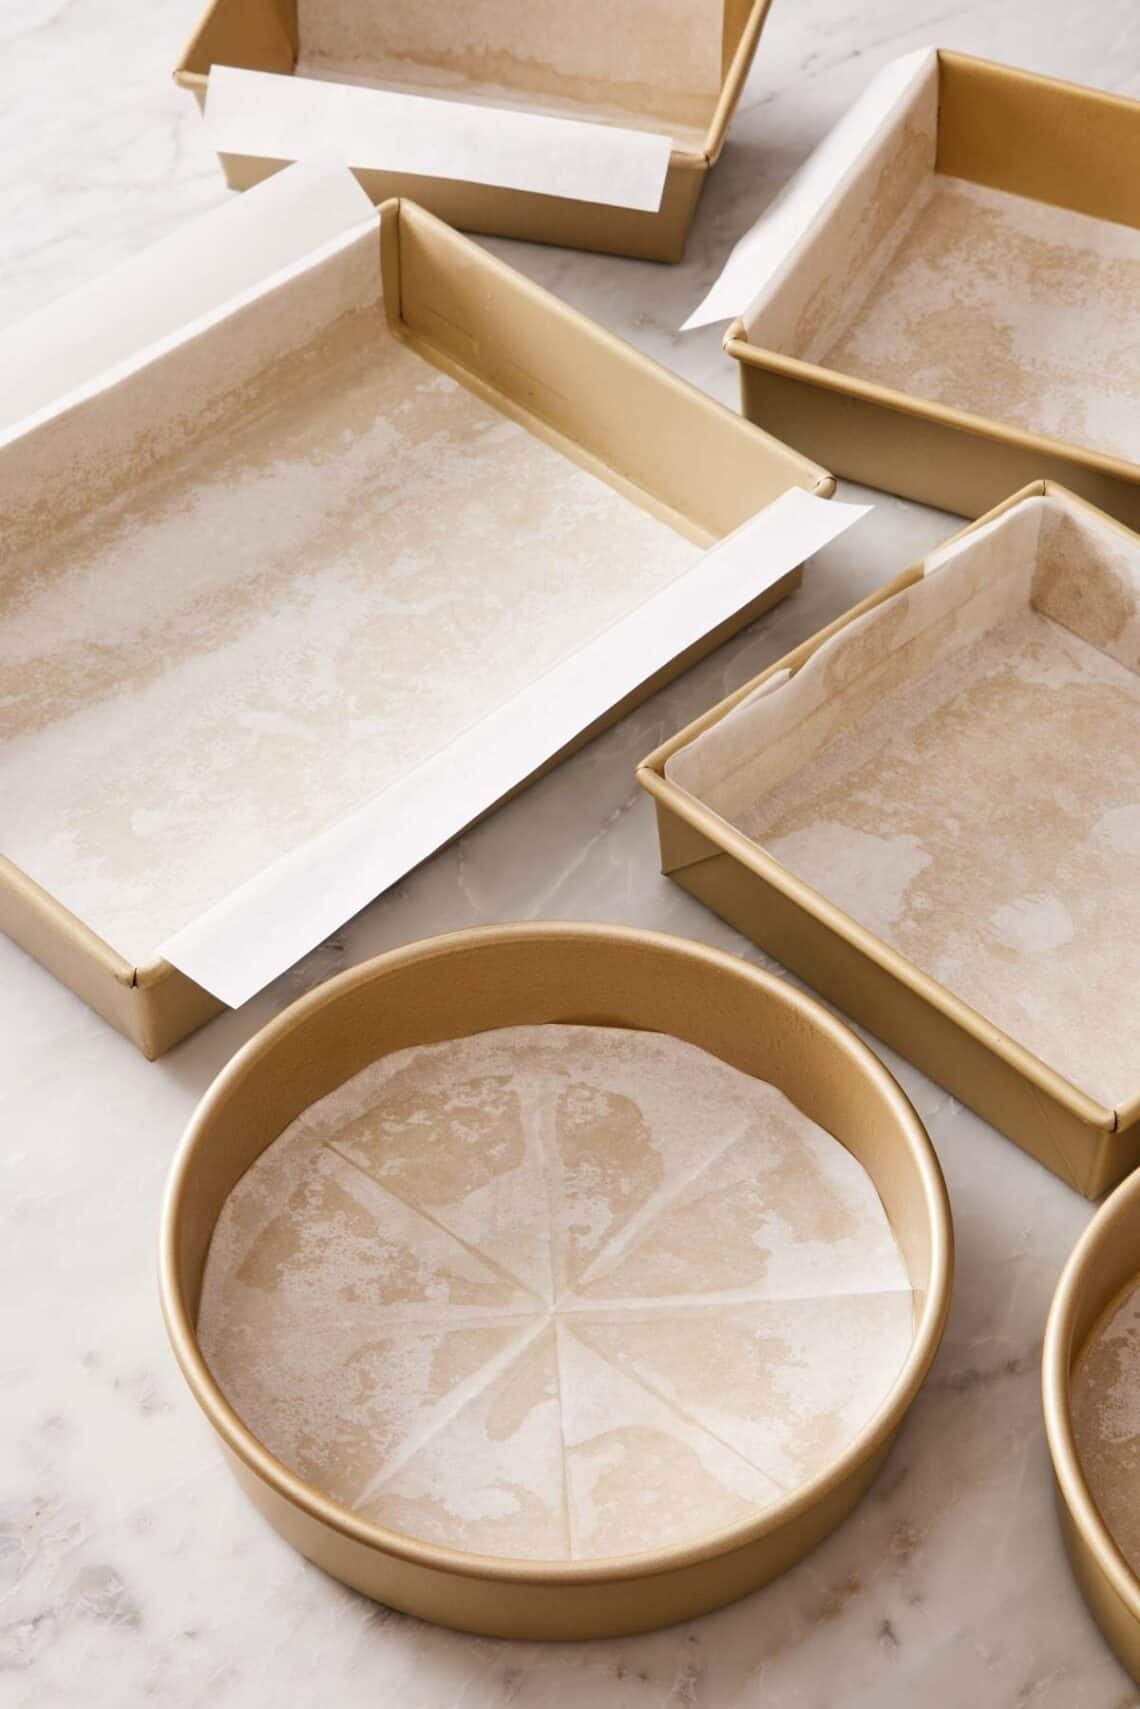
If you have baked any of my cake recipes, you likely notice they almost all start with lining the pan. This is because I have torn cakes in half more than once, even when I properly greased the pan, cooled it for just long enough, and ran a knife around the edge to release it before inverting. The center stayed glued to the pan while the rest of the cake came out. The fix is one super-fast extra step: a circle of parchment paper on the bottom of the pan before the batter goes in. That’s it!
This simple step can make the difference between a beautiful three-layer cake and a salvage operation. Greasing alone will help most of the cake release, but the center, where the batter is thickest and takes the longest to form a firmer crust, often sticks. A parchment liner removes that risk completely. The cake bakes against paper, the paper peels off after cooling, and you get a perfectly clean release every time.
This guide covers the four cake pan shapes you will most commonly use: round, square, rectangular, and loaf. For each, I’ll walk through the best methods I actually use, including a fold-and-cut technique for round parchment circles, the sling method vs fully lining a pan, and how you line a springform pan for a water bath. I’ll also cover the questions readers ask most often: do you grease and line, which side of the parchment goes up, can you reuse it, and what pans don’t need to be lined.
“Since I started making your cake recipe, I don’t ever skip lining the bottom of my pans! This was a game changer. I haven’t had a single cake stick since, and that is SUCH a relief.”
Lilian
Why Bother Lining A Cake Pan?
Greasing the pan with butter or non-stick spray creates a thin, slick layer that helps most of the cake release. Adding flour over the grease (the “butter and flour” method) gives you a second layer of release insurance—the flour gives the batter a surface to attach to instead of the pan itself, helping it cleanly release. This is why I like using baking spray, which is a nonstick oil spray that has flour already in it. This greasing and flouring method works fine for sturdy cakes like pound cake or bundt cake, where the structure is dense enough to pull cleanly off the pan.
Where greasing alone fails is the center of round, square, and rectangular cake pans, especially with delicate, moist cakes—vanilla cakes, chocolate cakes, sponge cakes, anything with a tender crumb. The center of the pan is where the batter is the thickest, takes the longest to bake through, and can stay stickier since the crust doesn’t firm up as much as the outer edges. When you invert the pan, the edges release first because they’re firmer or were loosened with a knife; the center can still be stuck, tearing as the rest of the cake pulls away.
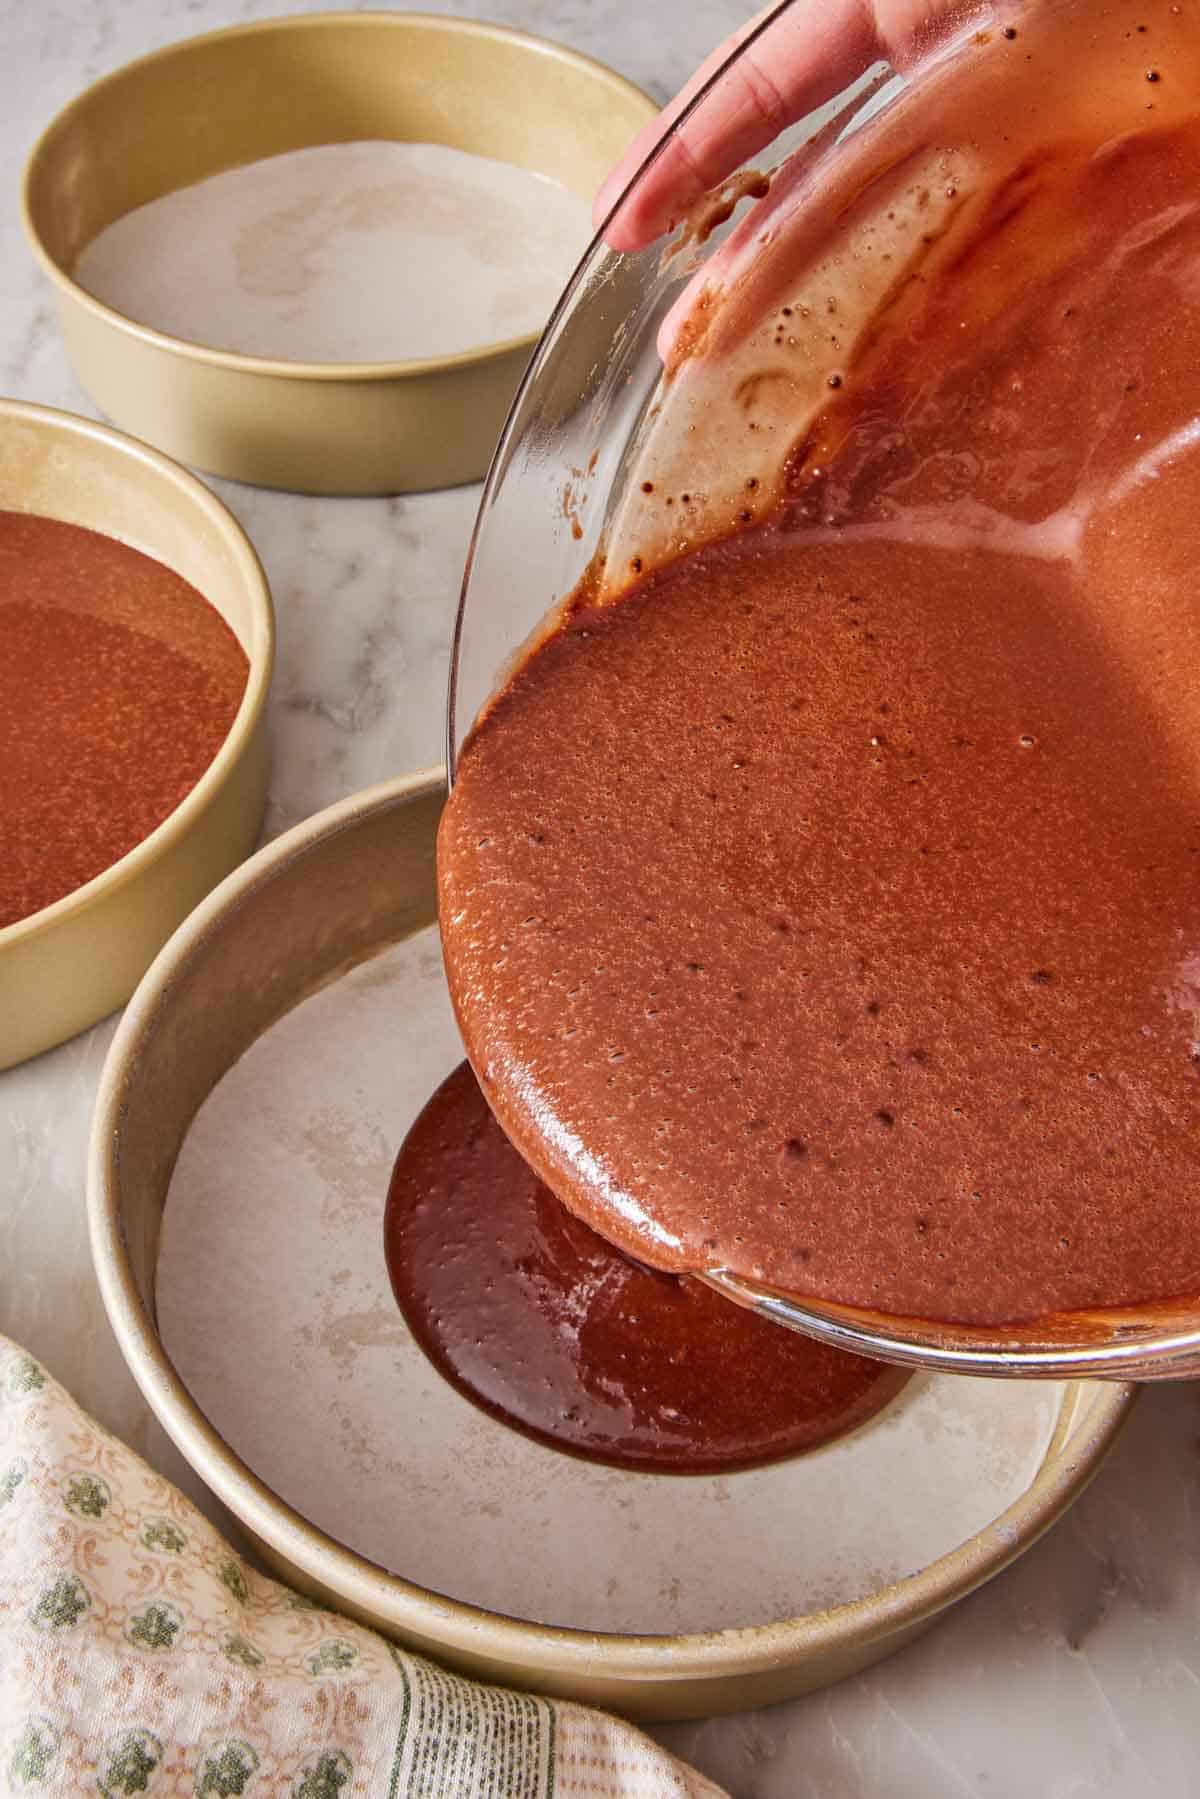
A parchment circle on the bottom of the pan eliminates the cake center’s bond with the pan entirely. The cake bakes against paper instead of metal. When you invert, the cake comes out as a complete, intact disc with a perfectly smooth bottom. You simply peel the parchment off in one smooth motion, and the cake is ready to frost. This is why almost every cake recipe on my site—like my vanilla cake, chocolate cake, lemon cake, and strawberry cake—calls for parchment lining. It’s a really important step in cake baking for guaranteeing a clean release.
Parchment Paper Vs. Wax Paper Vs. Foil
Use parchment paper for lining the inside of your cake pans, not the others. Here’s the difference between each and why it matters:
Parchment paper is a baking paper coated with silicone, which makes it heat-resistant up to about 425°F (sometimes 450°F depending on the brand) and naturally non-stick. It’s designed for baking and can go directly into a hot oven without smoking, burning, or transferring residue to your food. This is what you want for a clean release that also doesn’t affect the taste or texture of your baked goods. The slickness of parchment varies by brand. You may find a roll in the grocery store that feels rougher than a precut sheet from a bakery supplier. As long as it’s coated or mentions “nonstick,” they should both work well!
Wax paper is paper coated with a thin layer of paraffin wax. It is not heat-resistant. Putting wax paper in a hot oven can cause the wax to melt, smoke, and in some cases, ignite. The wax can also transfer onto your cake, leaving an unpleasant film. Wax paper is fine for cold-prep tasks (rolling out cookie dough on the counter, wrapping sandwiches), separating stacked layers for storage, or even for some warm-temperature applications like setting melted chocolate, but never for high-temperature uses like baking. If a recipe calls for parchment paper and you only have wax paper, the right move is to skip the lining and just grease and flour the pan thoroughly, instead of substituting it for wax paper.
Aluminum foil can technically line a pan, but it has two problems: foil isn’t naturally non-stick, so the cake can easily stick to the foil, and it’s reactive. The aluminum can react with acid and salt in your food, leaving them with a metallic taste or turning parts grey. Foil also tends to leave ridge marks on the bottom of cakes where it folds against the pan walls. Use foil for lining baking sheets with savory items when you want to minimize clean up (lasagna, sticky chicken wings), or even some baked goods when specifically called for, but don’t use it for delicate cakes.
If you absolutely cannot find parchment paper or don’t want to buy any, the right backup is to grease and flour the pan thoroughly—not to substitute wax paper or unlined foil.
Round Cake Pans (The Fold-And-Cut Method)
This is the most common cake pan shape for layer cakes and is most prone to sticking since the cakes are typically inverted out of the pan (not served in it). But getting a circle requires cutting your own parchment or ordering pre-cut liners. You can trace the pan onto parchment, cut around the line with scissors, and fit the cut circle into the pan—that whole process takes a couple of minutes and produces an even circle, but it takes more time and requires precise cutting. Here’s a faster way:
The fold-and-cut method:
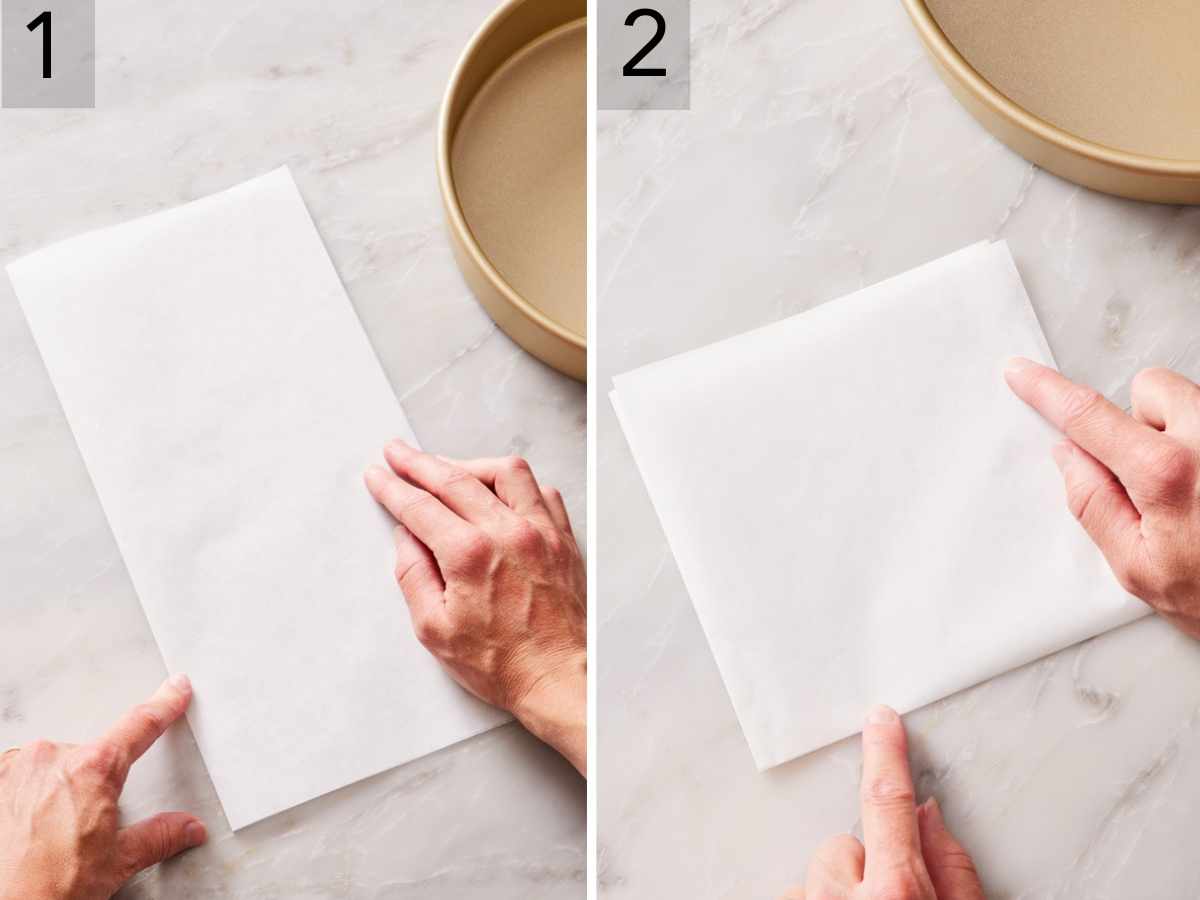
1. Tear off a square of parchment paper larger than the diameter of your pan. For a 9-inch pan, tear off about a 10-inch square. You don’t have to measure it precisely, just make sure it’s bigger than the pan.
2. Fold the square in half, then in half again, so you have a smaller square that’s a quarter of the original size.
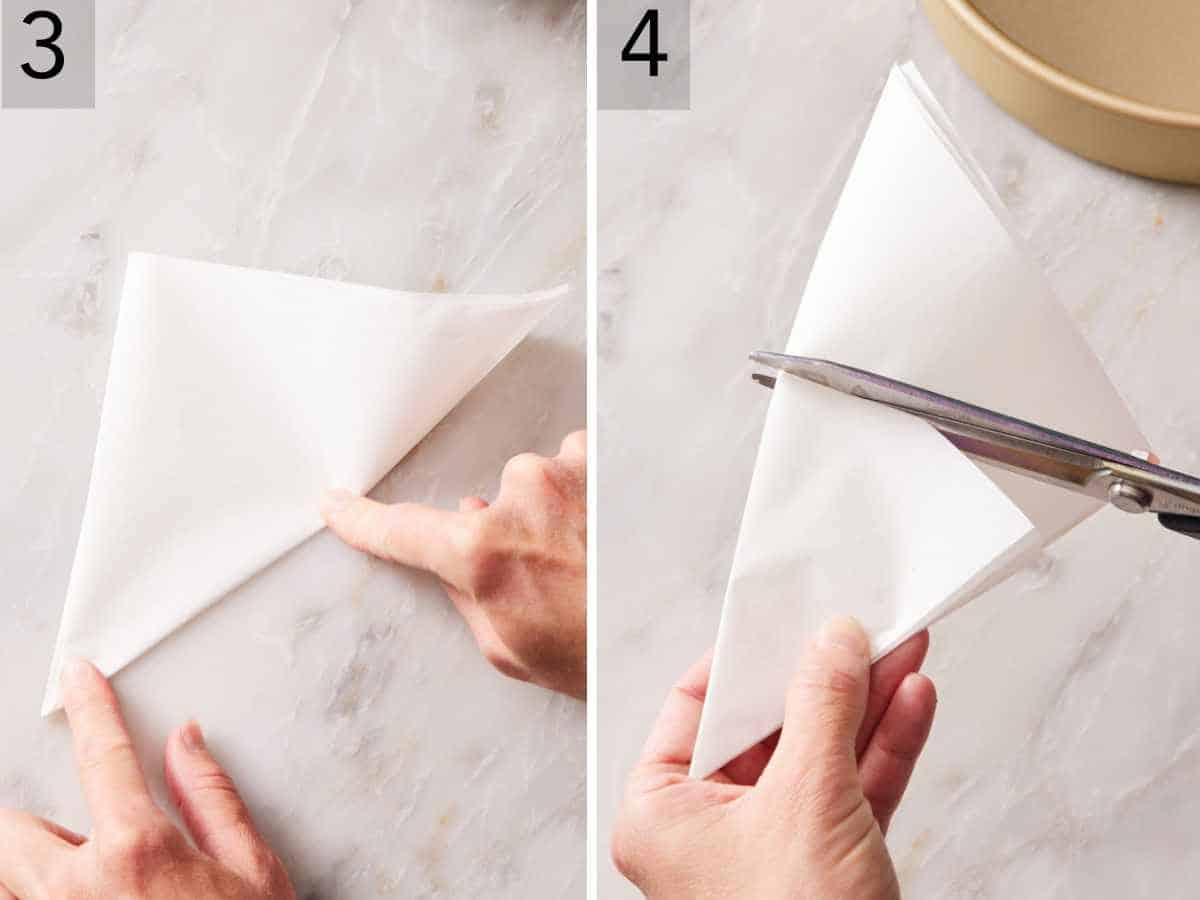
3. Fold the square diagonally to make a triangle, with the folded corner (the point) aimed at the center of where the original square was.
4. Hold the pointed tip of the wedge, and measure the radius of your pan, and mark that length from the center on your wedges. Or, place the point in the center of your pan with the wide end extending past the rim, and mark or pinch the parchment exactly where the inside of the rim meets the parchment.
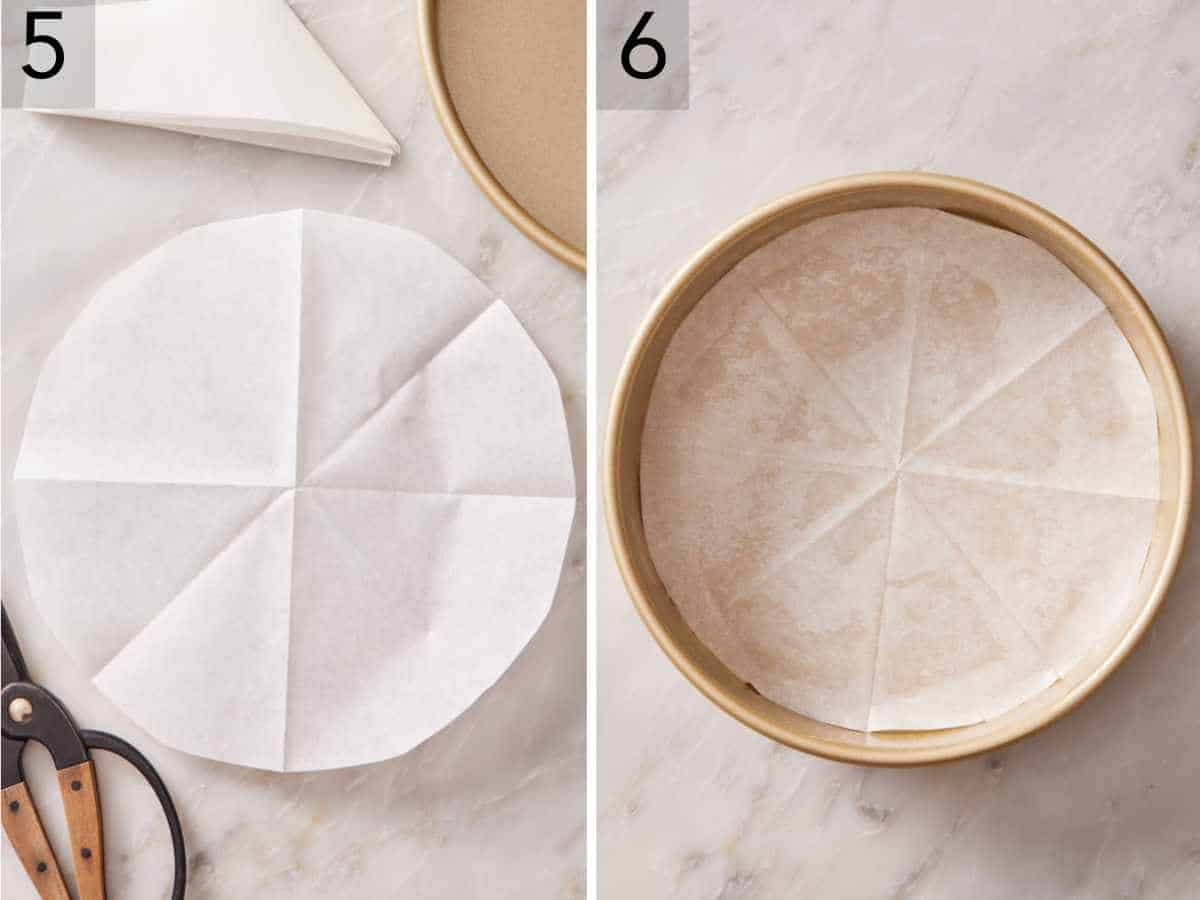
5. Cut across the parchment at that mark, using kitchen scissors, following a slight arch to roughly fit the curve of the pan (it’s okay if it isn’t exactly). Make sure you’re cutting across the wedge, from one long side to the other, not along its length.
6. Unfold the parchment. You now have a circle exactly the diameter of your pan! If needed, trim any points that want to fold up the side of the pan, making sure it fits only in the bottom.
The first time you do this, it might take a minute or two, but once you have it down, it takes about 30 seconds! The circle won’t be mathematically perfect—there might be a slight wobble in the curve—but it’ll be more than accurate enough to sit flat on the bottom of the pan, which is all that matters. A parchment circle that’s slightly smaller than the pan is also fine. One that’s slightly larger will buckle up the sides, which can leave a wrinkle impression on the bottom of the cake, so trim it if you have to.
How To Line The Pan Once The Circle Is Cut
1. Lightly grease the pan first (both the bottom and the sides). Use butter, non-stick baking spray, or a thin layer of vegetable oil. This isn’t the parchment substitute; it’s holding the parchment in place and greasing the sides where the parchment isn’t covering.
2. Drop the parchment circle into the bottom of the pan. It should sit flat (trim if not). Press the parchment into the bottom of the pan so it flattens out. Since you greased the pan first, the circle will stick lightly to the grease and stay put while you pour the batter.
3. Some bakers also grease the top of the parchment. This is optional. The silicone coating on parchment is naturally non-stick, so most cakes will release easily from a dry parchment surface. I skip this step on most cakes; if I’m baking something especially delicate (chiffon or sponge cake), I might give the parchment a light spritz of baking spray, but my recipe will say to do so if needed!
4. For the sides: if your recipe calls for it, dust the greased sides of the pan with a thin coating of flour (or cocoa powder for chocolate cakes—it disappears into the dark batter without leaving white streaks). Tilt and rotate the pan so flour evenly coats every greased surface, then tap out the excess.
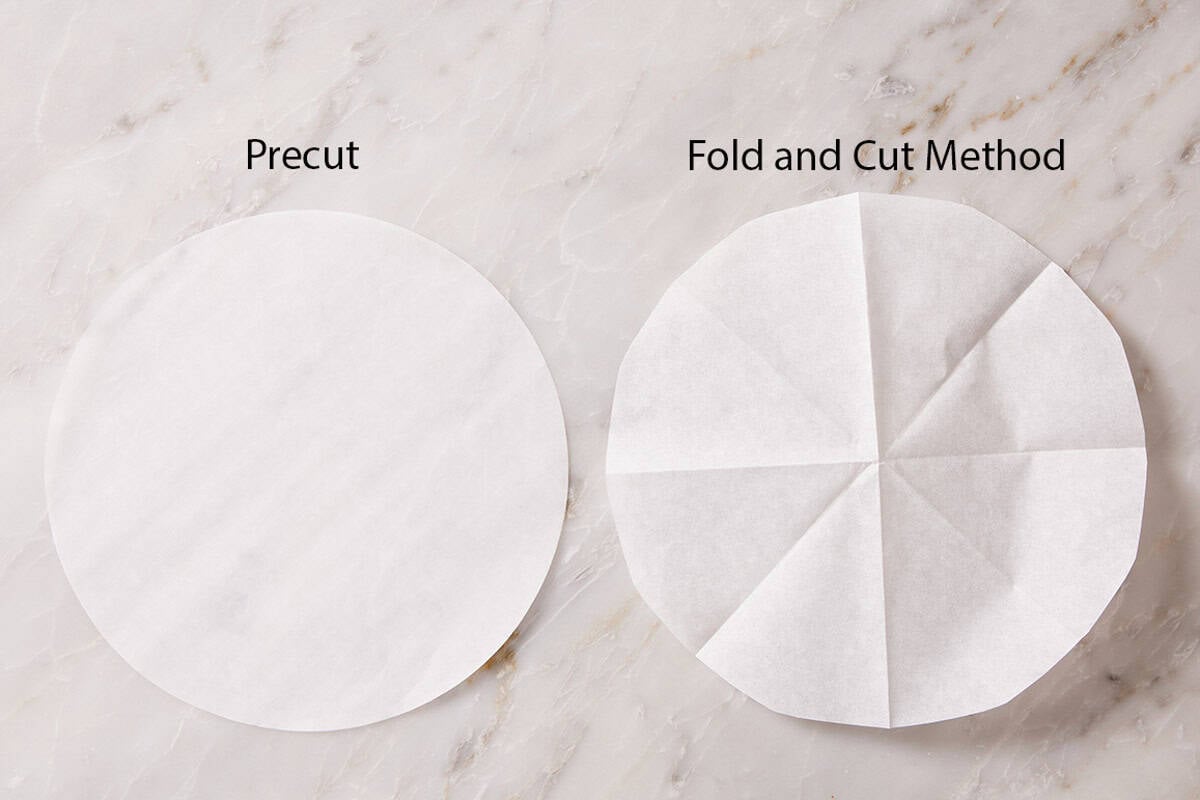
Pre-cut parchment rounds: are they worth it?
You can buy pre-cut parchment rounds in 6-, 8-, and 9-inch sizes at baking supply stores or online. They’re convenient if you bake the same pan size frequently. (I typically use precut rounds because I bake a lot of layer cakes!) For occasional baking, though, they’re not worth the cost or storage space.
Square And Rectangular Pans (The Sling Method)
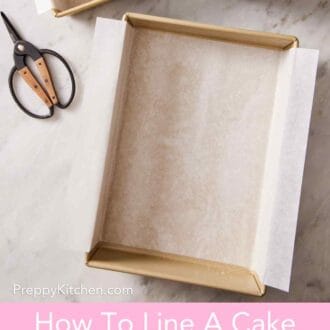
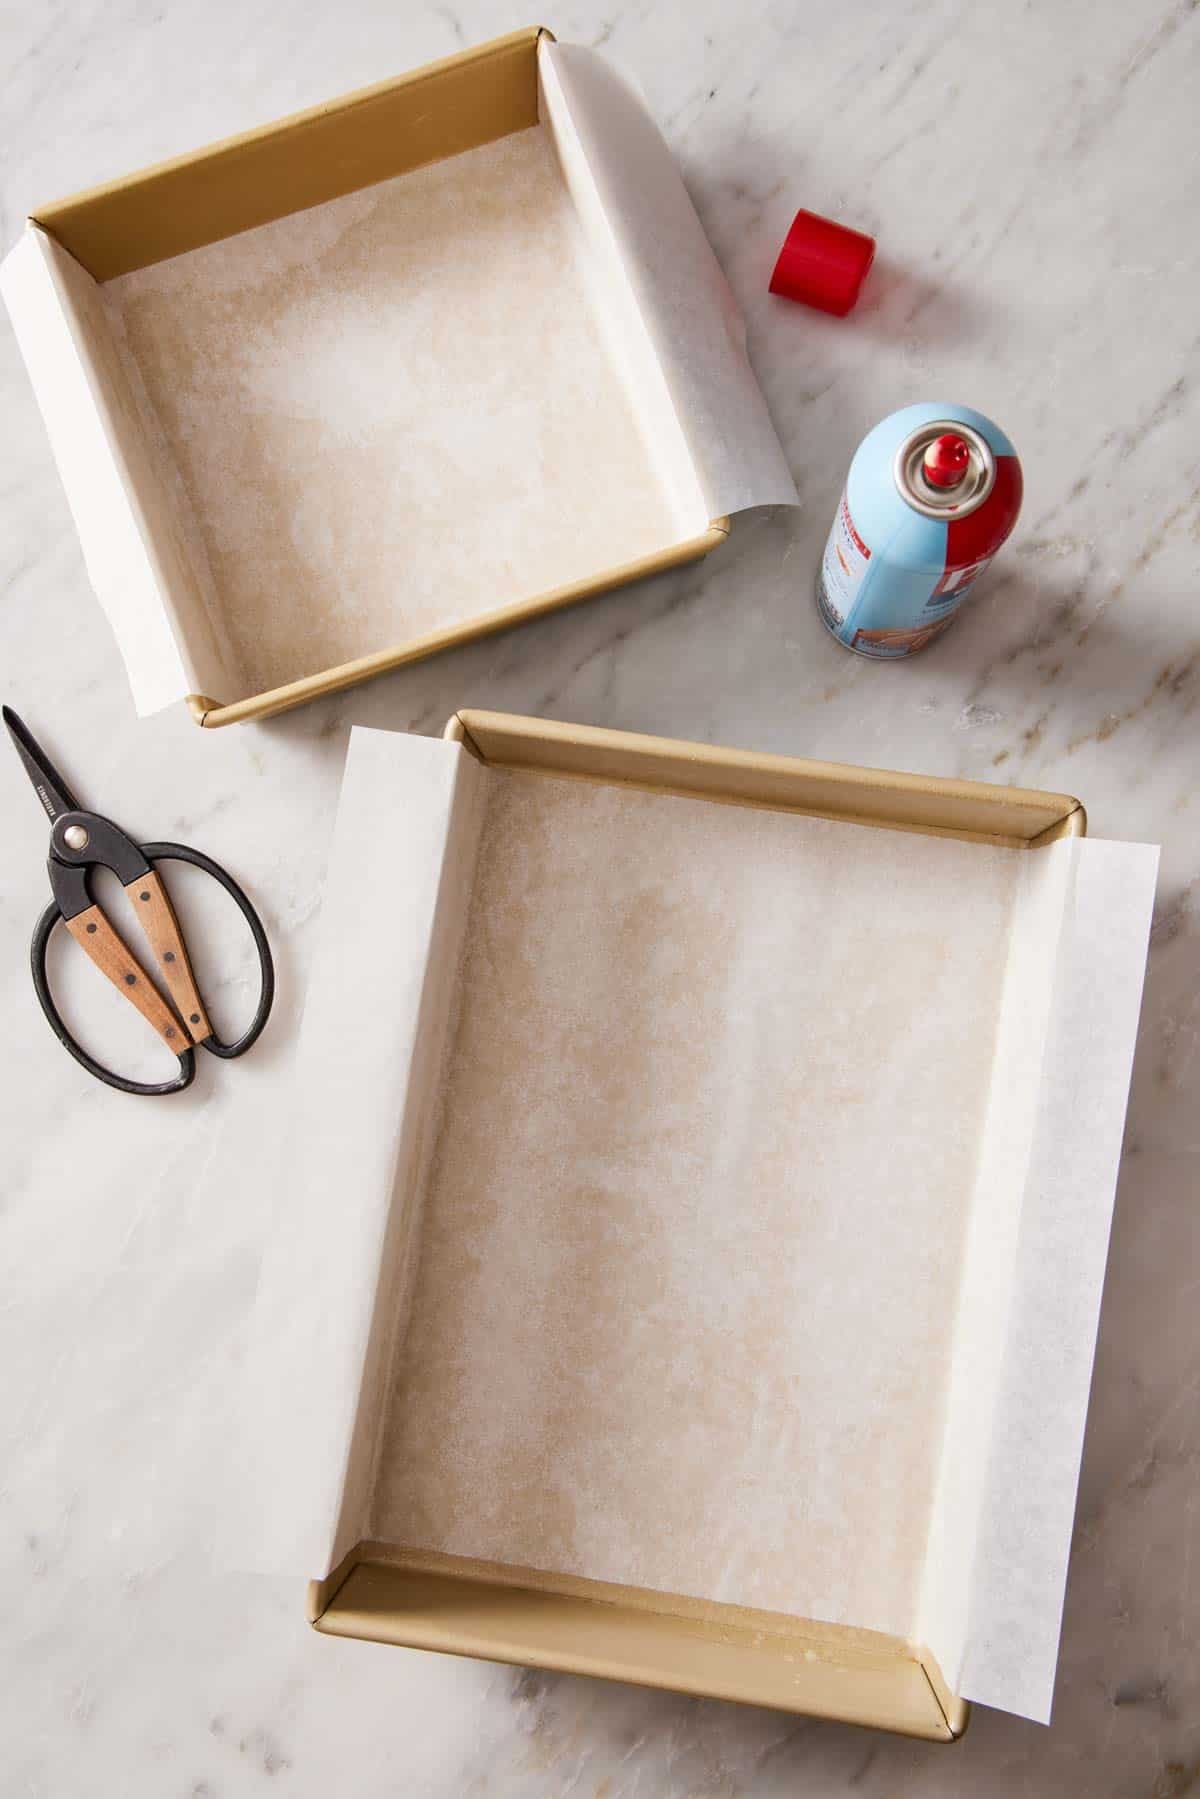
Square and rectangular pans—8×8 inches, 9×9 inches, and 9×13 inches—are lined differently from round pans. Instead of just covering the bottom, you create a “sling” that hangs over two sides of the pan and creates handles to lift the entire baked cake, brownie slab, or cookie bar slab out cleanly. This is best for larger sheet cakes or slab desserts that are too delicate to invert or have fillings or toppings that could get damaged that way.
The sling method:
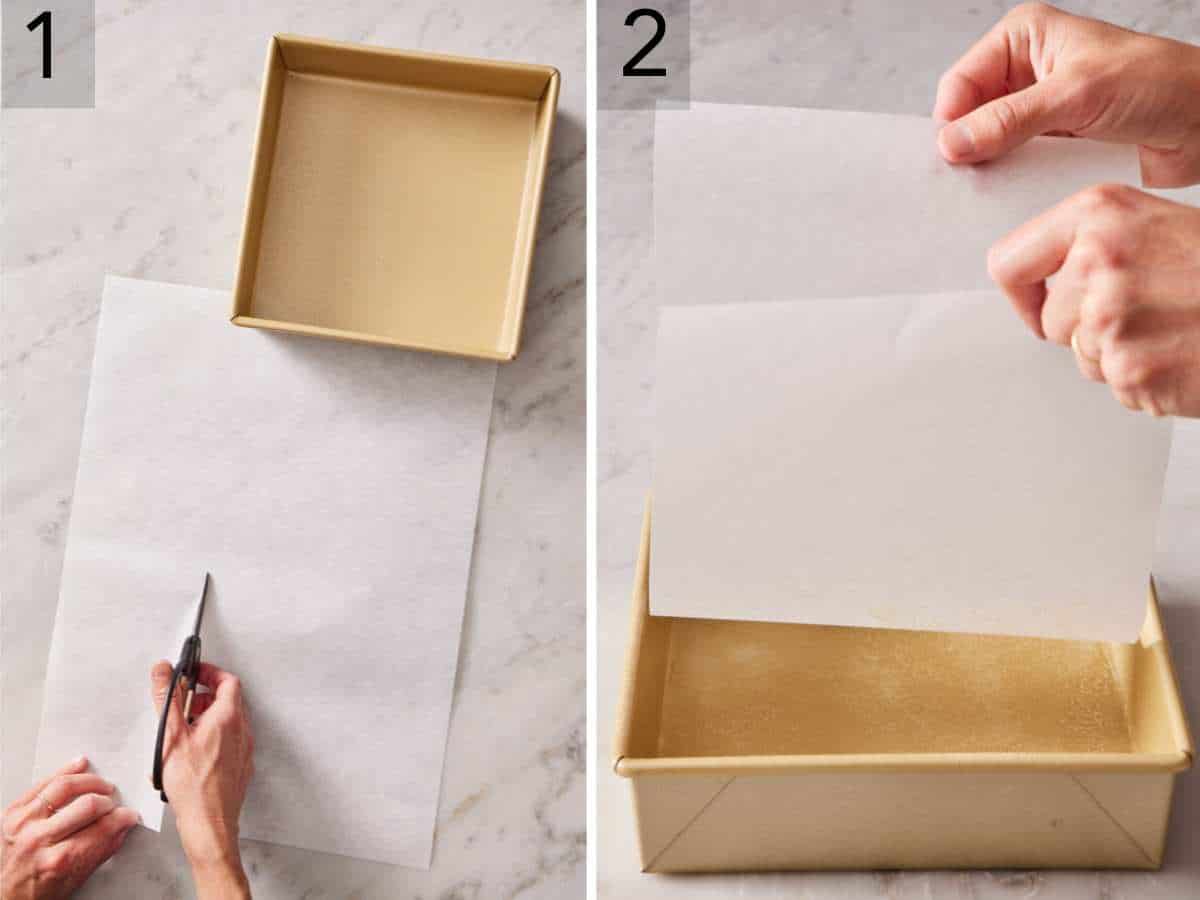
1. Tear off a strip of parchment that’s just narrower than the width of your pan and long enough to cover the bottom plus extend up two opposite sides with about 2 inches of overhang on each end. If you have a sheet of parchment paper, trim it to size. For a 9×13 pan, you want a strip about 12½ inches wide and 17 inches long.
2. Press the parchment strip into the greased pan, with the excess extending up two opposite sides (the long sides, if the pan is rectangular). The parchment should sit flush with the bottom and sides of the pan.
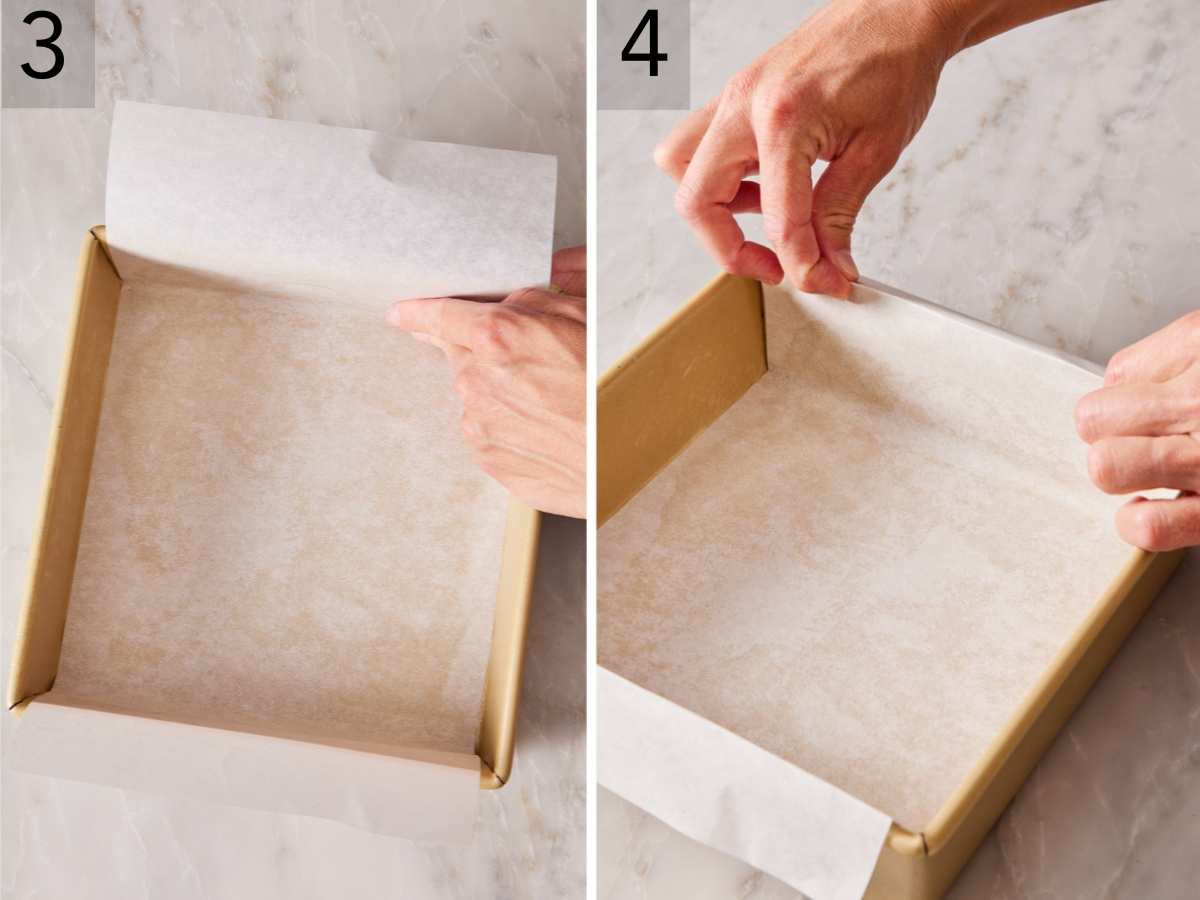
3. Smooth out any wrinkles by pressing the parchment on the bottom and into the corners. Wrinkles in the parchment will leave matching wrinkles in the bottom and sides of your baked cake, which can be invisible once baked.
4. Fold the excess overhang with the rim of the pan to help hold it in place. This also helps prevent any circulating air in the oven from blowing one of the ends onto your cake while baking. You can also attach metal binder clips to really secure the parchment, but it’s not totally necessary. For the two uncovered sides, the grease alone will ensure the cake’s release.
Why the sling matters
After baking and cooling, you can lift the cake out of the pan by pulling up on the parchment overhangs on either side. The cake comes out in one piece, sitting on a parchment surface — perfect for frosting, slicing, and serving without ever inverting it. This is especially valuable for sheet cakes (like my chocolate sheet cake), brownies, cookie bars, lemon bars, and any dessert you want to remove from the pan for decorating or serving.
Square And Rectangular Pans (Fully Lined)
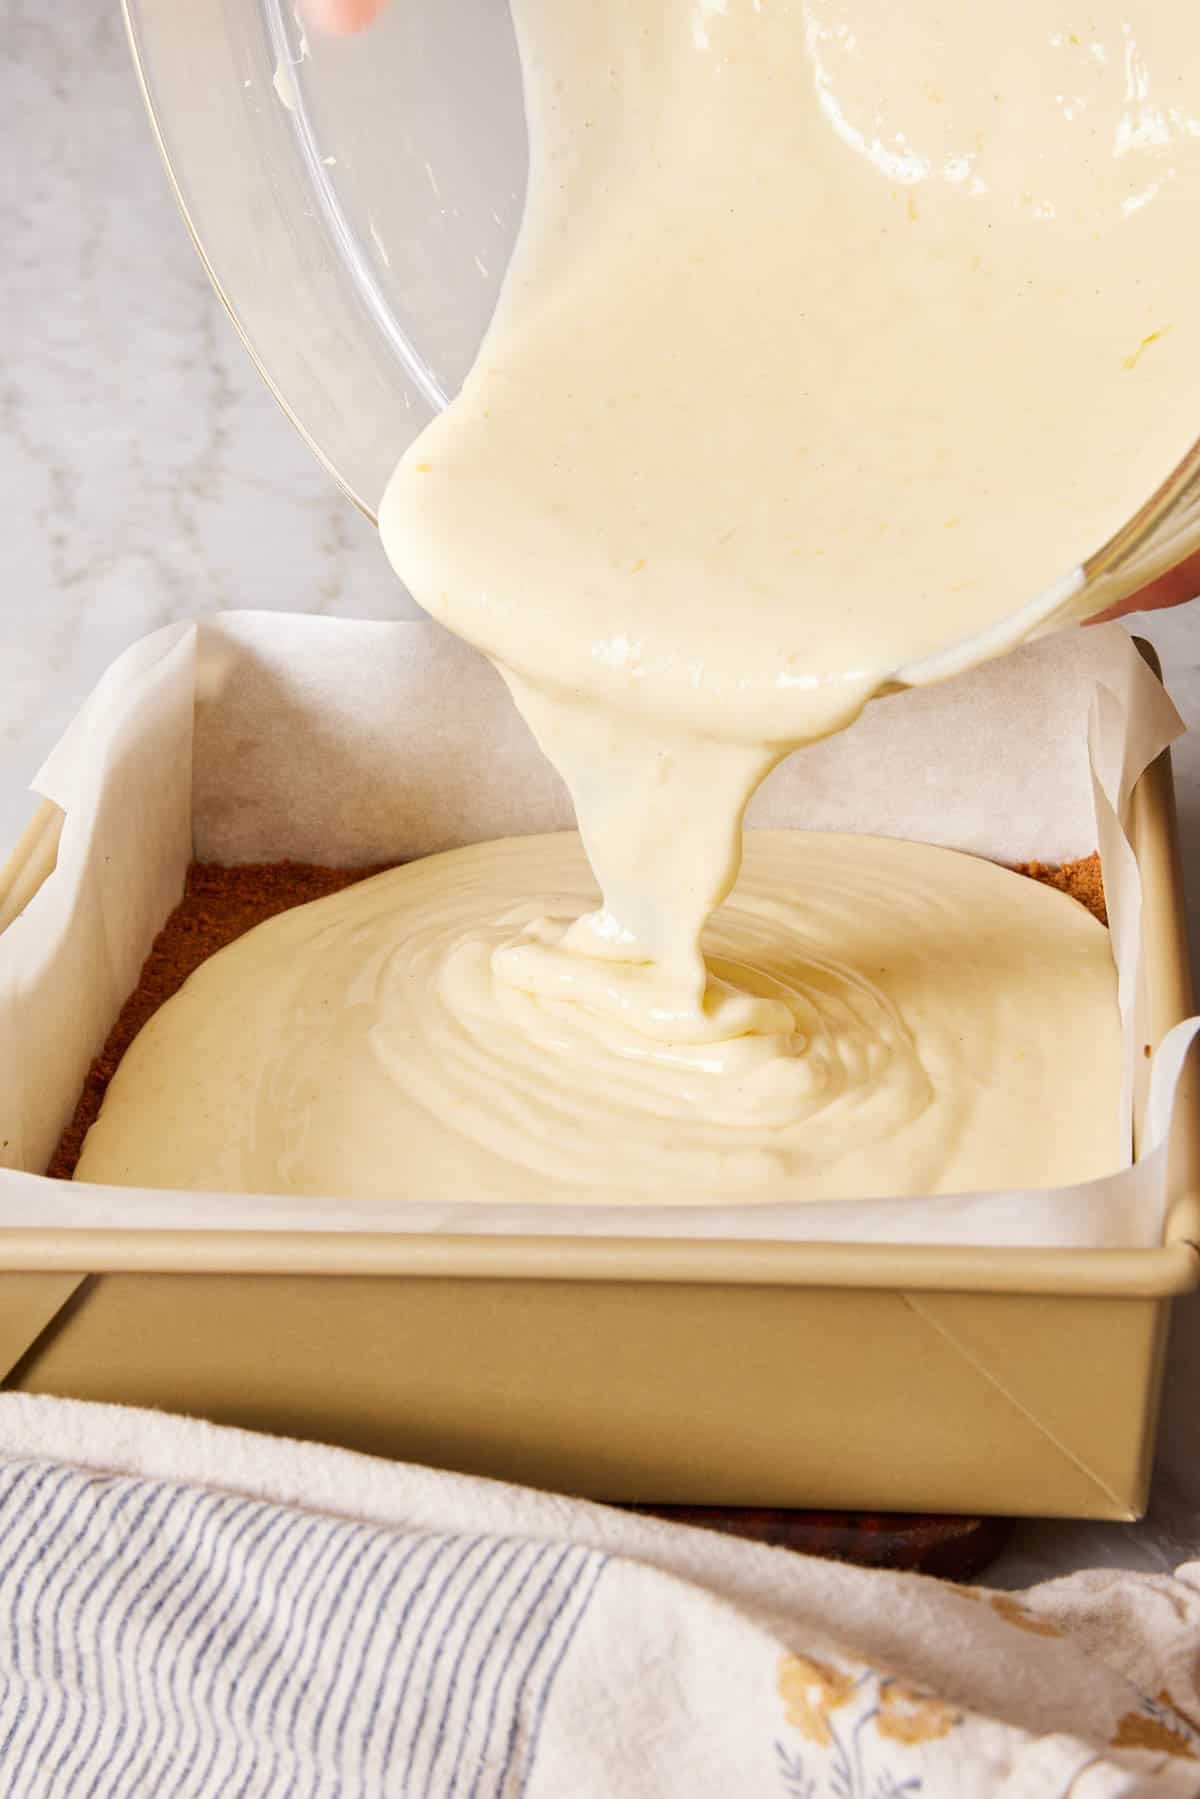
For certain recipes that may be very delicate or have stickier fillings, fully lining the pan with parchment paper helps them fully release from the pan without any issue.
The fully-lined method:
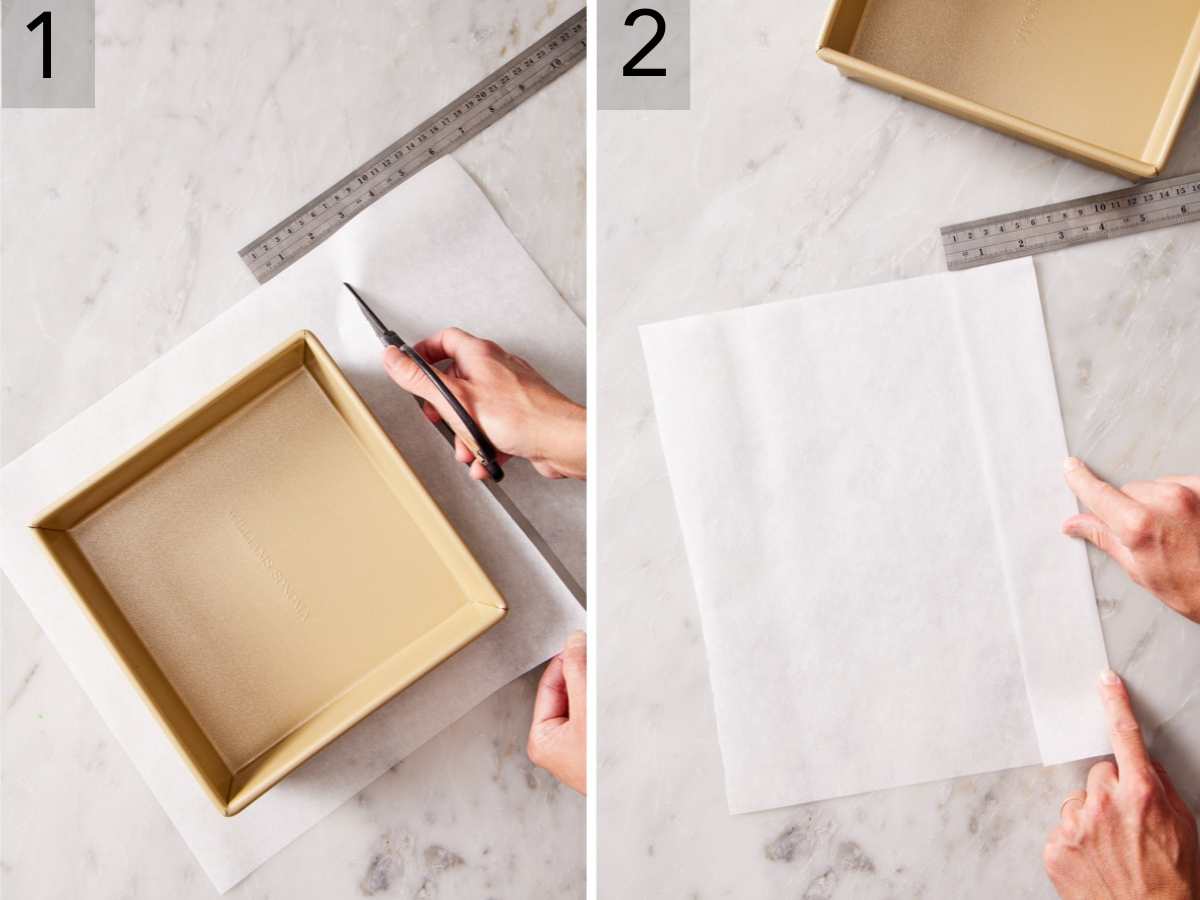
1. Cut a piece of parchment that is about 4 inches larger than the pan on all sides. So, for an 8-inch square pan, cut a 12-inch square piece of parchment paper.
2. Fold one side in 2 inches from the edge. Fold the opposite the same way. This creases the paper so it neatly fits in your pan, but it also provides guides for the next cutting step.
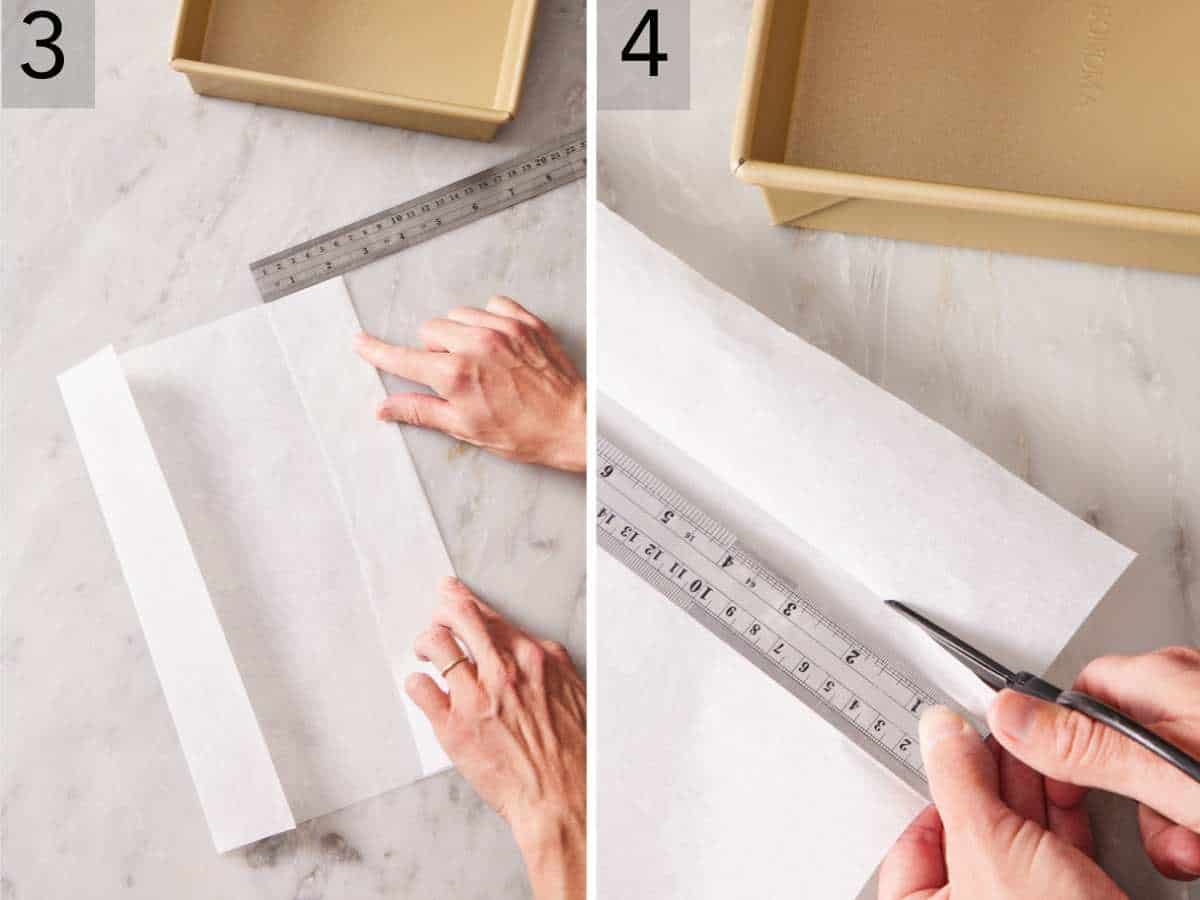
3. Unfold the paper. Once both sides are creased, unfold them. You should see defined marks where you folded it, running parallel to each other.
4. Cut a slit 2 inches down on each of the creases. Use the creases as your cutting line guide.
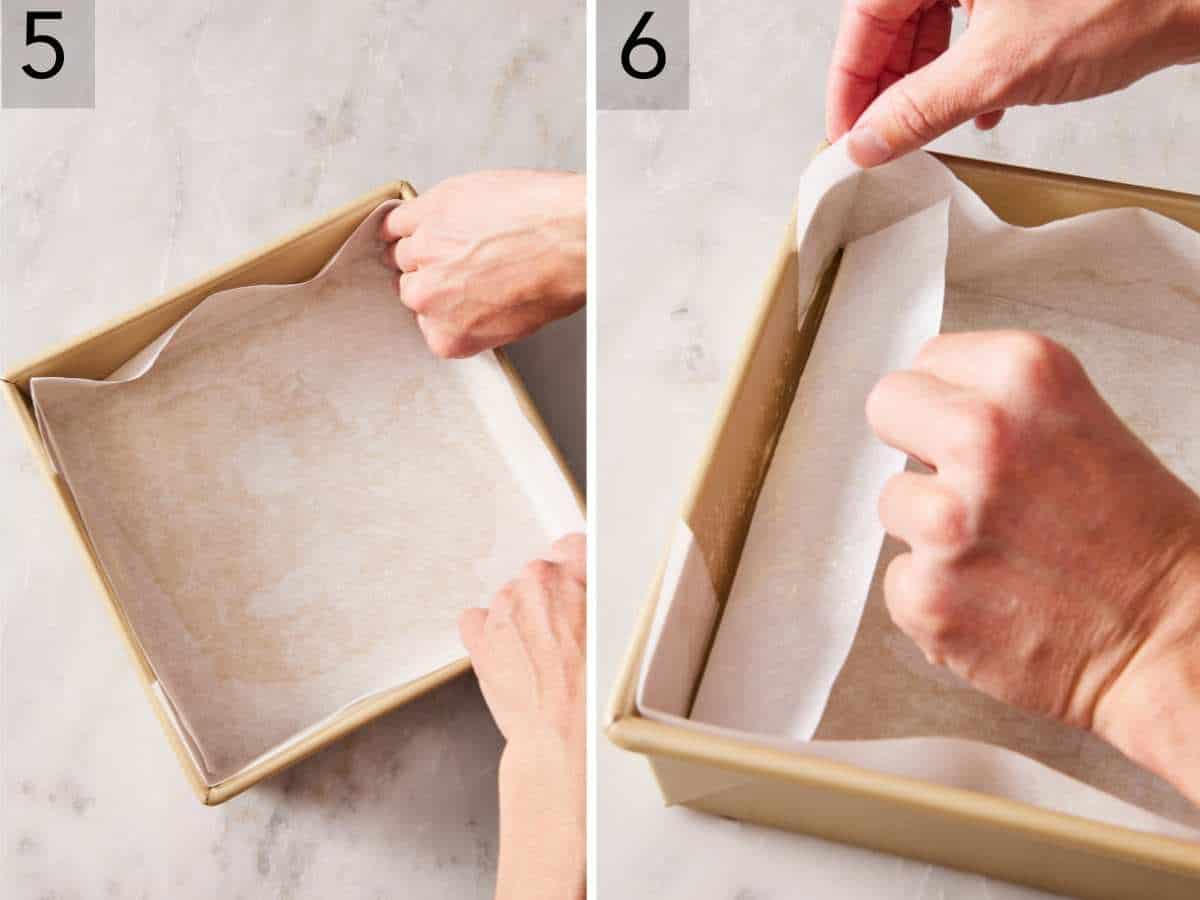
5. Fit the paper in your pan. Once you have greased your pan (the same rule applies here; the oil helps hold the paper in place), press the parchment into the pan. Use your fingers to fit it into the corners and edges so it is flush with the bottom and all sides.
6. Tuck the ends. There will be little flaps where you cut the slits. Tuck those behind the sides of the parchment paper lining, providing a smooth surface all around the interior of the pan.
You can also do a “double sling” by placing two strips of parchment laid perpendicular to each other, each providing overhang on opposite sides. This is a little easier to do since you don’t have to do any measuring or folding, but it uses twice as much parchment paper.
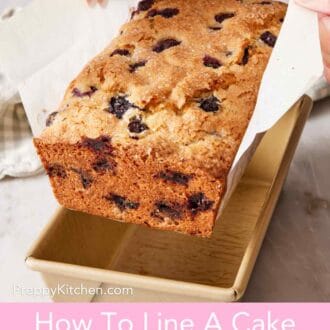
Loaf Pans (The Sling Method)
Loaf pans have a distinct problem: they’re tall and narrow, and quick breads and pound cakes baked in them are often dense and can be prone to sticking on all four sides. The easy solution is to use the sling method again, just like with the square and rectangular pans.
The loaf pan sling method:
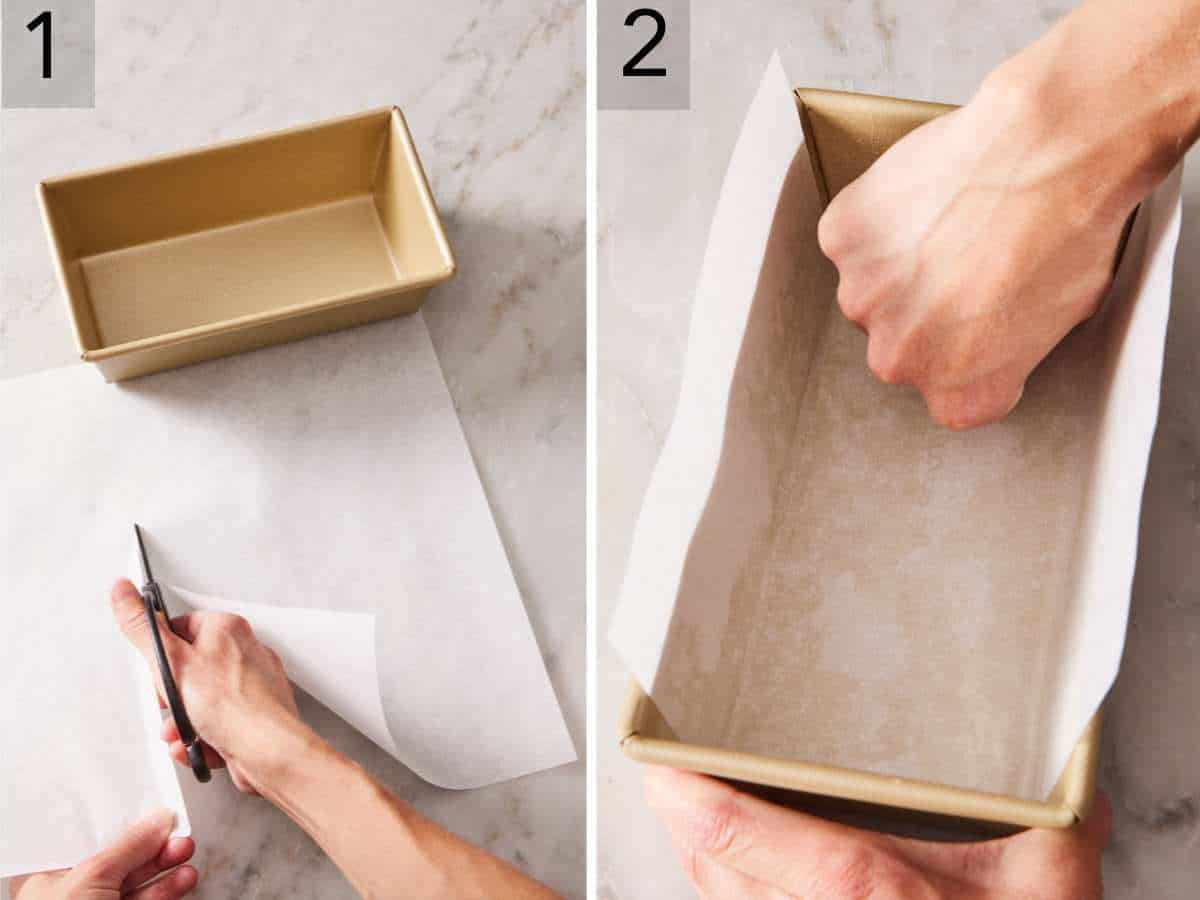
1. Tear a strip of parchment just narrower than the width of the pan’s bottom, and long enough to cover the bottom, extend up the two long sides, and hang over the edge about 2 inches on each long side. For a standard 9×5-inch loaf pan, that’s a strip about 4½ inches wide and 13 inches long. (Use the bottom of your pan as a guide—some taper more than others.)
2. Press the parchment into your grease pan so the bottom and sides are flush and the overhang extends up the two long sides. The two short ends will release with the greased surface, so there’s no need to line them. Crease the paper down along the top edge of the pan (with the excess hanging to the outside of the pan) to keep it from flopping into the batter during baking, or attach metal binder slips to secure it.
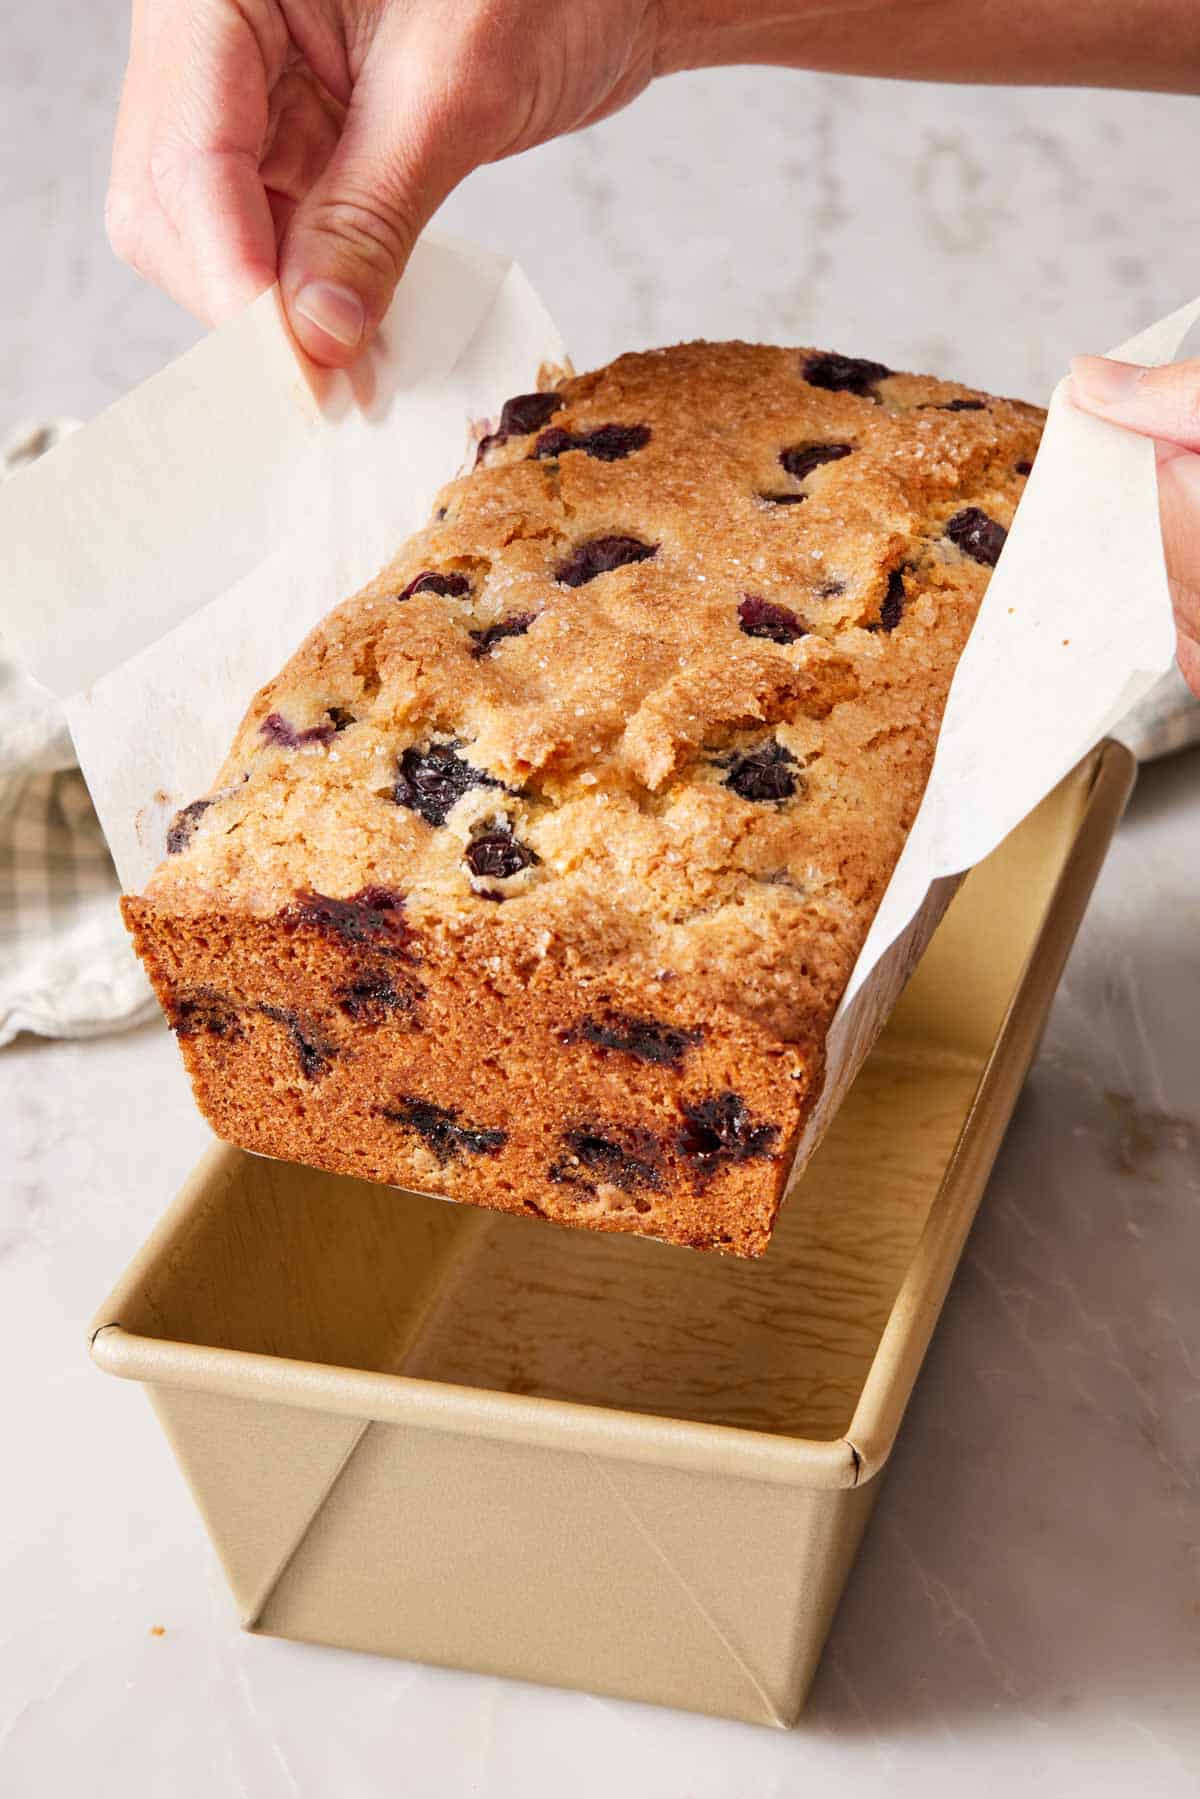
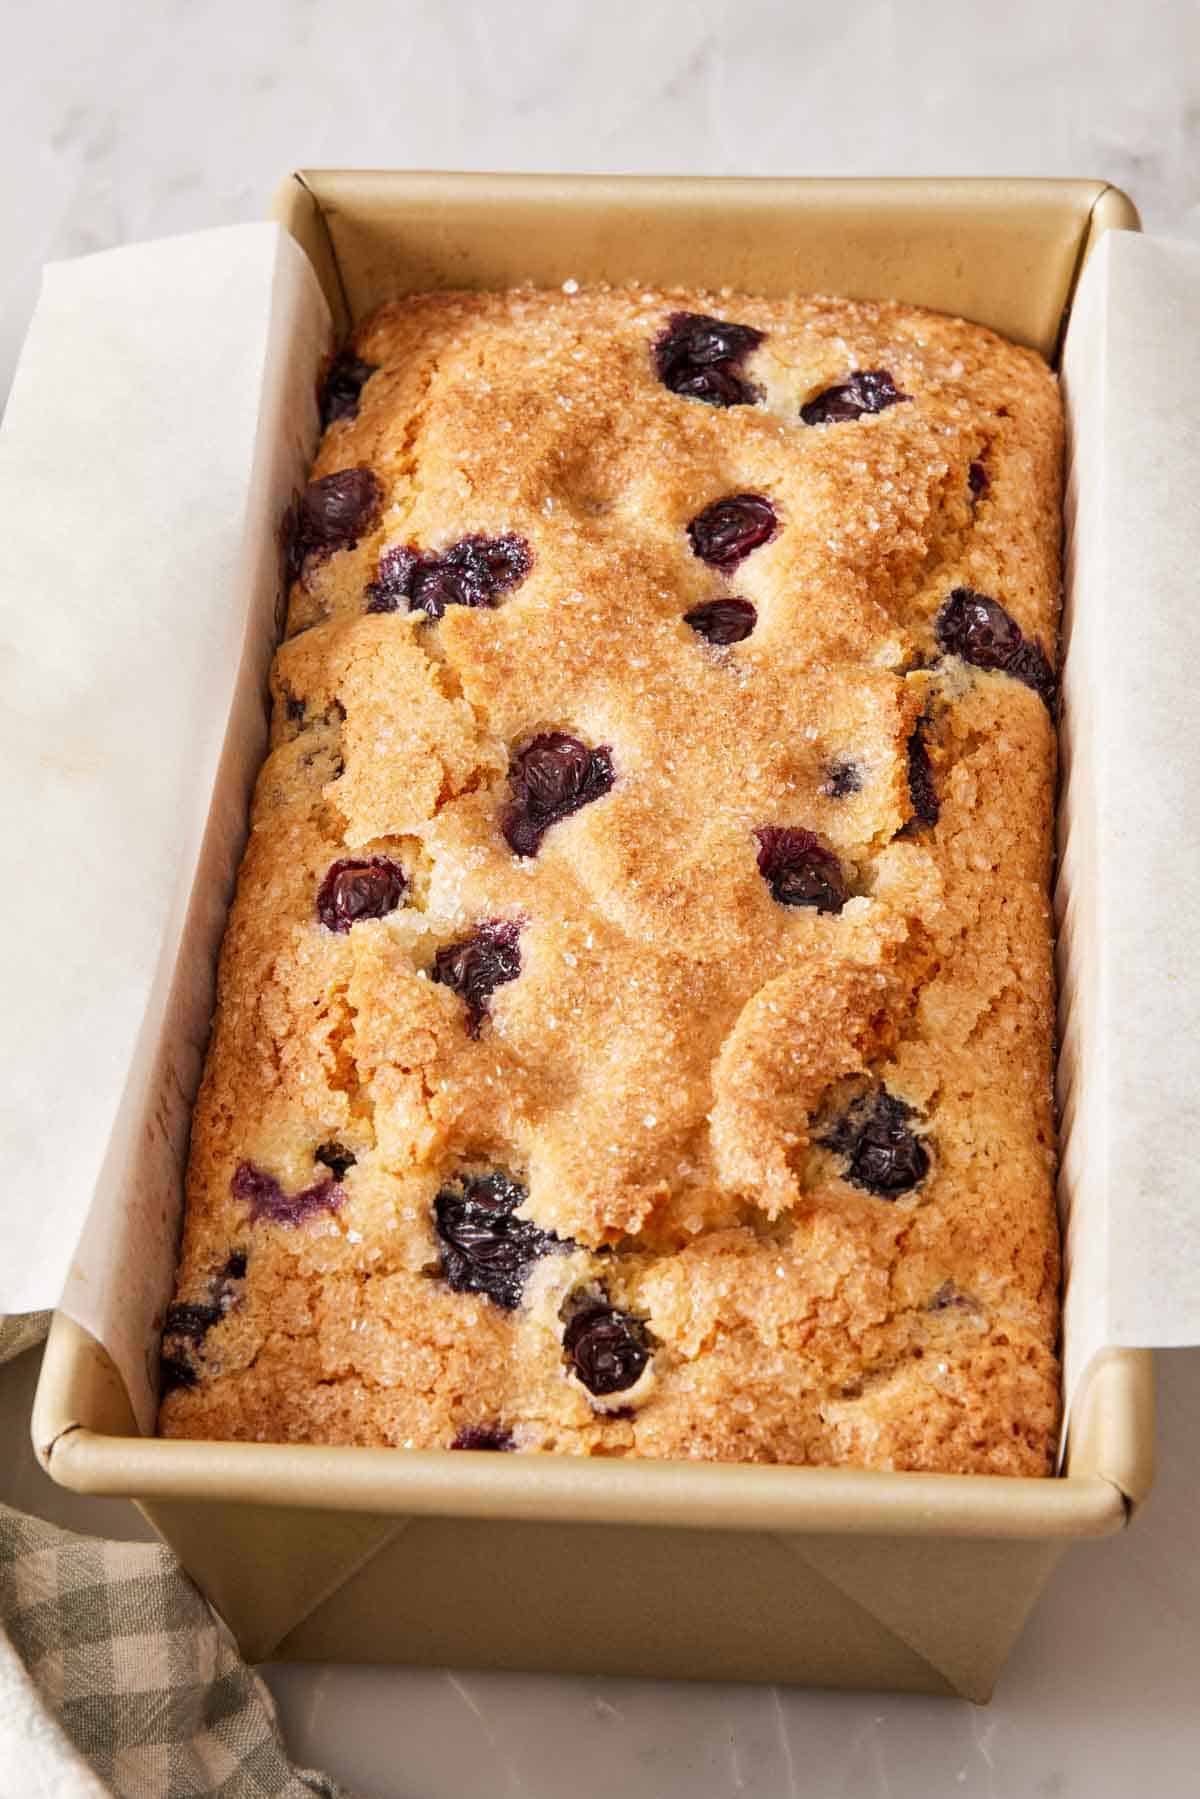
After baking and cooling for 10 minutes, run a thin knife around the two short ends to release them, then lift the loaf out by the parchment overhangs. If properly baked, the loaf should come out clean, and you can then discard the parchment paper and finish cooling on a wire rack or as directed. This method works so well for banana bread, pumpkin bread, zucchini bread, lemon pound cake, apple bread, and any other loaf cake or quick bread.
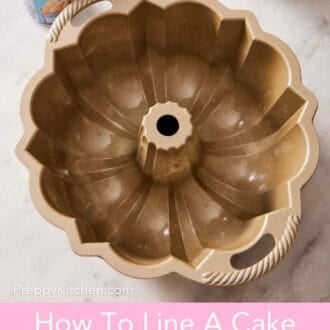
Bundt Pans (Don’t Line)
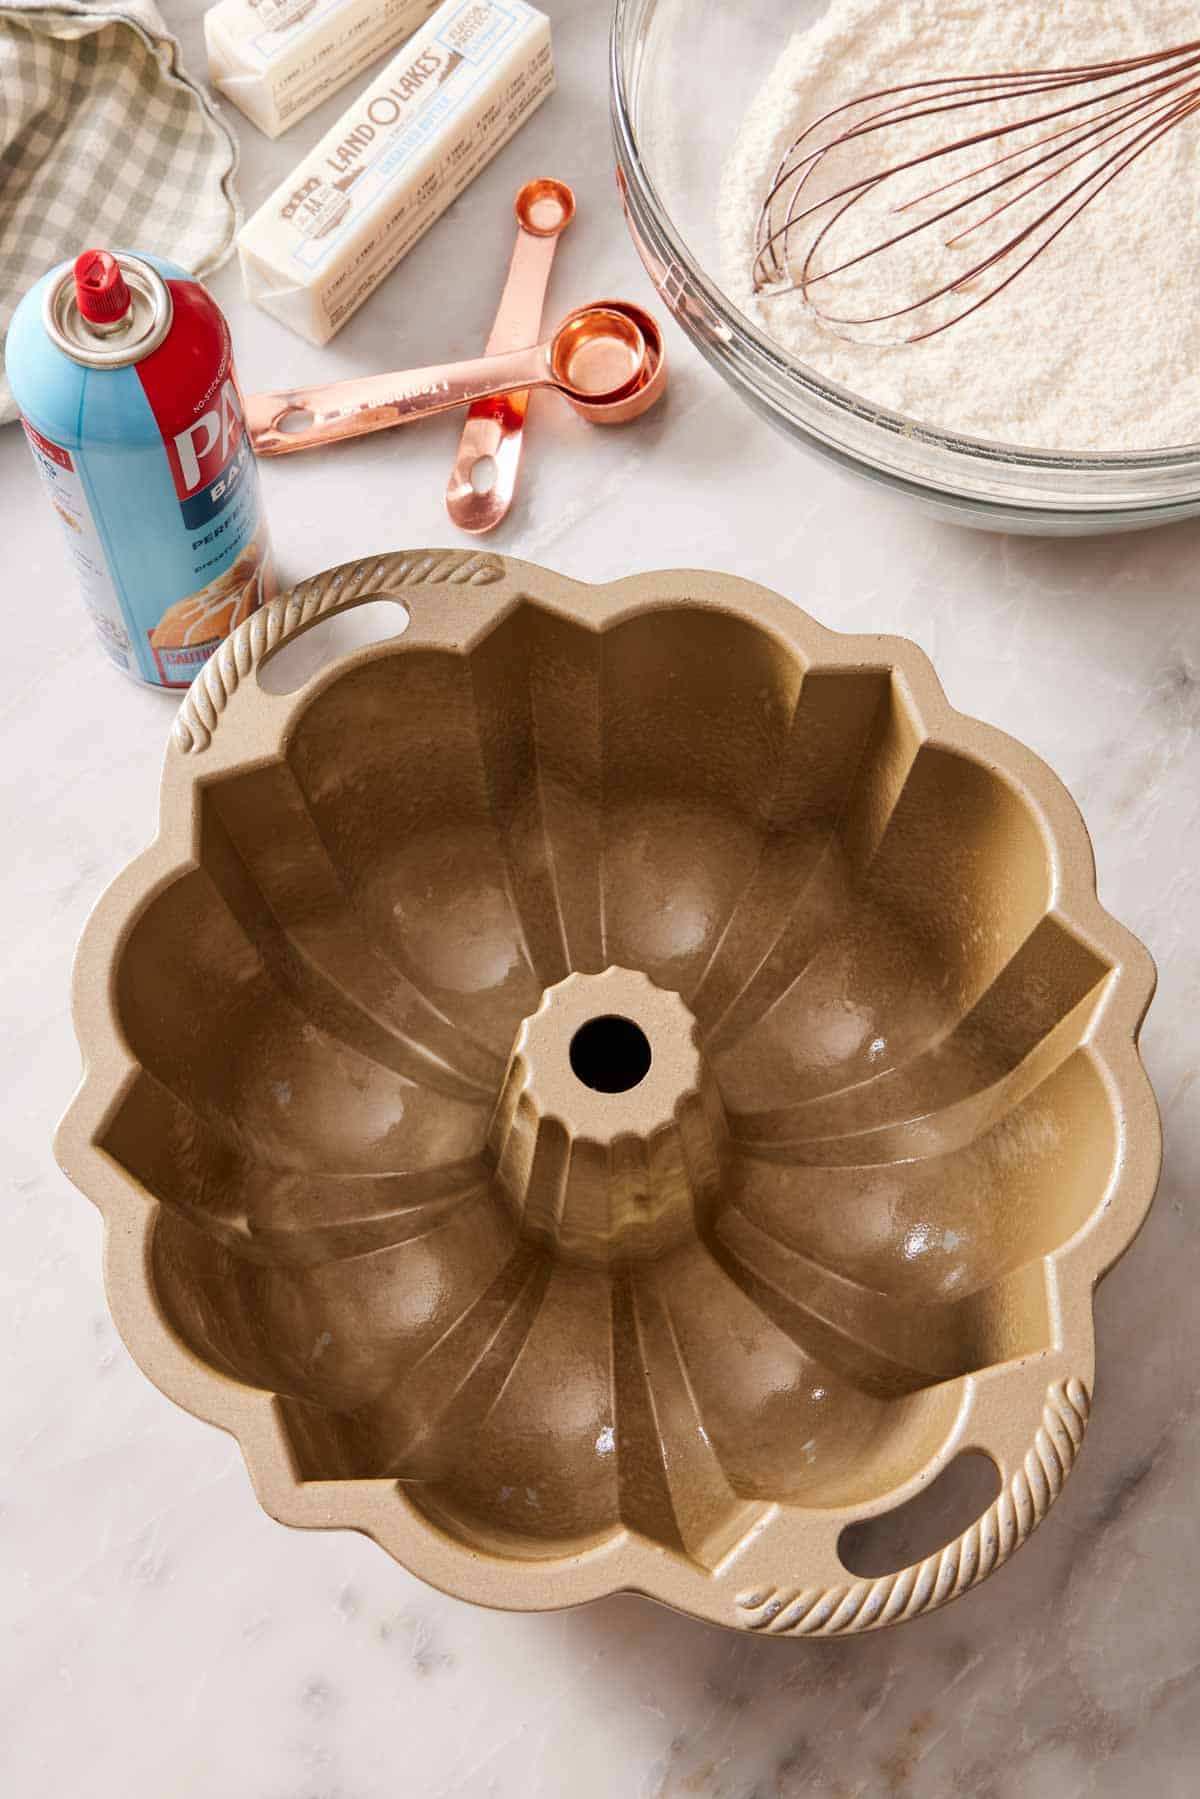
You cannot effectively line a bundt pan with parchment paper. The pan’s intricate fluted shape and central tube make any parchment lining impossible to fit cleanly, so don’t try! Bundt pans do have a reputation for sticking, though, and they need a proper greasing and flouring to release well. Here are the best options:
Use baking spray with flour (at the right time) — spray the pan after your batter is made, right before pouring it into the pan. Spray tends to pool in the deep flutes and leave gaps on the high ridges if you do it at the start of the recipe. This is the easiest option and what I do most often!
Use softened butter and flour — brushed butter coats every surface uniformly. Using a pastry brush and very soft butter helps get it into every groove and flute. Once it’s buttered, lightly sprinkle or sift flour into the pan, then tap it so it is fully coated. Flip it over and tap out the excess. You can do this at the start of the recipe since the butter and flour will stay in place as it sits.
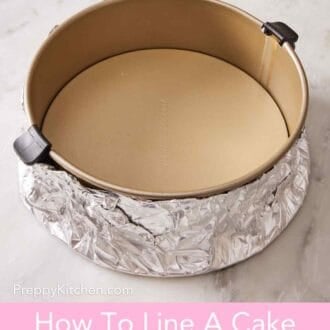
Springform Pans (A Special Case)
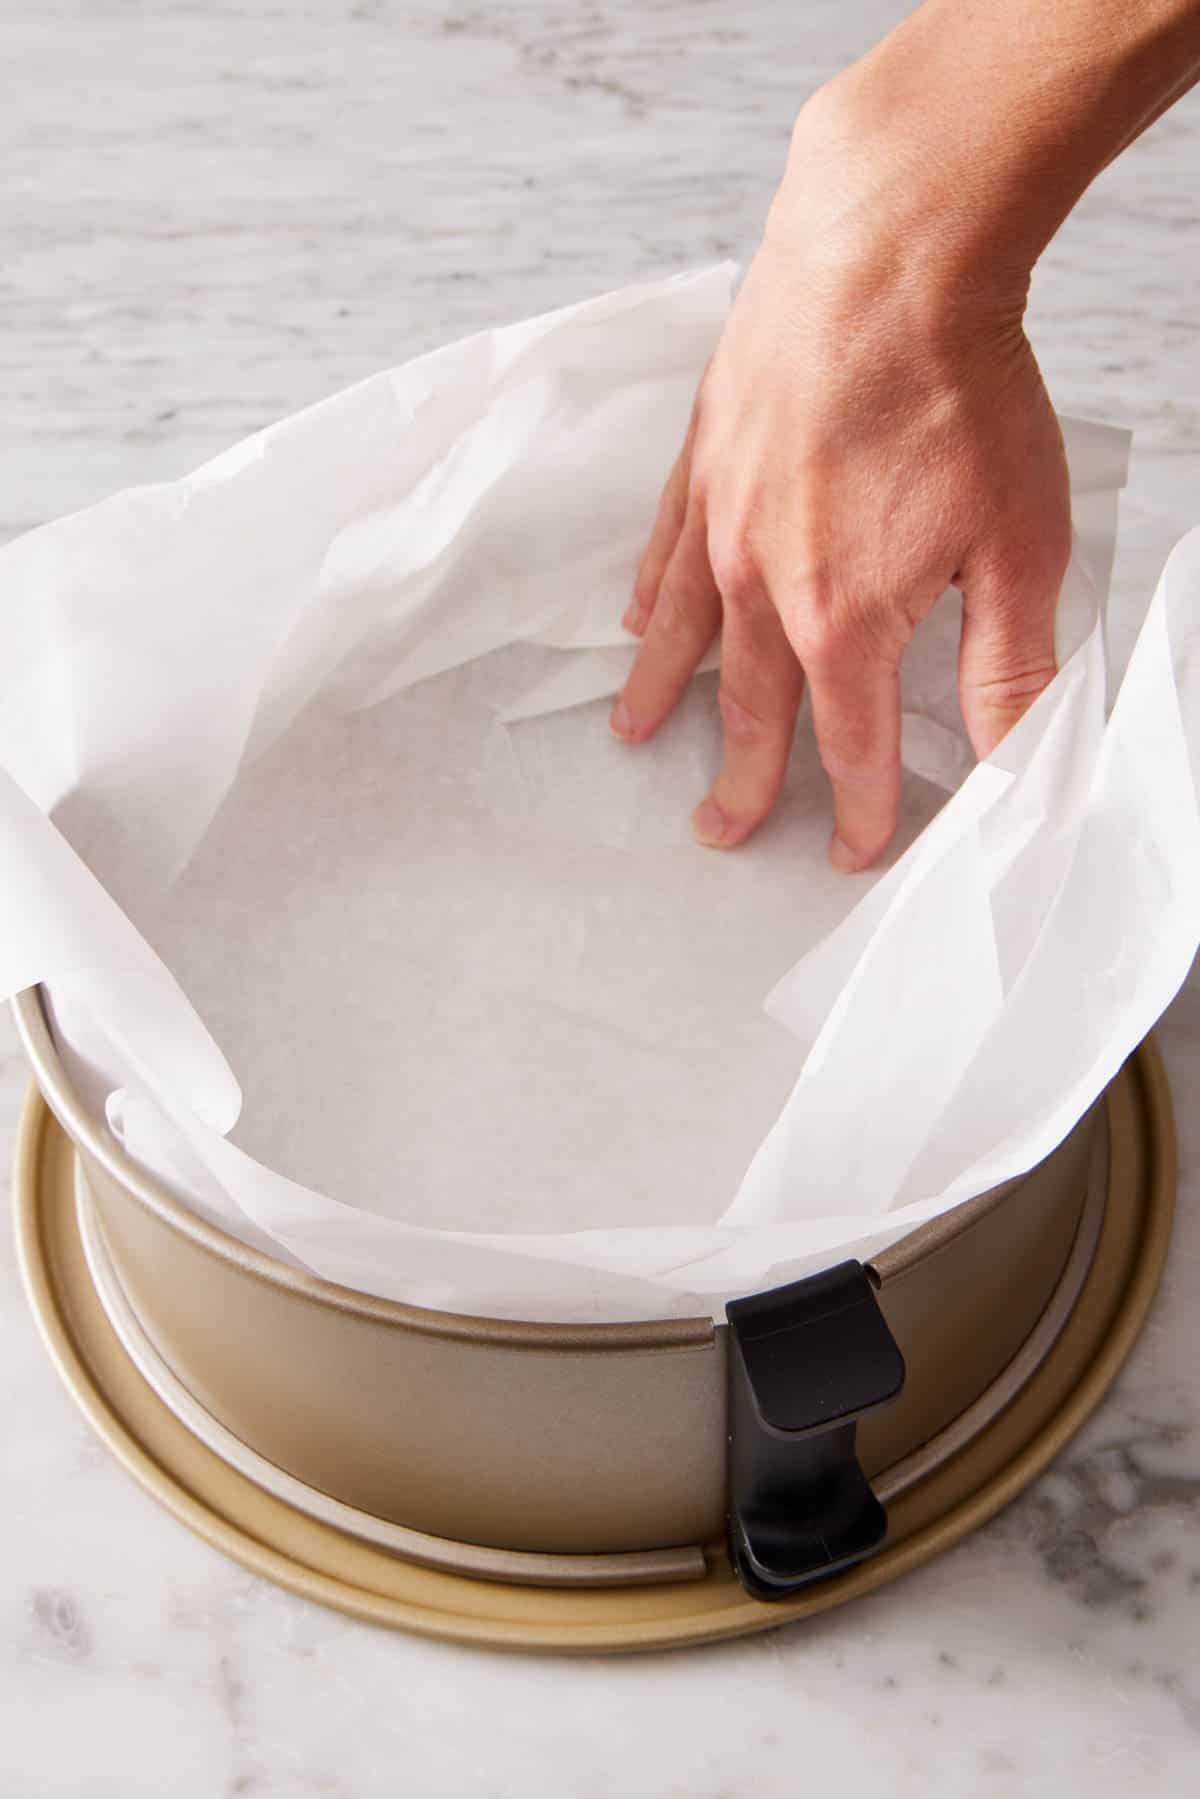
Springform pans—the kind with a removable side ring and a separable bottom—are most often used for cheesecakes. The lining strategy depends on the type of cake you are baking in a springform pan.
Cheesecakes (don’t line): Some recipes line the bottom of the pan with parchment paper before you press the crust in. I find this unnecessary and a bit difficult to deal with. Since you can’t flip a cheesecake over to remove the parchment paper from the bottom like you can a sponge cake layer, you have to cut and serve the cheesecake with the parchment still on it. This means being careful not to cut through it and accidentally serve it. It’s also a less pretty presentation because the round of parchment paper stays on the serving plate as you cut slices.
Basque cheesecake (fully lined): This is the only type of cheesecake that needs a parchment-lined pan. Since it is crustless, the parchment acts like the crust, helping it release from the pan and preventing the batter from leaking out the seams. For a deeper dive on cheesecake-specific springform pan strategy, see A Baker’s Guide to Cheesecake.
Single-layer cakes (line the bottom only): Some one-layer cakes, like my plum cake, olive oil cake, or taller sponge cakes, are baked in a springform pan, and the bottom can be lined. For the same reason as lining a round cake pan, the centers can stick when you try to release them from the pan. Since the sides of the pan are removable, it is easy to run a thin knife under the cake to release it, so lining isn’t as imperative, but it is still helpful.
Do You Need To Grease The Pan If You’re Using Parchment?
Yes. Greasing isn’t redundant when you’re also using parchment! They do different jobs and partner in their effectiveness.
The grease on the pan holds the parchment in place. Without it, the parchment slides around when you pour in batter and can shift mid-bake, leaving uneven edges. A thin coat of butter, non-stick spray, or oil on the bottom of the pan keeps the parchment locked in position.
The grease on the pan’s exposed sides helps release the parts of the cake that the parchment paper liner doesn’t cover. In a round pan, parchment only covers the bottom, so the sides need to be greased (and often floured) for the cake to release from them. Same for loaf and square or rectangular pan slings, where parchment doesn’t cover the short ends.
You don’t need to grease the top of the parchment unless the cake is especially delicate or sticky, and the recipe says to do so. Parchment’s silicone coating is non-stick on its own.
Here’s the right sequence: fully grease the pan, drop in the parchment, flour the exposed sides if your recipe calls for it, then pour in the batter.
The 5 Most Common Mistakes
These are the most common issues bakers run into when lining their cake pans and how to troubleshoot them:
1. Using wax paper instead of parchment. Wax paper melts and smokes in a hot oven. It’s not interchangeable. If you only have wax paper, skip the lining and properly grease and flour the pan instead.
2. Skipping the grease step entirely because you’re using parchment. Any exposed sides still need grease. Plus, the grease holds the parchment in place. A cake baked in an ungreased pan with only a parchment circle will release the bottom cleanly but stick to the sides, tearing as you try to invert it.
3. Cutting the parchment circle too large. A circle that’s bigger than the pan’s bottom buckles up the sides, leaving a wrinkle impression on the cake. The fold-and-cut method gets you close to perfect—trim if needed, and erring slightly small is better than slightly large.
4. Not using parchment for “just a quick cake.” This is how cakes tear. The 30 seconds it takes to line the pan is the cheapest insurance in baking. Don’t skip it because you’re in a hurry!
5. Lining a springform pan with parchment for cheesecake. It’s more obnoxious than it’s worth when you are trying to press in a crumb crust. And it can’t be removed before cutting.
Frequently Asked Questions
Both sides of parchment paper are silicone-coated and non-stick. There is no “right” or “wrong” side. If you’ve cut a sheet from a roll, place it however it will stay flat and doesn’t want to roll back up.
For dry baking like cookies, yes. A sheet of parchment can usually do 2 or 3 batches before it browns or warps too much to be useful. For wet batters like cake, no. The paper absorbs grease and moisture from the cake, is usually coated with crumbs once it is removed, and cannot be reused. Recycle or compost it after one cake.
Yes. “Baking paper” is the standard term in the UK, Australia, and parts of Europe; “parchment paper” is the American term. They often refer to the same silicone-coated, heat-resistant paper for baking. Outside the US, however, some parchment paper isn’t coated with silicone and isn’t non-stick (but baking paper typically is).
Silicone baking mats (Silpat, etc.) are reusable and excellent for cookies and rolling out dough. They’re flat sheets, though, which means they don’t fit cleanly into round, square, or loaf cake pans and have to be specifically purchased to fit in certain pan sizes. For cake pan lining, parchment paper is the right tool. For sheet pan baking and cookie sheets, silicone mats are an excellent reusable alternative to parchment.
More Tutorials To Try
If you’re looking for more cake tips, check out my other baking tutorials:
- Academy: How to Freeze Cakes — keep your cakes fresh for months with my freezing tips
- Academy: The 5 Main Cake Mixing Methods — master these cake methods to become an expert cake baker!
- Academy: Essential Kitchen Tools & Utensils — these are the essential cooking and baking tools you actually need.
- Academy: Baking Pans and Sizes — learn how to convert cake recipes to different pan sizes.
- How To Bake Flat Cake Layers — use baking strips to make perfectly flat cake layers for stable, even layer cakes.






